{happy weekend}

Happy Friday everyone. Truth is, I’m having a really hard time keeping a smile on my face these days. Despite what some on the television news might want you to think, this shutdown does affect real people. My husband and several of our close friends are among the 800,000 federal government employees furloughed until the government reopens. With the shutdown, half our income immediately disappeared. No expectation of backpay and no idea when he might be allowed to go back to work. The last shutdown lasted nearly three weeks. I’m trying to look on the bright side of things and be thankful that our situation isn’t worse. I’ve also never been more grateful for leaving federal employment three years ago, so that I can at least continue to earn while Congress gets its act together. With all of this uncertainty, this is a pretty scary time for our family. But it has also gotten us thinking about some larger changes we’d like to make in our life. Changes that will help us live our life on our own terms, rather than the whims of politicians. But in the meantime…
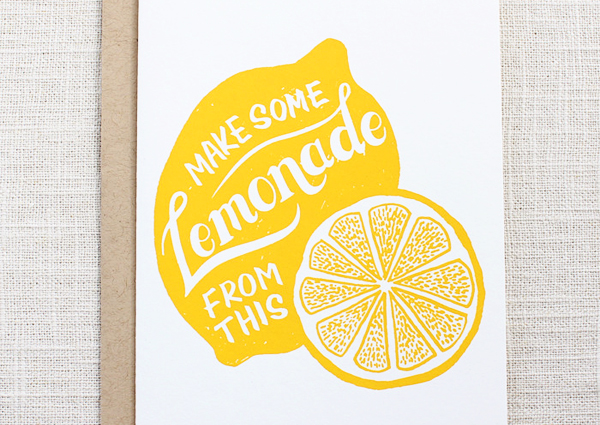
Maple-Belmont-Make-Lemonade

Photo Credit: Maple and Belmont

…a few links for your weekend!

This week on Oh So Beautiful Paper:

Check back soon for this week’s cocktail! I hope you all have a wonderful weekend, and I’ll see you back here next week! xoxo

DIY Tutorial: Patterned Photo Mats

Photo frame mats are not something that we usually give much thought to until we’re at the framer facing the dilemma of which one to choose. Typically, we just end up with black or white, since the fancy ones (of the few cools ones they actually have) are way more expensive. We love this project because the possibilities are endless and it doesn’t take more than 10 minutes! – Bailey and Emma of Antiquaria

Step One: Start off by cutting vertical strips of your patterned text-weight paper (we used our Paloma Coral Pattern and Chloe Pink Pattern) in 2 inch x 11 inch pieces. You can adjust this if you have a much smaller or larger mat.

Step Two: Take your strips, one at a time and spray the back with spray adhesive. Working your way around the mat, lay the strips down, aligning them with the inner mat edge that is bevelled.

DIY Tutorial: Patterned Frame Mats by Antiquaria for Oh So Beautiful Paper

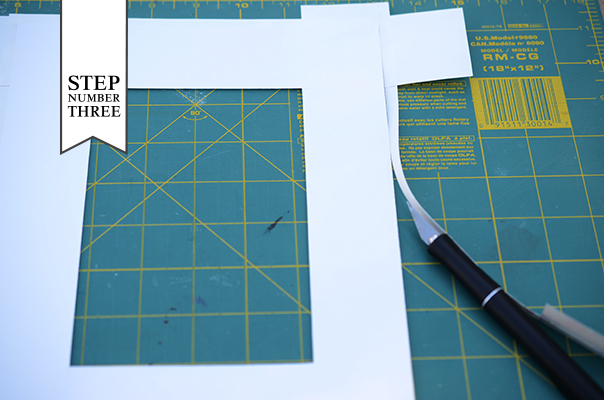
Step Three: Trim off the excess paper from the outer edge of your mat by using a craft knife. This can be done without the aid of a ruler since the mat material is very firm.

Step Four: To give polish to your mat design, you’ll want to miter the corners. To do this, line your ruler on the outer and inner corner of the mat (so it will be done four times). Make a cut with a craft knife through the top layer of paper (not too hard or you’ll damage the mat).

Step Five: After making the cut, you’ll simple peel off the top corner excess to reveal a gorgeous miter. Repeat for all corners and your mat is complete! Now all that’s left is to add some artwork and add them to your wall.

Using coordinating patterns is a fun way to accent a cluster of artwork. Use them inside a frame…or on their own held up by decorative washi tape.

When stacked, the two coordinating patterns yield a different, more subtle (but equally as fabulous) look.

Materials

Basic White Photo Mats

Paloma Coral Patterned Paper in text weight

Chloe Pink Patterned Paper in text weight

Self Healing Mat, Metal Ruler and Craft Knife

Spray Adhesive

Photo Credits: Antiquaria for Oh So Beautiful Paper

Pattern Artwork: ©Antiquaria

DIY Tutorial: Stamped Nautical Tri-Fold Wedding Invitation Suite

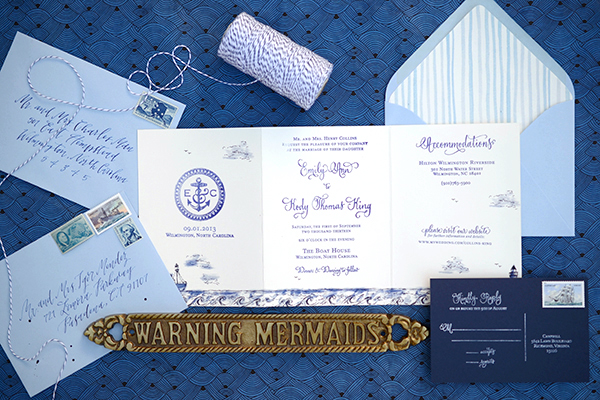
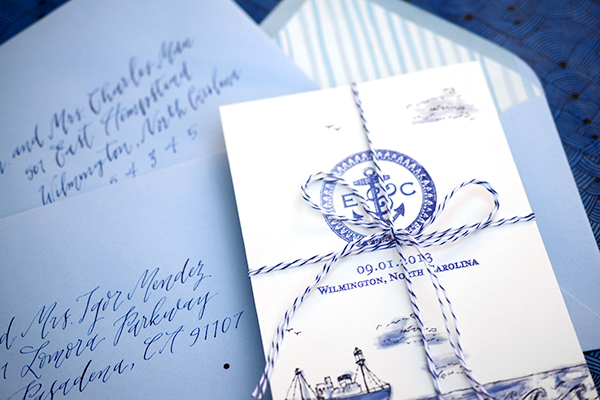
Shades of blue, anchor motifs, ships and rope… you could say that we are a pretty obsessed with nautical design. In this invitation suite, we created a stamped, fold out invitation with nautical details in mind. After discovering how easy and useful a fold out card is in a previous tutorial, we wanted to explore the format more and translate it into a full invitation. This would be perfect for a nautical seaside affair! To make this week even more fun, we’ve included a free download of the watercolor ocean-scape to make this tutorial a breeze. Enjoy! – Bailey and Emma of Antiquaria

DIY Tutorial: Stamped Nautical Tri-Fold Wedding Invitation Suite by Antiquaria for Oh So Beautiful Paper

DIY Tutorial: Stamped Nautical Tri-Fold Wedding Invitation Suite by Antiquaria for Oh So Beautiful Paper

DIY Tutorial: Stamped Nautical Tri-Fold Wedding Invitation Suite by Antiquaria for Oh So Beautiful Paper

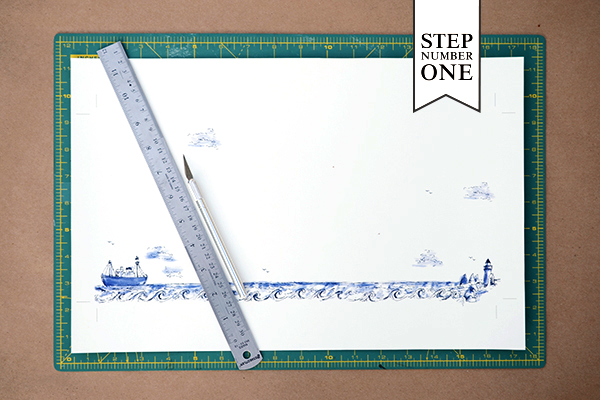
Step One: After downloading and printing the nautical tri-fold design (see bottom of post for download link). You will need 11″ x 17″ card stock to print the ocean scape. Next trim the card down at the crop marks to reach the final size (15″ x 7″). We used a self healing mat, metal ruler and craft knife for this step. If cutting many cards, we recommend taking them to a local printer to have them cut them all at once with an industrial cutter.

DIY Tutorial: Stamped Nautical Tri-Fold Wedding Invitation Suite by Antiquaria for Oh So Beautiful Paper

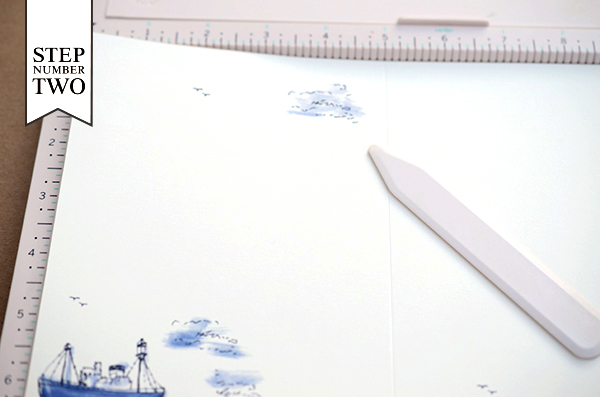
Step Two: Score the card twice: once at the 5″ mark and the other at the 10″ mark. Those will be your fold lines for the card but do not fold it yet!!

DIY Tutorial: Stamped Nautical Tri-Fold Wedding Invitation Suite by Antiquaria for Oh So Beautiful Paper

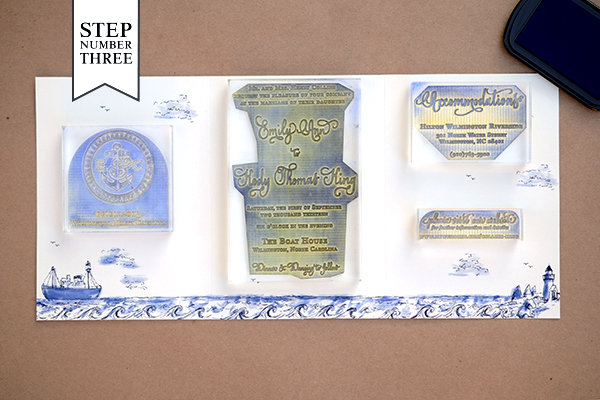
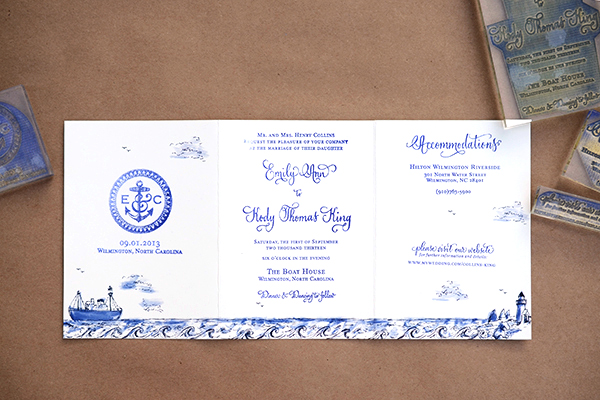
Step Three: Gather all of your stamps and lay them out to make certain that you have a stamping plan. The stamps we used for this design, from left to right are our Anchor Monogram Wedding Date Stamp, Vintage Calligraphy Invitation Stamp, Calligraphy Accent Accommodations Stamp and Calligraphy Accent Website Card Stamp. Once you have your plan, you will ink each stamp and align it into its appropriate space. For a step-by-step video tutorial about the stamp printing process go here.

DIY Tutorial: Stamped Nautical Tri-Fold Wedding Invitation Suite by Antiquaria for Oh So Beautiful Paper

DIY Tutorial: Stamped Nautical Tri-Fold Wedding Invitation Suite by Antiquaria for Oh So Beautiful Paper

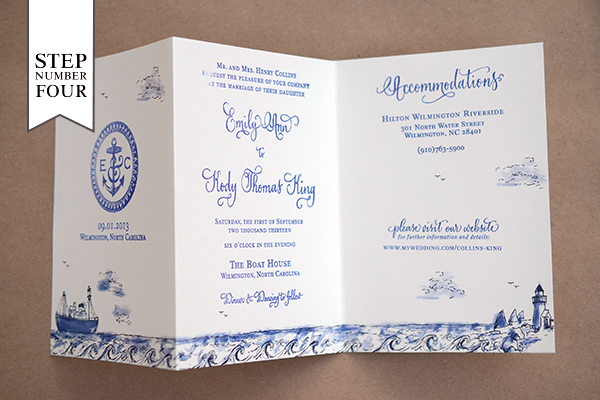
Step Four: Fold the card at the score marks. Use a bone folder to create crisp folds.

DIY Tutorial: Stamped Nautical Tri-Fold Wedding Invitation Suite by Antiquaria for Oh So Beautiful Paper

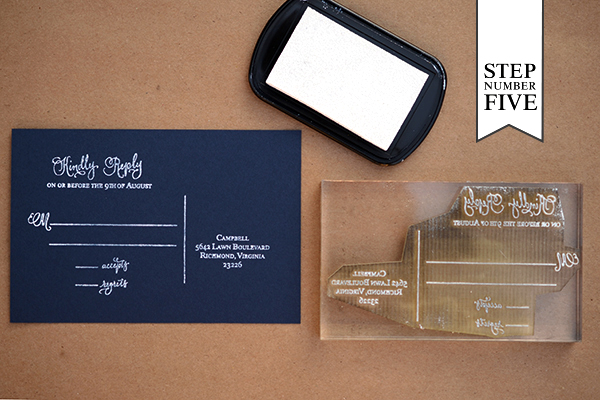
Step Five: Since the reply card will need to be sent back to you, we designed it as a separate piece. We used a white stamp pad with our Calligraphy Accent Reply Postcard Stamp on a navy A6 card (4″ x 6″).

DIY Tutorial: Stamped Nautical Tri-Fold Wedding Invitation Suite by Antiquaria for Oh So Beautiful Paper

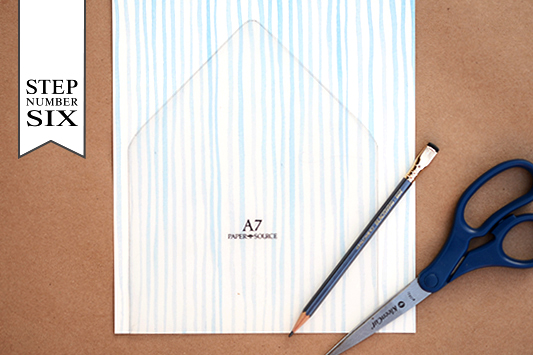
Step Six: Adding a printed envelope liner is a great way to add color and pattern to your save the date design. To make the liner, trace the template onto your printed paper (we used our  Watercolor Stripe in Ocean text weight) and cut it out with scissors. To install, simply use stick glue or double sided tape to adhere them into your envelope.

DIY Tutorial: Stamped Nautical Tri-Fold Wedding Invitation Suite by Antiquaria for Oh So Beautiful Paper

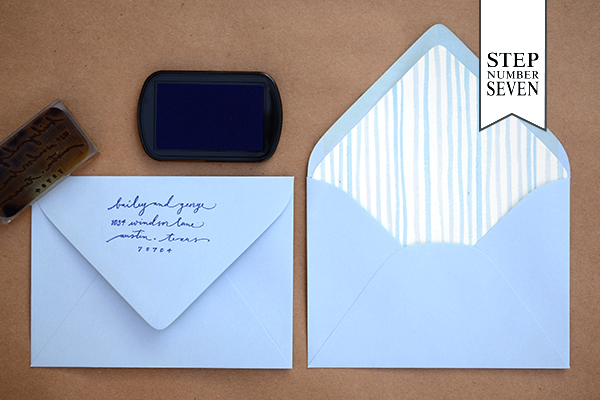
Step Seven: Next, you will stamp your return address on the back flap of your A7 envelope. We used our Scripted Return Address Stamp with navy blue ink for this design.

DIY Tutorial: Stamped Nautical Tri-Fold Wedding Invitation Suite by Antiquaria for Oh So Beautiful Paper

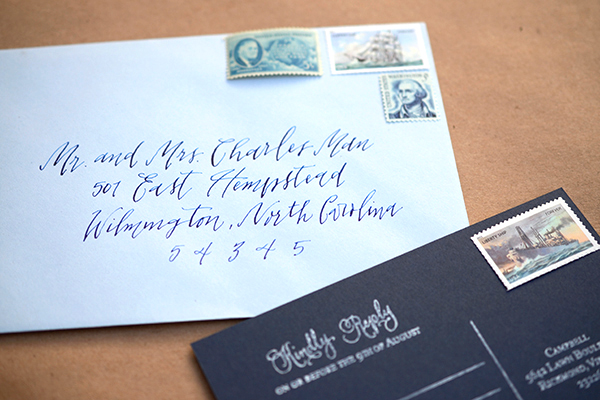
All that’s left is to add some gorgeous vintage postage (ours is from Verde Studio) and address them to your guests! We guarantee that they will be stoked to receive them in the mailbox and will be counting the days until your celebration!

Materials

Anchor Monogram Wedding Date Stamp

Vintage Calligraphy Invitation Stamp

Calligraphy Accent Accommodations Stamp

Calligraphy Accent Website Card Stamp

Calligraphy Accent Reply Postcard Stamp

Scripted Return Address Stamp

Stamp Pad in Midnight and Frost White

Watercolor Stripe Patterned Paper in Ocean Text Weight

Nautical Tri-Fold printed sheet (printed on 11×17 card stock), download file HERE  Note: digital download is for personal use only**

Self Healing Mat, Metal Ruler and Craft Knife

A6 Cards in Night

A7 Envelopes in Bluebell

Envelope Liner Templates

Vintage Postage

Anti­quaria is a mem­ber of the Designer Rolodex – you can see more of their beau­ti­ful work right here or visit the real wedding invitations gallery for more wedding invitation ideas!

Photo Credits: Antiquaria

DIY Tutorial: Rubber Stamp Butterfly Handkerchief Wedding Invitations

We absolutely love collecting and handkerchiefs are one of those things that are very hard to pass up when you find a beautiful one. Given the popularity of handkerchief wedding invitations and the growing number of them that are stashed around the studio, we decided it was time to design a gorgeous, butterfly inspired handkerchief suite. Adding in coordinating patterns, kraft paper and calligraphy really makes the design feel custom and personal. – Bailey and Emma of Antiquaria

DIY Tutorial: Rubber Stamp Butterfly Handkerchief Wedding Invitations by Antiquaria for Oh So Beautiful Paper

DIY Tutorial: Rubber Stamped Butterfly Handkerchief Invitation Suite by Antiquaria for Oh So Beautiful Paper

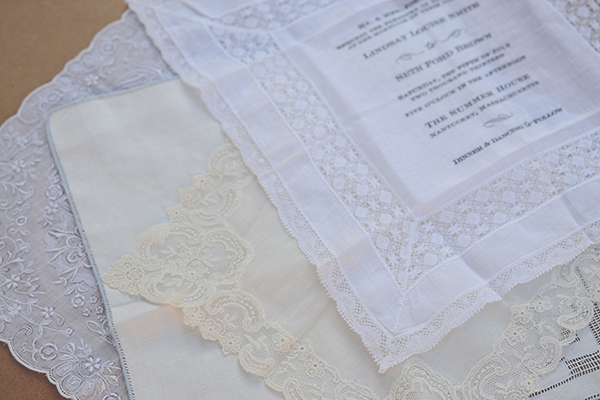
Just a few assorted handkerchiefs from the collection. Since there is so much pattern elsewhere in this suite, we decided to use only solid ones in white and ecru with pretty lace borders.

DIY Tutorial: Rubber Stamp Butterfly Handkerchief Wedding Invitations by Antiquaria for Oh So Beautiful Paper

DIY Tutorial: Rubber Stamp Butterfly Handkerchief Wedding Invitations by Antiquaria for Oh So Beautiful Paper

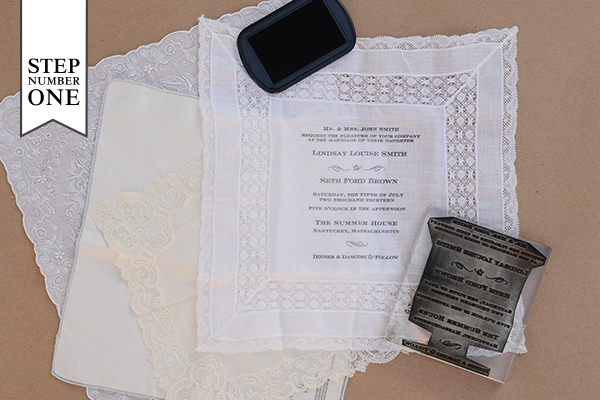
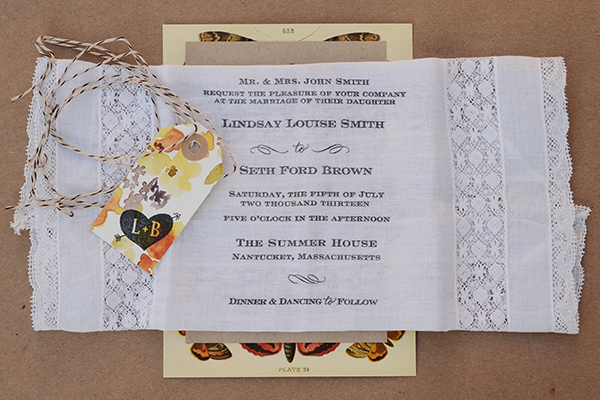
Step One: Iron all of your handkerchiefs smooth and lay a single handkerchief on a flat, sturdy surface. Ink your invitation stamp (we used our Sophisticate Invitation Stamp) throughly and center it over the middle of the handkerchief. Once it’s aligned, press it down firmly and apply even pressure across the entire stamp. Lift off and set aside to dry. You can also use crafters ink that can be heat set with an iron if you’d like the text to be waterproof! For a step-by-step video tutorial about the printing process go here.

DIY Tutorial: Rubber Stamped Butterfly Handkerchief Invitation Suite by Antiquaria for Oh So Beautiful Paper

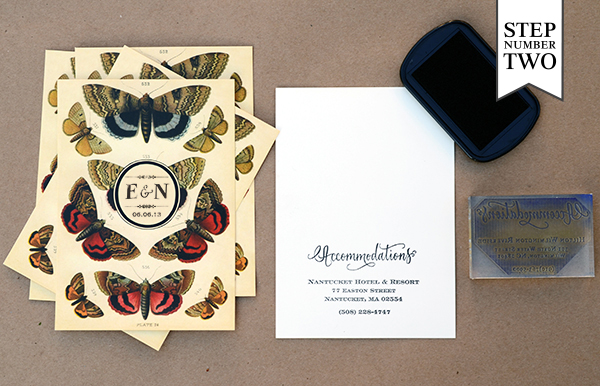
Step Two: We gussied up the accommodations card for this suite by using an A7 butterfly printed card. In the center, we stamped our Butterfly Monogram Stamp to add a personal touch. For the back of the card, we kept it simple, stamping it with the accommodations information (we used our Calligraphy Accent Accommodations Card Stamp).

DIY Tutorial: Rubber Stamped Butterfly Handkerchief Invitation Suite by Antiquaria for Oh So Beautiful Paper

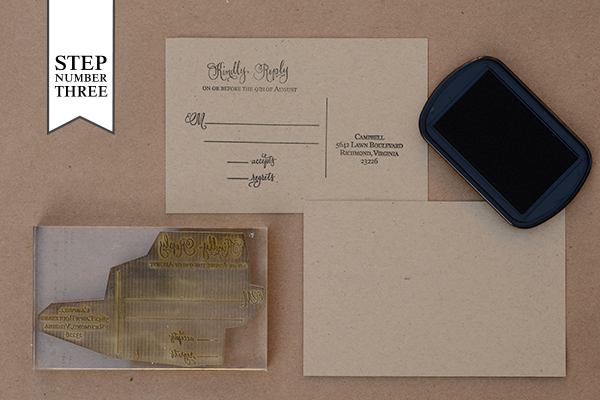
Step 3: Reply postcards are rapidly growing in popularity among couples these days for more casual affairs, so for this suite, we incorporated one in kraft! Place your postcard (4″x6″) on a flat, firm surface. Ink your stamp (we used our Calligraphy Accent Reply Postcard Stamp) and center it over the card. To make the print, press down with even, moderate pressure. Remove and set card aside to dry.

DIY Tutorial: Rubber Stamped Butterfly Handkerchief Invitation Suite by Antiquaria for Oh So Beautiful Paper

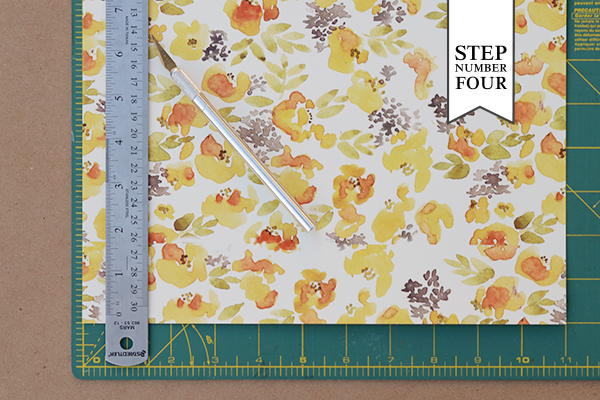
Step Four: To tie the suite together (and keep the handkerchief secure), we decided to make a monogram tag to coordinate with the design. First, you’ll need to cut your paper to rectangles sized 1.5″x3″ using a self healing mat, craft knife and ruler (we used our Chloe Yellow Floral Patterned Paper, in Cover Weight for the tag).

DIY Tutorial: Rubber Stamped Butterfly Handkerchief Invitation Suite by Antiquaria for Oh So Beautiful Paper

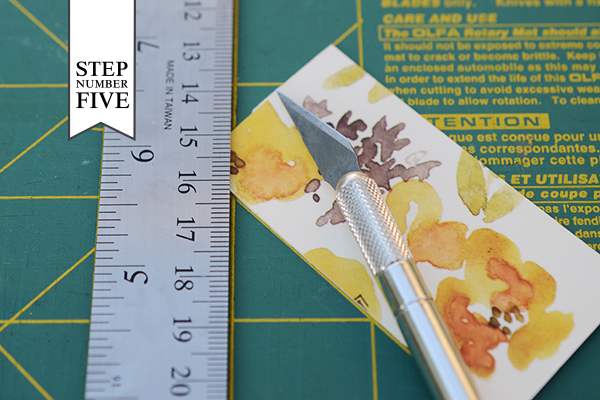
Step Five: To give the tag some extra detail, we notched the corners off of the top. Lay the rectangular tag on a self healing mat at the 45 degree angle, place the ruler and make the cut. Flip the tag over an repeat on the other side.

DIY Tutorial: Rubber Stamped Butterfly Handkerchief Invitation Suite by Antiquaria for Oh So Beautiful Paper

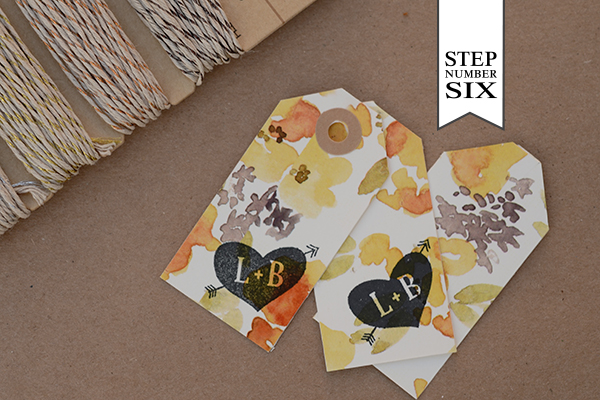
Step Six: To finish the tag we punched a hole in the top center and added an adorable kraft hole protector. Then we stamped our monogram (we used the Cross my Heart Monogram Stamp) on the lower right corner of the tag.

DIY Tutorial: Rubber Stamped Butterfly Handkerchief Invitation Suite by Antiquaria for Oh So Beautiful Paper

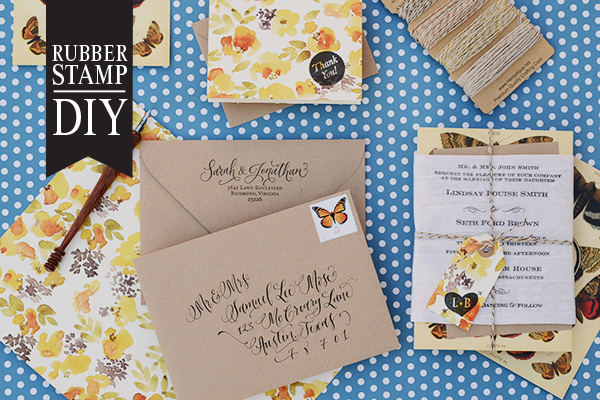
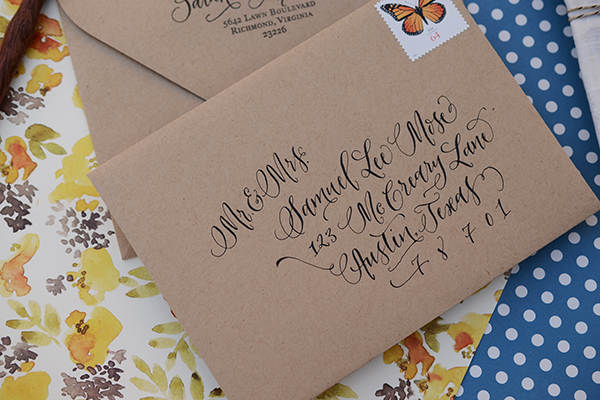
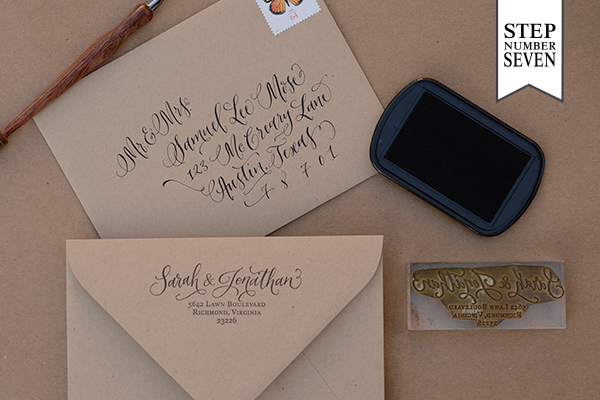
Step Seven: Next, you’ll need to stamp your return address (we used our Calligraphy Ampersand Return Address Stamp) and address them to all of your guests. Make sure to stamp the return address on all of your envelopes first! And how could we not add Butterfly themed postage!

DIY Tutorial: Rubber Stamped Butterfly Handkerchief Invitation Suite by Antiquaria for Oh So Beautiful Paper

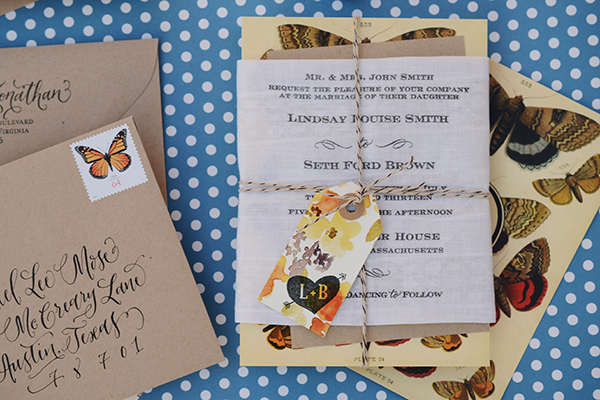
Tying everything together looks trickier than it is! Simply iron down the top and bottom of the handkerchief and fold it over your accommodations and reply card, overlapping the fabric a bit in the back. You can secure it with washi tape if you want or you can just go for it and tie the twine and tag around the suite sans tape.

DIY Tutorial: Rubber Stamped Butterfly Handkerchief Invitation Suite by Antiquaria for Oh So Beautiful Paper

 Materials

Sophisticate Invitation Stamp

Calligraphy Accent Accommodations Stamp

Butterfly Monogram Stamp

Calligraphy Accent Postcard Stamp

Cross my Heart Monogram Stamp

Calligraphy Ampersand Return Address Stamp

Stamp Pad in Black or Crafters in Black (if you choose to heat set)

Handkerchiefs with smooth open centers

Butterfly A7 Cards

Postcards in Paper Bag

A7 Envelope in Paper Bag

Chloe Yellow Floral Patterned Paper-in Cover Weight

Kraft Hole Protector

Self Healing Mat

Craft Knife

Metal Ruler

Twine similar to shown

Anti­quaria is a mem­ber of the Designer Rolodex – you can see more of their beau­ti­ful work right here or visit the real wedding invitations gallery for more wedding invitation ideas!

Photo Credits: Antiquaria

DIY Tutorial: Rubber Stamp Kids Animal Stationery

Emma has been designing custom stationery for her nephews for years. She recently asked her sister if she used the stationery and her sister’s response was, “Yes! I love it but I only use it for very special occasions because it’s so precious and I don’t want to run out of it.” Since Emma’s nephews are constantly on the go, we came up with a simple DIY solution for adorable kids stationery to help her sister (and other moms) craft exactly what they need on the go! These customizable rubber stamps make kids stationery a breeze… and not so precious as they can be stamped on pretty much anything! – Bailey and Emma of Antiquaria

DIY Tutorial: Rubber Stamp Stationery for Kids by Antiquaria for Oh So Beautiful Paper (1)

DIY Tutorial: Rubber Stamp Stationery for Kids by Antiquaria for Oh So Beautiful Paper (5)

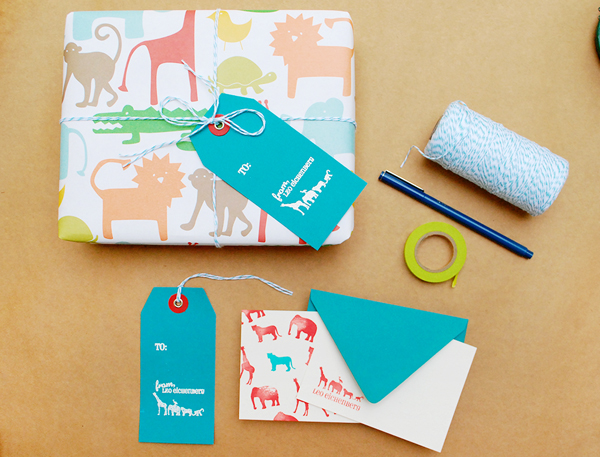
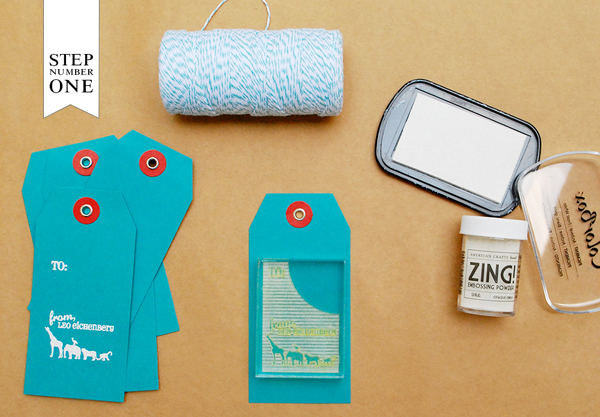
Step One: A stylish gift tag is a detail that gussies up any gift. For this one, we embossed our Animal Train Gift Tag stamp onto adorable peacock colored tags. For more information about how to emboss using stamps, please watch this instructional video. You could also simply ink and print your gift tag stamp in white or other color ink if your really short on time!

 DIY Tutorial: Rubber Stamp Stationery for Kids by Antiquaria for Oh So Beautiful Paper (4)

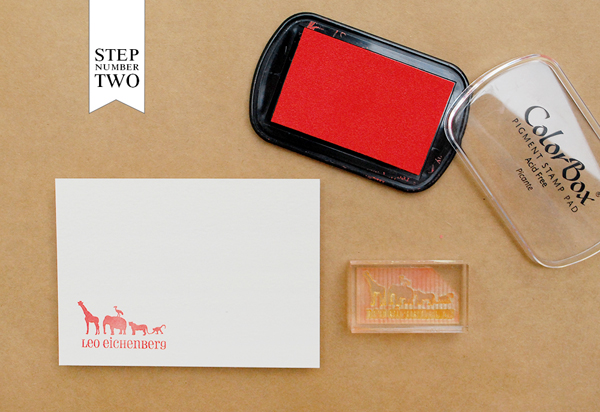
Step Two: Write thank you notes or enclose a birthday wish in style! To make your own notecard set, start my stamping your monogram (we used our Animal Train Monogram stamp) on the front of a plain A2 card.

 DIY Tutorial: Rubber Stamp Stationery for Kids by Antiquaria for Oh So Beautiful Paper (3)

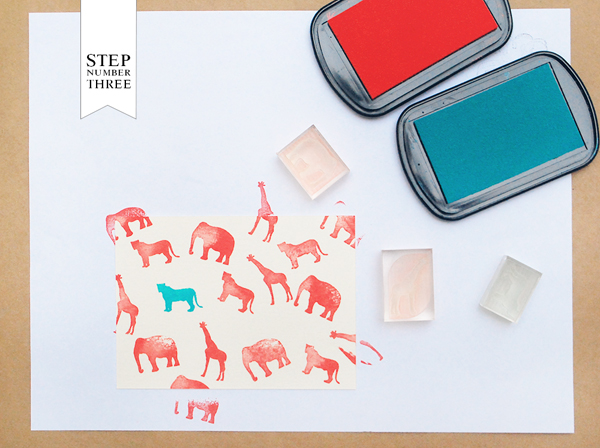
Step Three: If you have a little spare time…jazz up the back (and envelope in step four) with our Animal Pattern Stamps. Lay the A2 card monogram down on a scrap piece of paper. Randomly stamp the different animals in one color and accent with one design in a complementary second color (if you place this toward the center but not directly in it, you should get a balanced look).

 DIY Tutorial: Rubber Stamp Stationery for Kids by Antiquaria for Oh So Beautiful Paper (2)

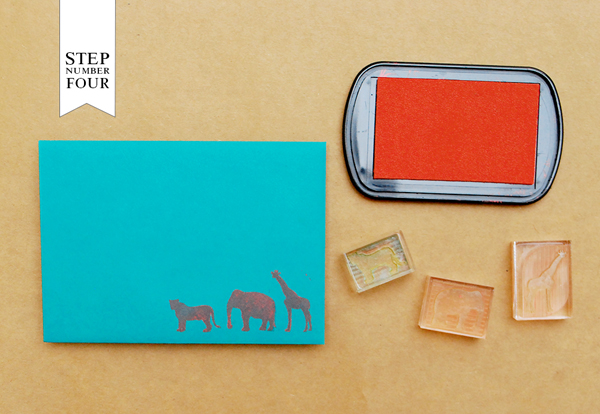
Step Four: We also dressed up our envelope with our Animal Pattern stamps, this time stamping them in a line!

Materials

Animal Train Gift Tag Stamp

Animal Train Monogram Stamp

Animal Train Pattern Stamps, set of 3

Stamp Pads in Picante and Surf

Embossing Powder

Embossing Heat Tool

Gift Tags

A2 Card in Eco White

A2 Envelope in Peacock

Photo Credits: Antiquaria