DIY Tutorial: Tropical Invitation Suite + Fabric Envelope

This week we’re fighting off winter blues with a fun and colorful tropical inspired invitation suite! The best part of this design? The awesome fabric inner envelope. As soon as we stumbled on this adorable tutorial on over on Martha Stewart, we were hooked and knew that we need to incorporate the technique into a DIY invitation suite! – Bailey and Emma of Antiquaria

DIY Tutorial: Tropical Invitation Suite + Fabric Envelope by Antiquaria for Oh So Beautiful Paper

DIY Tutorial: Tropical Invitation Suite + Fabric Envelope by Antiquaria for Oh So Beautiful Paper

DIY Tutorial: Tropical Invitation Suite + Fabric Envelope by Antiquaria for Oh So Beautiful Paper

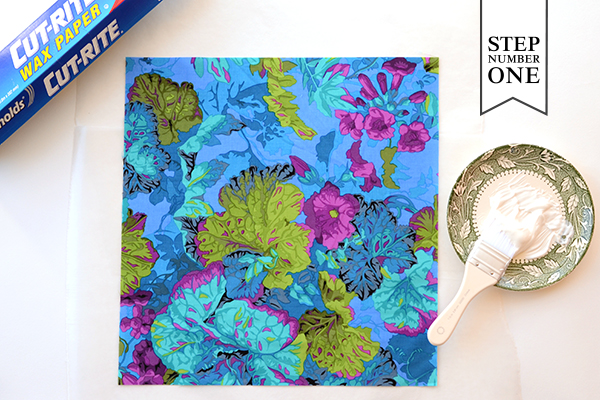
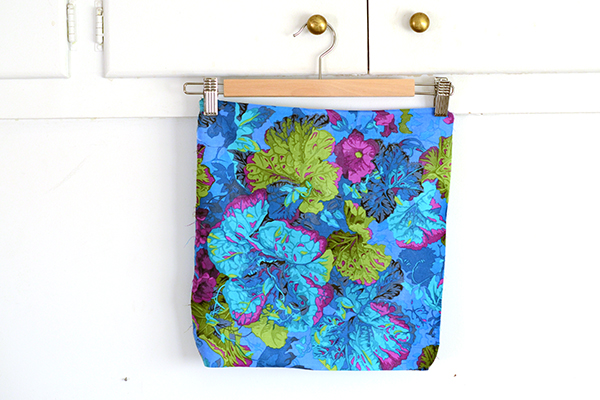
Step One: Over a piece of wax paper, thinly coat a piece of fabric measuring 13.5″ x 14″ with fabric decoupage on front and back. Once both sides are covered, hang the fabric from a pant hanger until dry (see below).
DIY Tutorial: Tropical Invitation Suite + Fabric Envelope by Antiquaria for Oh So Beautiful Paper

DIY Tutorial: Tropical Invitation Suite + Fabric Envelope by Antiquaria for Oh So Beautiful Paper

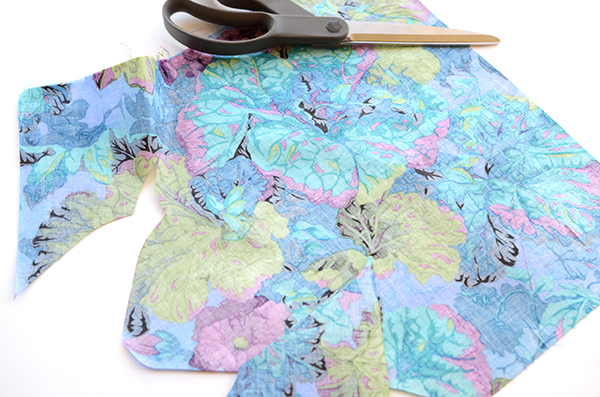
Step Two: Once the fabric is dry, trace an A7 envelope template on the “wrong” side of the fabric with a marker. Using a pair of very sharp fabric scissors, carefully cut out the envelope along the line.
DIY Tutorial: Tropical Invitation Suite + Fabric Envelope by Antiquaria for Oh So Beautiful Paper

DIY Tutorial: Tropical Invitation Suite + Fabric Envelope by Antiquaria for Oh So Beautiful Paper

Step Three: Now you’ll assemble the envelope. Place a sheet of wax paper approximately 7″ wide in the middle and fold the side flaps over it. Apply decoupage to the lower portion of the side flaps as shown above. Fold up the bottom flap to adhere it to the sides. Paint a thin coat of decoupage along the seams to seal the envelope closed (shown below).

DIY Tutorial: Tropical Invitation Suite + Fabric Envelope by Antiquaria for Oh So Beautiful Paper

DIY Tutorial: Tropical Invitation Suite + Fabric Envelope by Antiquaria for Oh So Beautiful Paper

Step Four: Next, you’ll emboss the invitation piece. Place your fig A7 card on a stable and firm surface. Ink your invitation stamp (we used our Vintage Calligraphy Invitation stamp) and center it over the card. When ready, press the stamp down with moderate pressure to make the print. Lift the stamp off and quickly move on to adding your embossing powder.

Once you’ve made your print, immediately cover it with embossing powder by sprinkling it across the card. Shift the powder around until you have covered the entire image. Now, you will pour the excess powder off of the card onto a scrap piece of paper so that you can reuse it for future prints. Heat set the print, using an embossing heat tool. You will be able to see the powder melt into an opaque and solid color when it’s done. For more information about how to emboss using stamps, please watch this instructional video.

Note: One key thing about embossing is that it is wise to try to closely match your ink color with your powder color. By doing this, you will get much more crisp and opaque results. For example, we used a white pad with white embossing powder on this invitation.

DIY Tutorial: Tropical Invitation Suite + Fabric Envelope by Antiquaria for Oh So Beautiful Paper

Step Five: Next, you’ll stamp your reply postcard on a 4″ x 6″ cream card. We used our Calligraphy Accent Reply Postcard stamp with eggplant ink.

DIY Tutorial: Tropical Invitation Suite + Fabric Envelope by Antiquaria for Oh So Beautiful Paper

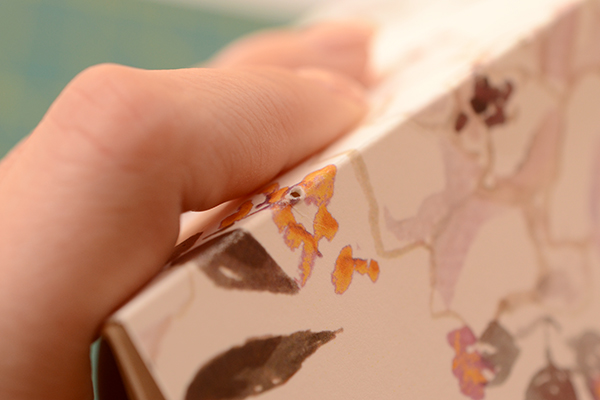
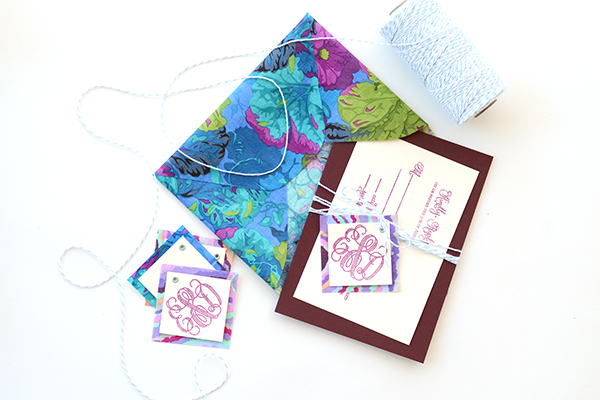
Step Six: There’s no reason to waste the scraps from cutting out the envelopes! We cut them into little 2.5″ squares to use with our monogram tags! The paper tag (in front) is a 2″ square. Once you have both squares cut, layer them on top of one another and punch a hole in the top center of the diamond. Insert a 1/8″ grommet into the hole so that the two pieces hold together.

Stamp your monogram stamp (we used our Antique Monogram stamp) on the tag with the same eggplant stamp pad as we used on the reply postcard.

DIY Tutorial: Tropical Invitation Suite + Fabric Envelope by Antiquaria for Oh So Beautiful Paper

Step Seven: Now all that’s left it to put it all together! We stamped the return address and addressed the outer envelope with turquoise ink for a tonal look. We also wrapped all of the pieces together with teal bakers twine to tie it all together!
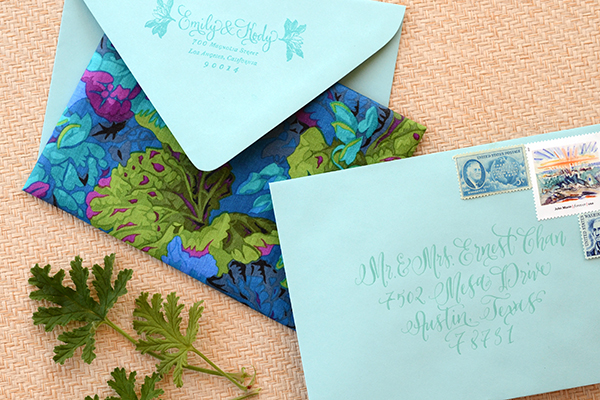
DIY Tutorial: Tropical Invitation Suite + Fabric Envelope by Antiquaria for Oh So Beautiful Paper

DIY Tutorial: Tropical Invitation Suite + Fabric Envelope by Antiquaria for Oh So Beautiful Paper

Materials

Vintage Calligraphy Invitation Stamp

Calligraphy Accent Reply Postcard Stamp

Antique Monogram Stamp

Fabric cut into 13.5″ x 14″ pieces

Rotary cutter, scissors, and self healing mat

Wax Paper

Decoupage, Paint Brushes, and Pant Hanger

Envelope Templates

A7 Cards in fig

A7.5 Envelopes in Pool

Cream Cardstock-cut into 4″ x 6″ and 2″ x 2″ pieces

Stamp pads in white, eggplant and turquoise

Embossing Powder, Embossing Heat Tool

1/8″ grommets

Crop-o-dile Tool for hole punching and grommet installation

Bakers Twine in Teal

Photography: Antiquaria for Oh So Beautiful Paper

Best of 2013: DIY Projects

We had so many wonderful DIY projects on Oh So Beautiful Paper this year – it was hard to narrow it down to just a few favorites! In addition to DIY tutorials from longtime contributors Bailey and Emma from Antiquaria, I was thrilled to welcome new DIY contributors Mandy from Fabric Paper Glue and the team from Caravan Shoppe to OSBP. I can’t wait to see what they dream up for us in 2014! In the meantime, here are a few of my favorite DIY ideas and projects from the past year, from save the dates to party place cards to a colorful paper backdrop!

OSBP-DIY-Tutorial-Gold-Calligraphy-Save-the-Dates-Antiquaria

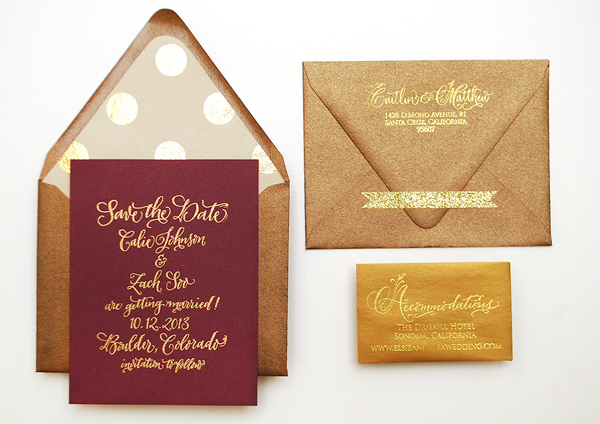
DIY Gold Calligraphy Save the Dates

OSBP-DIY-Tutorial-Neon-Kraft-Wedding-Invitations-Antiquaria

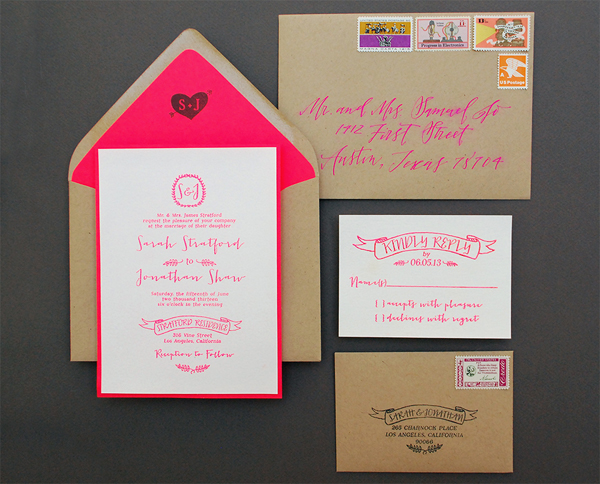
DIY Kraft + Neon Wedding Invitations

OSBP-DIY-Folded-Paper-Backdrop

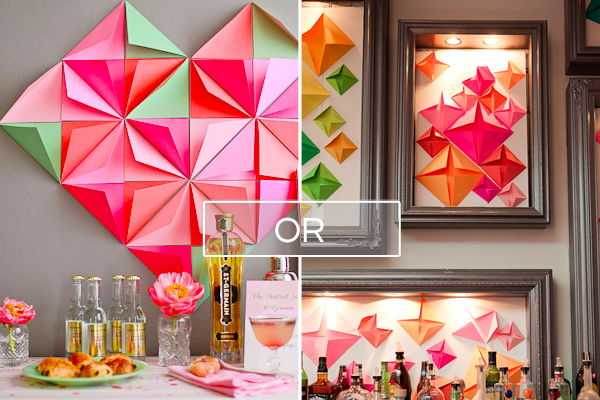
DIY Colorful Folded Paper Backdrop

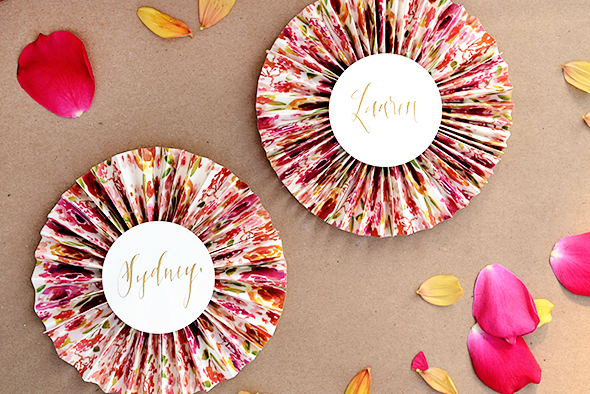
OSBP-DIY-Pattern-Paper-Fan-Place-Cards-Antiquaria

DIY Pattern Paper Fan Place Cards

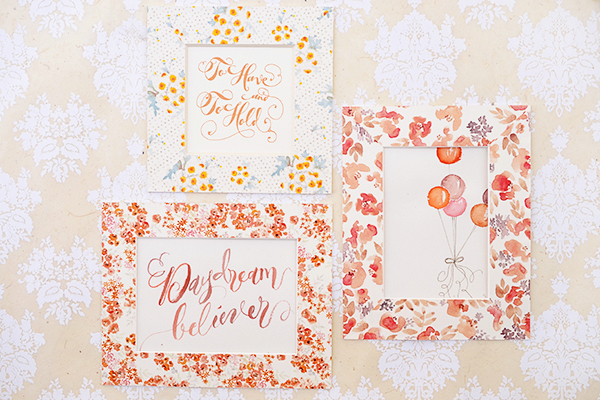
OSBP-DIY-Pattern-Photo-Mat-Antiquaria

DIY Patterned Photo Mats

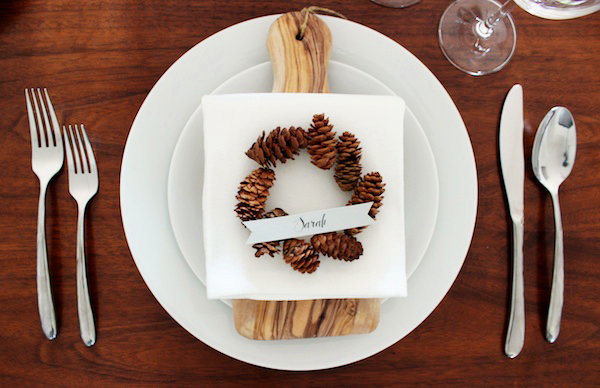
OSBP-DIY-Mini-Pinecone-Wreath-Place-Card-Fabric-Paper-Glue

DIY Mini Pinecone Wreath Place Cards

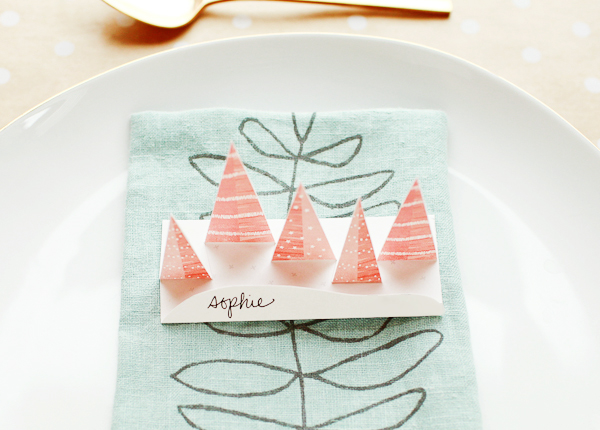
OSBP-DIY-Pop-Up-Winter-Forest-Place-Cards-Caravan-Shoppe

DIY Pop Up Winter Forest Place Cards

More DIY ideas and inspiration right here!

DIY Tutorial: Handmade Patterned Notebooks

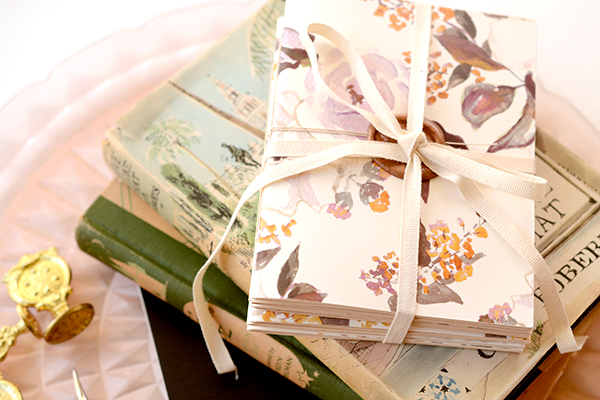
A handmade gift (or wedding favor) is always such a special way to show someone how much you care. With the holiday season in full swing, we’ve been brainstorming what handmade gifts to make this year for family and friends (an Antiquaria tradition!). This year, one gift that will be under the tree of all of our loved ones are a set of these patterned journals. They’re small enough to be carried around in a handbag which is ideal so that they’ll always be there to capture a great idea or quick thought. – Bailey and Emma of Antiquaria

DIY Tutorial: Pattern Notebook Gifts or Wedding Favors by Antiquaria for Oh So Beautiful Paper

We will be bundling them into sets of three but any quantity would be lovely! Six would be so luxurious for a friend who loves to write or sketch! While the process of making these journals has quite a few steps, they are fast and easy…we promise. You can easily knock out making them for all of your loved ones in a day if you work in an assembly line process!

DIY Tutorial: Pattern Notebook Gifts or Wedding Favors by Antiquaria for Oh So Beautiful Paper

Step 1: First, you will need to cut your cover sheets (we used our “Annabelle Violet” Floral Patterned Paper) and your text interior sheets (we used 4 sheets) to size. For ease, we just cut the 8.5″x11″ into 2 pieces (final measurement 8.5″x5.5″) using a metal ruler, craft knife and self healing mat. This way, there is not any paper waste! This also makes a wonderfully small pocket notebook size.

DIY Tutorial: Pattern Notebook Gifts or Wedding Favors by Antiquaria for Oh So Beautiful Paper

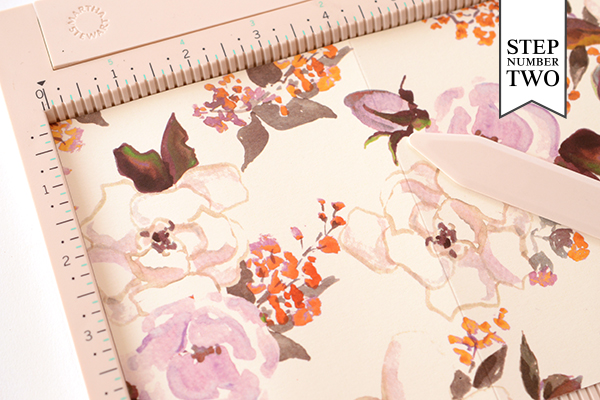
Step 2: Next, you’ll fold both the cover and interior pages in half. In order to make a clean fold on our cover paper we scored it down the center (at the 4.25″ mark). The interior sheets (8 in total) we just folded in half and used a bone folder to make the fold crisp.

DIY Tutorial: Pattern Notebook Gifts or Wedding Favors by Antiquaria for Oh So Beautiful Paper

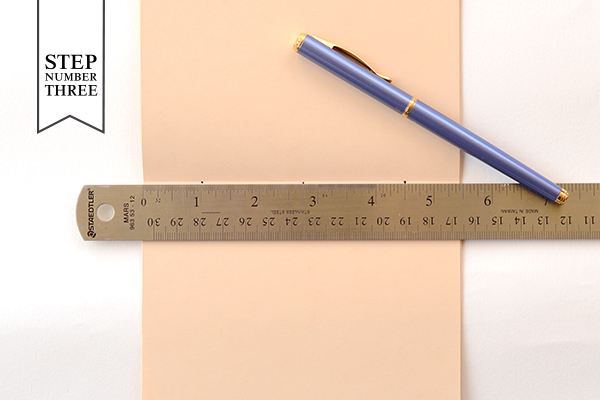
Step 3: We will be stitching these notebooks together, so we’ve got make holes to thread our needle through. Position your ruler over the center fold in the text paper stack. Make marks at 1 inch, 2.75 inches and 4.5inches. We’ve used a dark pen here so that you can see the dots…but feel free to use a pencil or whatever you have on hand.

DIY Tutorial: Pattern Notebook Gifts or Wedding Favors by Antiquaria for Oh So Beautiful Paper

Step 4: After you’ve marked your holes, you will need to punch through them with an awl. Stack your cover and interior pages together before making clean puncher marks though ALL of the sheets. This doesn’t take much force. If it helps, you can use binder clips to hold the pages and cover together and keep it straight.

DIY Tutorial: Pattern Notebook Gifts or Wedding Favors by Antiquaria for Oh So Beautiful Paper

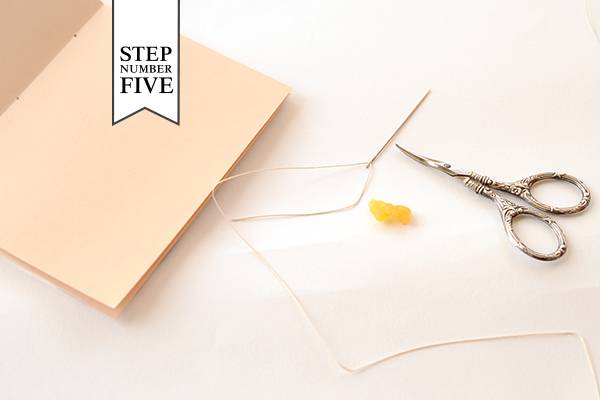
Step 5: Now you’re ready to sew! This step contains many sub-steps that go quickly once you get the hang of it. Thread your needle with bookbinding thread. We used approx. 18 inches for each book because it’s better to cut off extra than to come up short! If you’re having a hard time threading your needle, you can run a little beeswax on the tip to make it stiff and easier to thread through.

DIY Tutorial: Pattern Notebook Gifts or Wedding Favors by Antiquaria for Oh So Beautiful Paper

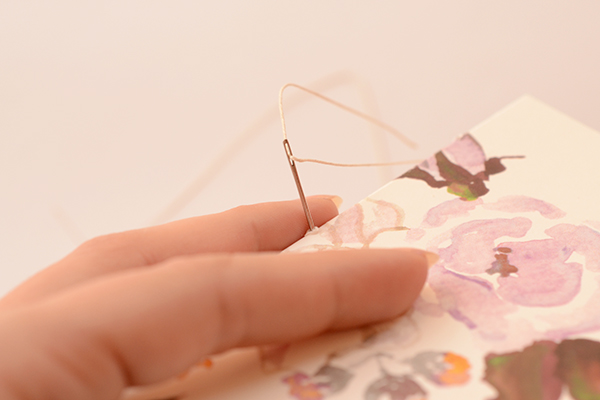
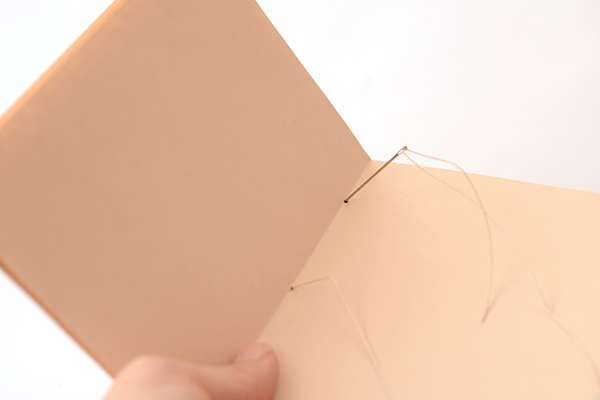
Step 5a: Thread your needle through the center hole on the outside of your journal as shown above. Pull through, leaving a tail that is approximately 6 inches long.

DIY Tutorial: Pattern Notebook Gifts or Wedding Favors by Antiquaria for Oh So Beautiful Paper

Step 5b: Now sew through the top hole in the inside of the journal as shown above. Make sure you still have your 6″ tail on the outside and you don’t pull it through!

DIY Tutorial: Pattern Notebook Gifts or Wedding Favors by Antiquaria for Oh So Beautiful Paper

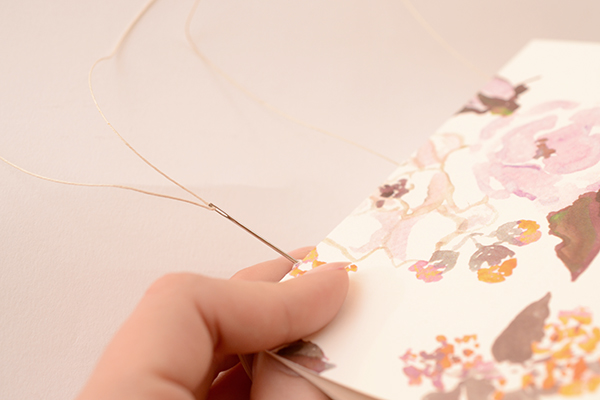
Step 5c: Next, you’ll bring your needle down and sew through the bottom hole on the outside of your journal.

DIY Tutorial: Pattern Notebook Gifts or Wedding Favors by Antiquaria for Oh So Beautiful Paper

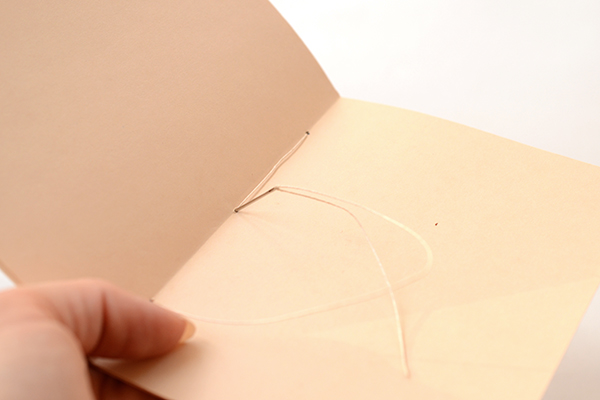
Step 5d: Now, you’ll sew through the center hole once more, ending up on the outside cover.

DIY Tutorial: Pattern Notebook Gifts or Wedding Favors by Antiquaria for Oh So Beautiful Paper

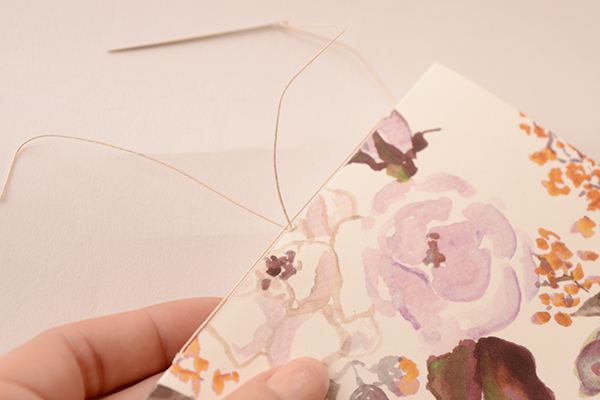
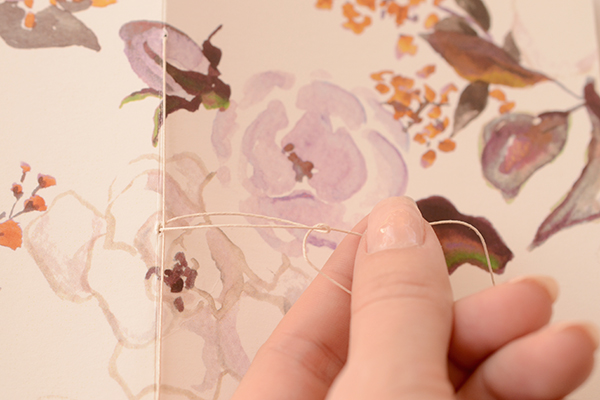
Step 5e: Once you’ve pulled your thread through the center a second time, you can take your needle off of the thread. Make sure that there is one thread end on either side of the spine thread (the one that’s down the center).

DIY Tutorial: Pattern Notebook Gifts or Wedding Favors by Antiquaria for Oh So Beautiful Paper

Step 5f: Pull your thread taught (not too hard or you’ll rip the paper) making sure that there is no slack on the outside or inside of the journal. Loop one thread under the other into a knot to tie off the binding.

DIY Tutorial: Pattern Notebook Gifts or Wedding Favors by Antiquaria for Oh So Beautiful Paper

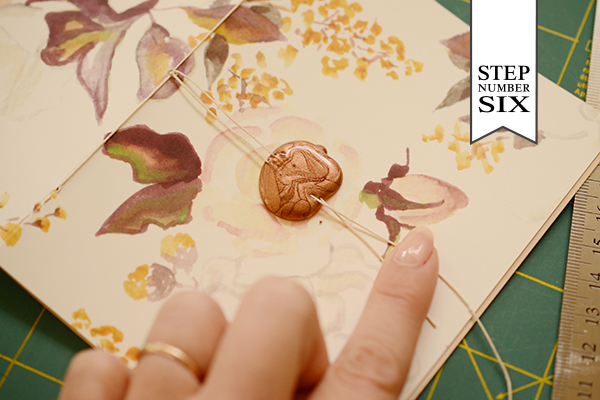
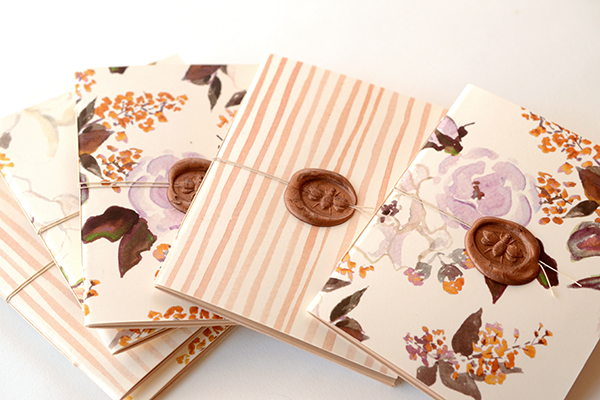
Step 6: Now we decorate! Instead of having loose string on the binding or tying it into a bow, we decided to secure it with sealing wax! Pull your two binding threads across the center front of the journal. Drip hot wax (we use a wax formulated for a glue gun-for ease) in the center over the threads (see above). Using your wax seal of choice, press it into the hot wax until it cools and releases (see below). Trim off and make the thread ends even, if desired.

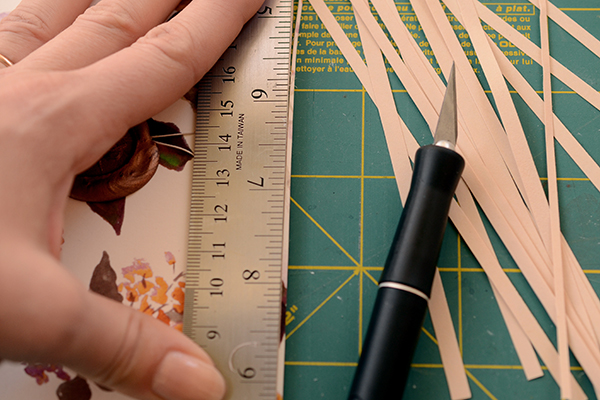
Step 7: We’re not going to lie… this may be the trickiest step out of the whole process! Once the journal is finished and  folded, you’ll need to make the edges of the book even so that they’re crisp and clean, like the journals that you buy in a store. The trick to this is using a REALLY sharp, new blade on your craft knife. If you’re making a lot of these journals, you may need to change your blade more than once!

Line up your ruler with the edge of your front cover. Make sure that all of your pages and the back cover are flat and pressed down (we kinda lean on the whole journal and ruler at the same time so that it doesn’t shift). Now, start trimming off the excess. It will take a few passes but will eventually be a clean, straight edge!

DIY Tutorial: Pattern Notebook Gifts or Wedding Favors by Antiquaria for Oh So Beautiful Paper

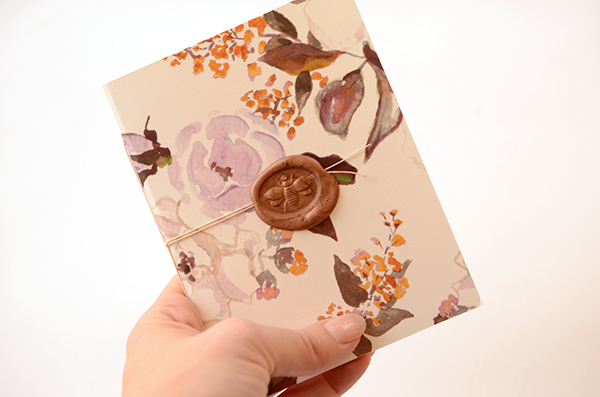
Et voila! Now your journal is finished and ready to give! We guarantee that your loved ones will cherish these little pretties for years to come. They may even ask for them year after year.

DIY Tutorial: Pattern Notebook Gifts or Wedding Favors by Antiquaria for Oh So Beautiful Paper

Materials

“Annabelle”  Patterned Paper, in Cover

“Annabelle Violet”  Patterned Paper, in Cover

“Watercolor Stripe” Coral Patterned Paper, in Cover

Text Paper for interior pages

Metal Ruler, Self Healing Mat and Craft Knife

Bone Folder

Scoreboard

Awl

Bookbinding Thread

Needle

Wax Seal

Sealing Wax and Glue Gun

Scissors

Beeswax (optional)

Photos: Antiquaria for Oh So Beautiful Paper

DIY Tutorial: Gift Wrapped Wine Box Favors

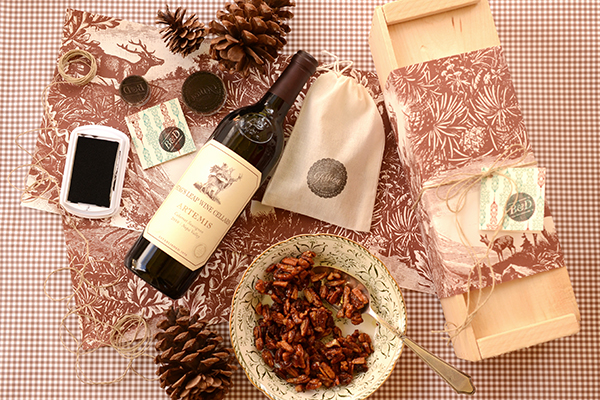
With the holidays right around the corner, we’ve definitely got gift wrapping on the brain! This tutorial is great because not only would this make a great hostess gift but it would also be a fabulous favor idea for a party or wedding. The steps are super simple, so it’s easy to make one box – or one hundred! â€“ Bailey and Emma of Antiquaria

DIY Tutorial: Gift Wrapped Wine Box Favors by Antiquaria for Oh So Beautiful Paper
DIY Tutorial: Gift Wrapped Wine Box Favors by Antiquaria for Oh So Beautiful Paper
DIY Tutorial: Gift Wrapped Wine Box Favors by Antiquaria for Oh So Beautiful Paper
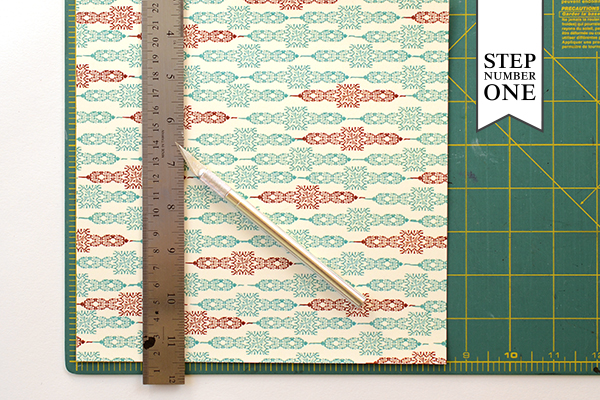
Step One: Start by creating the little hang tag for the outside of the box. To do this, cut your card stock (we used our Old West Patterned Paper) into rectangles measuring 2.5″ x 5″ with a craft knife and ruler on a self healing mat.

DIY Tutorial: Gift Wrapped Wine Box Favors by Antiquaria for Oh So Beautiful Paper
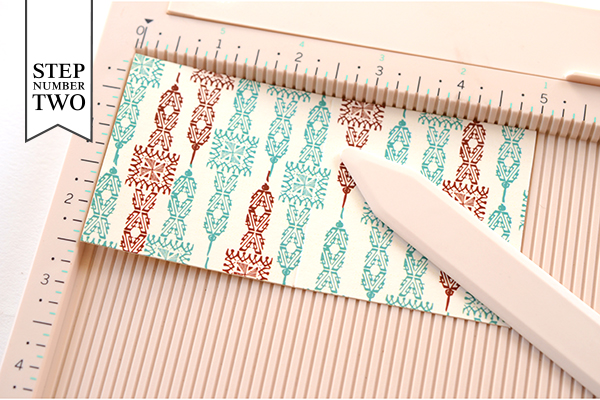
Step Two: Next, you’ll score the card so that it will fold nicely. On a scoreboard, run your tool at the 2.5 inch mark to make the score. Don’t fold the card yet!

DIY Tutorial: Gift Wrapped Wine Box Favors by Antiquaria for Oh So Beautiful Paper
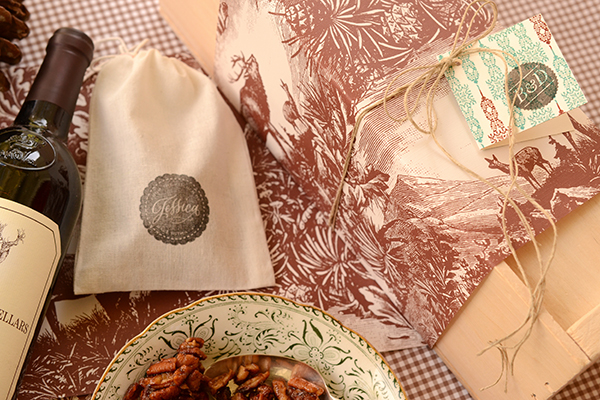
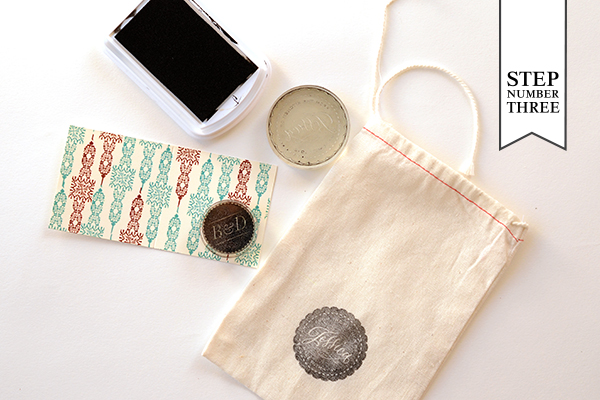
Step Three: Now you’ll get to stamping! Stamp your monogram (we used our Seal Monogram) on the tag in the lower lefthand corner. You’ll also want to stamp your muslin bag with your monogram, or if the goodies are homemade, a kitchen seal stamp works perfectly! With the stamps that are mostly black, like ones shown, you’ll want to take extra care that they are inked really well (see picture below). If they aren’t, your image will be too light to be legible. We’d suggest starting the project with a brand new stamp pad. You can watch our step-by-step video tutorial about the stamp printing process here.

DIY Tutorial: Gift Wrapped Wine Box Favors by Antiquaria for Oh So Beautiful Paper
DIY Tutorial: Gift Wrapped Wine Box Favors by Antiquaria for Oh So Beautiful Paper
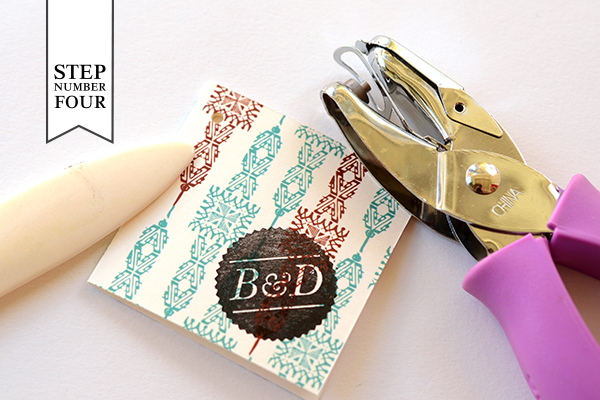
Step Four: Once your ink is dry, it’s time to fold your little card! Use a bone folder to get a crisp, clean fold. Then, punch a hole in the top left corner for the string to go through.

DIY Tutorial: Gift Wrapped Wine Box Favors by Antiquaria for Oh So Beautiful Paper
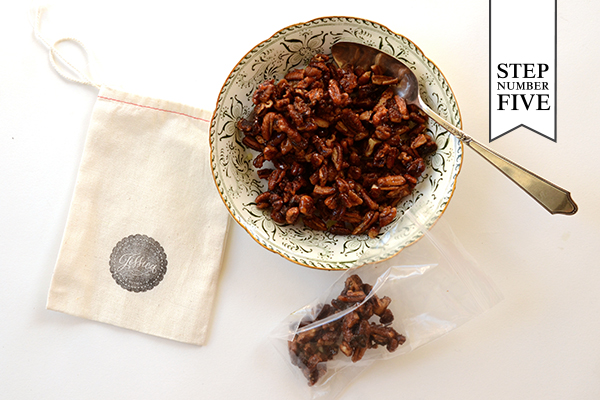
Step Five: Homemade treats make the holidays truly special. We decided to make a batch of these yummy spiced nuts (we used pecans) from a Martha Stewart recipe. Once the nuts are cooled, scoop them into clear food safe bags and insert them into your stamped muslin treat bag! Draw the string and tie the bag closed.

DIY Tutorial: Gift Wrapped Wine Box Favors by Antiquaria for Oh So Beautiful Paper
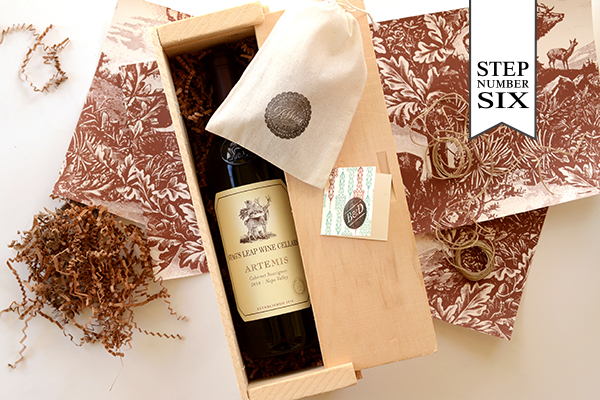
Step Six: Now it all comes together! Gather all of your wrapping materials together and get started. For the large box “belly band” we used a sheet of wrapping paper cut into thirds. To pad the wine bottle in its box, we used kraft crinkle packed snuggly around the bottle. Lay your treat bag on top of the wine bottle and fill up around everything with more crinkle. Now slide the box closed!

DIY Tutorial: Gift Wrapped Wine Box Favors by Antiquaria for Oh So Beautiful Paper
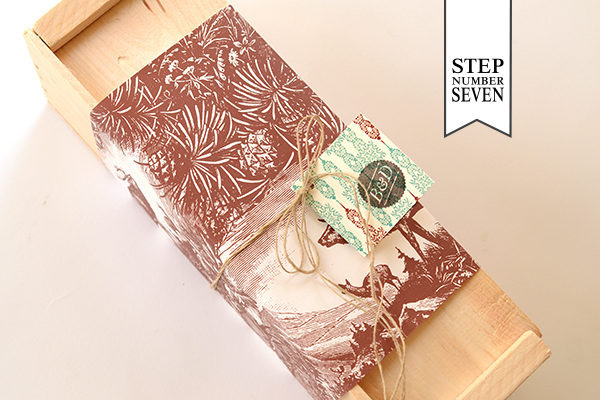
Step Seven: Once everything is secure in the closed box, wrap your decorative paper around the box and secure on the back with double sided tape. Tie around the middle with hemp twine, threading your stamped monogram tag before tying a bow. The gift is now ready and your friend and loved ones will be as thrilled with the gorgeous presentation as the yummy gifts themselves!

Materials

Old West Patterned Paper in Turquoise Card Stock

Seal Monogram Stamp

Kitchen Seal Stamp, No.2

Muslin Bags

Stamp Pad (we recommend a brand new one, this one can be heat set and made permanent on fabric)

Self Healing Mat, Craft knife and Metal Ruler

Score Board

Hole Punch

Wooden Wine Box

Food Safe Plastic Bags

Decorative Gift Wrap (you can have this pre-cut for you before having it shipped)

Hemp Twine

Kraft Crinkle

Phototgraphy: Antiquaria for Oh So Beautiful Paper
2013 Gift Guide: Designers + Calligraphers

Our next gift guide was inspired by a very sweet husband looking for ideas for his graphic designer (and aspiring hand lettering artist) wife. I turned to some friends, including Christine from Yellow Owl Workshop, Michele from Meant to Be Calligraphy, Courtney from Swiss Cottage Designs, Arley-Rose and Morgan from Ladyfingers Letterpress, and Liz from Linda & Harriett, for their recommendations. So whether you’re in the same predicament, looking for someone who dabbles in design or calligraphy, or just want to forward this post to your significant other – here are a few gift ideas!

 OSBP-2013-Gift-Guide-Design-Enthusiast

1. Wacom Tablet; 2. Pantone Guide Book; 3. Oblique Calligraphy Pen Holder; 4. Copperplate Nib Sampler; 5. Phantom Line Lettering Guide (found one on ebay here!); 6. Watercolor Set (and small pads of watercolor paper); 7. Calligraphy + Letterpress Classes (like this class from Meant to Be Calligraphy)

OSBP-2013-Gift-Guide-Design-Enthusiast-Part2

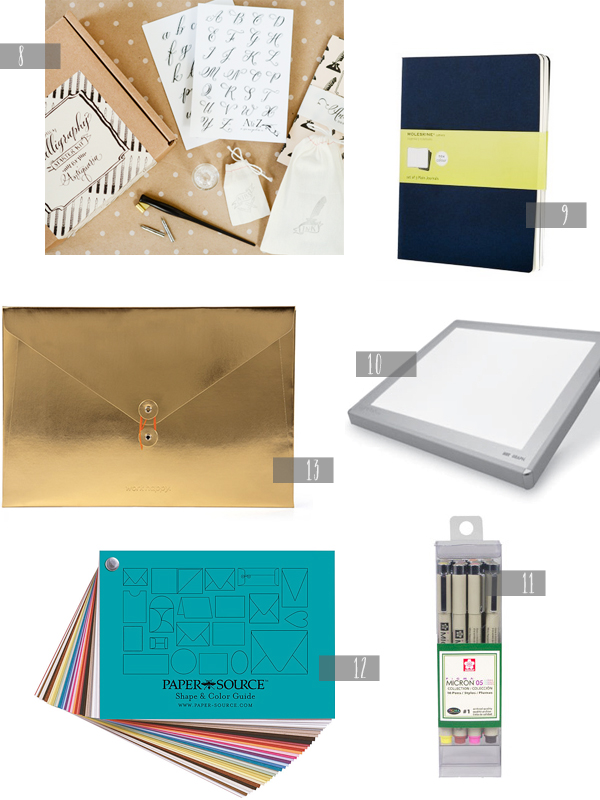
8. Calligraphy Starter Kit; 9. Moleskine Notebooks; 10. Calligraphy Light Box; 11. Micron Pens and black Uniball Pens; 12. Paper Source Swatch Book; 13. Poppin Metallic Folio
2 + 12 Pantone guide book + swatch books! Both essential tools for any artist, but also a great source of inspiration! The ladies of Ladyfingers Letterpress also recommend Soho Paper, French Paper Co., and Cards and Pockets.
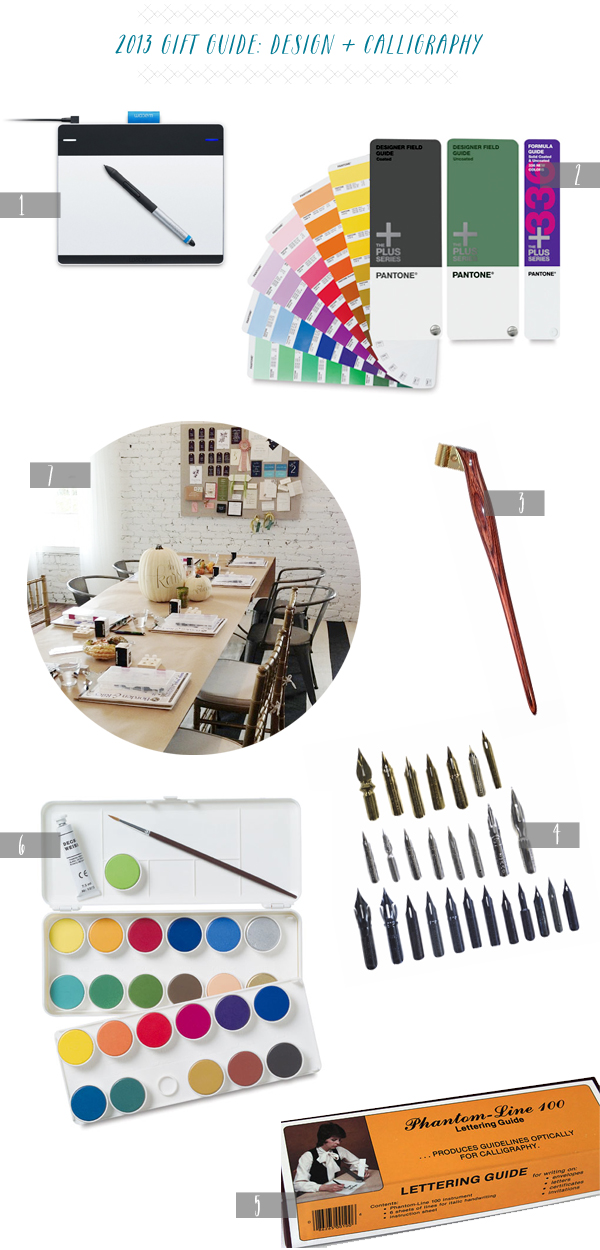
5 + 10 Arley-Rose from Ladyfingers Letterpress also recommended a vintage tool called the Phantom Line Lettering Guide that projects guidelines onto a page, although you’ll have to do some digging to find one. Alternatively, a light box is an essential tool for any aspiring or hobbyist calligraphers!

7 + 8 Classes are such a great way to both learn and connect with fellow designers and calligraphy enthusiasts in your area! I’ve listed some DC-area classes here, but look for letterpress workshops and calligraphy classes in your area or even explore online classes. But if you really can’t find a class that works, a calligraphy starter kit makes a wonderful gift.

13 Pretty office supplies! Because really, nothing is more of a bummer for creative energy than sad pocket folders and organization supplies. Courtney from Swiss Cottage Designs and I are both loving all the colorful office supplies from Poppin these days!

A couple of additional ideas from Courtney: consider treating your significant other to their very own business cards, perhaps with a gift certificate to their favorite printer. Or track down a web developer who can help build a website or blog. These two investments are particularly big deals for any designers that might just be starting out, and any little help towards both projects can mean the world to a growing business!

{images via their respective sources}