Happy Weekend!

Happy Friday everyone! Our little Alice celebrated her quarter birthday earlier this week. I can’t believe she’s already three months old! She’s smiling up a storm and generally the happiest and most chill baby we could have asked for – unless her gums (hello early teething!) or tummy are bothering her. And then she definitely lets you know that she’s not happy! We’ve had a few more of those nights than I would have liked this week, so I’m looking forward to a quiet weekend and a short week next week before we all head out for the holidays. But in the meantime…

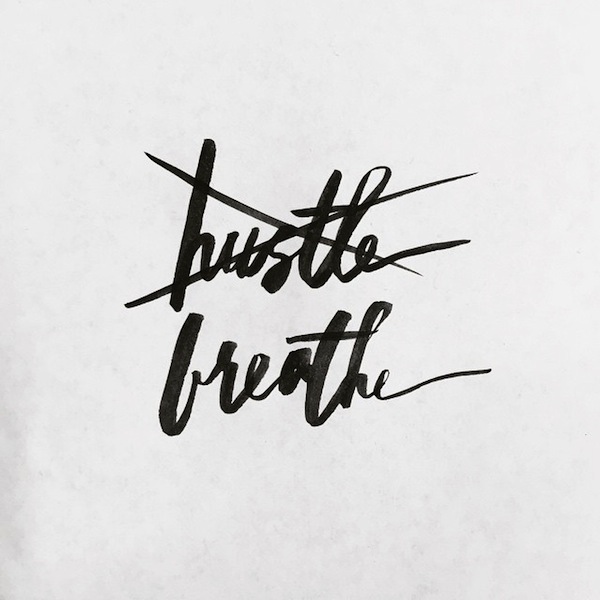
OurHeiday-Breathe-Instagram

Image Credit: Patricia Shen / Our Heiday

…a few links for your weekend!

This week on Oh So Beautiful Paper:

No cocktail this week, sadly, due to a certain unusually fussy 3 month-old – but we hope to have a pre-holiday cocktail for you early next week! Have a wonderful weekend, and I’ll see you back here on Monday! xoxo

Lisa + Paul’s Gold New Year’s Eve Wedding Invitations

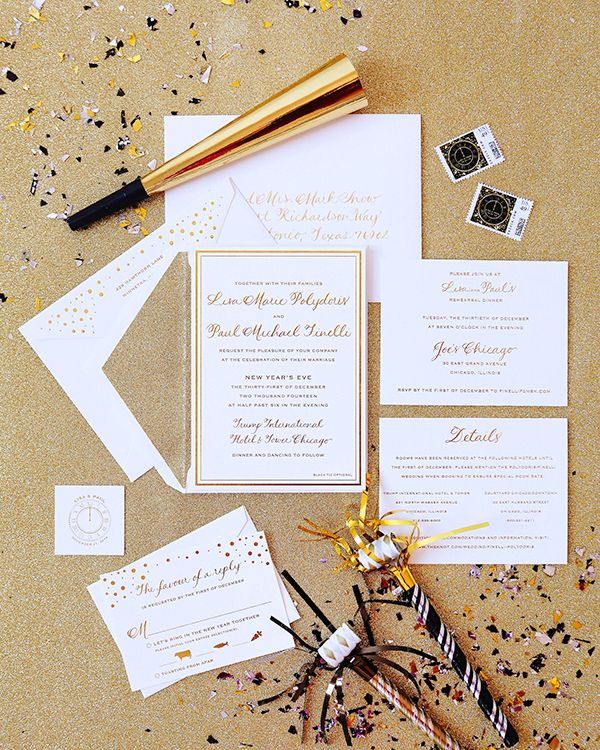
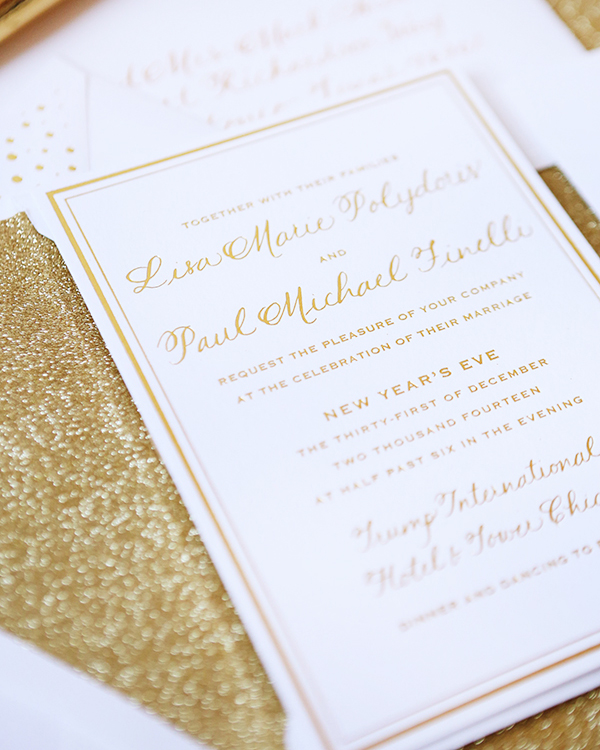
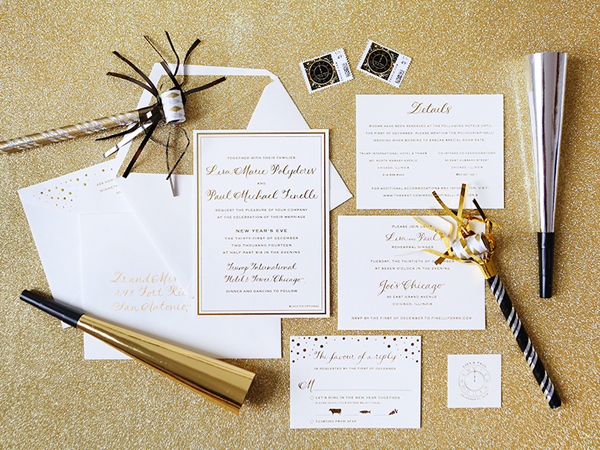
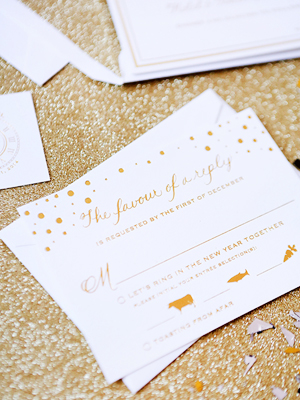
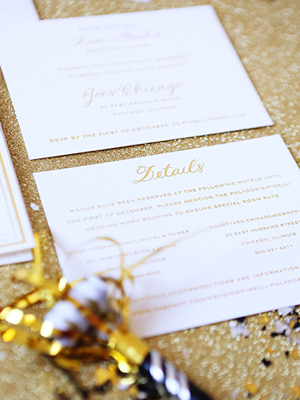
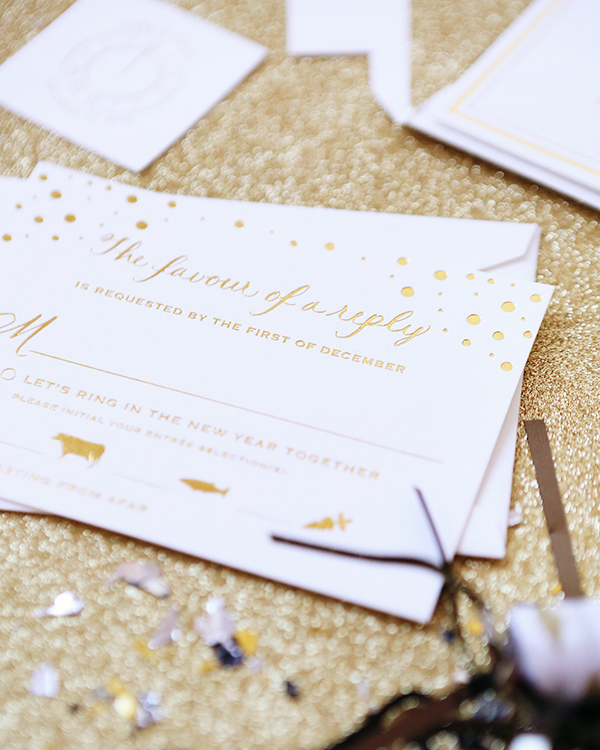
With 2015 just a couple of weeks away (!!), I couldn’t resist sharing these sparkly gold New Year’s Eve wedding invitations from Courtney Callahan Paper. Courtney paired gold foil and calligraphy with clock and confetti-inspired details – the perfect mix for a New Year’s Eve wedding!

Gold-New-Years-Eve-Wedding-Invitations-Courtney-Callahan-Paper-OSBP2

From Courtney: Since Lisa and Paul’s New Year’s Eve wedding will take place at Trump International Hotel & Tower Chicago, their wedding invitation had to be equally luxurious. Each piece of the invitation is printed on Crane’s Pearl White Lettra stock and features gold foil and custom calligraphy.

Gold-New-Years-Eve-Wedding-Invitations-Courtney-Callahan-Paper-OSBP4

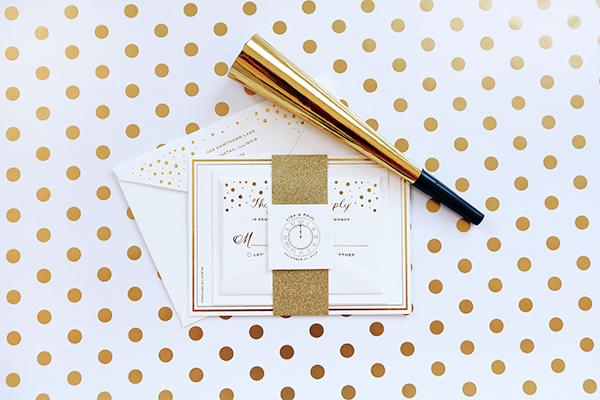
To tie in the “festive” part of their wedding, the inner envelope was lined in gold glitter and the entire suite was tied together with a gold glitter belly band and tag featuring the couple’s names, wedding date, and a clock at the stroke of midnight – which was also featured on a custom stamp. Guests also noted if they would be “ringing in the new year together” or “toasting from afar.” 

Gold-New-Years-Eve-Wedding-Invitations-Courtney-Callahan-Paper-OSBP3

Gold-New-Years-Eve-Wedding-Invitations-Courtney-Callahan-Paper-OSBP

Gold-New-Years-Eve-Wedding-Invitations-Courtney-Callahan-Paper-OSBP5Gold-New-Years-Eve-Wedding-Invitations-Courtney-Callahan-Paper-OSBP6

Gold-New-Years-Eve-Wedding-Invitations-Courtney-Callahan-Paper-OSBP8

Gold-New-Years-Eve-Wedding-Invitations-Courtney-Callahan-Paper-OSBP9

Thanks Courtney!

Design: Courtney Callahan Paper

Calligraphy: Calligraphy by Cristine

Foil Stamp Printing: Accucolor, Plus

Check out the Designer Rolodex for more tal­ented wed­ding invi­ta­tion design­ers and the real invi­ta­tions gallery for more wedding invitation ideas!

Photo Credits: Heather Roth Photography

Happy Weekend!

Happy Friday everyone! Thank you all so much for the toddler sleep tips last week – we’re making incremental progress with Sophie’s bedtime routine, but these days I still feel like I spend about half my day putting either a toddler or a newborn down to sleep. Gah! This weekend I’m looking forward to celebrating a very special first birthday and working on a brand new project that I’m excited to share here in a couple of weeks! But in the meantime…

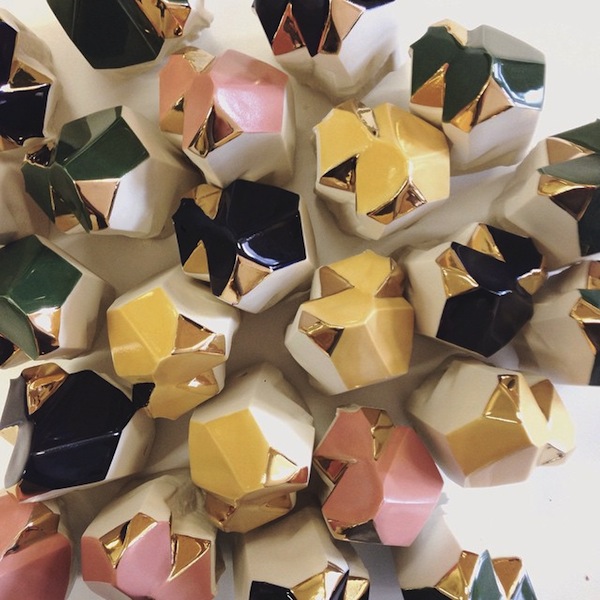
redravenstudios-ceramic-crystals

Beautiful ceramic crystals by Redraven Studios

…a few links for your weekend:

This week on Oh So Beautiful Paper:

Hand Lettered Wedding Invitations by AllieRuth Design

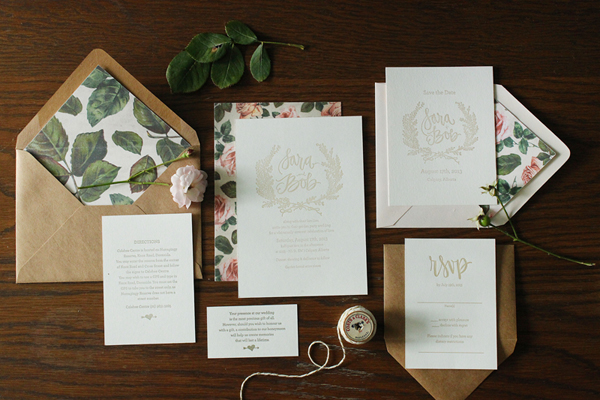
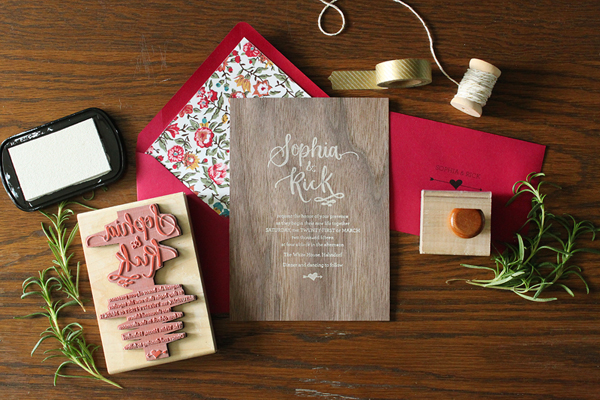
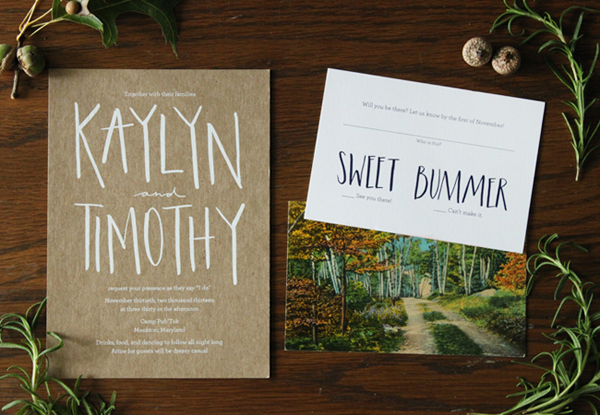
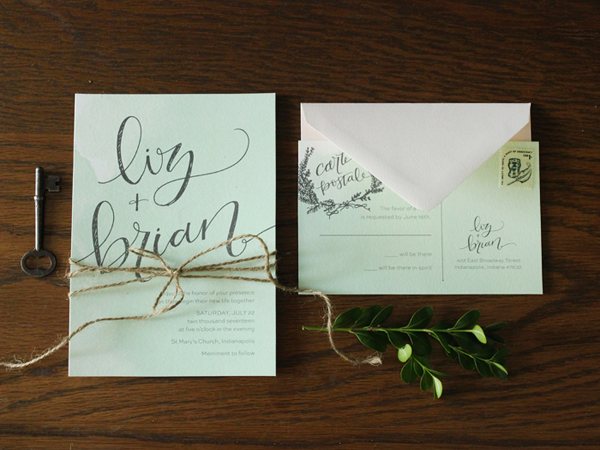
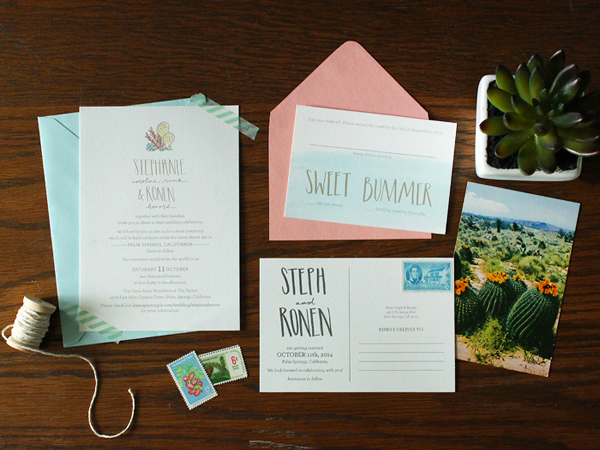
I’m a longtime fan of the custom invitation work by AllieRuth Design – it has been so fun to watch Allie’s style and beautiful hand lettering evolve over the years! Naturally, I’m a huge fan of the ready-to-order wedding invitation collection that Allie released late last month. The collection includes five designs with a range of customization options, including dip dye, patterned backings, custom-sourced vintage postcards, and of course Allie’s whimsical lettering hand written for each order. So pretty!

Allie-Ruth-Wedding-Invitations-OSBP2

Allie-Ruth-Wedding-Invitations-OSBP3

Allie-Ruth-Wedding-Invitations-OSBP5

Allie-Ruth-Wedding-Invitations-OSBP6

Allie-Ruth-Wedding-Invitations-OSBP7

Allie-Ruth-Wedding-Invitations-OSBP8

Allie-Ruth-Wedding-Invitations-OSBP4

Allie-Ruth-Wedding-Invitations-OSBP9

Allie-Ruth-Wedding-Invitations-OSBP10

Allie-Ruth-Wedding-Invitations-OSBP11

Allie-Ruth-Wedding-Invitations-OSBP

Thanks Allie!

AllieRuth Design is a member of the Designer Rolodex – you can see more of Allie’s beautiful work right here or visit the real invitations gallery for more wedding invitation ideas!

Photo Credits: AllieRuth Design

DIY Tutorial: Holiday Envelope Addressing Ideas

As you might be able to guess, we send quite a lot of snail mail in our line of work. Whether it’s thank you notes, catalogs, color samples, or a letter to our loved ones, we try to make all of our outgoing mail a treat for the recipient to receive. Since we have holiday cards on the brain, we decided to come up with some fun and easy addressing options suited to the season. They incorporate fun lettering styles as well as stamping and we just love them all! Want more DIY addressing styles? Check out our first envelope addressing post here. Have fun with the designs and happy addressing! –Bailey and Emma of Antiquaria
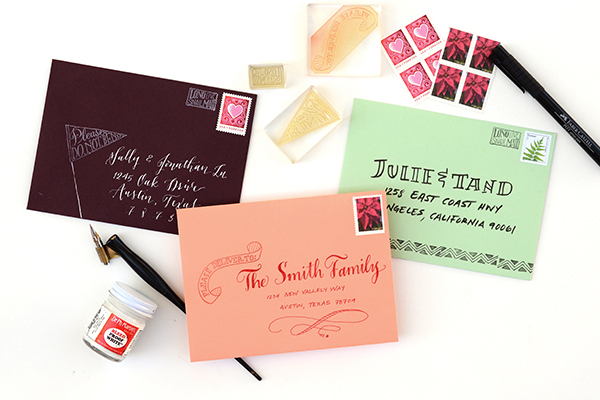
DIY Tutorial: Holiday Envelope Addressing Ideas by Antiquaria for Oh So Beautiful Paper

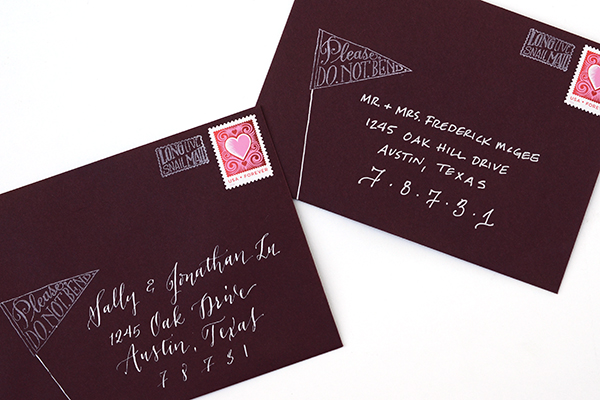
Option One: Do Not Bend Pennant Stamp + White DIY Pointed Pen Calligraphy Addressing. White stamping and white calligraphy ink really pop off of this gorgeous fig colored envelope. While it takes time to perfect using a pointed calligraphy pen, feel free to experiment also with white or silver gel pens for a similar (and easier) effect.
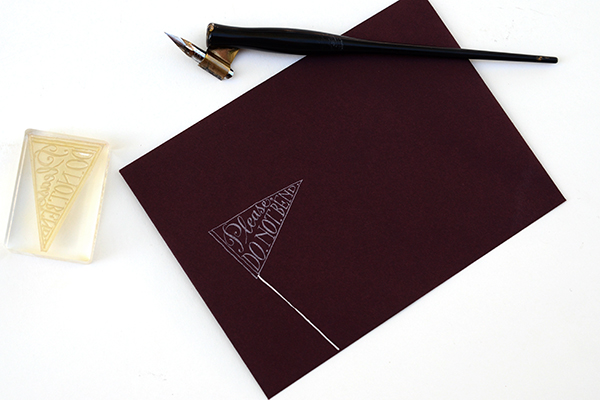
DIY Tutorial: Holiday Envelope Addressing Styles by Antiquaria for Oh So Beautiful Paper

Stamp your Please Do Not Bend Pennant Stamp on the lefthand side of your envelope, just a hair above the center. With your pen, draw a line to the bottom with white ink.
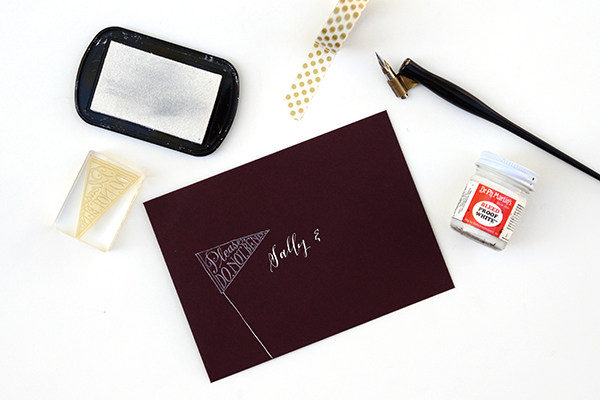
DIY Tutorial: Holiday Envelope Addressing Styles by Antiquaria for Oh So Beautiful Paper

Next, address the envelope to your loved one using a pointed calligraphy pen and white ink. Start your addressing right below the pennant stamp, as shown above.
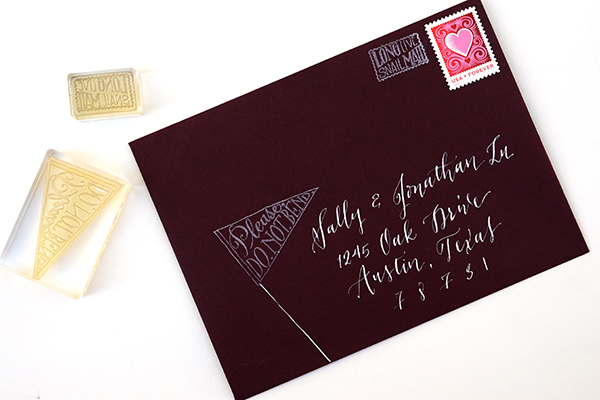
DIY Tutorial: Holiday Envelope Addressing Styles by Antiquaria for Oh So Beautiful Paper

Let the addressing dry completely (with white calligraphy ink this can take a few hours). Once it’s dry, add your postage and then stamp our Long Live Snail Mail Stamp to the left. Feel free to play with the lettering style of addressing on this design! A simple hand-written block print with white or silver gel ink also looks lovely (see below)!
DIY Tutorial: Holiday Envelope Addressing Styles by Antiquaria for Oh So Beautiful Paper

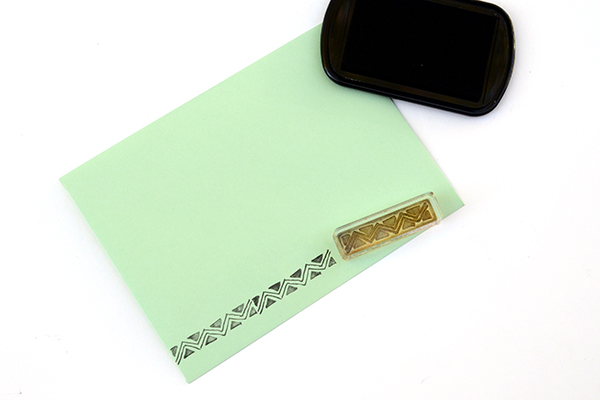
Option Two: Zig-Zag Stamp + Bold Brush Block Lettering. Adding a line of pattern along the bottom of the envelope instantly adds an air of “fun” to the design. When paired with an easy brushed address, the effect is bold and will stand out instantly among the bills and junk mail!
Mint-AddressingDIY Tutorial: Holiday Envelope Addressing Styles by Antiquaria for Oh So Beautiful Paper

Print your zig-zag stamp in black ink along the bottom edge of the mint colored envelope. You’ll want to make sure that each printing is close together but not overlapping.
DIY Tutorial: Holiday Envelope Addressing Styles by Antiquaria for Oh So Beautiful Paper

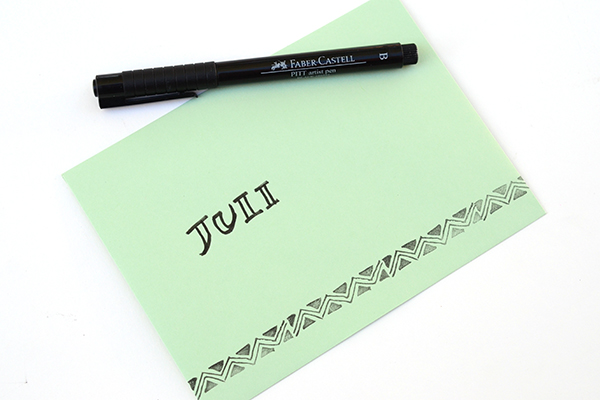
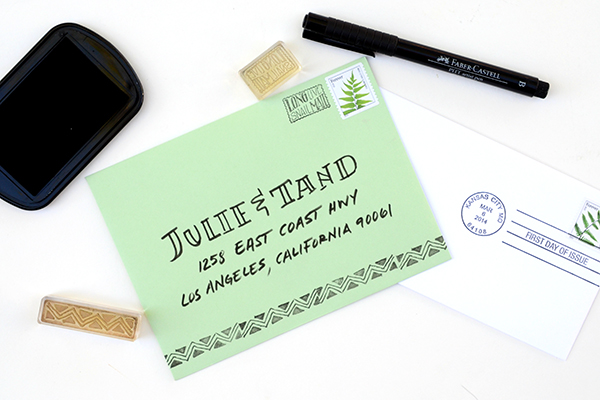
With a black brush pen, write out your loved one’s name. We decided to make big block letters for their name (with the mint color showing in the center) and a simple italic print for the address. Once the address is done, add your postage and our Long Live Snail Mail Stamp to complete the look!
DIY Tutorial: Holiday Envelope Addressing Styles by Antiquaria for Oh So Beautiful Paper

Option Three: Deliver To Banner Stamp + Hand-lettered Script. Bailey actually designed this adorable “Please Deliver To” stamp to use on her save the date a while back and we think that it makes the perfect snail mail statement on this coral envelope when combined with red addressing. The fun part of this design is that you get the look of calligraphy but with simpler tools! A common felt tipped pen made this gorgeous script. Incredible, right?
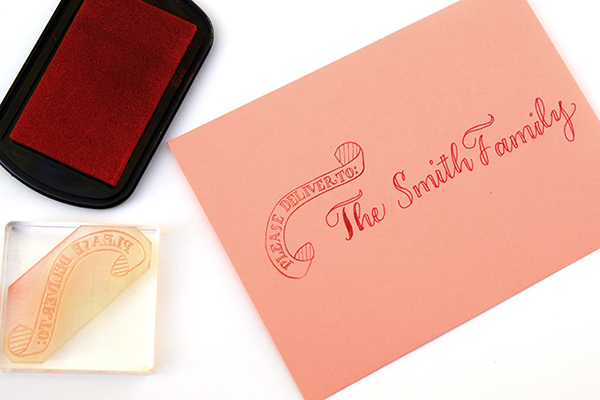
DIY Tutorial: Holiday Envelope Addressing Styles by Antiquaria for Oh So Beautiful Paper

Start by stamping your Deliver To Banner Stamp on the left hand side of the envelope, a little above center. Angle it so that you can nestle the lettering in underneath it. To make the hand lettered script, use your prettiest cursive and write the name across your envelope. Then, draw a second line along each letter, creating the thick and thin look (as shown above). Refer to a favorite script font for letter shape and style, if needed.
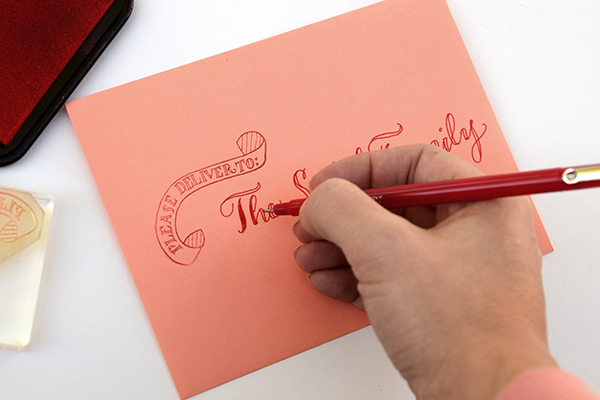
DIY Tutorial: Holiday Envelope Addressing Styles by Antiquaria for Oh So Beautiful Paper

Once you’ve done that for the entire name, color in the letters so that they are solid red. Finish out the addressing with a simple italic print for the address. We also added a fun flourish underneath the last address line to gussy the envelope up even more! Draw it in pencil first or practice on a scrap piece of paper if you need to before executing it on your envelope.
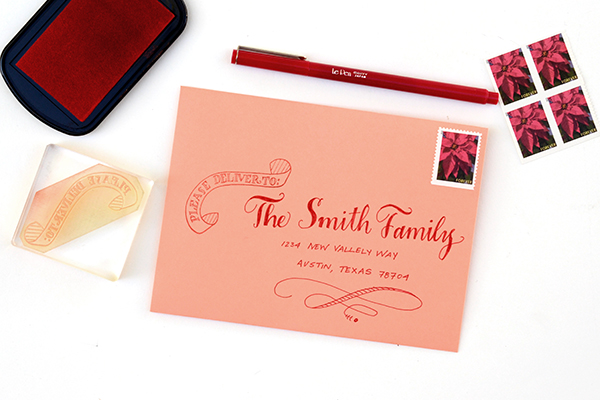
DIY Tutorial: Holiday Envelope Addressing Styles by Antiquaria for Oh So Beautiful Paper
While we think all of these styles would be perfectly suited to holiday greetings, we also think that they could be adapted and used on save the dates and Invitations as well! Play around with the techniques and find out what you like best with the cards that you’re sending. We hope that you have just as much fun addressing your cards as you do selecting them!

Materials and Resources

Special Delivery Stamp Kit: Deliver To Banner, Long Live Snail Mail and Do Not Bend Pennant

Feathers & Arrows Stamp Kit: contains the zig-zag stamp

Calligraphy Starter Kit

White Calligraphy Ink

Calligraphy Resources: Setting up your Tools,  Lower Case Alphabet by Bailey Rivera, Calligraphy Supplies

Brush and Felt Tipped Pens

For envelopes, we discuss many different envelope resources and options in a previous post, found here.

Current USPS Postage

Vintage Postage

Photography by Antiquaria for Oh So Beautiful Paper