DIY Tutorial: Spring Watercolor Wedding Invitation Suite

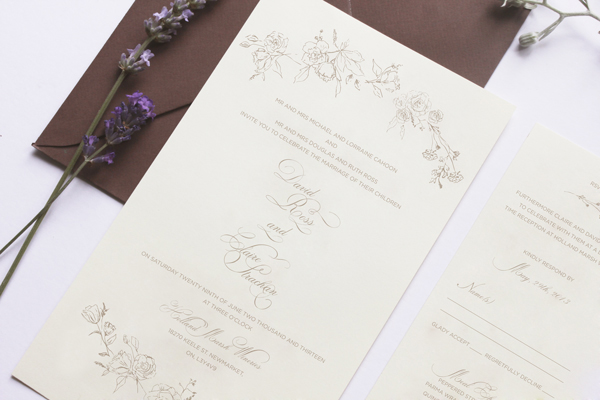
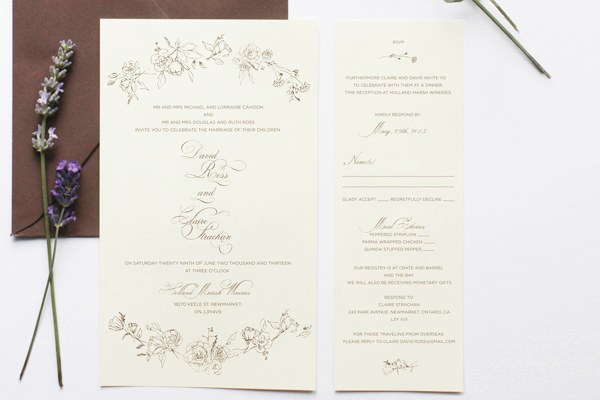
Spring is finally here and we couldn’t be more excited! When we stumbled across this gorgeous double sided watercolor paper by Rifle Paper Co., we just knew that it would be making a starring appearance in a future DIY tutorial. To kick off the season, we’ve designed a gorgeous, pastel invitation suite that would be perfect for any spring or summer event. The decorative watercolor paper trifold is just icing on the cake! We absolutely love it  this season as an alternative to the envelope liner! – Bailey and Emma of Antiquaria

DIY Tutorial: Watercolor Trifold Wedding Invitation by Antiquaria for Oh So Beautiful Paper

DIY Tutorial: Watercolor Trifold Wedding Invitation by Antiquaria for Oh So Beautiful Paper

Step One: Gather and cut the decorative paper that is destined to be your trifold wrap around your invitation. To fit an A7 (5″ x 7″) card cut the paper into rectangles measuring 7″ tall by 11″ long. This will allow for an inch of overlap around your invitation card. The decorative paper that you choose doesn’t have to be double sided like ours is but we would recommend selecting a paper with a pretty back, either clean white or a color or pattern. Remember that the back will be seen when your guests view the invitation!

DIY Tutorial: Watercolor Trifold Wedding Invitation by Antiquaria for Oh So Beautiful Paper

Step Two: For ease of folding and to make sure the line was straight, we scored one side of our decorative paper at the 2.5″ mark. Fold along the line and set the paper aside.

DIY Tutorial: Watercolor Trifold Wedding Invitation by Antiquaria for Oh So Beautiful Paper

Step Three: Next we stamped our invitation piece on an A7 card. For this design we used our Mod Invitation Stamp and an antique pewter stamp pad. For a step-by-step video tutorial about this printing process go here.

DIY Tutorial: Watercolor Trifold Wedding Invitation by Antiquaria for Oh So Beautiful Paper

Step Four: Next, we folded the other side of our decorative paper trifold around the A7 card, making sure it was a snug fit. We used a bone folder to make a crisp, folded edge.

DIY Tutorial: Watercolor Trifold Wedding Invitation by Antiquaria for Oh So Beautiful Paper

Step Five: Insert the A7 invitation card into the trifold decorative paper with double sided tape or stick glue. Put the tape on all four corners of the back of your card. Carefully place it over the center of the trifold and press it down to adhere it to the decorative paper.

DIY Tutorial: Watercolor Trifold Wedding Invitation by Antiquaria for Oh So Beautiful Paper

Step Six: For the reply card, we wanted to add some pattern and color to tie together the coral and turquoise sides of our decorative paper. For the reply card itself, we cut 4bar cards (3 1/2″ x 4 7/8″) out of our Paloma Patterned Coral Cover Paper and stamped our Mod  Reply Card Stamp on the blank, non-patterned side. We used a turquoise colored 4bar envelope stamped with our Mod Banner Return Address Stamp to coordinate. You will get four 4bar cards out of one sheet of card stock.

DIY Tutorial: Watercolor Trifold Wedding Invitation by Antiquaria for Oh So Beautiful Paper

Step Seven: The last step puts all of the gorgeous finishing touches on the suite. We used the Paloma Coral Paper again, except in text weight, to make the belly bands wrapped around the suite. We cut them into strips of 2″ x 11″ – meaning you will get four belly bands per sheet of paper. After taping the belly band, we tied a piece of ribbon around the band to soften the look and add a bit of texture to the design.

We stamped the same return address (Mod Banner Return Address Stamp) on the back flap of a blush envelope before addressing them and sending them on their merry way! We promise that each guest will be truly delighted to receive such a present in their mailbox!

Materials

Mod  Invitation Stamp

Mod  Reply Card Stamp

Mod Banner Return Address Stamp

Stamp Pad in Antique Pewter

Decorative Paper (we used these ombré gift wrap sheets from Rifle Paper Co.) cut to 7″ x 11″

A7 Cards in Superfine White

A7 Envelopes in Luxe Blush

Paloma Coral Patterned Paper in Cover and Text weight

4bar Envelopes in Pool

Double sided tape or stick glue

Scoring Board

Ribbon

Anti­quaria is a mem­ber of the Designer Rolodex – you can see more of their beau­ti­ful work right here or visit the real wedding invitations gallery for more wedding invitation ideas!

Photo Credits: Antiquaria for Oh So Beautiful Paper

Claire + David’s Romantic Floral Wedding Invitations

UK-based designer Belinda Love Lee sent over these soft and romantic wedding invitations that she designed for a recent wedding. Belinda paired classic script and serif typefaces with beautiful floral illustrations for a soft and romantic feel. I love the matching ceremony programs incorporating the floral illustrations from the invitation!

Romantic-Floral-Wedding-Invitations-Belinda-Love-Lee2

From Belinda: I designed and hand illustrated Claire and David’s wedding invitations and ceremony programs. When designing this wedding invitation suite, I aimed to keep it classy and elegant with a modern touch. The invitation is design soft and delicate yet leaves a lasting impression. 

Romantic-Floral-Wedding-Invitations-Belinda-Love-Lee4

Romantic-Floral-Wedding-Invitations-Belinda-Love-Lee5

Romantic-Floral-Wedding-Invitations-Belinda-Love-Lee6

Romantic-Floral-Wedding-Invitations-Belinda-Love-Lee7

Romantic-Floral-Wedding-Invitations-Belinda-Love-Lee8

Thanks Belinda!

Check out the Designer Rolodex for more tal­ented wed­ding invi­ta­tion design­ers and the real invi­ta­tions gallery for more wedding invitation ideas!

Photo Credits: Belinda Love Lee

Stefanie + Martin’s Whimsical Illustrated Wedding Invitations

Designer Paulina Ortega sent over these lovely wedding invitations all the way from the Philippines! This whimsical invitation suite was hand lettered and illustrated by Paulina in a classic black and white color palette. So pretty!

Whimsical-Black-White-Illustrated-Wedding-Invitations-Paulina-Ortega6

From Paulina: I created these Alice in Wonderland and Great Gatsby inspired invitations for the magical garden wedding of Stefanie and Martin. A lot of the imagery in the main invitation sheet hints towards the couple’s story: boy and girl meet in New York, watch the Cure on their first date, and finally, everything comes together in their family’s garden estate in the Philippines. Everything was hand-lettered and hand-drawn in pencil by me.

Whimsical-Black-White-Illustrated-Wedding-Invitations-Paulina-Ortega2Whimsical-Black-White-Illustrated-Wedding-Invitations-Paulina-Ortega3

Whimsical-Black-White-Illustrated-Wedding-Invitations-Paulina-Ortega

Whimsical-Black-White-Illustrated-Wedding-Invitations-Paulina-Ortega4

Whimsical-Black-White-Illustrated-Wedding-Invitations-Paulina-Ortega8

Whimsical-Black-White-Illustrated-Wedding-Invitations-Paulina-Ortega7

Thanks Paulina!

Check out the Designer Rolodex for more tal­ented wed­ding invi­ta­tion design­ers and the real invi­ta­tions gallery for more wedding invitation ideas!

Photo Credits: Paulina Ortega

Jaymie + Miles’s Calligraphy Gold Foil Wedding Invitations

This beautiful invitation suite from Melissa at Atheneum Creative combines so many of my favorite things: a love of travel, gorgeous calligraphy (in collaboration with the talented Anne Robin), and elegant gold foil! Inspired by the idea of a luggage tag, Melissa designed a keepsake leather tag tied to the invitation suite with twine. Love that idea!

Calligraphy-Gold-Foil-Wedding-Invitations-Atheneum-Creative9

From Melissa: Jaymie and Miles love to travel and it was important to them to keep their shared travel history a focal point of the design in an elegant way. Jaymie also wanted to attach a luggage tag to her wedding invitations without being too clunky. Knowing we wanted to incorporate leather into the invitation suite, we decided to create a leather tag inspired by a traditional luggage tag that could be attached to the invitation with twine. We tested tons of leather stain options to see which one engraved best and printed the invitations and envelopes with gold foil for an overall elegant look.

Calligraphy-Gold-Foil-Wedding-Invitations-Atheneum-Creative3Calligraphy-Gold-Foil-Wedding-Invitations-Atheneum-Creative4

Calligraphy-Gold-Foil-Wedding-Invitations-Atheneum-Creative

Calligraphy-Gold-Foil-Wedding-Invitations-Atheneum-Creative8

Calligraphy-Gold-Foil-Wedding-Invitations-Atheneum-Creative10

Calligraphy-Gold-Foil-Wedding-Invitations-Atheneum-Creative6Calligraphy-Gold-Foil-Wedding-Invitations-Atheneum-Creative7

Calligraphy-Gold-Foil-Wedding-Invitations-Atheneum-Creative11

Thanks Melissa!

Design: Atheneum Creative

Calligraphy: Anne Robin

Printing: Crayton Heritage Letterpress

Atheneum Creative is a member of the Designer Rolodex – you can see more of their beautiful work right here or visit the real invitations gallery for more wedding invitation ideas!

Photo Credits: Chelsea Davis Photography

Happy Weekend!

Happy Friday everyone – and Happy Spring! Thankfully it actually feels like Spring today in DC, even if it doesn’t quite look like Spring just yet. Hopefully soon! But in the meantime…

 Pink-Hellebore-Floral-Arrangement-sarah-winward-kate-osborne-snippet-and-ink

Pink Hellebore Floral Arrangement by Sarah Winward / Photo by Kate Osborne via Snippet & Ink

…a few links for your weekend!

This week on Oh So Beautiful Paper:

Check back soon for this week’s cocktail! I hope you all have a wonderful weekend, and I’ll see you back here next week! xoxo