How to Back Invitations with Patterned Paper

Sometimes it’s good to get back to DIY basics. Patterned invitation backers can break the budget for many couples because there is so much time and labor involved. We always like to encourage people to take matters into their own hands – and today we’ll show you exactly how to do that! Over the years, we’ve experimented with backers of all sorts as well as different methods to DIY-ing them. This simple tutorial yields beautiful results if you’re precise and don’t mind getting your hands a little dirty, so to speak! – Bailey and Emma of Antiquaria
DIY Tutorial: How to Back Invitations with Patterned Paper via Oh So Beautiful Paper

DIY Tutorial: How to Back Invitations with Patterned Paper via Oh So Beautiful Paper

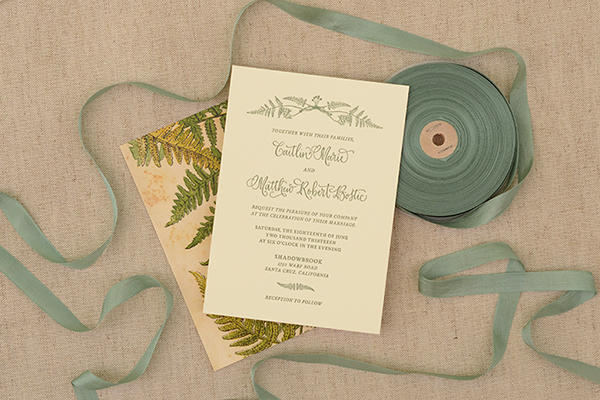
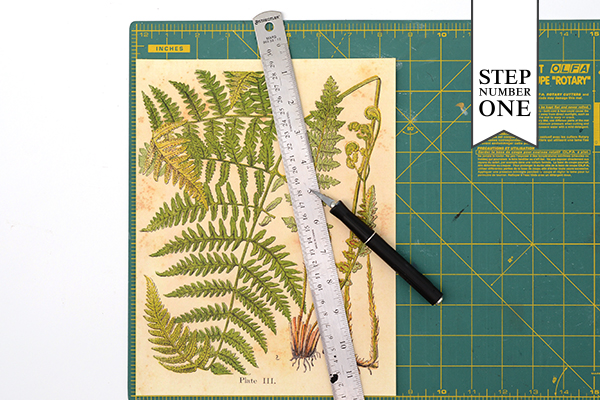
Step One: First you’ll want to decide what paper or material you’d like to use on the back of your invitations. We selected this Botanical Fern Paper in text weight to coordinate with the fern invitation design. Vertical directional patterns like this one mean that you’ll only get one backer out of each 8.5″ x 11″ sheet of text paper. If you’d like to get two backers per sheet, select a non-directional or horizontal pattern. Measure your invitation precisely (very, very precisely), and cut your text paper to that size. Our invitation was 5″ x 7″ so that is the size we cut our paper.
DIY Tutorial: How to Back Invitations with Patterned Paper via Oh So Beautiful Paper

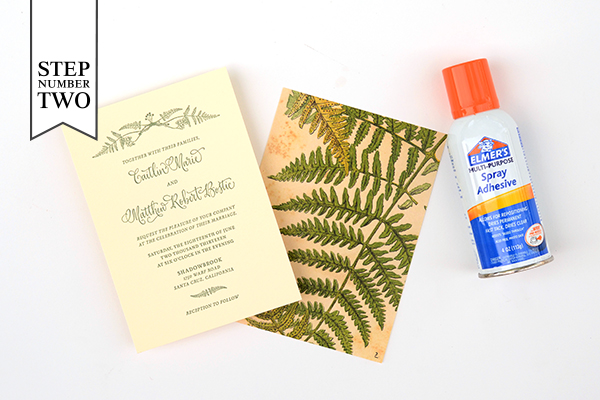
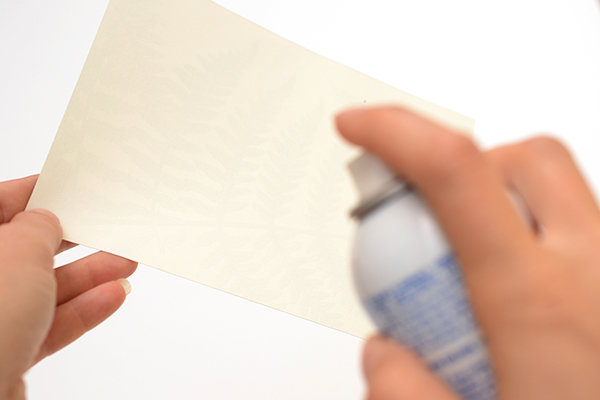
Step Two: Gather all of your materials together. This will be your invitation, pre-cut paper backers, and spray glue. When using spray glue, it is important that you do your project in a ventilated location, preferably outside. Make sure that you have a clean, sturdy table so that you can move immediately to the next step. Hold the patterned paper, back side facing you, and spray with a light coat of spray adhesive (see photo below). When the entire surface is covered, move immediately to Step Three.
DIY Tutorial: How to Back Invitations with Patterned Paper via Oh So Beautiful Paper

DIY Tutorial: How to Back Invitations with Patterned Paper via Oh So Beautiful Paper

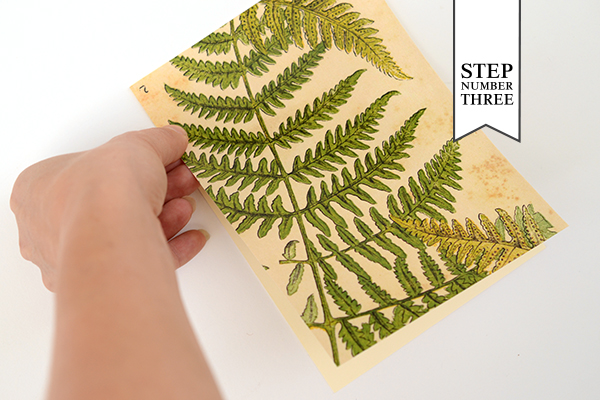
Step Three: On your clean and firm surface, place one invitation face down. Very carefully align the top corners of the backer to the top corners of the invitation. Slowly adhere the paper down the back until you’ve reached the bottom corners. Set aside. The key here is to really get the backer on carefully and straight. It’s just a matter of being precise and having the paper cut correctly to start.

Repeat Step Two and Three until all of your invitations are complete. Then move on to Step Four.
DIY Tutorial: How to Back Invitations with Patterned Paper via Oh So Beautiful Paper

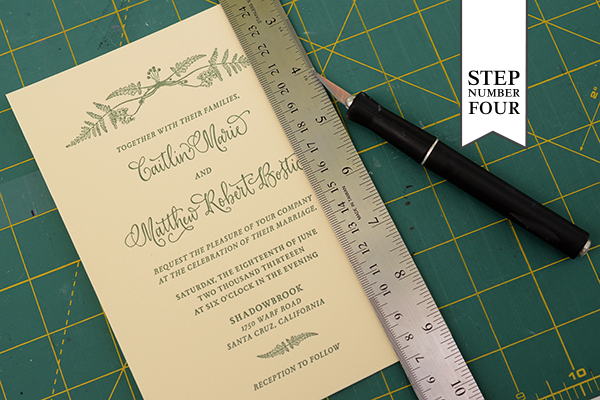
Step Four: Check your invitations and see if there are any paper edges peeking over the edge of the invitation. If there is, carefully trim them off with a ruler and craft knife, being certain not to cut into the invitation itself. Once you’ve checked them all, let them cure. Overnight is best and you can also weigh them down under a heavy book if you’d like. The key is to make certain that they’re really well adhered.
DIY Tutorial: How to Back Invitations with Patterned Paper via Oh So Beautiful Paper

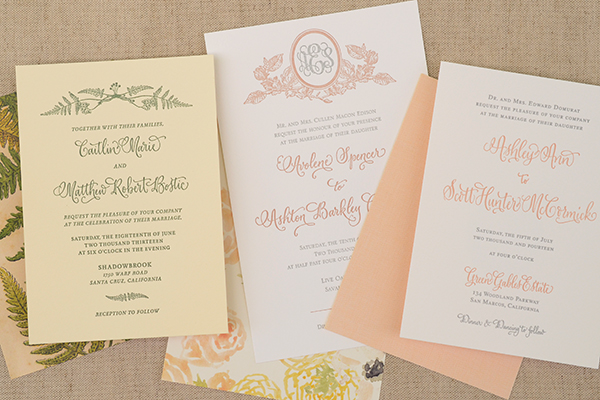
Bookbinding linen, which has a study paper back adhered, is another really beautiful and classic option for backing your invitation (see the blush linen backer in the photo above). There are numerous colors to choose from and it’s just as easy to use as paper! No fraying involved!

Materials

Invitations

Patterned Paper or Book Binding Linen

Spray Adhesive

Ruler and Craft Knife

Anti­quaria is a mem­ber of the Designer Rolodex – you can see more of their beau­ti­ful work right here or visit the real wedding invitations gallery for more wedding invitation ideas!

Photography: Antiquaria for Oh So Beautiful Paper

Mennat + Omar’s Bilingual English Arabic Wedding Invitations

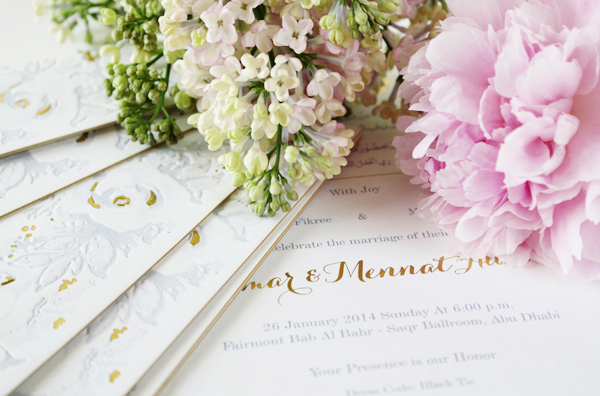
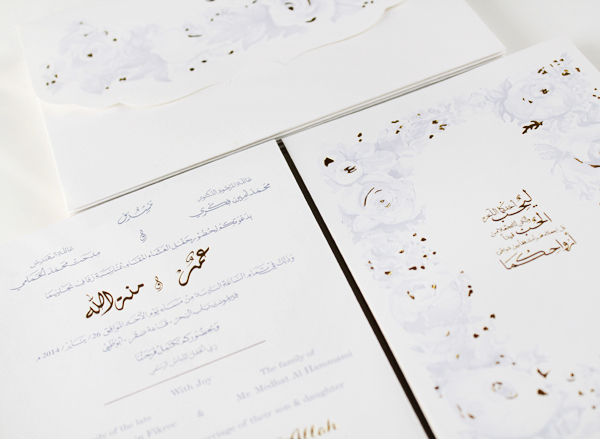
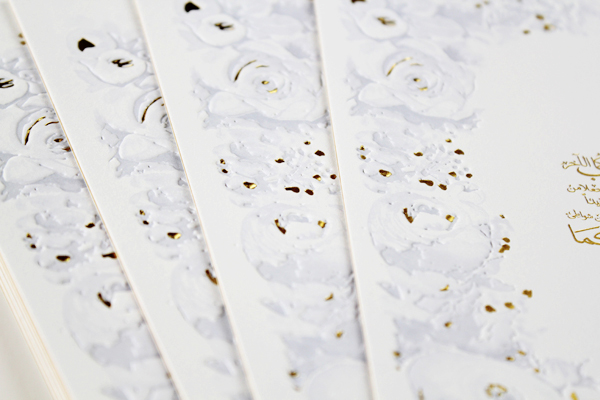
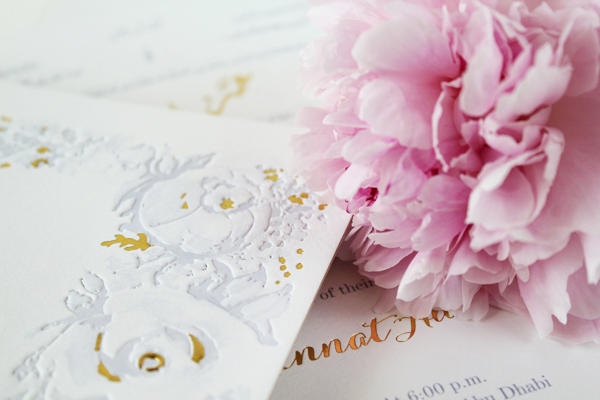
These romantic floral wedding invitations come to us all the way from Dubai! Mariam from Natoof Design created bilingual invitations with a sophisticated light blue and gold color palette, combining English text and Arabic calligraphy – and lots of gold foil. So pretty!

Bilingual-English-Arabic-Parisian-Chic-Wedding-Invitations-Natoof10

From Mariam: The bride and groom wanted a Parisian chic invitation with peonies and roses, and for the color palette to reflect seductive light blue hues with a light romantic touch.

Bilingual-English-Arabic-Parisian-Chic-Wedding-Invitations-Natoof2

Bilingual-English-Arabic-Parisian-Chic-Wedding-Invitations-Natoof6

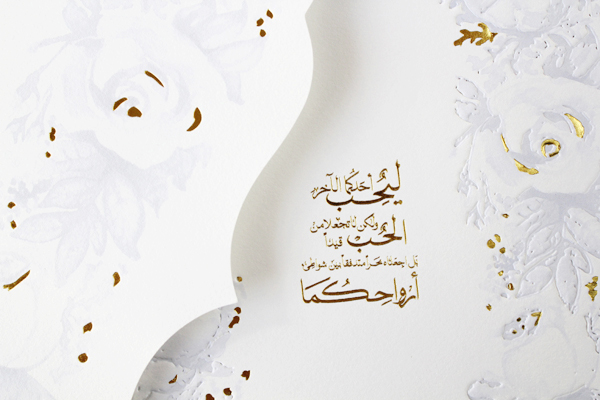
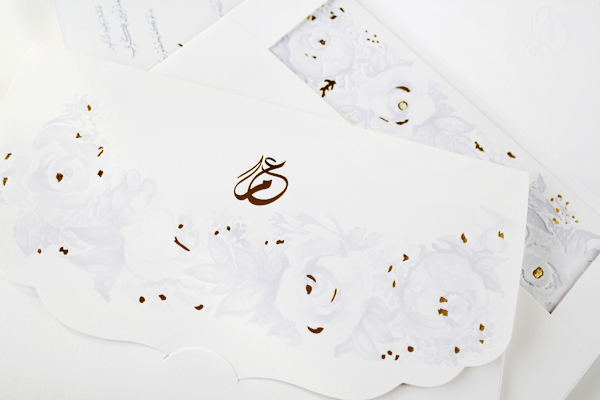
The invitation is bilingual with Arabic calligraphy and English typography, with an Arabic calligraphy monogram on the envelope flap. On the back of the invitation is a quote by Gibran Khalil Gibran which reads in English as following: “Love one another, but make not a bond of love. Let it rather be a moving sea between the shores of your souls.”

Bilingual-English-Arabic-Parisian-Chic-Wedding-Invitations-Natoof4

Bilingual-English-Arabic-Parisian-Chic-Wedding-Invitations-Natoof11

The bride expressed her love for the letterpress style; however, letterpress printing isn’t available in Dubai and generally in the Middle East region. So with the little time that we had before the wedding we worked with our local printer to mimic letterpress results with offset equipment.

Bilingual-English-Arabic-Parisian-Chic-Wedding-Invitations-Natoof5

Bilingual-English-Arabic-Parisian-Chic-Wedding-Invitations-Natoof7

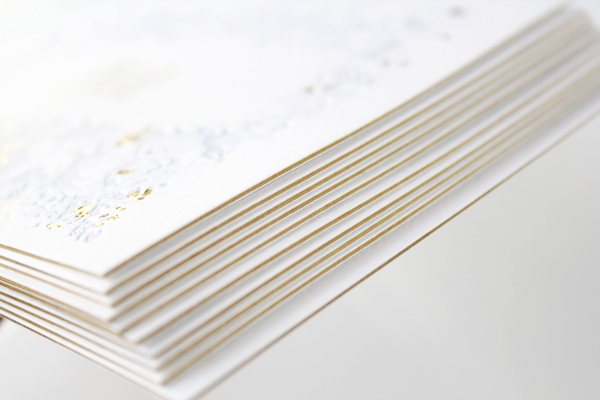
We duplexed the cotton paper with a layer of gold paper sandwiched between two layers of white cotton paper. The design incorporates gold foil, embossing, and debossing to achieve a dream wedding invitation suite.

Bilingual-English-Arabic-Parisian-Chic-Wedding-Invitations-Natoof9

Bilingual-English-Arabic-Parisian-Chic-Wedding-Invitations-Natoof12

Thanks Mariam!

Check out the Designer Rolodex for more tal­ented wed­ding invi­ta­tion design­ers and the real invi­ta­tions gallery for more wedding invitation ideas!

Photo Credits: Natoof

Riley + Jimmy’s Bold Floral Wedding Announcements

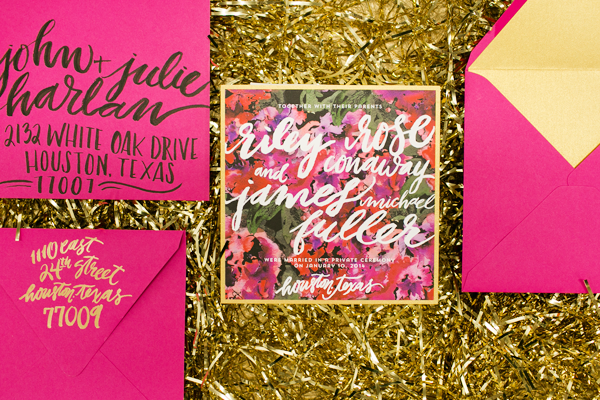
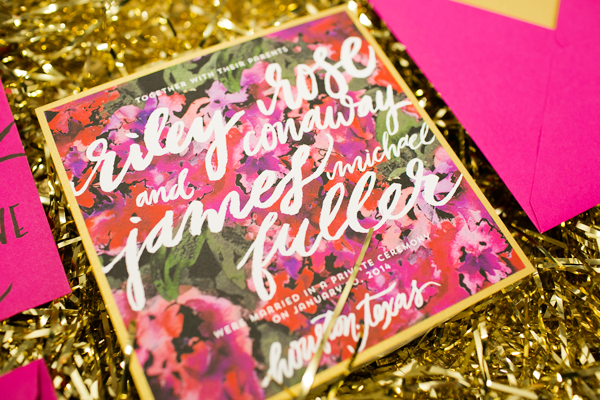
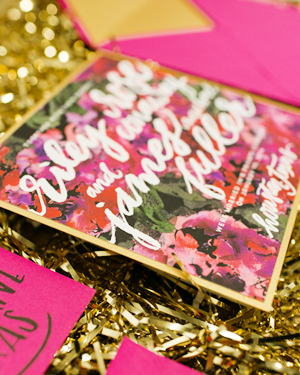
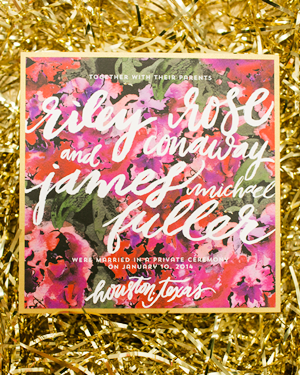
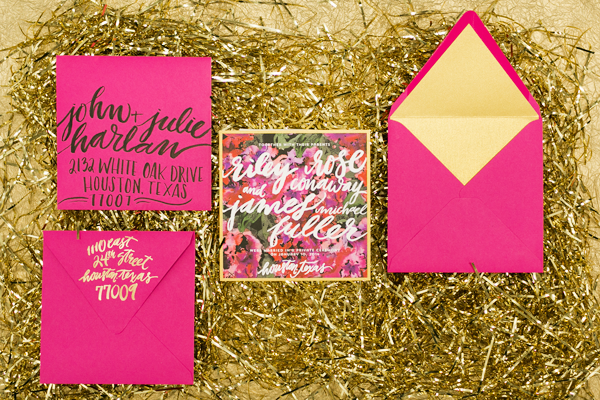
When Riley and Jimmy decided to elope earlier this year, they knew they wanted to send fun and non-traditional wedding announcements to their friends and family. Riley also happens to be a lead designer at Papellerie, so she knew she didn’t want to sacrifice on her wedding stationery. The resulting announcements feature beautiful brush style calligraphy, a floral background pattern, and a bold hot pink and gold color palette. So lovely!

Floral-Pink-Gold-Wedding-Announcements-Papellerie2

From Riley: These are my own wedding announcements from earlier this year. Jimmy and I had started planning a wedding, and for me, the most important part of the whole thing (besides actually marrying him) were the flowers and paper goods. I had been gushing over my ideas with the other designers at Papellerie and had laid out plans for my save the dates with our in house calligrapher and illustrator, Alyssa. Then, kind of out of the blue, Jimmy and I decided to secretly elope and forgo the big wedding we were planning. I knew that I could still have my dream suite, even it if it was announcements instead of save the dates and invitations, and a floral background instead of actual flowers.

Floral-Pink-Gold-Wedding-Announcements-Papellerie5

Jimmy and I are both really non-traditional and like to have fun, so I knew right away I wanted hot pink and gold. I really had fallen in love with this style of brush script lettering and I wanted to make sure that was incorporated into the design. I worked with Alyssa on the calligraphy style and it’s exactly what I hoped for!

Floral-Pink-Gold-Wedding-Announcements-Papellerie3Floral-Pink-Gold-Wedding-Announcements-Papellerie4

The announcements were digitally printed on  pearl white Crane lettra cotton paper by Infovine here in Houston, and then hand mounted onto gold shimmer card stock. The envelopes pull in the hot pink of the floral background and feature a gold shimmer paper envelope liner.

Floral-Pink-Gold-Wedding-Announcements-Papellerie

Thanks ladies!

Design and Calligraphy: Papellerie

Printing: Infovine

Check out the Designer Rolodex for more tal­ented wed­ding invi­ta­tion design­ers and the real invi­ta­tions gallery for more wedding invitation ideas!

Photo Credits: Chelsea Davis Photography

Kate + Alex’s Elegant Rustic Wedding Invitations

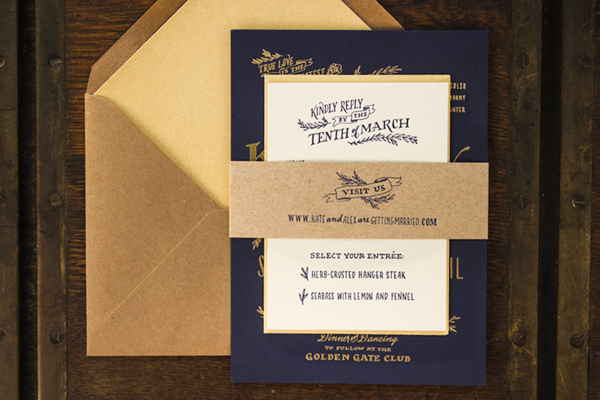
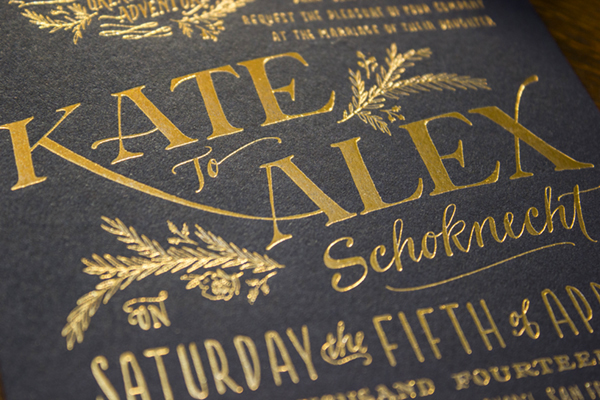
Happy Monday everyone! After a beautiful spring weekend, I’m ready to start the week with these hand lettered wedding invitations from Arley-Rose and Morgan of Ladyfingers Letterpress! With a classic navy and gold color palette, these invitations combine elegant gold foil with rustic kraft paper and whimsical hand lettering. Gorgeous!

Rustic-Elegant-Letterpress-Gold-Foil-Wedding-Invitations-Ladyfingers-Letterpress2

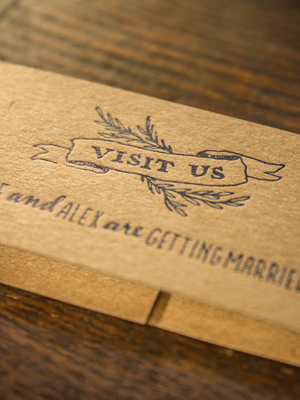
From Arley-Rose and Morgan: Kate and Alex’s wedding will be held at the historic Presidio Chapel in San Francisco, and they wanted to capture the sophistication and elegance of their wedding while giving their guests something to hold onto and cherish forever. We had been working with Kate and Alex since their save the dates, which we letterpress printed onto kraft CD sleeves and then lovingly stuffed with CDs filled with their favorite jams!

Rustic-Elegant-Letterpress-Gold-Foil-Wedding-Invitations-Ladyfingers-Letterpress

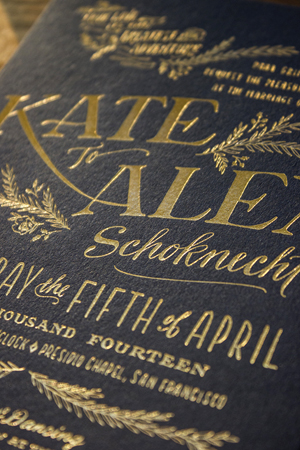
For their gold and navy color scheme, we hot foil stamped gold foil onto a soft navy paper. The rest of their suite was letterpress printed in navy onto kraft paper, 110lb Crane Lettra paper, and shimmer gold paper. Their suite was wrapped in the kraft paper belly band and housed in a shimmer gold-lined kraft paper envelope.

Rustic-Elegant-Letterpress-Gold-Foil-Wedding-Invitations-Ladyfingers-Letterpress9

Rustic-Elegant-Letterpress-Gold-Foil-Wedding-Invitations-Ladyfingers-Letterpress4Rustic-Elegant-Letterpress-Gold-Foil-Wedding-Invitations-Ladyfingers-Letterpress5

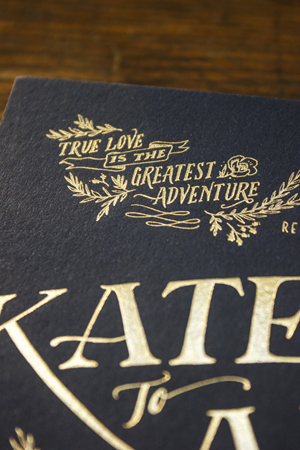
The phrase, “True Love is the Greatest Adventure,” graces the top of their invitation, reminding their loved ones that the best is yet to come!

Rustic-Elegant-Letterpress-Gold-Foil-Wedding-Invitations-Ladyfingers-Letterpress7Rustic-Elegant-Letterpress-Gold-Foil-Wedding-Invitations-Ladyfingers-Letterpress8

Thank you so much ladies!

Ladyfingers Letterpress is a member of the Designer Rolodex – check out more of their beautiful work right here or visit the real invi­ta­tions gallery for more wedding invitation ideas!

Photo Credits: Ladyfingers Letterpress

Happy Weekend!

Happy Friday everyone! We’re back in DC after a glorious week in Puerto Rico – and I’m desperately missing that warm tropical air, but at least I came home to lilac buds and blooming magnolias. Yay Spring! Also, a huge, huge thanks to Courtney from Swiss Cottage Designs for filling in this week. I hope you loved her posts as much as I did! I’ll be back here with brand new posts on Monday, but in the meantime…

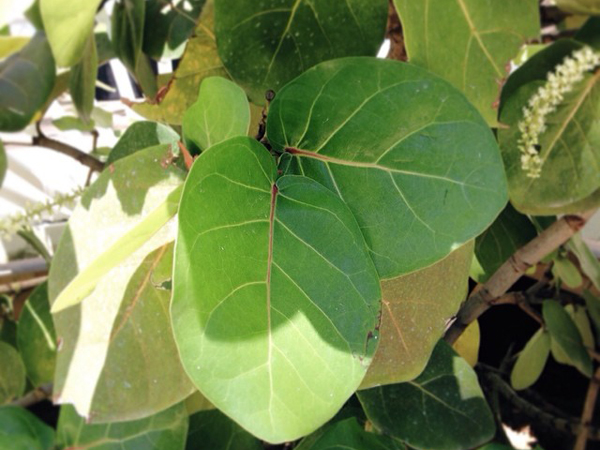
OSBP-Sea-Grape-Leaves

Photo by me via Instagram // It was so nice to see Seagrapes again in Puerto Rico!

…a few links for your weekend!

This week on Oh So Beautiful Paper:

That’s it for me this week! I hope you all have a wonderful weekend, and I’ll see you back here on Monday! xoxo