Elderflower Tequila Rickey

It’s spring, and springtime means Tequila for us! Tequila’s bright, vegetal earthiness is the perfect spirit to complement all this green bursting out of the grown around us. We decided to pour some Tequila into one of our favorite spring cocktails, the Rickey, and combine it with another Spring favorite: Elderflower! You’ll want to drink this delicious Elderflower Tequila Rickey all Spring, and possibly all Summer. –Andrew

Elderflower Tequila Rickey Cocktail Recipe by Liquorary

Elderflower Tequila Rickey

2 oz Silver Tequila
1/2 a Lime, Juiced, Plus the Spent Lime Shell
Elderflower Tonic Water

Combine the Tequila and lime juice in a highball glass and toss in the spent lime shell. Add ice and top with the tonic water. Give it a stir, garnish with fresh mint, and enjoy!

Just like a traditional Rickey with gin or whiskey – DC’s official cocktail! – a Tequila Rickey is airy and effervescent and tart and deeply refreshing. Using a bright, fresh silver Tequila gives this drink, normally herbaceous and spicy if made with gin, an earthy but still light character. Lime is, of course, the perfect partner for Tequila.

Elderflower Tequila Rickey Cocktail Recipe by Liquorary

We used a delightful elderflower tonic by Fever Tree, which is bittersweet with gentle floral notes. Combined with the Tequila, these are perfect for spring; it’s like drinking a blooming garden. If you don’t have elderflower tonic handy, you could add a splash of St-Germain for the same effect, though your drink will be a touch sweeter as a result.

Elderflower Tequila Rickey Cocktail Recipe by Liquorary

That mint is not really a traditional Rickey garnish, but our garden is exploding with mint this spring. So, to keep it from completely taking over, we’re throwing it into drinks as fast as it grows back. Expect to see lots of mint in our drinks this spring! And remember, nothing beats fresh ingredients in your cocktails, so consider growing some of the simpler, hardier plants (like mint!) at home in your very own cocktail garden. Just grow it in a pot, because if it gets loose…

(Don’t forget to follow us on Instagram!)

Glassware by Liquorary

Photo Credits: Nole Garey for Oh So Beautiful Paper

This post contains affiliate links. By clicking on these links, you’ll help support Oh So Beautiful Paper while also purchasing some wonderful products. We only recommend products that we truly love and trust that you’ll love, too. Our full disclosure policy can be found here.

The World of Illustration: Joya Rose

Hello friends! Thanks to the online world we live in, a quick scroll through Instagram will instantly show you just how much talent is out there. And I’m not just talking about people who are really good at one thing. I’m talking about the artists out there rocking two (or more) impressive talents. Which brings me to the illustration inspiration for today. Artist Joya Rose creates illustrations and lettering that are fresh, modern, and oh-so-impressive. So let’s take a look at this multi-talented artist! Jen

Joya Rose Illustration and Hand Lettering

Joya Rose Illustration and Hand Lettering

Many of Joya’s illustrations are small in scale, and they all feel simply modern in style. They look like effortless doodles, but of course, that’s the talent behind the illustration. I love a good map illustration, and here she uses things (like a beer tap for a pub) as icons for the different destinations in the city. I’m also digging the color palettes that Joya uses. This mix of pinks and greens feels so fresh.

Joya Rose Illustration and Hand Lettering

Here’s a different style of illustration by Joya. The watercolor softness of this illustration shows how skilled she is — there’s so much detail in the cacti and chickens. Somehow she manages to add in refined details with a paint that’s naturally soft and watery.

Joya Rose Illustration and Hand Lettering

I had to stick this one in. Here’s a self-portrait of Joya! Again, it amazes me how illustrators like Joya can show such expressive details in an illustration that’s on the more minimal side. Such a cool style in modern illustration.

Joya Rose Illustration and Hand Lettering

I’d like to wallpaper an entire room in this print. Pretty please!

Joya Rose Illustration and Hand Lettering

Since my original roots are in home design, I’m a sucker for illustrations like this that show classic furniture pieces made more whimsical in drawing. And Joya’s choice of going with this soft green color, versus a heavy brown, for example, makes the illustration feel more modern.

Joya Rose Illustration and Hand Lettering

Watercolor seals pair Joya’s illustration with her lettering work. Which one would you choose?

Joya Rose Illustration and Hand Lettering

This sweet illustration speaks to family in such an iconic way.

Joya Rose Illustration and Hand Lettering

Here’s a peek at a menu that pairs her illustration with her modern lettering. The drawings add a really fun detail to this menu.

Sending a big thanks to Joya for sharing her illustration and lettering work! You can check out more from Joya Rose Illustration and Hand Lettering on her website and over on Instagram.

Images via Joya Rose Illustration and Hand Lettering

Wedding Stationery Inspiration: Bohemian Wedding

If you’re more of a free spirit, here are some ideas for adding bohemian flair to your wedding stationery and décor. Hint: It involves a lot of fringe, dreamcatchers, and earthy details. – Annie

Wedding Stationery Inspiration: Bohemian Wedding / Oh So Beautiful Paper

Get the party started by providing tambourines. | Photography: Love and Wolves Co, Wedding Planning: Elite Wedding Planning via 100 Layer Cake

Wedding Stationery Inspiration: Bohemian Wedding / Oh So Beautiful Paper

I love the ribbon and yarn on these dreamcatchers. | Photography: Elate Photo, Event Design: Artsy Heartsy Events, Planning: Repose Events via Green Wedding Shoes

Wedding Stationery Inspiration: Bohemian Wedding / Oh So Beautiful Paper

Shower the happy couple with floral confetti. | Photography: Ruth Eileen Photography via Style Me Pretty

Wedding Stationery Inspiration: Bohemian Wedding / Oh So Beautiful Paper

Calligraphy on agate slices add a pop of color to the table. | Photography: Mary Costa Photography, Event Design & Planning: Samantha Dapper via Green Wedding Shoes

Wedding Stationery Inspiration: Bohemian Wedding / Oh So Beautiful Paper

Potted succulents double as escort cards and favors. | Photography: The Melideos, Event Design & Planning: Lace and Likes, Paper Goods: Smitten on Paper, Calligraphy: Taryn Eklund via Green Wedding Shoes

Wedding Stationery Inspiration: Bohemian Wedding / Oh So Beautiful Paper

These dip dyed tassels make the perfect backdrop. | Photography: Chloé Lapeyssonnie, Handmade Details: Christina Sfez via Green Wedding Shoes

Wedding Stationery Inspiration: Bohemian Wedding / Oh So Beautiful Paper

Brightly colored ribbon draped over the table adds an effortless bohemian look. | Photography: Chris & Kristen PhotographyPlanning, Design & Styling: Sterling Social, Tabletop Elements: Borrowed Blu via Rue

Wedding Stationery Inspiration: Bohemian Wedding / Oh So Beautiful Paper

Give your guests seed packets to plant at home or in this case, chocolate covered sunflower seeds. | Photography: Anna Killian via The House That Lars Built

Wedding Stationery Inspiration: Bohemian Wedding / Oh So Beautiful Paper

Love these modern dreamcatcher place cards. | Photography: Danielle Poff Photography, Design & Coordination: Danae Grace Events, Calligraphy: Rosey Calligraphy, Dreamcatchers: Dreamkeepers LLC via Style Me Pretty

Wedding Stationery Inspiration: Bohemian Wedding / Oh So Beautiful Paper

Use your natural surroundings! Hang escort cards from tree branches and vines. | Event & Design: Smith + James via Smith + James

Behind the Stationery: Hartland Brooklyn

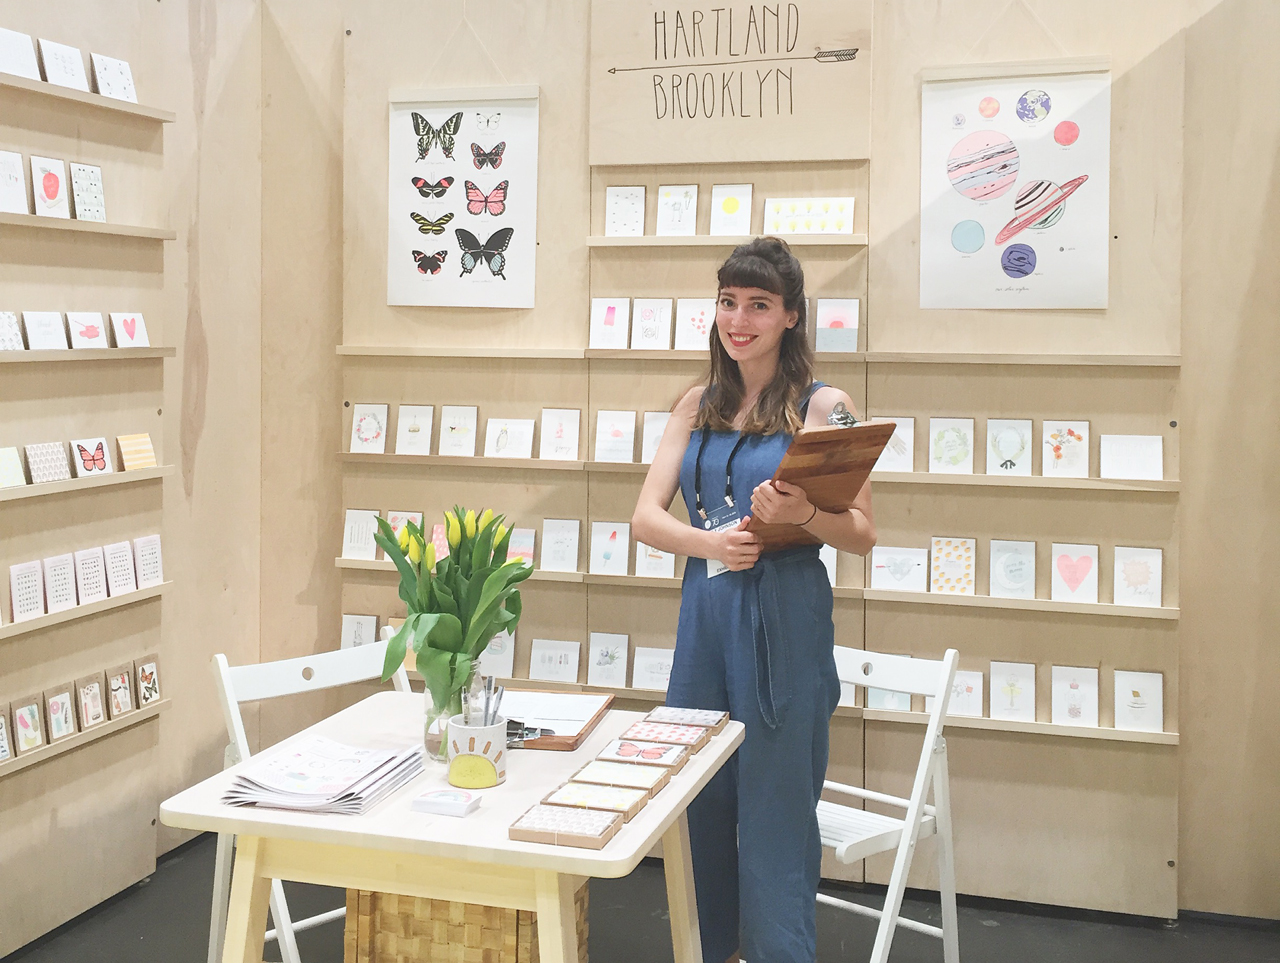
Our next installment of Behind the Stationery ventures up to New York and highlights Emily’s story from Hartland Brooklyn. From hand painting her first cards to walking her line sheet into a local stationery shop, Emily is here to share her stationery business story. Her journey takes us to upstate New York where she opened a quaint stationery storefront, office, and home — all in one building. Hartland Brooklyn has always put a priority on making eco-conscious goods, and Emily explains how her printing process has shifted as she’s grown her business. Welcome, Emily! –Megan Soh

Behind the Stationery: Hartland Brooklyn

From Emily: Since I was a little girl, I always knew I would be in a creative field, and most likely have my own business. My grandmother is a watercolor painter and my mom has a dried flower farm, and they both were huge influences growing up (and still are!). I saw that you could make your living off of something you love to do. I set off to NYC for college to study fashion design, and worked for about 6 years in both small and large fashion companies. This is where I learned the ins and outs of design, running a business, and found my creative voice.

Behind the Stationery: Hartland Brooklyn

I began making birthday cards at my desk for co-workers, and soon their friends and family. With some encouragement I set up an Etsy shop and started selling my hand painted cards. The beautiful stationery store Papel was around the corner from my apartment in Brooklyn, and I brought my tiny line sheet and samples in to share. They placed an order and became my first wholesaler, and from there Hartland took off!

Behind the Stationery: Hartland Brooklyn

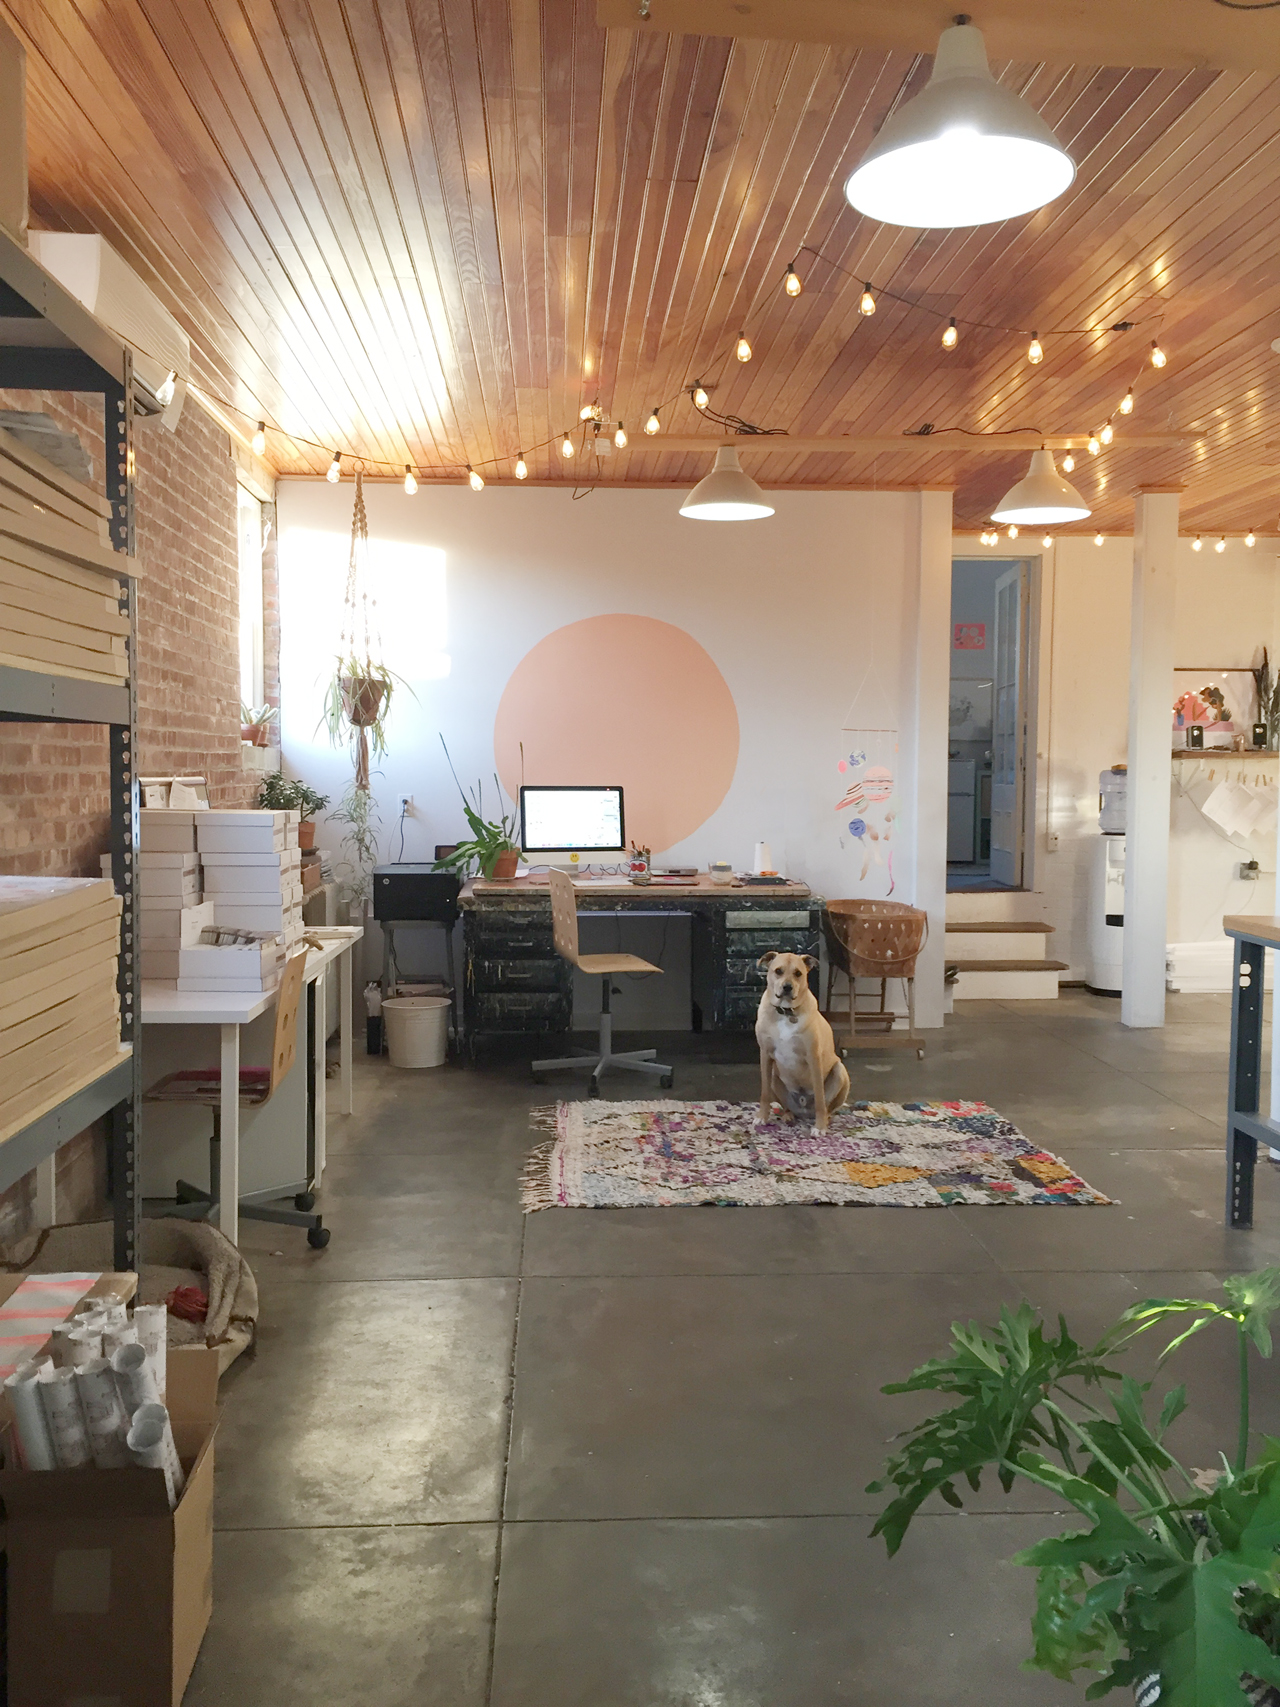
I worked from my apartment for a year or so, then moved to a tiny studio in Greenpoint the following year. I quickly grew out of that space as well, and while looking for a new studio I started looking upstate. An old general store 2 hours north of NYC caught my eye, when my husband and I saw that the post office was located across the street, I knew it was meant to be.

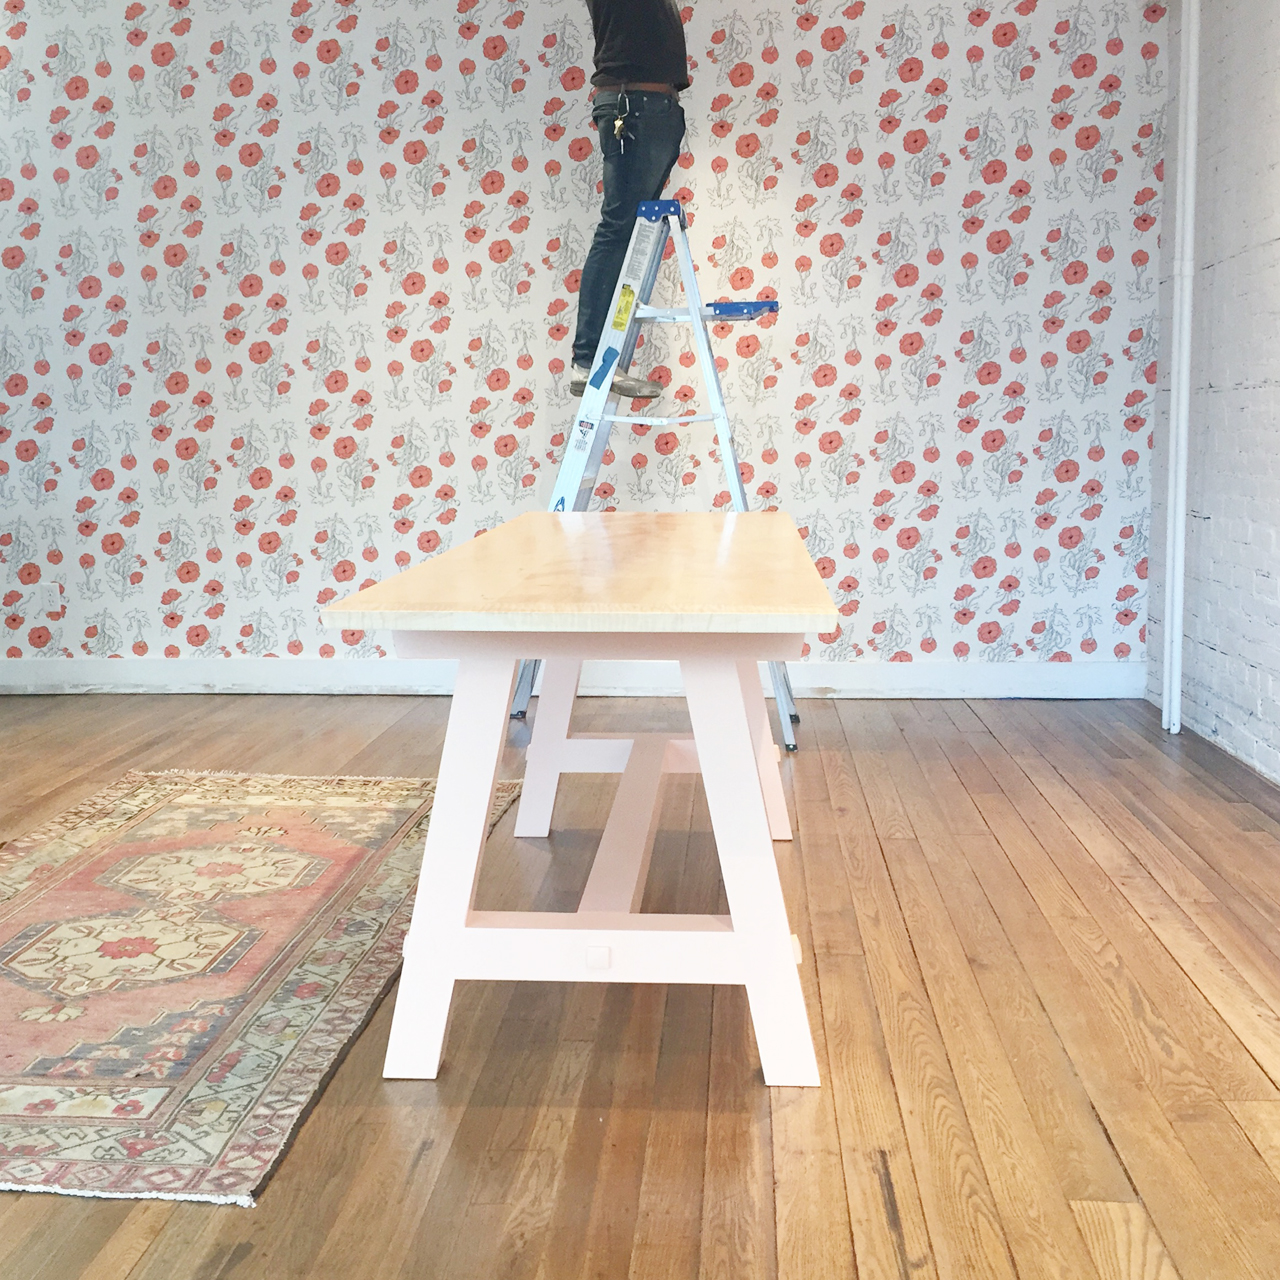
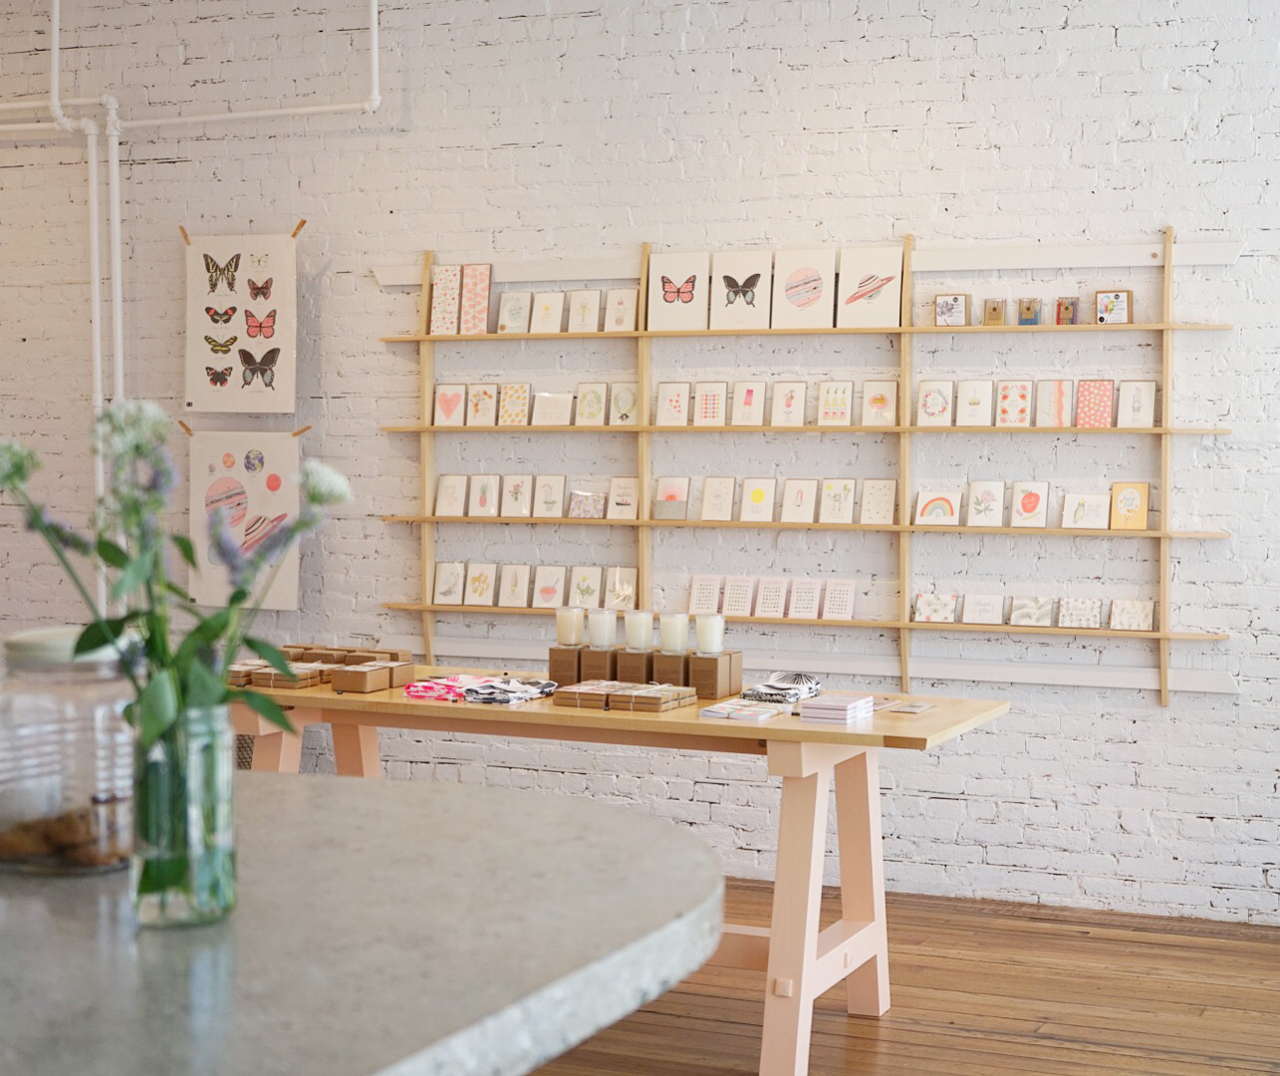
Since the building had a storefront, we decided to open a card and coffee shop. I designed the wallpaper, and we worked with a few local contractors to build out the space. Hartland on Hudson opened fall 2016. My husband runs the coffee/card shop and I run Hartland Brooklyn from behind the storefront.

Behind the Stationery: Hartland Brooklyn

Behind the Stationery: Hartland Brooklyn

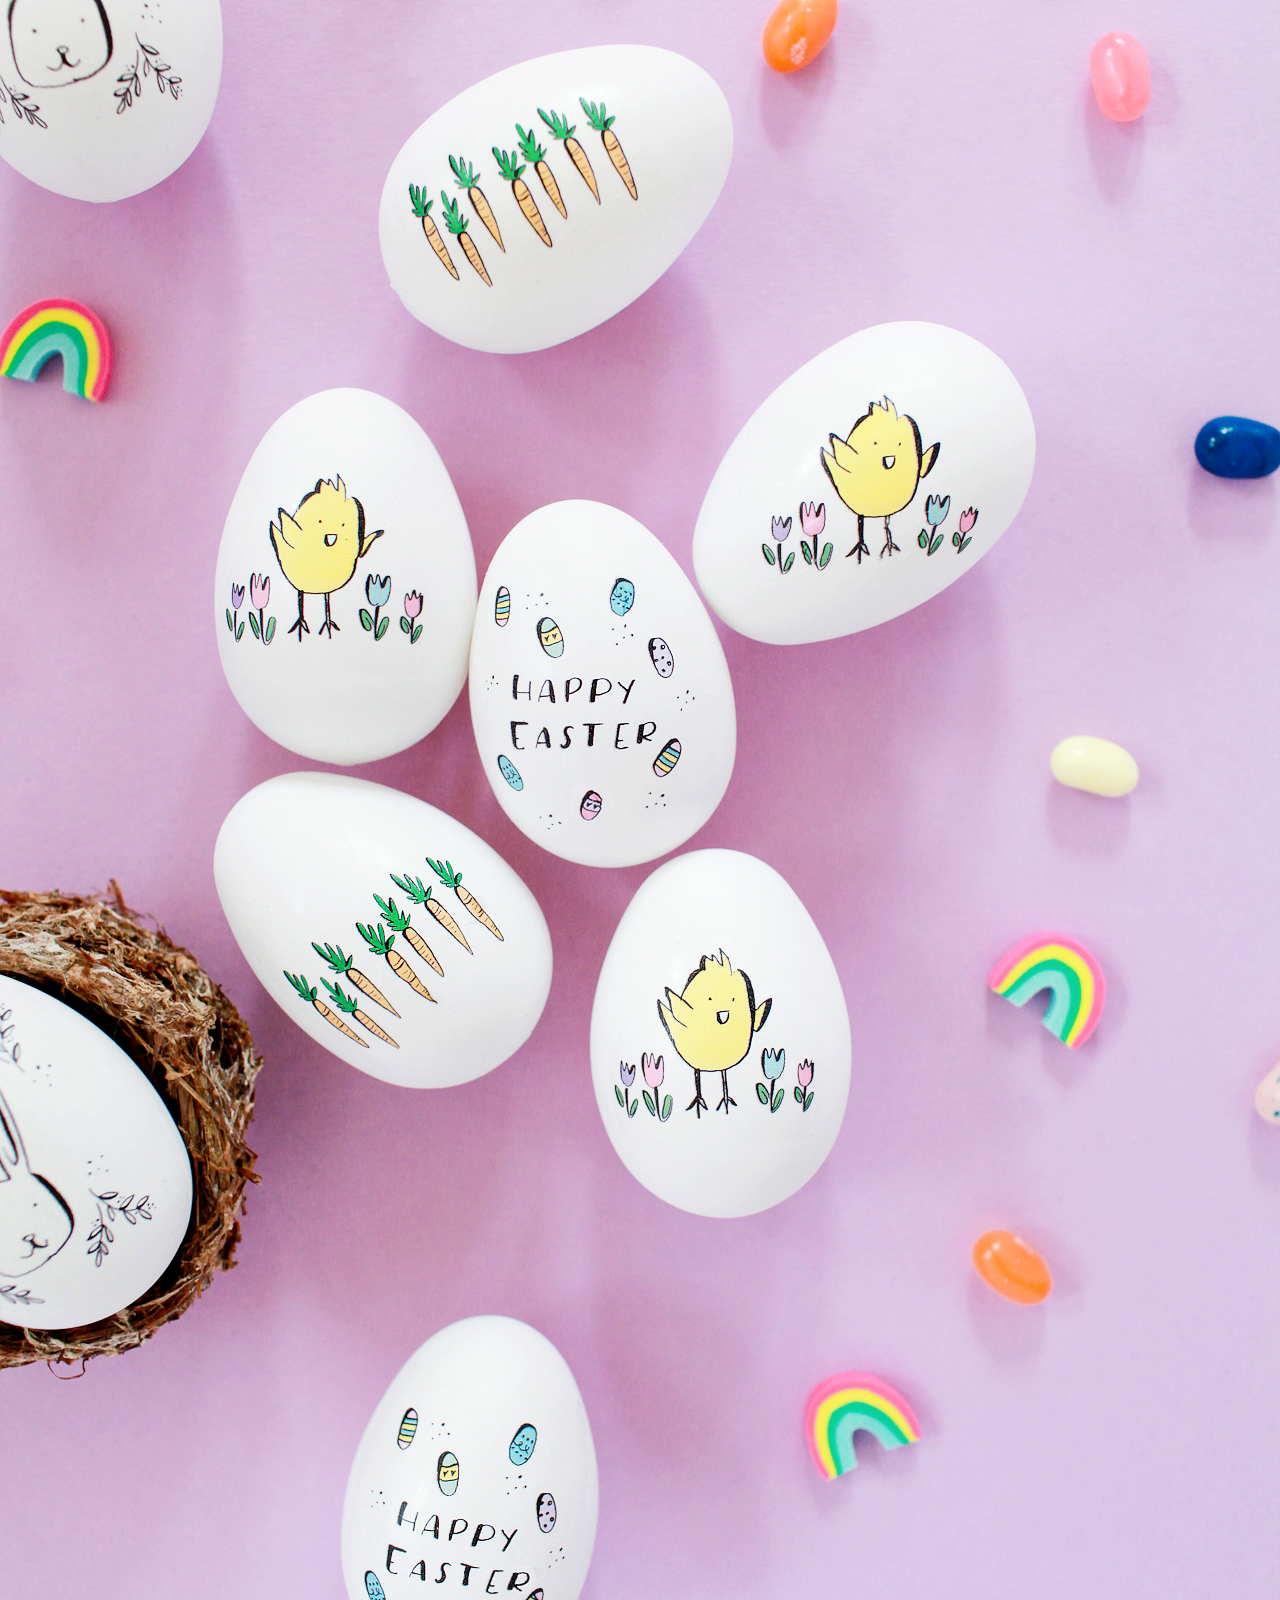
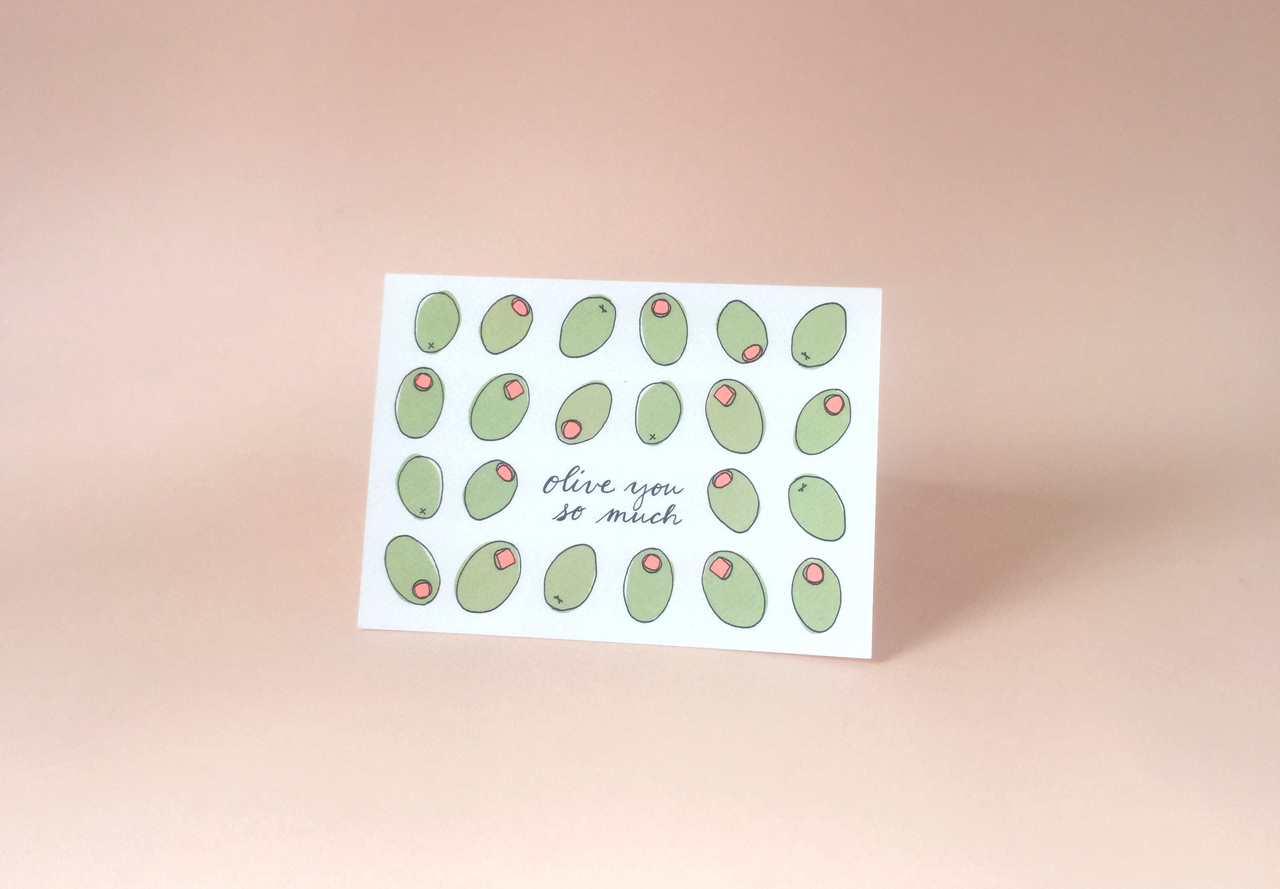
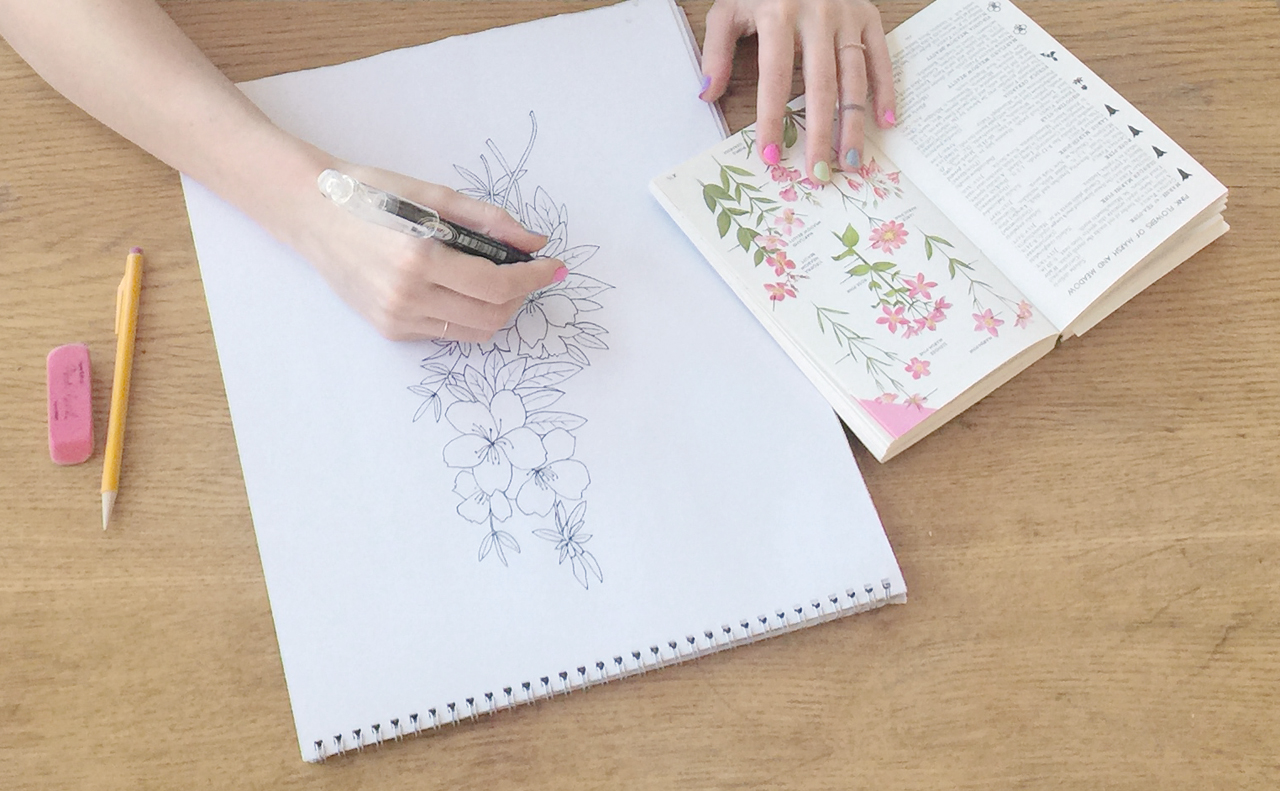
All my designs are hand illustrated with ink, then imported to the computer to color. This way I can edit and add the neon Pantone colors that are the core of Hartland Brooklyn.

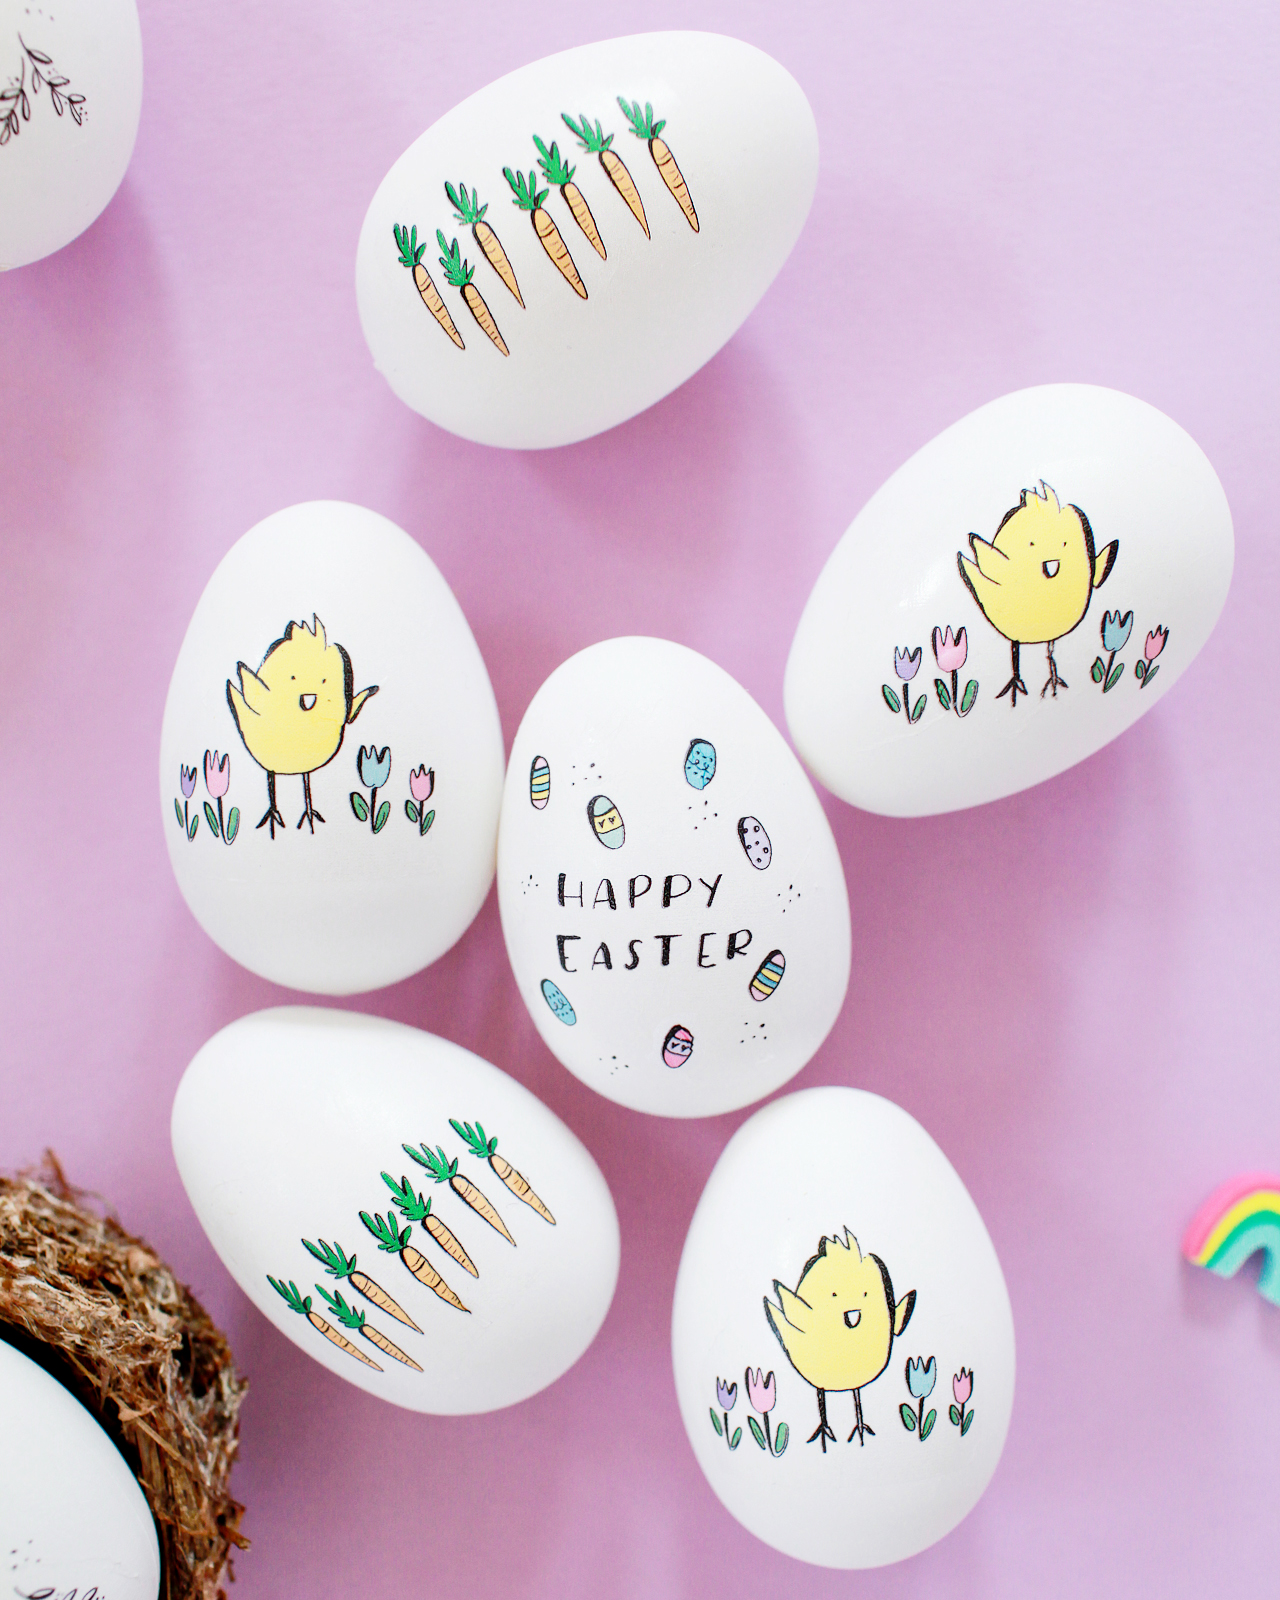
I’m always jotting down card ideas, and find inspiration all around me. I come up with the best ideas while traveling, since you’re removed from so many distractions. I sometimes end up designing new cards when I have an occasion to give a card and realize I don’t have the perfect one. In each new design, I make sure it’s something that I would be excited to give to someone. Ideas can come from many sources — I am particularly inspired by nature at the moment with our new life in the country.

Behind the Stationery: Hartland Brooklyn

Behind the Stationery: Hartland Brooklyn

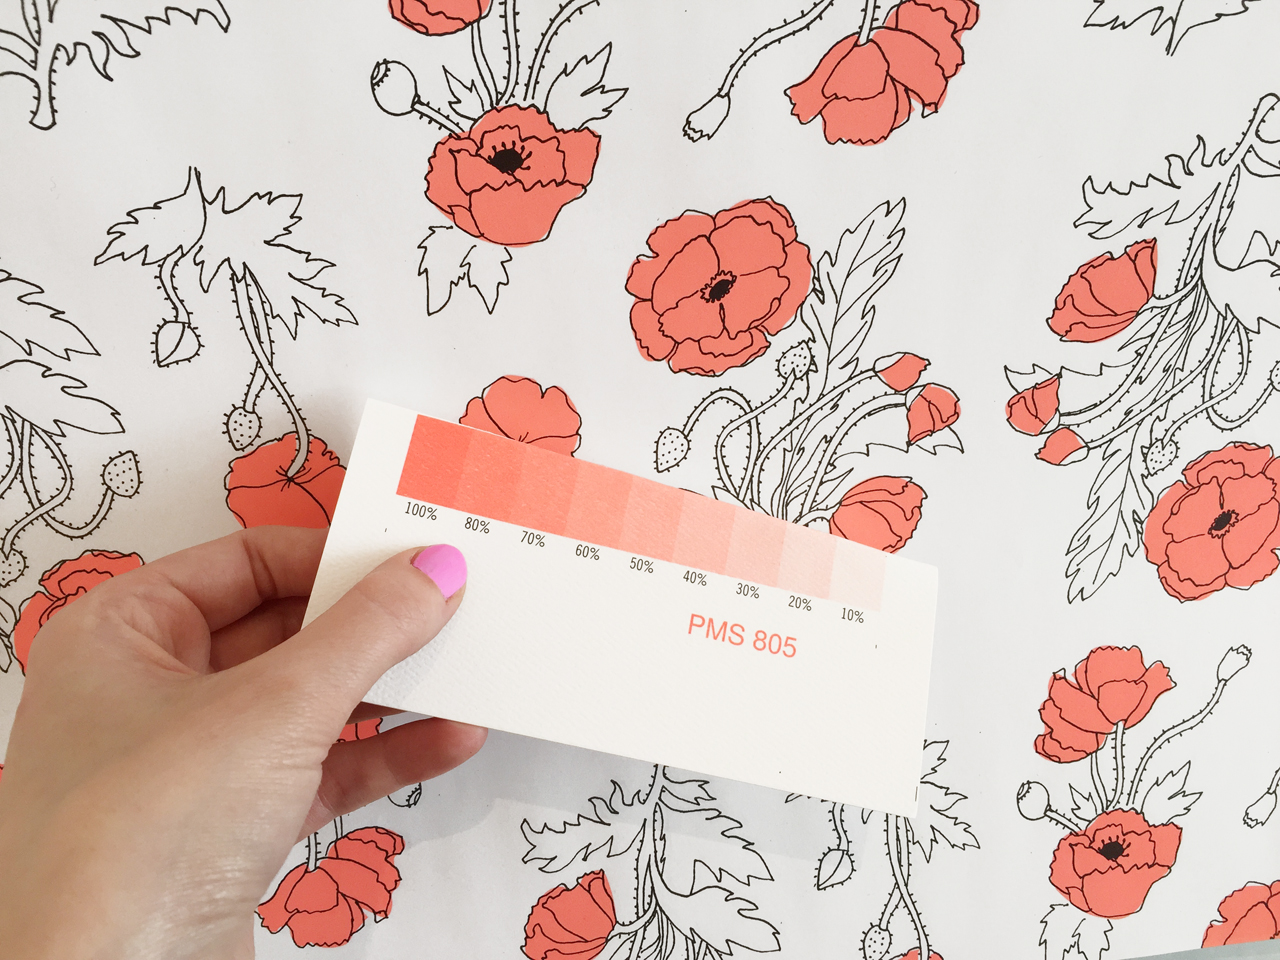
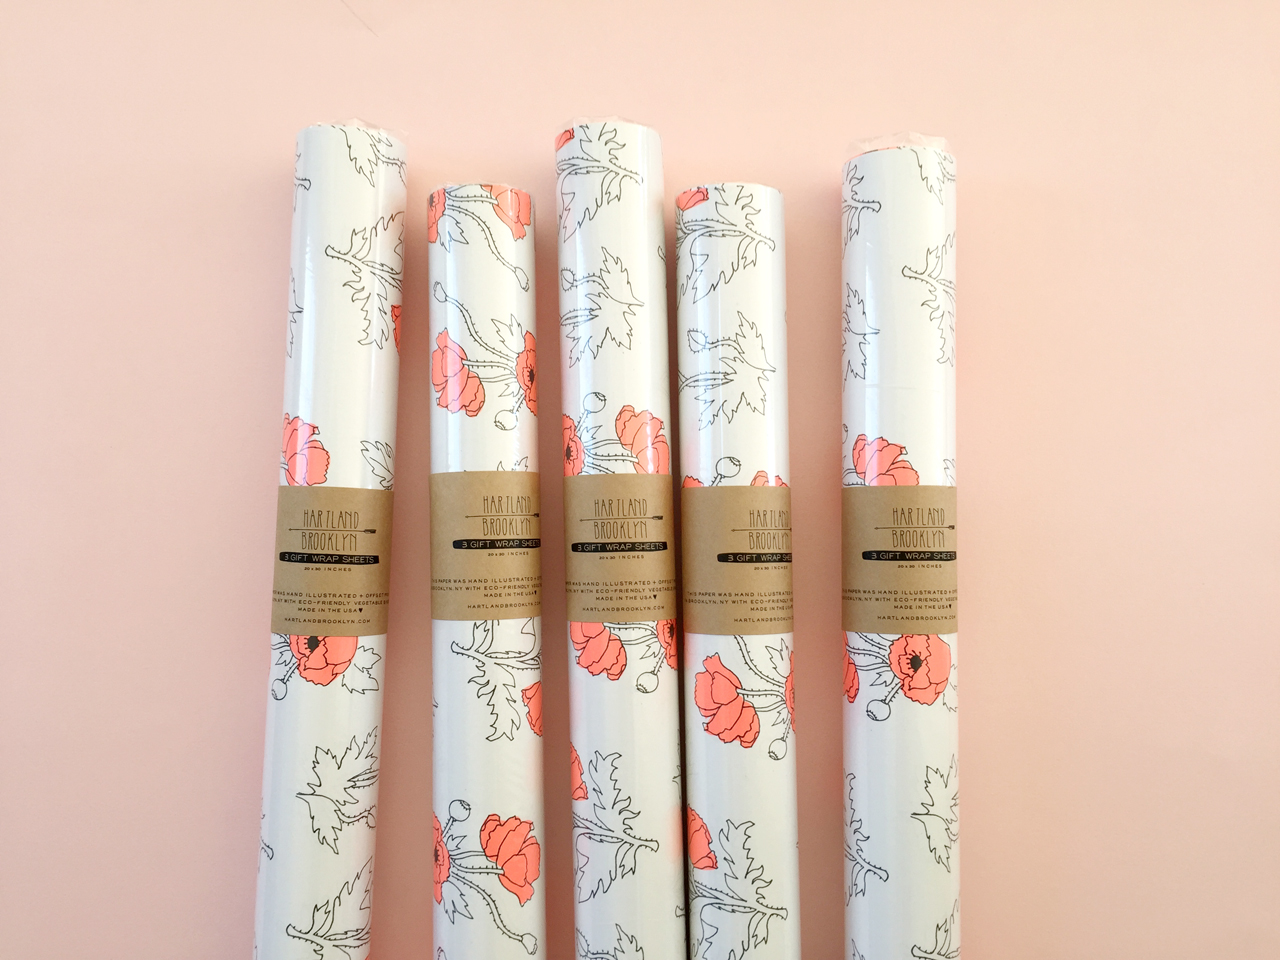
Each card is offset printed with added neon pigment in Brooklyn, NY. We work with a wonderful printer who is eco-conscious and prints with vegetable-based ink. We’ve worked together to match our neon Pantone colors and have had great success. I also love to add foil stamping, which is stamped in midtown Manhattan. I chose a felted paper to give it a hand-painted feel.

When I first started Hartland Brooklyn I didn’t have the minimums to offset print, so I was hand painting the neons on the cards (it was very labor-intensive). This way I could test styles and see what works, without investing all my money into printing thousands of cards. With the quantities I now order, the neons can be printed, which gives me the ability to add even more color and saves me an incredible amount of time.

Behind the Stationery: Hartland Brooklyn

Behind the Stationery: Hartland Brooklyn

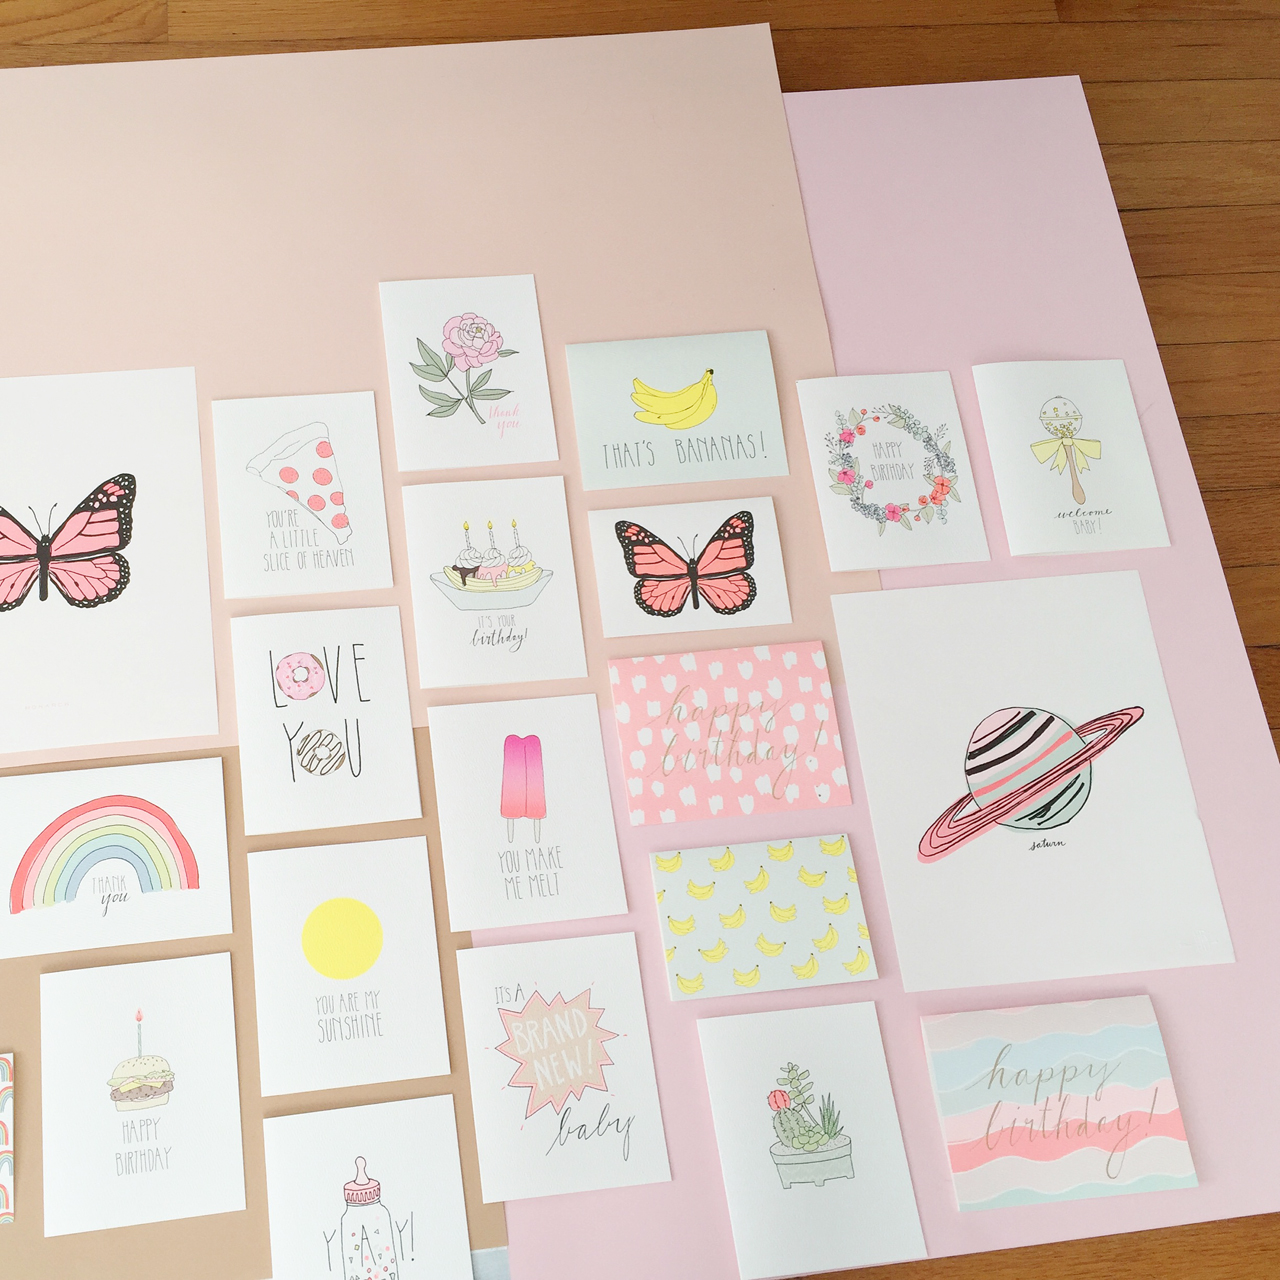
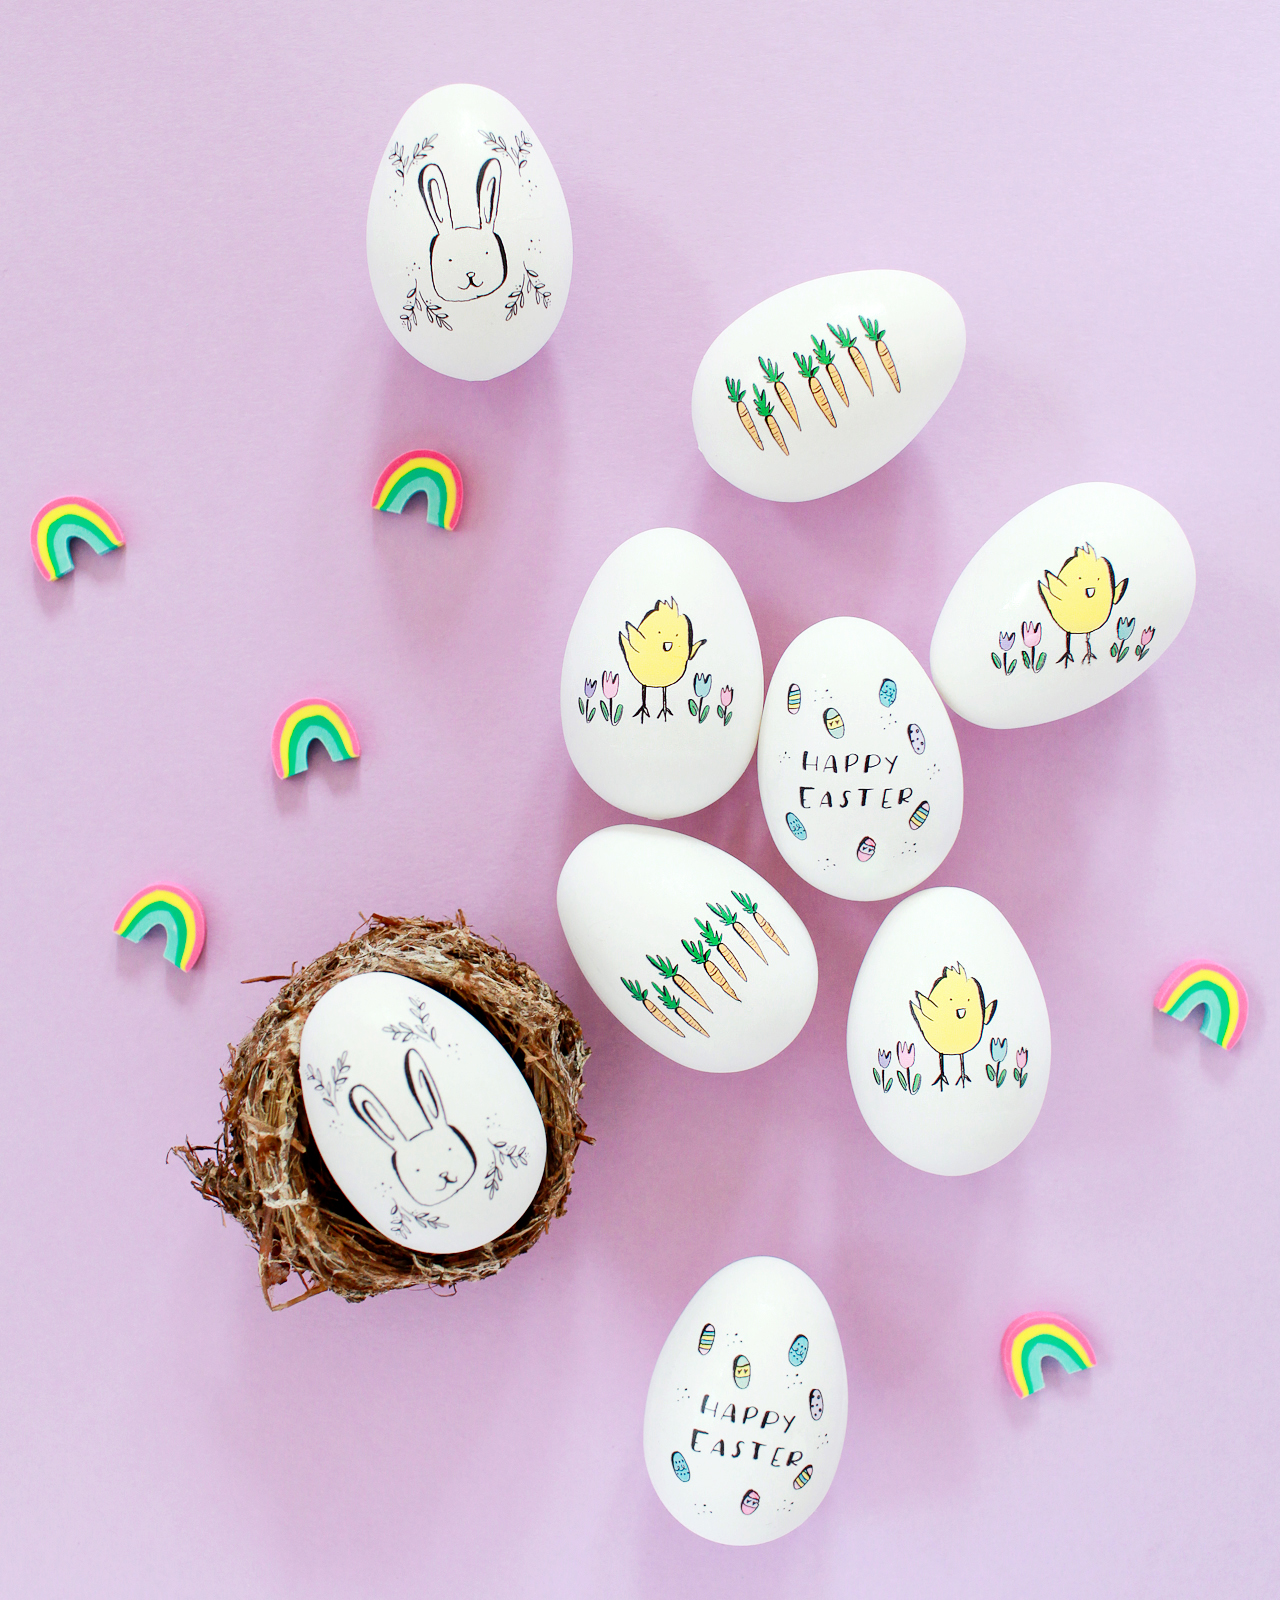
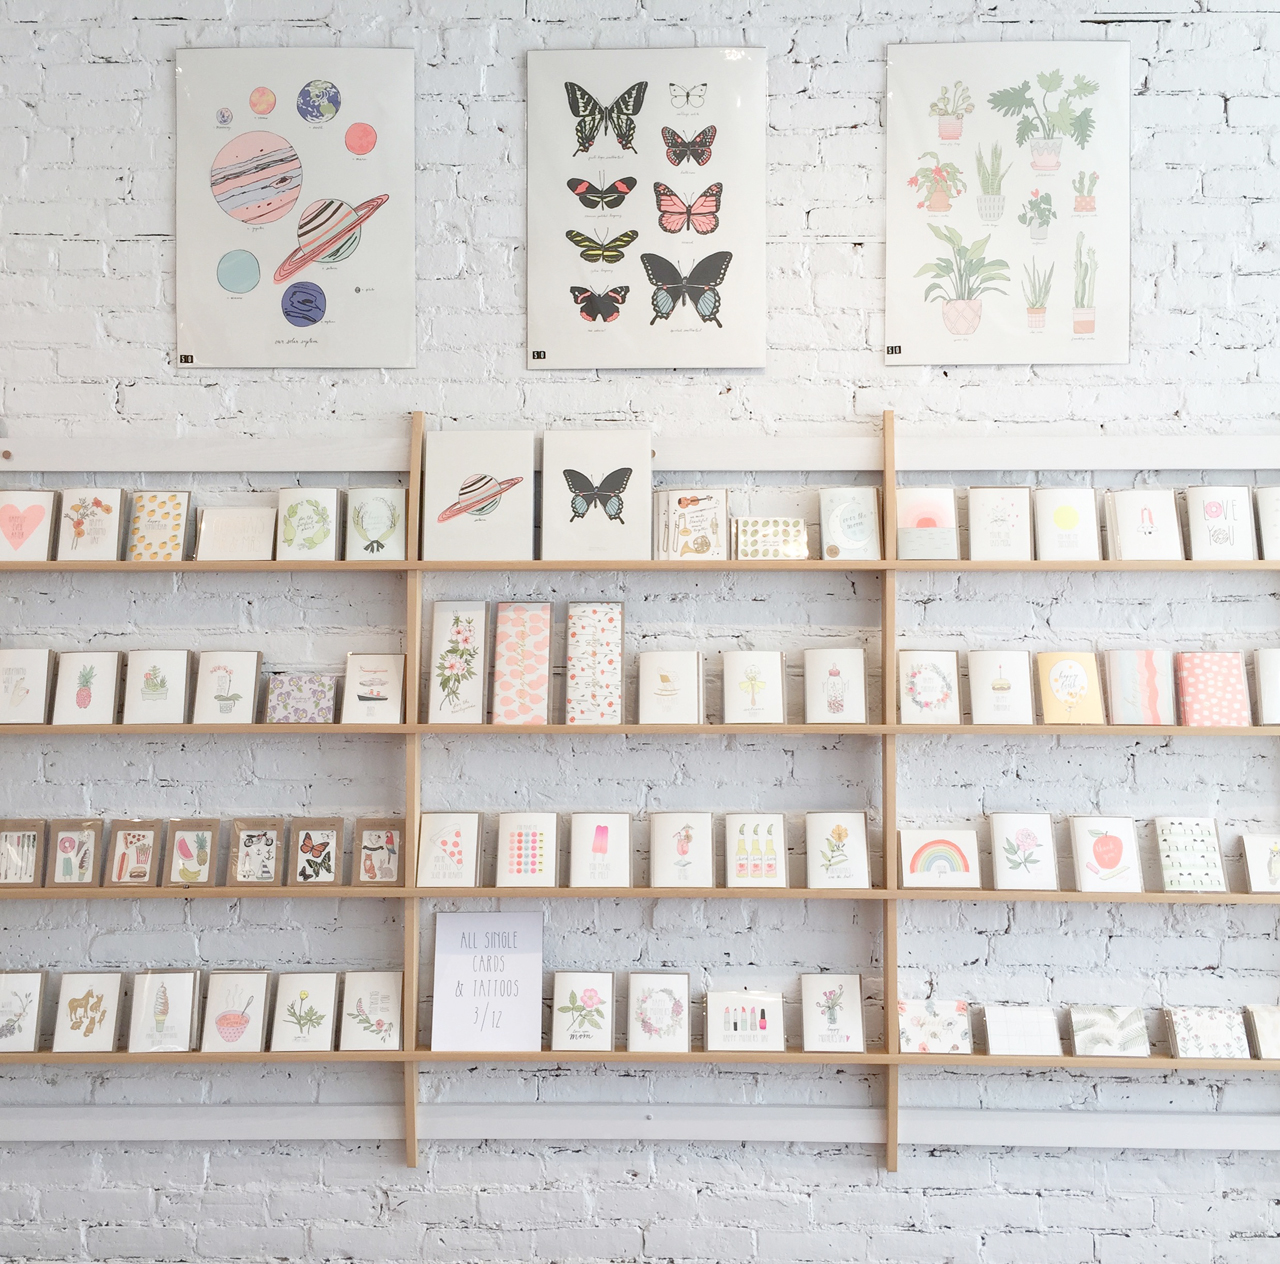
I think the graphic illustrations and color palette are a unique combination. The paper is felted, which gives it a hand-made feel. I’ve recently introduced wrapping paper sheets, with my added neons that I haven’t seen in the market. I’m hoping to expand on these, since I love patterns and it feels so new in the line.

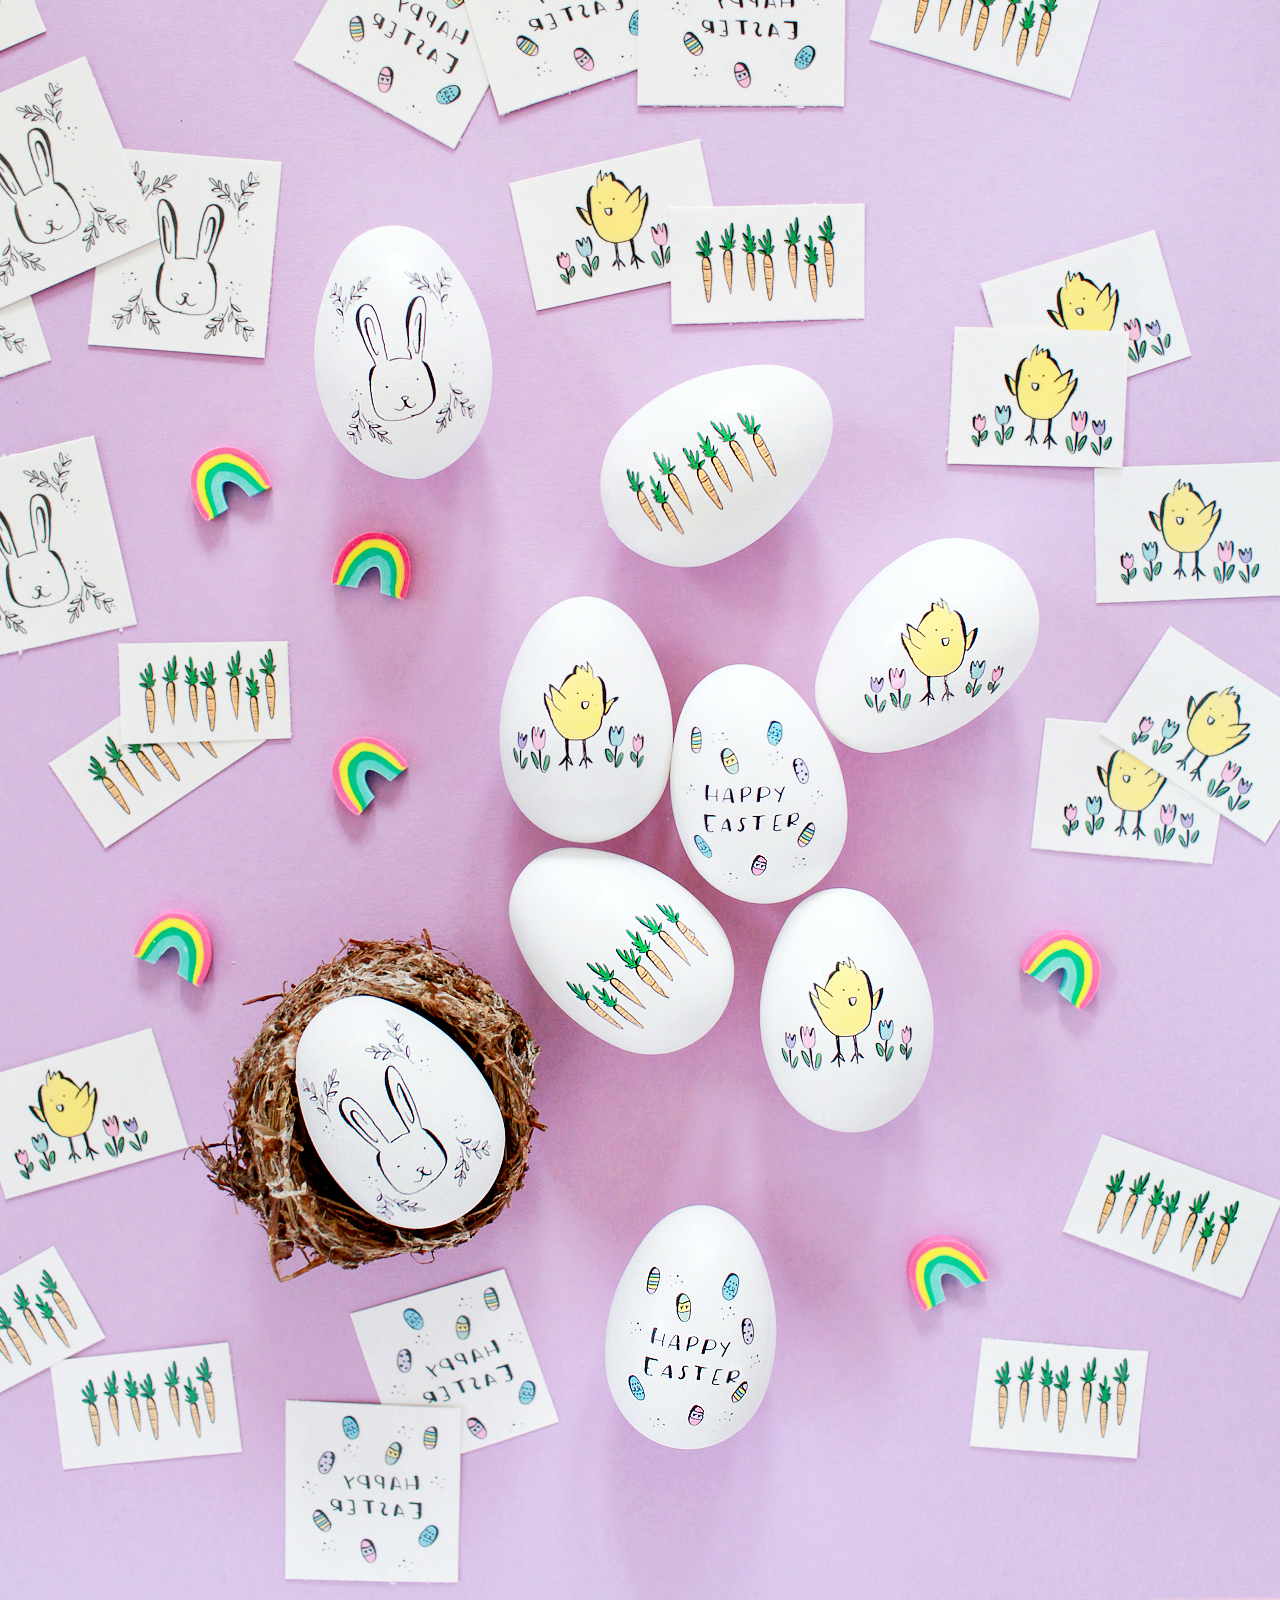
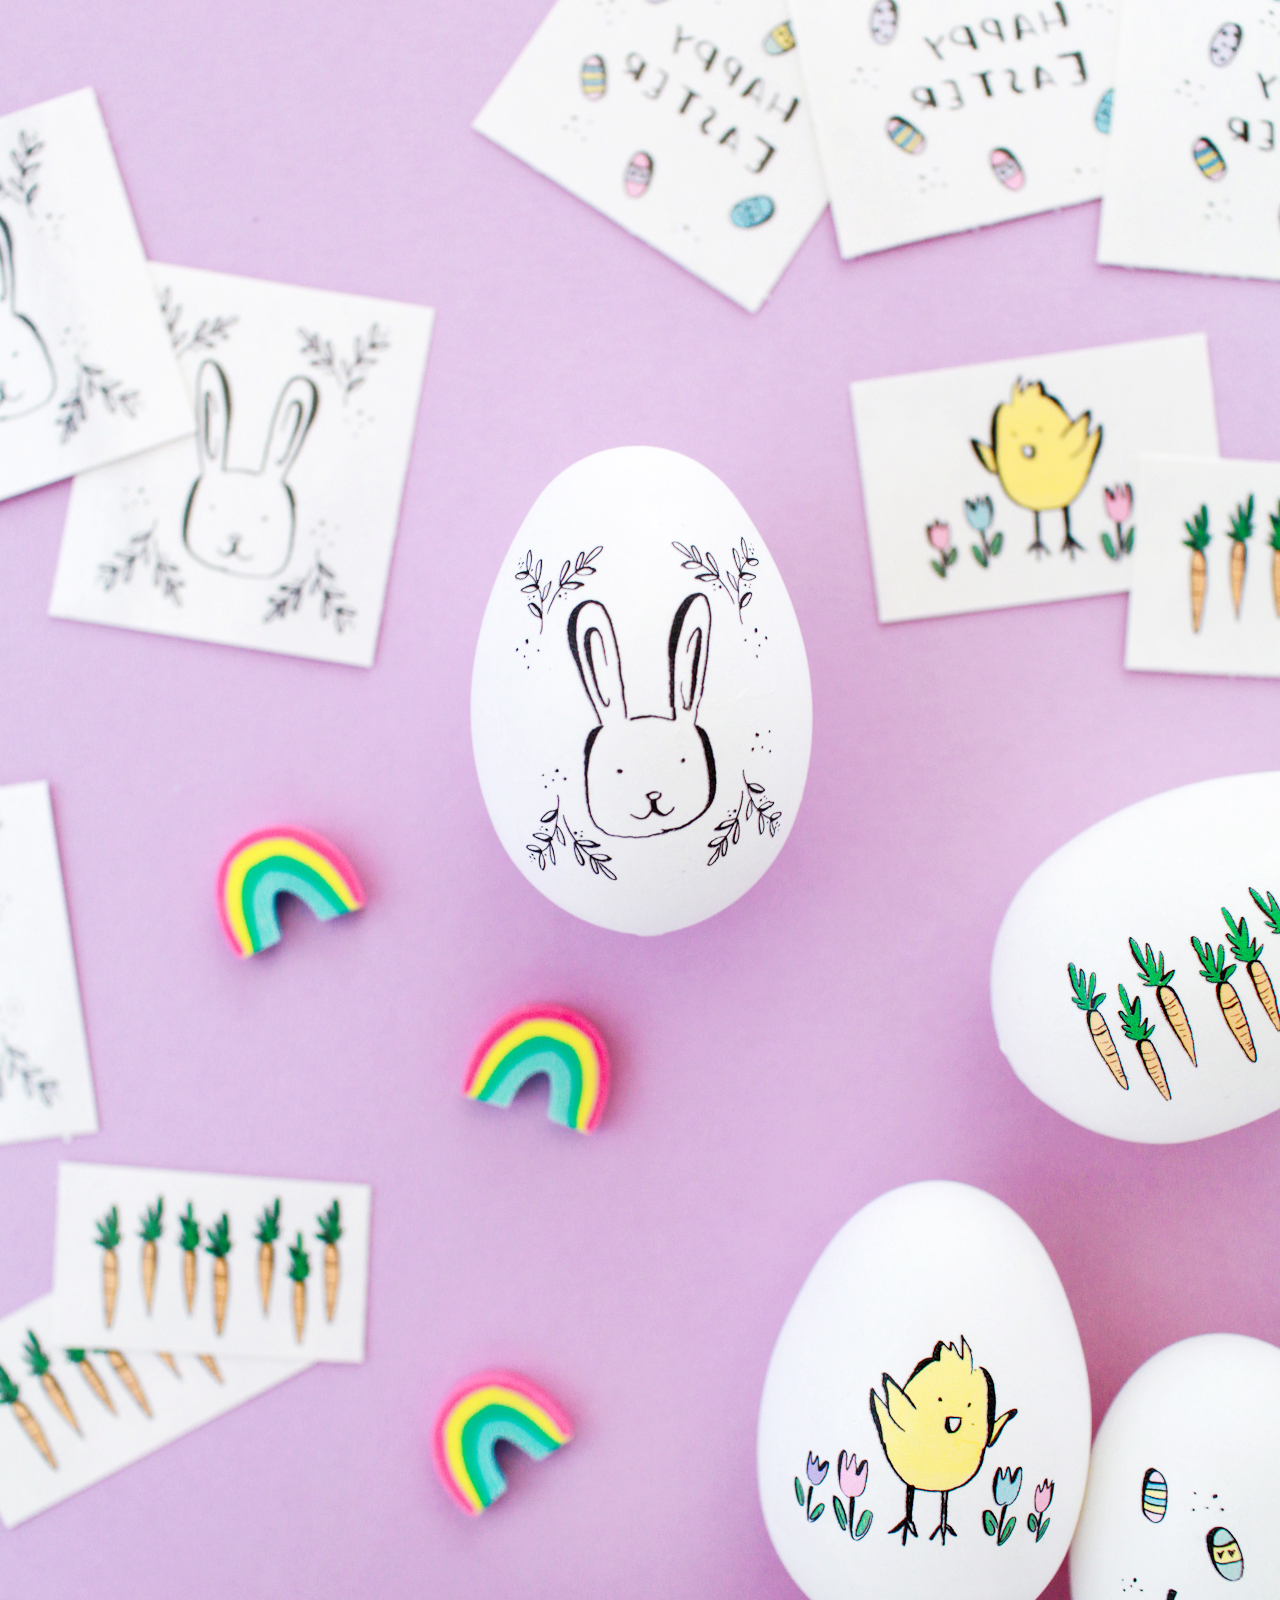
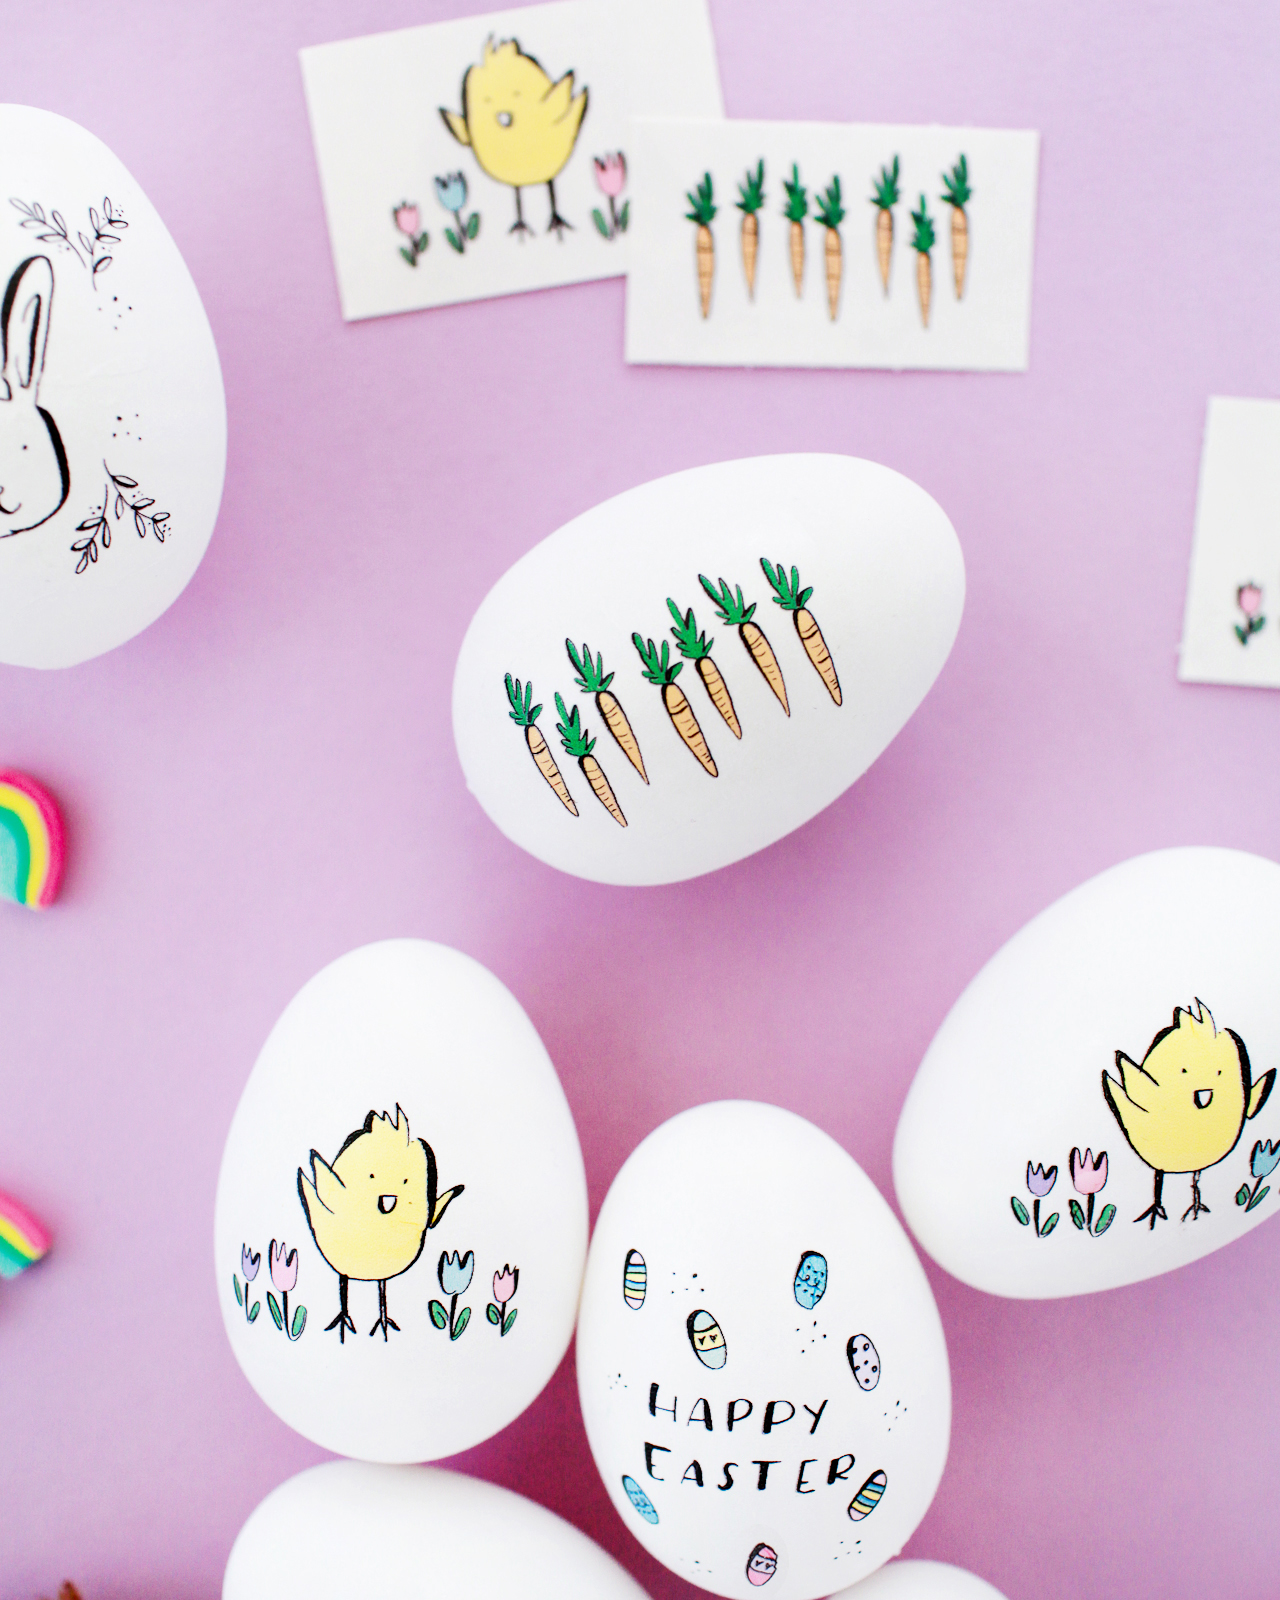
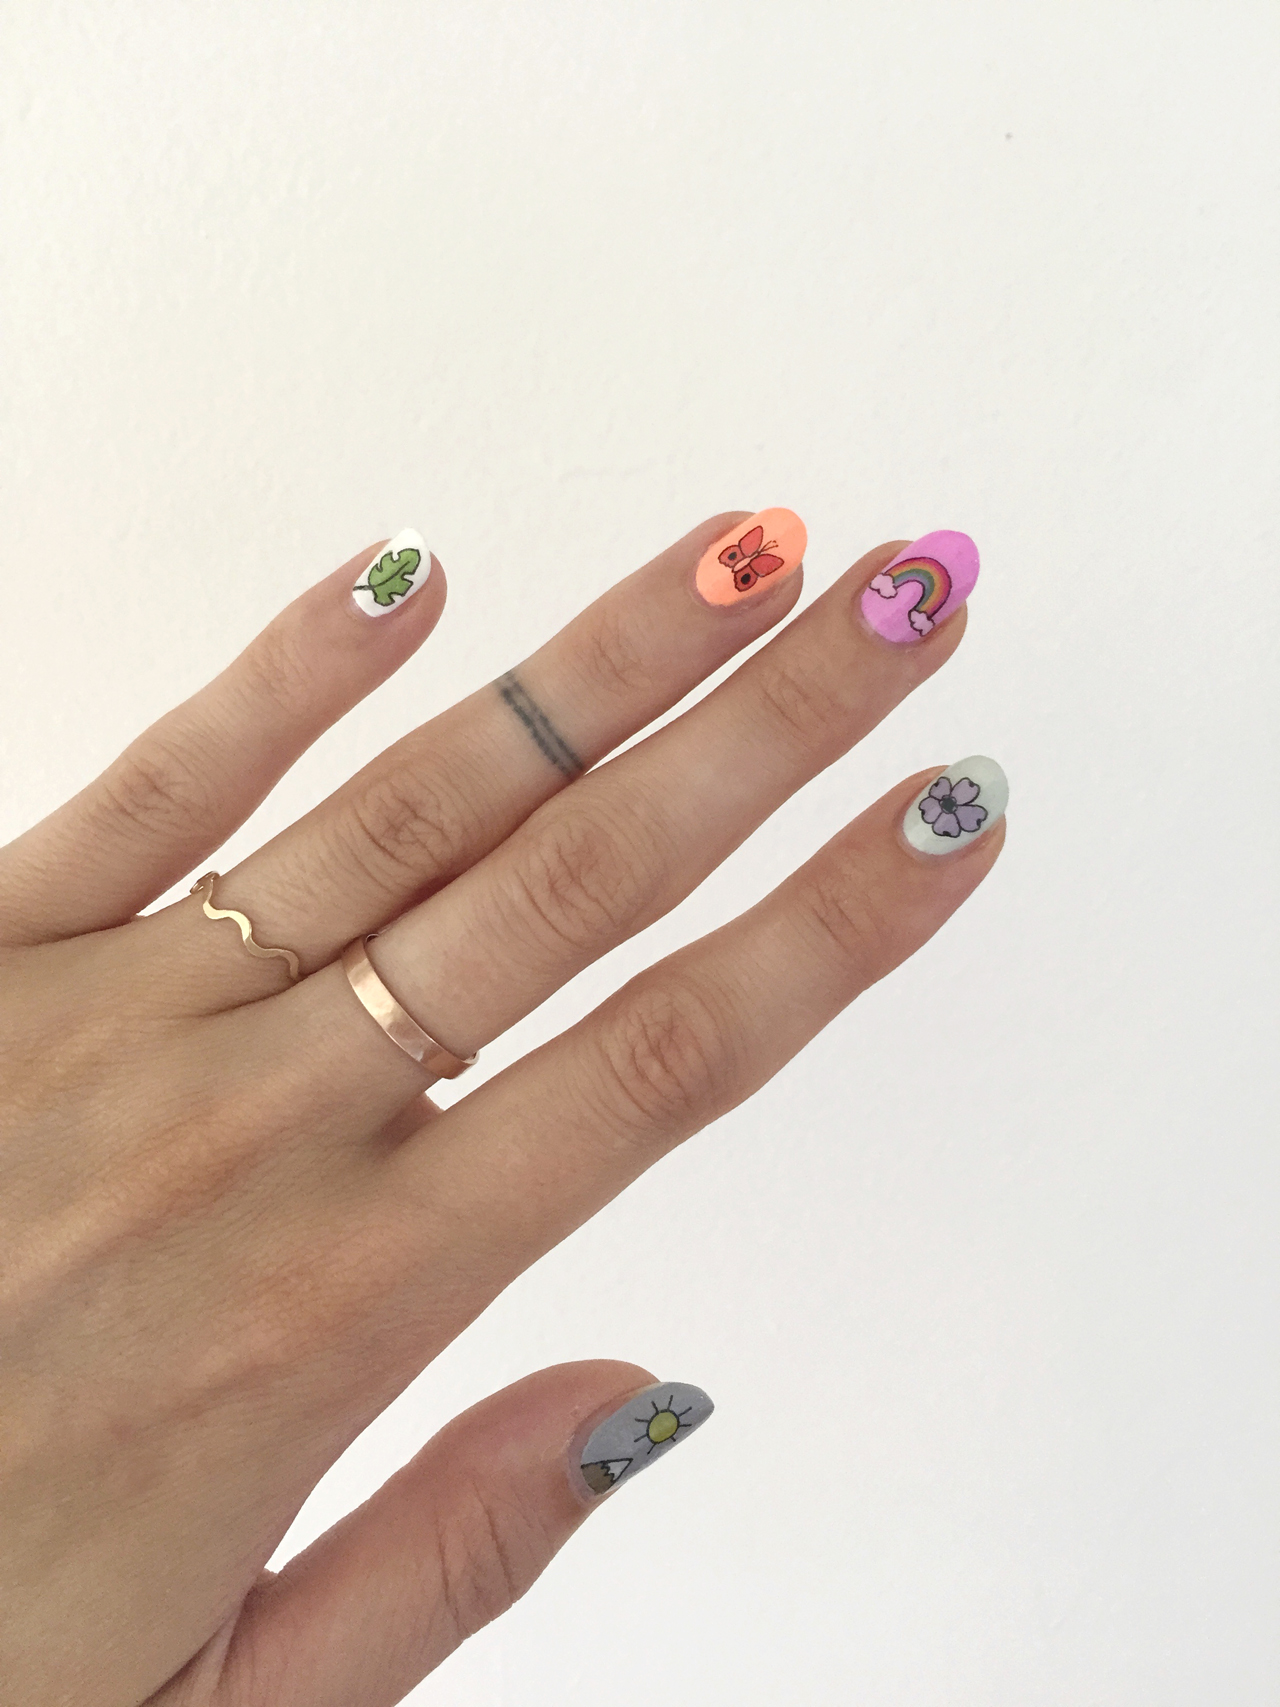
We also offer soy-based temporary tattoos and nail tattoos.

I try not to pay attention to what other companies are doing. I like my ideas to come from my life and experiences and not from short-lived trends. I also try and keep it fun, so people can send a little happiness with every card.

Behind the Stationery: Hartland Brooklyn

Behind the Stationery: Hartland Brooklyn

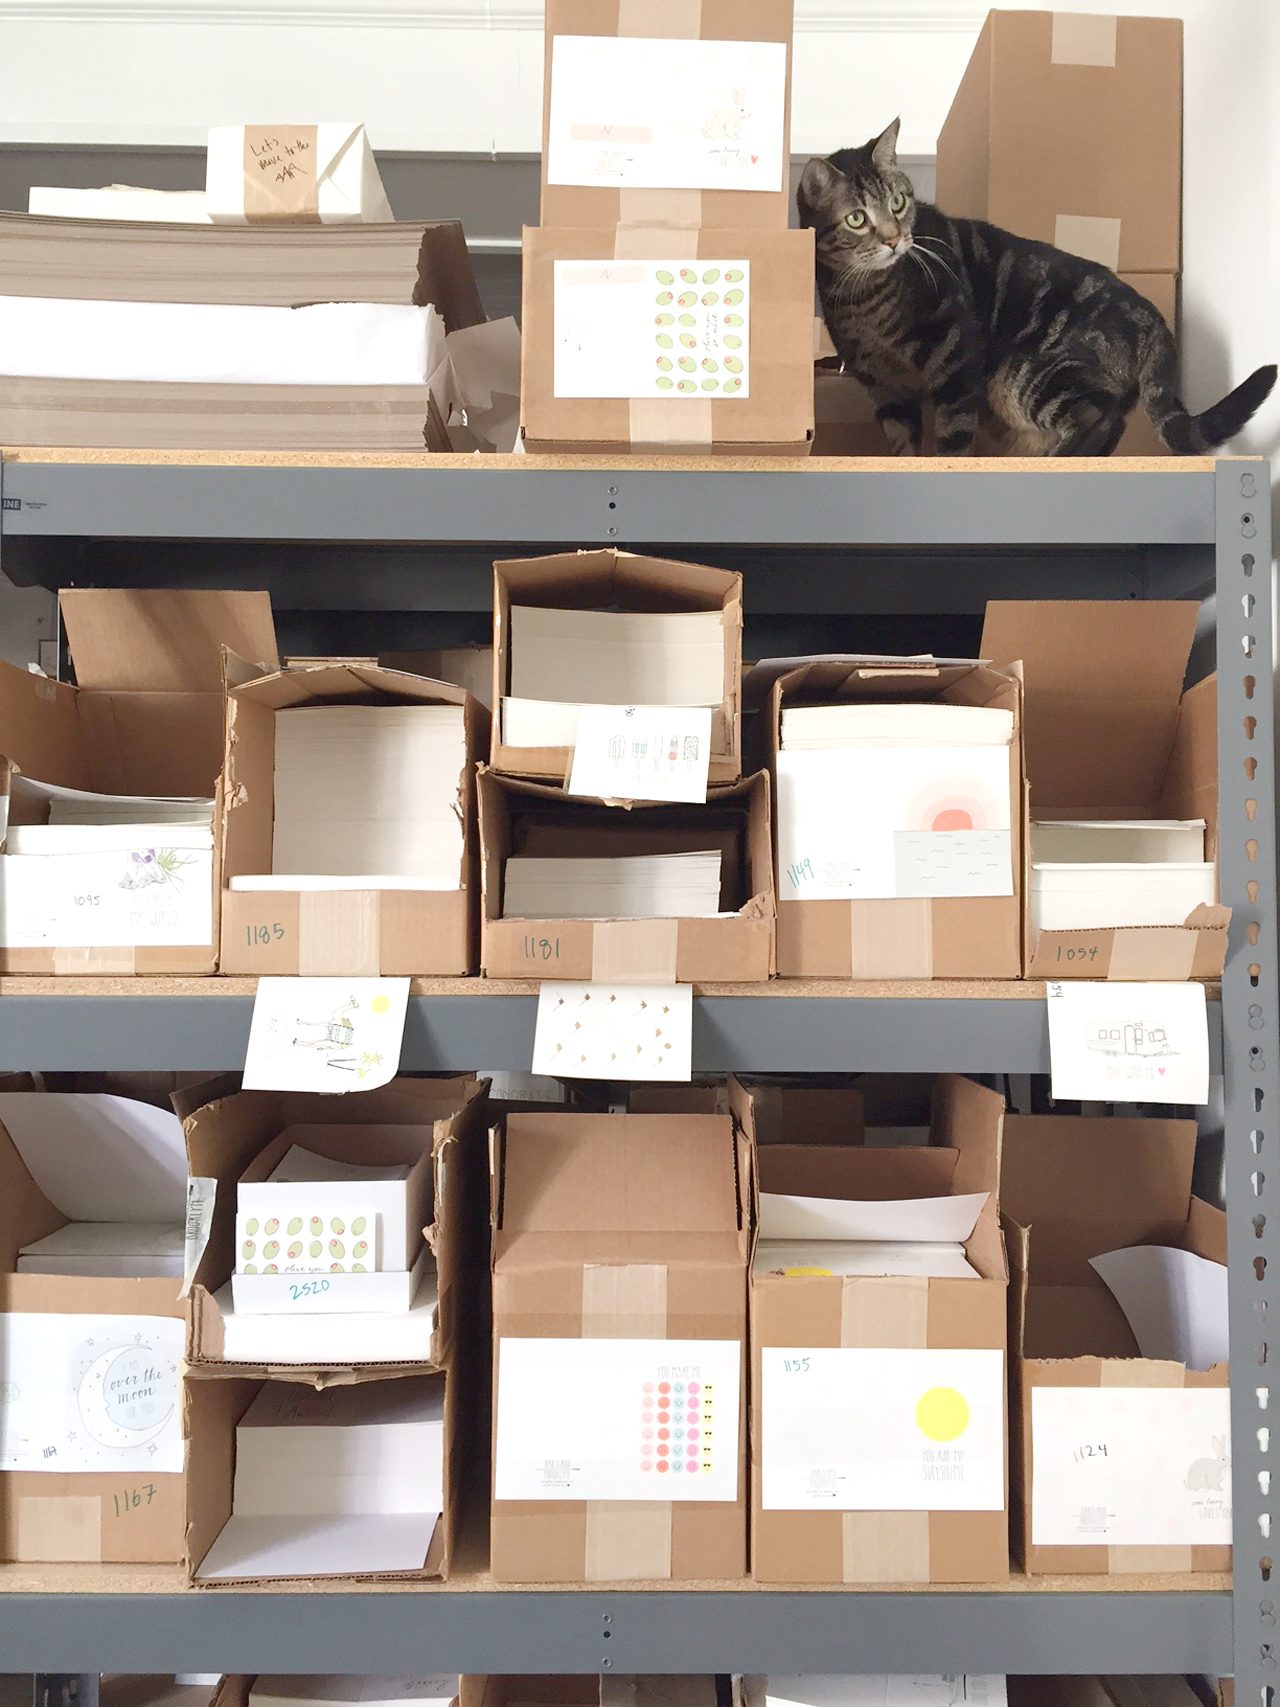
Our typical workday is a little more complicated now that have a newborn. It’s been interesting finding a good work/life balance. We live above the studio, so I can take my time coming down to work or pop in and out and check on the status of orders. I think I was away from the office for about 3 or 4 days after Olive was born..! I can’t stress how thankful I have been for the people I have helping me pack cards, since every second free is more valuable now!

Once the shop closes at 3 (and my husband can watch the baby if she’s not napping) I spend some time shipping out orders, and we run everything to the post office by 4:30.

Behind the Stationery: Hartland Brooklyn

Thanks so much for stopping by Emily!

DIY Illustrated Temporary Tattoo Easter Eggs

Today I’m sharing one final DIY Easter egg decorating idea – and this one involves temporary tattoos featuring illustrations by Courtney of Swiss Cottage Designs! These illustrations are so adorable I can’t even stand it. And the best part is that you can use ’em to decorate Easter eggs to your heart’s content, then use any leftovers as regular old temporary tattoos!

DIY Illustrated Temporary Tattoo Easter Eggs

Every kid I know is obsessed with temporary tattoos (including my own kids), and it’s such a fun way to decorate Easter eggs. After making these tissue paper tropical leaf Easter eggs last year, I knew I wanted to give tattoo paper a try this year. I’ll also happily jump at any opportunity to team up with Courtney from Swiss Cottage Designs, and I absolutely love all the Easter-inspired illustrations she created for these tattoos. An adorable bunny! A sweet baby chick! Tiny Easter eggs! And the cutest little carrots I’ve ever seen. I couldn’t decide if I liked the color version or the black and white version of the illustrations better, so I decided to make them both available to all of you below. Let’s make some eggs!

DIY Illustrated Temporary Tattoo Easter Eggs

DIY Illustrated Temporary Tattoo Easter Eggs

Supplies

Hard boiled eggs*

Printable templates (we made two versions: color and black + white)

Temporary tattoo paper

Ink jet printer

Scissors

Paper towels

Water

*A couple quick notes about the eggs: I personally love the idea of using plain white eggs for these temporary tattoos, but you can totally use them with pre-dyed eggs, too! The temporary tattoos work best on fully dry, room temperature eggs, so if you plan to dye your eggs first, just make sure you give them enough time to dry before applying the tattoos. Similarly, hard boiled eggs stored in the refrigerator may form condensation after they are first taken out of the fridge, which will prevent the tattoos from sticking to the eggs.

DIY Illustrated Temporary Tattoo Easter Eggs

To make the DIY illustrated temporary tattoo Easter eggs:

Step 1. Print our templates (you can choose COLOR or BLACK + WHITE – or both!) onto temporary tattoo paper, and apply the clear adhesive liner according to the package instructions.

Step 2. Once the adhesive liner has been applied, use scissors or a paper trimmer to cut out the individual tattoos. Each sheet of tattoo paper yields 28 tattoos. I recommend cutting as close to the printed tattoo area as possible, which makes it a bit easier to apply the tattoos to the eggs.

Step 3. Peel the clear liner off the tattoo paper and apply it to the egg sticky side down. Press a wet paper towel to the back of the tattoo, making sure that you cover the entire area of the tattoo, until the image is successfully transferred to the egg and the paper easily slides off. Continue applying tattoos to the remaining eggs. The entire process takes about 10-20 seconds per egg.

DIY Illustrated Temporary Tattoo Easter Eggs

DIY Illustrated Temporary Tattoo Easter Eggs

DIY Illustrated Temporary Tattoo Easter Eggs

Aaaaaahhhh! So cute! I’m beyond obsessed with these adorable illustrations. And don’t worry – if you don’t have tattoo paper handy, you can still totally make these illustrated Easter eggs. Just follow this tutorial to print the designs onto a sheet of white tissue paper and apply them to hard boiled eggs using Mod Podge. It’s actually way easier than it sounds!

DIY Illustrated Temporary Tattoo Easter Eggs

DIY Illustrated Temporary Tattoo Easter Eggs

I hope you’ve enjoyed all of our Easter egg tutorials this year! If you make any of our eggs this year, please share photos on Instagram using the hashtag #madewithosbp so I can see them! And just in case you missed the previous ideas, here they are!

DIY hologram foil Easter eggs

DIY marbled hologram “galaxy” Easter eggs

DIY hologram and iridescent glitter-dipped Easter eggs

All artwork © 2017 Swiss Cottage Designs created exclusively for Oh So Beautiful Paper. All artwork is made available for personal use only. By downloading the patterns you agree to the terms of use.

Photos by Nole Garey for Oh So Beautiful Paper