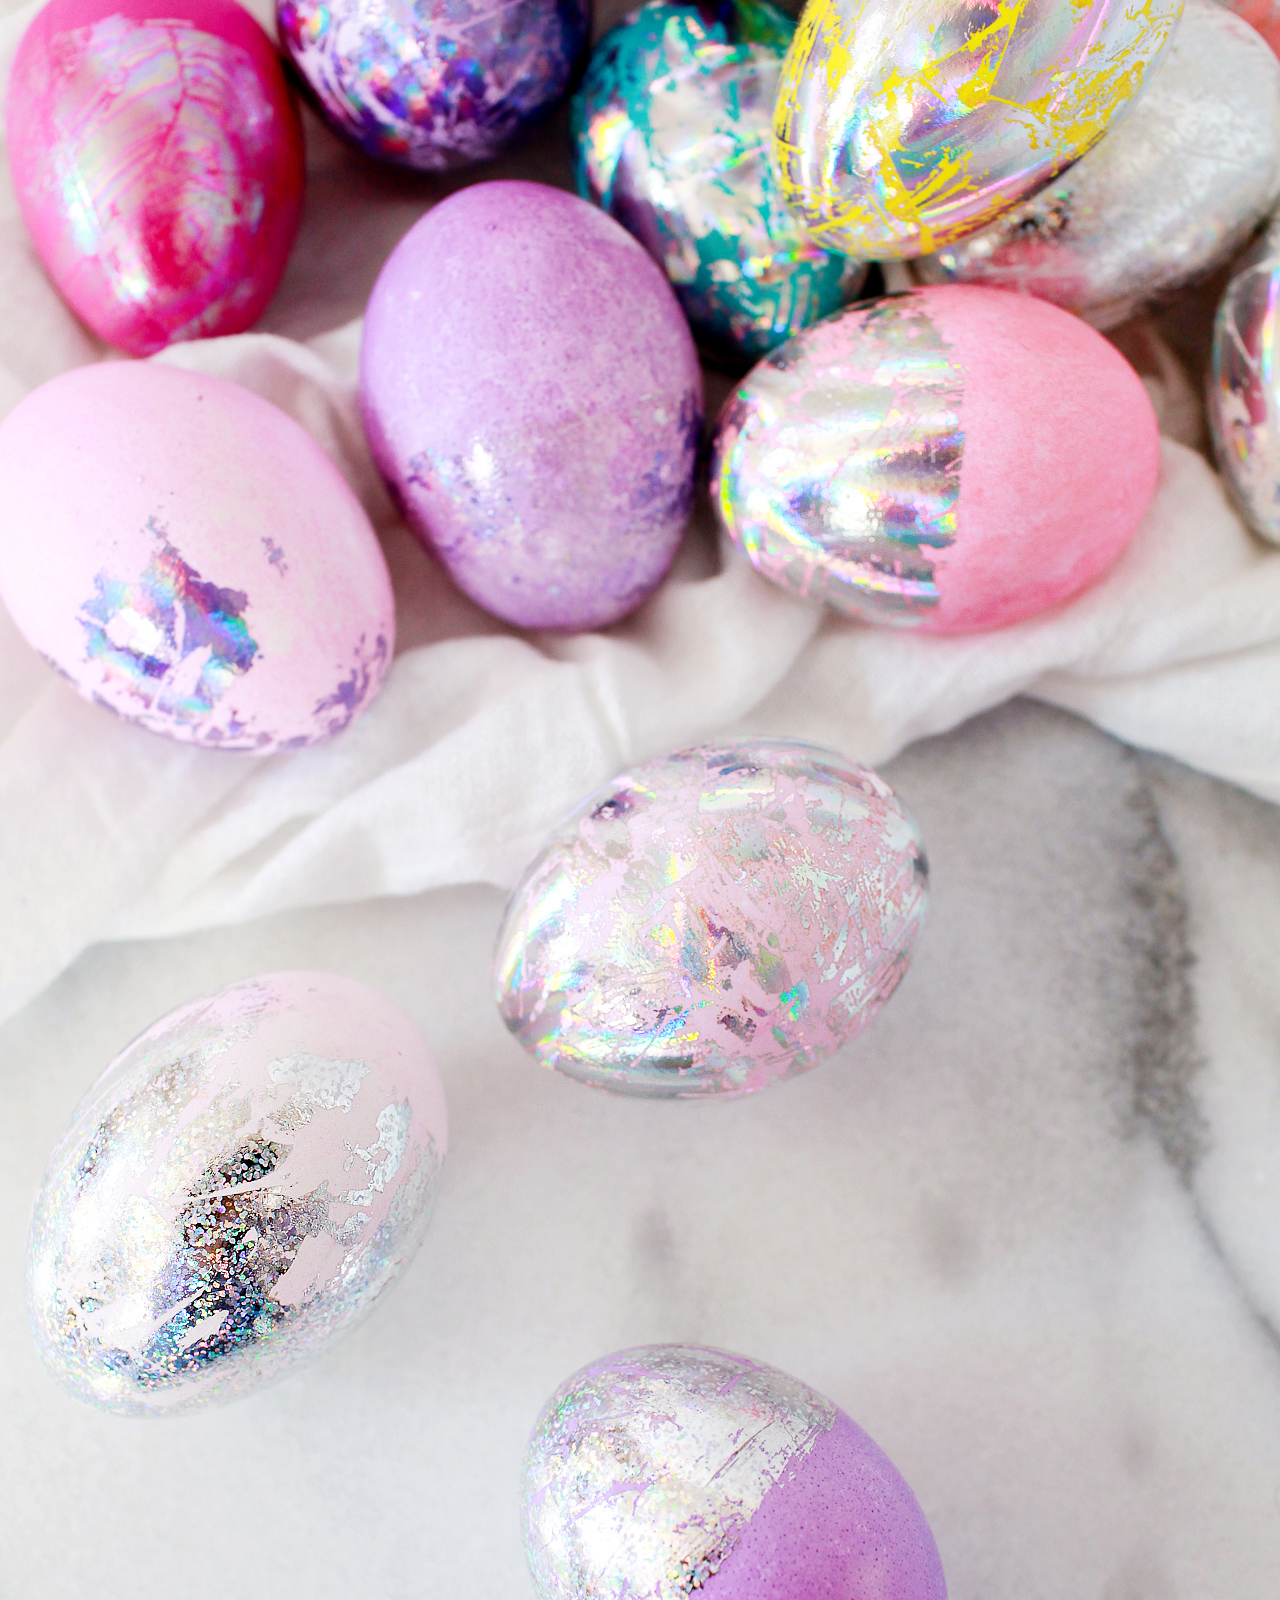
Happy Monday everyone! Today I’m sharing another DIY Easter egg tutorial – and this might just be my favorite yet: DIY hologram foil Easter eggs in every shade of the rainbow! These holographic Easter eggs just make me so happy every time I look at them, and you can even apply the technique to faux eggs to enjoy them year after year. All it takes is a few rolls of hologram nail foil, nail foil transfer adhesive, and you’re good to go!
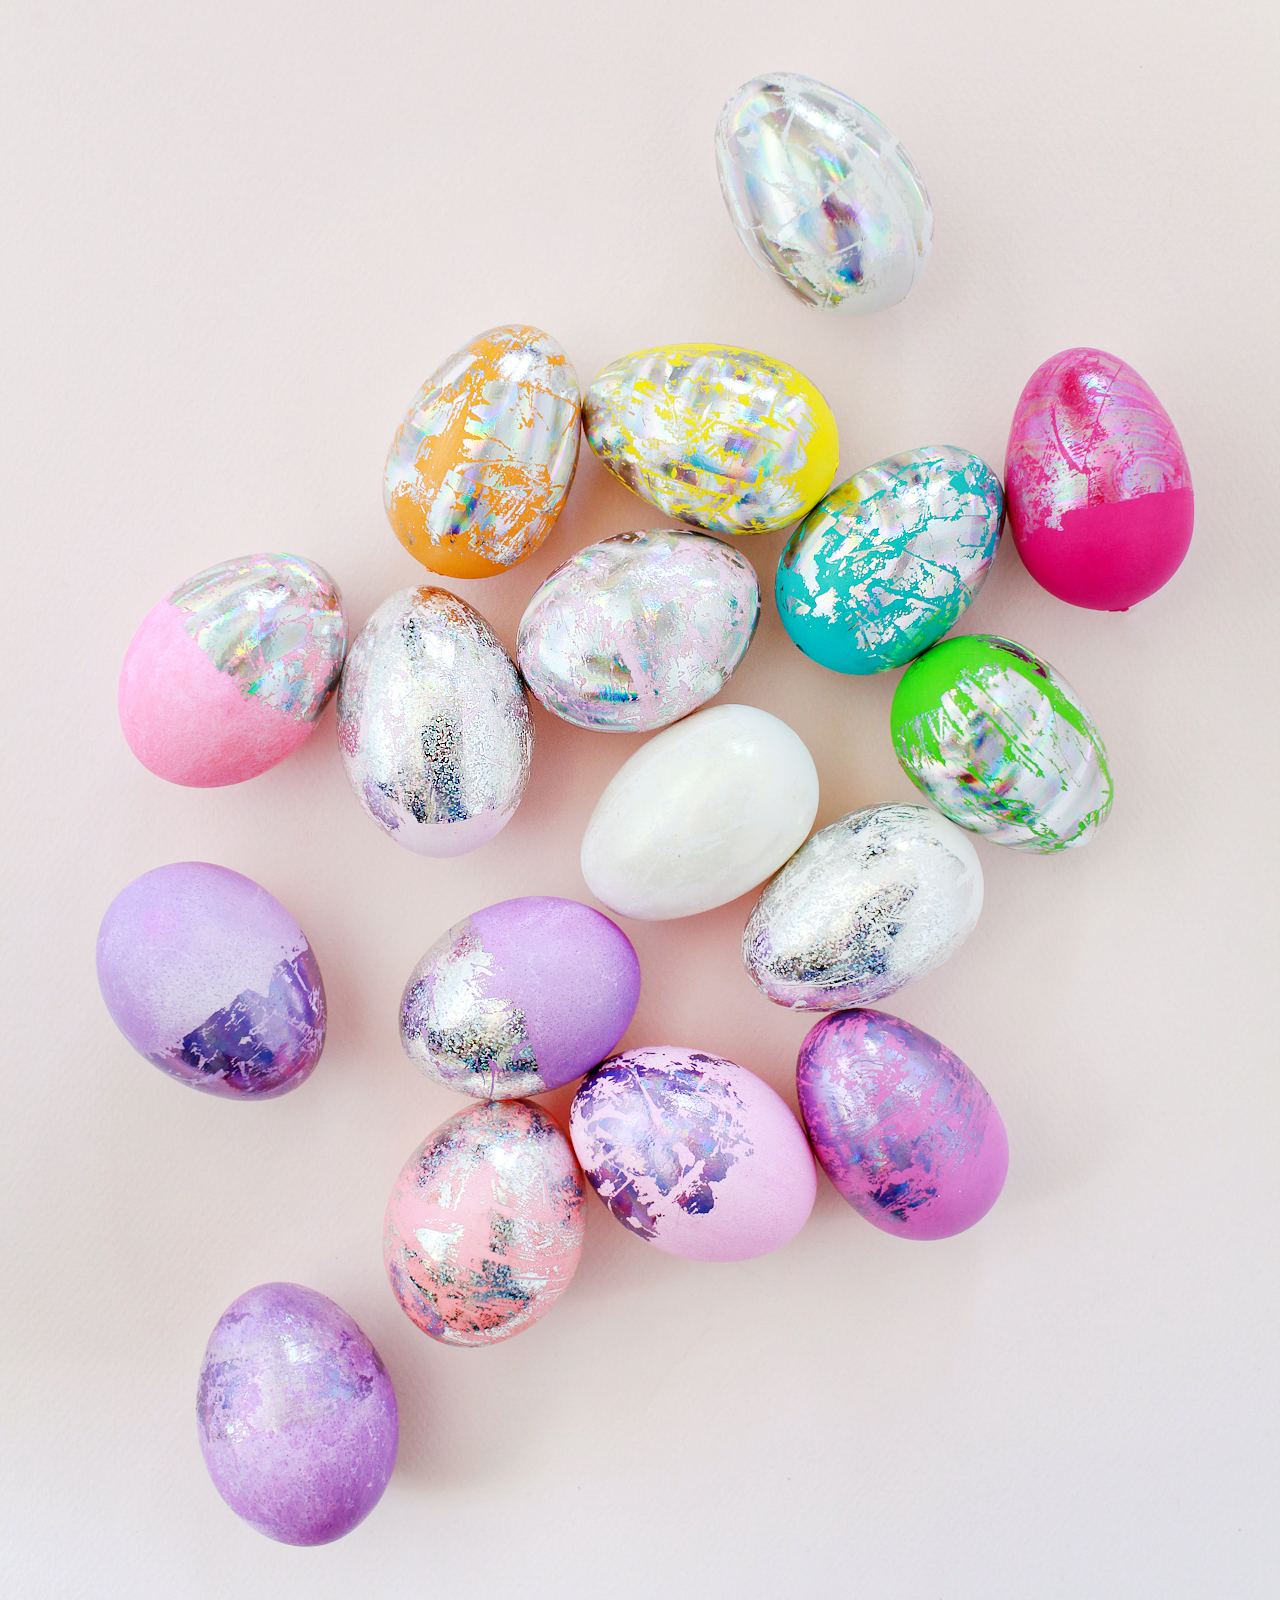
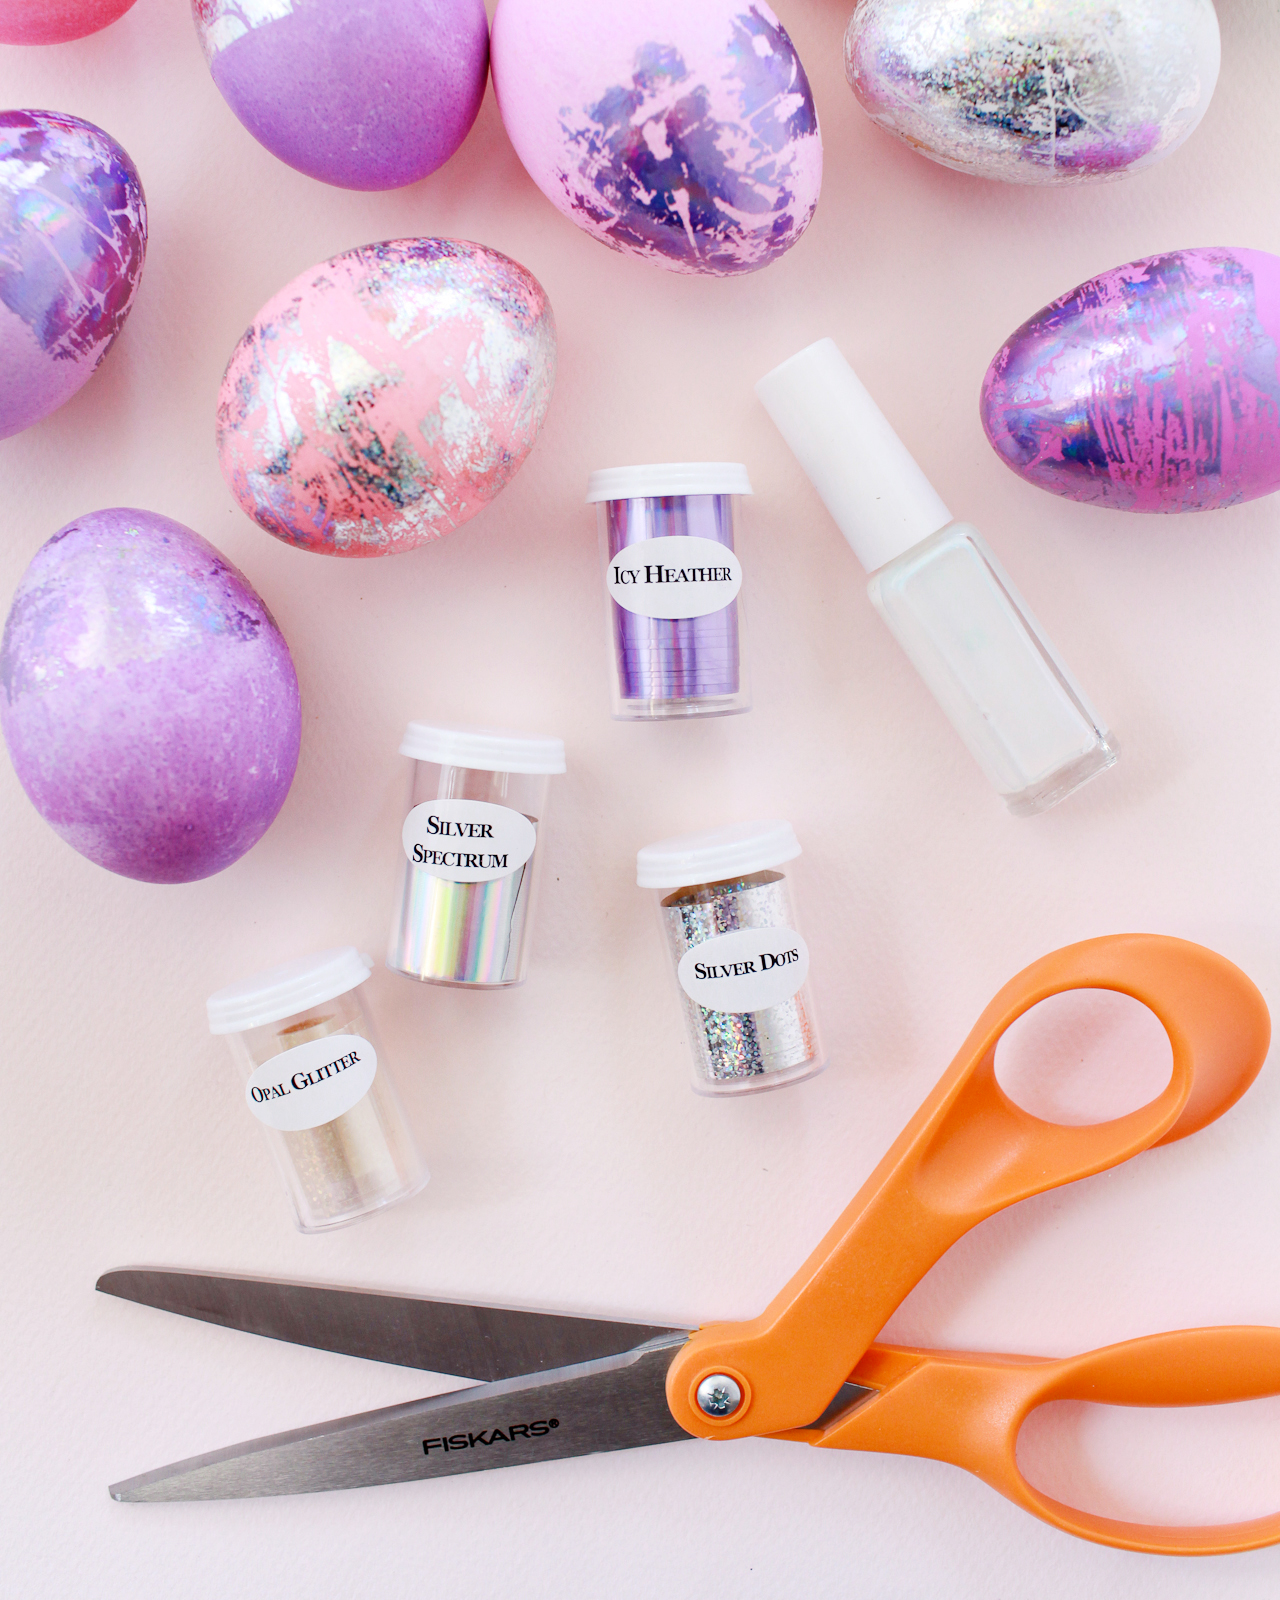
So first, if you don’t already know about the amazing magic that is nail transfer foil, you’re welcome. It’s super cheap (only $1 for a roll of 5 feet!!), comes in the most amazing range of color and patterns, and you can use it to give yourself a really fun manicure when you’re not busy making holographic Easter eggs. I stuck to a color palette of silver hologram, lavender hologram, and a clear iridescent foil, but you could create an entire rainbow of hologram and iridescent easter eggs just using the nail foils. Now how fun would THAT be??

Supplies
Faux or hardboiled eggs
Nail foil in your choice of color – I used Silver Spectrum, Silver Dots, Opal Glitter, Icy Heather, and a bit of Opal Swirl. I bought all my nail foils here, but you can also find some fun colors and patterns on Amazon.
To make the DIY hologram foil Easter eggs:
Step 1. Start with faux Easter eggs in fun colors (I picked mine up from the dollar spot at Target) or dye hardboiled eggs in a rainbow of bright colors. Just a quick FYI: I tried this foil technique with naturally dyed eggs, and it didn’t go too well. The foil adhesive seemed to have a difficult time sticking to the naturally-dyed eggs. But the eggs dyed with regular liquid food coloring turned out great! The hologram foil also looks pretty great against white eggs, so you could just skip the dye and go straight for the hologram foil.
Step 2. Cut several 2-inch lengths of nail foil in your chosen colors. I usually needed about six 2-inch pieces of foil to cover a single egg. The foiling process moves pretty quickly, so it’s helpful to have a bunch of pre-cut pieces ready to apply ahead of time.
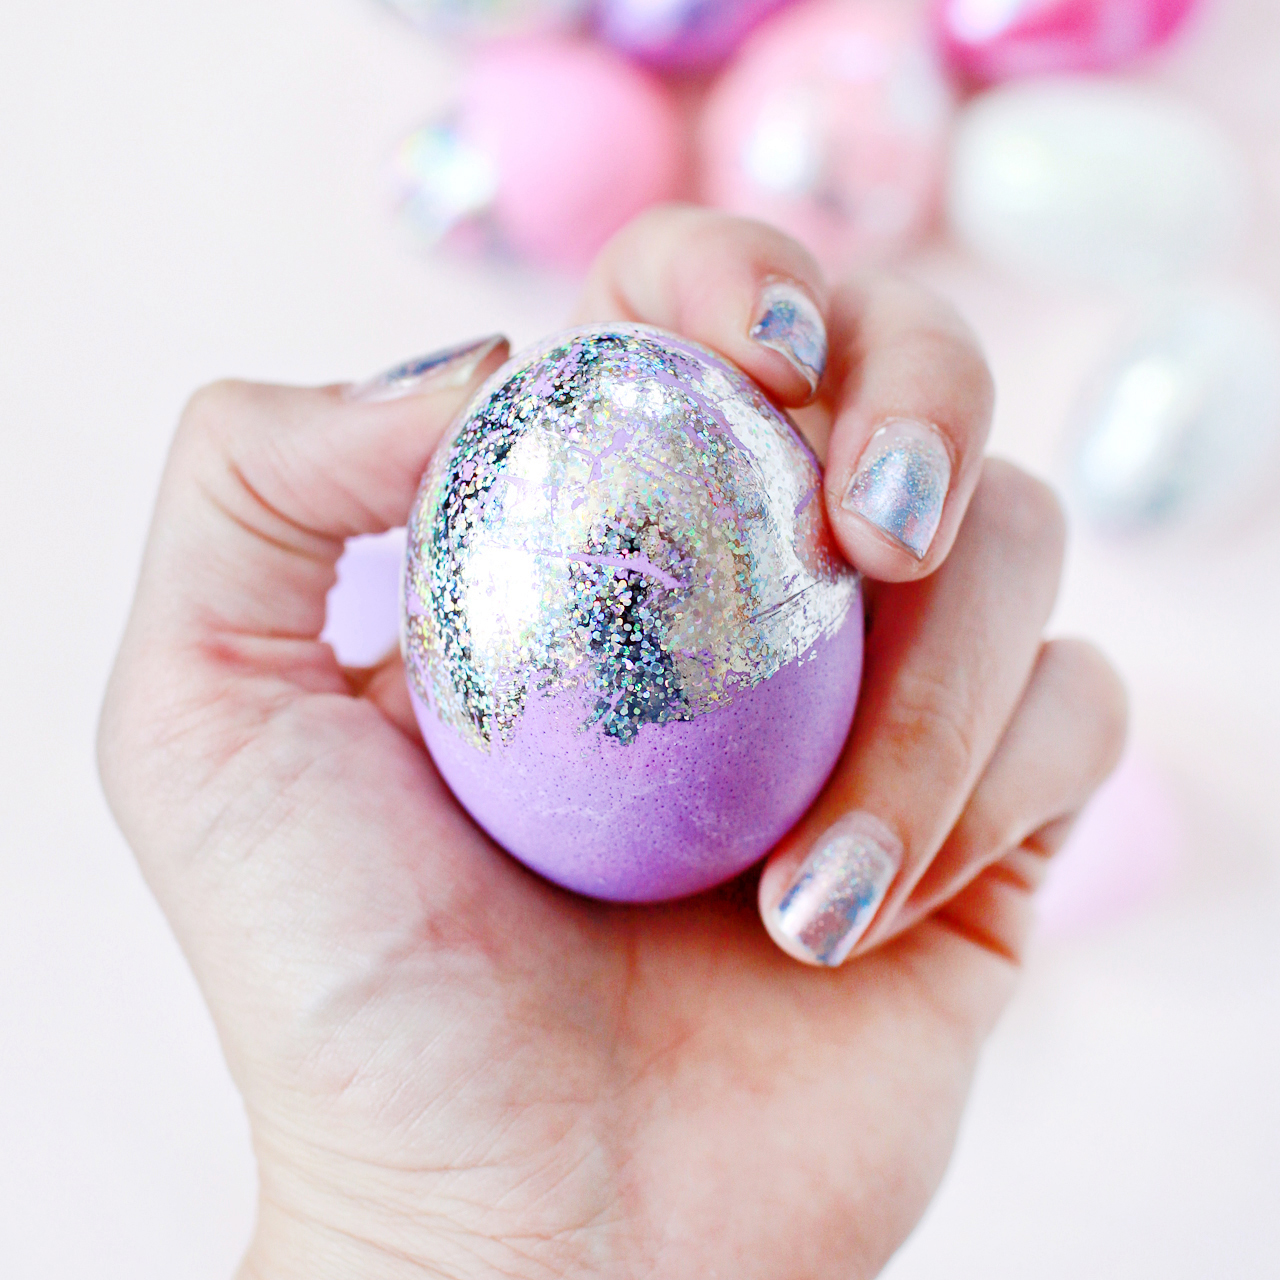
Step 3. Apply the nail foil transfer adhesive to your egg and allow it to dry for several minutes, or until the adhesive becomes clear and tacky. I found it easiest and most effective to apply the adhesive to several eggs at once, but only one half of the egg at a time. I lined up about six eggs at a time and applied the adhesive to each egg, and by the time I was done the first egg was usually ready for hologram foil.
Step 4. Once the adhesive is clear and tacky to the touch, apply the hologram foil to the egg. For more solid coverage, press a piece of foil over the adhesive and smooth it down with your fingers. If you want more of the egg color to show through, quickly tap the foil against the adhesive and then move to another section of the egg. Continue around the entire area until you’re satisfied with the amount of coverage.

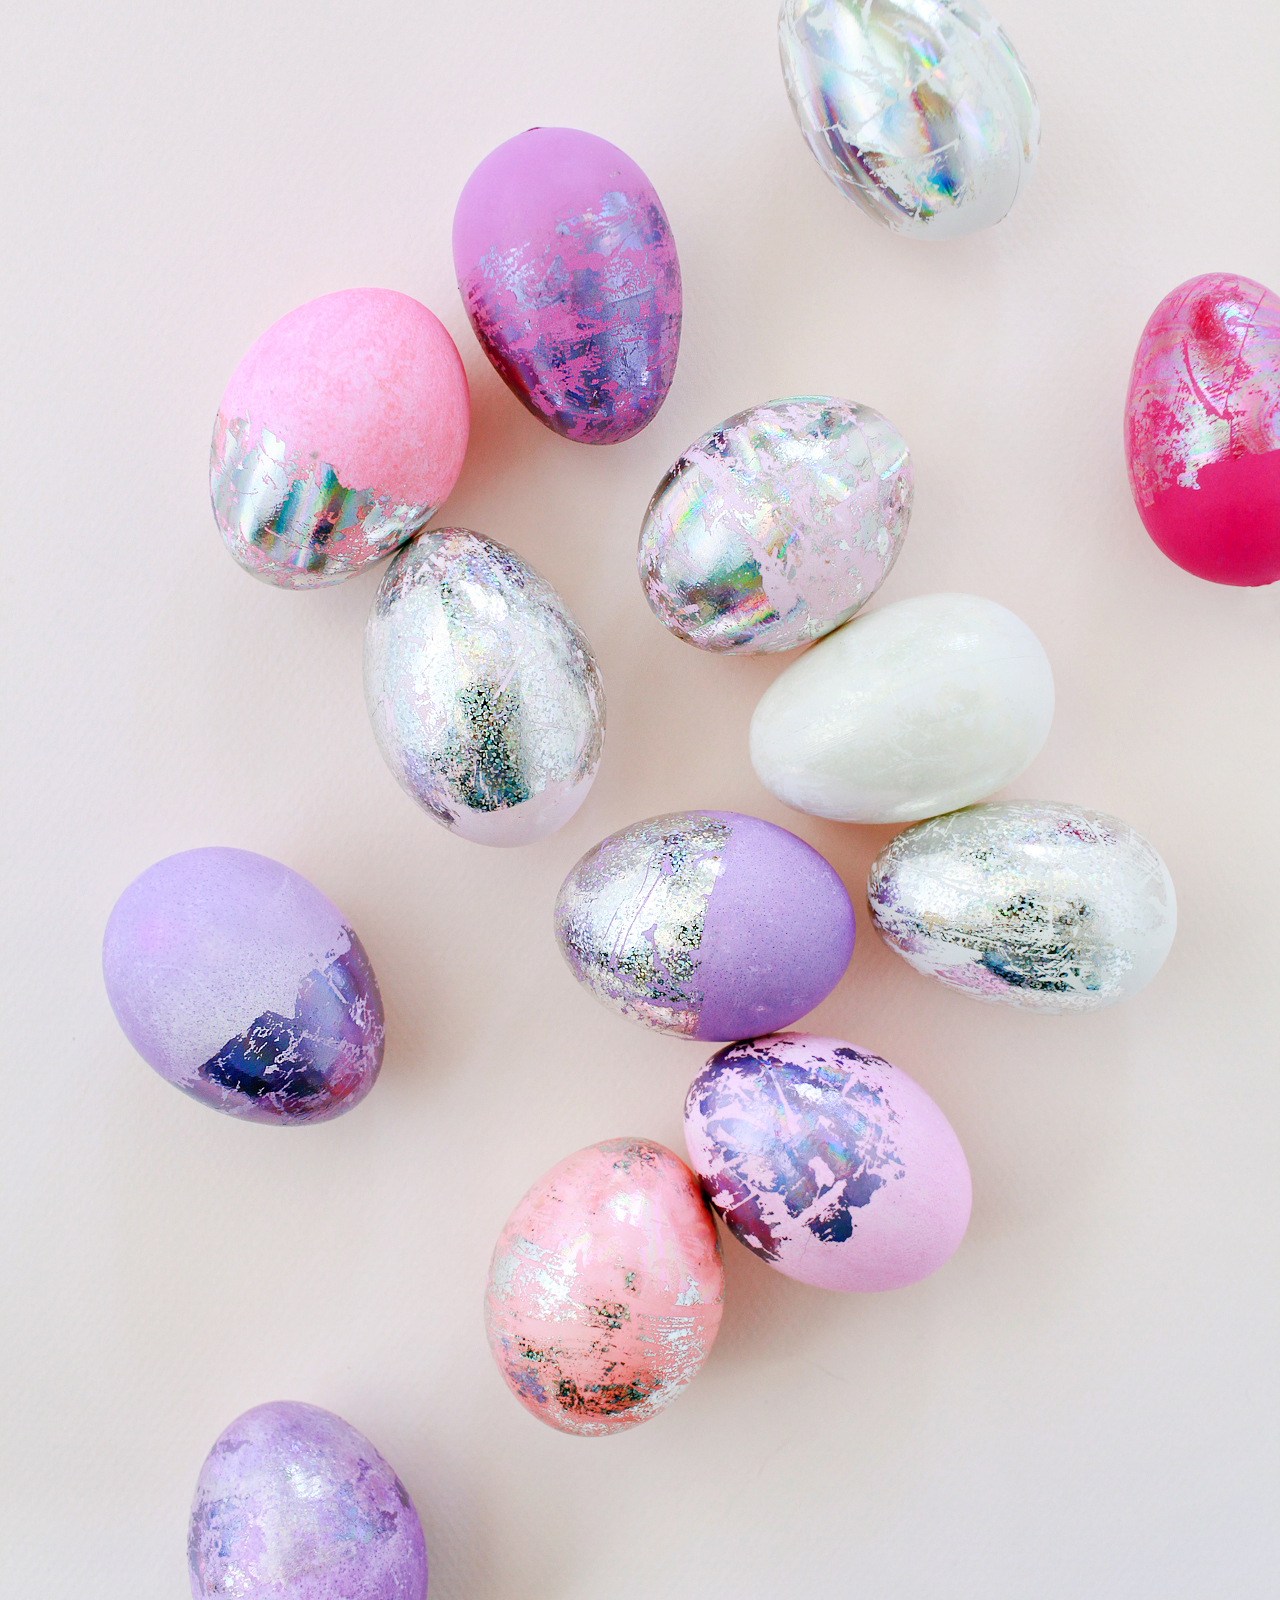
The silver spectrum and silver dots hologram foils are so much fun – and they look good on both white and colorful eggs! The opalescent foils are really subtle in person and look best on brighter or dark color eggs, but are just so gorgeous in person. And how pretty is that lavender (aka icy heather) hologram foil?? So many great color combinations, so little time!
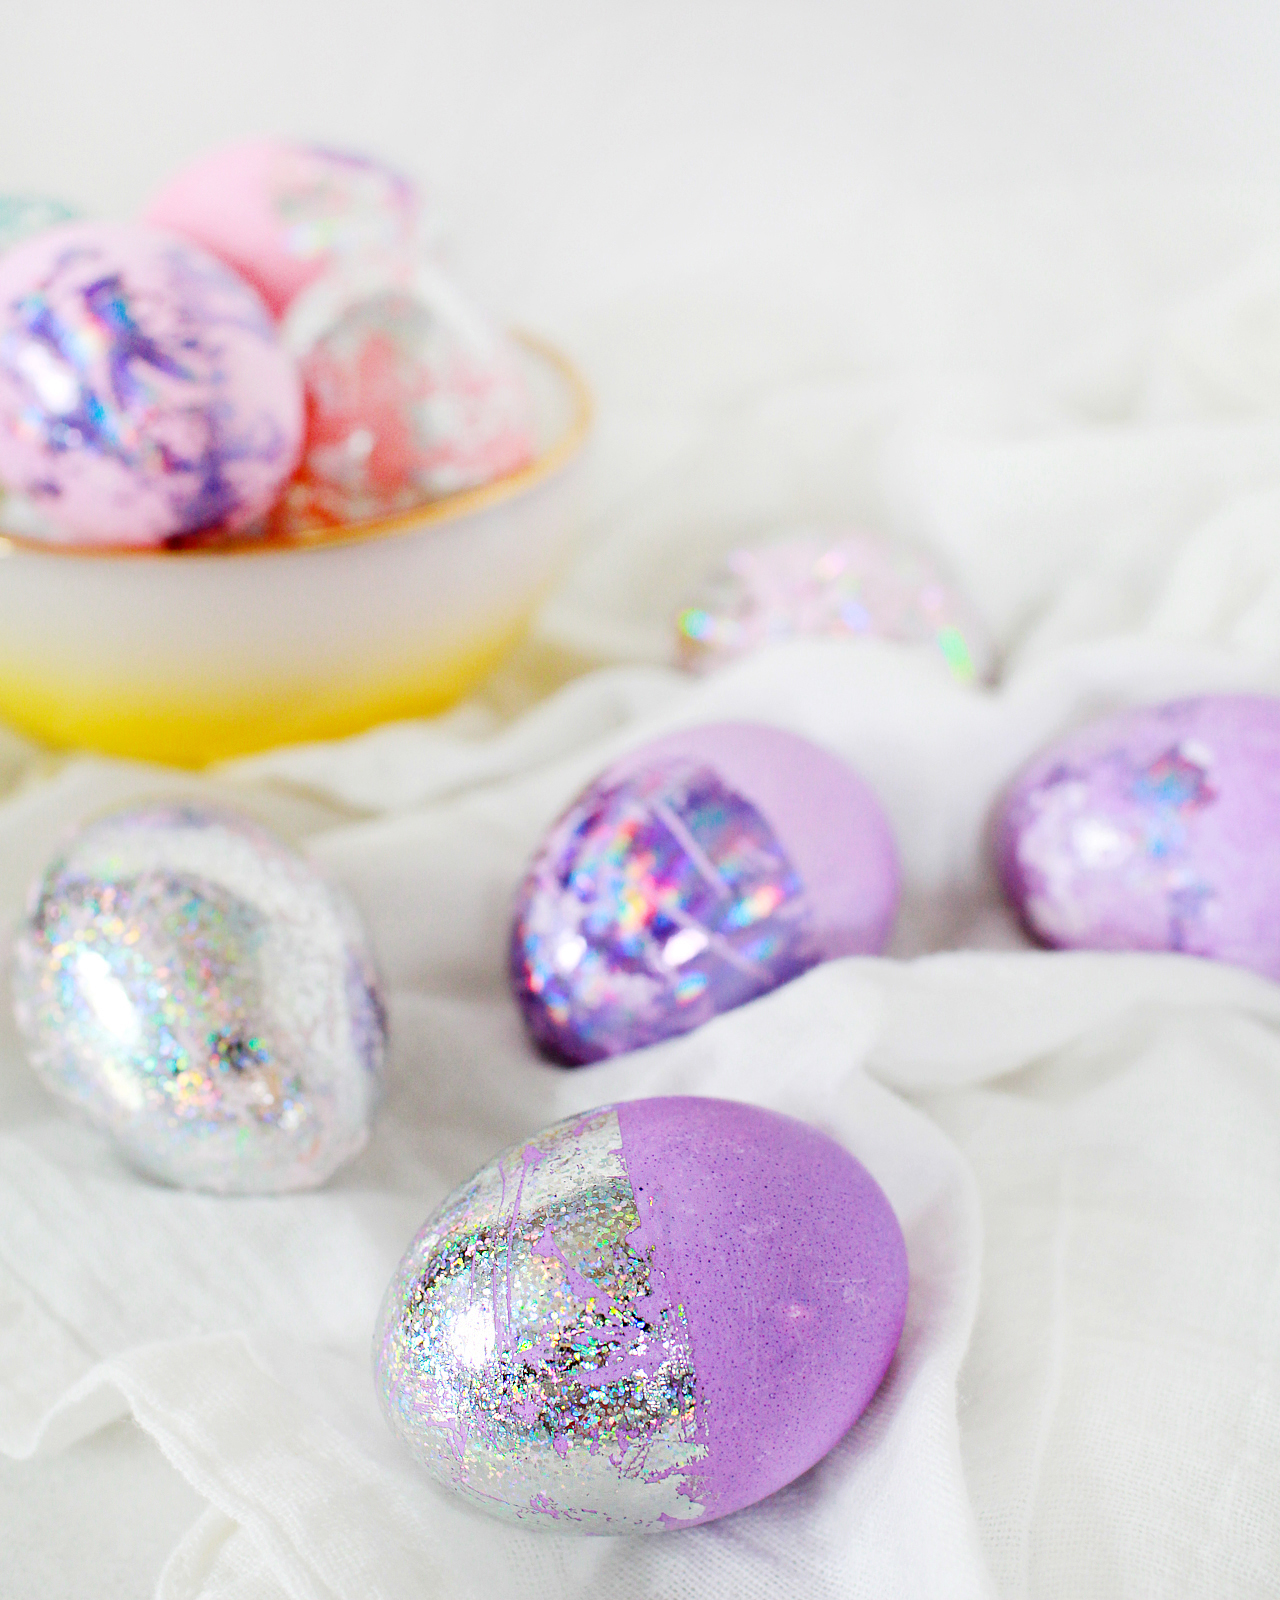
Sparkle! Rainbows! Gah, I just love these eggs SO much! But what do YOU think?? Will you be making holographic Easter eggs this year? If you do, be sure to share a photo on Instagram with the hashtag #madewithosbp so I can see it!
p.s. DIY painterly pink and gold Easter eggs and DIY tropical leaf Easter eggs
Photos by Nole Garey for Oh So Beautiful Paper
Very innovative concept for Easter eggs.