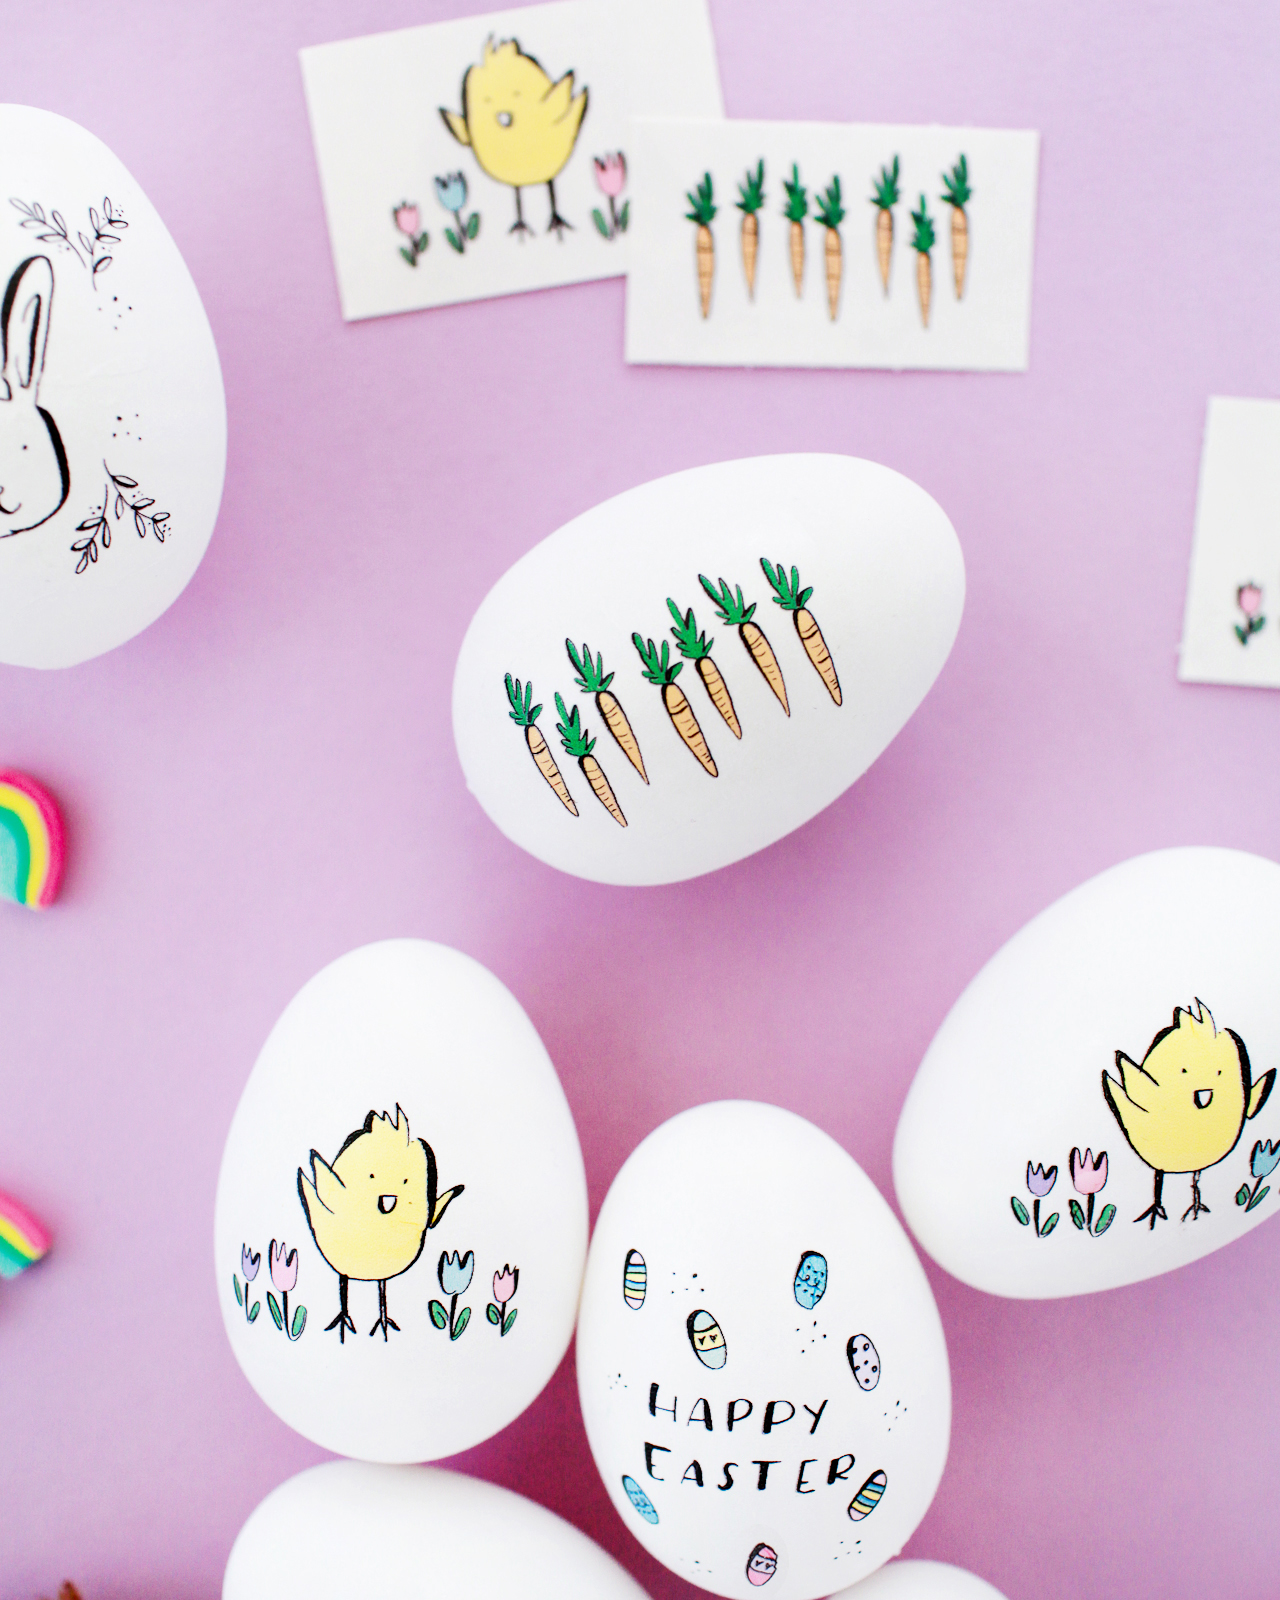
Today I’m sharing one final DIY Easter egg decorating idea – and this one involves temporary tattoos featuring illustrations by Courtney of Swiss Cottage Designs! These illustrations are so adorable I can’t even stand it. And the best part is that you can use ’em to decorate Easter eggs to your heart’s content, then use any leftovers as regular old temporary tattoos!
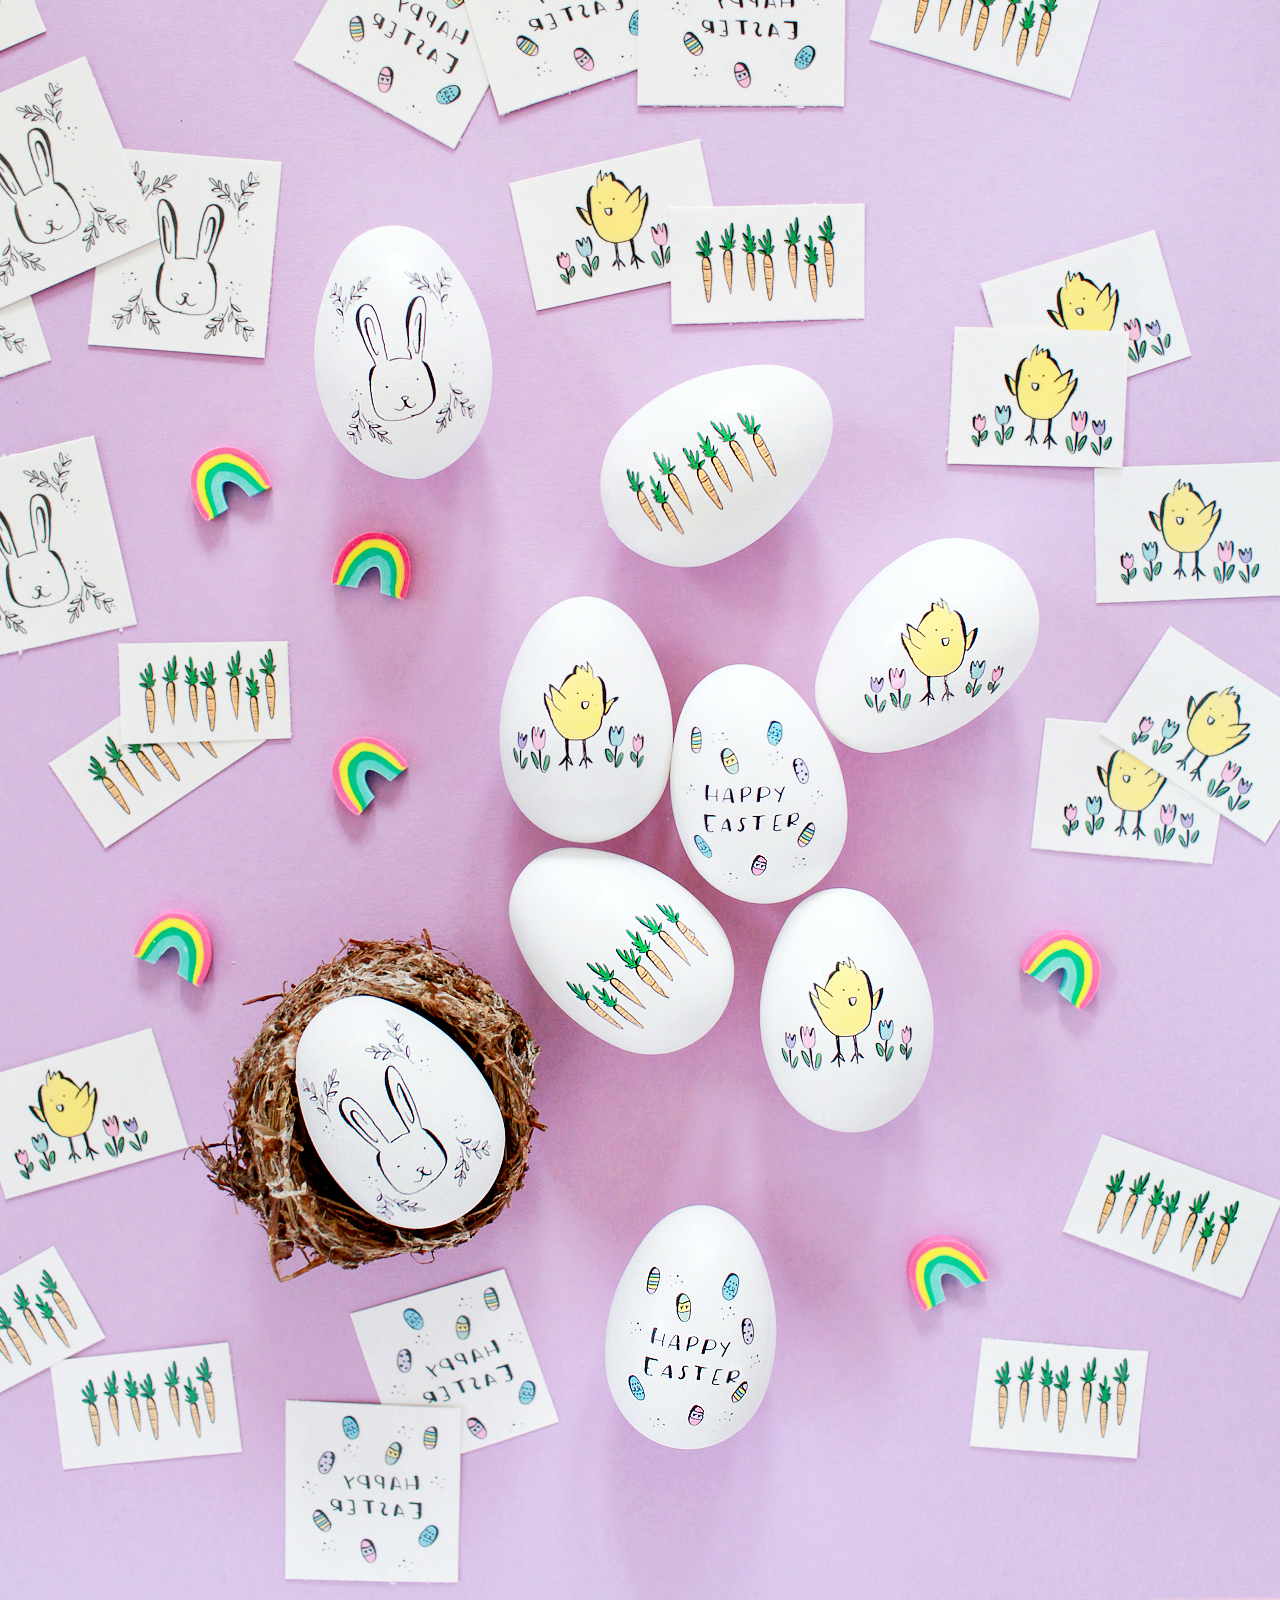
Every kid I know is obsessed with temporary tattoos (including my own kids), and it’s such a fun way to decorate Easter eggs. After making these tissue paper tropical leaf Easter eggs last year, I knew I wanted to give tattoo paper a try this year. I’ll also happily jump at any opportunity to team up with Courtney from Swiss Cottage Designs, and I absolutely love all the Easter-inspired illustrations she created for these tattoos. An adorable bunny! A sweet baby chick! Tiny Easter eggs! And the cutest little carrots I’ve ever seen. I couldn’t decide if I liked the color version or the black and white version of the illustrations better, so I decided to make them both available to all of you below. Let’s make some eggs!
Supplies
Hard boiled eggs*
Printable templates (we made two versions: color and black + white)
Ink jet printer
Scissors
Paper towels
Water
*A couple quick notes about the eggs: I personally love the idea of using plain white eggs for these temporary tattoos, but you can totally use them with pre-dyed eggs, too! The temporary tattoos work best on fully dry, room temperature eggs, so if you plan to dye your eggs first, just make sure you give them enough time to dry before applying the tattoos. Similarly, hard boiled eggs stored in the refrigerator may form condensation after they are first taken out of the fridge, which will prevent the tattoos from sticking to the eggs.

To make the DIY illustrated temporary tattoo Easter eggs:
Step 1. Print our templates (you can choose COLOR or BLACK + WHITE – or both!) onto temporary tattoo paper, and apply the clear adhesive liner according to the package instructions.
Step 2. Once the adhesive liner has been applied, use scissors or a paper trimmer to cut out the individual tattoos. Each sheet of tattoo paper yields 28 tattoos. I recommend cutting as close to the printed tattoo area as possible, which makes it a bit easier to apply the tattoos to the eggs.
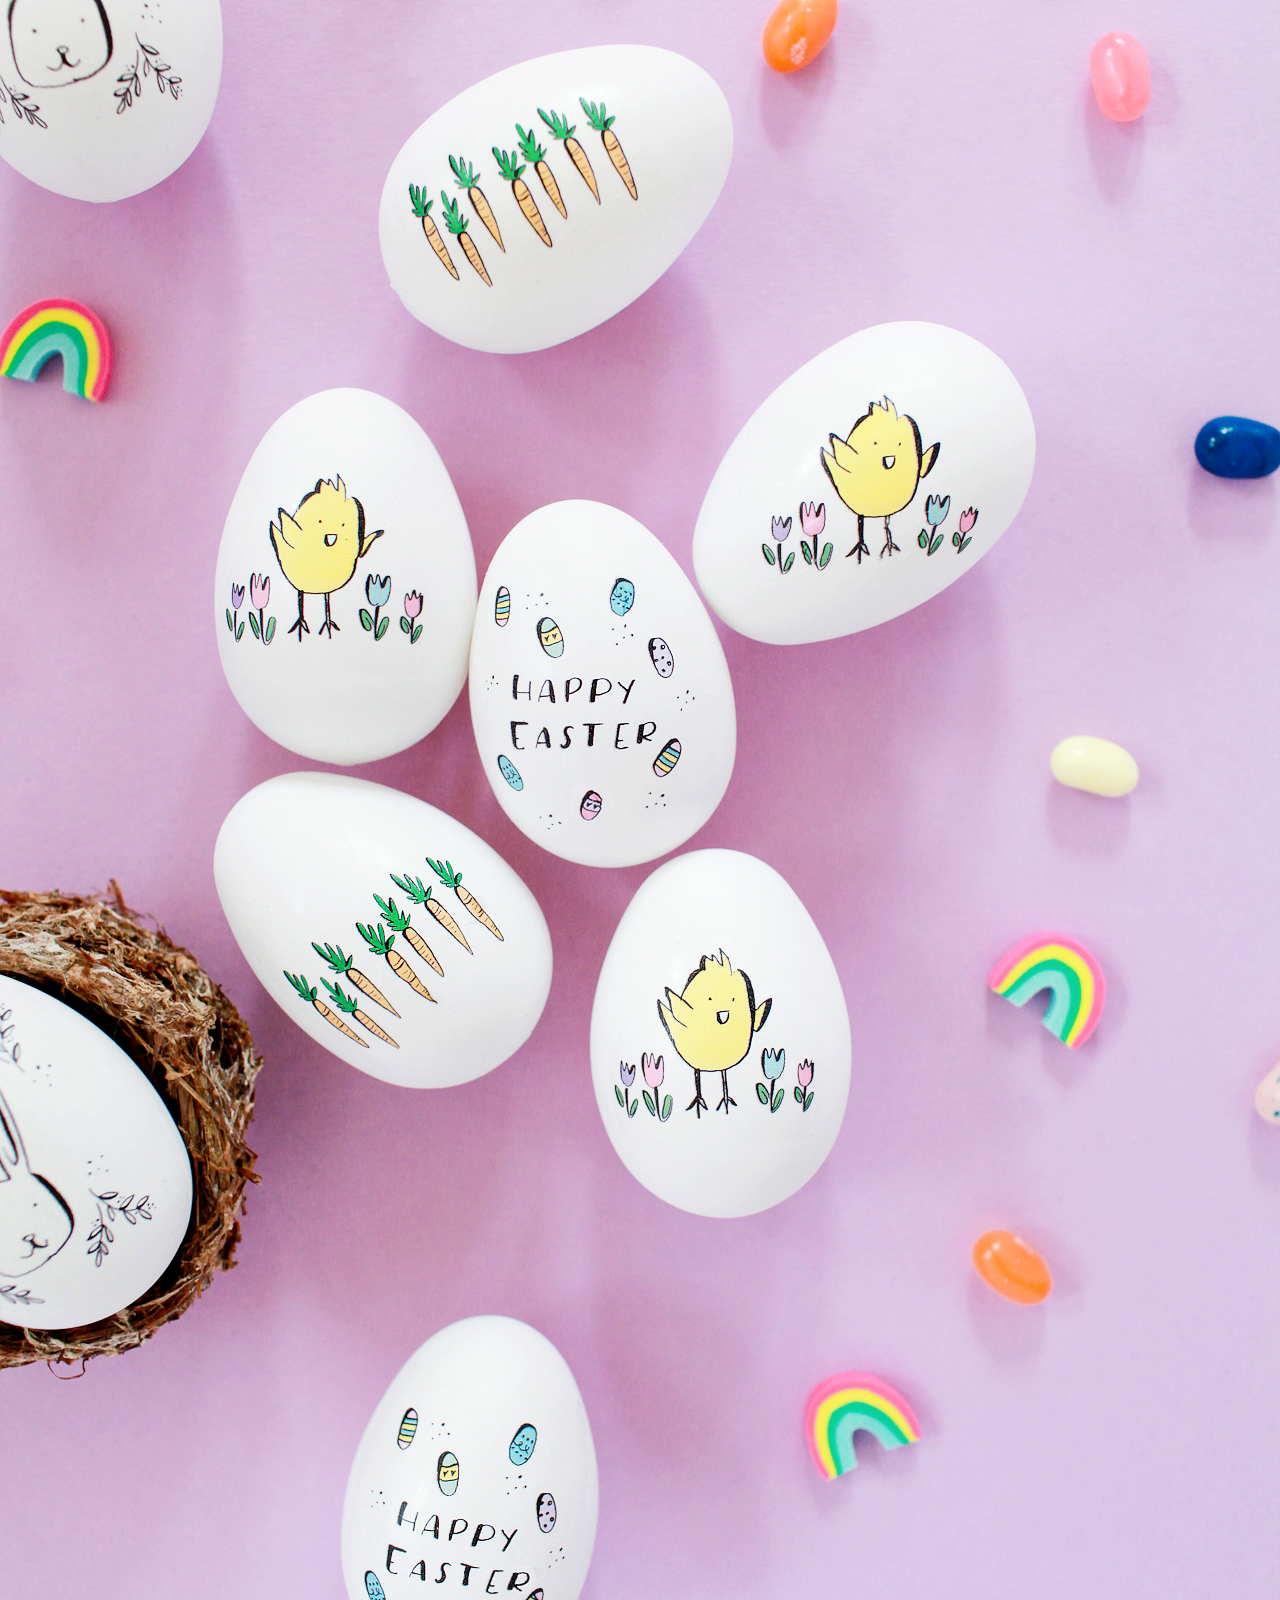
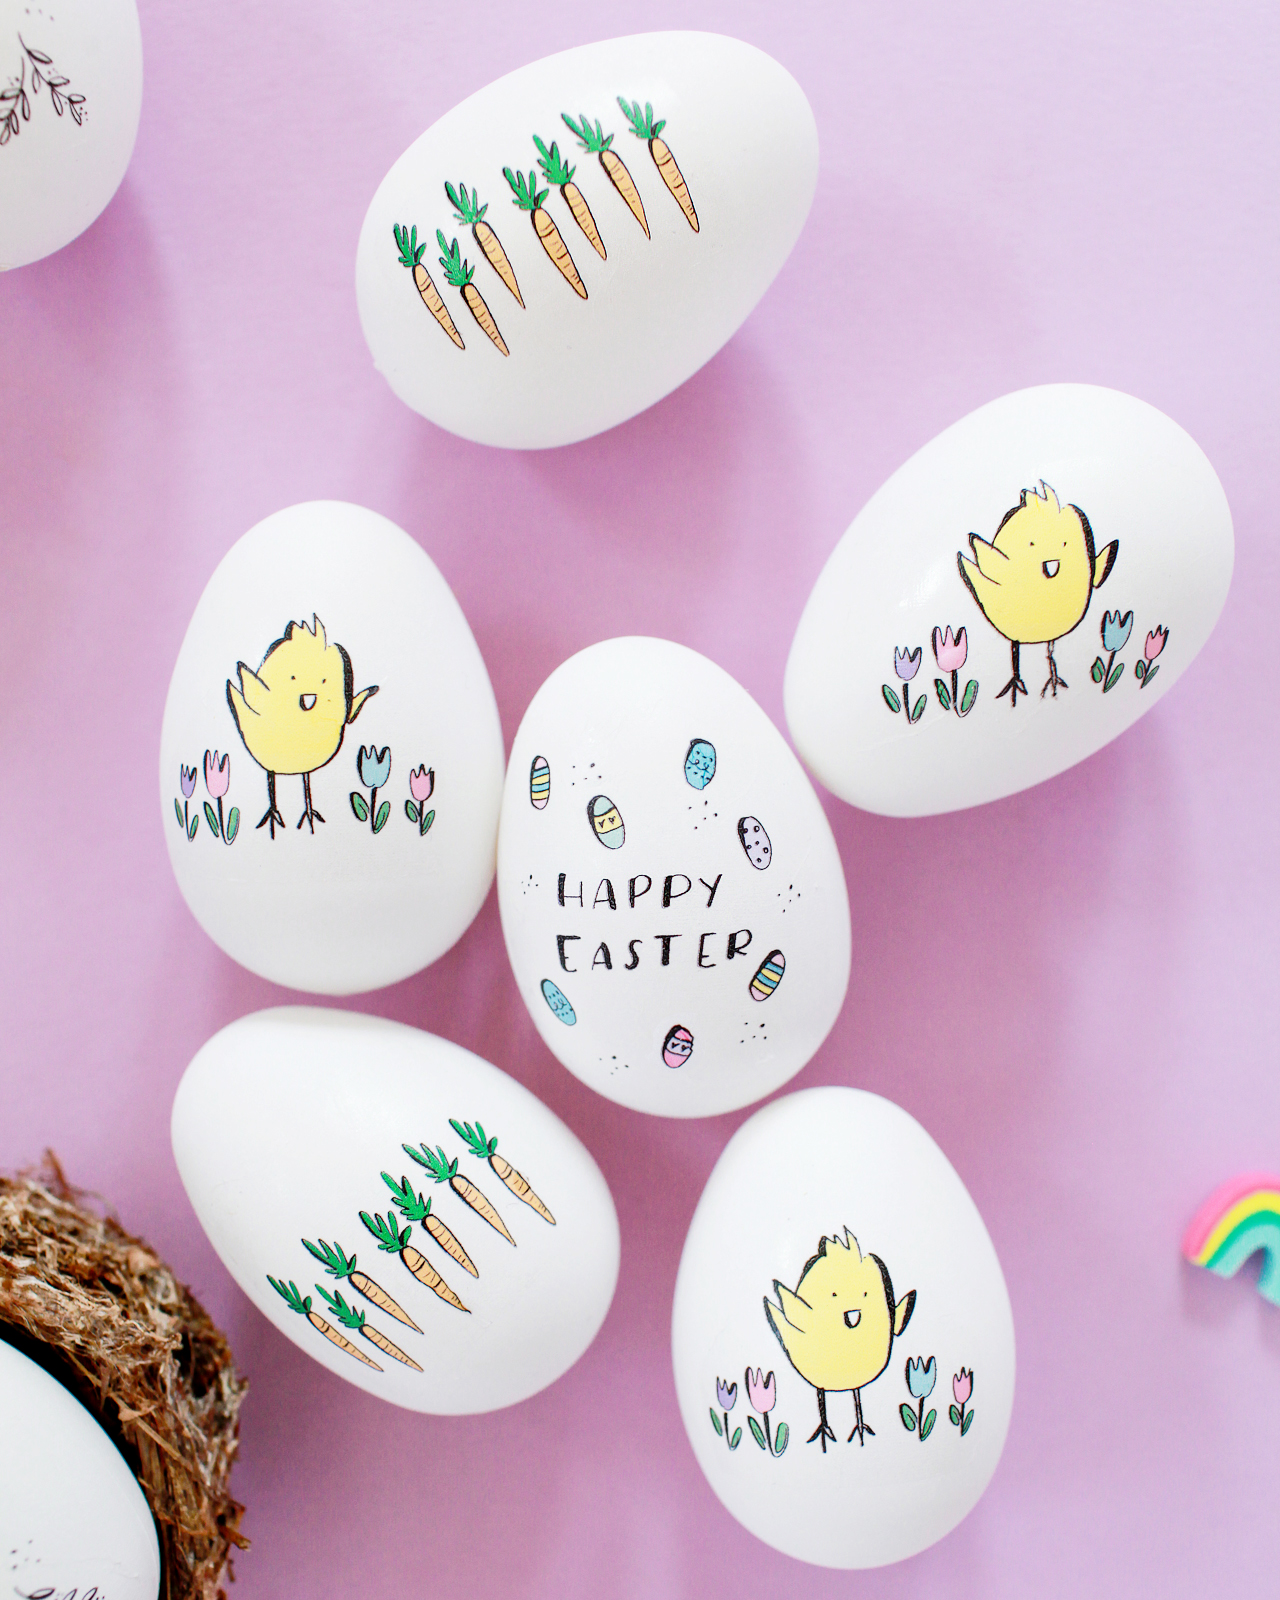
Step 3. Peel the clear liner off the tattoo paper and apply it to the egg sticky side down. Press a wet paper towel to the back of the tattoo, making sure that you cover the entire area of the tattoo, until the image is successfully transferred to the egg and the paper easily slides off. Continue applying tattoos to the remaining eggs. The entire process takes about 10-20 seconds per egg.
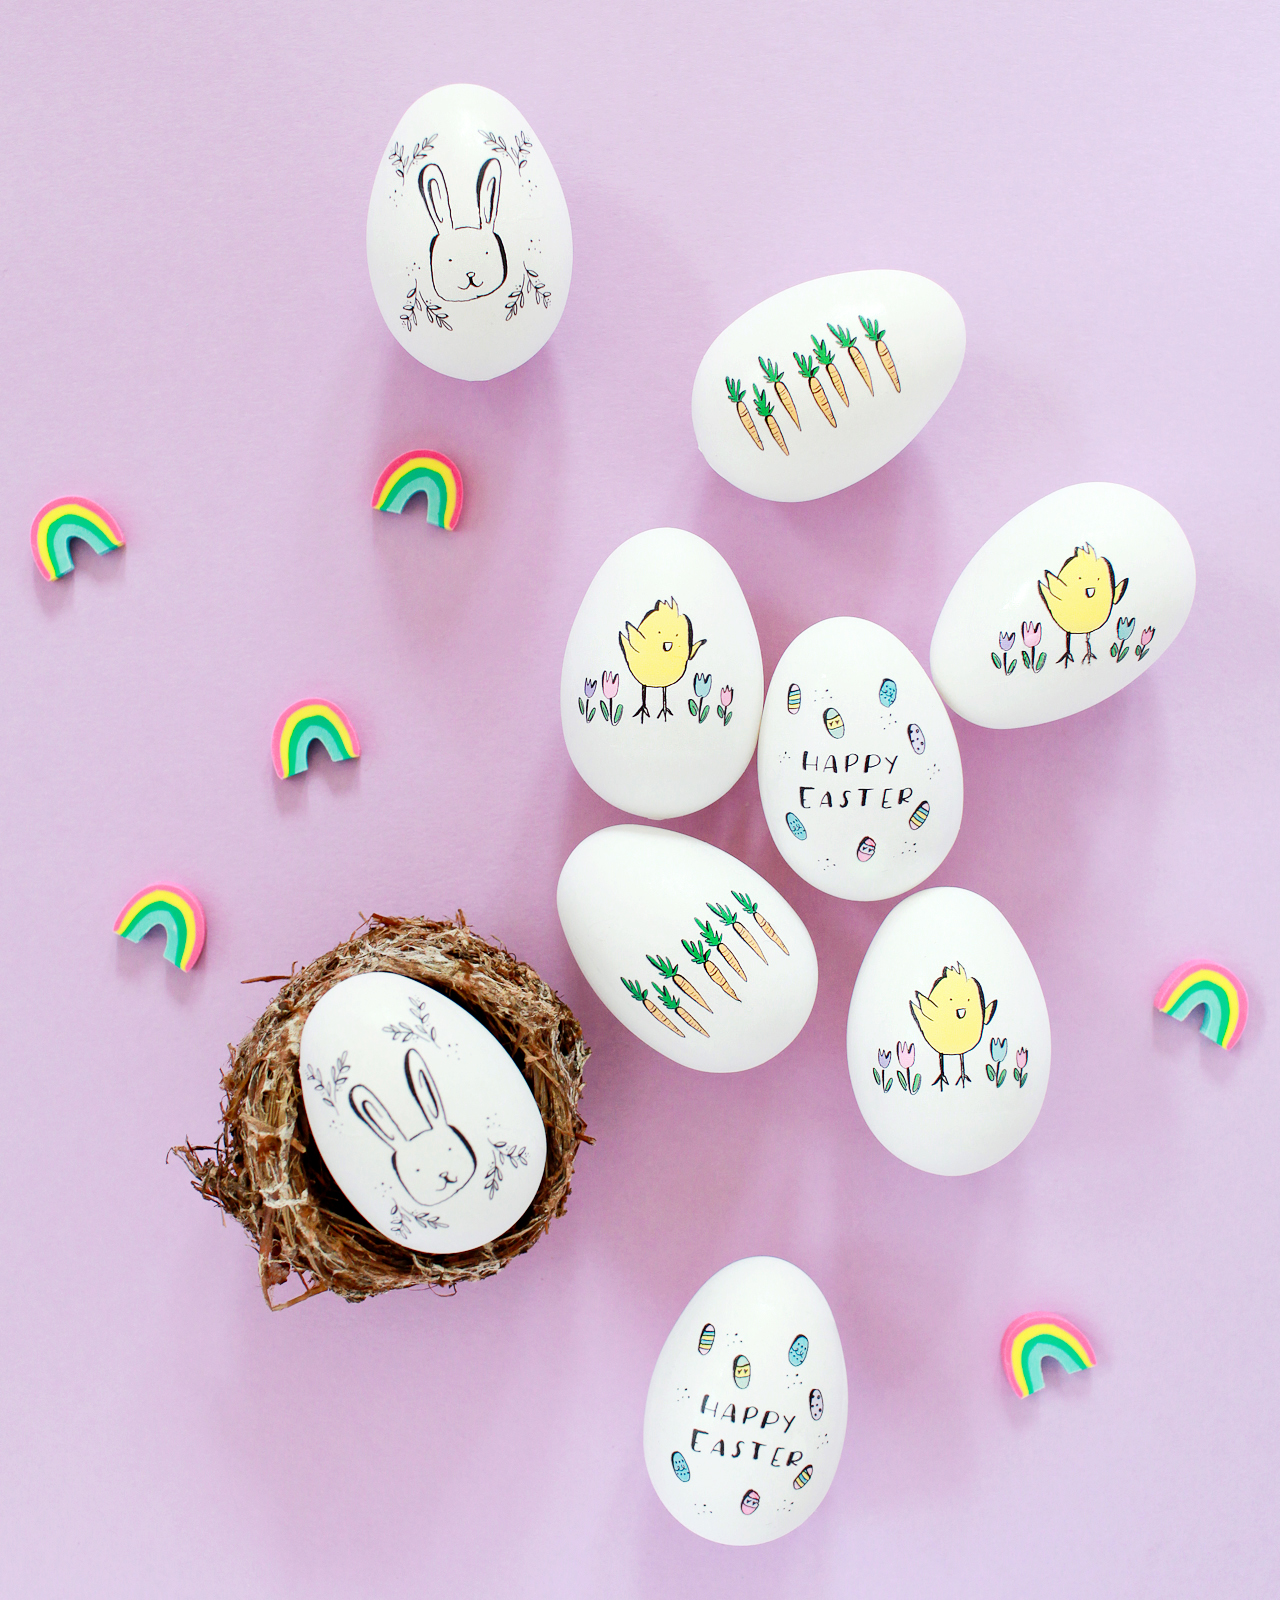

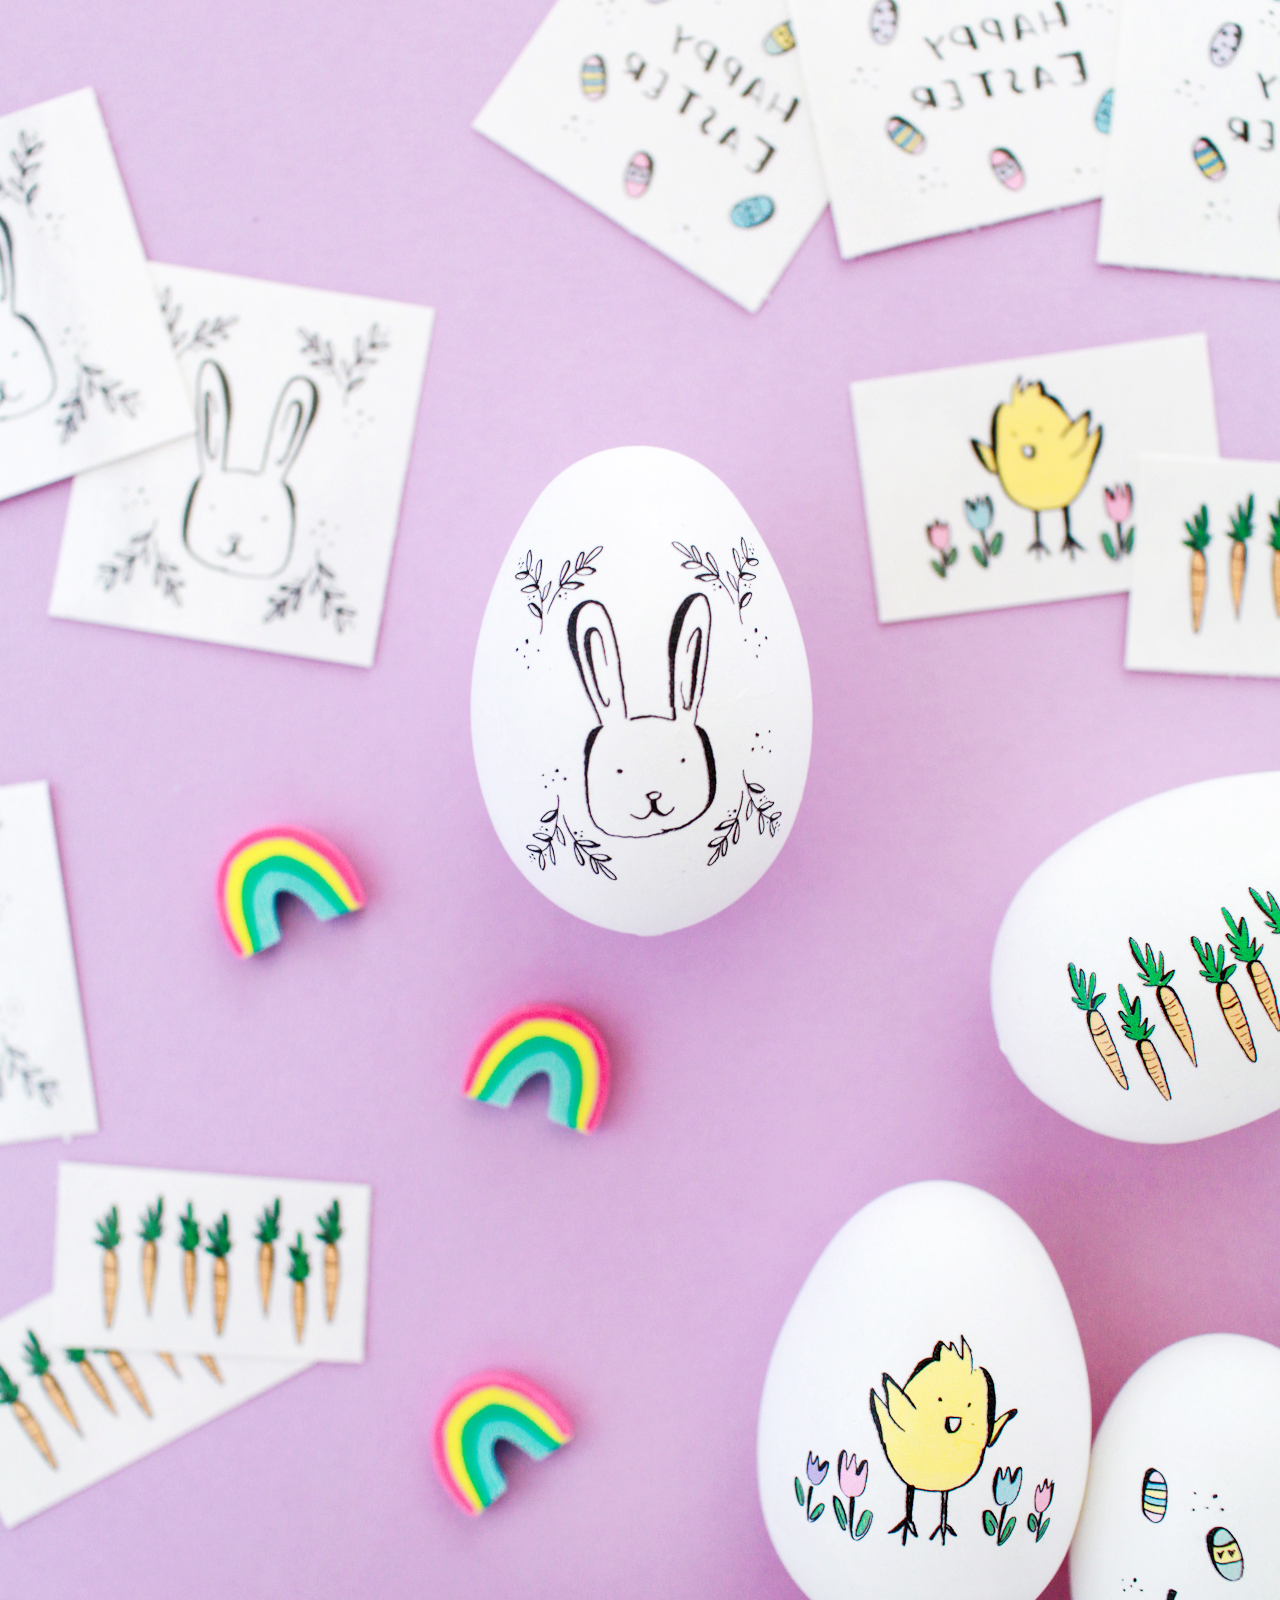
Aaaaaahhhh! So cute! I’m beyond obsessed with these adorable illustrations. And don’t worry – if you don’t have tattoo paper handy, you can still totally make these illustrated Easter eggs. Just follow this tutorial to print the designs onto a sheet of white tissue paper and apply them to hard boiled eggs using Mod Podge. It’s actually way easier than it sounds!

I hope you’ve enjoyed all of our Easter egg tutorials this year! If you make any of our eggs this year, please share photos on Instagram using the hashtag #madewithosbp so I can see them! And just in case you missed the previous ideas, here they are!
DIY marbled hologram “galaxy” Easter eggs
DIY hologram and iridescent glitter-dipped Easter eggs
All artwork © 2017 Swiss Cottage Designs created exclusively for Oh So Beautiful Paper. All artwork is made available for personal use only. By downloading the patterns you agree to the terms of use.
Photos by Nole Garey for Oh So Beautiful Paper