Best of 2013: Cocktails

It’s Friday – which means time for an end of the week Happy Hour! We’ve had so much fun coming up with cocktail recipes to share with you every week, from seasonally-inspired recipes to classic cocktails that you can enjoy year round. Here are a few of our favorite recipes from 2013!

OSBP-Cocktail-Recipe-The-Love-Letter

The Love Letter with Hibiscus-Infused Gin, Lemon Juice, and Grenadine

OSBP-Cocktail-Recipe-Pisco-Punch

Pisco Punch with Pisco, Lime Juice, and Pineapple-Infused Simple Syrup

OSBP-Signature-Cocktail-Recipe-Peach-Margarita

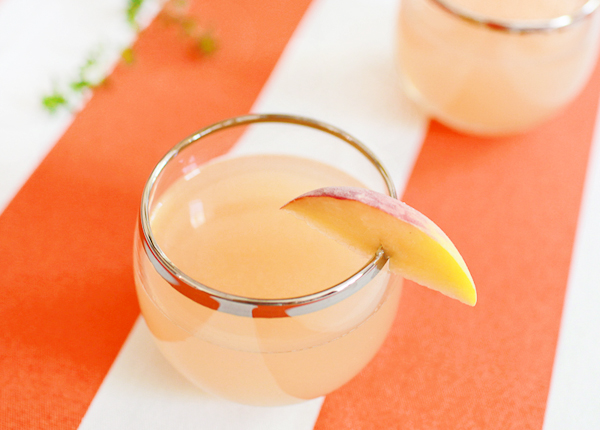
Peach Margarita with Tequila, Peach Liqueur, Lemon and Lime Juice, and Simple Syrup

OSBP-Signature-Cocktail-Recipe-Sunset-Mai-Tai

Sunset Mai Tai with Rum, Lime Juice, Triple Sec, Velvet Falernum, Orgeat Syrup, Grenadine, Angostura Bitters, and Mint

OSBP-Signature-Cocktail-Recipe-Summer-Rose

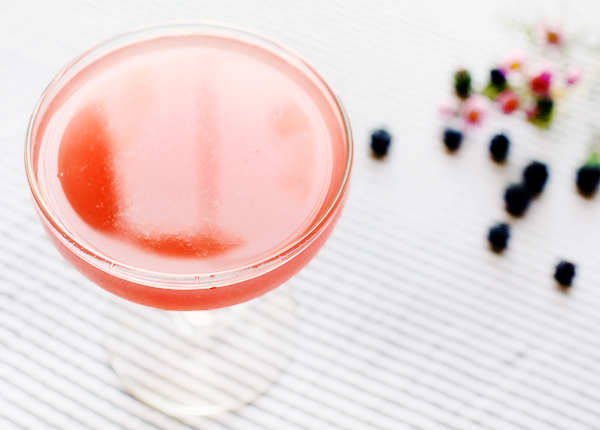
The Summer Rose with Gin, Lemon Juice, Lavender Simple Syrup, and Blueberries

OSBP-Signature-Cocktail-Recipe-Mai-Pen-Rai

The Mai Pen Rai with Batavia Arrak, St-Germain, Lemongrass Simple Syrup, Mint, and Soda Water

OSBP-Signature-Cocktail-Recipe-Left-Bank-Cider

Left Bank Cider with Dry Sherry, White Port, St-Germain, Apple Cider, and Lemon Juice

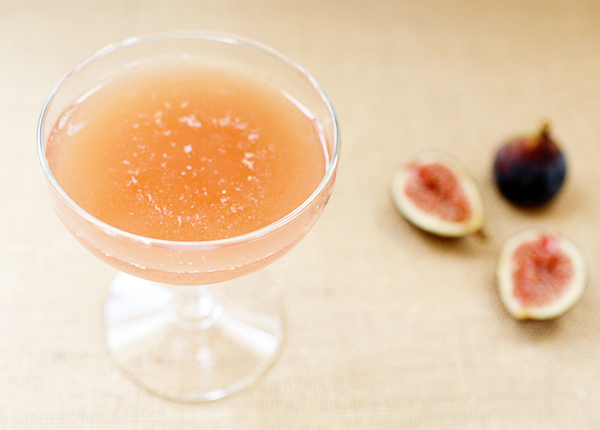
OSBP-Signature-Cocktail-Recipe-Raised-in-a-Red-Barn

Raised in a Red Barn with Bourbon, Sweet Vermouth, Lemon Juice, and Figs

OSBP-Signature-Cocktail-Recipe-Winter-Cobbler

Winter Cobbler with Bourbon, Dry Sherry, Cranberries, and Citrus

More cocktail recipes right here!

Best of 2013: Wedding Invitations

Another year is coming to a close – so in keeping with my annual tradition, it’s time to recap some of my favorite posts from the year that was. And today I’m starting with some of my very favorite wedding invitations from 2013!

Travel-Inspired-Wedding-Invitations-Ruby-the-Fox2

Charles + Sara’s Travel-Inspired Calligraphy Wedding Invitations by Ruby the Fox and Molly Jacques

Orange-Teal-Chevron-Stripe-Fabric-Pocket-Wedding-Invitation8

Janine + Craig’s Modern Fabric Pocket Wedding Invitations by Janine Rae Design and Boxcar Press

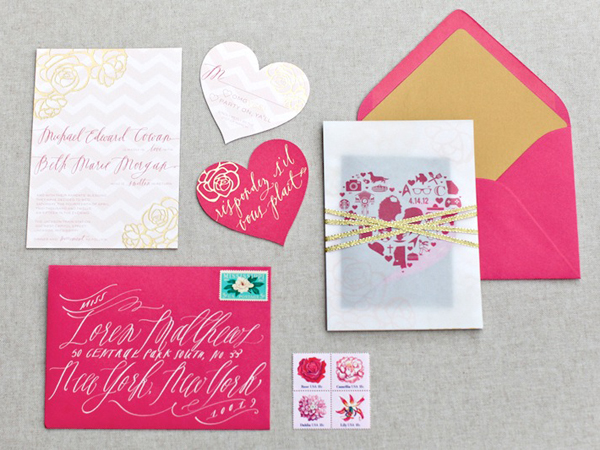
Pink-Gold-Foil-Heart-Wedding-Invitations-August-Blume

Michael + Beth’s Modern Pink and Gold Foil Wedding Invitations by August Blume

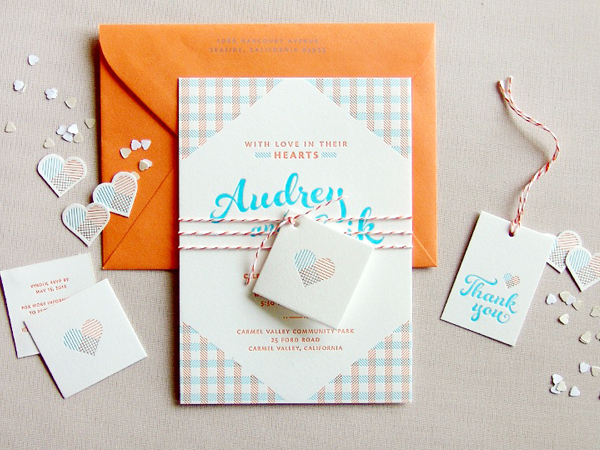
Orange-Blue-Letterpress-Overprint-Wedding-Invitations-Studio-SloMo

Audrey + Erik’s Gingham Overprint Wedding Invitations by Studio SloMo

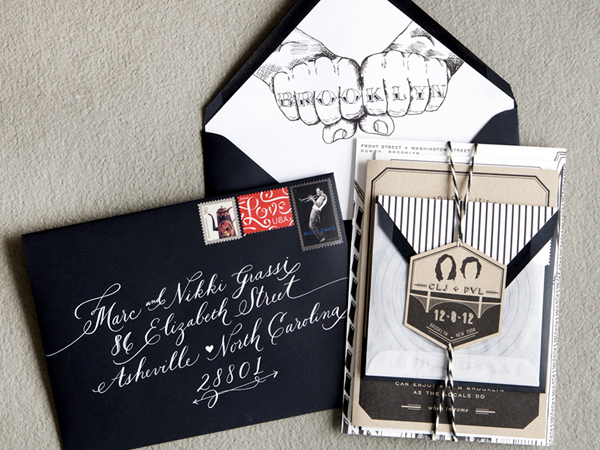
Brooklyn-Wedding-Invitations-Swiss-Cottage-Design2

Courtney + Paul’s Brooklyn Wedding Invitations by Swiss Cottage Designs

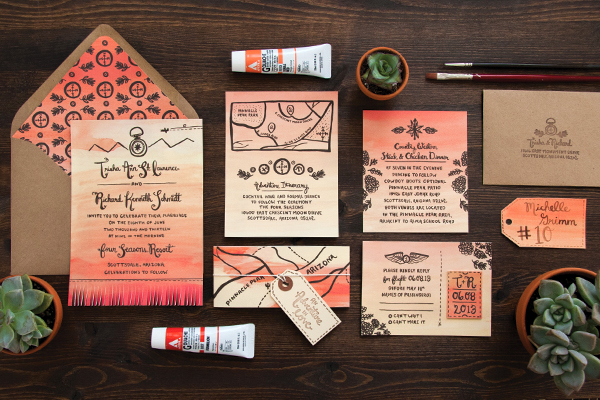
Arizona-Desert-Sunset-Wedding-Invitations-Lovely-Paper-Things

Trisha + Richard’s Arizona Sunset Wedding Invitations by Lovely Paper Things

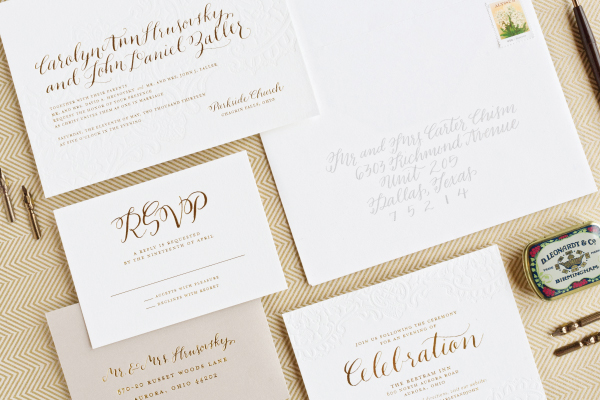
Gold-Foil-Calligraphy-Wedding-Invitations-Lauren-Chism-Fine-Papers

Carly + John’s Calligraphy Gold Foil Wedding Invitations by Lauren Chism Fine Papers

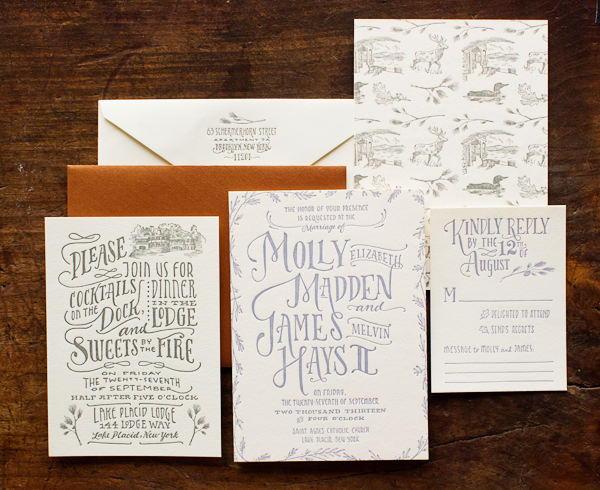
Woodland-Toile-Wedding-Invitations-Ladyfingers-Letterpress

James + Molly’s Woodland Toile Wedding Invitations by Ladyfingers Letterpress

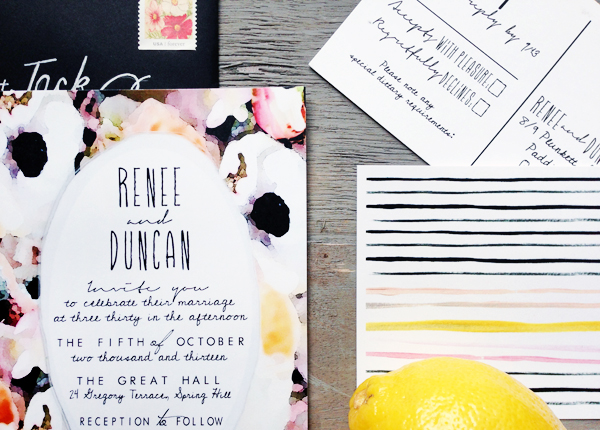
Watercolor-Flower-Stripes-Wedding-Invitations-Hoopla-Love3

Renee + Duncan’s Modern Floral Watercolor Wedding Invitations by Hoopla Love

Looking for more inspiration? Check out the real wedding invitations gallery right here!

Printable Pop Up Winter Forest Place Cards

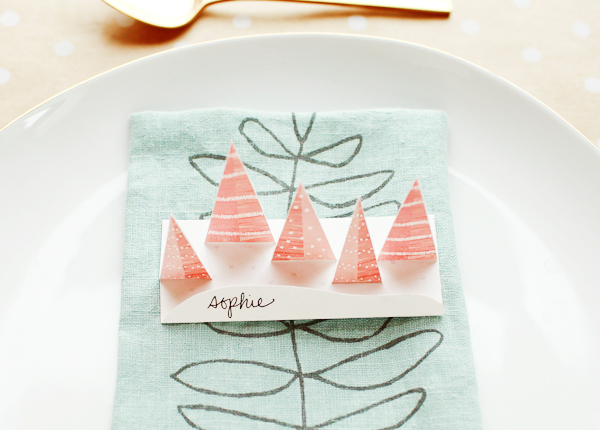
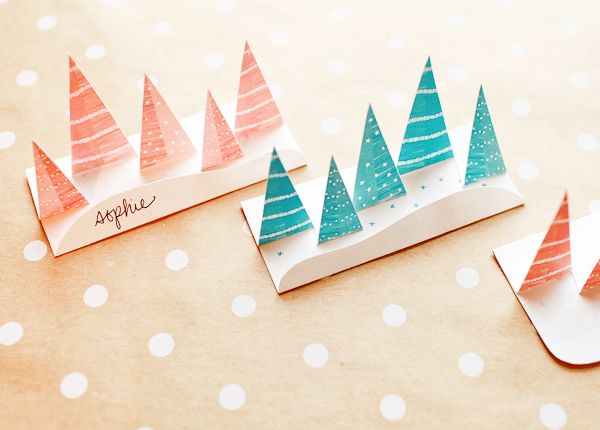
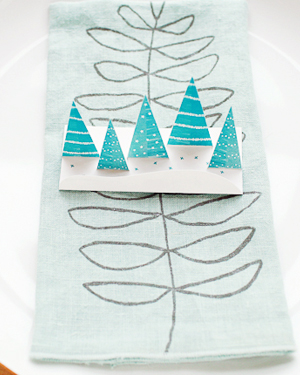
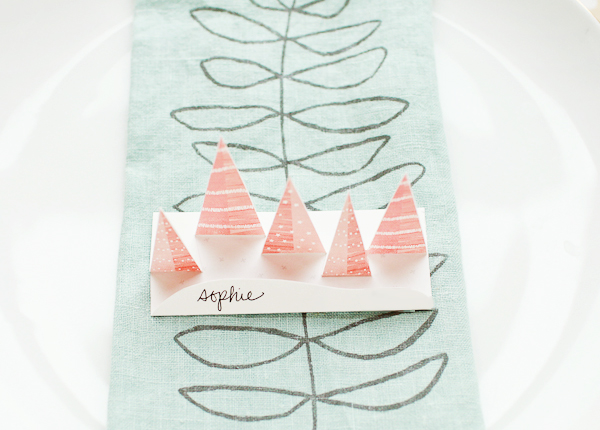
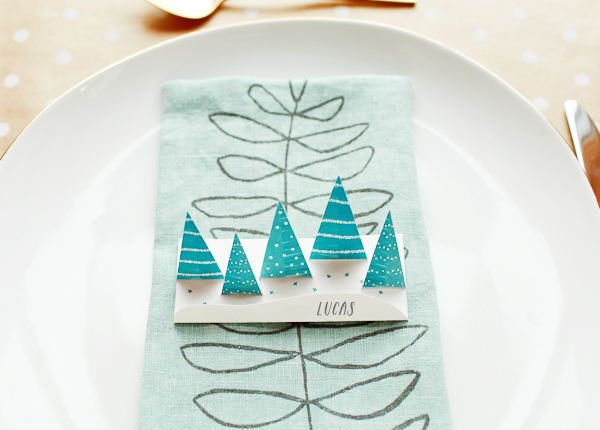
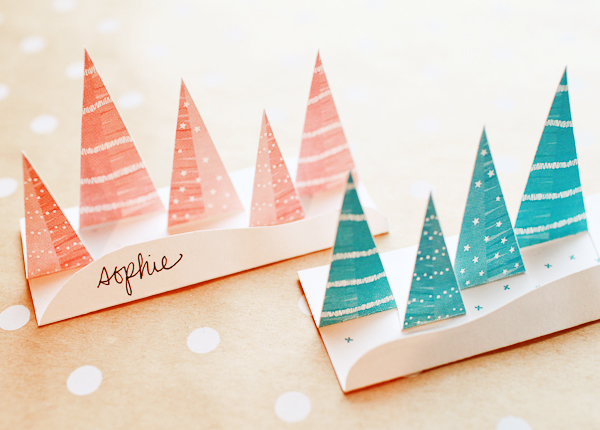
The wonderful team behind Caravan Shoppe is stopping by again today – this time with some really fun place cards to bring extra cheer to your holiday celebrations! Inspired by snowy winter trees, Alma at Caravan Shoppe designed these beautiful printable pop up forest place cards. The artwork is available in four colorways – green, pink, blue, and gray – so just pick your favorite, follow a few basic instructions, and you’ll have a fun addition for Christmas dinner!

OSBP-DIY-Pop-Up-Winter-Forest-Place-Cards-Caravan-Shoppe-41

OSBP-DIY-Pop-Up-Winter-Forest-Place-Cards-Caravan-Shoppe-54

OSBP-DIY-Pop-Up-Winter-Forest-Place-Cards-Caravan-Shoppe-27

Materials

White Cover Weight Paper or Cardstock

Scissors

Double Sided Tape or Glue

Bone Folder (optional)

OSBP-DIY-Pop-Up-Winter-Forest-Place-Cards-Caravan-Shoppe-2OSBP-DIY-Pop-Up-Winter-Forest-Place-Cards-Caravan-Shoppe-7

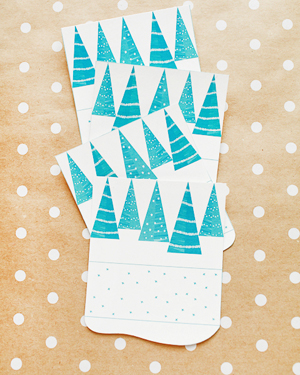
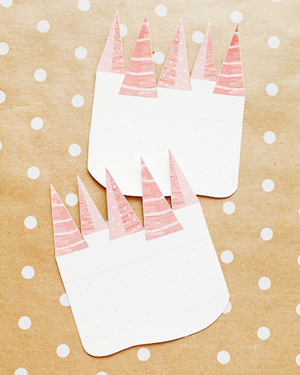
Step 1: Print out the place cards in your chosen colorway, then cut out each card along the blue outline.

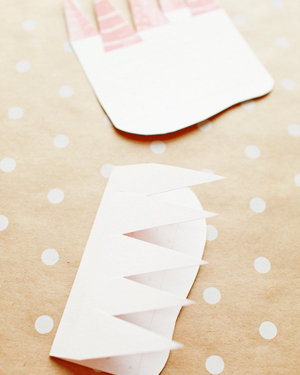
Step 2: Cut out the white space between each tree. Be sure to cut a line down to the base of each tree – you’ll use those when folding later!

OSBP-DIY-Pop-Up-Winter-Forest-Place-Cards-Caravan-Shoppe-13OSBP-DIY-Pop-Up-Winter-Forest-Place-Cards-Caravan-Shoppe-15

Step 3: Fold each card at the middle blue line. Depending on the thickness of your paper or cardstock, you may want to use a bone folder and ruler to score the lines at each folding point (optional).

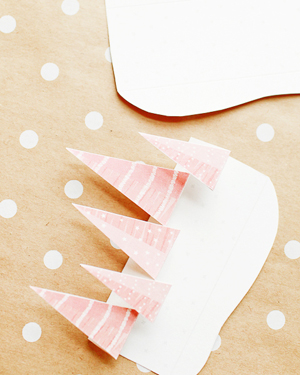
Step 4: Fold each tree backwards along the base.

OSBP-DIY-Pop-Up-Winter-Forest-Place-Cards-Caravan-Shoppe-24OSBP-DIY-Pop-Up-Winter-Forest-Place-Cards-Caravan-Shoppe-57

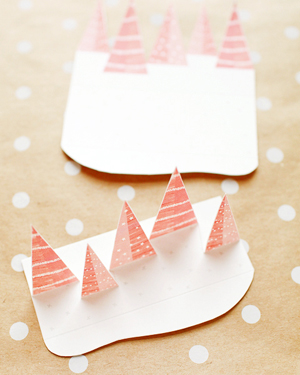
Step 5. Use glue or double sided tape to secure the underside of each tree to the place card base.

Step 6. Fold the snow line up.

OSBP-DIY-Pop-Up-Winter-Forest-Place-Cards-Caravan-Shoppe-40

Step 7: Write a name in the snow area, and you’re done!

OSBP-DIY-Pop-Up-Winter-Forest-Place-Cards-Caravan-Shoppe-37

OSBP-DIY-Pop-Up-Winter-Forest-Place-Cards-Caravan-Shoppe-56

Thanks so much Alma!

Click here to download the files!

Artwork copyright Caravan Shoppe, created exclusively for Oh So Beautiful Paper. All artwork is for personal use only. Caravan Shoppe specializes in printable digital downloads – from calendars to prints to holiday goods. They have some wonderful Christmas products right here!

Photo Credits: Nole Garey for Oh So Beautiful Paper

DIY Hand Painted Envelopes

We all love to dress up our envelopes with beautiful postage stamps, gorgeous calligraphy, and pretty address labels. But what about cards (and envelopes) delivered in person? I always try to personalize the front of my hand delivered envelopes, whether it’s a simple hand drawn border or a pretty flourish around the recipients’ names. This week I thought I’d share a few of the ways I’m personalizing my hand delivered holiday cards, although you can totally use these ideas year round. These aren’t really tutorials – just a few ideas that I wanted to share. Today we’re starting with my favorite idea: hand painted envelopes!
OSBP-DIY-Tutorial-Painted-Envelopes-6

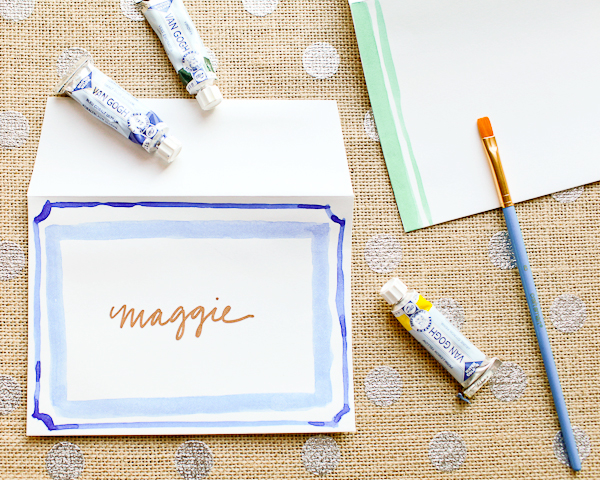
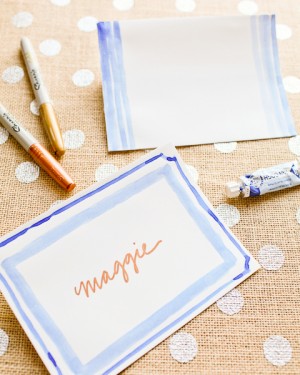
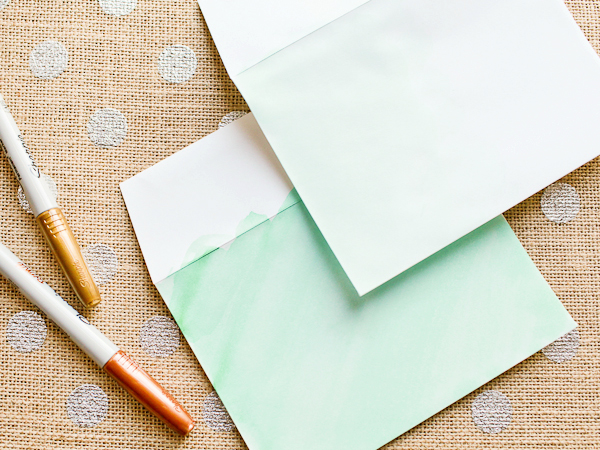
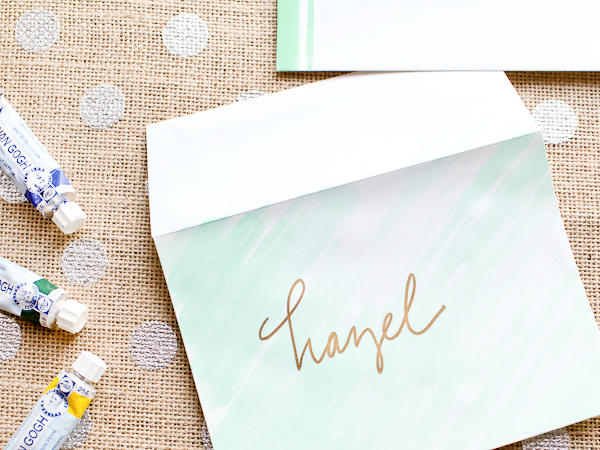
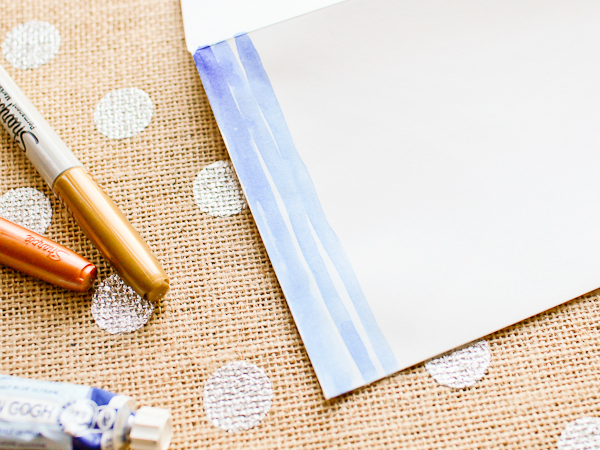
Watercolor paints are one of my favorite ways to dress up light color envelopes – the pattern options are endless! I’m partial to stripes and line borders, but you can also create a watercolor wash by using more water to dilute your chosen color. For this example, I used a deep cobalt blue and emerald green on Mohawk Superfine White envelopes.
OSBP-DIY-Tutorial-Painted-Envelopes-55OSBP-DIY-Tutorial-Painted-Envelopes-45

OSBP-DIY-Tutorial-Painted-Envelopes-54

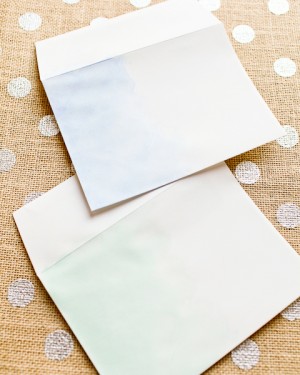
You’ll probably want to play around with colors and patterns on some scrap paper before moving on to your envelopes. Normally, watercolors would be used on super thick paper, so depending on your particular envelopes there will most likely be some warping/wrinkling in the paper. I’m not bothered by this, but just make sure that the envelopes are completely dry before you insert your card or address the finished envelope.
OSBP-DIY-Tutorial-Painted-Envelopes-46

OSBP-DIY-Tutorial-Painted-Envelopes-16

OSBP-DIY-Tutorial-Painted-Envelopes-26

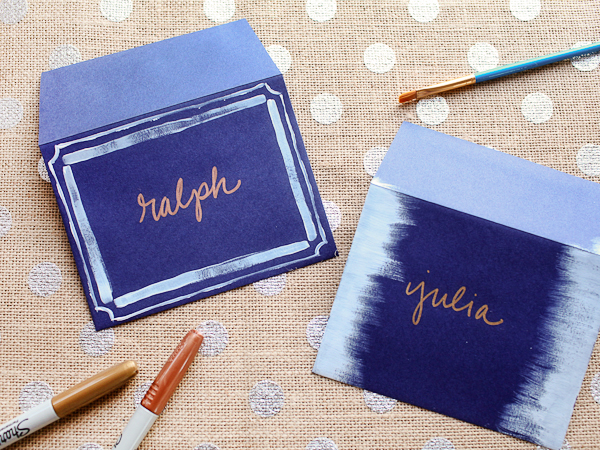
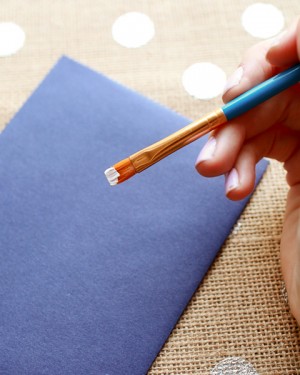
For darker envelopes, I like to use opaque acrylic paint for a fun light-on-dark effect. Here I used white acrylic paint on Mohawk antique vellum envelopes (in Iris) paired with my favorite gold and copper metallic Sharpie markers.
OSBP-DIY-Tutorial-Painted-Envelopes-29OSBP-DIY-Tutorial-Painted-Envelopes-40

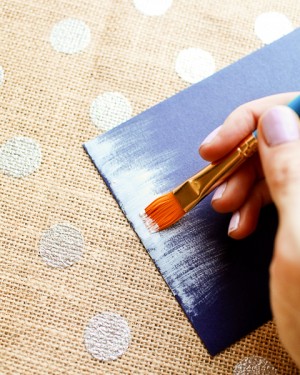
To create a dry brush effect along the edge, simply start out with a small amount of paint on the edge of your brush. Too much paint, and you’ll loose the feathery texture. Starting at the top left corner of your envelope, paint a horizontal stroke – moving in a single motion until your brush runs out of paint. Repeat down each side of the envelope. Let dry, then write the name of your recipient on the envelope!
OSBP-DIY-Tutorial-Painted-Envelopes-31

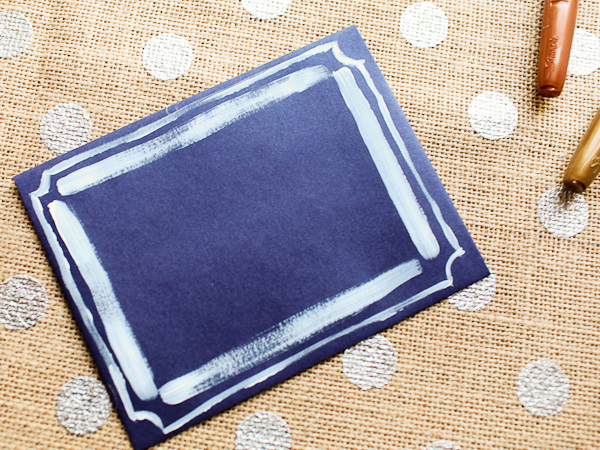
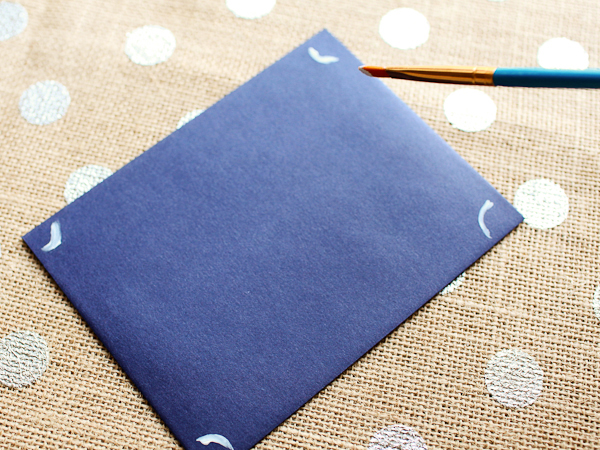
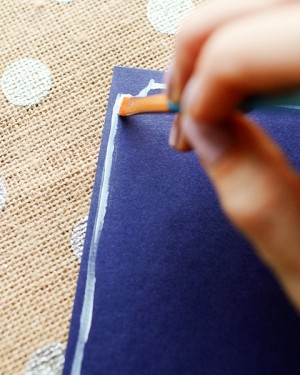
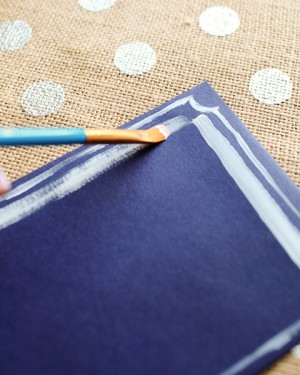
For the border effect, I like to start with the small curves in each corner to serve as guides. Then draw lines to connect the ends of each curve. I used the flat edge of my brush for the outer frame to achieve a thinner line, then switched to the broad edge of the brush for a thicker inner frame. Don’t worry about painting perfectly straight lines – any wobbly lines or changes in texture will only add to the hand painted charm. Let dry, then write in the name of your recipient – and done!
OSBP-DIY-Tutorial-Painted-Envelopes-32OSBP-DIY-Tutorial-Painted-Envelopes-34

OSBP-DIY-Tutorial-Painted-Envelopes-38

I’ll be back with a couple more ideas later in the week!

Photo Credits: Nole Garey for Oh So Beautiful Paper
2013 Gift Guide: Designers + Calligraphers

Our next gift guide was inspired by a very sweet husband looking for ideas for his graphic designer (and aspiring hand lettering artist) wife. I turned to some friends, including Christine from Yellow Owl Workshop, Michele from Meant to Be Calligraphy, Courtney from Swiss Cottage Designs, Arley-Rose and Morgan from Ladyfingers Letterpress, and Liz from Linda & Harriett, for their recommendations. So whether you’re in the same predicament, looking for someone who dabbles in design or calligraphy, or just want to forward this post to your significant other – here are a few gift ideas!

 OSBP-2013-Gift-Guide-Design-Enthusiast

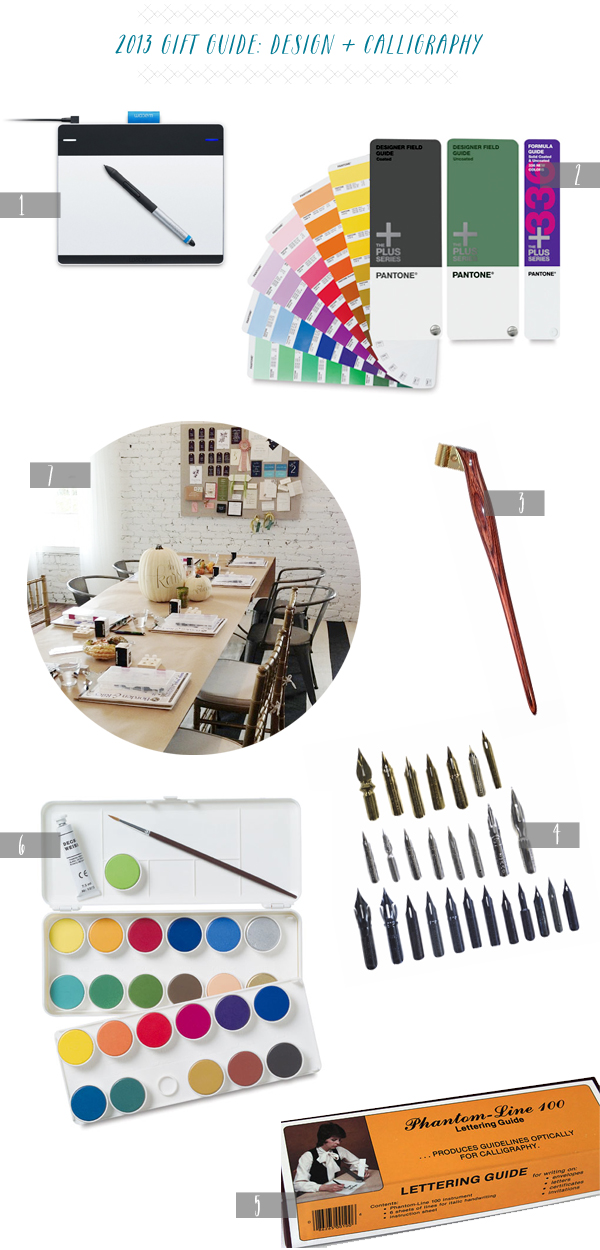
1. Wacom Tablet; 2. Pantone Guide Book; 3. Oblique Calligraphy Pen Holder; 4. Copperplate Nib Sampler; 5. Phantom Line Lettering Guide (found one on ebay here!); 6. Watercolor Set (and small pads of watercolor paper); 7. Calligraphy + Letterpress Classes (like this class from Meant to Be Calligraphy)

OSBP-2013-Gift-Guide-Design-Enthusiast-Part2

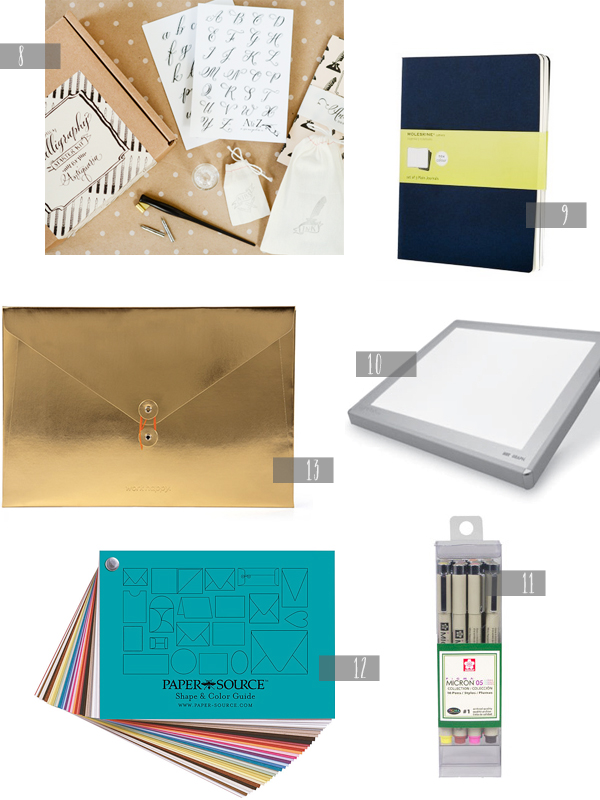
8. Calligraphy Starter Kit; 9. Moleskine Notebooks; 10. Calligraphy Light Box; 11. Micron Pens and black Uniball Pens; 12. Paper Source Swatch Book; 13. Poppin Metallic Folio

2 + 12 Pantone guide book + swatch books! Both essential tools for any artist, but also a great source of inspiration! The ladies of Ladyfingers Letterpress also recommend Soho Paper, French Paper Co., and Cards and Pockets.
5 + 10 Arley-Rose from Ladyfingers Letterpress also recommended a vintage tool called the Phantom Line Lettering Guide that projects guidelines onto a page, although you’ll have to do some digging to find one. Alternatively, a light box is an essential tool for any aspiring or hobbyist calligraphers!

7 + 8 Classes are such a great way to both learn and connect with fellow designers and calligraphy enthusiasts in your area! I’ve listed some DC-area classes here, but look for letterpress workshops and calligraphy classes in your area or even explore online classes. But if you really can’t find a class that works, a calligraphy starter kit makes a wonderful gift.

13 Pretty office supplies! Because really, nothing is more of a bummer for creative energy than sad pocket folders and organization supplies. Courtney from Swiss Cottage Designs and I are both loving all the colorful office supplies from Poppin these days!

A couple of additional ideas from Courtney: consider treating your significant other to their very own business cards, perhaps with a gift certificate to their favorite printer. Or track down a web developer who can help build a website or blog. These two investments are particularly big deals for any designers that might just be starting out, and any little help towards both projects can mean the world to a growing business!

{images via their respective sources}