Happy Weekend!

Happy Friday everyone! So, apparently I’m a wee bit crazy, because I decided that the last couple of weeks before Christmas was just the perfect time to completely gut and renovate the only full bathroom in our house. Ha! Actually, our contractor just happened to have an opening in his schedule (we’d been on the waiting list for 5 months), so I decided to just go for it. I’ve absolutely loathed our bathroom from the very first time we ever looked at our house, so I’m super excited to see it go – even if our house is a complete disaster zone at the moment. Our contractor is doing all the demo and pre-tile prep work for us, but we’re planning to do all the tiling. So my Dad is down from New Jersey this weekend to help with everything – wish us luck! I’ll be sharing the final results here in January and I can’t wait! But in the meantime…

Jill Rosenwald / Behind the Scenes via Instagram / OSBP

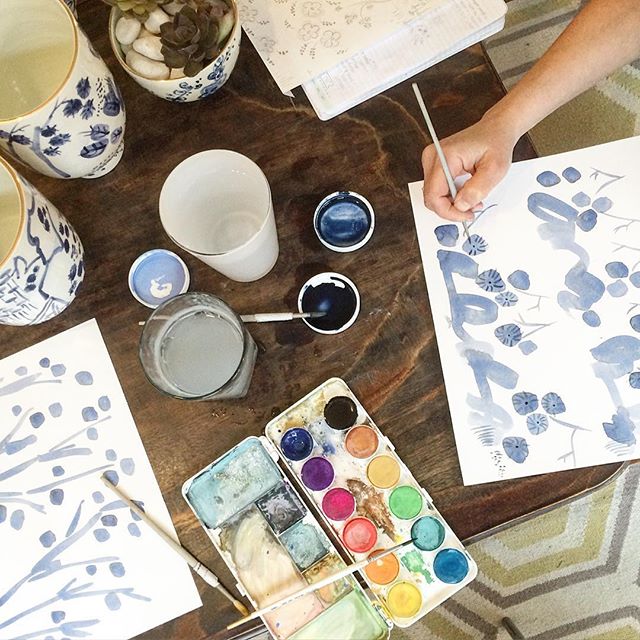
Love this behind the scenes peek from Jill Rosenwald via Instagram

…a few links for this weekend!

This week on Oh So Beautiful Paper:

That’s it for me this week! Check back a bit later for this week’s cocktail recipe – and I hope you all have a wonderful weekend! I’ll see you back here on Monday! xoxo

Fresh Cut Paper Flowers: Magnolia Paper Flower Holiday Place Settings

We’re closing out a wonderful year with lots of festive greens and paper flowers! Yes, It’s already December and Christmas is right around the corner. Naturally, my favorite part about hosting for the holidays is creating something homemade to make our loved ones feel right at home. Enjoy these magnolia paper flower holiday place settings with just a few easy steps! –Rachael

Magnolia Paper Flower Holiday Place Settings / Appetite Paper for Oh So Beautiful Paper


Paper Flower Magnolia Holiday Place Settings / Appetite Paper for Oh So Beautiful Paper

Materials

Cream Crepe Paper

1/2″ Polystyrene Sphere

Hot Glue Gun + Glue Sticks

Scissors

Liquid Gold Leaf and Paint Brush

Cream Cardstock and Gold Pen

Paper Magnolia Pattern (Download Here!)

Magnolia Paper Flower Holiday Place Settings / Appetite Paper for Oh So Beautiful Paper

Here’s how to make the magnolias:

Step 1 + 2. Cut out six large petals using your cream crepe paper, stretch the paper grain to form a deep, bowl shape. Place hot glue at the bottom of three large petals and adhere them, as outlined in the diagram below.

Step 3 + 4. Fold the bottoms of the three remaining large petals, to provide a deeper bowl shape and a little bit more body then the last.

Step 5. Hot glue the three new petals on top of the original three large petals, alternating to form a flower shape.

Step 6 + 7. Cut three small petals using your cream crepe paper, stretch the paper grain to form a deep, bowl shape. Just like your large petals, fold the bottoms of your small petals to provide a deeper bowl shape and give them a little bit more body!

Step 8. Glue the small petals on top of the large petals, alternating where the last petals were placed.

Step 9 + 10. Cut out one bud, using your cream crepe paper. Stretch the paper grain of your bud to form a smooth square.

Step 11. Scrunch a small piece of scrap paper into a tight ball. Adhere your the scrap paper ball on top of your polystyrene sphere with a dab of hot glue. Cover the polystyrene sphere using your bud square, twisting the excess crepe paper at the bottom. Paint the bud gold using liquid gold leaf. Once dry, trim the bottom of the bud.

Step 12. Place hot glue at the bottom of the bud and adhere to the center of your flower!

Magnolia Paper Flower Holiday Place Settings / Appetite Paper for Oh So Beautiful Paper

Magnolia Paper Flower Holiday Place Settings / Appetite Paper for Oh So Beautiful Paper

To create the name tags simply trace your leaf shape found in your Magnolia pattern onto cream cardstock. Write the names of your guests with gold ink, then cut and place inside your paper magnolia.

Magnolia Paper Flower Holiday Place Settings / Appetite Paper for Oh So Beautiful Paper

Photo Credits: Appetite Paper for Oh So Beautiful Paper


DIY Watercolor Paper Snowflake Gift Toppers

We’ve been playing “Jingle-Bells” since the moment the weather turned chilly here in London. It is, after all, the most wonderful time of the year! With under three weeks to go until Christmas Day, I wanted to share an easy gift wrap idea that you can make with things you can find at home. These snowflakes are – like the real ones – unique and personal in every way. They only take 5 minutes but look amazing! - Erin from BerinMade Paper Goods

DIY Watercolor Paper Snowflake Gift Toppers / BerinMade for Oh So Beautiful Paper

Supplies

Copier paper (1 sheet makes two small ones)

Flat brush

Stapler

PVA glue

Blue watercolor paint or acrylic paint

Sharp scissors

DIY Watercolor Paper Snowflake Gift Toppers / BerinMade for Oh So Beautiful Paper

Step 1. Dilute your paint with water in a plastic container. Dip your brush into the paint, then tap the brush so that the brush is slightly wet but not dripping. Stroke lightly over the paper to make faint, painted lines. Paint over the entire piece of paper. If you’re making more than one gift topper you can also paint multiple sheets at the same time.

Step 2. Cut the paper in half length-wise, and fold into a 12-part accordion, and trim the ends into points. Staple the center of the accordion, then cut a combination of straight and curvy lines into the folded accordion. Get creative with your snowflake designs by experimenting with different sizes and shapes for the cutouts.

Step 3. Fold the accordion in half and gently open it up like a fan, carefully separating the snowflake tips. Secure the ends with glue or double-sided tape.

Step 4. Use mounting squares or double-sided tape to adhere the gift topper to your present!

DIY Watercolor Paper Snowflake Gift Toppers / BerinMade for Oh So Beautiful Paper


DIY Watercolor Paper Snowflake Gift Toppers / BerinMade for Oh So Beautiful Paper


_JBD3901

_JBD3907 2

Photo Credits: Lauhaus Co

Happy Weekend!

Happy Friday everyone! This has been such a busy week, and I’m not even exaggerating when I say that I’m looking forward to cleaning my house this weekend! My house is normally pretty crazy thanks to the two little muchkins running around, but we haven’t even had a chance to unpack from going away for Thanksgiving! Yikes. I’m also looking forward to getting our Christmas tree this weekend and pulling all the decorations out of storage! But in the meantime…

Oh So Beautiful Paper Wreath / Instagram

A little behind-the-scenes peek at something we worked on this week, via my Instagram

…a few links for your weekend!

This week on Oh So Beautiful Paper:

That’s it for me this week! Check back a bit later for this week’s cocktail recipe – and I hope you all have a wonderful weekend! I’ll see you back here on Monday! xoxo

Party Paper: A Gift Wrapping Party

Finding the perfect gift and wrapping it with flair is one of my favorite Christmas traditions. This year, gather your friends, stock up on colorful gift wrap, ribbon, and tags for a gift wrapping party! (And don’t forget the eggnog!) – Annie

Party Paper: A Gift Wrapping Party! / Oh So Beautiful Paper

1. Santa & Reindeer Party Cups from Oh Happy Day

2. Holiday Script Ornament Tags from LEIF (They double as gift tags!)

3. Jolly Confetti Shaker Mini Card from LEIF

4. Candy Cane Yarn from Paper Source

5. Red & Gold Gift Box from Sugar Paper for Target

6. Jolly Party Plates from Oh Happy Day