Rachel + Stefan’s Modern Pink Wedding Invitations

One of my favorite jewelry designers, Rachel from Elephantine, is getting married in a few weeks – and she’s here to share her wedding invitations!  I first fell in love with her sweet and simple illustrated save the dates back in December, and I love the way she incorporated her signature modern style into a sophisticated and meaningful invitation suite.  Rachel and Stefan are planning a small wedding and were able to invest some time into creating a personalized invitation for each recipient.  So pretty!
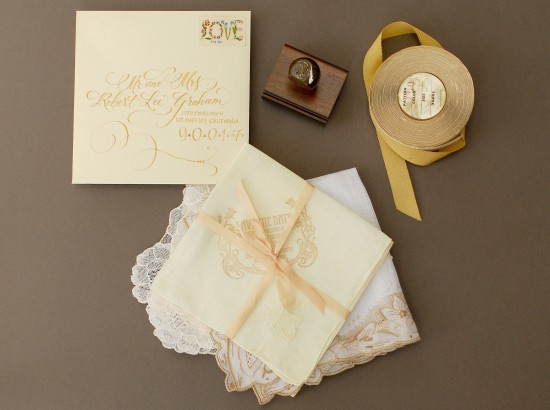
Modern-Pink-Wedding-Invitations

From Rachel:  I’ve always had my heart set on a wedding invitation with multiple parts to it. (I’ve also always had this fascination with things that contain several smaller things, like matryoshka dolls.)  Our invitation is made up of three flat cards, printed on both sides: one is the actual invitation, another has important details and a detachable RSVP, and a third has a map & directions.  Then there’s the RSVP envelope and the mini calendar reminder for guests to put in their day planner or on their fridge.

Modern-Pink-Wedding-Invitations-Suite

Modern-Pink-Wedding-Invitations-Detail

I wanted the invitations to feel personal to the recipients. The whole “suite” is held together by a band that I reverse-printed each invitee’s name on.  When the band comes off, it reveals the “Love, R & S” on the first card.  On the back of the first card is the actual invitation.  The fonts are Whitney and Cyclone.

Modern-Pink-Wedding-Invitations-Font

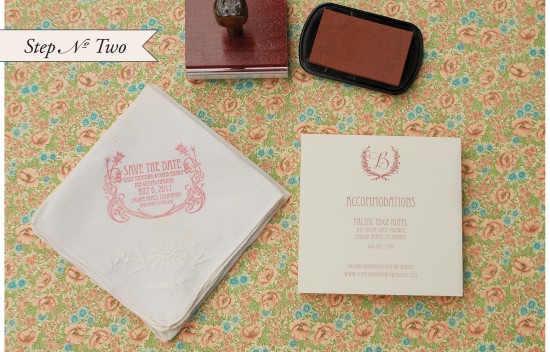
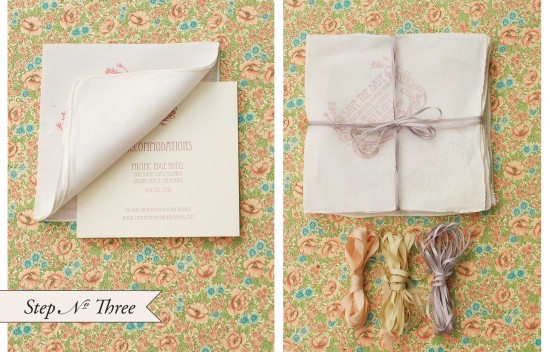
The last card has the nitty-gritty details and the RSVP, which can be detached.  I lightly perforated the “detach here” line above the RSVP with a tracing wheel.  On the back, there’s a quote from A.A. Milne, aka Winnie-the-Pooh’s author (“Some people care too much. I think it’s called love.”) and then there are a few lines for guests to write a note to us, if they’d like to.

Modern-Pink-Wedding-Invitations-RSVP

Modern-Pink-Wedding-Invitations-RSVP

Modern-Pink-Wedding-Invitations-Calendar

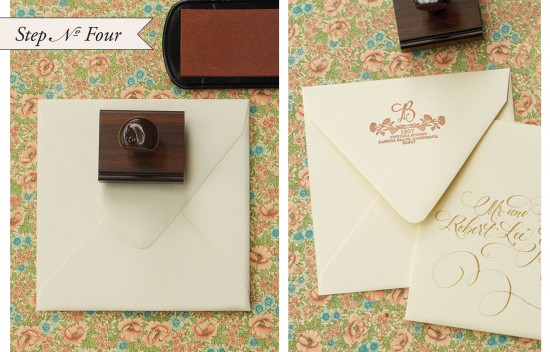
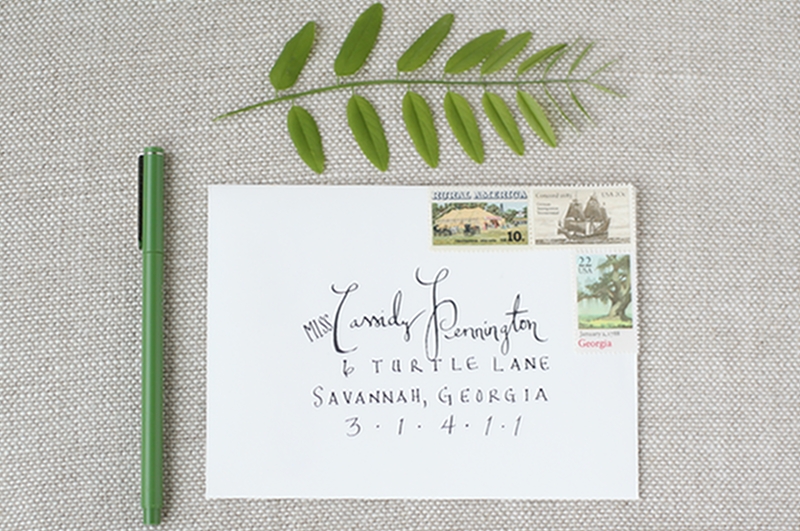
I printed the mailing & return addresses directly onto the envelopes, added a little bit of gold washi tape, and used my favorite stamps.  Et voilà!

Modern-Pink-Wedding-Invitations-Envelope

Absolutely fabulous!  Thanks Rachel!

Photo Credits: Elephantine

{happy weekend!}

Happy Friday everyone!  I got a wee bit of a head start on the weekend last night, when I went with this awesome lady to go see Mumford & Sons.  It was my third time seeing them live and they put on an awesome show, so definitely worth being a bit more on the tired side today.  Now I’m really anxious to get a move on the weekend, but in the meantime…

Letterpress from Naomie Ross on Vimeo, found via Pia Jane Bijkerk

…a few links for your weekend!

This week on Oh So Beautiful Paper:

That’s it for me this week!  I hope you all have a wonderful weekend, and I’ll see you back here on Monday! xoxo

DIY Vintage Handkerchief Save the Dates

Hi Everyone!  Today I’m super excited to introduce a new DIY series from the ladies of Antiquaria, an online shop curated by designer Emma James (you might remember her awesome wedding invitations) and calligrapher Bailey Amon.  In addition to their shop, Emma and Bailey offer custom rubber stamps featuring Bailey’s calligraphy and they’ll be joining us here every couple of weeks with a fun DIY project to inspire all of you at home.  Let’s get started!

Hello!  We’re Bailey and Emma from Antiquaria, and we love vintage handkerchiefs!!  This tutorial uses custom rubber stamps to create elegant and original save the dates.  These offer your guests a true keepsake and help set the tone for your vintage wedding!

Vintage Handkerchief Save the Dates

DIY Hand Stamped Handkerchief Save the Dates : Step 1

Step One:

After washing and ironing the handkerchiefs to the desired size, choose stamp pad and ink up the custom  Save the Date stamp.  We used our  “Art Nouveau” Save the Date Stamp.  On a hard and sturdy work surface, place the inked stamp on the handkerchief and apply even pressure.  Then gently lift the stamp off the handkerchief.

Step 1: DIY Handkerchief Save the Dates

Step Two:

Most couples will find it necessary to include accommodation options with their Save the Date – including them in the invitation is often too late to capture discounted rates, etc.  For this Save the Date, we printed out an accommodations card with a compatible font, we then used Antiquaria’s  Wreath Monogram stamp to accent the enclosure.

Antiquaria DIY Hand Stamped Handkerchief Save the Dates: Step 2

Step Three:

Slide the accommodations card into the handkerchief and using your desired ribbon, tie them together, like a present.

DIY Hand Stamped Handkerchief Save the Dates : Step 3

Step Four:

Using a coordinating return address stamp {we used our Wildflowers Return Address Stamp}, ink the stamp and place it in the center of your square envelope.

**Remember to do this before you or a calligrapher addresses the envelopes so that you don’t have to redo any if you get a bad inking.**

DIY Hand Stamped Handkerchief Save the Dates: Step 4

Materials List

Custom Rubber Stamps like these:  “Art Nouveau” Custom Save the Date Stamp, “Wreath Monogram” Stamp, “Wildflowers” Return Address Stamp

Vintage Handkerchieves – Iron to 5.5 x 5.5 squares with starch and a hot iron.  Check Ebay for lots of handkerchieves.  It is more affordable to buy them in bulk than one at a time.  Expect to pay $1-3 per handkerchief for vintage handkerchieves for this project.  Etsy and local thrifts are other good places to look for them.

Colorbox Stamp Pad – we used a variety of pinks and neutrals for this project.

5.5″ x 5.5″ Flat Card – for the accommodations card

5.75 x 5.75 Square Envelope

Hand Painted Silk Ribbon

Photo Credits: Antiquaria

Sweet + Simple Save the Dates

Here’s another sweet kraft paper save the date.  Vicky and her fiancé live in Brisbane, Australia but are planning a wedding in the English countryside, so they felt the need to send their save the dates well in advance of their fall 2012 wedding.  Vicky is a graphic designer and printed the save the dates herself on her trusty Gocco.

Kraft-Paper-Gocco-Save-the-Date

From Vicky:  Being a graphic designer I have always had a passion for paper and typography so now I get to bring them together and start designing my own wedding stationery.  As a British citizen currently living in Brisbane, we realised the need to send our save the dates as soon as possible to give people enough time to save up and arrange a trip to the other side of the globe.  We will be married at home in the English countryside and we want everything to be simple and personal.

Kraft-Paper-Gocco-Save-the-Date

When it come to the design I wanted kraft paper and envelopes.  I hand printed every single ‘save the date’ on my Print Gocco.  I had so much fun and now I can not wait to get started on designing the invitations… no rush really as the wedding isn’t for another 15 months!


Kraft-Paper-Gocco-Save-the-Date

Kraft-Paper-Gocco-Save-the-Date

Thanks Vicky!

Photo Credits: Vicky Hairsine

Southern Magnolia Bridal Luncheon Invitation

I’ve had these bridal luncheon invitations bookmarked the last couple of weeks – Christine from Ink*Lemonade created these lovelies for a friend in Georgia who will be hosting a luncheon in honor of her cousin’s upcoming wedding.  Christine used magnolias and the concept of the Old South with a modern twist as her design inspiration, along with a color palette of green, brown, and cream.  I’m having visions of sweet iced tea, mint juleps, and lots of yummy treats – sounds delightful!

Magnolia-Southern-Bridal-Shower-Invitation-Suite

Christine letterpress printed the main invitation, incorporating her own hand lettering style into the invitation text.  She then calligraphed the outer envelopes and paired them with coordinating vintage stamps.  So, so pretty.

Magnolia-Southern-Bridal-Shower-Invitation

Magnolia-Southern-Bridal-Shower-Invitation-Envelope-Detail


Magnolia-Southern-Bridal-Shower-Invitation 

Magnolia-Southern-Bridal-Shower-Invitation
 

Magnolia-Southern-Bridal-Shower-Invitation-Stamps

Thank you so much Christine!

Photo Credits: Christine Lucaciu for Ink Lemonade