Southwestern Mixed Media Wedding Invitations

You guys, today is going to be a GREAT day: we have an invitation from Arley-Rose and Morgan of Ladyfingers Letterpress to share with you! If you’ve been reading OSBP for the last five or so years, you know that these ladies produce some of the most imaginative and beautiful custom stationery (including my first daughter’s baby announcement!). These stunning southwestern mixed media wedding invitations are no exception. Arley and Morgan incorporated non-traditional materials like mica, leather, sage, and wood to create a complete invitation experience. Amazing!
Southwestern Mixed Media Wedding Invitations by Ladyfingers Letterpress

From Arley-RoseIt’s safe to say that most of our clients these days have already experienced firsthand the quality and creativity of our work before they hire us. They likely have received an invitation of ours from a family or friend and intimately know the thrill of receiving a commissioned Ladyfingers Letterpress invitation in the mail and want their guests to feel the same way.
Southwestern Mixed Media Wedding Invitations by Ladyfingers Letterpress

A few years back, we had created pretty insane baby shower invitations for some close friends who are in the film industry in New York. A guest of that shower, Alex Bolotow, was dating the iconic fashion photographer Terry Richardson at the time, and when they became engaged, she called us up right away with tons of enthusiasm and ideas.
Southwestern Mixed Media Wedding Invitations by Ladyfingers Letterpress

Alex and Terry were planning an intimate gathering at a remote and serene southwestern desert location outside of Taos, New Mexico and wanted to give their guests a preview of the warmth, love, and realness that they would soon be experiencing on their wedding day. A gift of excitement, a collection of beautiful things both close to their hearts and to the heart of the place they wed.
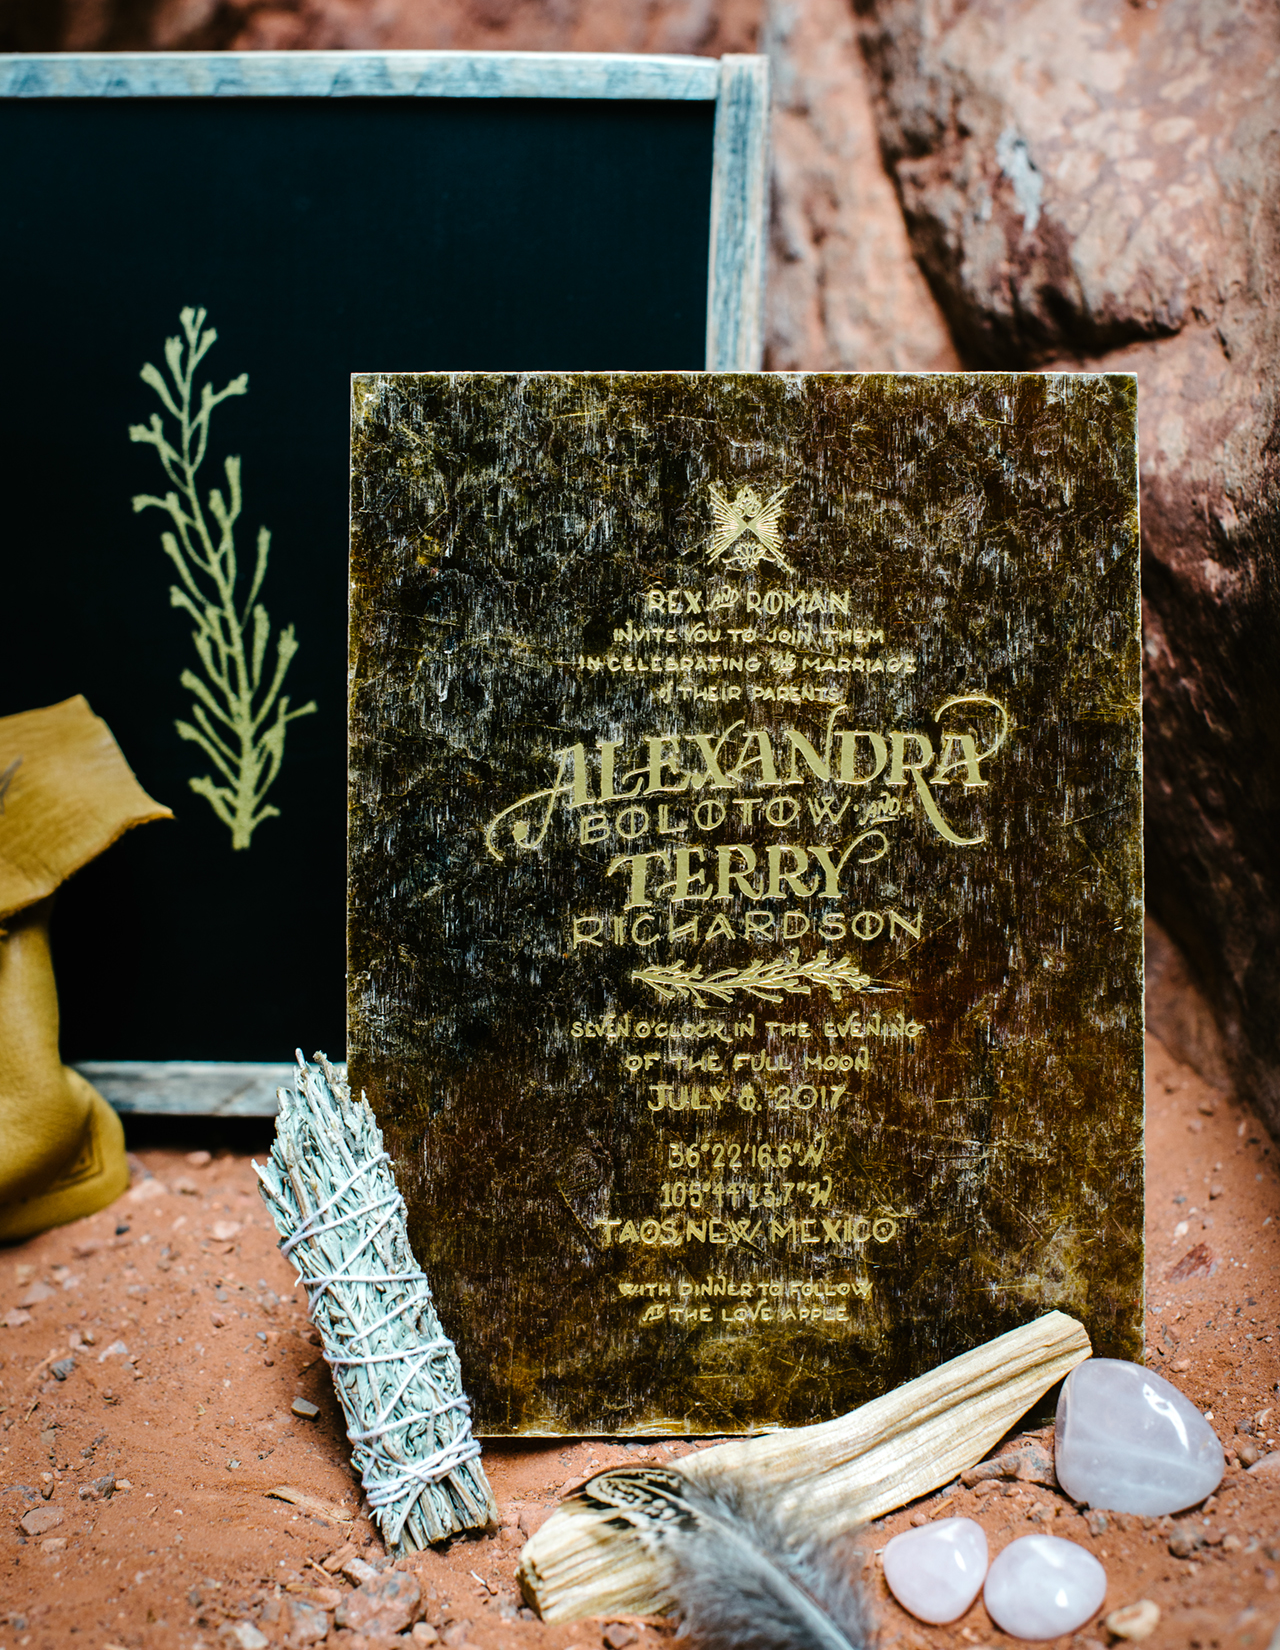
Southwestern Mixed Media Wedding Invitations by Ladyfingers Letterpress

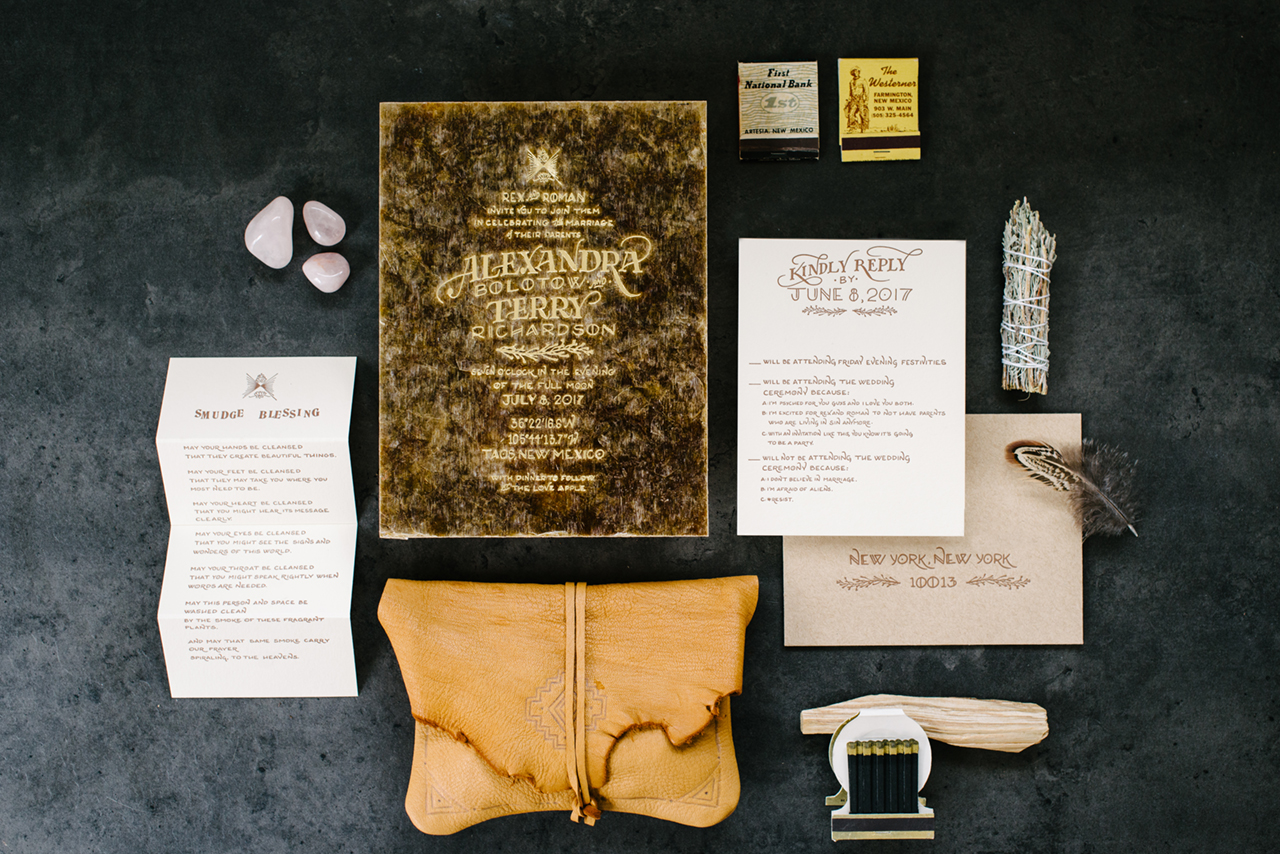
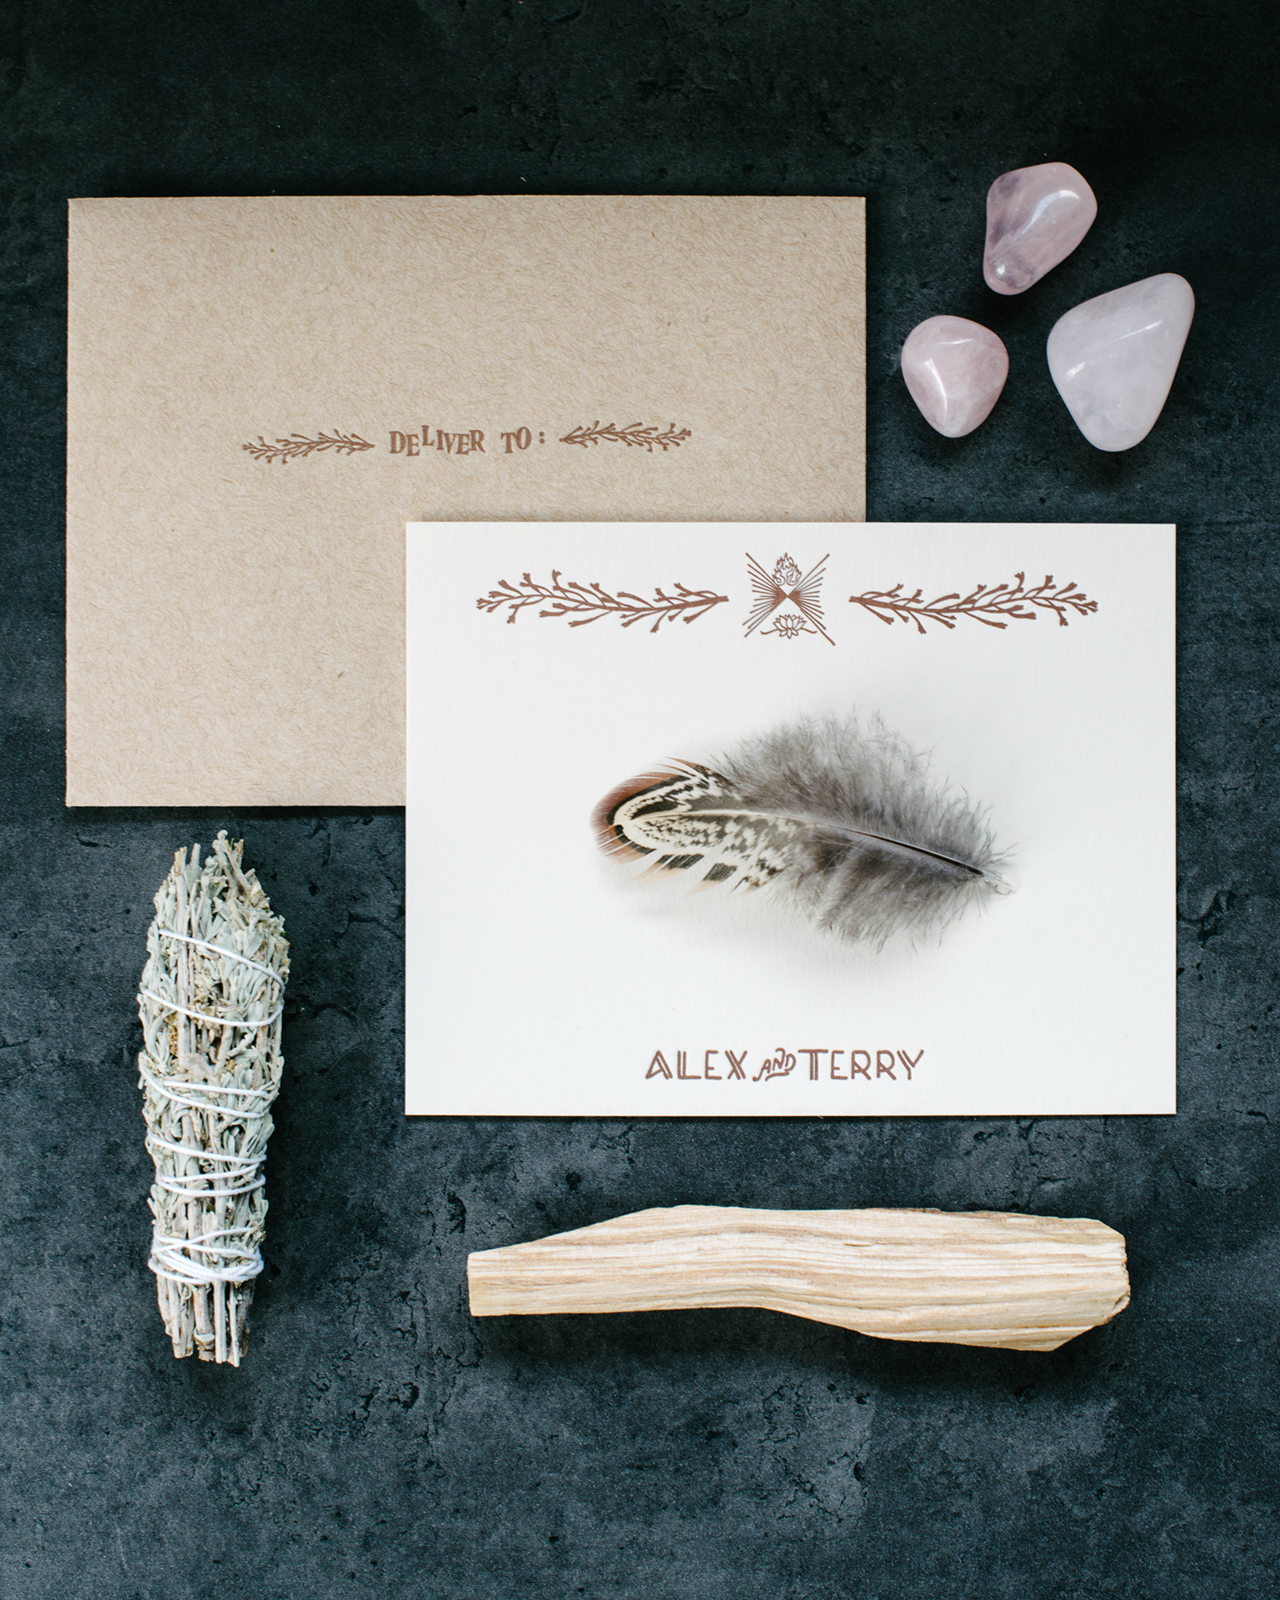
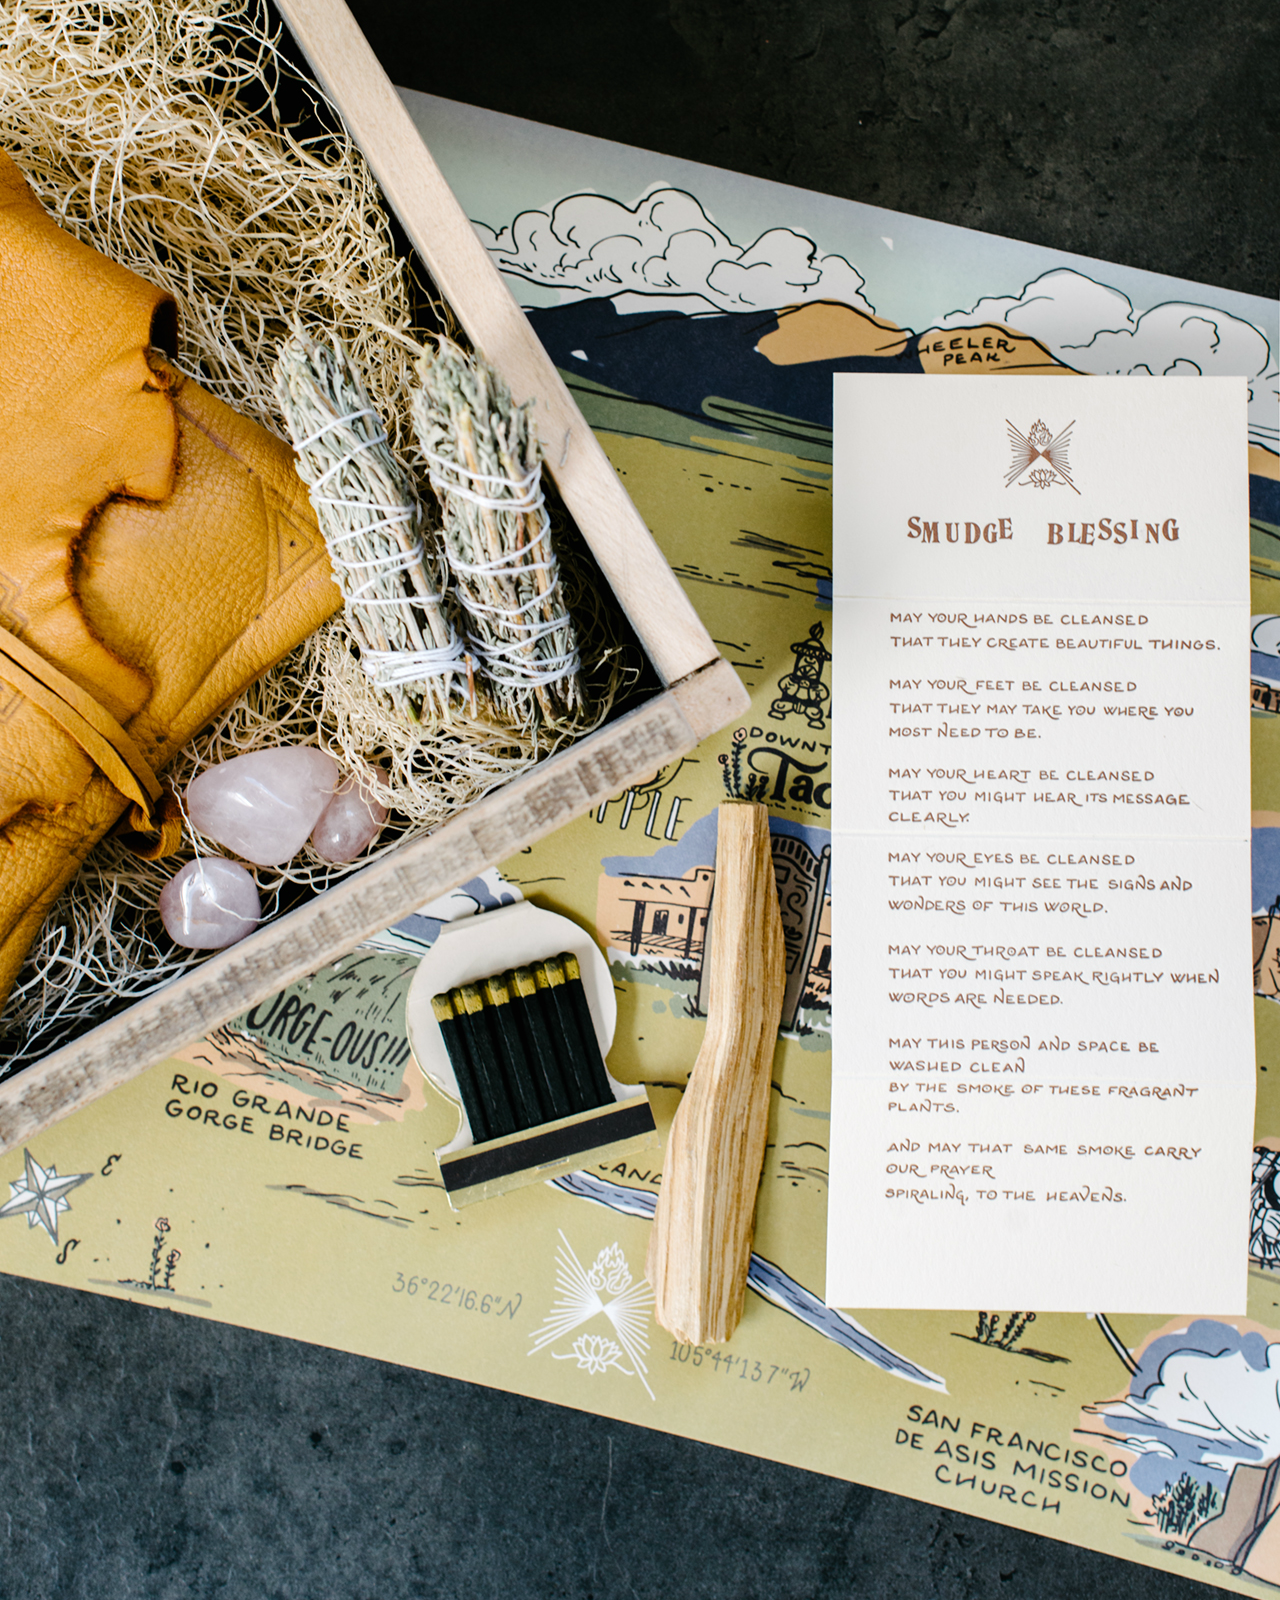
We worked together for ten months to create something that could hardly be deemed an invitation. A gift, maybe. More like a finely curated assemblage of meaningful things, like opening the lid of a close friend’s favorite collection of personal objects. Alex and Terry wanted the suite to be as personal, tactile and location-centric as possible. The concept took on a three-dimensional form, and the invitations were shipped in large hand-lettered kraft boxes that were carefully opened to uncover a sun-kissed wooden box overflowing with the invitation and supporting objects.
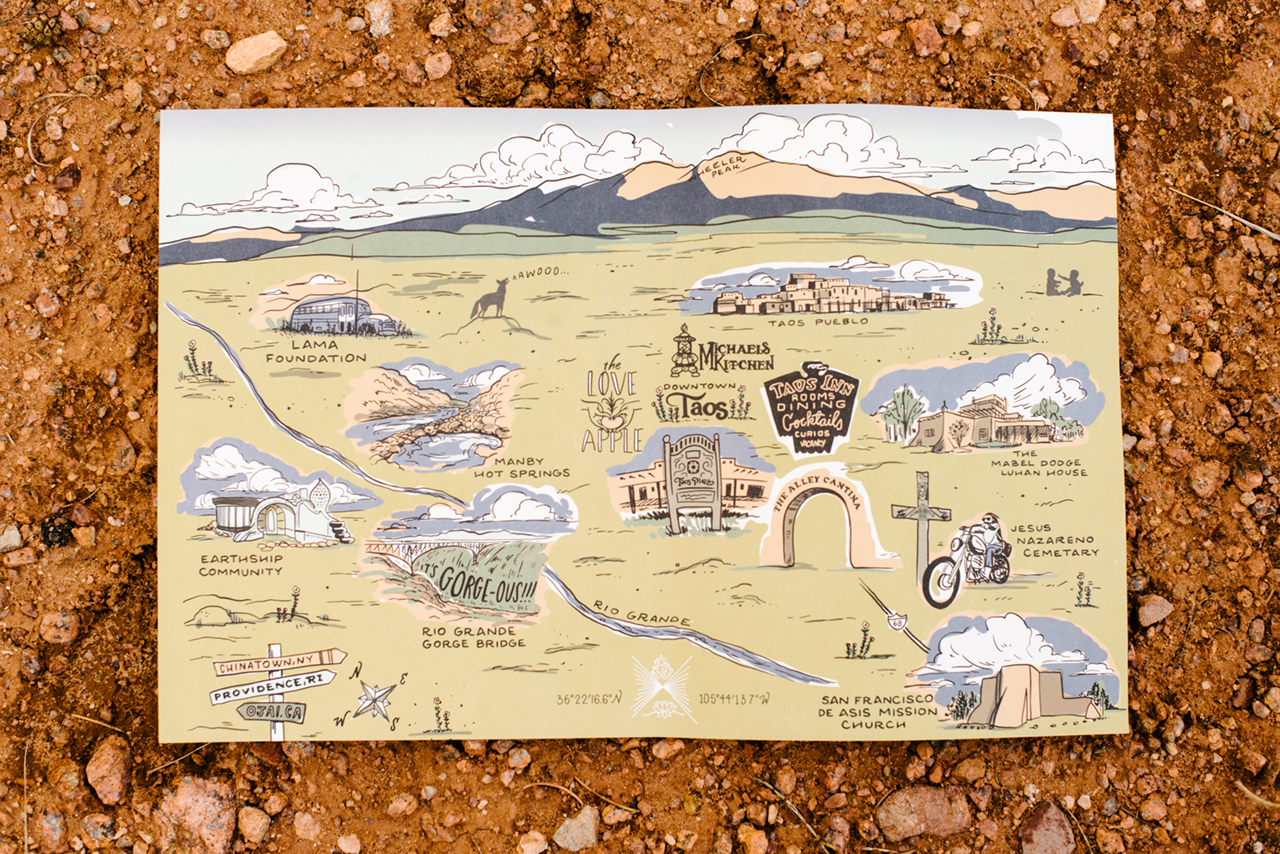
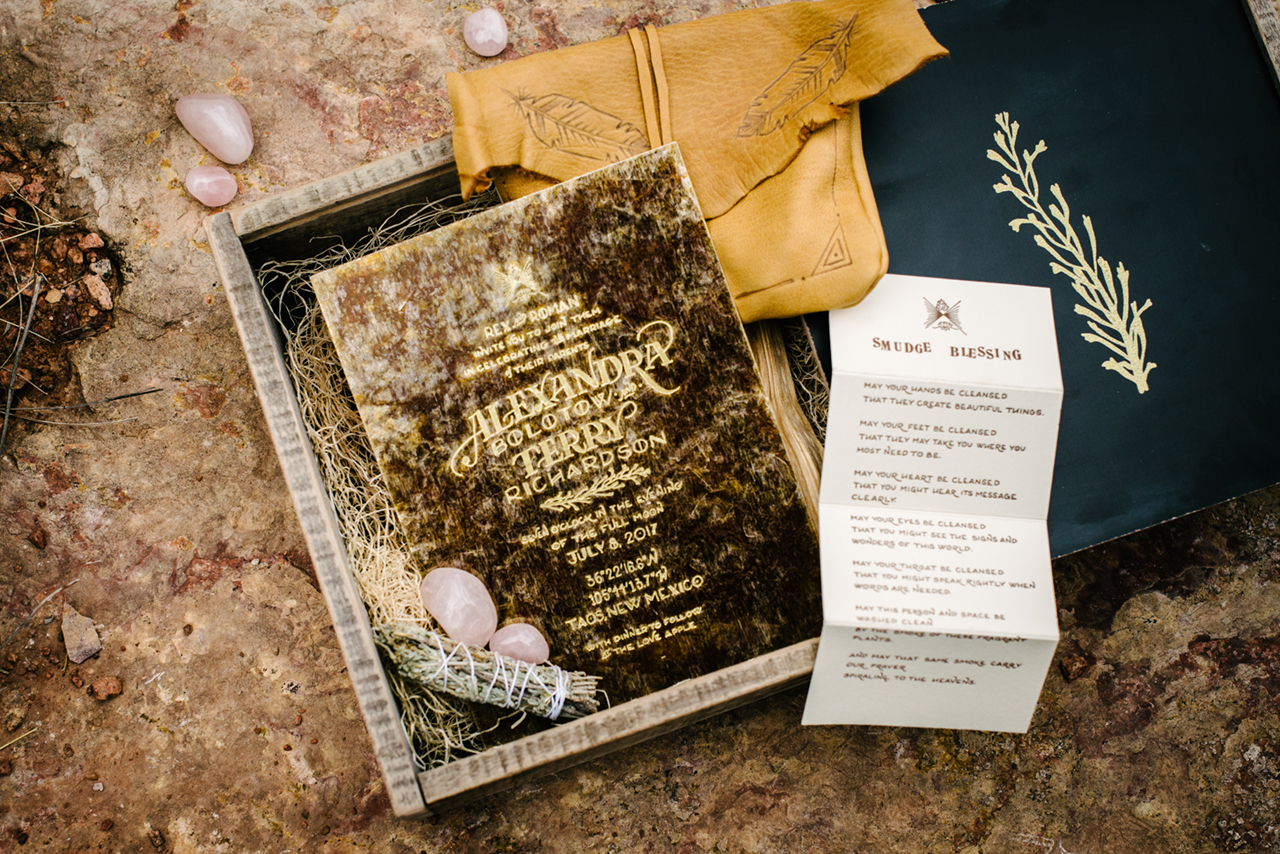
Southwestern Mixed Media Wedding Invitations by Ladyfingers Letterpress

Southwestern Mixed Media Wedding Invitations by Ladyfingers Letterpress

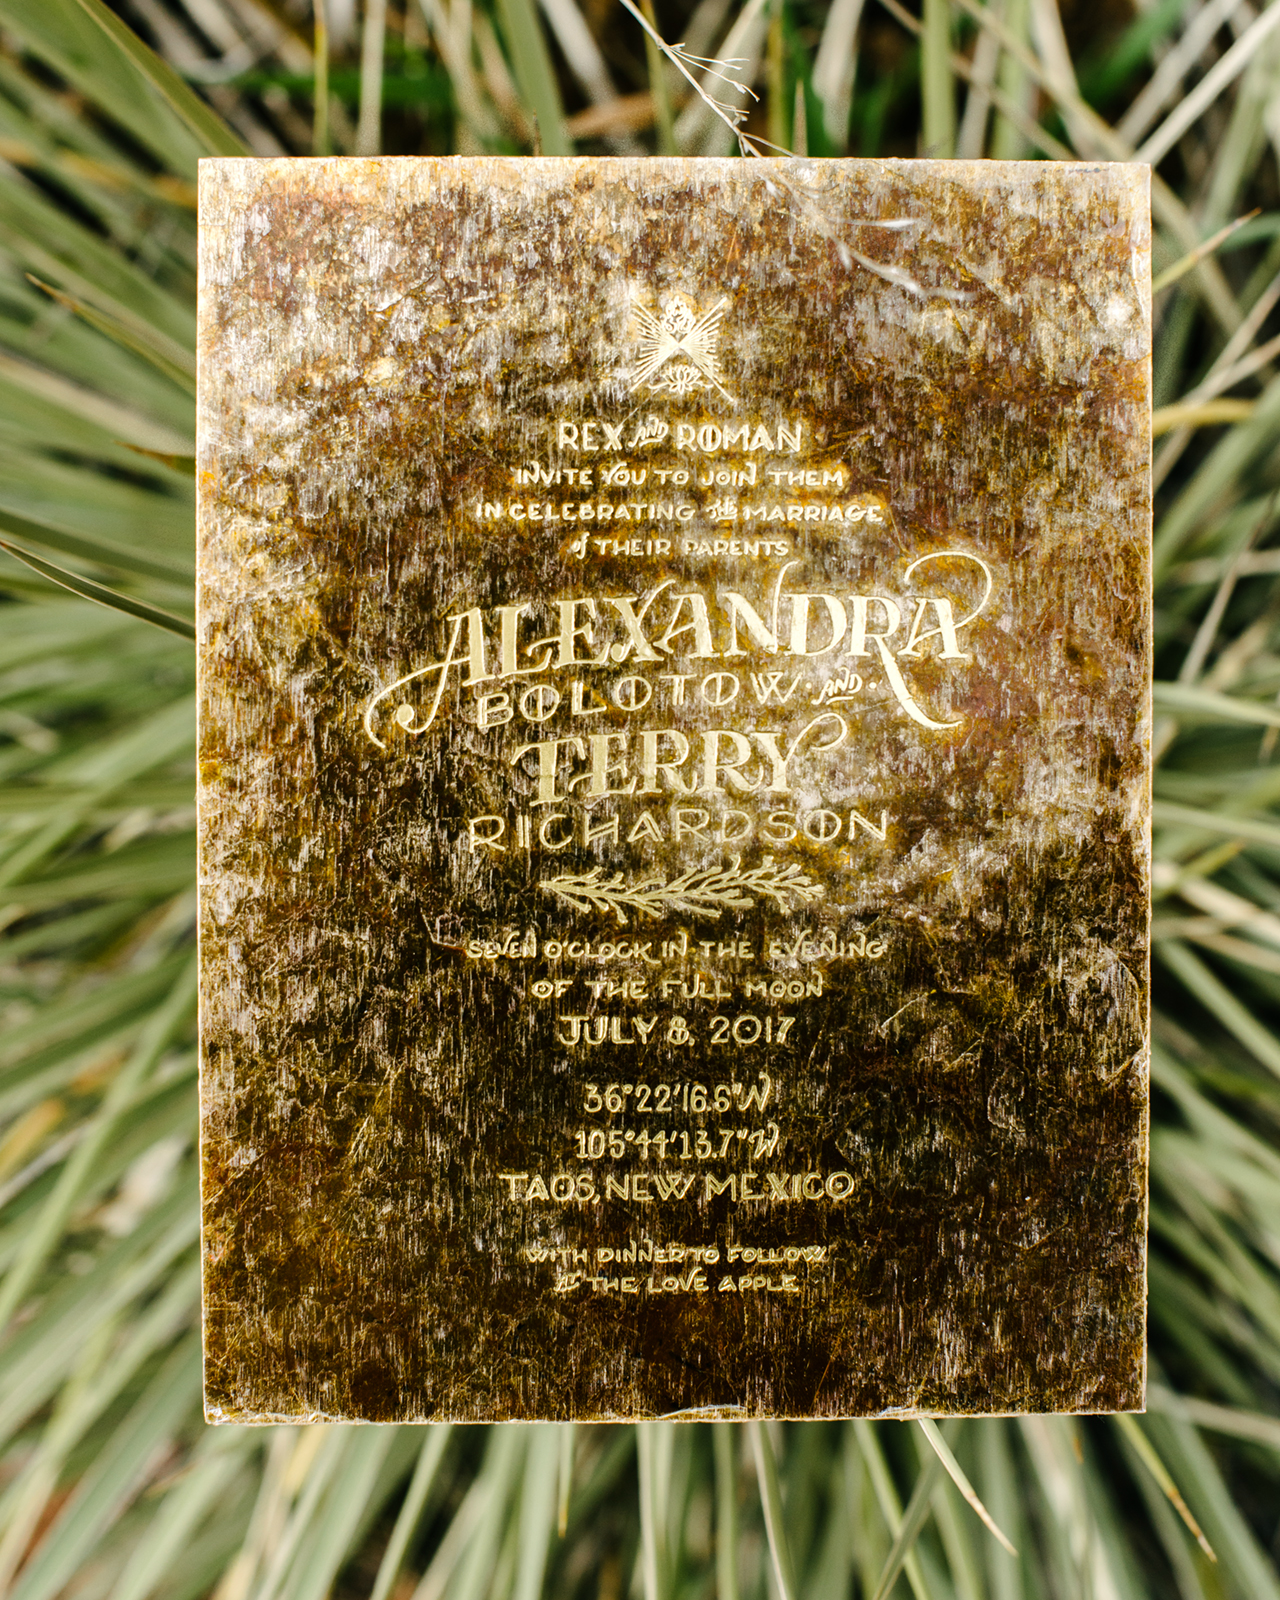
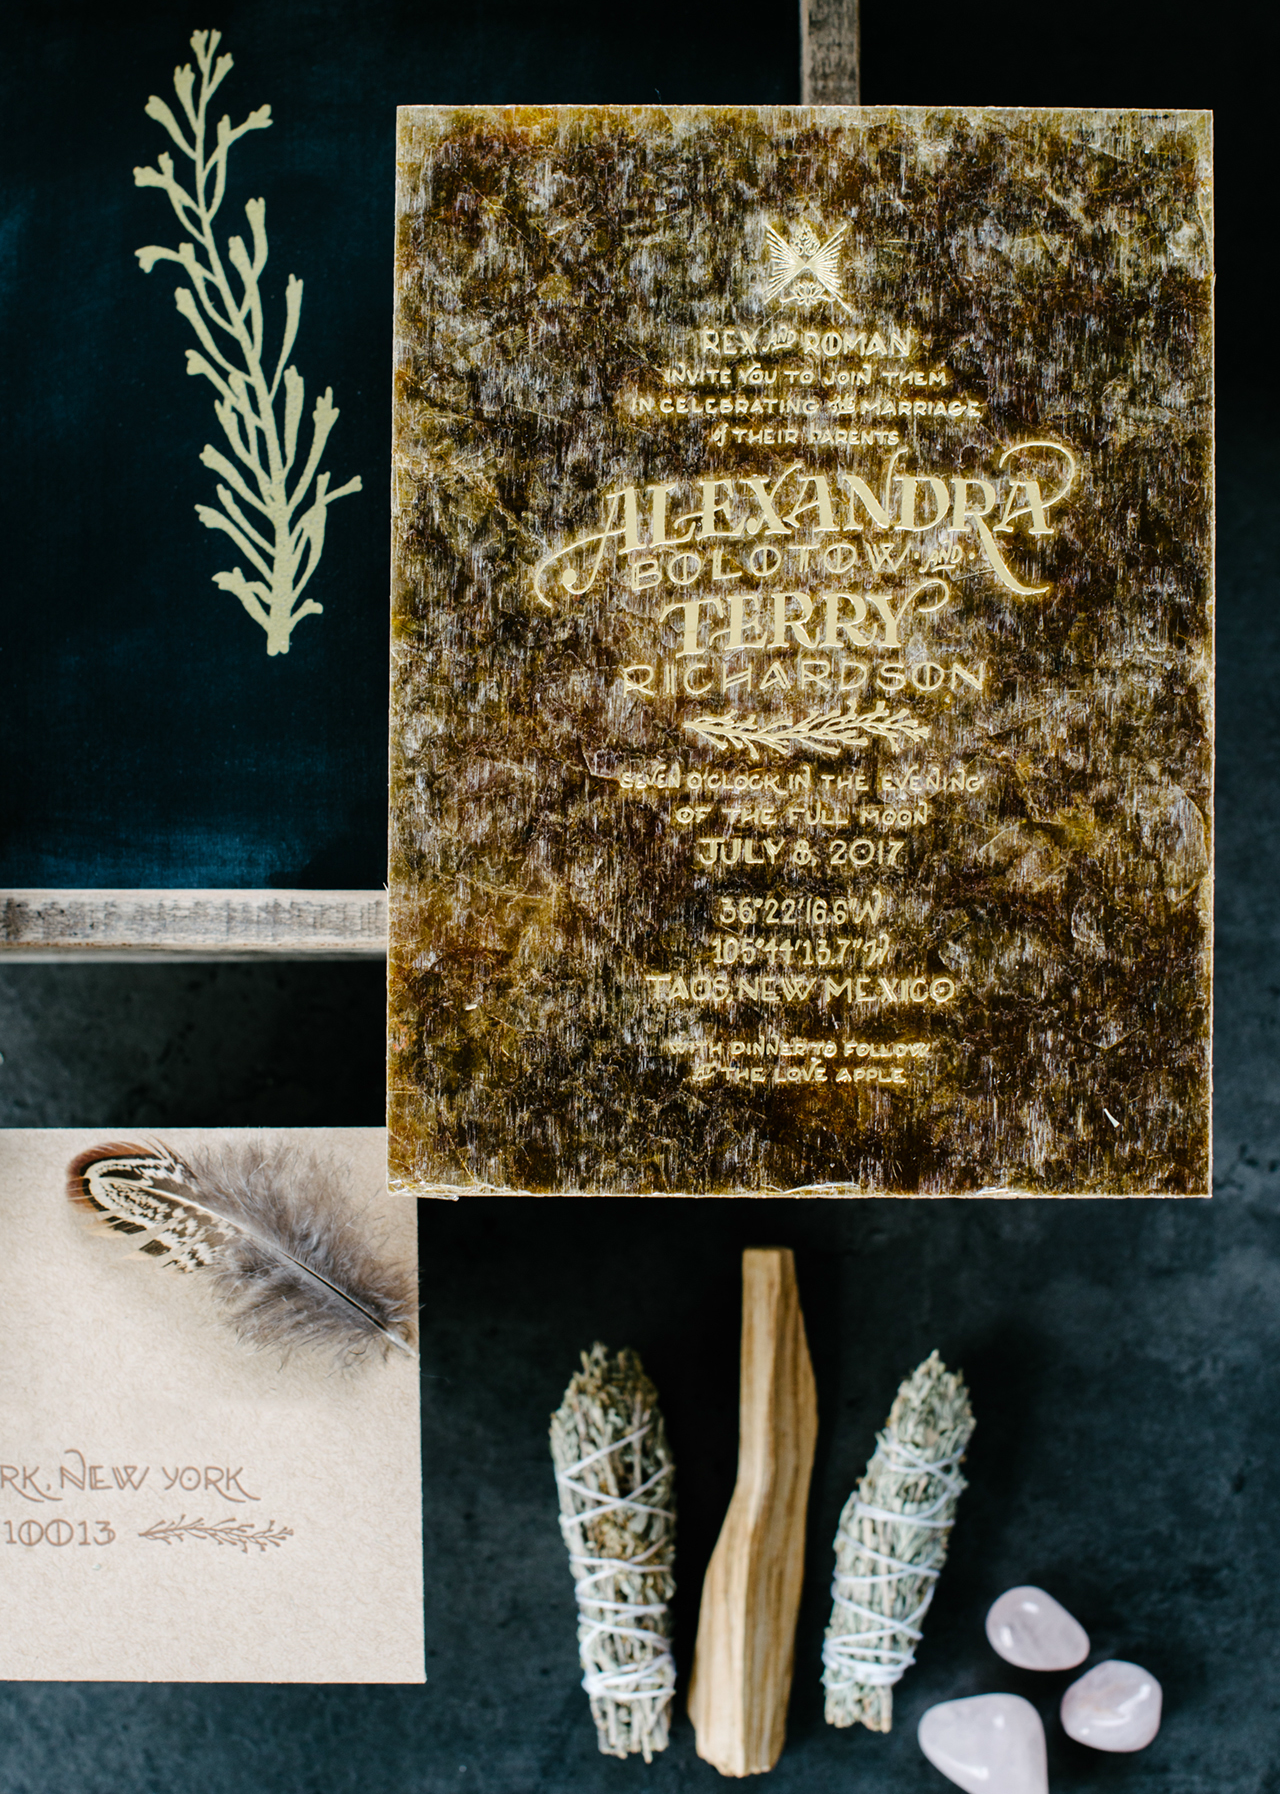
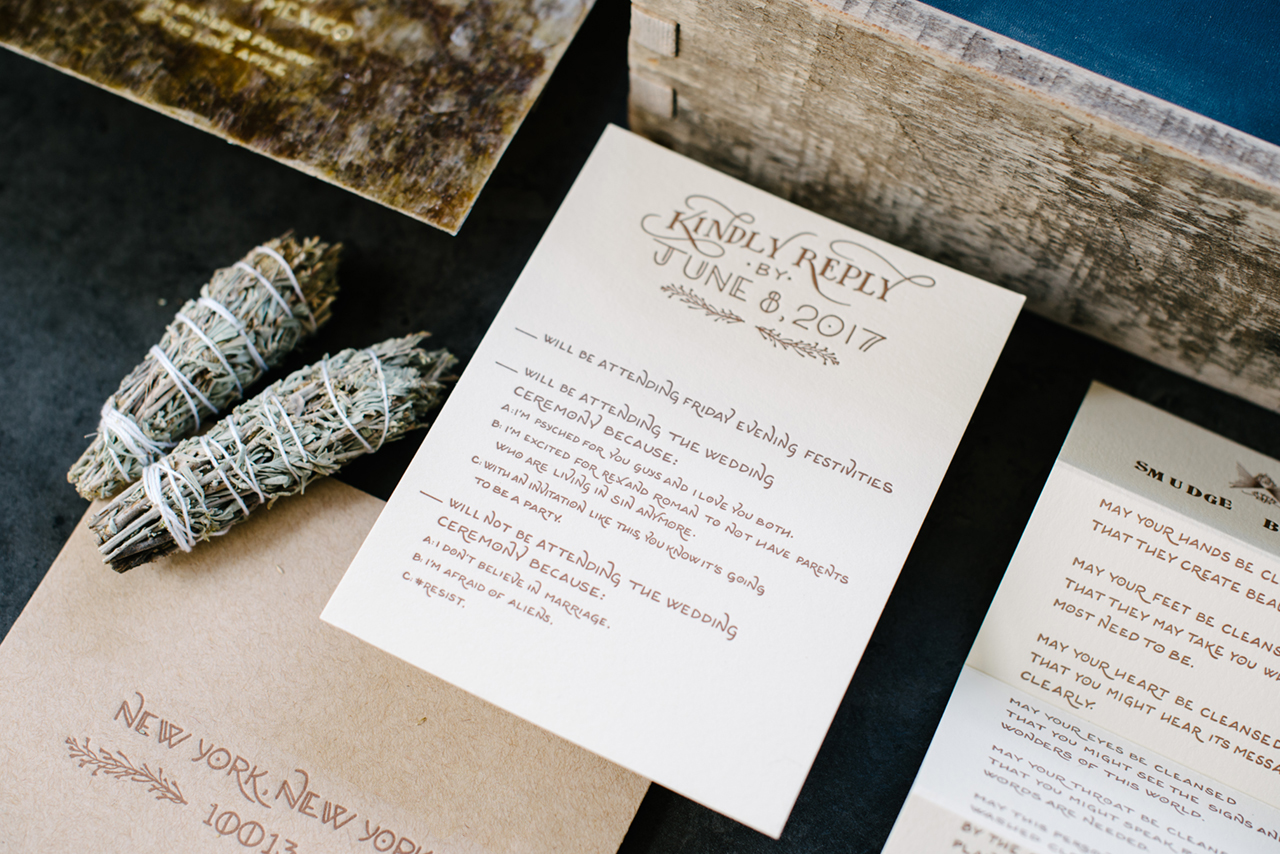
We hand lettered the invitation and foil printed it in gold foil onto sturdy and semi-translucent pieces of mica. Additional pieces such as their RSVP and Smudge Blessing Card were letterpress printed on thick cotton paper. We worked with local artist Pipilo Road to design and manufacture handmade wooden boxes out of reclaimed materials. The lids were hand painted and screen printed. We went through several iterations where we sent videos of different prototypes back and forth before a design was settled and the boxes were fabricated.
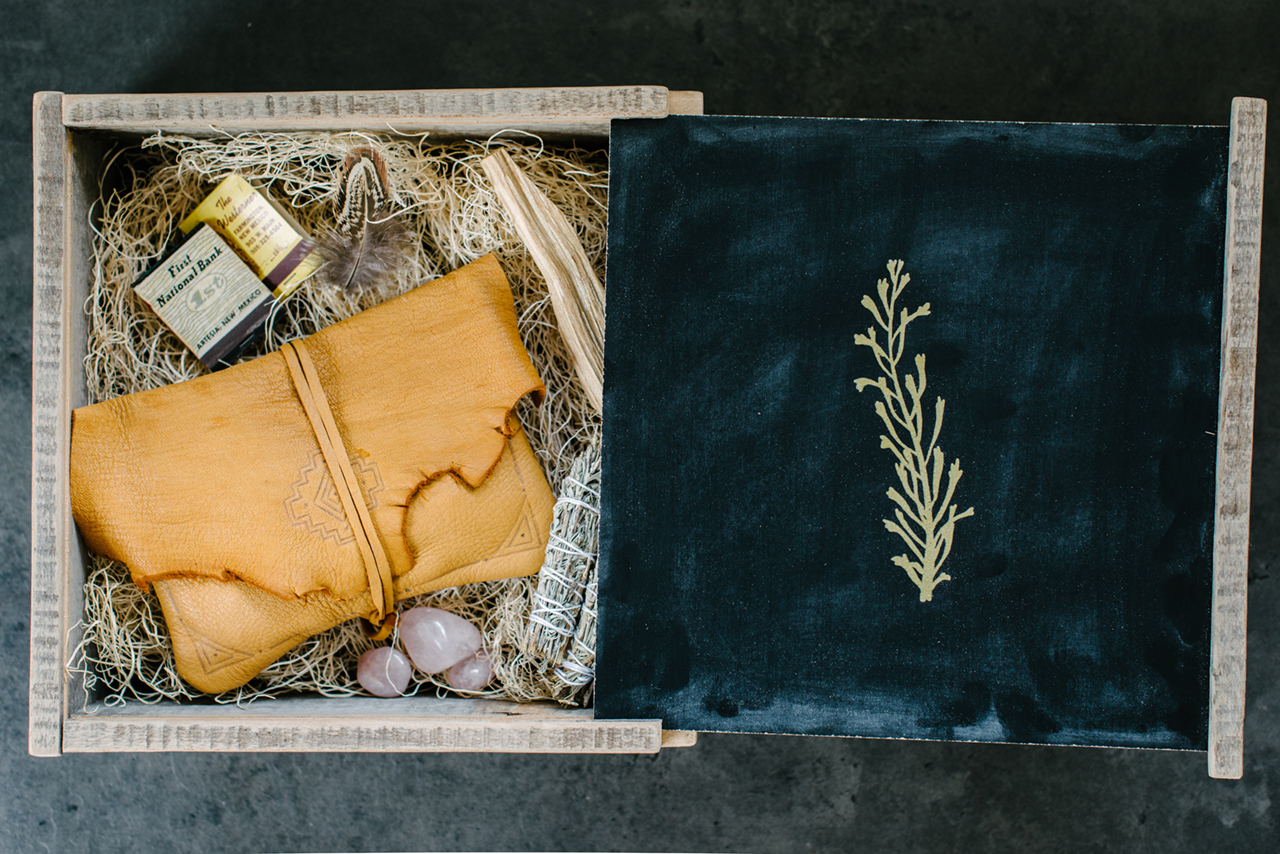
Southwestern Mixed Media Wedding Invitations by Ladyfingers Letterpress

Soft, tobacco deerskin leather pouches were carefully designed, stitched and hand burned by Three Arrows Leather out of Taos. Alex helped us source sage bundles, quartz rocks, vintage matches from New Mexican locations and palo santo sticks to complete the suite and allow their guests to conduct a Smudge Blessing of their own. All of these items, plus a hand-drawn map of Taos and a celestial map of the night sky on the date of their wedding, were carefully tucked into the handmade wooden box which was designed to fit perfectly within an outer shipping box.
Southwestern Mixed Media Wedding Invitations by Ladyfingers LetterpressSouthwestern Mixed Media Wedding Invitations by Ladyfingers Letterpress

We got to know Alex over the time we spent working together, and now consider her a close friend. In fact, she and Terry surprised us with an invitation to their wedding, which we happily accepted. We’re still reeling from our time spent in Taos with this lovely couple and are happy to finally share these photos taken by Lauren Memarian with you! For more gorgeous photos of this suite, check out the Gallery of Commissioned Works at ladyfingersletterpress.com.
Southwestern Mixed Media Wedding Invitations by Ladyfingers Letterpress

Thanks Arley-Rose and Morgan!

Design: Ladyfingers Letterpress
Wooden Boxes: Pipilo Road
Leather Pouches: Three Arrows Leather

Ladyfingers Letterpress is a member of the Designer Rolodex â€“ check out more of their beautiful work right here or visit the real invi­ta­tions gallery for more wedding invitation ideas!

Photo Credits: Lauren Memarian

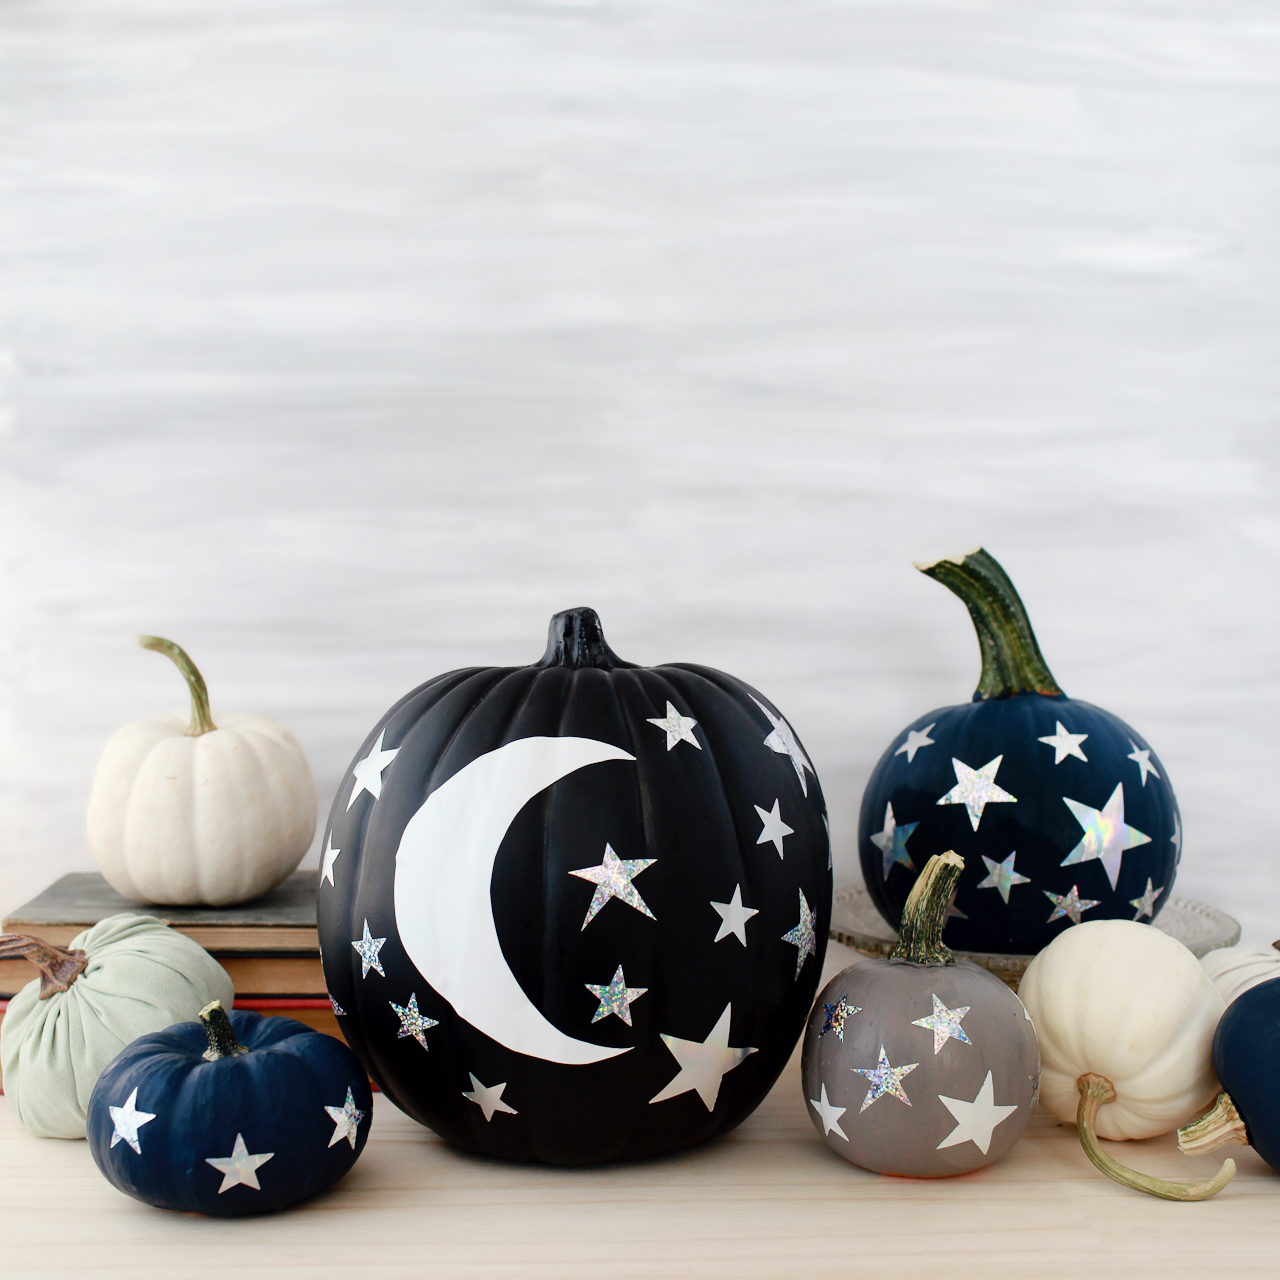
DIY Moon and Stars Pumpkins

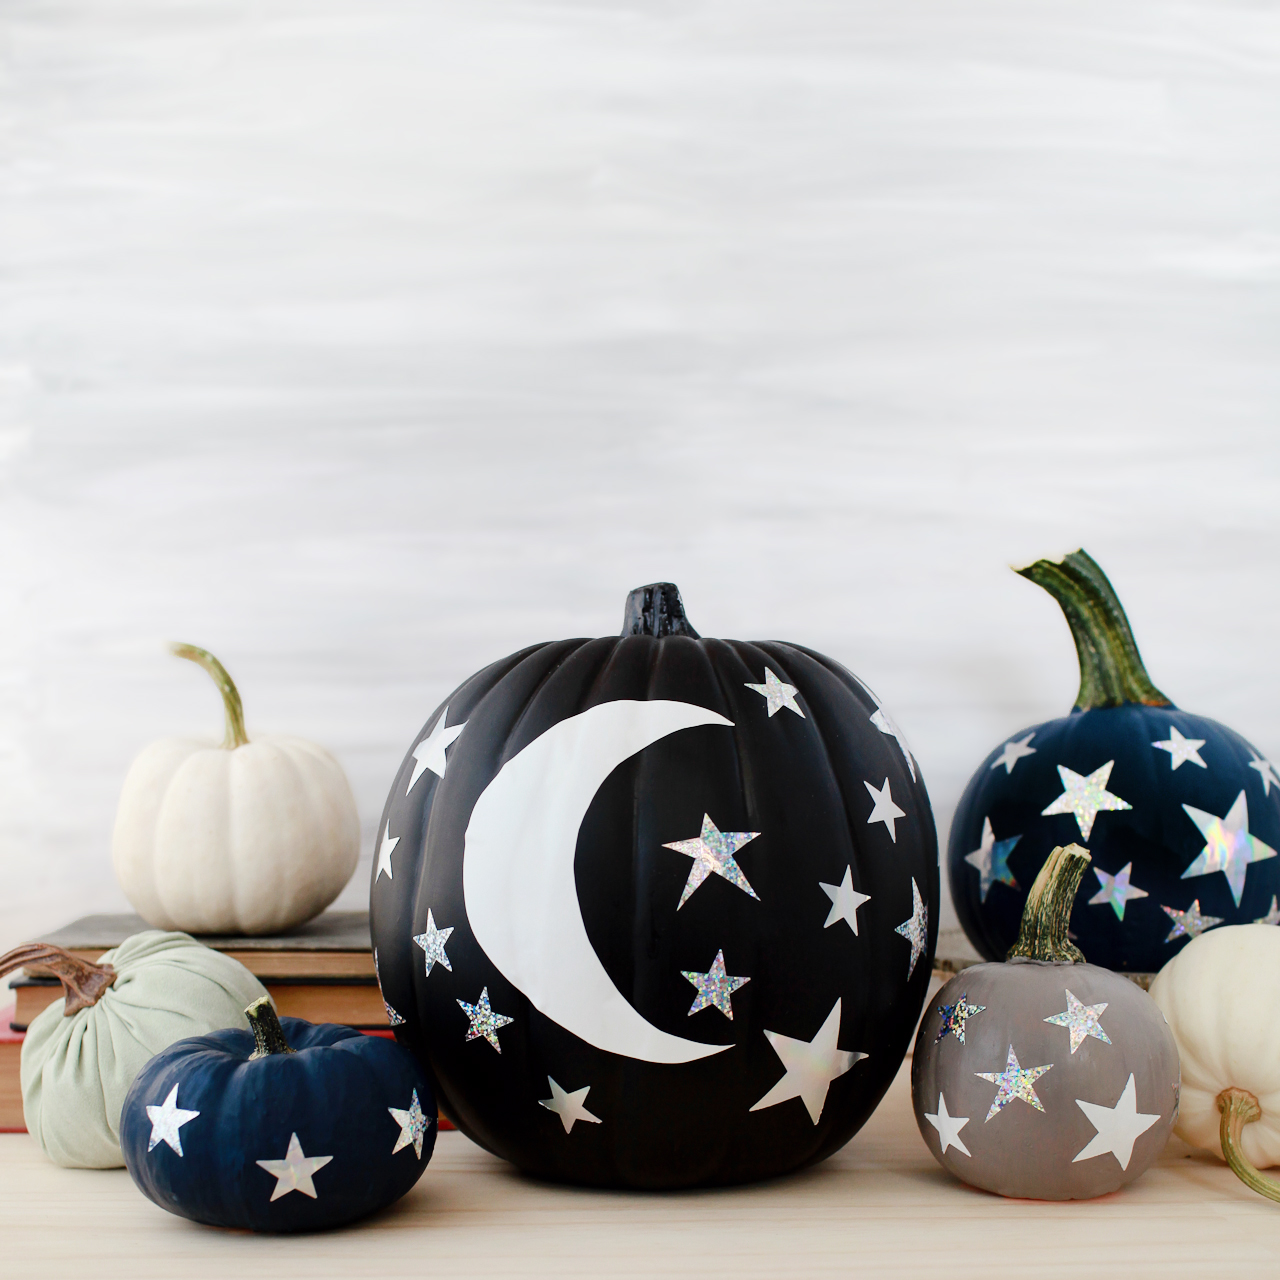
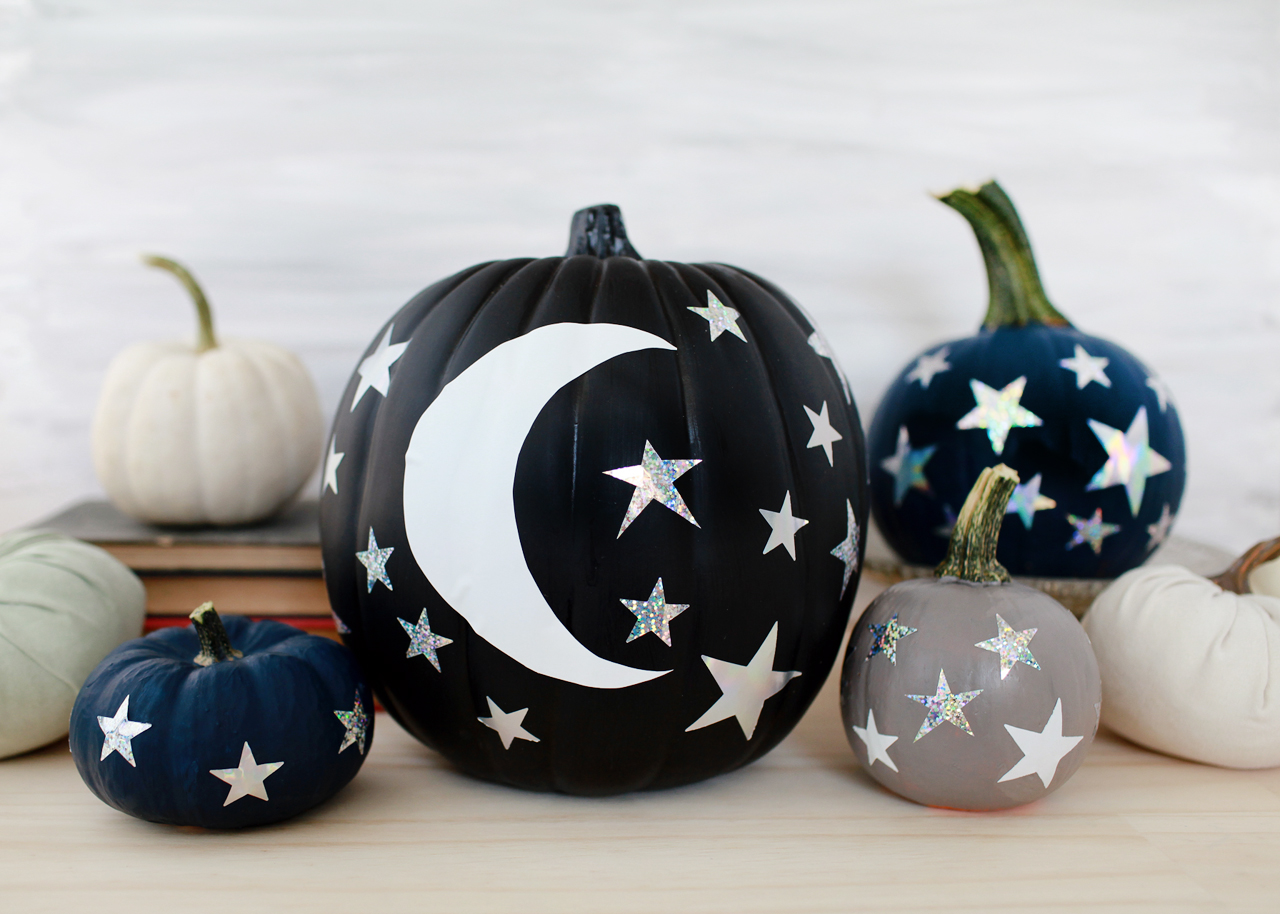
Last year, I made these really fun swirly galaxy-inspired iridescent pumpkins. This year, I wanted to do another spin on a celestial-inspired pumpkin using my new favorite material: hologram vinyl! So today I’m teaming up with one of my favorite crafting partners, Fiskars, to make these beautiful DIY moon and stars pumpkins. This DIY couldn’t be easier – all you need are some scissors, a few craft punches, and vinyl! Oh, and pumpkins of course. And since the vinyl essentially functions like a sticker, it’s also a super fun activity for kids. Are you ready? Let’s go!

DIY Moon and Stars Pumpkins

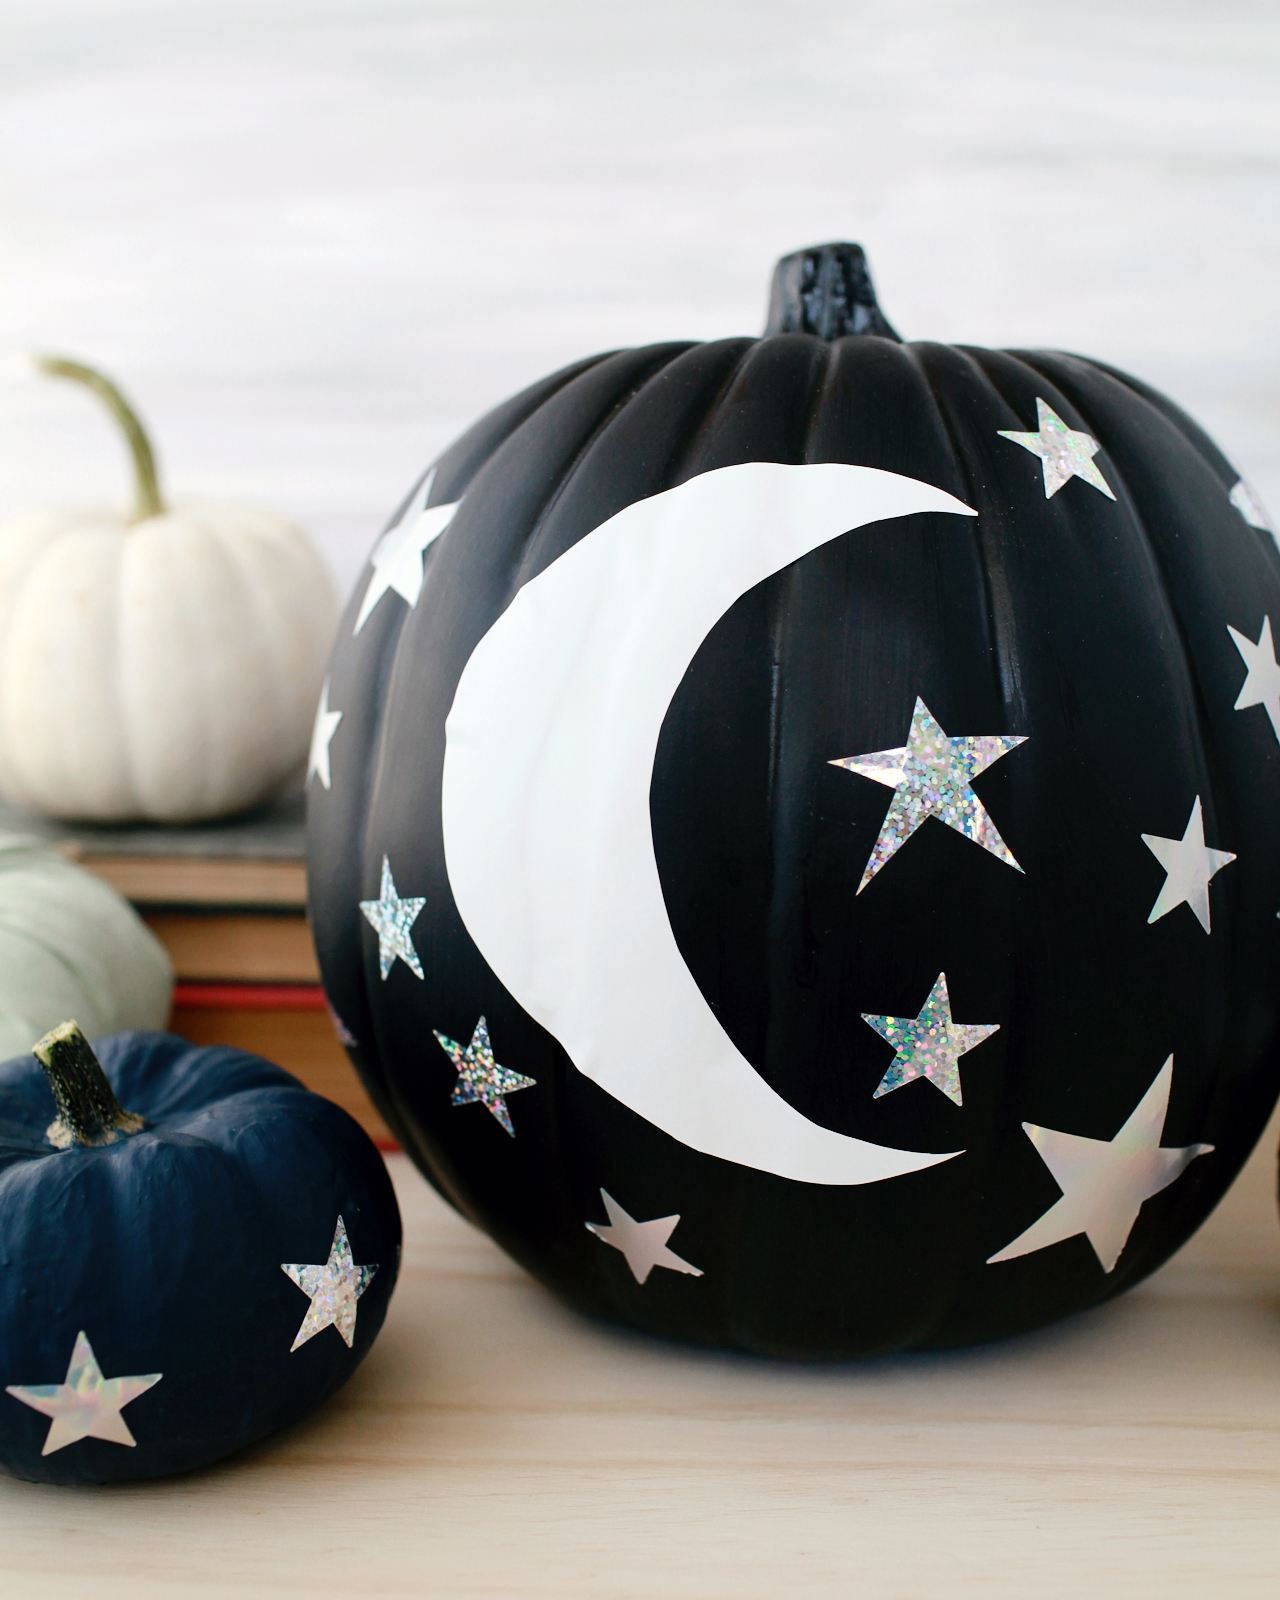
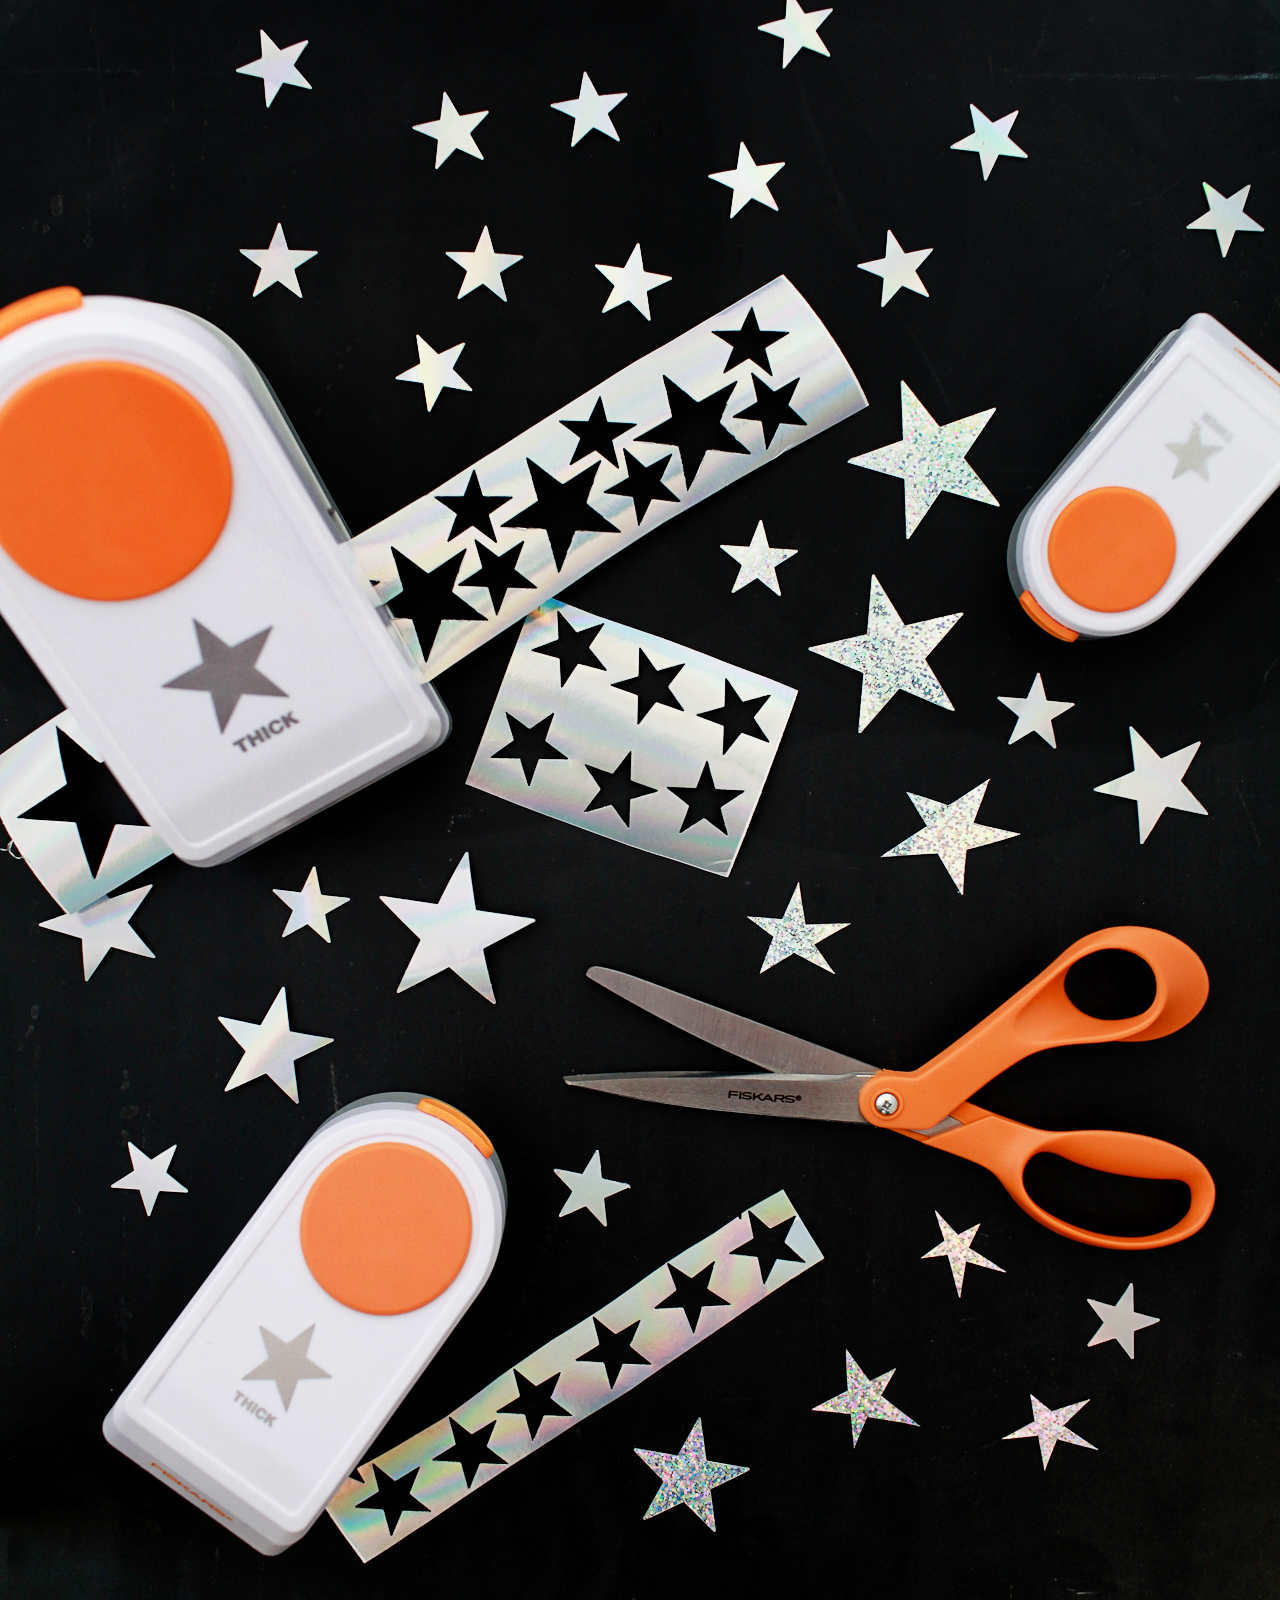
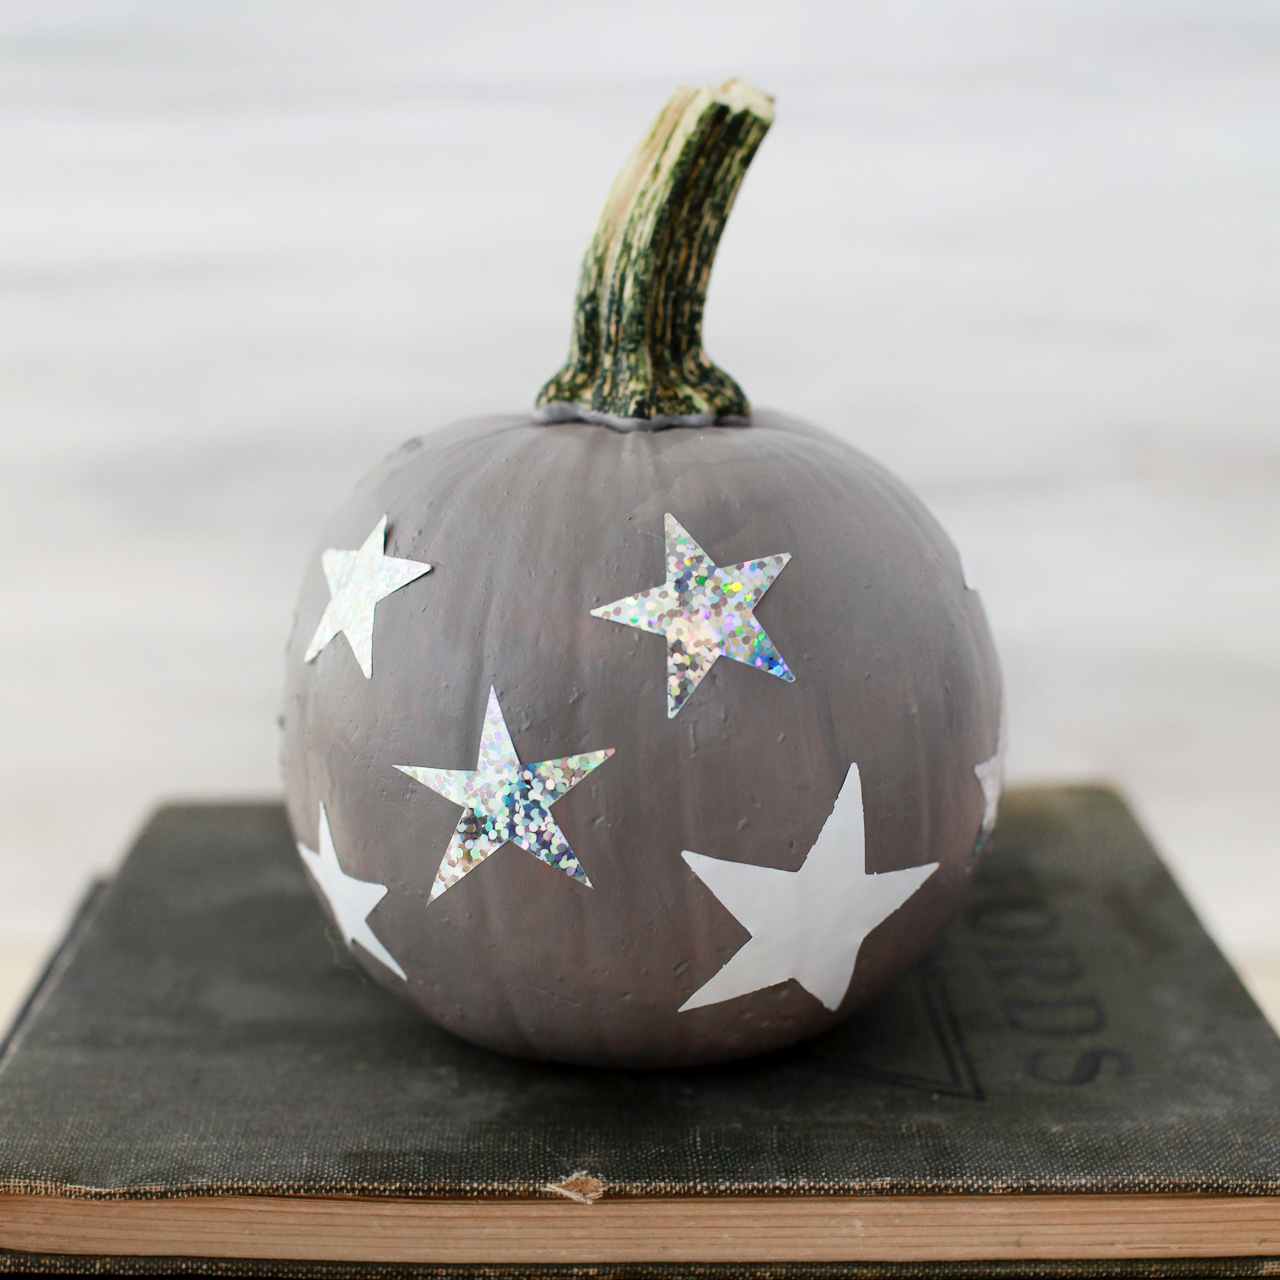
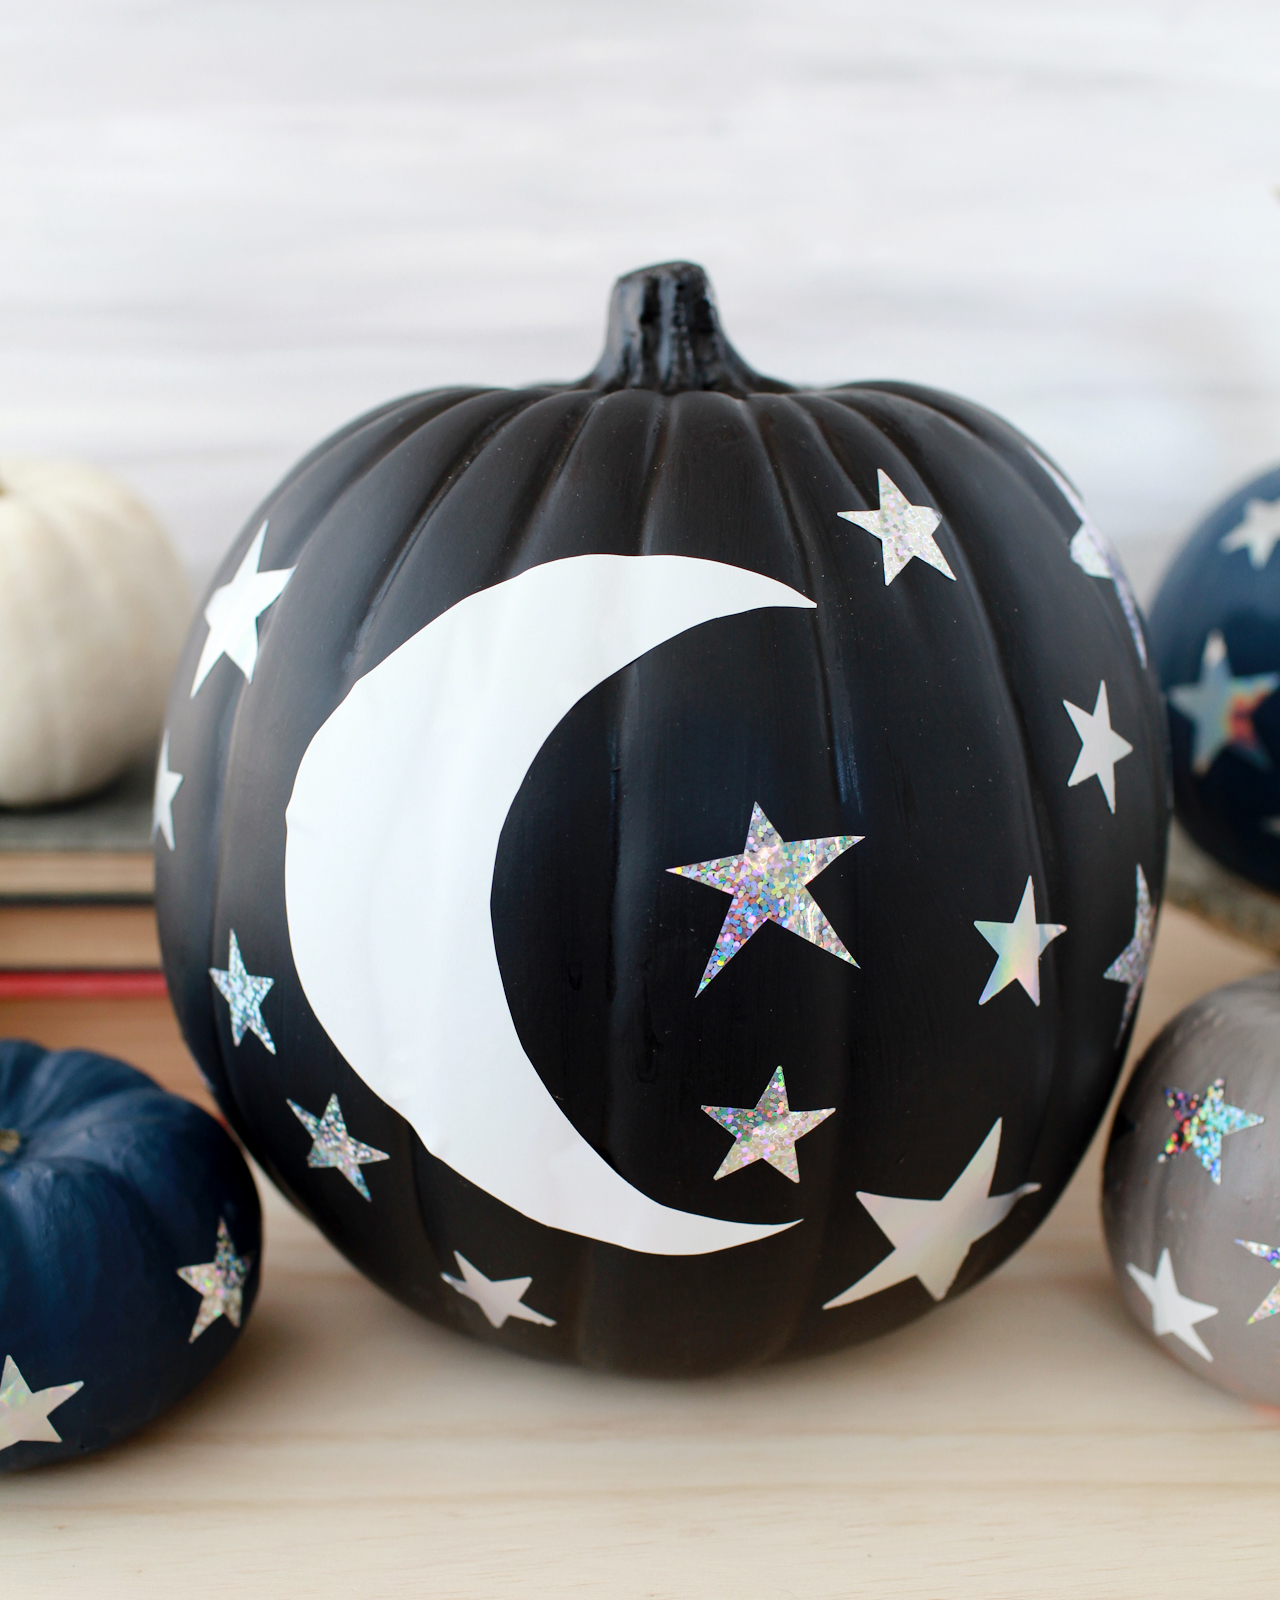
I always like to incorporate hand drawn shapes into my projects, so these pumpkins feature a quirky crescent moon and cute little stars that I cut by hand using my favorite Orange-handled Scissors – which just celebrated their 50th anniversary! (Did you catch the Matisse-inspired garland that I made to celebrate??) For those of you with little helpers at home that are anxious to help out, they can cut a few hand drawn stars using Fiskars Kids Scissors! I made the rest of the stars using the Fiskars Star Thick Materials Shape Punches and mixed them with the hand cut shapes. I love the idea of having one big pumpkin with the crescent moon surrounded by lots of little pumpkins with tiny hologram foil stars!

DIY Moon and Stars Pumpkins

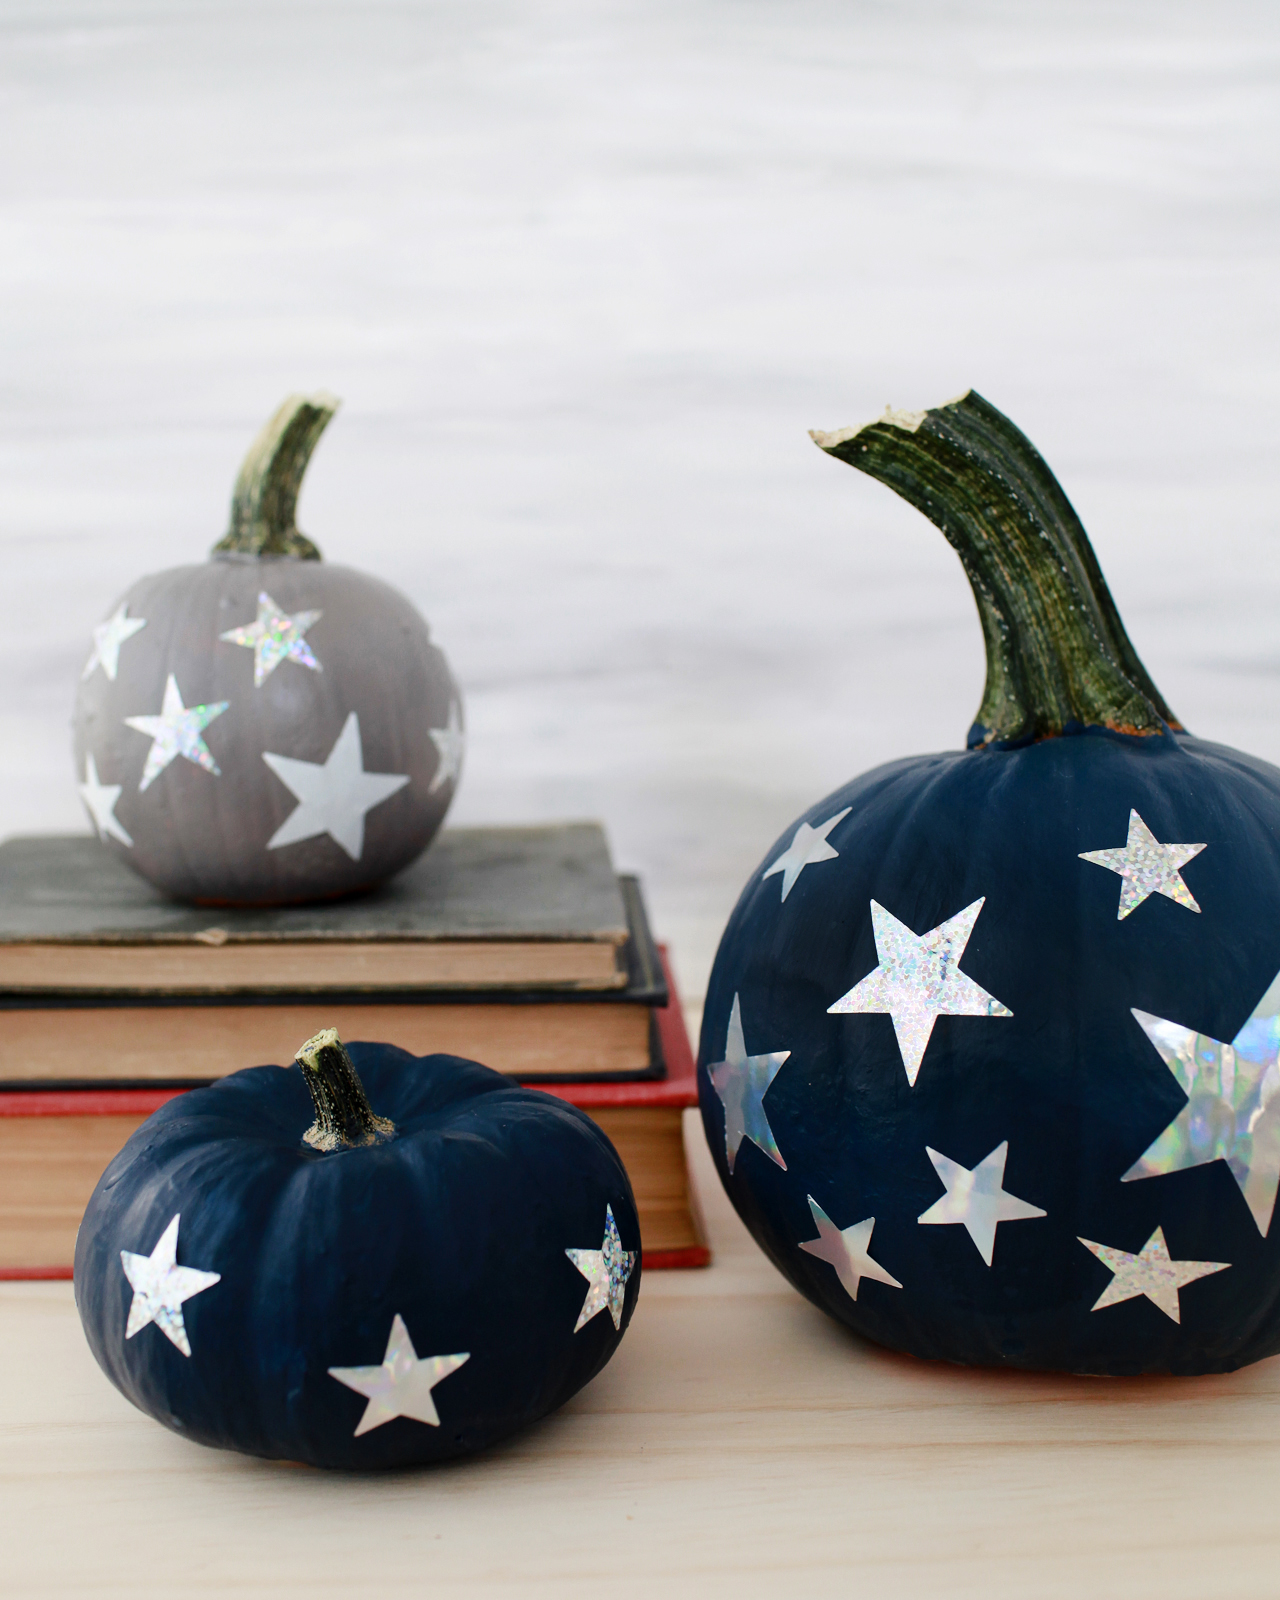
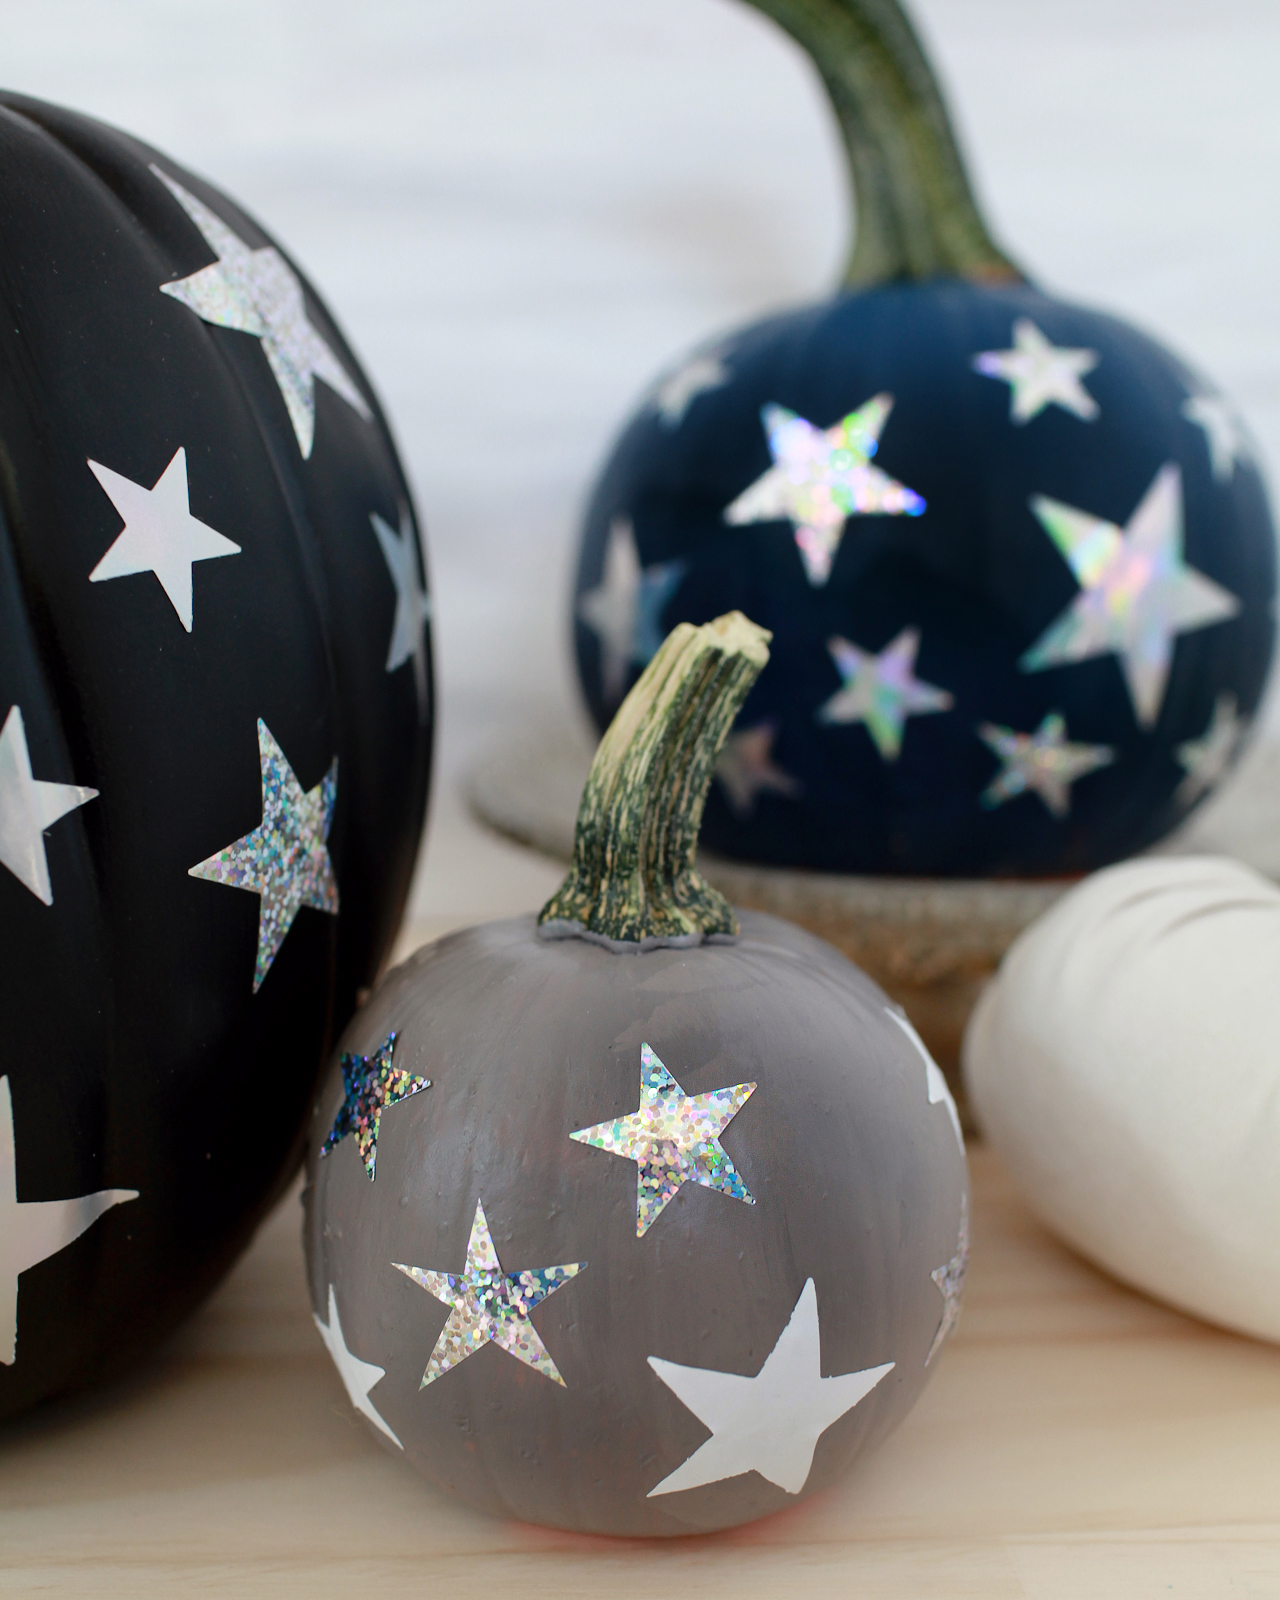
I’m always drawn to black and white pumpkins for Halloween, but for these moon and star pumpkins I added dark navy blue and charcoal gray to the mix. I’m all about those non-traditional holiday color palettes! You can use faux pumpkins and/or real pumpkins for this tutorial (I used both), but the hologram foil is particularly striking against dark colors, so I’d recommend painting any real pumpkins with navy blue or black matte craft paint before applying the hologram foil stars.

DIY Moon and Stars Pumpkins

Supplies

Fiskars Original Orange-handled Scissors

Fiskars Kids Scissors (for those of you with little helpers!)

Fiskars Star Thick Materials Shape Punch in small, medium, and large

Hologram vinyl, hologram glitter self-adhesive sheets, and matte white vinyl

Pencil

Real or faux pumpkins

Matte craft paint and paintbrush

DIY Moon and Stars Pumpkins

DIY Moon and Stars Pumpkins

To make the DIY Moon and Stars Pumpkins:

Step 1. Paint your pumpkins using a matte craft paint in a dark color (like navy blue, charcoal gray, or black) and allow them to dry completely. If you like, you can also use faux black pumpkins and skip this step!

Step 2. Use a pencil to lightly sketch the shape of a crescent moon on the back of the white vinyl. The size of the crescent moon will vary depending on the size of your pumpkin, but my crescent moon was just over 5″ tall on an 8″ tall faux pumpkin. Use the Orange-handled Scissors to cut the crescent moon shape from the white vinyl.

Step 3. Use the Star Thick Materials Shape Punches to make lots of stars in varying sizes from the hologram vinyl and hologram glitter self-adhesive sheets. You can also punch some stars out of the matte white vinyl and add those to the mix!

A couple quick tips for punching the star shapes from the vinyl: I found it easiest to cut 3″ strips of vinyl from the roll using my Orange-handled Scissors, then punch the star shapes from those strips. When operating the punch, I had the best luck when the vinyl was facing up and I moved the blades really quickly. If you try to punch the vinyl too slowly, the vinyl can get stuck in the blades and create rough edges. Punching quickly creates nice clean edge lines!

Step 4. Use a pencil to draw some stars on the back of the hologram vinyl and glitter sheets, then cut those by hand using the Orange-handled Scissors. If you have little helpers, they can also cut out a few hand drawn stars using Fiskars Kids Scissors!

Step 5. Peel the protective backing off the white crescent moon and apply the vinyl shape to your largest pumpkin. Then peel the protective backing off the star shapes and apply them to your pumpkins one by one. Try to cluster a bunch of the smallest stars together and incorporate the larger stars in random patterns, just like you’d see in the night sky. For the smallest pumpkins, use only the smallest star shape and place them in a staggered line around the pumpkin. Continue placing stars (and punching new stars as needed) until you’ve covered all of your pumpkins!

DIY Moon and Stars Pumpkins

DIY Moon and Stars Pumpkins

DIY Moon and Stars Pumpkins

DIY Moon and Stars Pumpkins

Aaaaaah! These are so cute I can barely stand it! And so pretty when mixed with a few undecorated white (or even orange!) pumpkins. Add in some colorful fall flowers and you’re pretty much guaranteed to have the prettiest front porch on the block. Happy Halloween crafting!

p.s. Printable Halloween favor bags and a fun DIY eyeball Halloween door cover!

This post was created in partnership with Fiskars. All content and opinions are my own. Thank you for supporting the sponsors that make Oh So Beautiful Paper possible!

Photos by Nole Garey for Oh So Beautiful Paper

Happy Weekend!

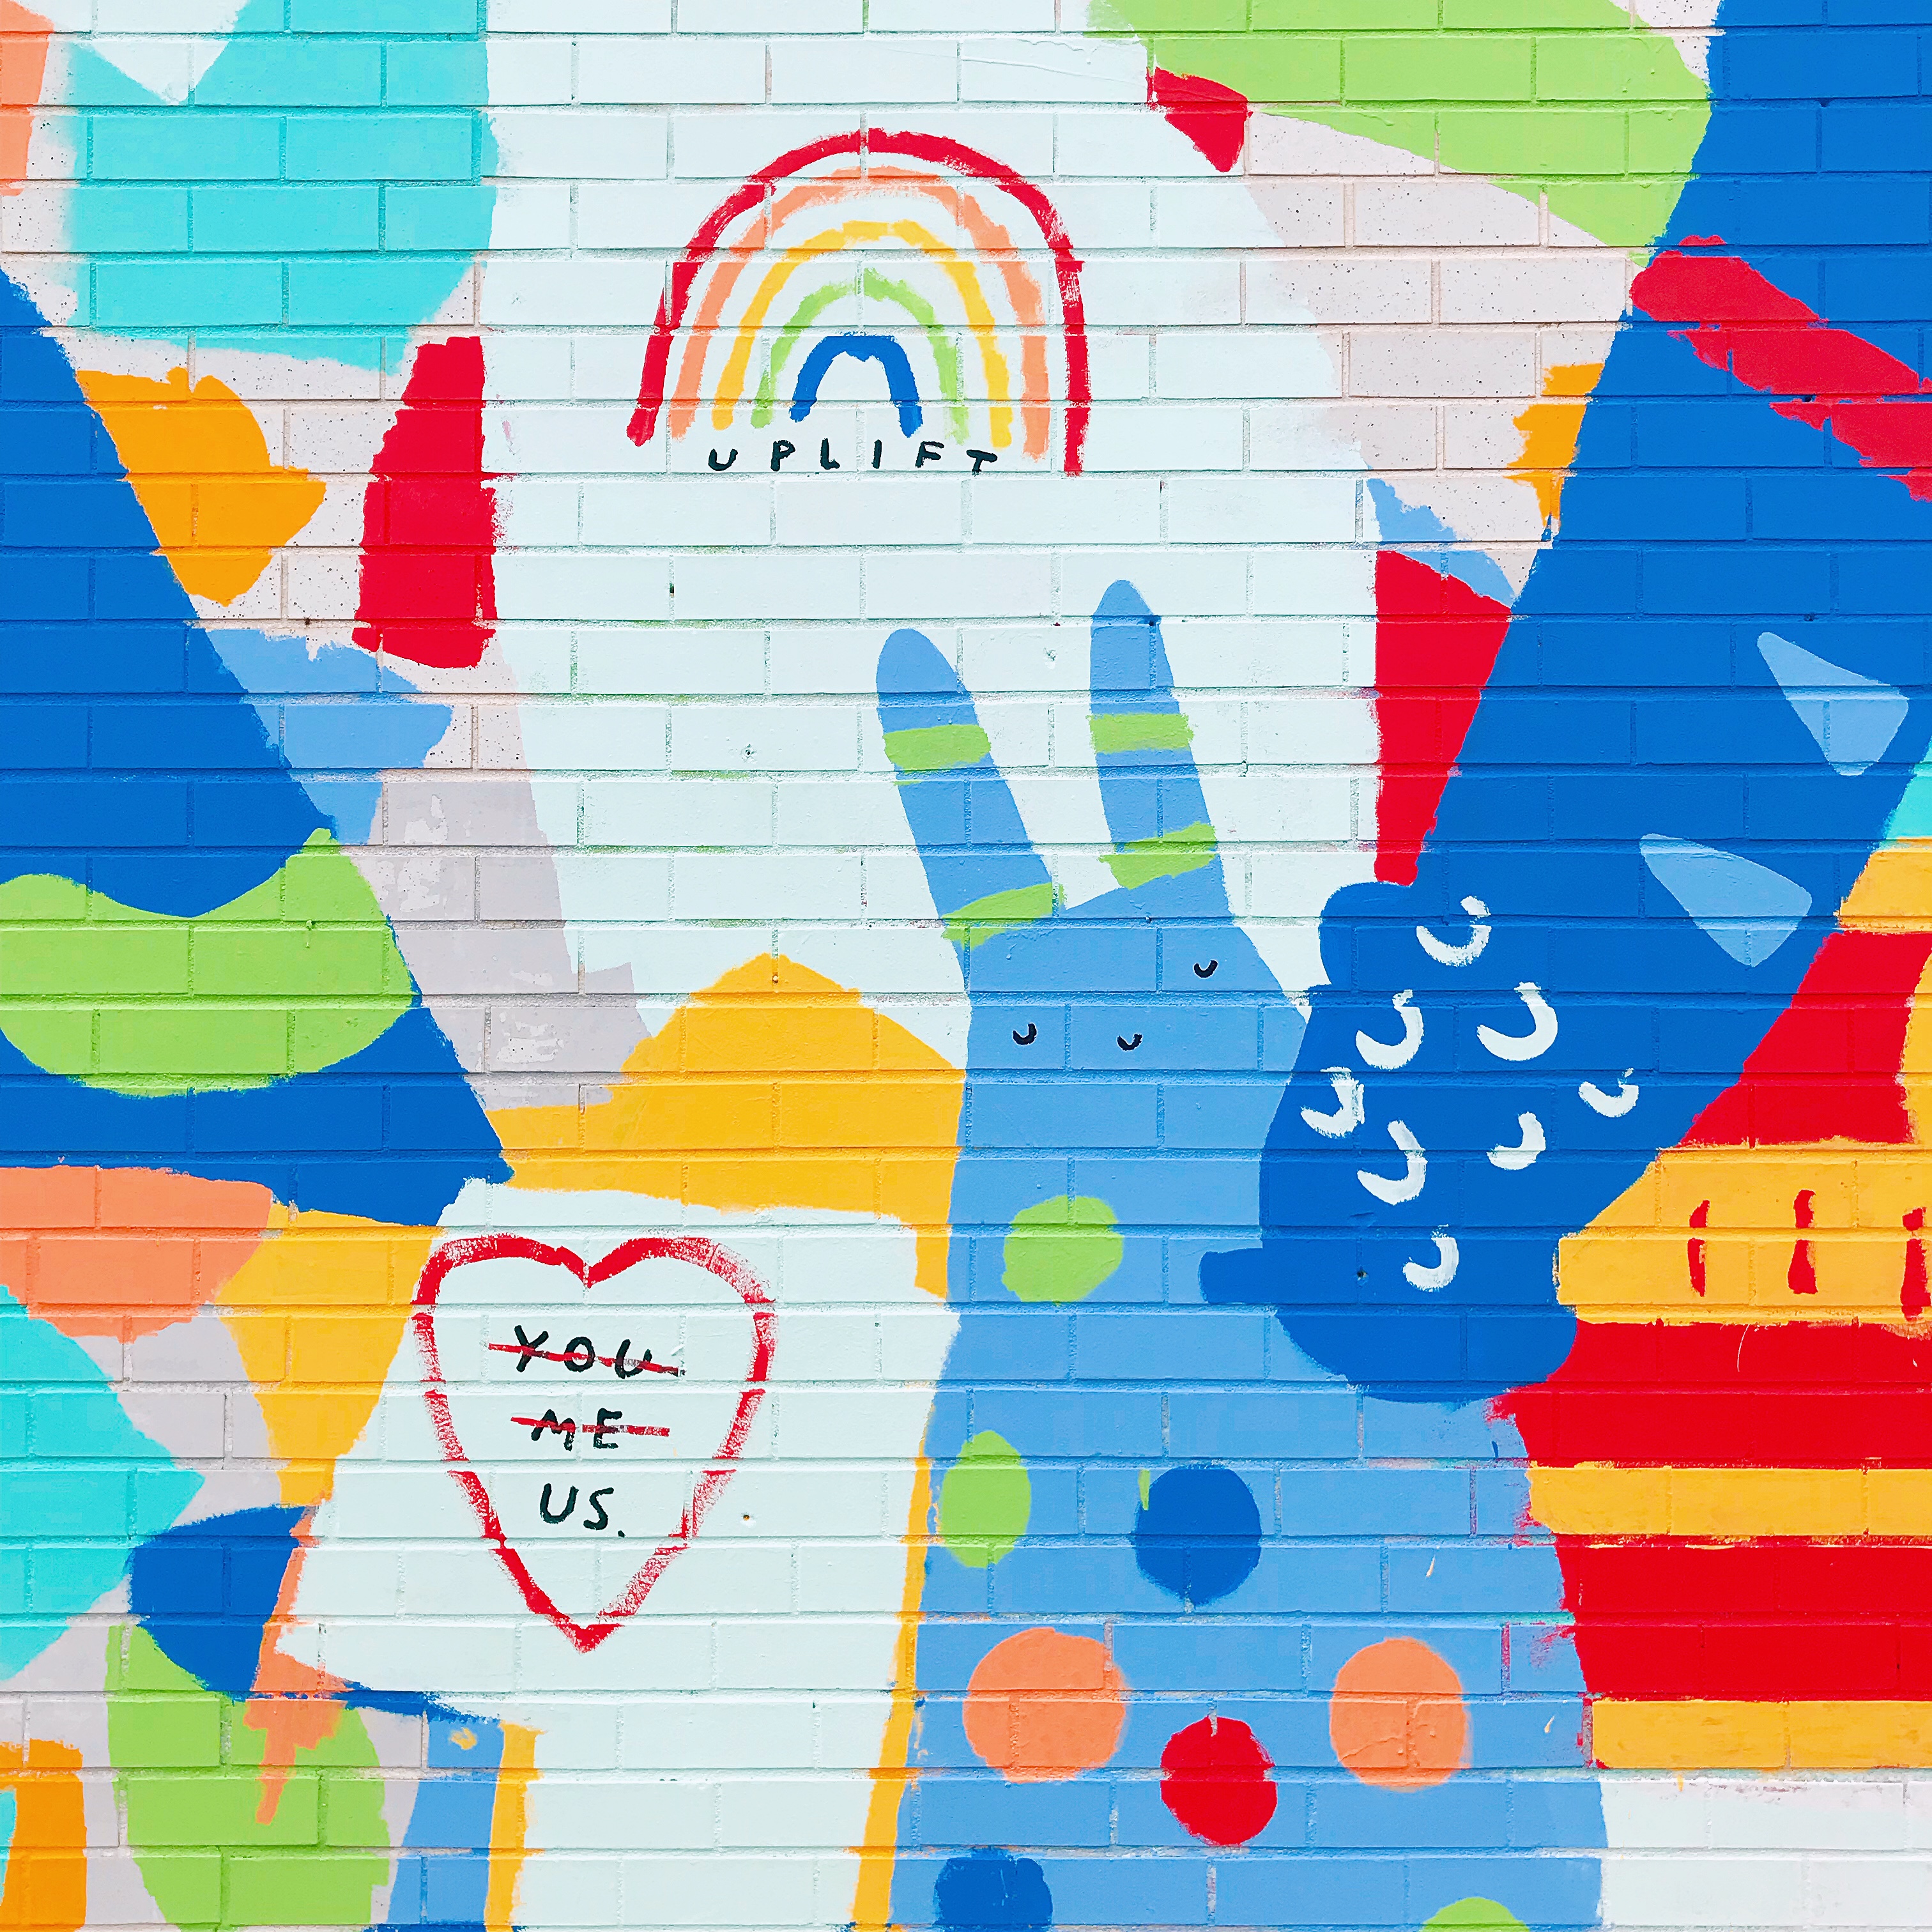
Happy Friday everyone! We’ve had the most gorgeous week here in DC, and I got to chaperone my first field trip for Sophie’s kindergarten class on Monday! We went out to a farm in Virginia with a huge pumpkin patch and a bunch of fun things for kids to do. Sophie has 25 kids in her class, so it was a little bit chaotic, but a lot of fun. This weekend we’re planning to take Alice to the pumpkin patch (since she didn’t get to go on the field trip) and enjoy this gorgeous fall weather! But in the meantime…

Dallas Clayton #kindcomments Mural at Union Market in Washington, DC

Photo by me of the new Dallas Clayton #kindcomments Mural at Union Market here in DC

…a few links for your weekend!

I just bought this jacket and I’m already completely obsessed with it! And it’s currently 25% off!

Definitely going to try this DIY two-toned concrete vase project

Country Curtains is going out of business after 60 years, and I’m so sad. They make my absolute favorite thermal blackout roman shades – get some while you still can!

This velvet dress is perfect for the holidays!

Love the hologram foil edge on these business cards

The perfect fall bootie

MAKE: Pumpkin donuts with maple glaze and toasted coconut


This week on Oh So Beautiful Paper:

Weekend project alert! Make these DIY Matisse-inspired pumpkins

Have you tried the new recycled cotton business cards from MOO? They’re perfect for bright colors and illustrations!

Fun and modern color blocked geometric wedding invitations

Black and white wedding stationery inspiration


That’s it for me this week. I’ll see you all back here on Monday! xoxo

Seasonal Stationery: Halloween Cards (part boo!)

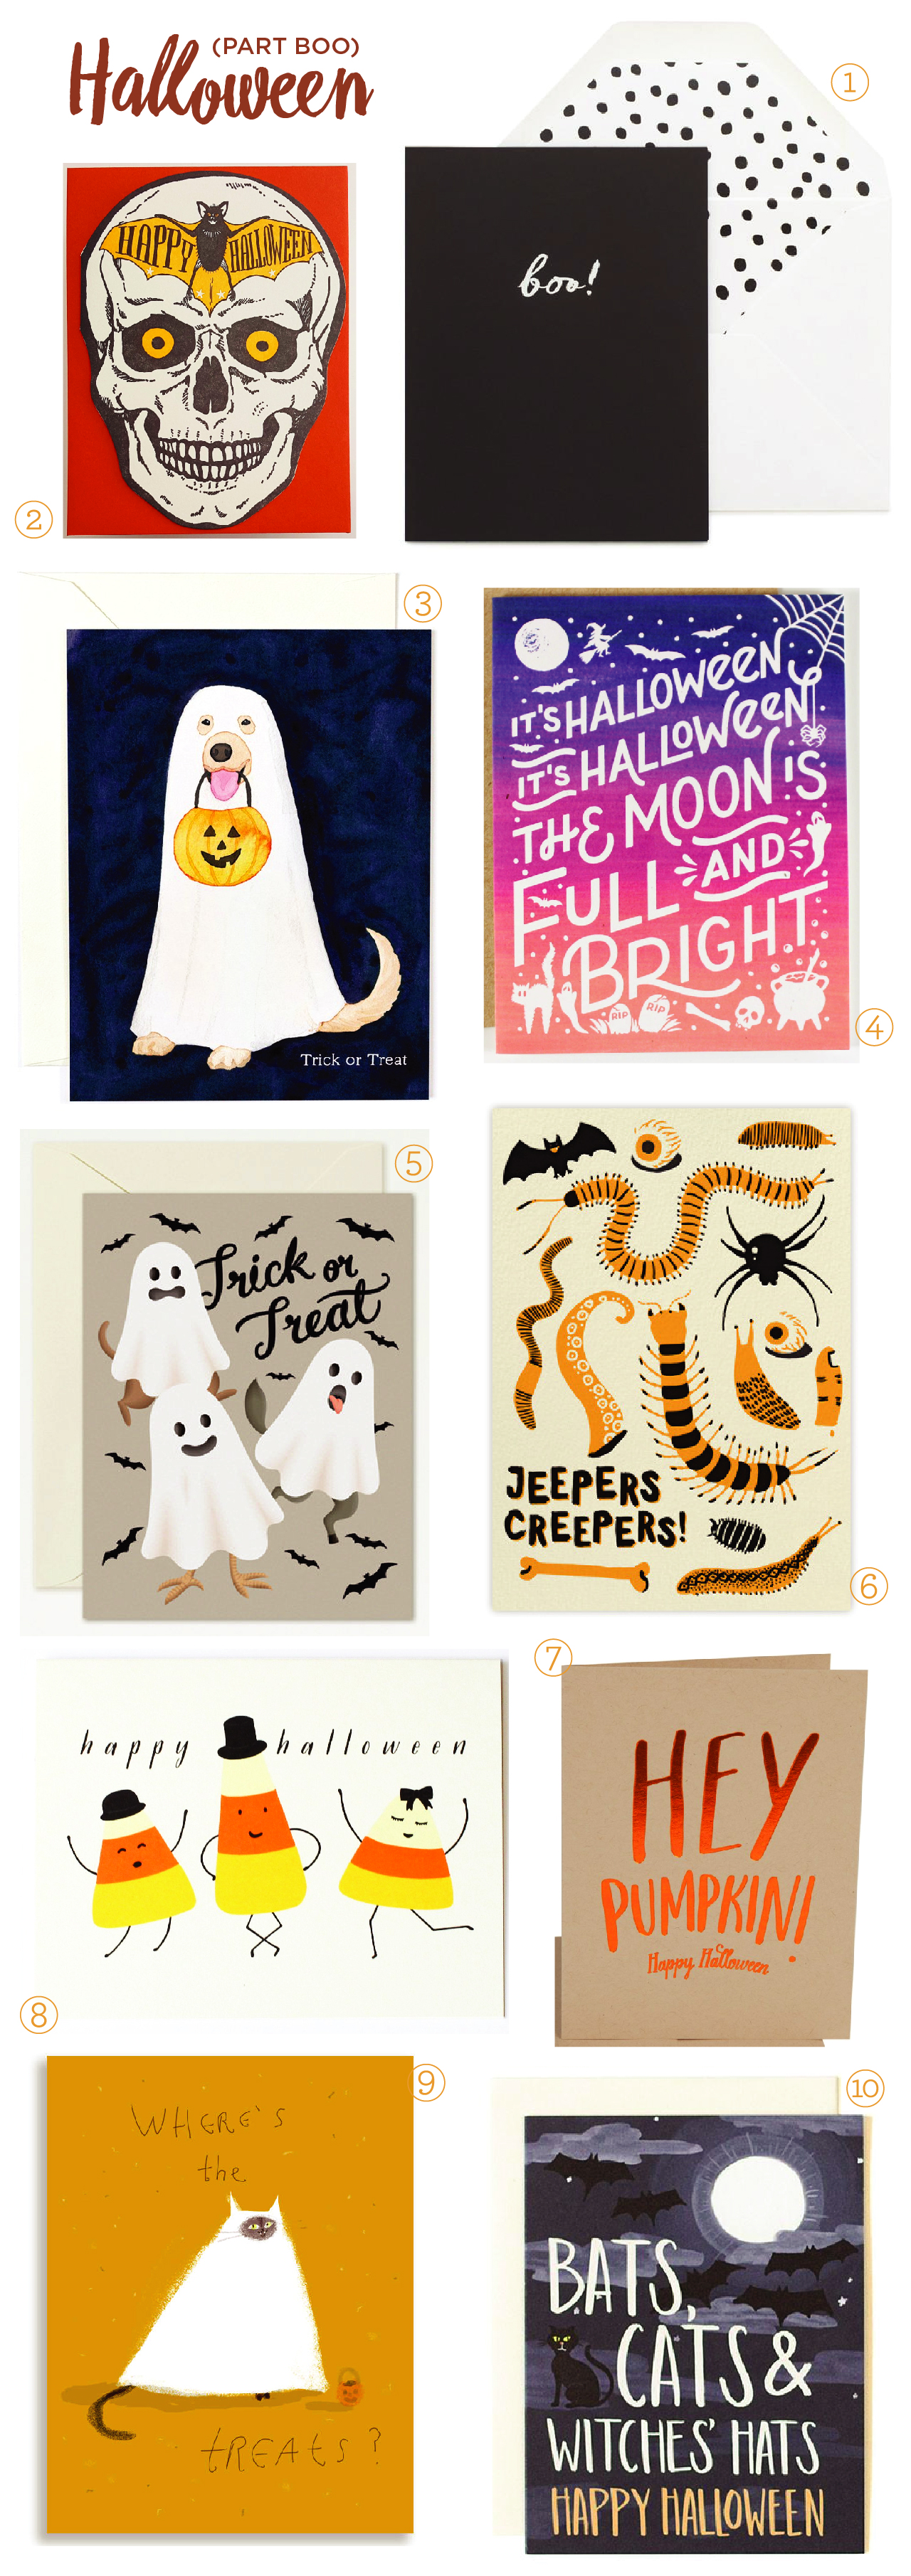
Trick or treat! We found so many great Halloween cards, that it was worth doing a second round up (check out last weeks Halloween card round up here). We’ve got anthropomorphic candy and scary skulls, not to mention three different takes on animals using the tried and true sheet-as-a-ghost costume. No matter what your favorite part of Halloween is – getting scared out of your wits, dressing up as your favorite condiment, or chowing down on multiple forms of sugar – there’s bound to be something that satisfies your Halloween sweet tooth. Happy Halloween! – Shauna

Halloween Card Round Up

From top right:

1. Boo! This classy Sugar Paper design is elegantly printed with white foil on black paper and just the right amount of Halloween cheer.

2. This Blackbird Letterpress skull and bat combo go perfectly with haunted houses and scary stories. The die cut shape adds an extra spooky dimension.

3. This furry dog ghost from Los Angeles based Golden Fox Goods is reminiscent of my personal favorite Halloween activity – patronizing our local pet parade (Check out this dog dressed as Iris Apfel!!).

4. This Wild Hart Paper design trades the traditional orange and black color palette for an ombre rainbow yet keeps the witches and ghouls for just the right combination of a very modern Halloween.

5. More animals in costume, more opportunities to dress your pug like a fried chicken sandwich. From Clap Clap Design.

6. Jeepers Creepers! Keep those creepy crawlies at bay with this bug infested design from Hello!Lucky for Paperless Post.

7. What better use for orange foil than this seasonally appropriate term of endearment number from The Social Type?

8. Get those Halloween party vibes going with these dancing candy corn courtesy of Paula and Waffle. That bowler hat!

9. Where’s the treats? Ghost cat, I was just wondering the exact same thing. From Jamie Shelman, aka The Dancing Cat.

10. Bats and cats and witches hats! From One Canoe Two.

Modern Botanical Chicago Wedding Invitations

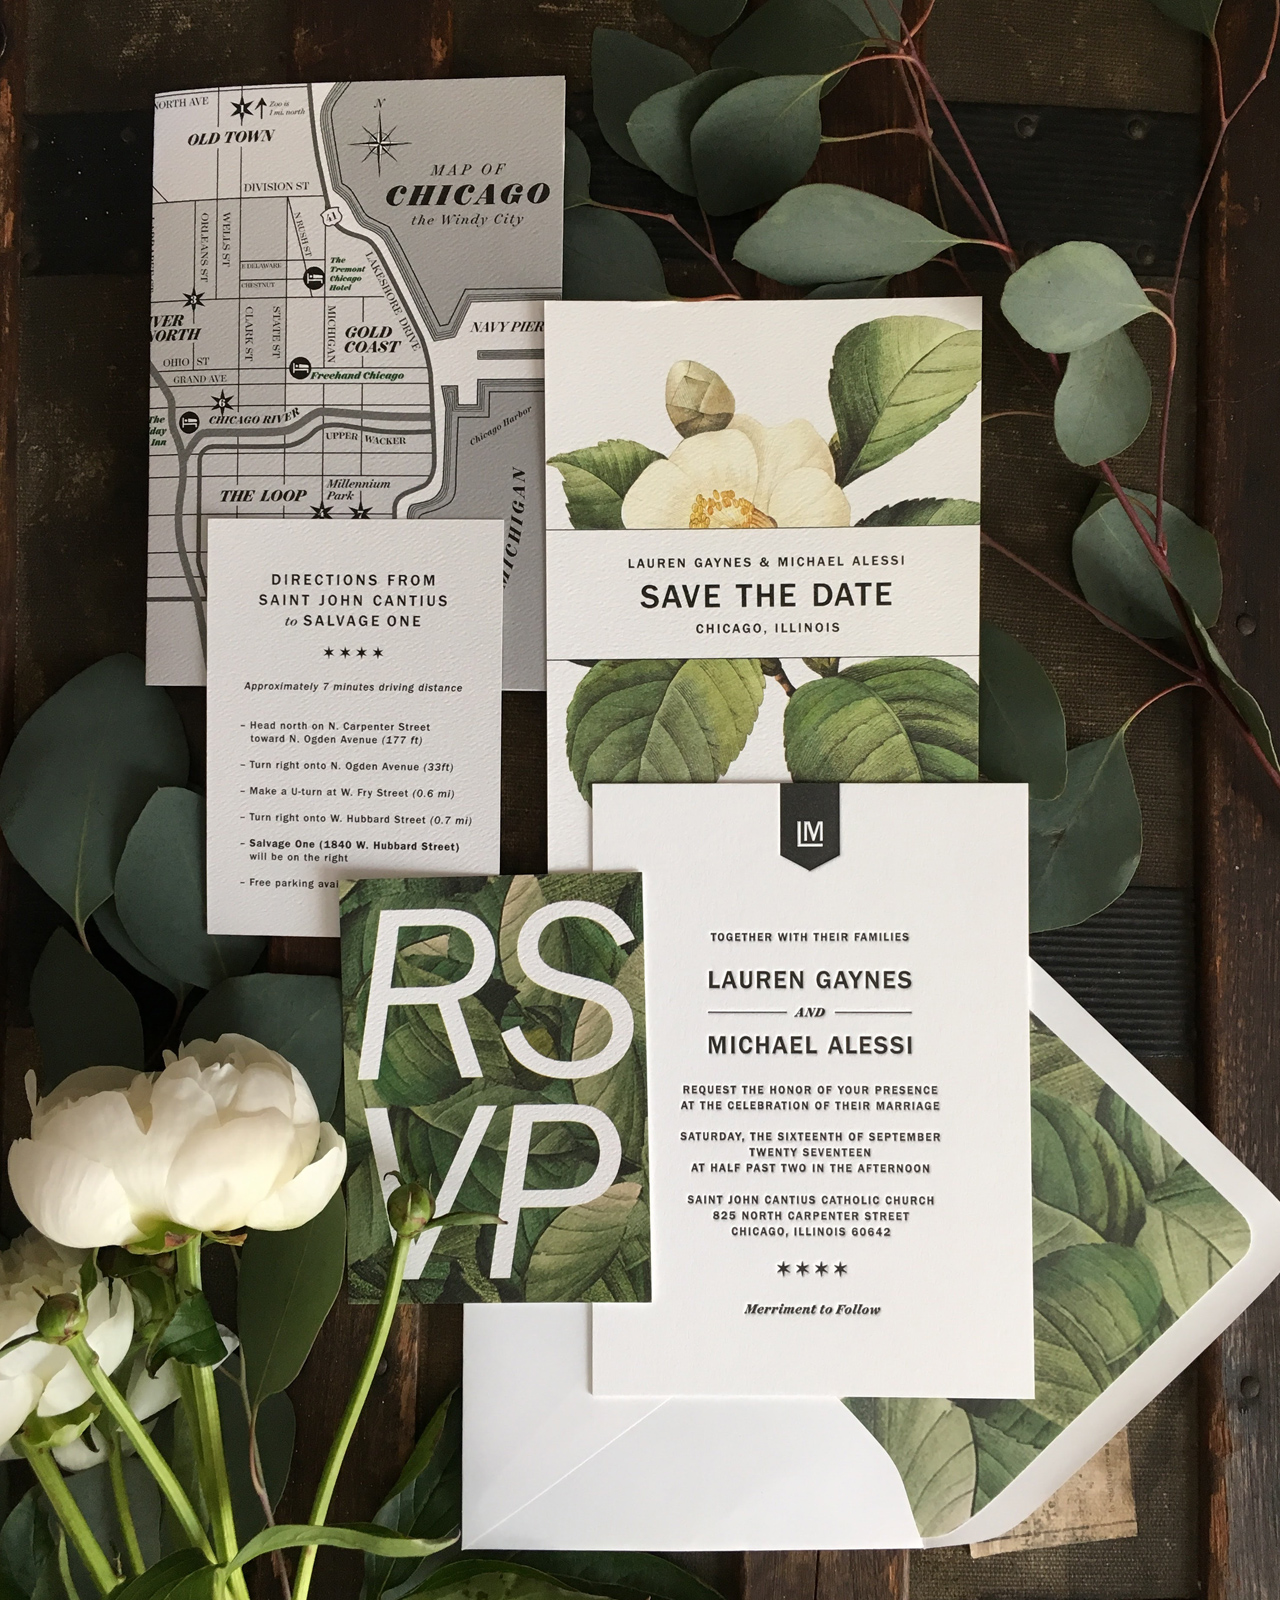
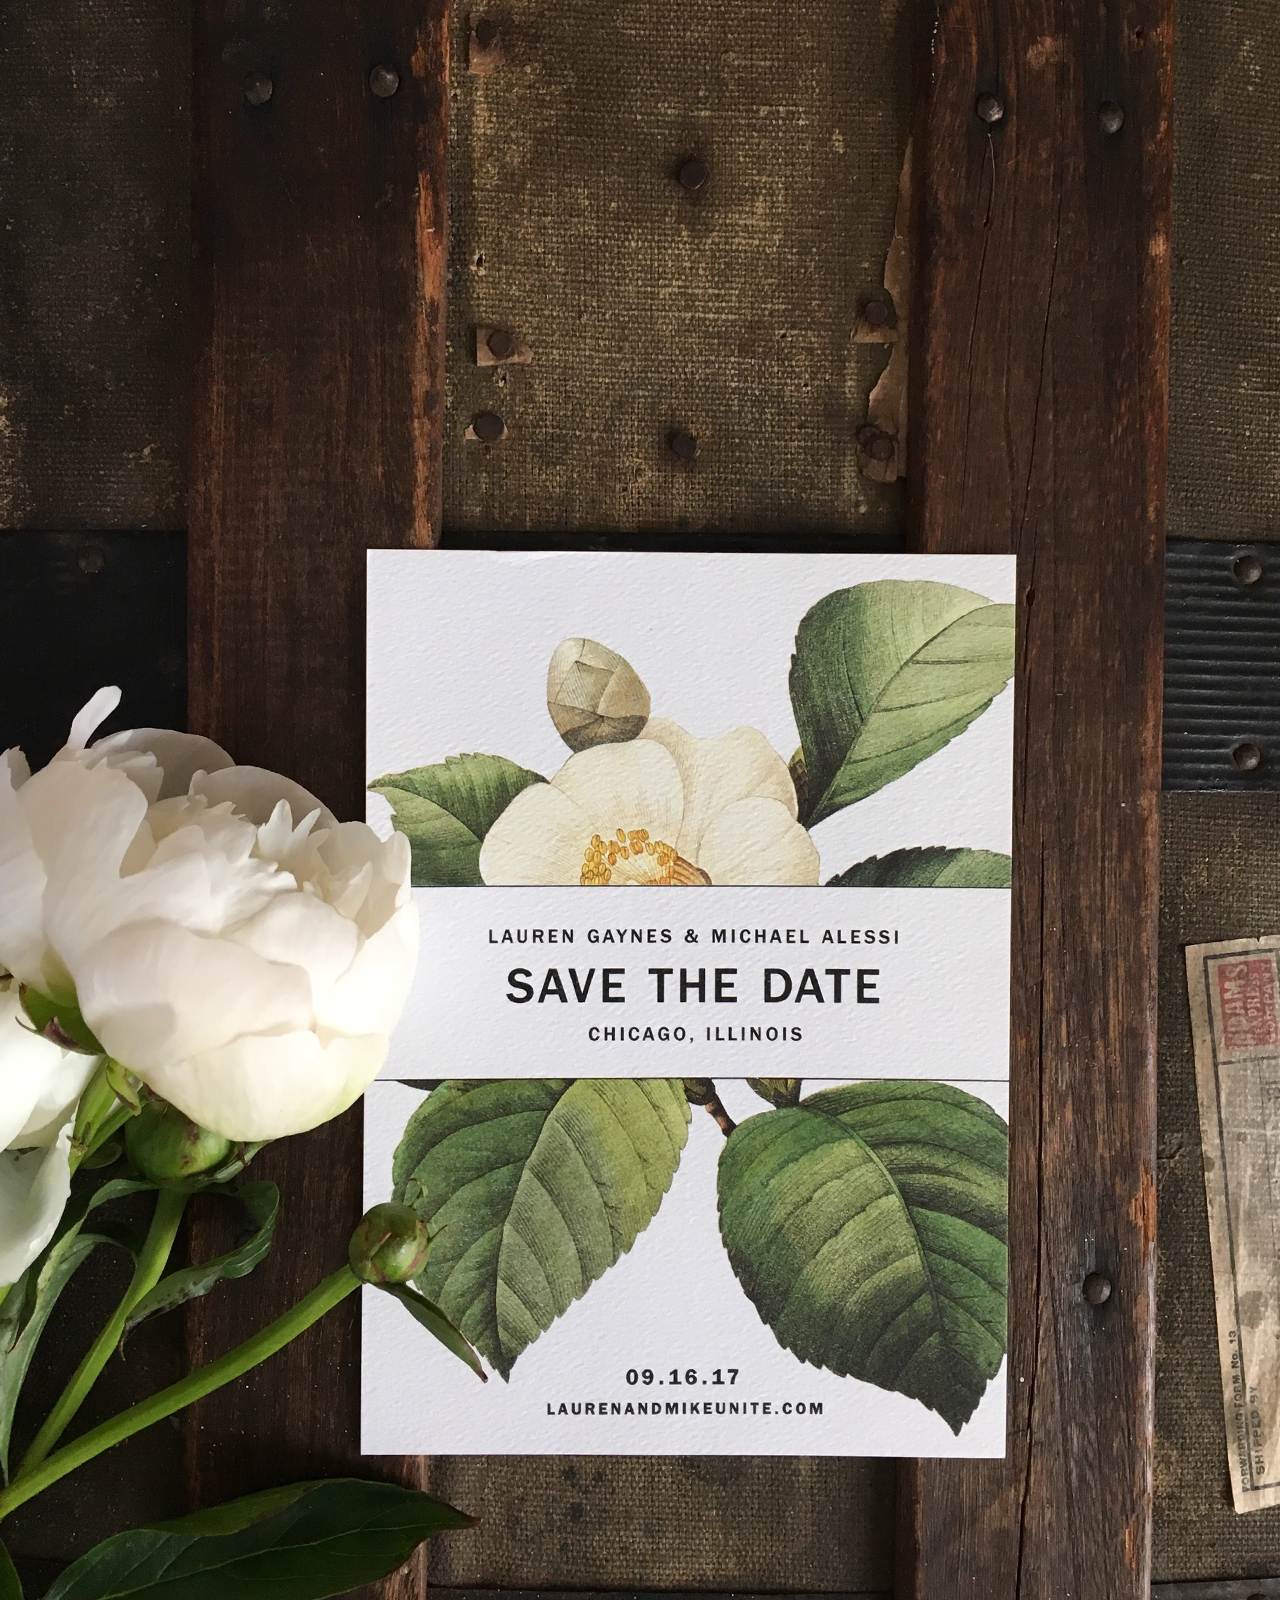
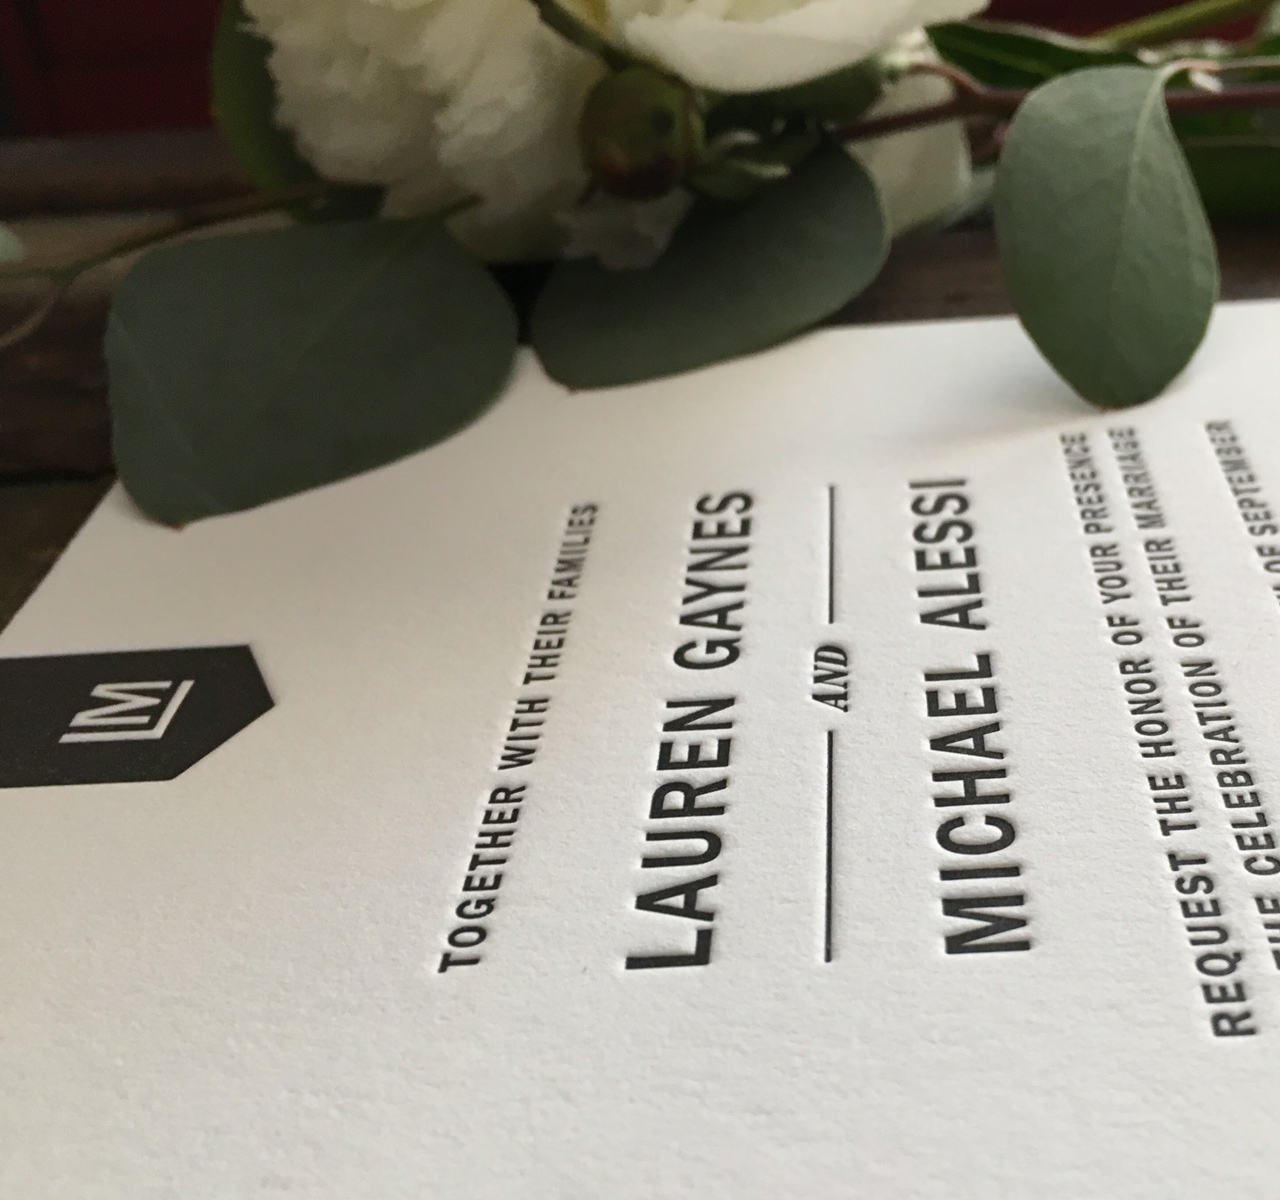
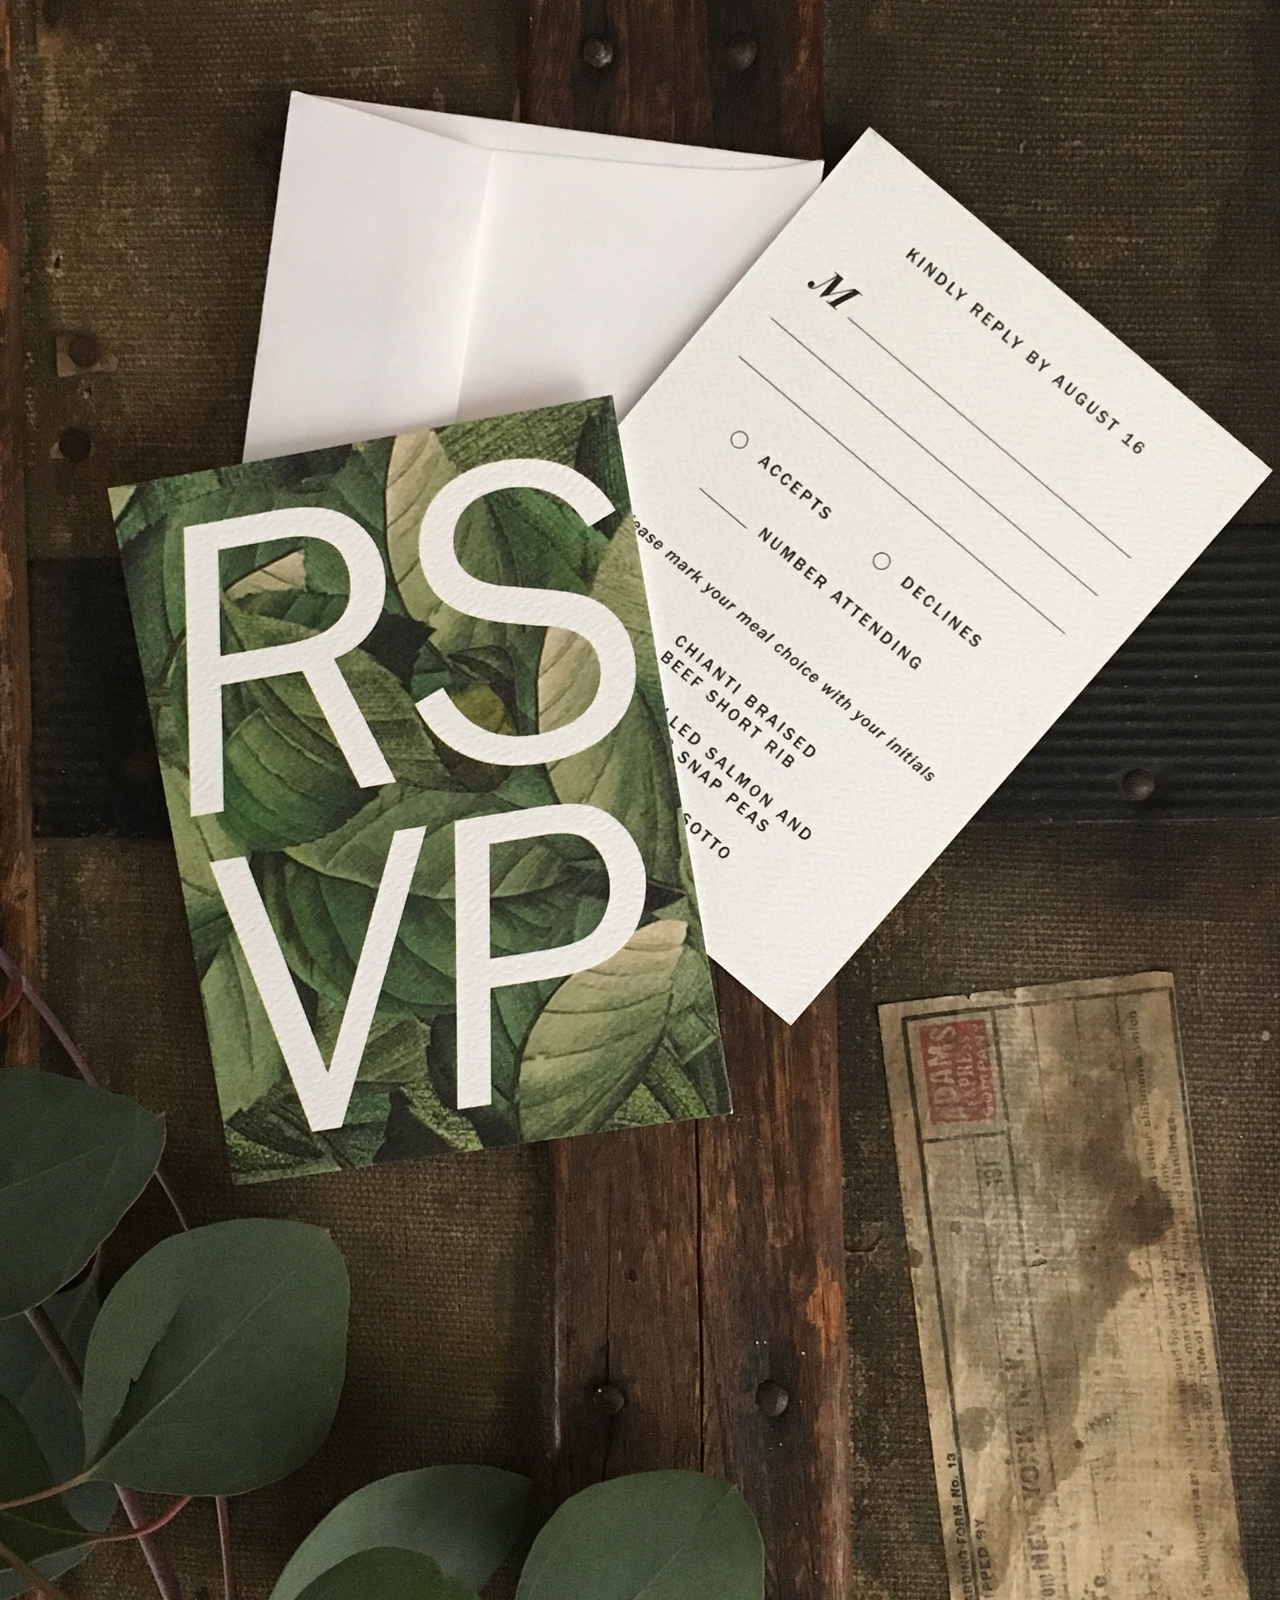
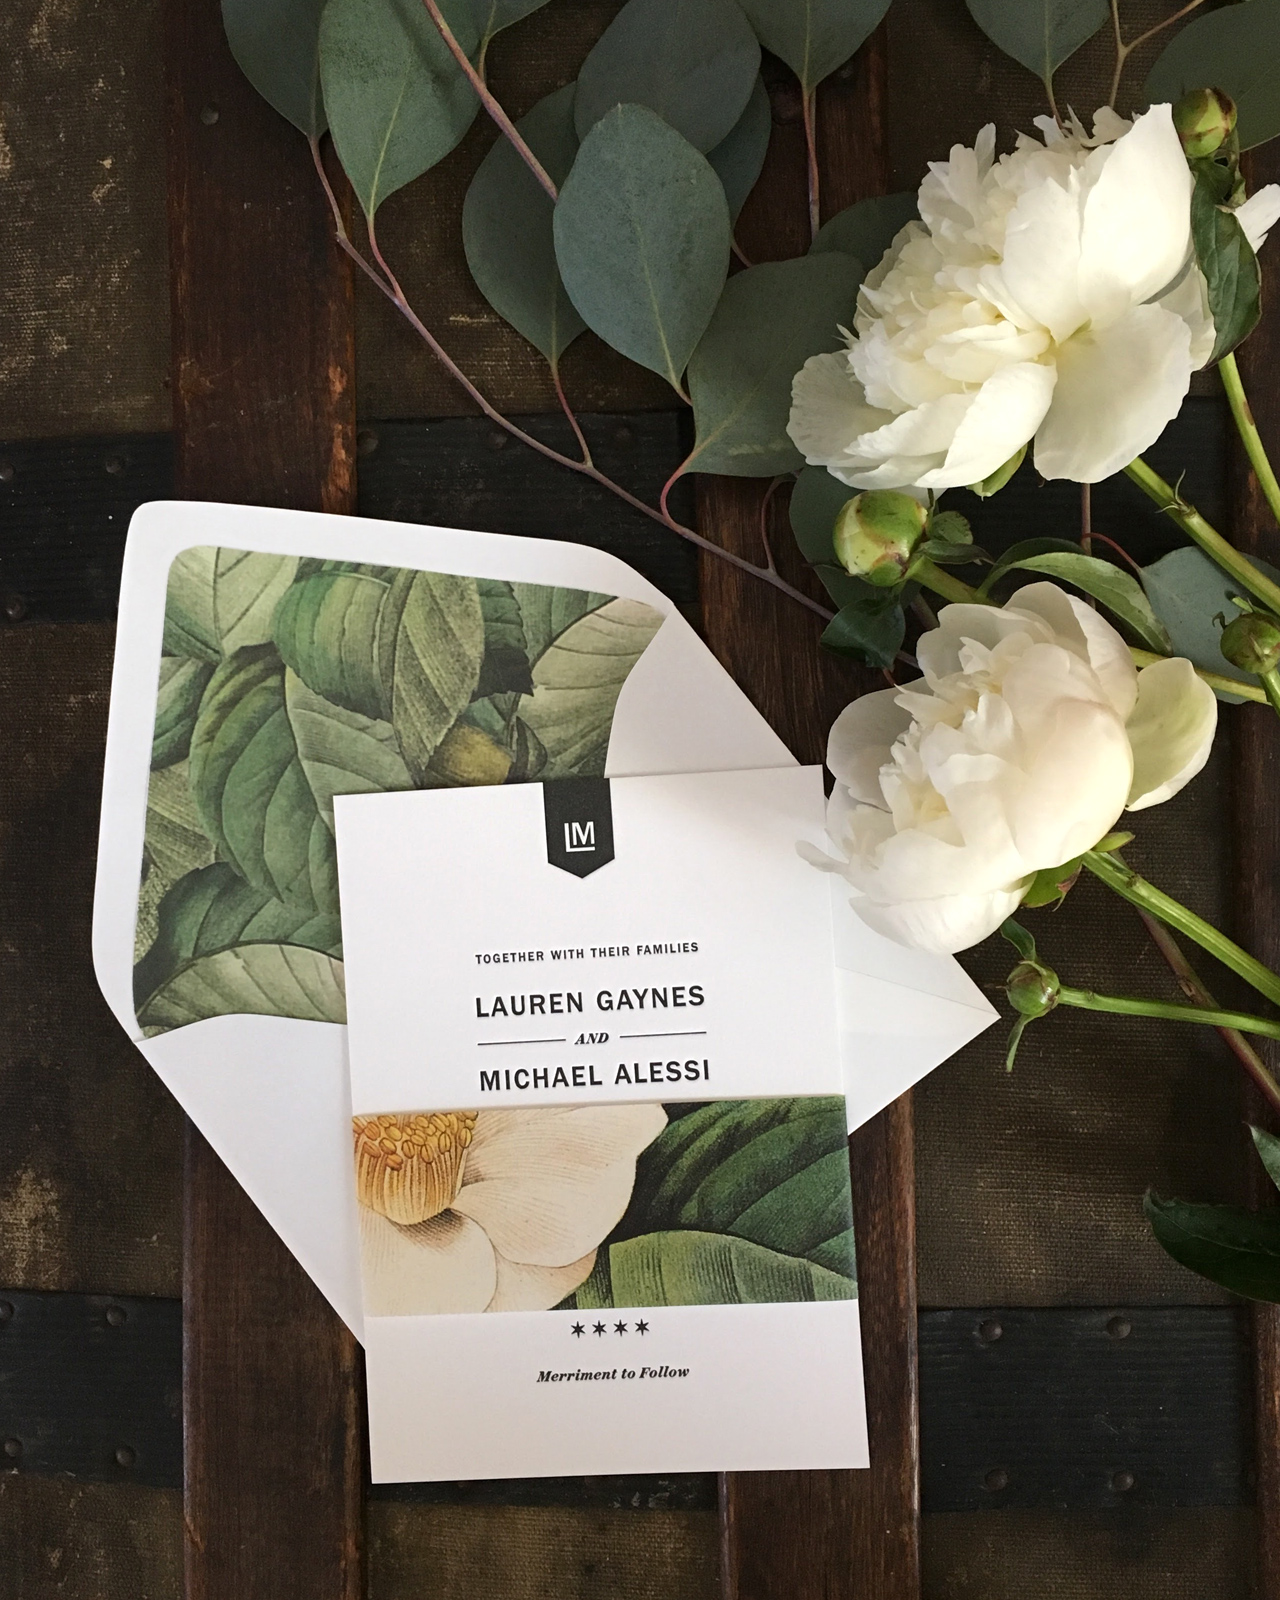
I’m partial to oversize floral patterns in wedding invitations – they make such a fantastic statement in a wedding invitation! (If you haven’t already, you have to check out the botanical envelope liners on these invitations.) I love how designer Christina Egan Chang combined modern elements with classic florals in these modern botanical Chicago wedding invitations. The large scale (and negative space!) text over the oversized botanical print on the RSVP card? So good! What a fun modern twist on a botanical invitation suite!

Modern Botanical Chicago Wedding Invitations by Christina Egan Chang

From Christina: This was a fun save the date announcement and wedding invitation suite for an elegant September Chicago wedding! Lauren, the bride, is a stylish advertising agency account manager and Michael is a teacher and writer. The pair, both Chicago natives, met in Michigan while at college and became engaged after six years of dating. Lauren and Michael wanted to evoke the ambiance from their wedding venue within the invitation details, so their color palette of green, white, black, and silver was pertinent to the design.

Modern Botanical Chicago Wedding Invitations by Christina Egan Chang

Their wedding reception took place in an antique shop turned event space by night, so we selected a vintage botanical print featuring the same flowers in Lauren’s bouquet as a recurring element in the invitation suite. Their table centerpieces featured stacks of vintage books draped with green eucalyptus and various seasonal white blooms, a visual that was frequently referred to during the design process. We created a modern crest with their first initials to add some boldness to their effortless black and white invitations.

Modern Botanical Chicago Wedding Invitations by Christina Egan Chang

Modern Botanical Chicago Wedding Invitations by Christina Egan Chang

Lauren and Michael opted for traditional letterpress printing on their wedding invitation. To balance out the cost of letterpress printing, we transformed the vintage botanical print multiple times, rather than purchasing additional botanical prints. Most noticeably the leaves from the print were trimmed out and reconstructed into a leaf composition for the envelope liners and front of the RSVP card. Lauren wanted a strong use of green for the envelope liner to contrast with the crisp white envelope, so this made for an excellent solution.

Modern Botanical Chicago Wedding Invitations by Christina Egan Chang

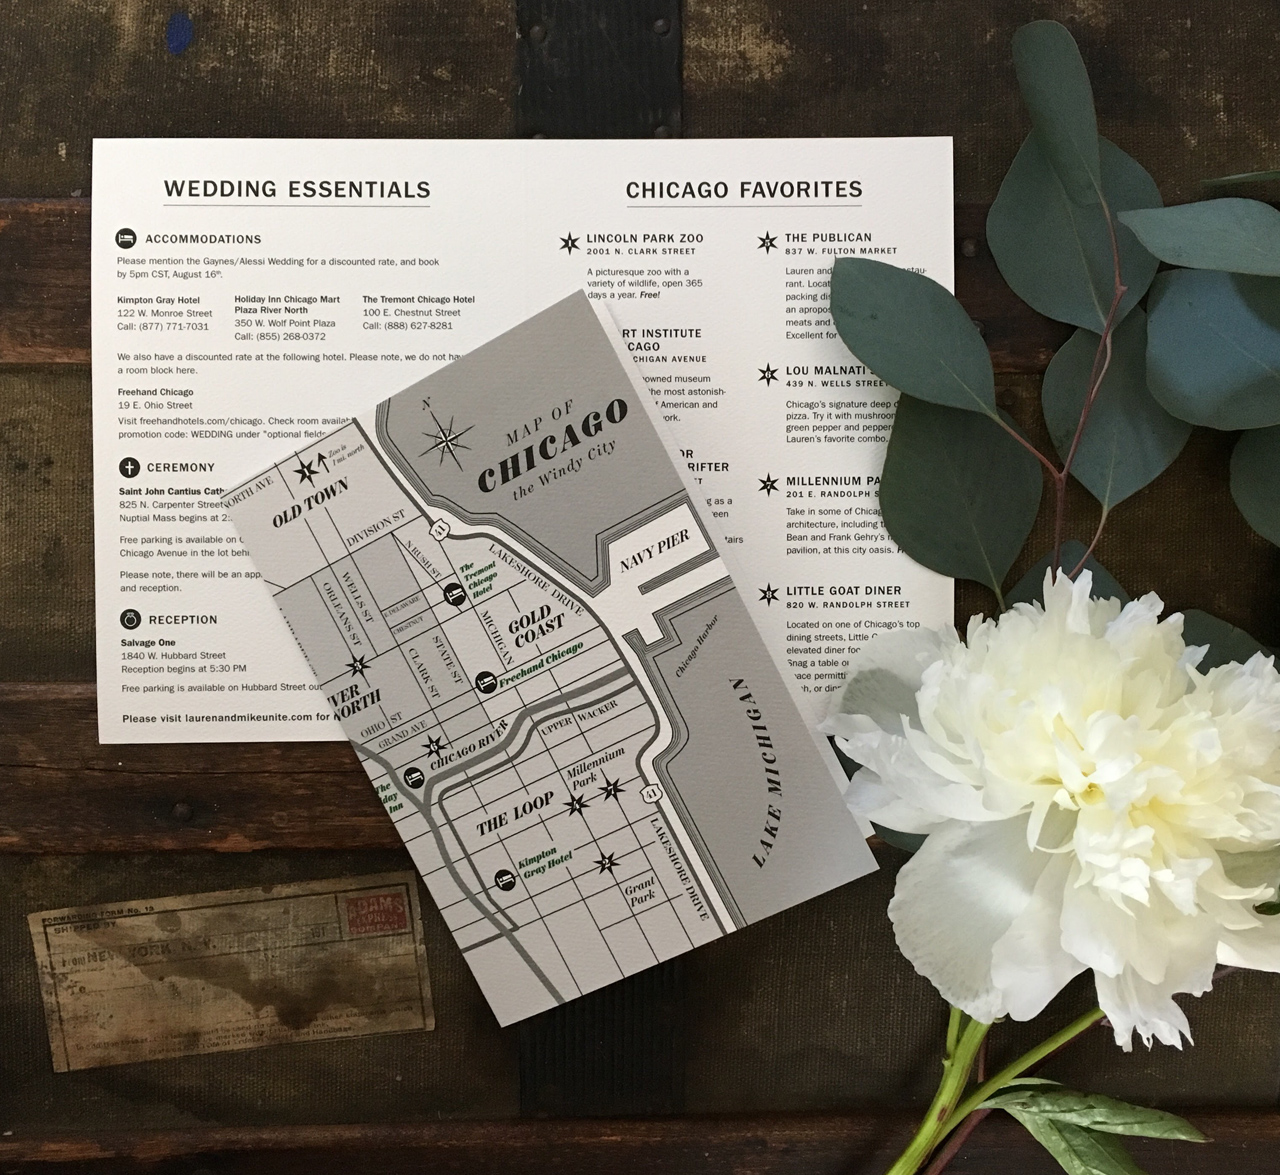
A fold over map card was included for traveling guests along with wedding details and favorite places to visit in Chicago. Lauren and Michael initially explored script fonts, classic serif fonts, and calligraphy – but ultimately opted for a modern sans serif font on their invitation suite. This type selection perfectly rounded out their personal style: an appreciation for styles of the past, combined with a love for modern and mid-century design.

Modern Botanical Chicago Wedding Invitations by Christina Egan Chang

Thanks Christina!

Design: Christina Egan Chang

Printing: Steracle Press

Check out the Designer Rolodex for more tal­ented wed­ding invi­ta­tion design­ers and the real invi­ta­tions gallery for more wedding invitation ideas!

Photo Credits: Christina Egan Chang