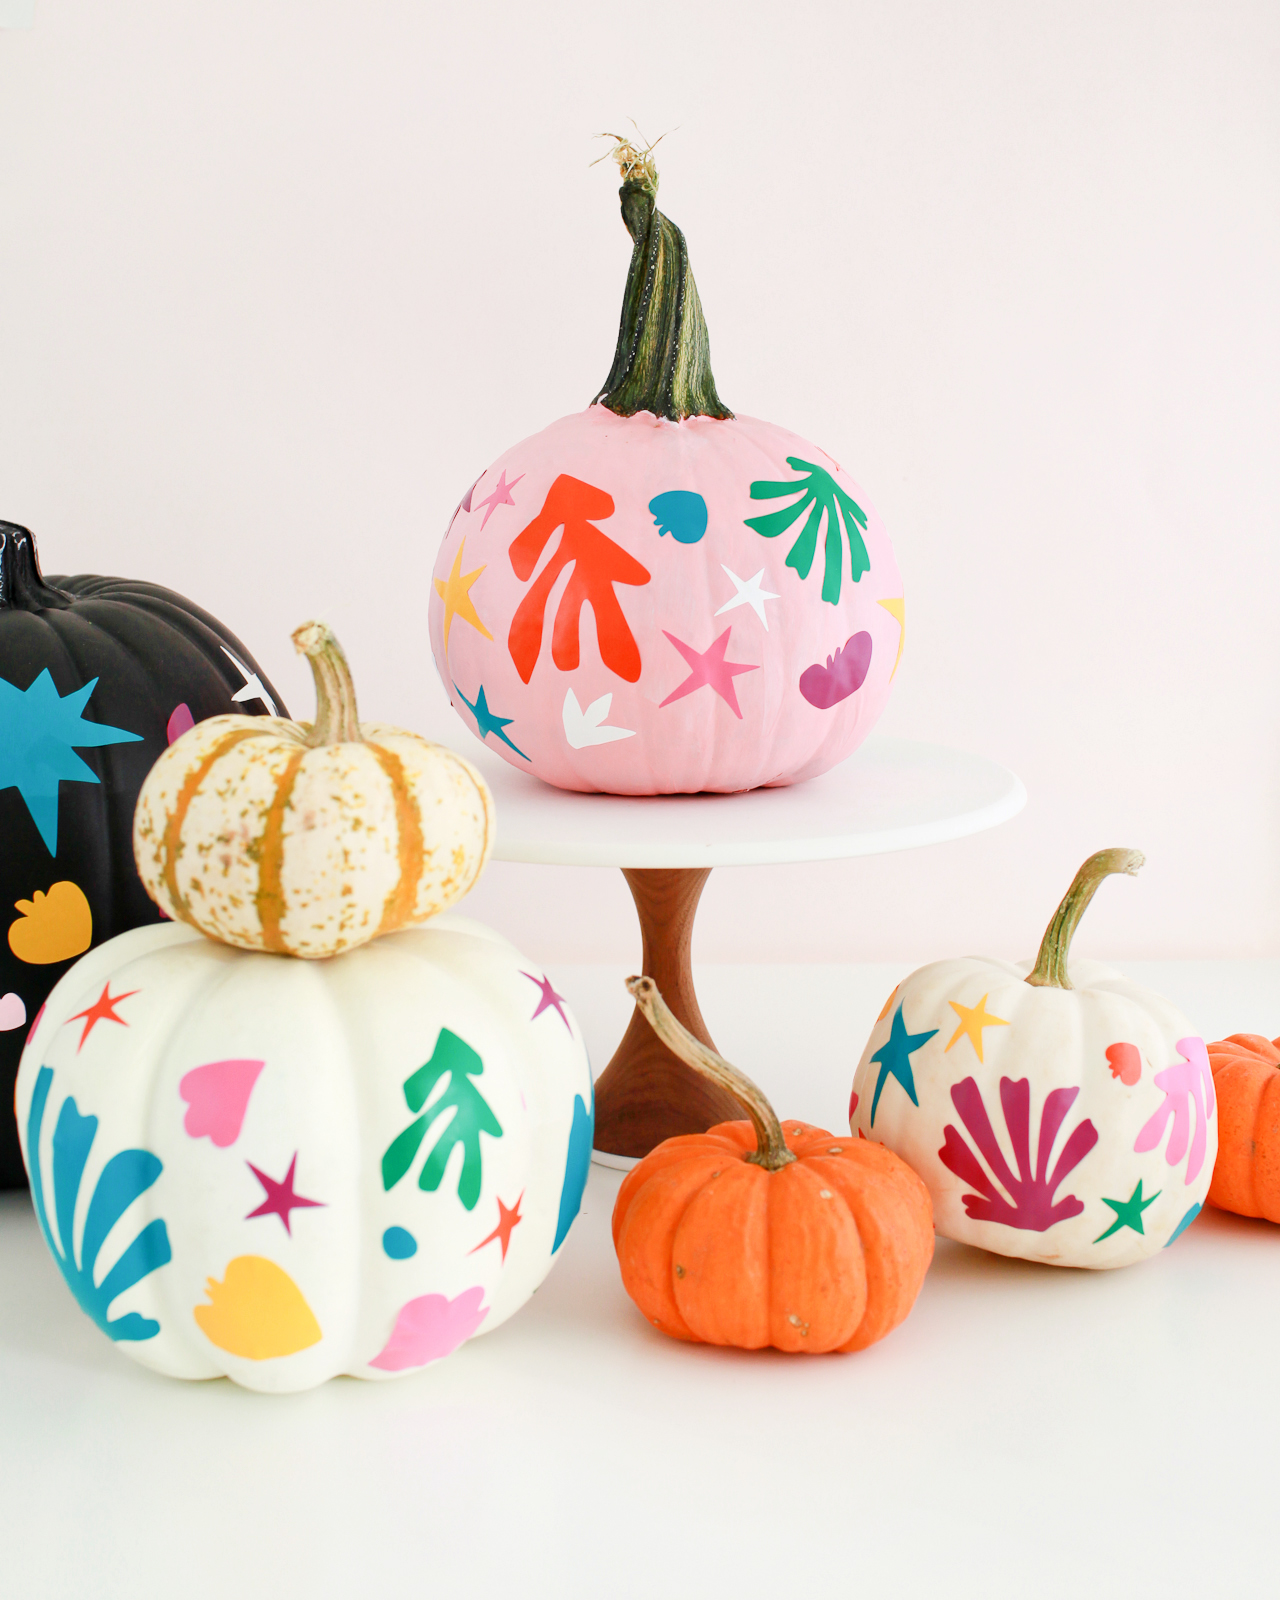
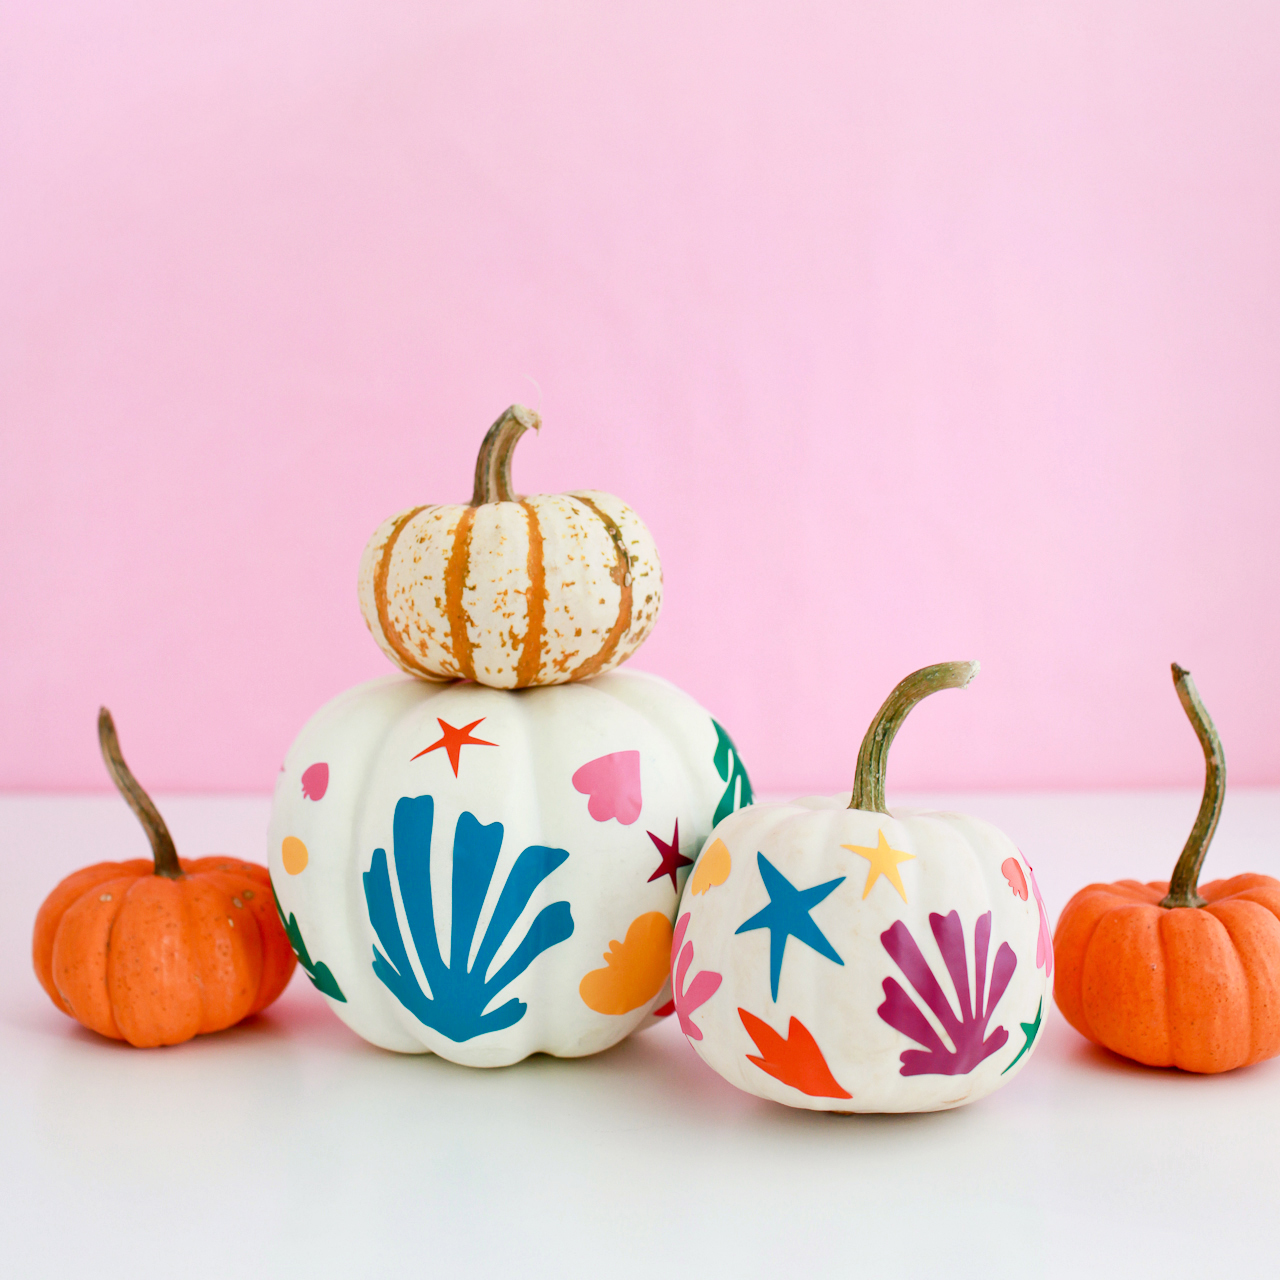
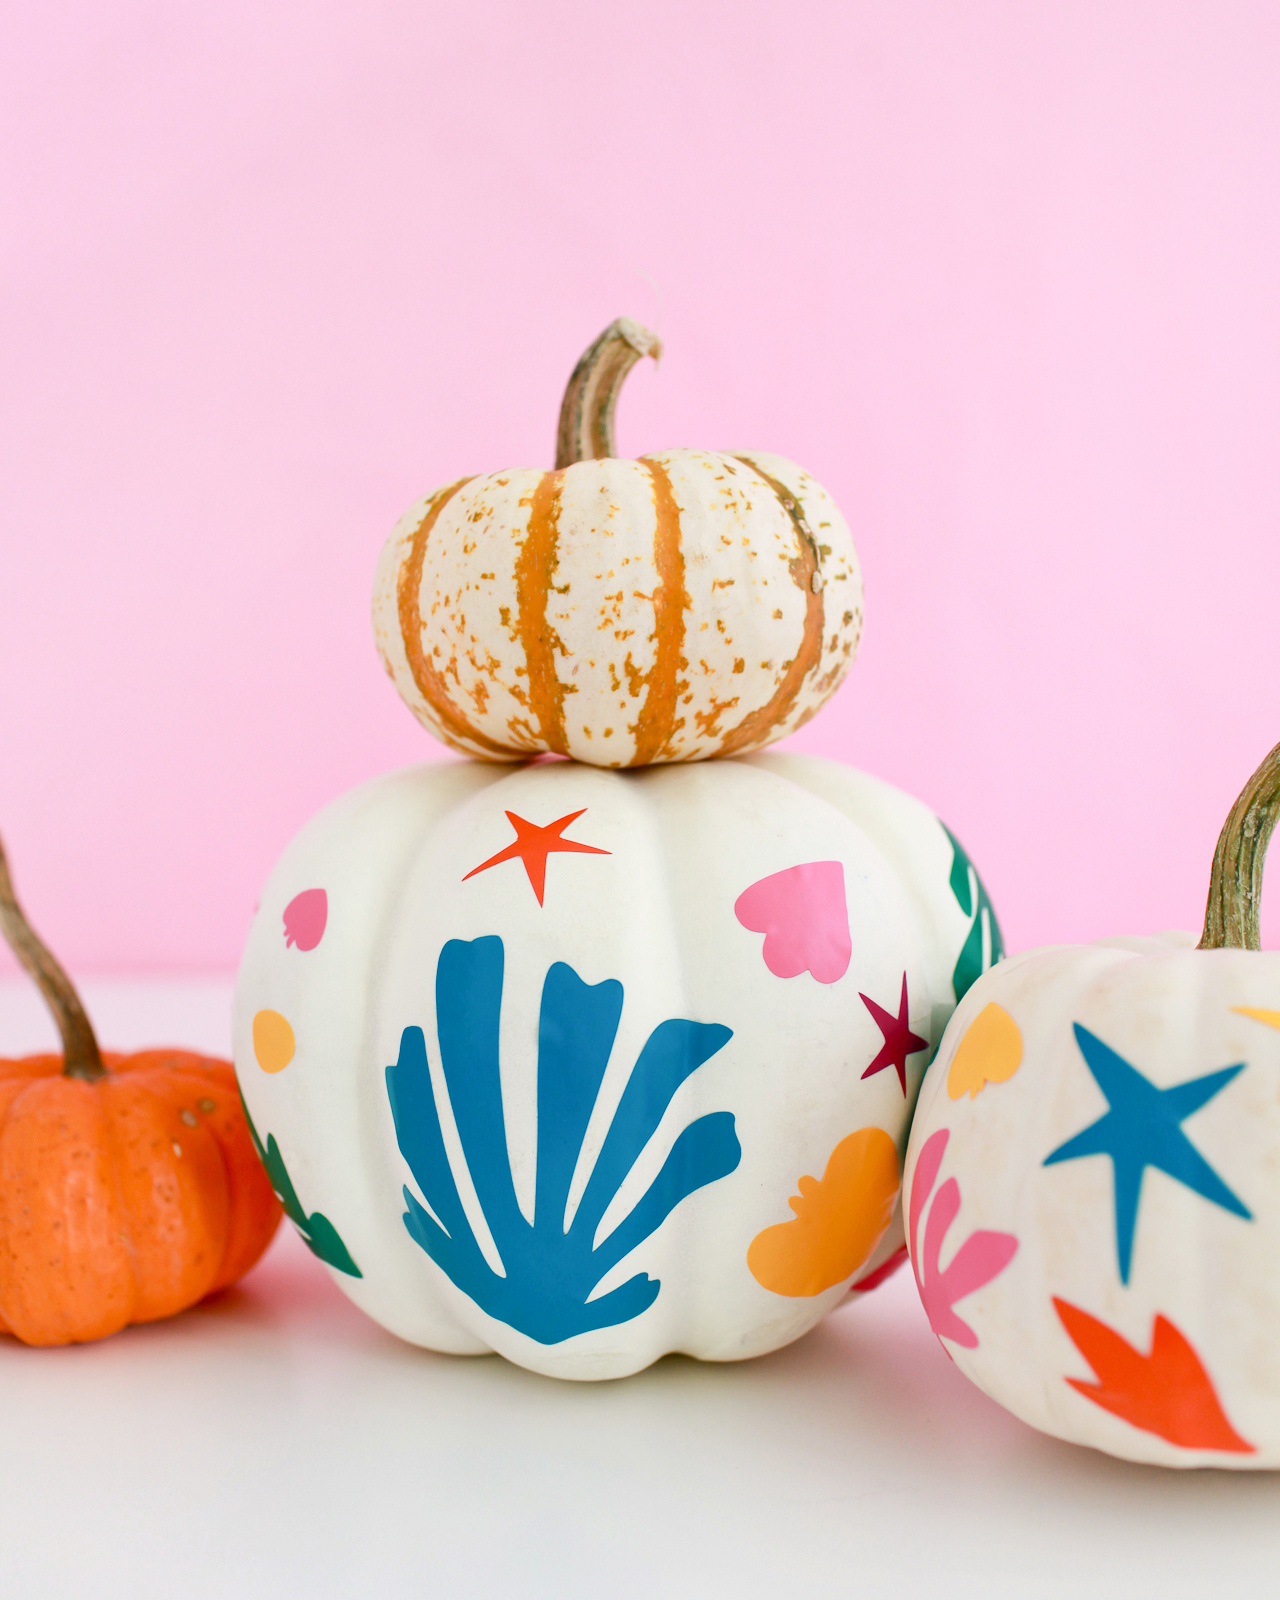
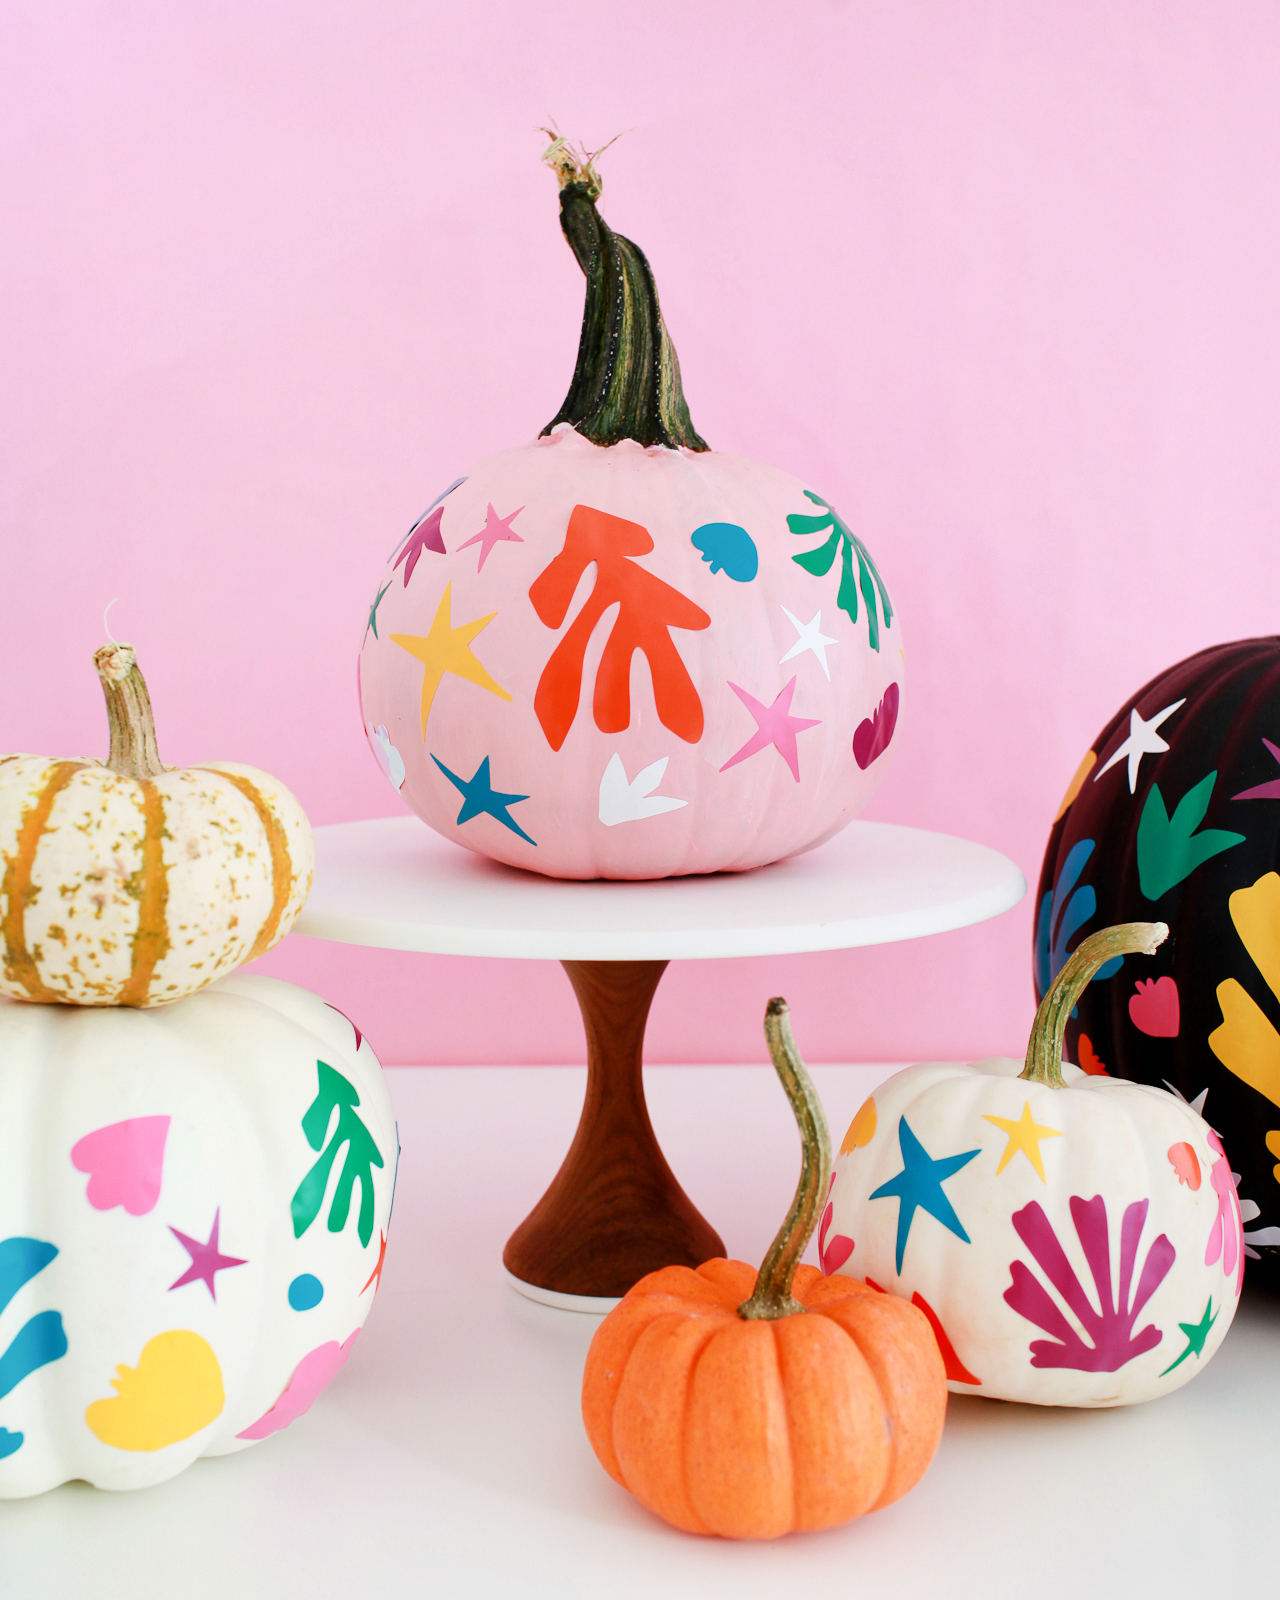
With two little kids in the house, our Halloween tends to be more fun and colorful – less creepy and scary. So today I’m sharing a Halloween pumpkin tutorial inspired by fine art! The idea for these pumpkins came as I was making this Matisse-inspired paper garland a couple of weeks ago. The shapes are just so fun and colorful, I thought they would be great on Halloween pumpkins. These DIY Matisse-inspired pumpkins are super easy to make, and I’m sharing my template below so you can make your own!
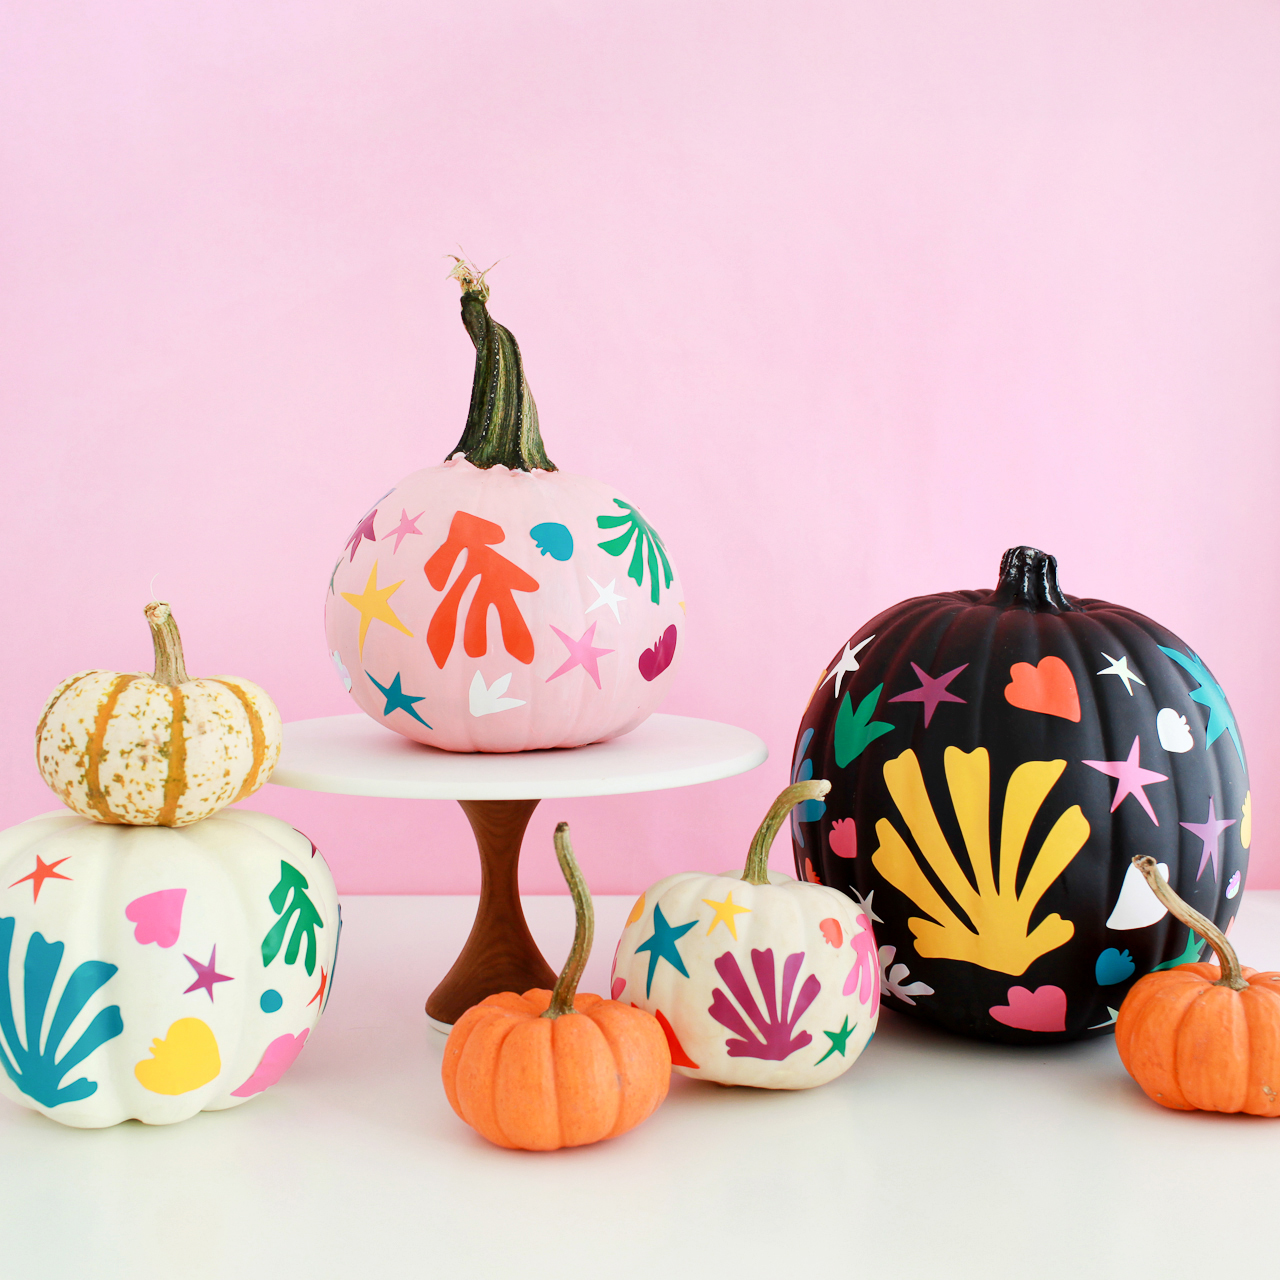
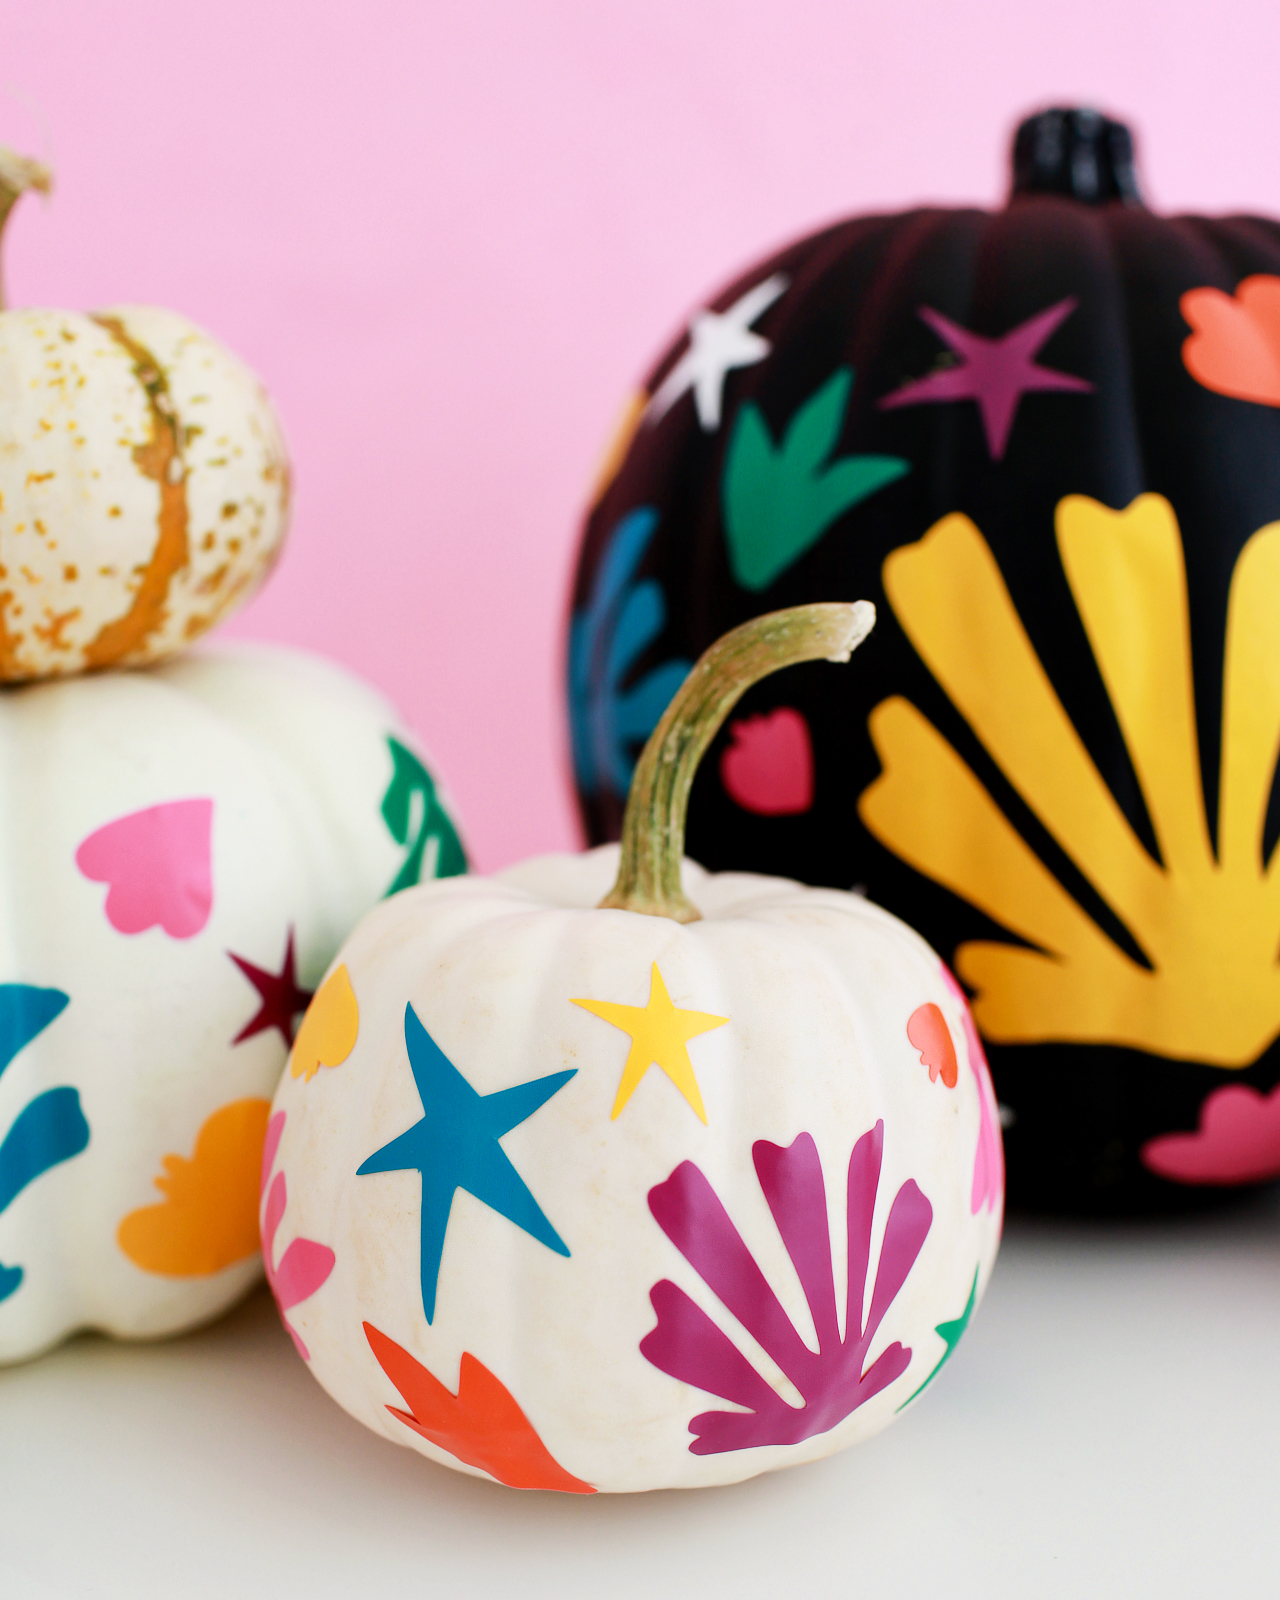
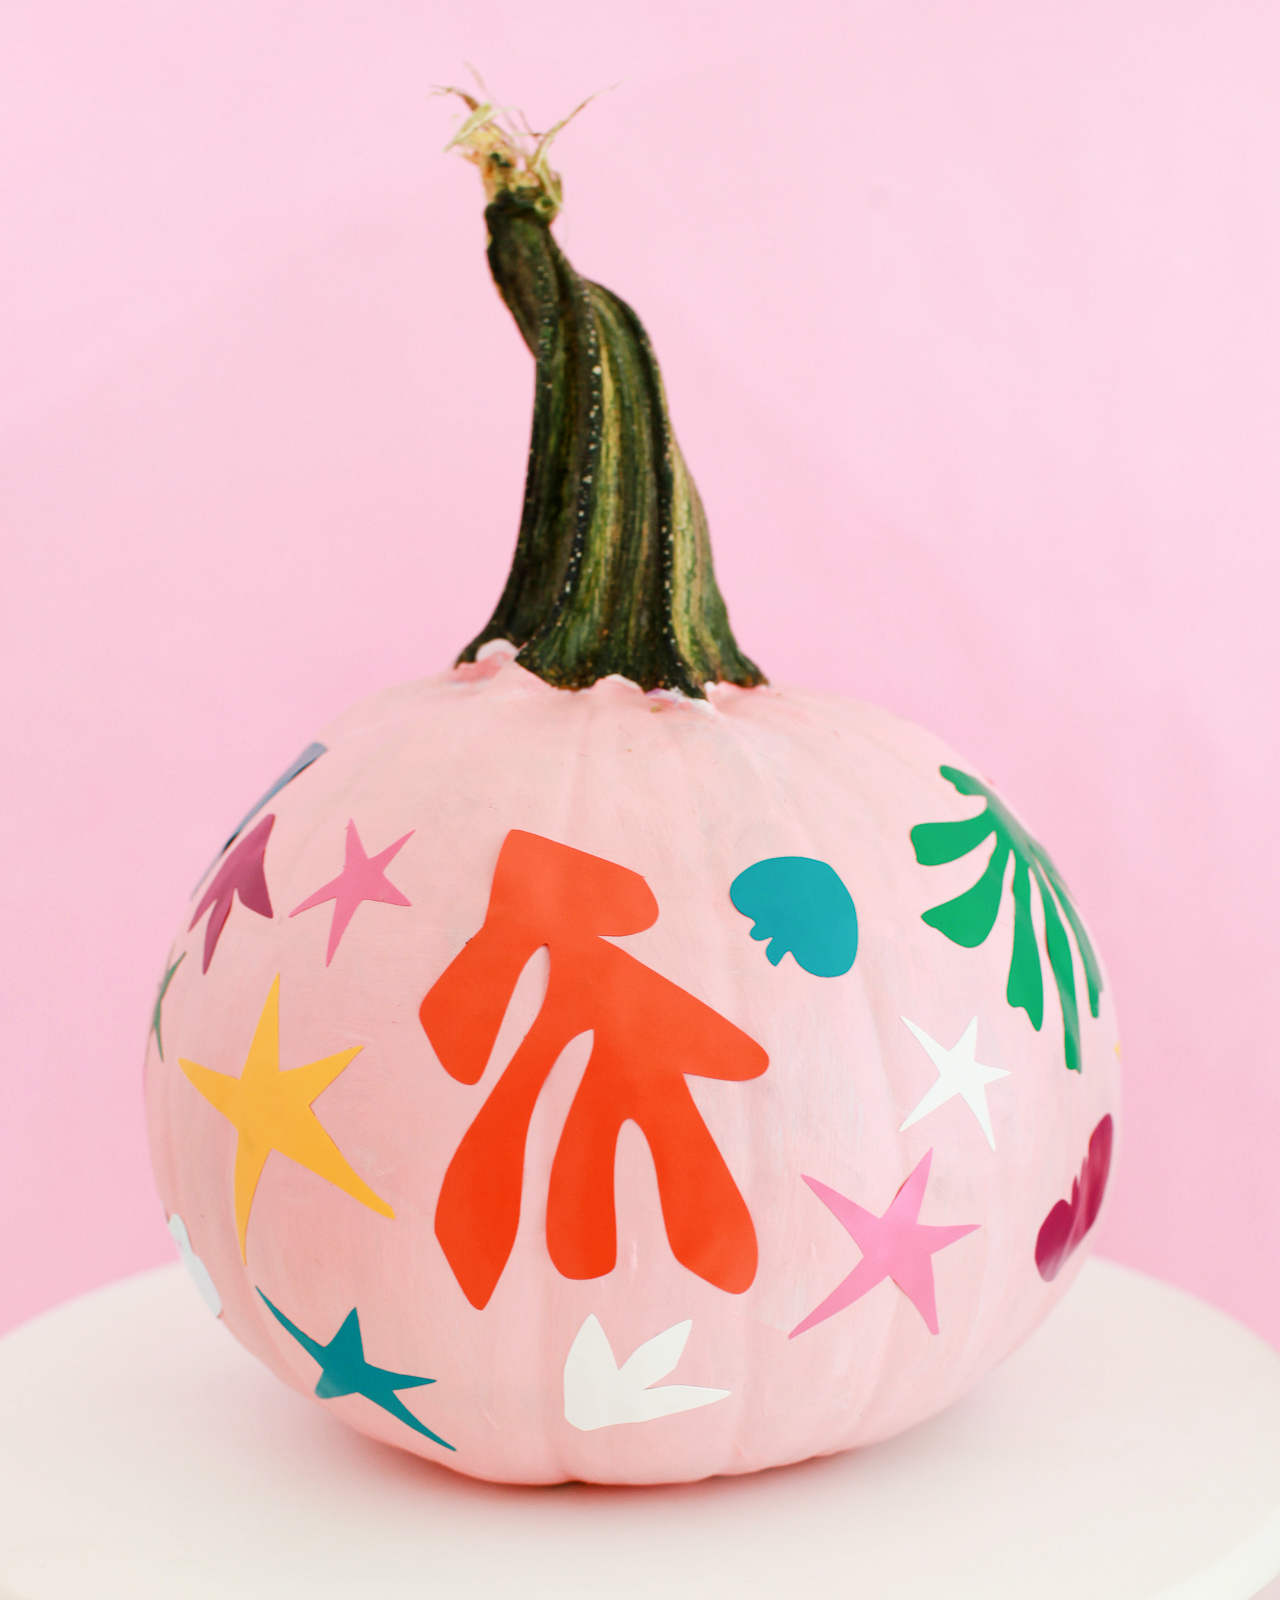
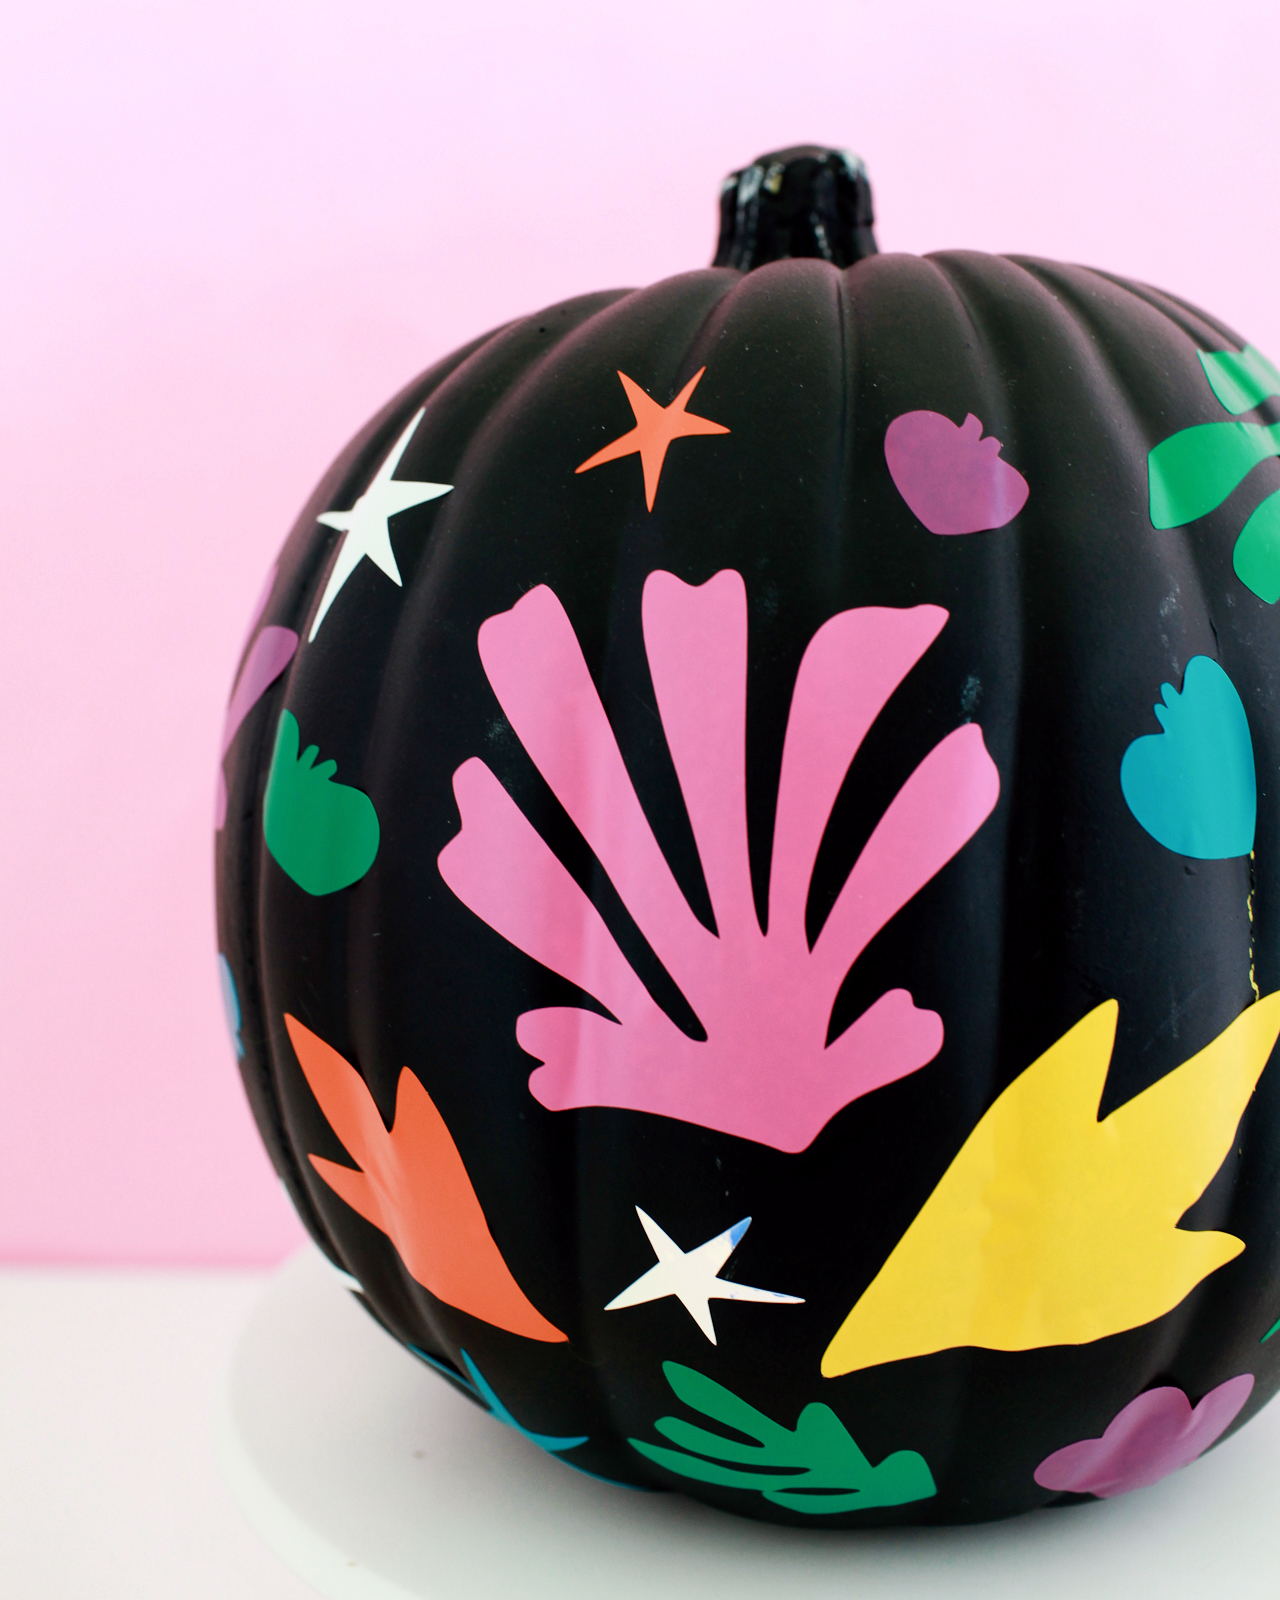
I love, love, love the way the colors pop against the white pumpkins, but they’re also great against black faux pumpkins or colorful painted pumpkins! The pink painted pumpkin is so sweet, don’t you think?
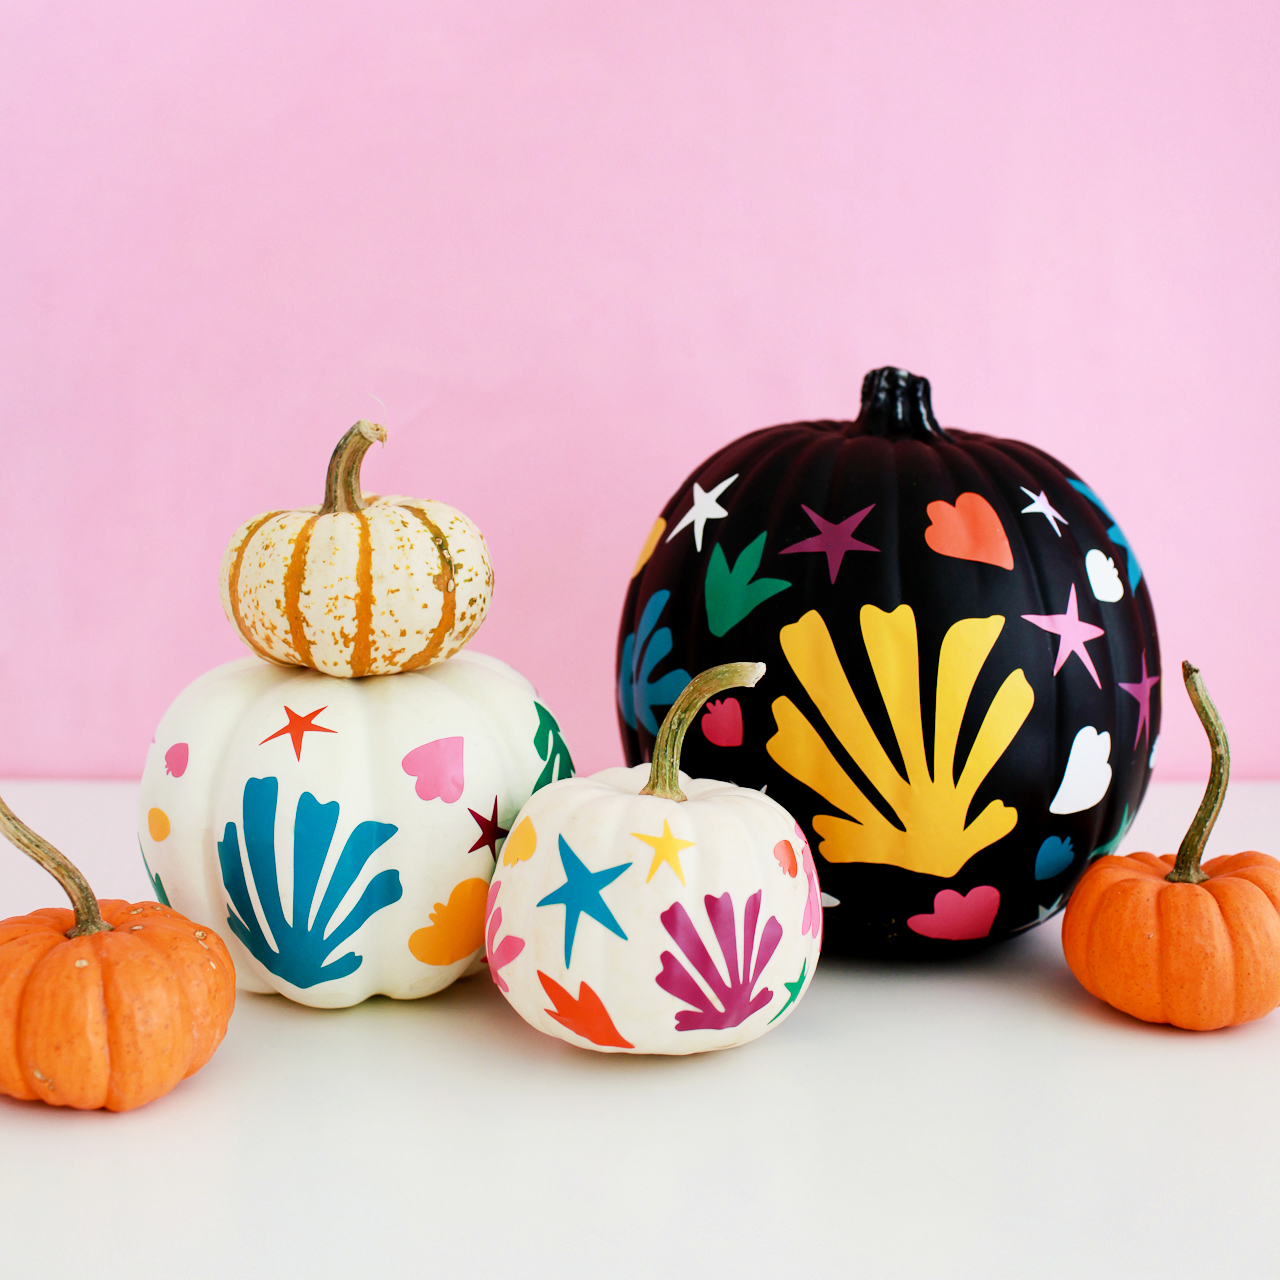
I adapted the Matisse-inspired shapes that I originally created for the garland to work on a pumpkin, making them slightly smaller for large pumpkins and adding a set of smaller shapes to use on tiny pumpkins and mix with the larger size shapes for variety. And the shapes are really fun when mixed all together in a random pattern on the pumpkin!
The supplies for this project are pretty simple: you’ll need matte craft vinyl in a variety of colors (I used pink, orange, yellow, green, teal, purple, and white) and a Silhouette Cameo or Cricut Explore cutting machine. If you don’t have one of those machines, you can still use our template to trace the shapes onto the vinyl and cut the shapes out by hand – but it will go a LOT faster with a cutting machine. You can download our templates at the bottom of the post!
To make the DIY Matisse-inspired pumpkins:
Step 1. Download our templates at the bottom of the post and use your Silhouette Cameo or Cricut to cut the shapes from each color of vinyl. You can do a colorful rainbow like I did (best if you’re doing a big group of pumpkins) or keep things simple with just one or two colors!
Step 2. Carefully peel individual shapes from the adhesive backing and apply to the pumpkin like a sticker. I found it easiest to start with some of the larger shapes randomly scattered around the pumpkin surface, then fill in with the smaller shapes as I went. I really didn’t have a plan, so you can totally just wing it! If you place a shape and then change your mind, you should be able to move it by very carefully peeling the vinyl from the pumpkin and moving it to a new spot.
Step 3. Continue placing vinyl shapes until you’ve covered the entire pumpkin, and enjoy!
So easy, right? And such a great way to add some color to your front porch for Halloween!
Download the templates below!
MATISSE-INSPIRED PUMPKIN TEMPLATE (Silhouette Studio file)
MATISSE-INSPIRED PUMPKIN TEMPLATE (SVG file)
p.s. DIY Iridescent Pumpkins and DIY Rainbow Halloween Treat Bags
Photo Credits: Nole Garey for Oh So Beautiful Paper
Funnnnnn – beyond creative and unique
Ursula @ http://kraftmint.com (modern DIYs)