Frozen Cocktail Recipe: Apple Cider Granita

I’m so happy that it’s finally fall, DC’s finest hour, when the heat and humidity break and the city is livable again. So seize the day and drink down as many fall drinks as you can! That’s what we’re doing this week: apple cider, mulling spices, brown sugar, dark rum – perfect for this weather, hot or cold – and the perfect cocktail for a Halloween party! – Andrew

Apple-Cider-Cocktail-Granita-Recipe-OSBP-20

Apple-Cider-Granita-Recipe-Card-Shauna-Lynn-Illustration-OSBP

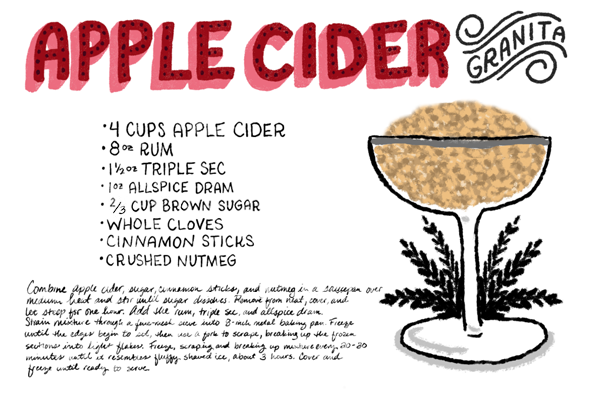
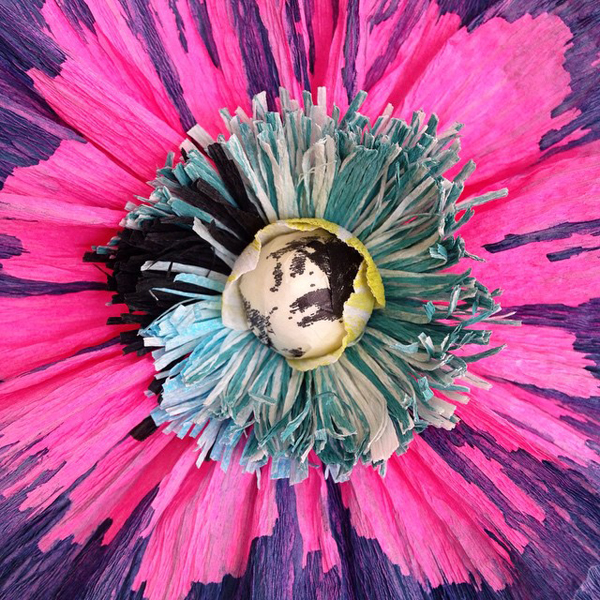
llustration by Shauna Lynn for Oh So Beautiful Paper
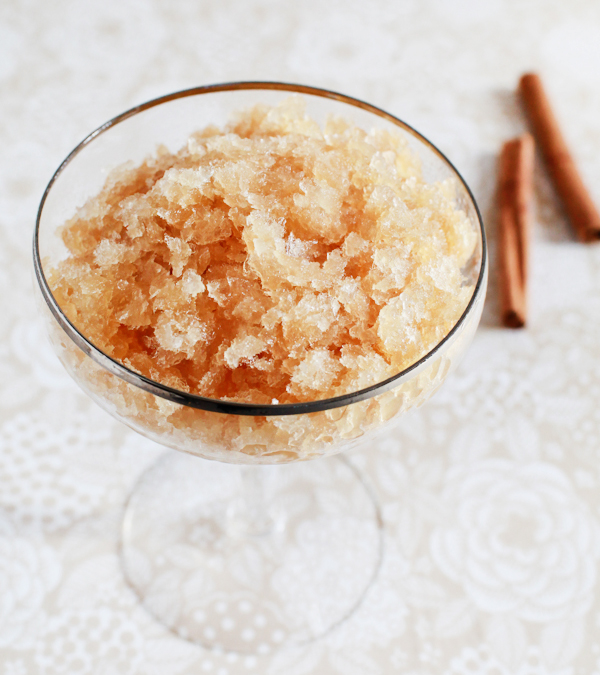
Apple Cider Granita

4 Cups Apple Cider
8 oz Aged Rum
1 1/2 oz Triple Sec
1 oz Allspice Dram
2/3 Cup Brown Sugar
10-20 Whole Cloves
2-3 Cinnamon Sticks
2 Crushed Nutmeg

Combine apple cider, cloves, cinnamon sticks, and nutmeg in a saucepan over medium heat and stir until sugar dissolves. Remove from heat, cover, and let steep for one hour. Add the rum, triple sec, and allspice dram.

Strain mixture through a fine-mesh sieve into 8-inch metal baking pan. Freeze until the edges begin to set, then use a fork to scrape, breaking up the frozen sections into light flakes. Freeze, scraping and breaking up mixture every 20–30 minutes until it resembles fluffy shaved ice, about 3 hours. Cover and freeze until ready to serve.

Apple-Cider-Cocktail-Granita-Recipe-OSBP-14

Apple-Cider-Cocktail-Granita-Recipe-OSBP-26Apple-Cider-Cocktail-Granita-Recipe-OSBP-18

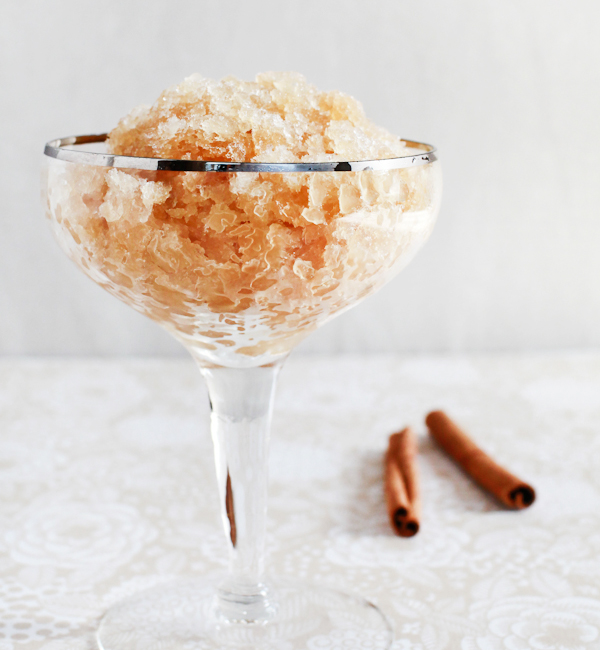
The result is a sweet and spicy granita with a kick that’s perfect for a fall desert. Granitas are, I think, an underutilized desert – they’re light and crunchy and full of fruit flavor. But you don’t just have to enjoy this recipe cold. We tasted the mix while it was simmering and it was delicious. Pretty much a classic, hot mulled cider with rum has kept many a New Englander warm in the fall. So have it hot, or have it cold… or double the recipe and have it both ways. Can’t go wrong.

P.S.–These gorgeous silver-rimmed coupes are available for sale at our new Etsy shop, Liquorary.

Photo Credits: Nole Garey for Oh So Beautiful Paper

Happy Weekend!

Happy Friday everyone! I’m going to be honest – we’ve had a rough week over here. Sophie is going through some typical two year old tantrums (we’ve started referring to her as our “twonager” since it’s a nice little preview of what she’ll be like as a teenager), and when you combine that with a needy newborn you get two very tired parents. I know this is just a phase, but I feel like I could sleep for about a week straight if given the opportunity! For now I’ll just settle for (hopefully) a few extra minutes this weekend, but in the meantime…

Thuss-Farrell-Paper-to-Petal-Instagram

Photo by the incredibly talented Thuss & Farrell

…a few links for your weekend:

This week on Oh So Beautiful Paper:

Check back soon for this week’s cocktail! I hope you all have a wonderful weekend, and I’ll see you back here next week! xoxo

DIY Tutorial: Vine and Berries Holiday Card

For those of you who craft your own holiday cards, it’s already time to get started. It’s always good to give yourself plenty of time to create and address them and the slight lull between Halloween and the week of Thanksgiving is usually when we try to get started. That way, they’re ready to mail out come December. The design in this tutorial features white embossing combined with white hand embellished vine details to create a one of a kind holiday card. You could even add a photo to the back of the card or simply write a note if you have more to say. We hope that this project inspires you to dream up and make your own holiday card this year! –Bailey and Emma of Antiquaria

DIY Holiday Card Tutorial by Antiquaria for Oh So Beautiful Paper

DIY Holiday Card Tutorial by Antiquaria for Oh So Beautiful Paper

Materials

Peace on Earth Holiday Greetings Stamp

Mod Holly Return Address Stamp

Banner Rubber Stamp

Frost White Stamp Pad or Embossing Stamp Pad

Olive Stamp Pad

White Embossing Powder

Embossing Heat Tool

5.5″ Square Cards,  in Chartreuse

5.75″ Square Envelopes, in Pure White

Calligraphy Starter Kit

Dr. Martin’s White Ink

Vintage Holiday Postage

DIY Holiday Card Tutorial by Antiquaria for Oh So Beautiful Paper

Step One: Stamp your holiday message (we used our Peace on Earth Holiday Greetings Stamp) in white ink in the center of a 5.5″ square card.

DIY Holiday Card Tutorial by Antiquaria for Oh So Beautiful Paper

Step Two: Immediately after step one, before the ink dries, pour white embossing powder over the stamped image. Heat set the powder using a heat embossing tool. For a step by step video on embossing, please watch the tutorial found here.

DIY Holiday Card Tutorial by Antiquaria for Oh So Beautiful Paper

Step Three: Next, let your imagination go wild! Embellish around the greeting with vines and berries using white ink and a pointed calligraphy pen. While this ink is our favorite for its opacity, you could also use a white gel pen if you prefer.

DIY Holiday Card Tutorial by Antiquaria for Oh So Beautiful Paper

Step Four: Stamp your return address on the back flap of a 5.75″ square white envelope. We used our Mod Holly Return Address stamp with olive ink to coordinate.

DIY Holiday Card Tutorial by Antiquaria for Oh So Beautiful Paper

Step Five: As snail mail lovers, addressing the envelope is half the fun for us. When we found this cute banner stamp, we knew exactly how we wanted to use it! We stamped it on the lefthand side of the envelope front and let it dry. Then, we added the addressing in a darker green ink (this was custom mixed from gouache paint) to add dimension and pull the whole design together.

DIY Holiday Card Tutorial by Antiquaria for Oh So Beautiful Paper

Add vintage postage and any additional photos or messages and send them off to your loved ones!

Photo Credits: Antiquaria for Oh So Beautiful Paper


Pretty Paper in the Office: Maps

When looking to dress your office walls, maps are certainly the go-to solution. Maps can be visually stunning and educating, and there are many options to choose from. From scratch maps to maps with pins to maps that you pin things to. No matter what you’re looking for, these maps will make sure you’re looking in the right place. – Julie
Pretty Paper in the Office: Map Round Up via Oh So Beautiful Paper

No. 1 Corkboard map from West Elm; No. 2 Places of Earth by Oliver Jeffers; No. 3 World wall map from Schoolhouse Electric; No. 4 Kraft + White world map from Kawaii Stationery; No. 5 Deluxe Scratch-Off World map from Urban Outfitters; No. 6 Black + White world map from Kawaii Stationery


{images via their respective sources}

Lauren + Samuel’s Dip Dyed Save the Dates

Dip dyeing is one of my favorite techniques – the results are stunning and each individual piece is completely unique! These save the dates from Alex of Goodheart Design combine green dip dye with crisp black and white letterpress. Love!

Dip-Dye-Hand-Lettered-Save-the-Dates-Goodheart-Design-OSBP

From Alex: Lauren came to me with two requirements for her save the date: brush lettering and dip-dye. How could I say no to that?!

Dip-Dye-Hand-Lettered-Save-the-Dates-Goodheart-Design-OSBP3Dip-Dye-Hand-Lettered-Save-the-Dates-Goodheart-Design-OSBP2

She wanted all black and white with some ‘lush’ green dip-dye. Czar Press letterpress printed them on extra thick paper so I could individually dip-dye each one without them warping. I had such a fun time not only designing the save the dates but also dip-dying each one! It’s so nice to be able to design outside of the computer sometimes.

Dip-Dye-Hand-Lettered-Save-the-Dates-Goodheart-Design-OSBP4

Thanks Alex!

Design + Dip-Dyeing: Goodheart Design

Letterpress Printing: Czar Press

Check out the Designer Rolodex for more tal­ented wed­ding invi­ta­tion design­ers and the real invi­ta­tions gallery for more wedding invitation ideas!

Photo Credits: Goodheart Design