Strawberry-Rhubarb Shrub

Nole and I introduced our first Shrubs last year, those drinks built around flavored vinegar syrups: a peach and bourbon shrub and then a peach and berry summer shrub. Well, it’s Shrub time again! Shrubs are super-tart and full of super-crisp fruit flavors, perfect for summer. Today’s Strawberry-Rhubarb Shrub cocktail recipe, courtesy of Portland’s Ración restaurant via Imbibe magazine, is my favorite Shrub so far. – Andrew

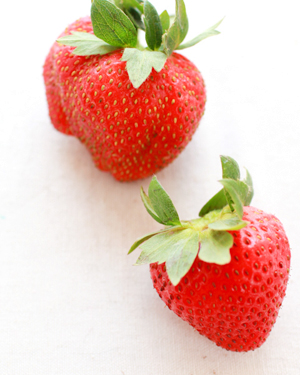
Cocktail-Recipe-Ideas-Strawberry-Rhubarb-Shrub-OSBP-32

Cocktail-Recipe-Card-Strawberry-Rhubarb-Shrub-Shauna-Lynn-Illustration-OSBP

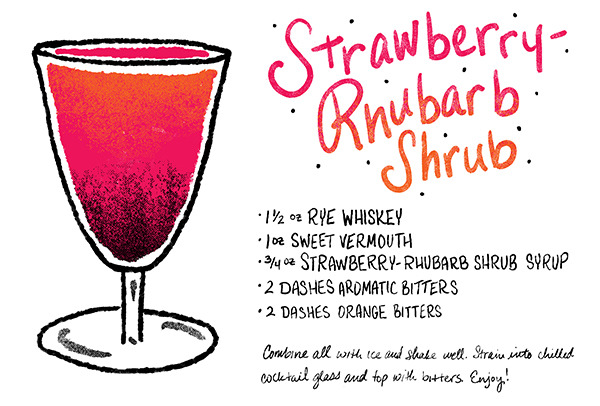
Illustration by Shauna Lynn for Oh So Beautiful Paper

Strawberry-Rhubarb Shrub
1 1/2 oz Rye Whiskey
1 oz Sweet Vermouth
3/4 oz Strawberry-Rhubarb Shrub Syrup
2 Dashes Orange Bitters
2 Dashes Aromatic Bitters

To make the shrub syrup: combine one cup of Champagne vinegar, 2/3 cup granulated sugar, one cup of diced rhubarb and one cup of diced strawberries in a jar. (The original recipe calls just for rhubarb, but we had so many strawberries leftover…) Shake hard to combine and refrigerate for three days. Then strain through a sieve or cheesecloth into a new jar. This should keep in the refrigerator for at least a couple of weeks.

Cocktail-Recipe-Ideas-Strawberry-Rhubarb-Shrub-OSBP-18

To make the Shrub: combine the whiskey, vermouth, and syrup with ice and shake well. Strain into a chilled cocktail glass and top with the bitters. Enjoy!

Cocktail-Recipe-Ideas-Strawberry-Rhubarb-Shrub-OSBP-28

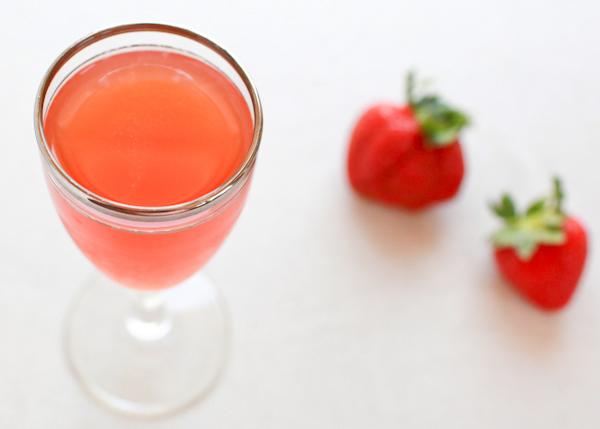
You can make a shrub syrup much faster, by heating the fruit and vinegar until the vinegar is infused with flavor. But the result can often taste a bit like jam, cooked and thick. The alternative is to let the vinegar sit for days – the downside being, of course, that you have to wait, which neither of us are too good at. But the upside is a light shrub with crystal-clear, earthy flavors of tart rhubarb and sweet strawberries. Just really delicious (and would probably go well with some sparkling water to make a shrub soda).

Cocktail-Recipe-Ideas-Strawberry-Rhubarb-Shrub-OSBP-9Cocktail-Recipe-Ideas-Strawberry-Rhubarb-Shrub-OSBP-12

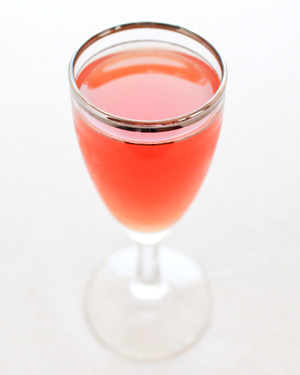
The resulting drink opens with a burst of sweet, tart, fruity shrub, but has a finish that is mellowed out the by the sweet vermouth and rye whiskey. Perfect for unwinding on a sumer night after work.

If you do make one at home, you can use #osbphappyhour to share photos of these (or your own creations) on Instagram.

Photo Credits: Nole Garey for Oh So Beautiful Paper

Happy Weekend!

Happy Friday everyone! And what a week! Sophie has been experiencing some separation anxiety at night, making bedtime a wee bit difficult in our house these days. Sigh. This too shall pass, I hope. Yesterday I took a quick up-and-down trip to New York City for a meeting – I love traveling by train and I’m so glad we live close enough to make these kinds of trips feasible! This weekend we’re hoping to take Sophie to the National Zoo to say goodbye to the Invertebrate Exhibit. We’re so sad that it’s closing! But in the meantime…

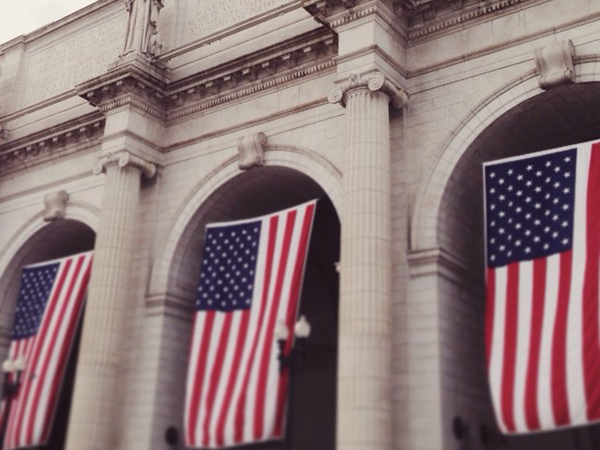
Union-Station-DC-OSBP-Instagram

The beautiful Union Station // Photo by me via Instagram

…a few links for your weekend:

This week on Oh So Beautiful Paper:

Check back soon for this week’s cocktail! I hope you all have a wonderful weekend, and I’ll see you back here next week! xoxo

DIY Autumn Floral Wedding Invitations

Summer may just have arrived, but in the world of wedding invitations, we’re already looking forward toward the autumn and winter seasons. We love this fresh take on an autumn color palette – mixing a dark watercolor pattern with lovely shades of peach, coral, and blush – for a beautiful suite of autumn floral wedding invitations and save the dates. It has romance written all over it! – Bailey and Emma of Antiquaria
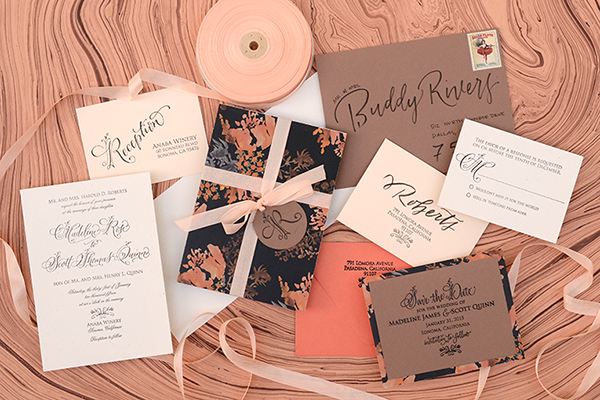
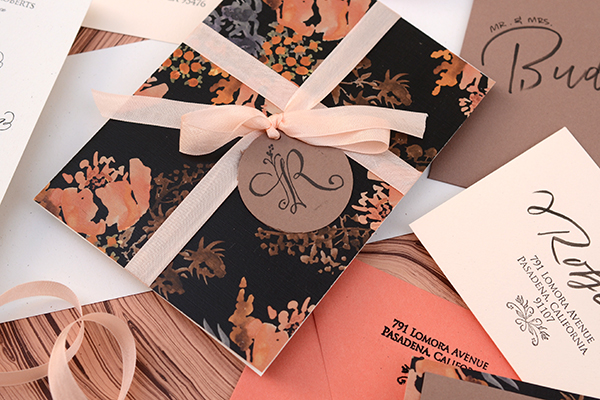
DIY Tutorial: Autumn Floral Wedding Invitations by Antiquaria for Oh So Beautiful Paper

Autumn Floral-DIY-Final2

DIY Tutorial: Autumn Floral Wedding Invitations by Antiquaria for Oh So Beautiful Paper

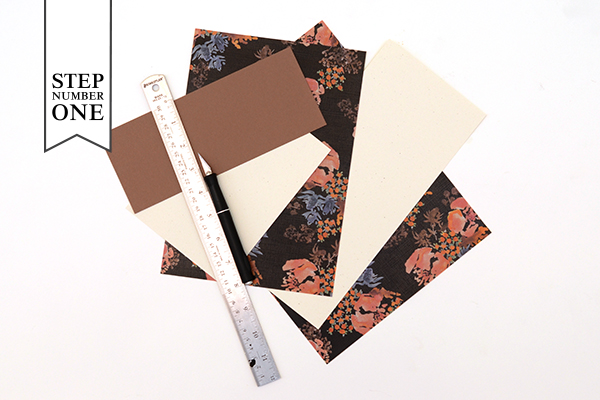
Step One: For this design, we’re making a save the date and wedding invitation suite together. None of the paper came cut to size, so we had to cut the paper and cards ourselves. You can manually cut them with a self healing mat, kraft knife, and metal ruler or you can take everything to be cut at a local printer (the best idea for precision).

You’ll need these final paper sizes:

Save the Date – Java, 3.75″ x 5″

Save the Date Backer – “Zoe” Floral Patterned Cover, 4.25″ x 5.5″

Invitation – Milkweed, 5″ x 7″

Invitation Folder – “Zoe” Floral Patterned Text Weight, 10″ x 7″

Reply Card – Milkweed, 3.5″  x 4.875″

Reception Card – Old Lace, 3.5″ x 4.875″
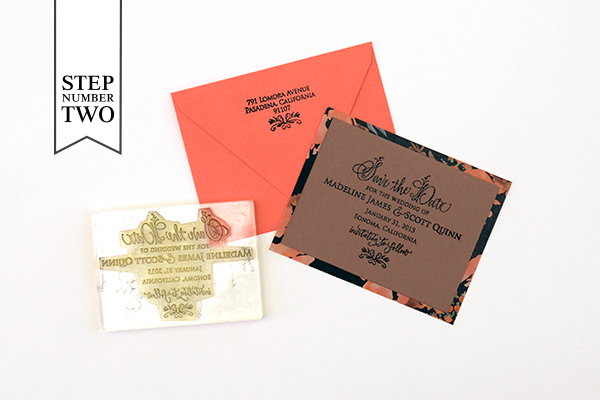
DIY Tutorial: Autumn Floral Wedding Invitations by Antiquaria for Oh So Beautiful Paper

Step Two: Create your save the date. We embossed our Floral Calligraphy Save the Date design onto a Java card with black embossing powder for a great opaque look (see steps below). We also embossed our return address stamp on the back flap of our envelope. You will mount the Java card onto the patterned backer, using double sided tape or stick glue, making certain that the margins are equal on all sides.
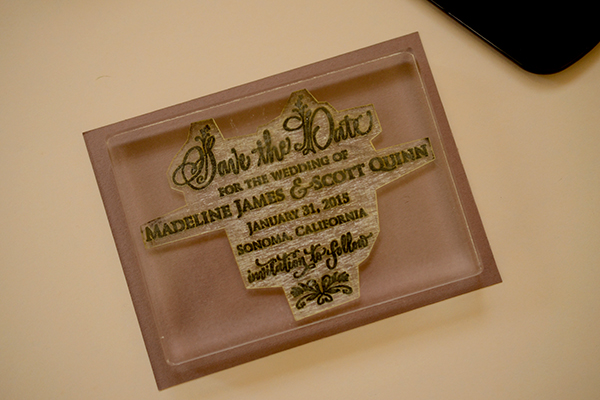
DIY Tutorial: Autumn Floral Wedding Invitations by Antiquaria for Oh So Beautiful Paper

Stamp the save the date onto your card using black ink.
DIY Tutorial: Autumn Floral Wedding Invitations by Antiquaria for Oh So Beautiful Paper

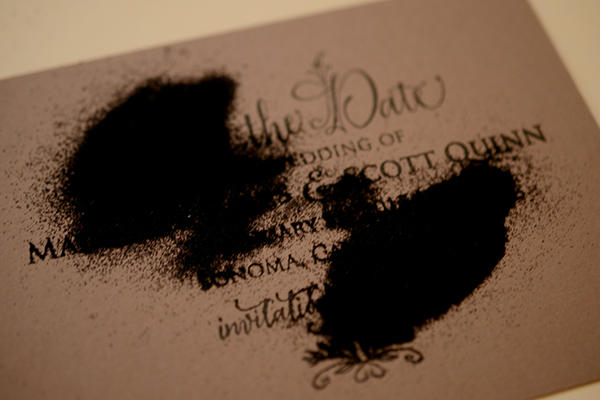
Immediately cover the printed image with black embossing powder (best to do this step over scrap paper). Shift it around to cover the entire image and tap off  the excess.

DIY Tutorial: Autumn Floral Wedding Invitations by Antiquaria for Oh So Beautiful Paper

Heat set the design with an embossing heat tool.  For more information about this process, please watch our video tutorial found here.
DIY Tutorial: Autumn Floral Wedding Invitations by Antiquaria for Oh So Beautiful Paper

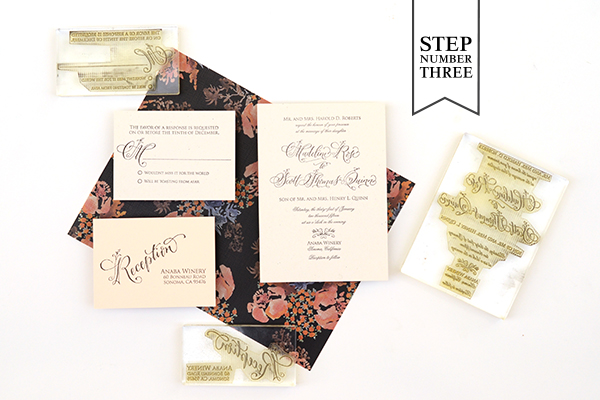
Step Three: Stamp all of your invitation suite cards. We used designs from our Floral Calligraphy Collection for this suite, including the Floral Calligraphy Invitation Stamp, Floral Calligraphy Reply Card Stamp and Floral Calligraphy Reception Stamp. We used black ink with the designs to tie everything together with the floral watercolor paper!
DIY Tutorial: Autumn Floral Wedding Invitations by Antiquaria for Oh So Beautiful Paper

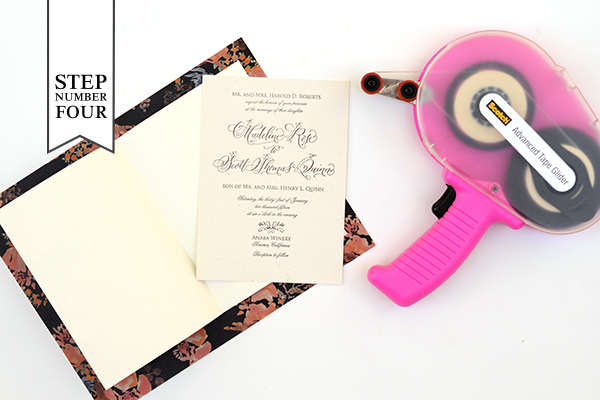
Step Four: We love coming up with new ways to incorporate pattern and color into our designs. This patterned invitation “folder” is one fun way! Fold your 10″ x 7″ patterned text weight paper in half. Apply double sided tape or stick glue to the back of your invitation card. Stick it into the right hand side of the “folder” and press to adhere. The invitation card and right hand side of the folder should be the same size, 5″ x 7.”

DIY Tutorial: Autumn Floral Wedding Invitations by Antiquaria for Oh So Beautiful Paper

Step Five: Next, we’ll make our reply envelopes. Our return address stamp design didn’t include a name – but that’s okay! We’ll simply add one! With a black brush pen, we wrote the last name across the envelope, a little higher than center. Then we stamped our return address design in black right below it. Mission accomplished!
DIY Tutorial: Autumn Floral Wedding Invitations by Antiquaria for Oh So Beautiful Paper

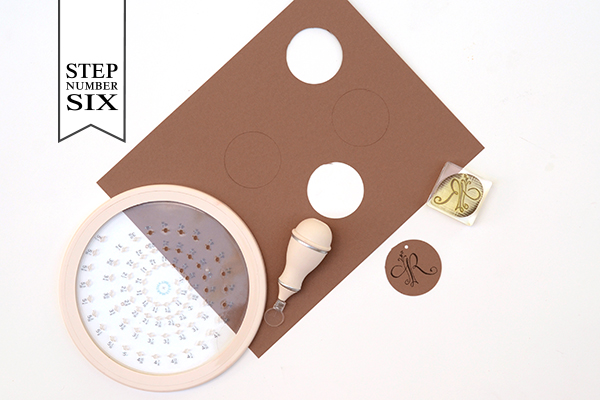
Step Six: A monogram tag is a really great way to tie the suite together. And you can also use it at your reception and on personal stationery after the wedding! We cut out 2″ circle tags using a circle making tool (or using a circle punch). Then, we stamped our Floral Calligraphy Monogram Initial Stamp in black in the center. Finally, we punched a small hole in the top center so that we have something to thread our ribbon through!
DIY Tutorial: Autumn Floral Wedding Invitations by Antiquaria for Oh So Beautiful Paper

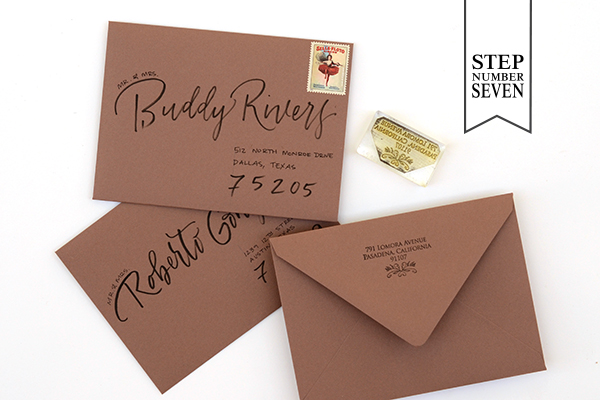
Step Seven: A big consideration for any invitation suite is how your are going to address them. We decided that a modern brush style in black would be fun with this design. After stamping our return address on the back flap, we addressed them using this calligraphy addressing tutorial.
DIY Tutorial: Autumn Floral Wedding Invitations by Antiquaria for Oh So Beautiful Paper

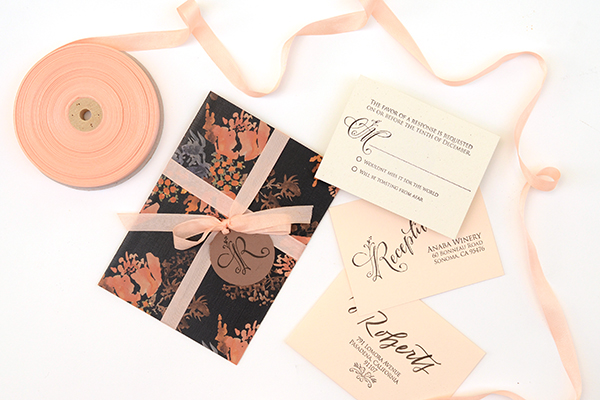
The Final Touches: To finish off the suite, we tucked all of the cards inside our “folder” and then tied it all up with some gorgeous blush colored tailors ribbon. Guests will feel like they’re opening a gift when they receive it in the post and get a small glimpse of the fun to come!

Materials

Stamps

Floral Calligraphy Save the Date Stamp

Floral Calligraphy Return Address Stamp, No.2

Floral Calligraphy Invitation Stamp

Floral Calligraphy Reply Card Stamp

Floral Calligraphy Reception Stamp

Floral Calligraphy Initial Monogram Stamp

Paper

“Zoe” Floral Patterned Paper-in Cover weight and Text weight

Java Cover Stock

Milkweed Cover Stock

Old Lace Cover Stock

Papaya A2 Envelopes

Java A7 Envelopes

Old Lace 4bar Envelopes

Other Items

Self Healing Mat, Kraft Knife and Metal Ruler

Double sided tape or stick glue

Circle Cutter or Circle Punch

Stamp Pad in Black

Embossing Powder and Heat Tool

Brush Pen

Hole Punch

Tailors Ribbon in Grecian Pink

Anti­quaria is a mem­ber of the Designer Rolodex – you can see more of their beau­ti­ful work right here or visit the real wedding invitations gallery for more wedding invitation ideas!

Photo Credits: Antiquaria for Oh So Beautiful Paper
Reid’s Pac-Man Arcade Game Birthday Party Invitations

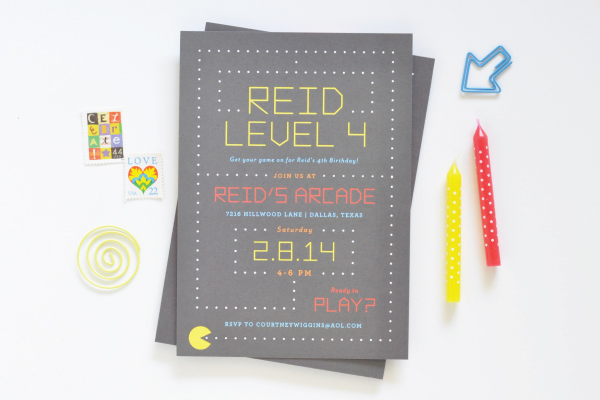
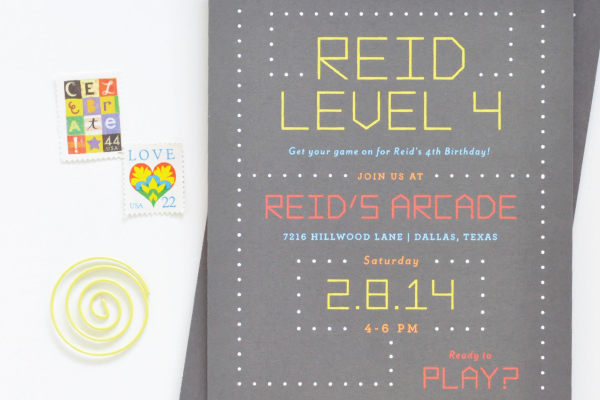
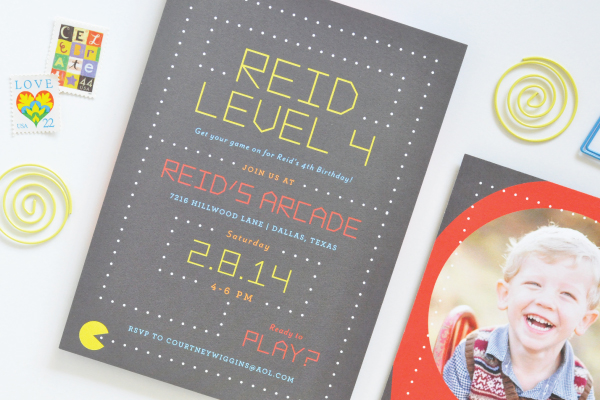
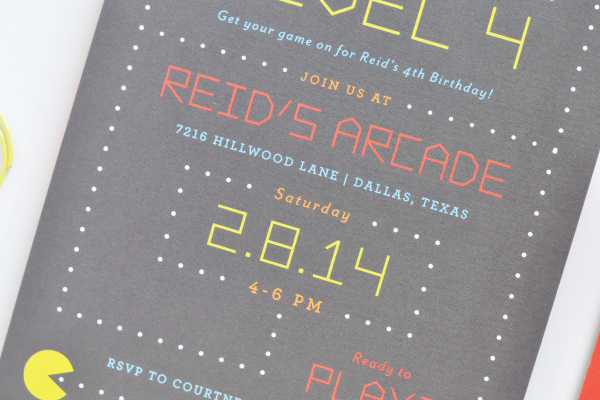
First it was superheroes, now arcade games! Designer Lauren Chism created these arcade game invitations for a 4th birthday party, drawing from the familiar playful elements of Pac-Man to appeal to both adult and kid guests. So fun!

Arcade-Game-PacMan-Birthday-Party-Invitations-Lauren-Chism-Fine-Papers

From Lauren: My husband’s cousin, Courtney, asked me to design the invitations for her son Reid’s 4th birthday party earlier this year. She wanted to do an arcade theme and was open to a few arcade games, but I knew it would be tricky getting what there without using specific characters. We went with a Pac-Man inspired concept, which was cute and something adults and children would find fun.

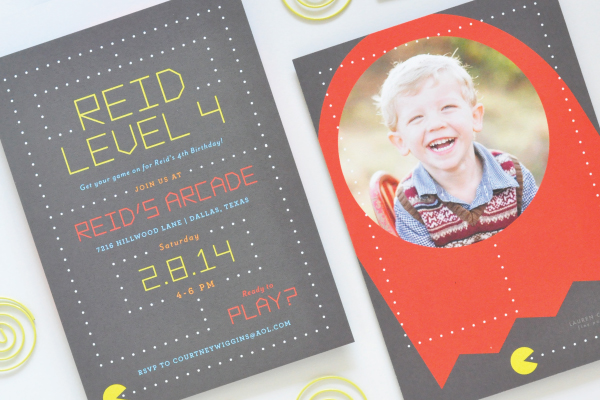
Arcade-Game-PacMan-Birthday-Party-Invitations-Lauren-Chism-Fine-Papers2

While I wish I could take credit for her clever copywriting, Courtney came ready with such a cute play on words, especially with ‘Reid Level 4’. Sometimes the wording can just make an invitation! Courtney is also a talented photographer and had the cutest photo ever to incorporate on the back of the invitation.

Arcade-Game-PacMan-Birthday-Party-Invitations-Lauren-Chism-Fine-Papers7

Children’s birthday invitations are always a little challenging for me. Trying to marry my minimalist, typography-inspired design style with a children’s theme can be tricky, but I would call this one a success. I love how they turned out!

Arcade-Game-PacMan-Birthday-Party-Invitations-Lauren-Chism-Fine-Papers3

Arcade-Game-PacMan-Birthday-Party-Invitations-Lauren-Chism-Fine-Papers4

Thanks Lauren!

Design: Lauren Chism

Lauren Chism Fine Papers is a member of the Designer Rolodex – you can check out more of Lauren’s work right here!

Photo Credits: Lauren Chism Fine Papers