DIY Western Reception Wedding Details, Part I

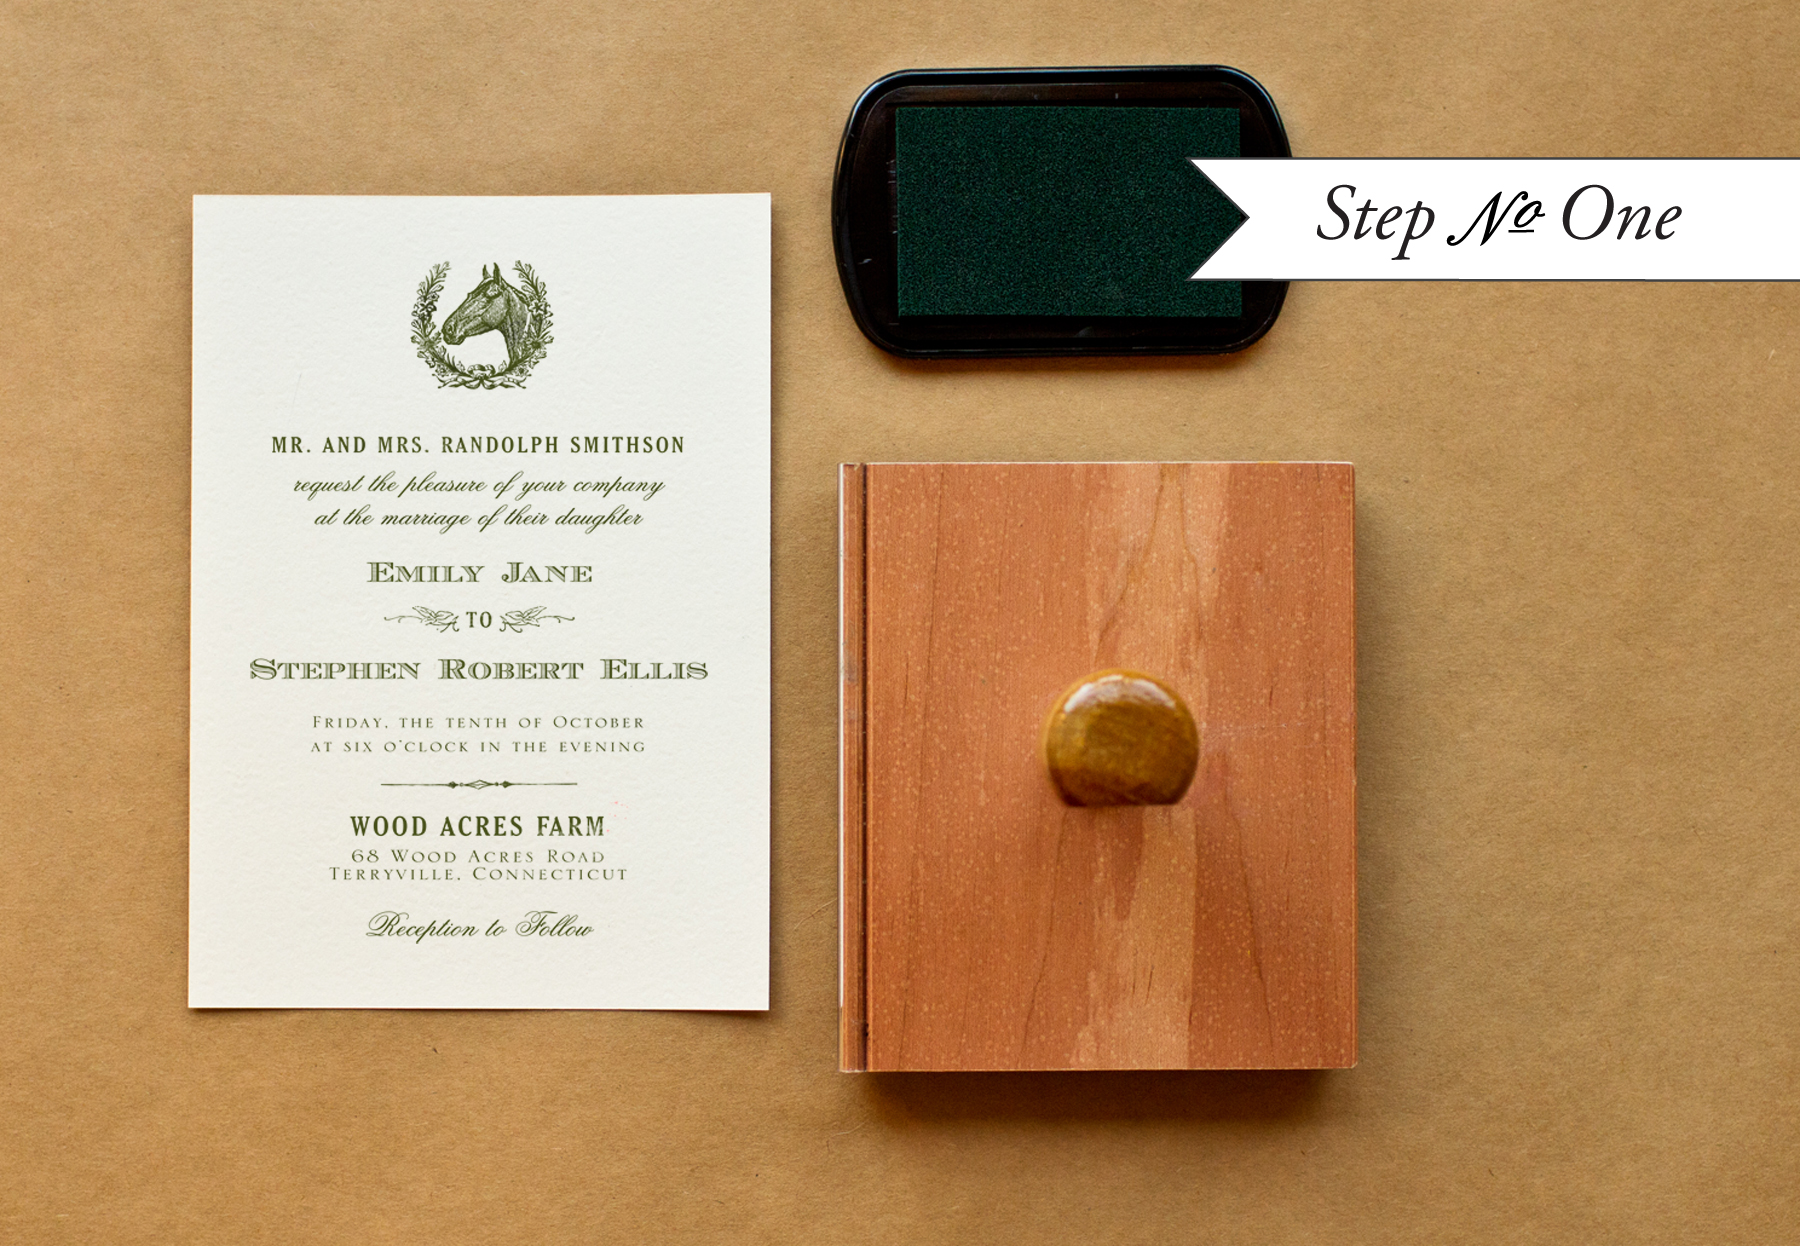
The details are part of the fun of creating an event – be it a wedding, dinner party or bridal shower.  Those details make the event special, unique, and totally you!  Remember the Western Save the Date & Invitation DIY we did a few months ago?  It was one of our favorite tutorials… so we decided to expand on the theme and offer up some ideas for how to embellish a Western reception. – Bailey and Emma of Antiquaria

Western Wedding Detail Ideas and Inspiration

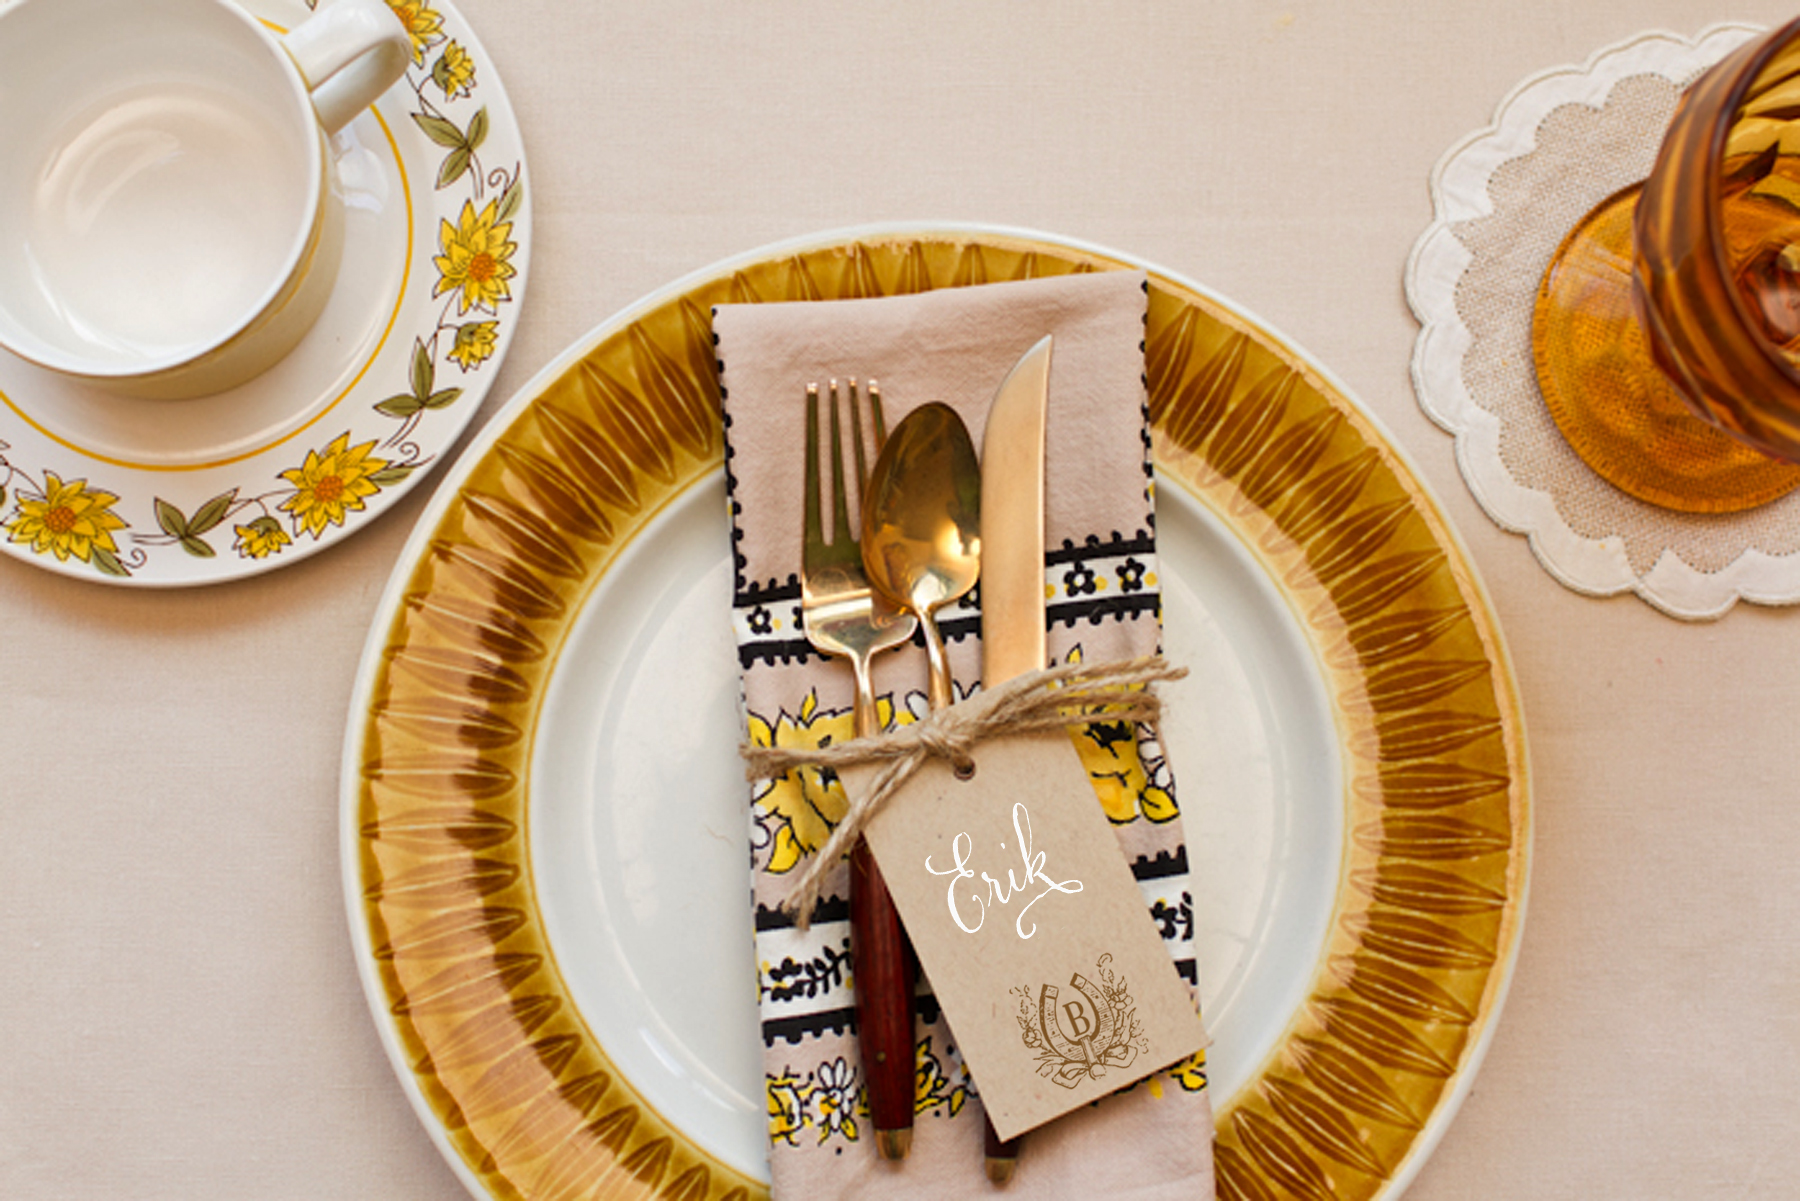
A simply set, color appropriate place setting is ready for your guest as they approach the table.  Kraft tags tied around the napkin, are embellished with a monogram and serve as place cards for this casual, fun fete.

Western Wedding Detail Ideas and Inspiration - Place Cards

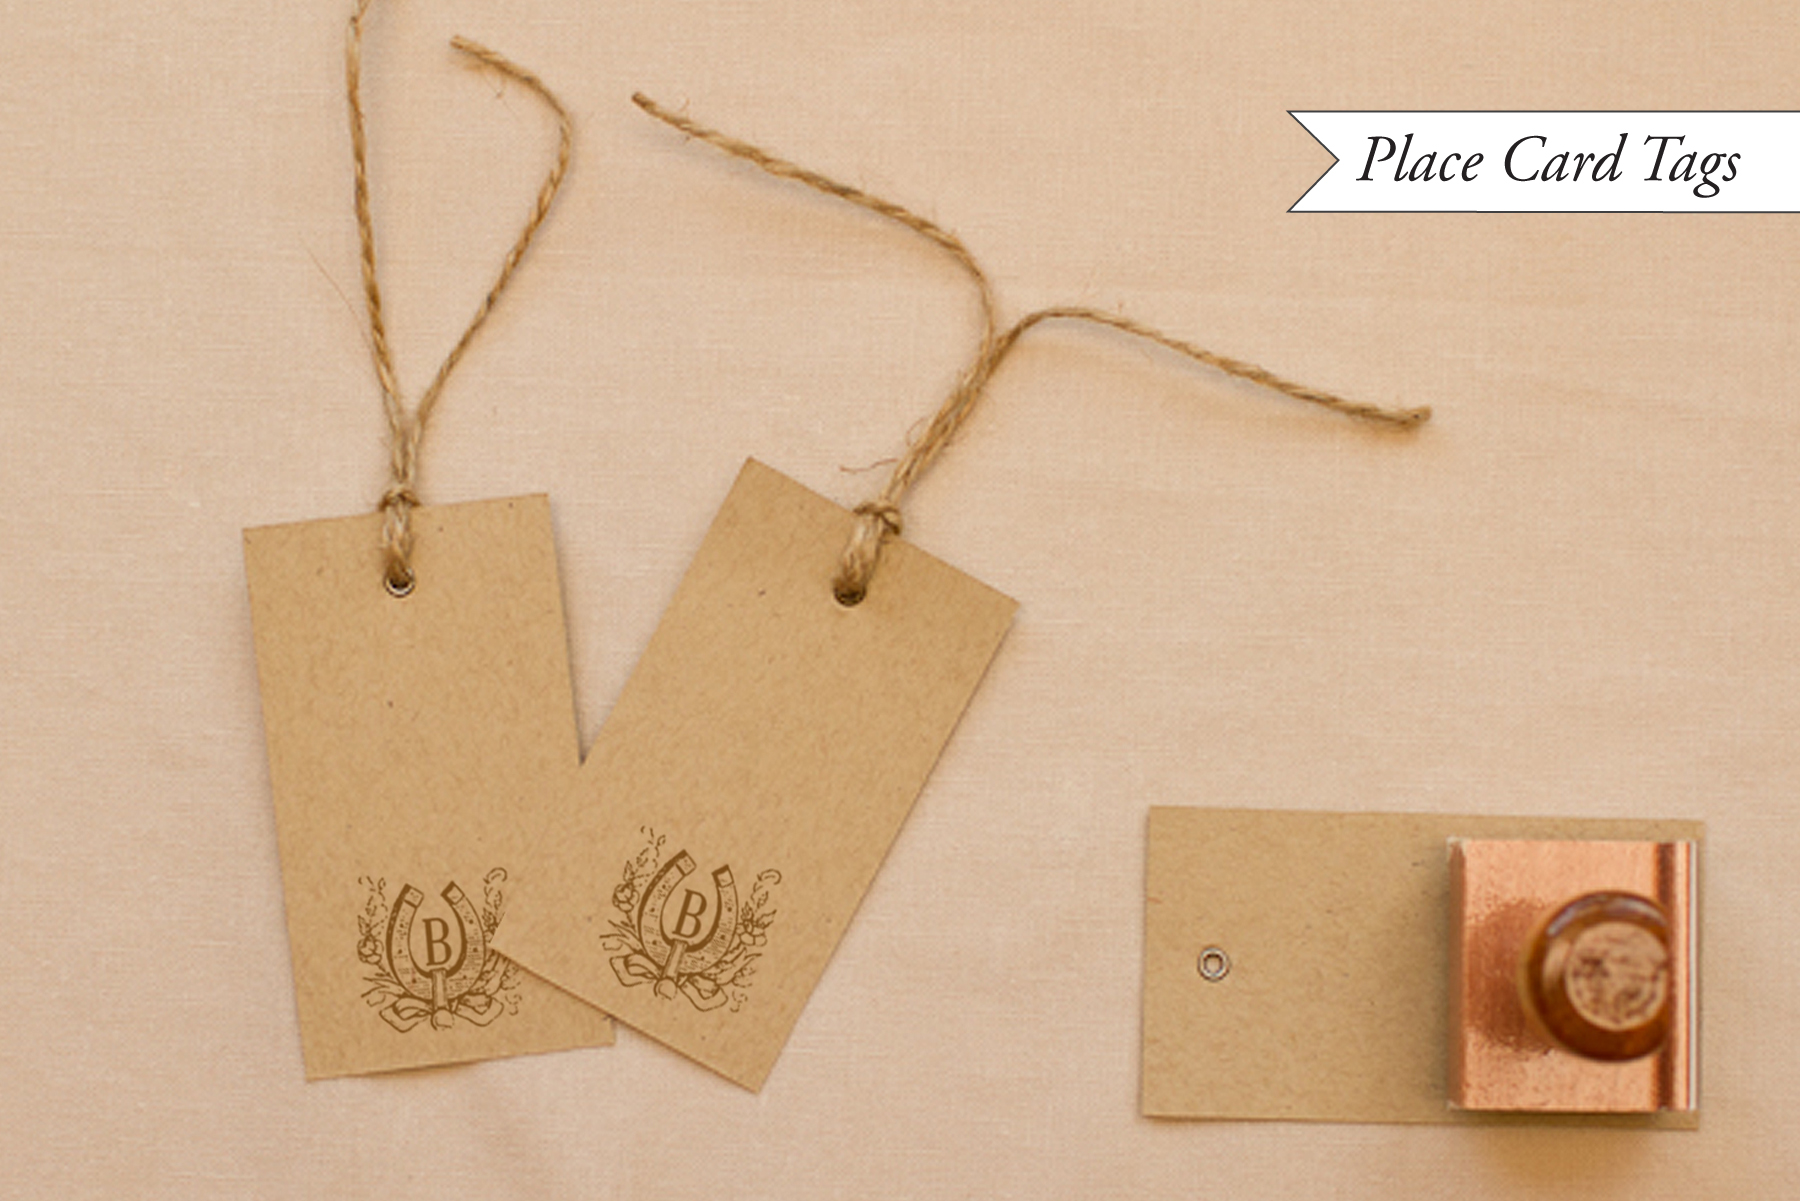
To make the place card yags: Ink your monogram stamp (we used our Vintage Horseshoe Initial Monogram) and center it on the bottom of a kraft paper gift tag (or manilla shipping tag).  Press stamp down moderately and remove from surface.  Set aside to dry.  Once dry, write your guests’ names on the tag.  We love the way that the opaque white calligraphy ink looks on kraft paper.  Next, cut about 2 feet of rustic twine and wrap it around a pressed napkin.  Tie in a knot, thread the tag on to one loose in, and then tie the twine in a bow.

Western Wedding Detail Ideas and Inspiration

A collection of goodies for the reception.  They all look so cute together!

Western Wedding Detail Ideas and Inspiration

How to make the stamped escort cards: Our escort card stamps are some of our new faves in the shop.  For this western themed card, cut kraft paper into 3.75″ x 2.5″ inch rectangles.  Ink your stamp (we used our Howdy Escort Card Stamp) and center over the card.  Press down moderately, using the handle as the main point of pressure.  Remove stamp and let dry.  Once you have your final seating arrangement, fill in the cards accordingly.  We repeated the white ink for the names to have continuity throughout the event.

p.s.  Ed Note: Confused by the difference between escort cards and place cards?  Escort cards are typically displayed together at a central location near the reception entrance and include the guest’s name and table number, guiding your guest to the appropriate table where they can then find their seat.  A place card with the guest name then sits at the individual table place setting, indicating an assigned seat where a guest should sit at their table.

Western Wedding Detail Ideas and Inspiration

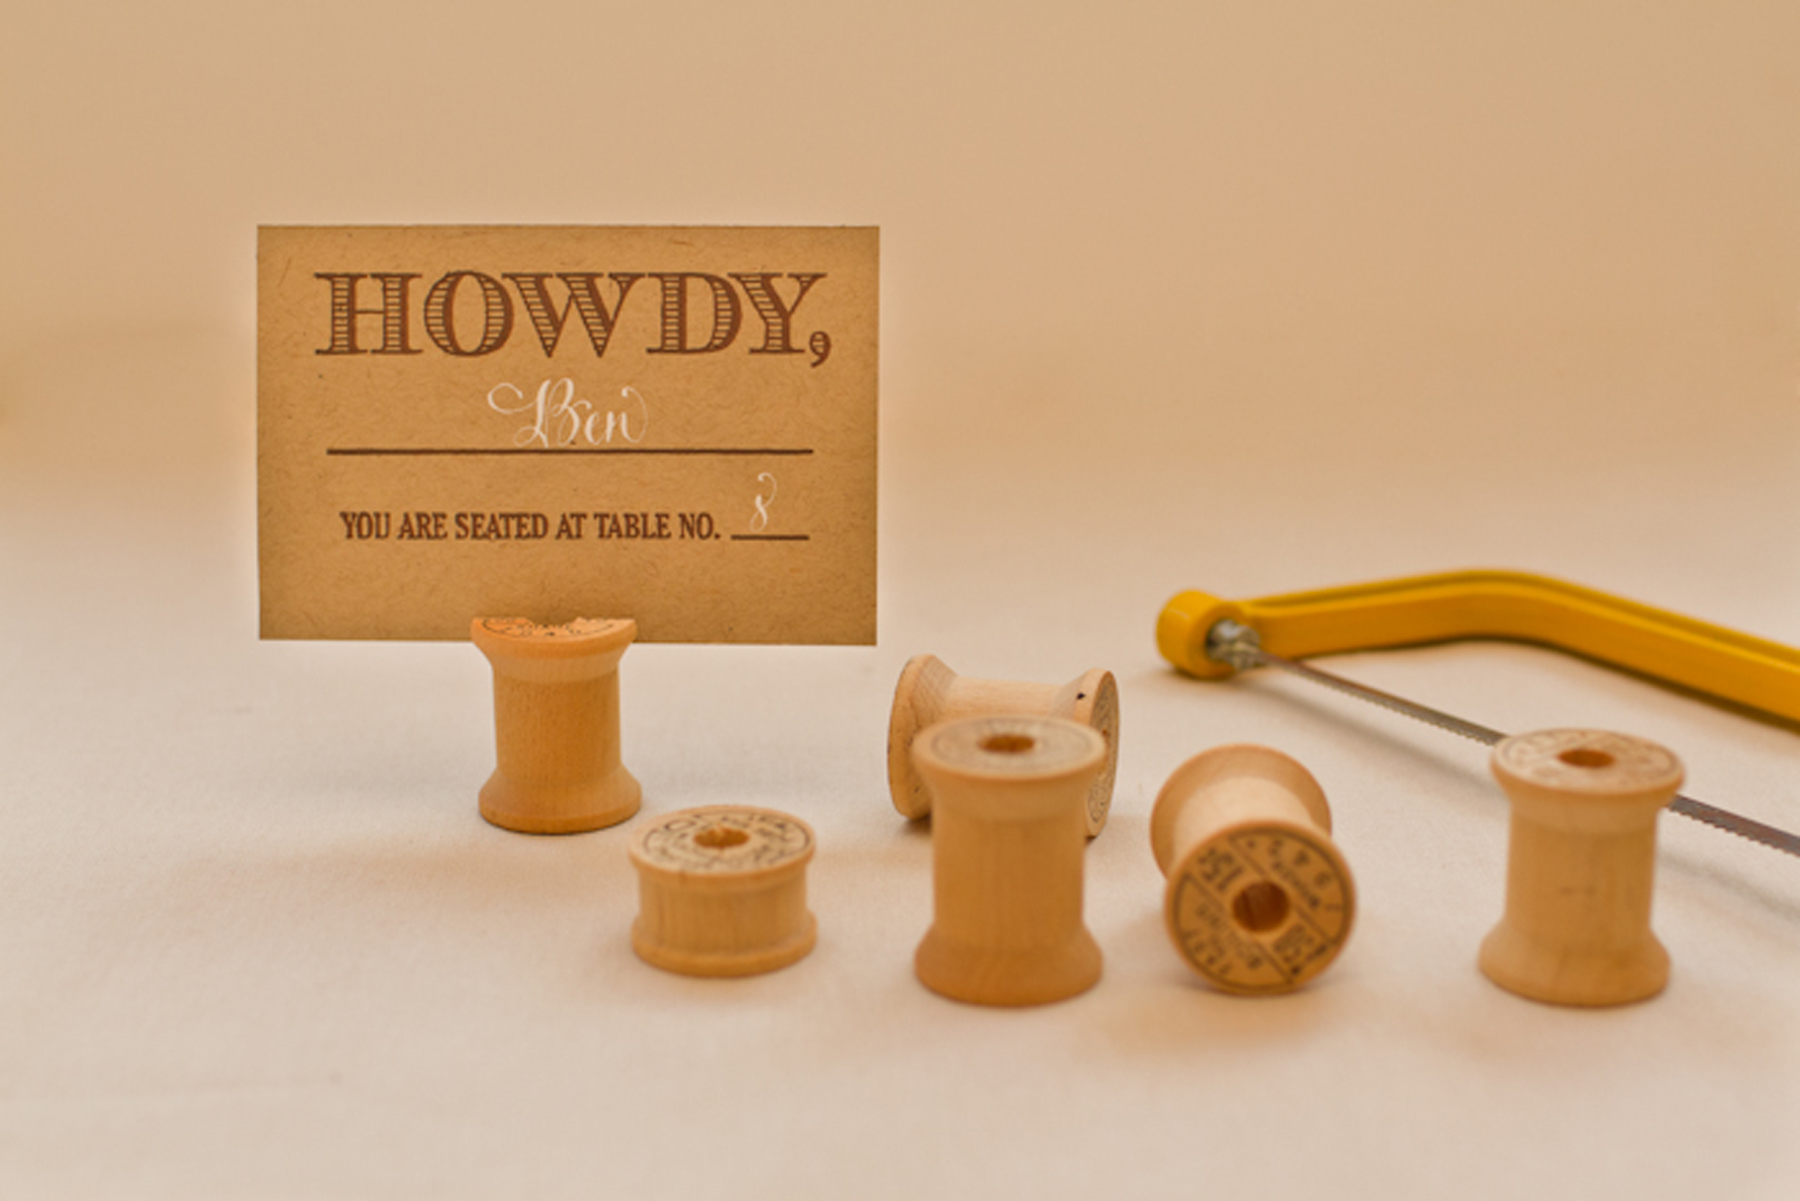
We racked our brains to figure out a cute and unique way to display all those howdy escort cards to no avail… until we stumbled across Emma’s mother’s vintage wooden spool and bobbin collection.  Perfect!

Western Wedding Detail Ideas and Inspiration - Wood Spool Escort Card Display

Bobbin Card Stands: Troll the internet or thrift stores for vintage wooden spools or bobbins (bobbins will be smaller).  Once you acquire the number that you need, you’re ready to start converting them into escort card holders.  Lightly draw a pencil line across the diameter of the top of the spool. With a small hand saw, saw down about an eighth to a quarter inch (so that the card can slide in).  Now your ready to set them all up and put them to work directing your guests to their tables!

We’ll be back with more Western wedding detail ideas in our next post!

Materials:

Vintage Horseshoe Initial Monogram Stamp

Howdy Escort Card Stamp

Stamp Pad (in Chestnut)

Metal Eyelet Gift Tags in Kraft

Rustic Twine

White Calligraphy Ink

Kraft Card Stock

Ruler and x-acto blade

Wooden Spools and Bobbins

Hand Saw

Photo Credits: Intertwyned for Antiquaria

{happy weekend!}

So now that our big news is out, it’s time to wish you all a wonderful weekend!  Next week, the husband and I are jetting off to St. Lucia for a few days of rest and relaxation – I can’t wait!  While we’re away I’ll be sharing a little mini guide to DC, from restaurants to shops to museums.  I hope you enjoy the guide!  But in the meantime…

St. Lucia Map Illustration by Laura Bird

…a few links for your weekend!

This week on Oh So Beautiful Paper:

That’s it for me this week!  We’re taking a quick break from Cocktail Fridays until after we get back from our trip, but if you’re looking or a fun recipe to try this weekend – try two of my favorite recipes so far: the Aviation or Vieux Mot.  Have a wonderful weekend!  xoxo

Edge Painted Business Cards from Antiquaria

You already know Bailey and Emma, the lovely and talented ladies behind Antiquaria, from their regular DIY tutorials here on Oh So Beautiful Paper – not to mention their custom wedding invitations and vintage shop.  Bailey and Emma recently redesigned their business cards, and I’m loving the beautiful knockout calligraphy logo and soft aqua edge painting!

From Bailey and Emma: We wanted to make something unique while keeping in line with our brand image.  The cards were letterpress printed in black and copper on super thick cotton paper.  We then added the edge painting ourselves because, after all, who doesn’t love a pop of color?


Thanks ladies!

Antiquaria is a member of the Designer Rolodex – check out more of their beautiful work right here!  For DIY inspiration, you can also see their DIY tutorials here.

Photo Credits: Kelly James of Studio Austin Weddings

DIY Rubber Stamp Equestrian Wedding Invitations

We love horses at Antiquaria and find ourselves constantly drawn to and inspired by vintage horse imagery.  Today we’re thrilled to be able to show you how to create a sophisticated equestrian themed invitation suite all your own!  This suite is subtle but definitely sets the stage for horse farm or equestrian center nuptials.  The color palette of hunter green, peach, and cream helps elevate the overall look and make it fresh.  The best part?  The stamped leather tag! – Bailey and Emma of Antiquaria

Wedding Invitation Ideas - DIY Equestrian Wedding Invitations

Wedding Invitation Ideas - DIY Equestrian Wedding Invitations

Step One: Set an A7 (5″x7″) piece of card stock on a hard, clean surface.  Ink your invitation stamp (we used our Equestrian Invitation stamp) thoroughly with a hunter green stamp pad.  Center stamp over card stock and carefully set down.  Press moderately on the stamp.  Too firm and it will smudge and too softly will not give a clear print.  Remove stamp and let the ink dry.

Wedding Invitation Ideas - DIY Equestrian Wedding Invitations

Step Two: Repeat the printing technique in step one on a 4bar (3.5″x5″) piece of paper.  We used our Equestrian reply card stamp for this piece.

Wedding Invitation Ideas - DIY Equestrian Wedding Invitations

Step Three: The little “extras” are what really make your invitation your own.  For this suite, we wanted to bring in a different texture for the monogram tag used to tie the whole thing together.  Cut leather into 2″ x 2″ squares.  Punch a 1/8″ hole in the left corner of the square.  Install a metal grommet in the hole to give it a clean and professional finish.

Now you’re ready to stamp!!  Ink your stamp (we used our Handwritten Calligraphy Names monogram) and center it on the leather.  Apply pressure (you can be a bit more gently this time since the surface is softer) and make your print. Let dry.

Wedding Invitation Ideas - DIY Equestrian Wedding Invitations

Step Four:  Stamp your return and reply address on the respective A7 and 4bar envelopes.  It is wise and a huge money saver to use the same stamp for both!  We used our Vintage Horseshoe return address stamp for this suite.  Cut a liner to fit your A7 outer envelope.  You will want it to sit right under the adhesive.  You can either cut it yourself or have your local print shop cut them all for you.  To insert the liner,  place a line of double stick tape or stick glue across the top  and slide it into position and press to secure.  Fold at the crease with a bone folder to get a nice, crisp edge.

Wedding Invitation Ideas - DIY Equestrian Wedding Invitations

Materials

Equestrian custom stamps: invitation, reply card, return address

Calligraphy Names Monogram stamp

A7 Cards

4Bar Cards

A7 Envelopes

4Bar Envelopes

Leather

Metal Eyelets

Twine

Vintage Postage

Anti­quaria is a mem­ber of the Designer Rolodex – you can see more of their beau­ti­ful work right here or visit the real wedding invitations gallery for more wedding invitation ideas!

Photo Credits: intertwyned for Antiquaria

DIY Rubber Stamp Pattern Envelope Liners

It’s the ladies of Anti­quaria, back with another cre­ative DIY project for you!  Today they’re sharing a fun tutorial on how to make DIY envelope liners using rubber stamps!

The finishing touches make your stationery special and unique.  It’s the little things – like vintage postage, twine, washi tape, calligraphy and envelope liners – that can turn a basic invitation, card or letter into a show stopper.  At Antiquaria, we love envelope liners… but they can be mighty expensive, so we figured out a way to get the look of decorative paper on a shoestring budget.  Plus it’s super easy!

DIY Tutorial: Rubber Stamp Envelope Liners

DIY Tutorial: Rubber Stamp Envelope Liners

DIY Tutorial: Rubber Stamp Envelope Liners

Step 1: Lay your sheet of text weight paper out on a hard surface.  Choose your stamp (we used our Mod Fern Pattern stamp), and ink it well.  Print your pattern stamp in an orderly fashion on the paper, making sure you stamp enough area so that the images will bleed off once the liner is cut.  In general, you will not want to overlap the stamped images (but don’t worry if they do).

DIY Tutorial: Rubber Stamp Envelope Liners

Step 2: Cutting your liner… the technique will all depend on what style of envelope you choose.  You can find envelope liner template kits at Paper Source to fit their envelopes.  To use these, trace the template and cut along the line.  If you’re using square envelopes, you can have your local print shop cut paper down to your envelope specifications or draw out the dimensions and cut your own!

DIY Tutorial: Rubber Stamp Envelope Liners

Step 3:  To insert your liner,  place a line of double stick tape or stick glue across the top (or around the top triangle), slide them into position and press to secure.  Fold at the crease with a bone folder to get a nice, crisp edge.

DIY Tutorial: Rubber Stamp Envelope Liners

Materials

Pattern Stamps – we used Mod Fern Pattern stamp (in turquoise), Repeat Leave Pattern Stamp (in ochre)

Stamp Pad

Envelopes

Double Stick Tape or Stick Glue

Bone Folder

Anti­quaria is a mem­ber of the Designer Rolodex – you can see more of their beau­ti­ful work right here!

Photo Credits: Intertwyned for Antiquaria