DIY Tutorial: Rubber Stamp Airmail Save the Dates

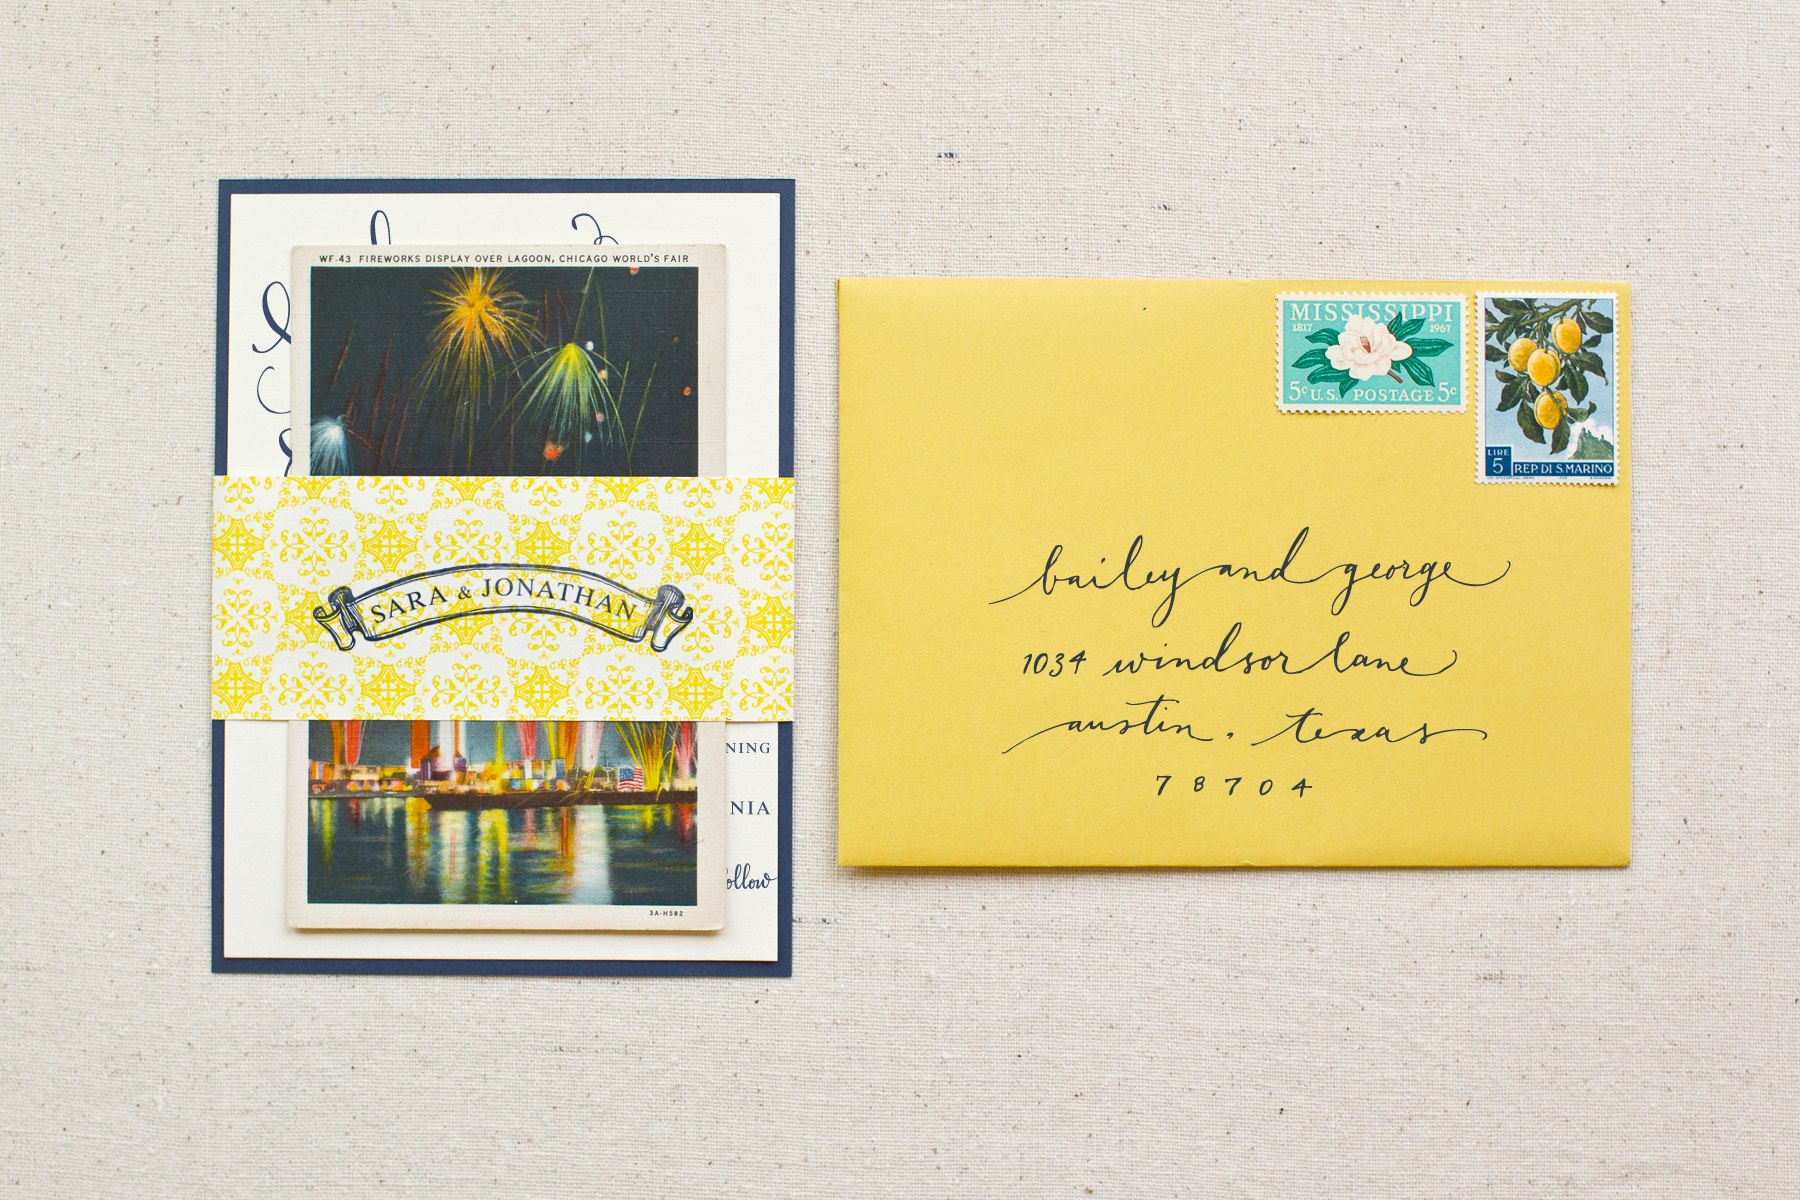
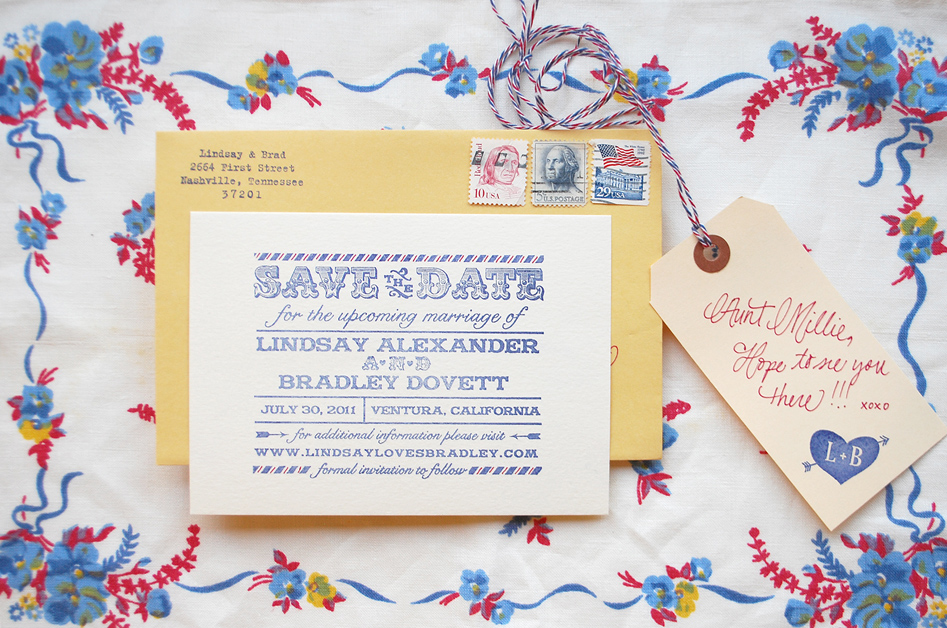
While digging though Emma’s stash of vintage stamps a while back, we stumbled across old airmail that she had received from a long lost pen pal.  It made us nostalgic for the days of hand written correspondence – which in turn made us think it would be the perfect thing to inspire this save the date design and tutorial!  Best of all….it’s super simple to put together.  – Bailey and Emma of Antiquaria

DIY Tutorial: Rubber Stamp Airmail Save the Date by Antiquaria via Oh So Beautiful Paper

DIY Tutorial: Rubber Stamp Airmail Save the Date by Antiquaria via Oh So Beautiful Paper

DIY Tutorial: Rubber Stamp Airmail Save the Date by Antiquaria via Oh So Beautiful Paper

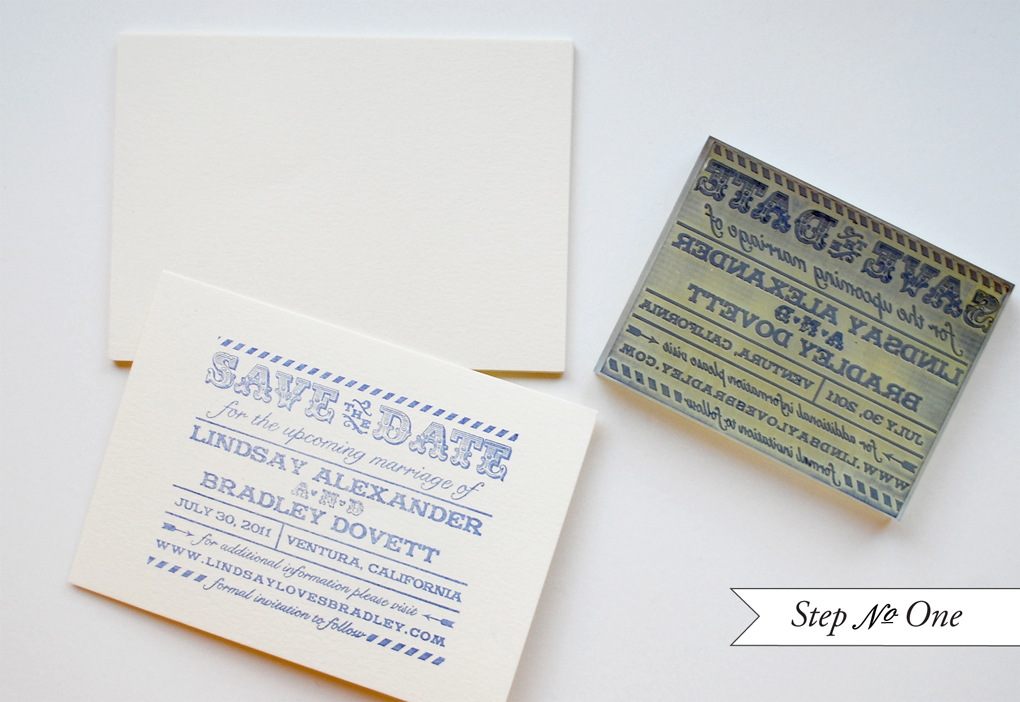
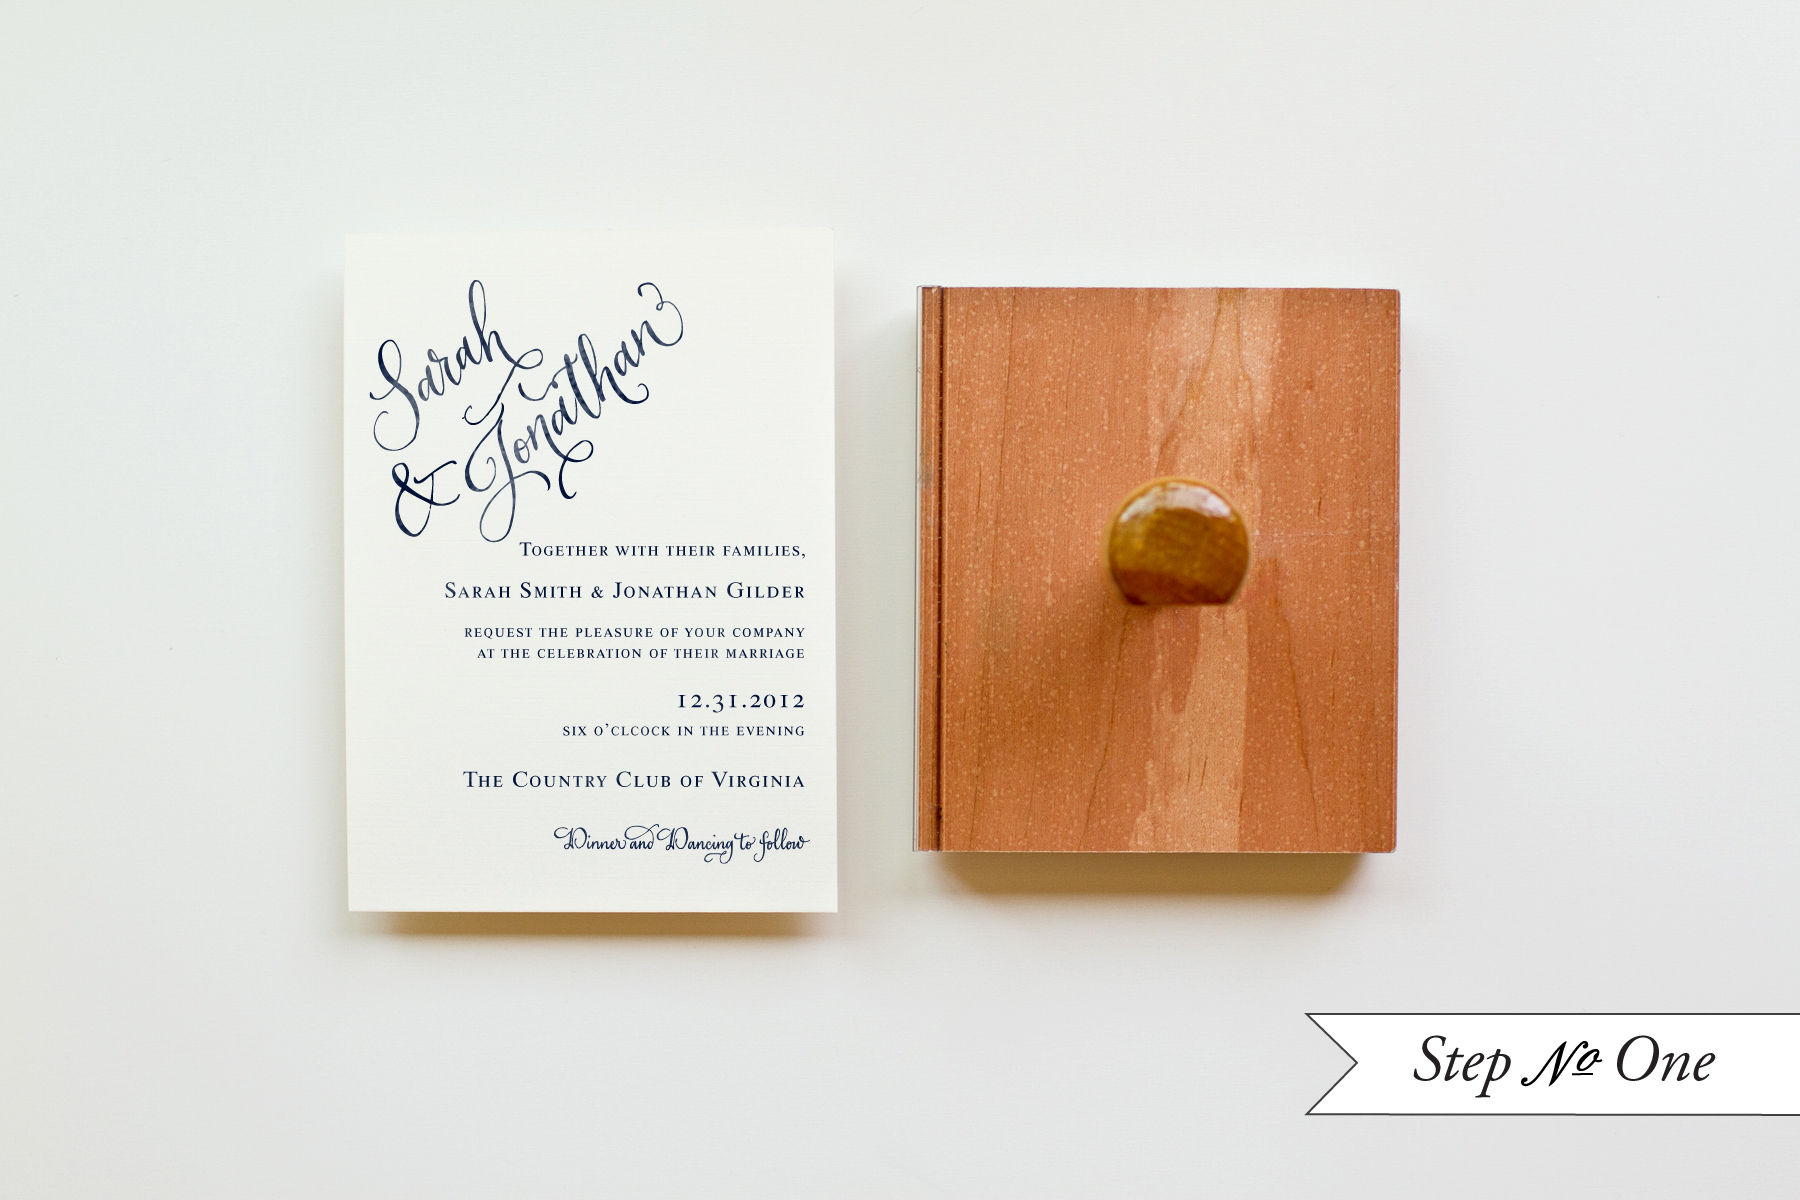
Step One: Lay out an A6 piece of cream heavyweight card stock on a smooth, hard surface.  Ink your save the date stamp (we used our Airmail Save the Date Stamp) with navy ink.  Center your stamp over the card and press firmly down to make the print.  Since there are no longer handles on our stamps (see note at the bottom of the post), you will want to make sure that you apply even pressure to all of the stamp, especially the center.  Lift stamp off and let the card dry.

DIY Tutorial: Rubber Stamp Airmail Save the Date by Antiquaria via Oh So Beautiful Paper

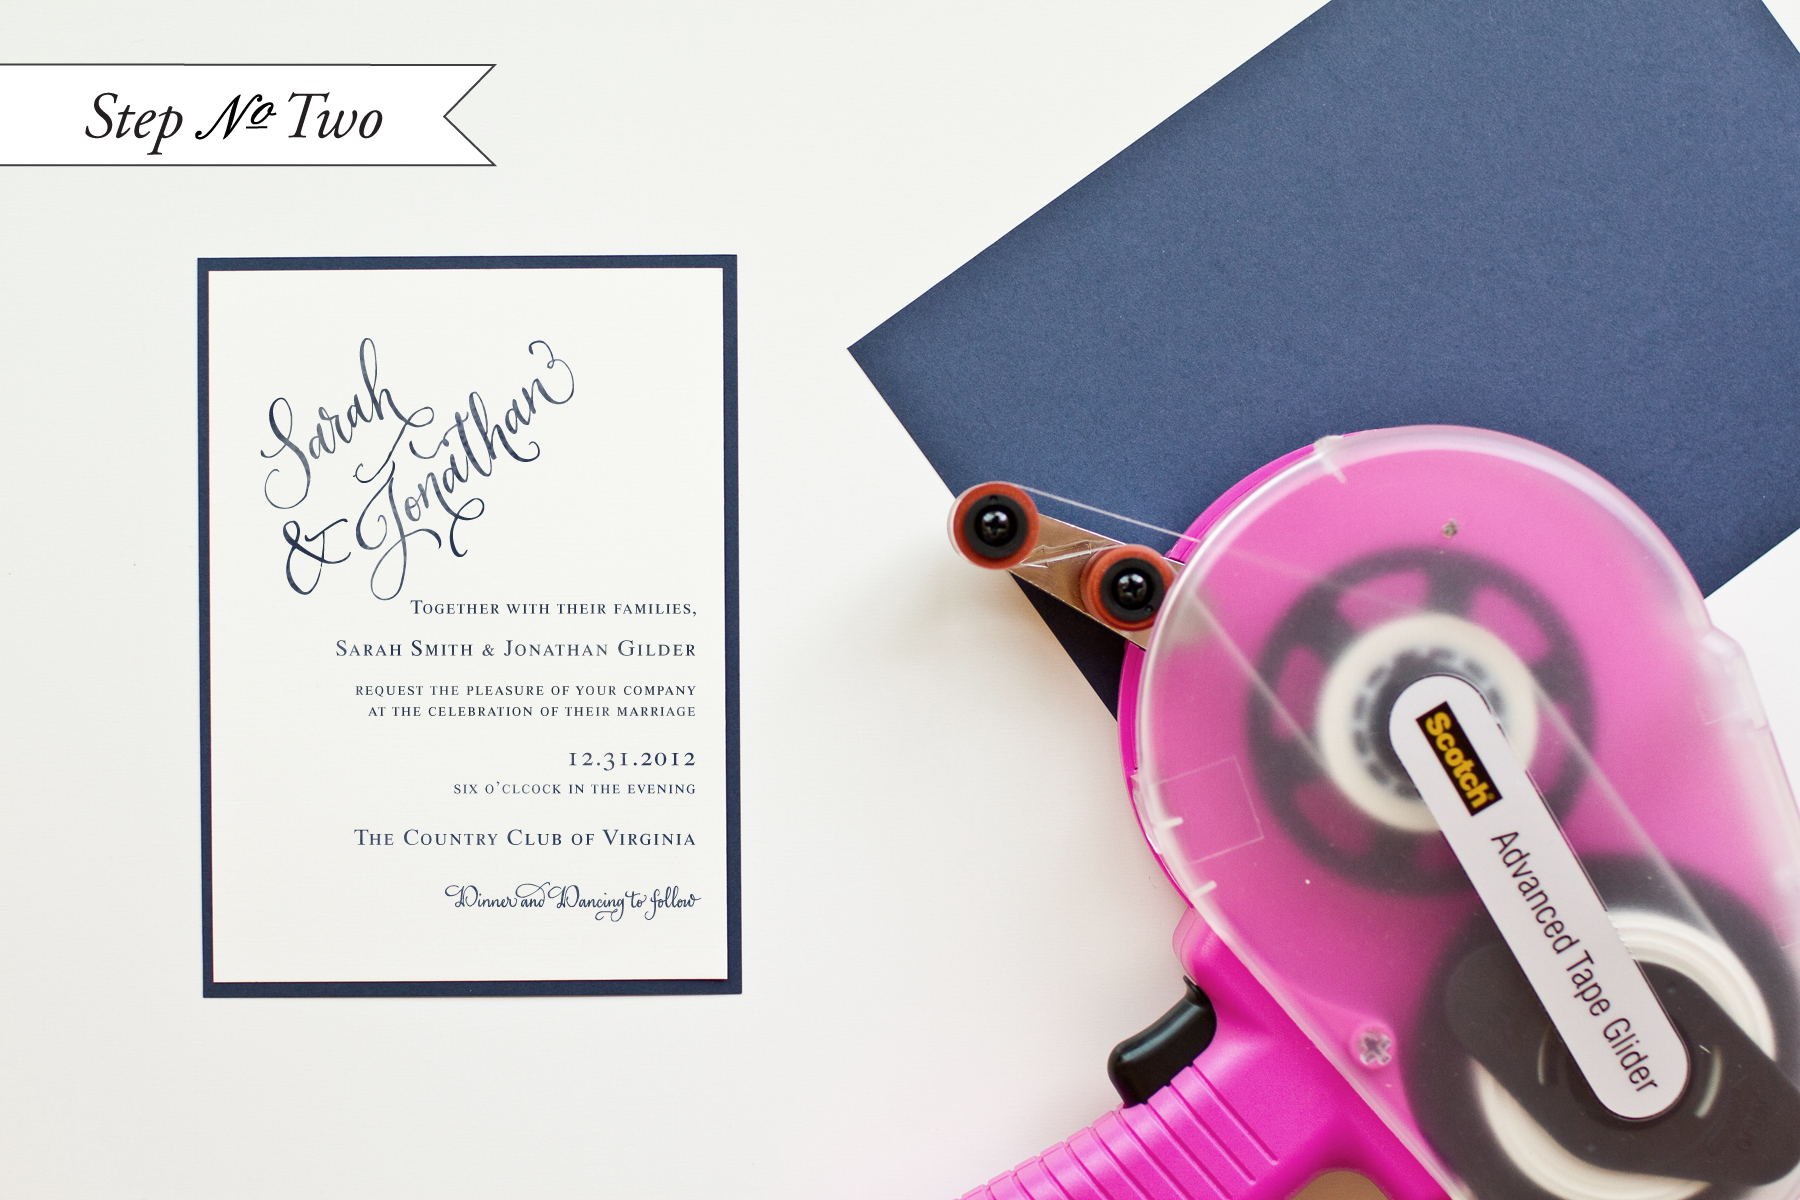
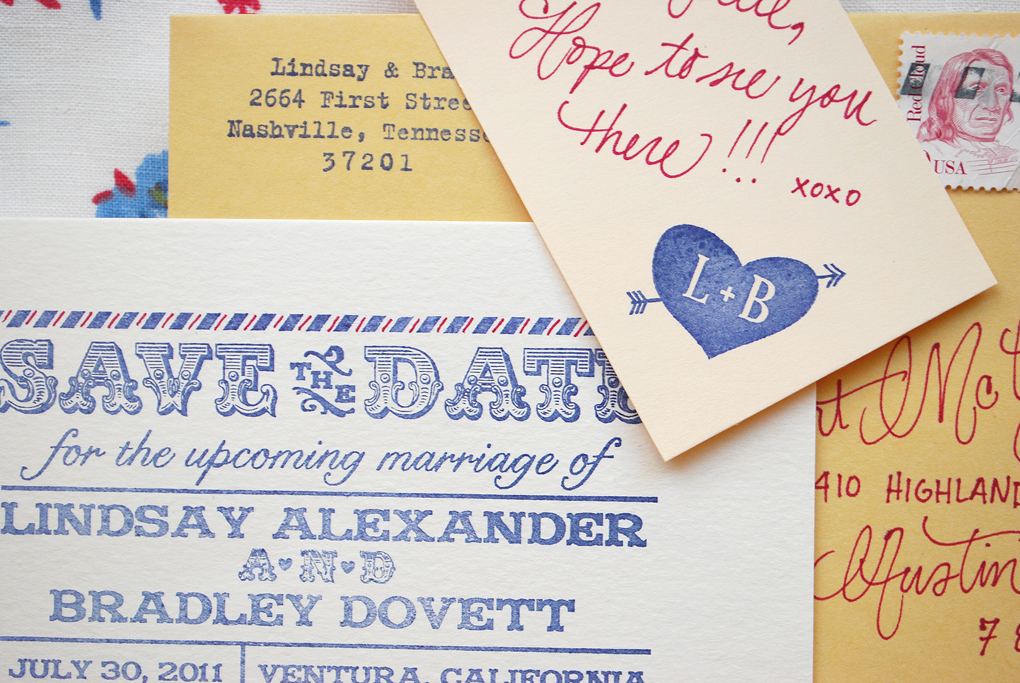
Step Two: To add an authentic airmail feel, draw lines with a red felt tipped marker or pen in between the blue stamped lines.

DIY Tutorial: Rubber Stamp Airmail Save the Date by Antiquaria via Oh So Beautiful Paper

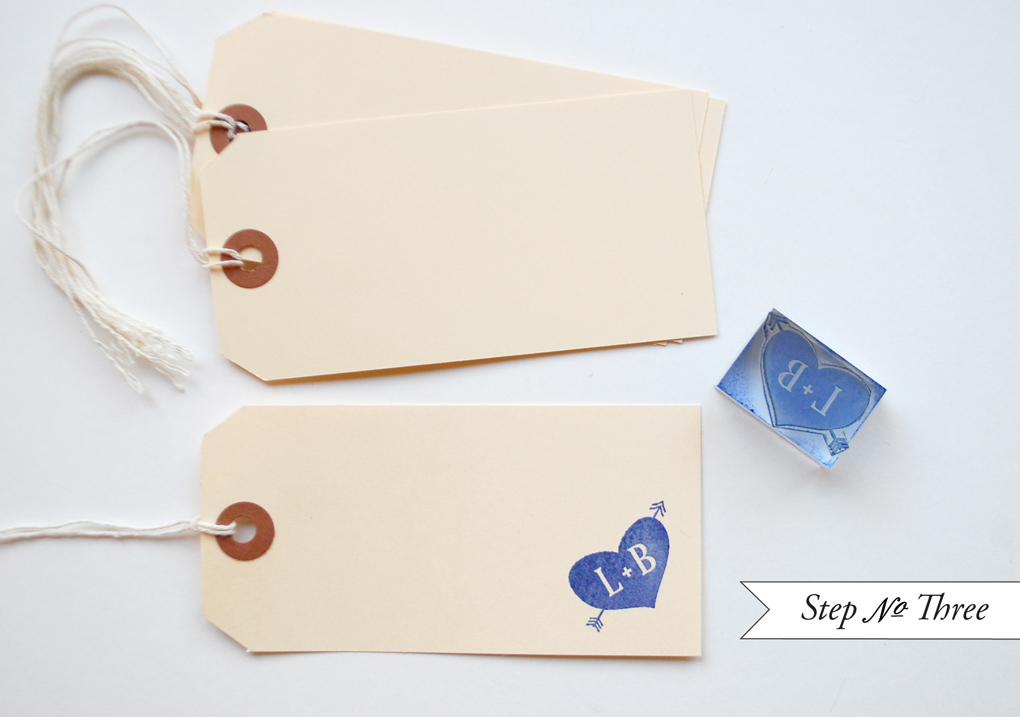
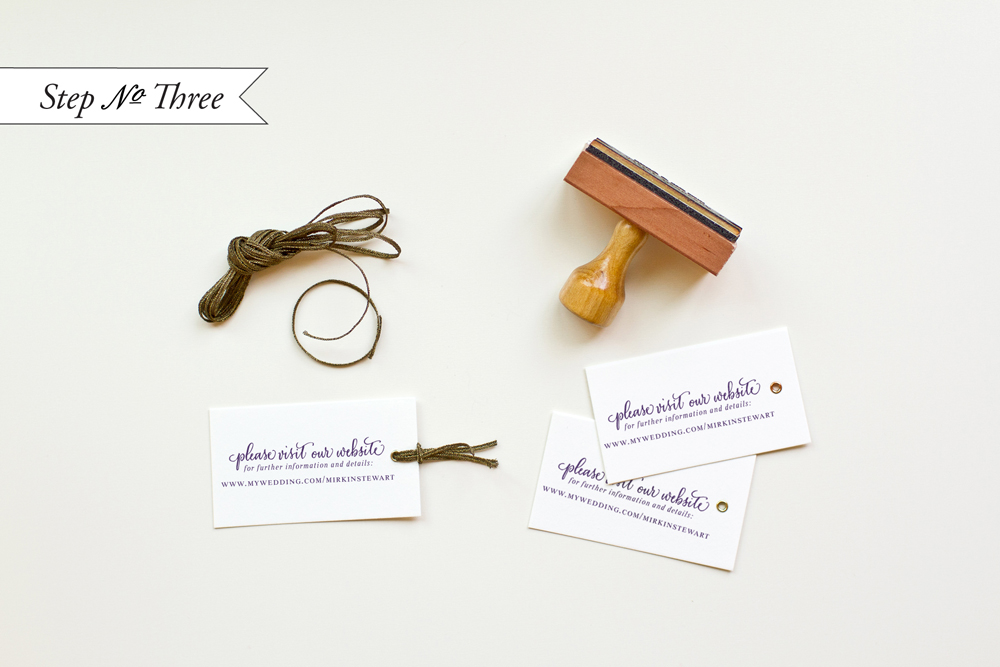
Step Three: Personalizing your wedding stationery makes your guests feel special and really sets the tone for your upcoming event.  Let them know how you want much them there by adding a note to each guest on a monogrammed manila shipping tag.  We used our (Cross my Heart Initials Monogram Stamp) in navy ink on the corner of the tag to coordinate the tag & the save the date.  We then used the same red pen to write a note to each guest!
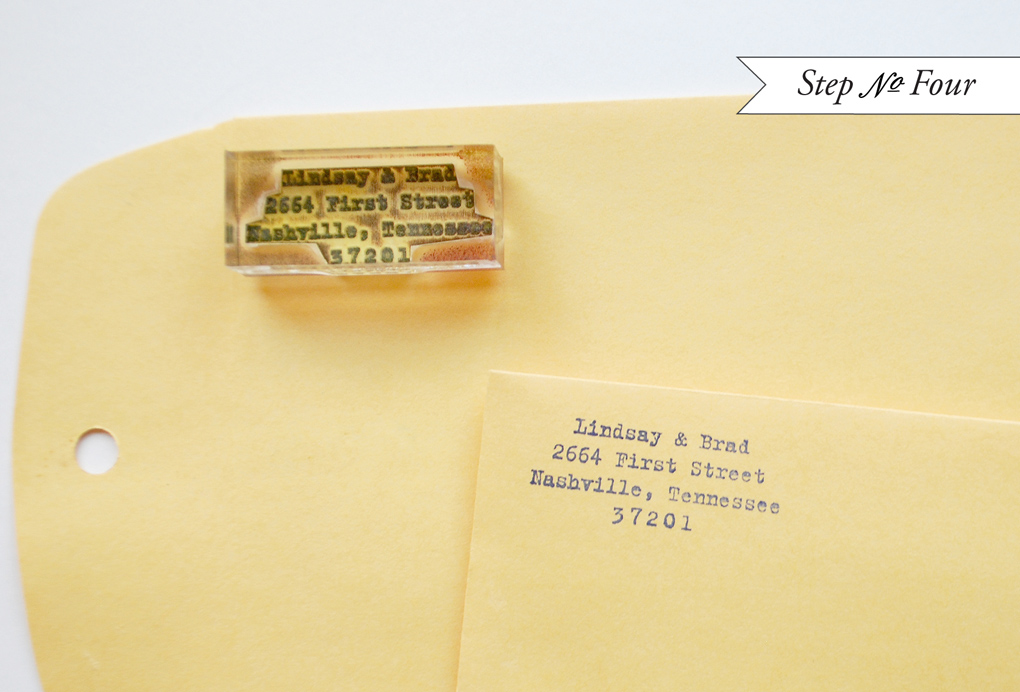
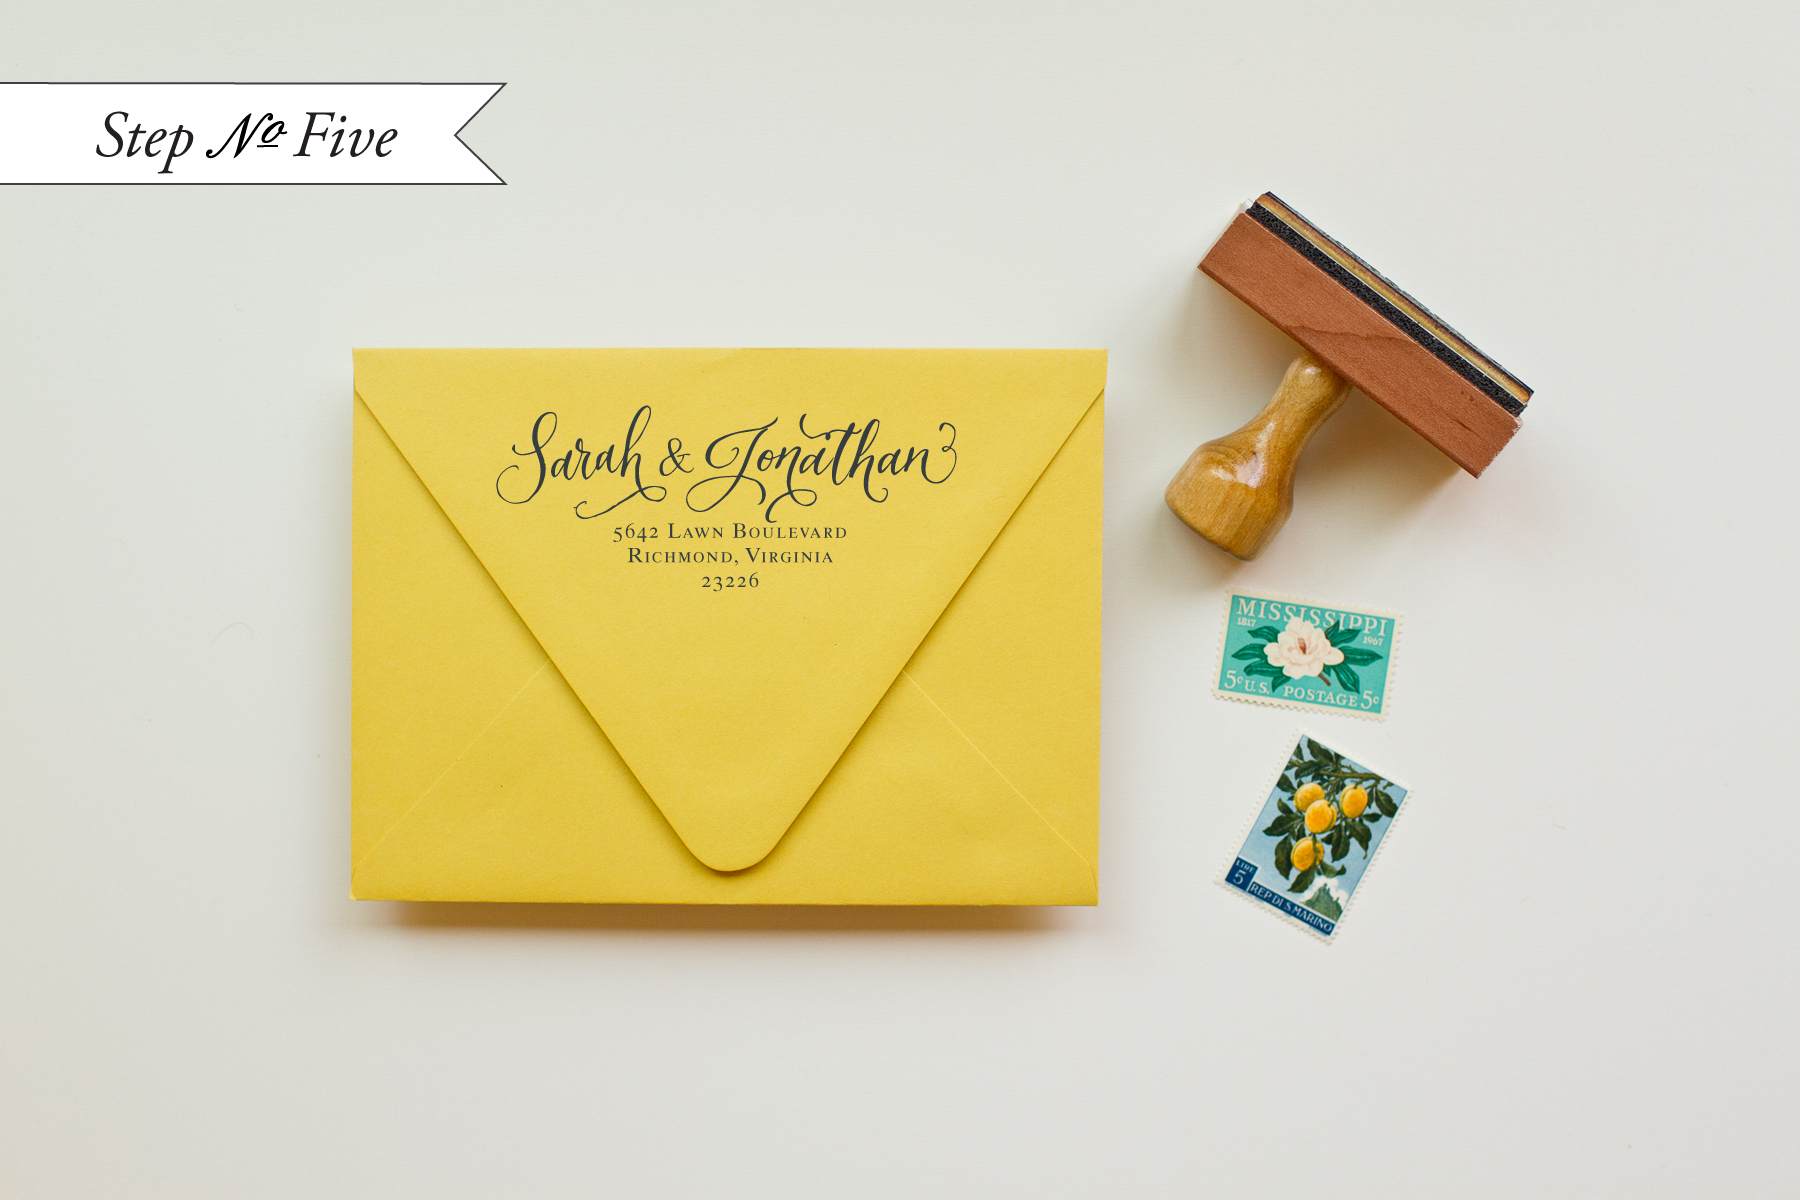
DIY Tutorial: Rubber Stamp Airmail Save the Date by Antiquaria via Oh So Beautiful Paper

Step Four: Sometimes simple is best.  On the left hand corner of our envelope, we stamped our return address using our Old Typewriter Return Address Stamp.

DIY Tutorial: Rubber Stamp Airmail Save the Date by Antiquaria via Oh So Beautiful Paper

Step Five: We finished off the save the date design by tying the pieces together using this awesome airmail twine!  It couldn’t be more perfect.  We addressed the envelopes in red and sent them on their way!

Note: We at Antiquaria are thrilled to announce that we’ve made the switch to acrylic mounts for all of our stamp designs.  Not only do the mounts make the product look clean, sleek and beautiful, they vastly improve their functionality & make printing the stamps easier!

Materials:

Airmail Save the Date Stamp

Cross my Heart Initials Monogram Stamp

Old Typewriter Return Address Stamp

Stamp Pad in Midnight

A6 Cards in Luxe Cream

Manila Shipping Tags 4 3/4″ x 2 3/8″

Manilla Envelopes – ours were vintage but this is a similar product

Airmail Twine

Red Pen

Anti­quaria is a mem­ber of the Designer Rolodex – you can see more of their beau­ti­ful work right here or visit the real wedding invitations gallery for more wedding invitation ideas!

Photo Credits: Antiquaria

DIY Tutorial: Rustic Monogram Rubber Stamp Wedding Invitations

This week we’re showing you how to create a rustic twist on a classic wedding invitation using a palette of eggplant, ivory, and kraft – a beautiful color combination for late summer and fall weddings!  Using a variety of papers, ink colors, and stamps, we gave some additional depth to an otherwise classic invitation.  – Bailey and Emma of Antiquaria

DIY Tutorial: Kraft Paper Rubber Stamp Wedding Invitations by Antiquaria via Oh So Beautiful Paper

DIY Tutorial: Kraft Paper Rubber Stamp Wedding Invitations by Antiquaria via Oh So Beautiful Paper

DIY Tutorial: Kraft Paper Rubber Stamp Wedding Invitations by Antiquaria via Oh So Beautiful Paper

Step One: Set an A7 (5″x7″) piece of card stock on a hard, clean surface.  Ink your invitation stamp (we used our Classic Invitation Stamp) thoroughly with a black stamp pad.  Center stamp over card stock, leaving room for your monogram.  Carefully set the stamp down.  Press moderately on the stamp.  Too firm and it will smudge and too softly will not give a clear print.  Remove stamp and let the ink dry.  Repeat, using eggplant ink, with the monogram stamp (we used our Crest Monogram stamp) centering it at the top.

DIY Tutorial: Kraft Paper Rubber Stamp Wedding Invitations by Antiquaria via Oh So Beautiful Paper

Step Two: Using the same technique as in step one, stamp your reply card (we used our Classic Reply Card stamp) & reply address (we used our Baroque Frame return address stamp).  You’ll want to use a 4 bar card (3 1/2 x 4 7/8″) and a 4 bar envelope (3 5/8 x 5 1/8″) for these pieces.

DIY Tutorial: Kraft Paper Rubber Stamp Wedding Invitations by Antiquaria via Oh So Beautiful Paper

Step Three: Nowadays, it is increasingly important to include your wedding website within your invitation suite.  Guests rely on the wedding website for travel info, locations, and addresses – not to mention your registry!  We stamped our website card (we used our Calligraphy Accent Web Card stamp) on grommeted gift tags to add some interest to the suite.  We then tied some decorative gold ribbon through the hole to finish it off!

DIY Tutorial: Kraft Paper Rubber Stamp Wedding Invitations by Antiquaria via Oh So Beautiful Paper

Step Four: We love to used things unexpectedly within an invitation suite… so when we ran across these tiny kraft sacks, we knew they would be perfect to incorporate into our next design!  Using the same monogram from your invitations (our Crest Monogram rubber stamp) – see budget savings!! – stamp it horizontally onto your tiny kraft bag.  Let dry.

Anti­quaria is a mem­ber of the Designer Rolodex – you can see more of their beau­ti­ful work right here or visit the real wedding invitations gallery for more wedding invitation ideas or to inquire about custom design services!

Materials:

Classic Invitation Stamp

Crest Monogram Stamp

Classic Reply Card Stamp

Baroque Frame Return Address Stamp

Calligraphy Accent Web Card Stamp

A7 Cards

4Bar Cards

A7 Envelopes

4Bar Envelopes

Paper Bags

Metal Eyelet Tags

Photo Credits: Intertwyned for Antiquaria

Rubber Stamp Memorial Day Summer Kick Off Invitations

I absolutely LOVE the idea of using large scale rubber stamps to create party invitations – particularly a fun and informal summer kick-off party!  Lindsay from McMillian + Furlow used a single rubber stamp with black ink on kraft paper to create the invitations for her family’s annual Memorial Day event.  I love the modern but rustic feel, not to mention the unique texture of each individual invitation!

Rubber Stamp Memorial Day Kick Off Party Invitations by McMillian + Furlow via Oh So Beautiful Paper (5)

From Lindsay: I designed these invitations for my family’s annual Memorial Day Pig Roast.  Each year I try and come up with a new look and feel for the same event, which proves to be quite challenging, but I think this year’s design was quite a success!

Rubber Stamp Memorial Day Kick Off Party Invitations by McMillian + Furlow via Oh So Beautiful Paper (2)

I love how the stamp created such a nice texture with the ink on the kraft paper, making each invitation entirely unique.  The rustic feel really suits this outdoor upstate New York event.

Rubber Stamp Memorial Day Kick Off Party Invitations by McMillian + Furlow via Oh So Beautiful Paper (4)

Rubber Stamp Memorial Day Kick Off Party Invitations by McMillian + Furlow via Oh So Beautiful Paper (1)

Thanks Lindsay!

p.s. You can see some of Lindsay’s other fun projects right here and check out some fun rubber stamp DIY projects here!

Photo Credits: McMillian + Furlow

DIY Tutorial: Rubber Stamp Fireworks Invitation

We love the challenge of creating an invitation suite based off of a unique theme, venue or color palette.  For this DIY tutorial, we were inspired by a fabulous vintage firework postcard (that we found while hunting at a local thrift shop)!  This combo would be so perfect for New Years Eve or July 4th nuptials – or even a Fourth of July party!  The mixture of colors and patterns is sure to make a statement to all of your guests. – Bailey and Emma of Antiquaria

DIY Tutorial: Rubber Stamp Fireworks Invitation by Antiquaria

DIY Tutorial: Rubber Stamp Fireworks Invitation by Antiquaria

Step One: Lay a 4.25 x 6″ card (preferably a heavyweight card stock) on a stable and hard surface.  Ink your invitation stamp (we used our Calligraphy Accent Invitation Stamp) and center it over card.  Press down firmly with moderate pressure, using the handle as the anchor point.  Lift off the stamp and set card aside to dry.

DIY Tutorial: Rubber Stamp Fireworks Invitation by Antiquaria

Step Two: Cut a navy sheet of paper into a 4.5 x 6.25″ rectangle.  Once the printed invitation piece is dry, flip over and adhere double stick tape to each edge.  Center over the navy card and stick it down pressing the edges to make sure that the two pieces are stuck together properly.

DIY Tutorial: Rubber Stamp Fireworks Invitation by Antiquaria

Step Three: In order to use our found postcard for all of our guests, we scanned the front image into the computer and printed out enough cards to suit our quantity.  (The cards ended up being 3.5 x 5.5″ rectangles).  We stamped the back of each card using our Calligraphy Accent Reply Postcard Stamp.  Of course, let the cards dry after inking.

DIY Tutorial: Rubber Stamp Fireworks Invitation by Antiquaria

Step Four: To make the belly band, cut a fun, patterned paper into 2 x 11″ or 2 x 12″ (depending on the length of your paper) strips.  Stamp a monogram (we used our Banner Name Monogram Stamp) in the middle and wrap the band around your invitation suite, securing it in the back with double sided or decorative washi tape.  Now all of your pieces will stay together and look cute at the same time!

DIY Tutorial: Rubber Stamp Fireworks Invitation by Antiquaria

Step Five: Stamp an A6 envelope with your return address (we used our Calligraphy Ampersand Return Address stamp), address the front, pick out your postage and send them on their way!

Materials:

Calligraphy Accent Invitation Stamp

Calligraphy Accent Reply Card Stamp

Calligraphy Ampersand Return Address Stamp

Banner Name Stamp

Stamp Pad (we used Midnight)

Cream Cardstock cut to 4.25 x 6 inches

Vintage Postcard measuring 3.5 x 5.5 inches, found locally

Navy Blue Cardstock cut to 4.5 x 6.25 inches

Patterned Paper (ours was custom designed and printed by Antiquaria)

A6 Envelope (we used Curry)

Double sided tape

Washi Tape

Tape Gun (optional but definitely helpful in taping on the navy backers)

Photo Credits: Jamie of Intertwyned

DIY Tutorial: Western Reception Wedding Details, Part II

Hi Everyone! Before we jump back into Stationery Show sneak peeks, the ladies from Antiquaria are sharing some fun Western-inspired DIY wedding projects!

Two weeks ago, we shared a few DIY projects inspired by our Western Save the Date & Invitation DIY, including fun DIY escort cards and place setting ideas.  As promised, today we’re back with a couple of extra details to infuse some Western style into your wedding reception!  –Bailey and Emma of Antiquaria

Western Wedding Reception Detail Ideas

What better to give as a favor than a festive jar of  pickles?!  This project couldn’t be simpler to make…and depending on how much time you have to devote to it, you could even make the pickles yourself!

Western Wedding Reception Detail Ideas

Stamped Jar Labels: Cut a sheet of 8.5 x 11″ label paper into pieces that measure 3 x 3.”  Ink your stamp (we used our Vintage West Favor Tag/Thank You Stamp) thoroughly and center over the label.  Press down with moderate pressure using the handle.  Set aside to let dry.  We used this on jars of pickles, but this idea could be great for  jam, lemon curd… really anything in a jar.

Western Wedding Reception Detail Ideas

Western Wedding Reception Detail Ideas

Monogramed Cocktail Napkins: Cocktail hour is one place where it’s fun to incorporate some personal touches into your decor.  One way to do this is to stamp blank cocktail napkins.  To do this, we inked up one of our Monogram Stamps and stamped it in the center of the napkin.  Since paper napkins are absorbent, the ink dried in a snap!

Now that everything is decorated…enjoy the party!

Materials:

Vintage West Favor Tag/Thank You Stamp

Custom Monogram Stamp (Email us for inquires about custom design!)

8.5″x11″ Label Paper (we used paper bag)

Ruler and Craft Blade to cut the labels

Stamp Pad (ours was chestnut)

Cocktail Napkins

Anti­quaria is a mem­ber of the Designer Rolodex – you can see more of their beau­ti­ful work right here or visit the real wedding invitations gallery for more wedding invitation ideas!

Photo Credits: Antiquaria