Fall Cocktail Recipes + a Cocktail Class!

DC friends! If you enjoy delicious cocktails, please join my husband (and our resident cocktail expert) Andrew for a fall cocktail demonstration at Red Barn Mercantile this Thursday, October 18! You’ll get to sample three fantastic fall cocktails, plus Andy will show you how to make each cocktail – and send you home with plenty of tips for making delicious drinks at home! You can sign up for the fall cocktail class right here. We’ll also have a selection of our vintage glassware available for purchase at the workshop and through the rest of the weekend, so even if you can’t make it to the class you should totally go check it out in person! Old Town Alexandria is always ridiculously charming, especially in the fall.

And now that fall weather has DEFINITELY arrived here in DC, it’s the perfect time to round up some of our favorite fall cocktail recipes!

The Stone Fence Cocktail Recipe Bourbon Pear Vanilla Bean Smash Cocktail Recipe / Liquorary for Oh So Beautiful Paper

The Stone Fence // Bourbon-Pear Vanilla Bean Smash

Chocolate-Fig Old Fashioned Cocktail Recipe / Liquorary for Oh So Beautiful Paper The Manhattan Classic Cocktail Recipe / Liquorary for Oh So Beautiful Paper

Chocolate-Fig Old Fashioned // The Manhattan

The Mulled Daiquiri Fall Cocktail Recipe

The Mulled Daiquiri

Whiskey Smash Cocktail Recipe / Liquorary for Oh So Beautiful Paper Rum Stone Fence Cocktail Recipe with Apple Cider / Liquorary for Oh So Beautiful Paper

Whiskey Smash // A Rum Stone Fence

The Robert Frost Cocktail Recipe Orange-Vanilla Bean Scotch Smash Cocktail Recipe / Liquorary for Oh So Beautiful Paper

The Robert Frost // Orange Vanilla-Bean Scotch Smash

Each of these recipes is absolutely delicious – no matter which one you choose, you can’t go wrong! I’m partial to the smashes (only require a few ingredients and are SO good), the Robert Frost is a crowd pleaser (you’ll get to taste one if you come to Thursday’s cocktail class!), and the Mulled Daiquiri is the perfect way to transition from summer to fall.

BTW – I know we haven’t done any cocktail recipes lately. Life got kind of hectic and we let them slide, but would you be interested in seeing them come back? I know some of you really enjoyed them, and they continue to be some of our most popular pins on Pinterest, so hopefully we can bring them back soon if some of you are interested!

Friday Faves

I Am A Voter / Sophie and Lilli

Illustration by Sophie and Lilli

Happy Friday everyone – let’s talk about voting. Are you registered to vote? Need to confirm that your registration is still valid? Click here and take care of it RIGHT NOW. It’s super easy. You can even request an absentee ballot if you won’t be able to make it to a polling location on Election Day! The voter registration deadlines have already passed for many states, but if you had been registered to vote and discover that you got kicked off your state’s voter roll, you still have options. Just go to your local polling location on Election Day and request to vote by provisional ballot. With voter suppression efforts across the country and especially in Georgia and North Dakota, it’s super, super, super important that every American over the age of 18 votes in the upcoming elections. It’s our most fundamental civic responsibility and it’s never been more important to make your voice heard.

Oh, and by the way, the whole idea of voter registration is voter suppression. Let’s get rid of it and automatically register everyone to vote.

Here are a few easy ways to help support local campaigns in these last few weeks before the mid-term elections.

Between Brock Turner and Brett Kavanaugh, when do girls matter?

How Iceland chose to clean up it’s financial crisis

Everything you know about obesity is wrong

I love the idea of Open House Sundays

DC friends! My husband is teaching a fall cocktail class at Red Barn Mercantile! You can sample three delicious fall cocktails and learn how to make them for yourself back at home. Come join us!

It’s finally sweater season! I’ve got my eye on this cozy popcorn stitch sweater, this adorable Madewell sweaterthis polka dot sweater, and this classic crewneck from Everlane.

Loving this new wood mirror at Target!

My heart goes out to everyone affected by Hurricane Michael in my home state of Florida today – especially the folks living in the Florida panhandle. For those of you looking to help out, the New York Times wrote an article with ways to support recovery efforts. Please help support recovery efforts if you are able to do so. Every little bit helps!

Inspiring Calligraphers: Frani Matthews of Authentic By Frani

Hey everyone! So I have a beautiful collection of calligraphy to share with you all today. We’re taking a look at the work of Frani Matthews and her take on the art of lettering work and favorite projects she’s worked on with her business Authentic by Frani. Let’s dive in! – Jen

Inspiring Calligraphers: Authentic by Frani

Inspiring Calligraphers: Authentic Frani

Inspiring Calligraphers: Authentic by Frani

On her start as a calligrapher, Frani shares:

“When I started lettering (more seriously than my notebook-doodling days, mind you), I simply mimicked the letter forms and fonts I saw in magazines, on Instagram, in advertisements, etc. I would trace things and break more intricate forms into smaller, more manageable portions; but in the end, my style just looks like the upgraded version of my loose, cursive handwriting. Using a pointed pen and ink amps it up to its characteristic look: effortless, romantic, whimsical. After almost three years of refining, my style is now a part of me. Each stroke carries the tension of my day, the joy, the hunger-shakes. We live (and create) out of the overflow of our hearts, and I’m thankful that this art continues to be a release.”

Inspiring Calligraphers: Authentic by Frani

Photo Credit: Swak Photography

Paper or digital? The answer is clear, according to Frani:

“When designing pieces, I always sketch it out on paper first. I’m kind of a noob at digitizing my work (read: I’m still learning!), and I’d have no idea how to start from the screen. Sometimes, I consider saving up for a fancy iPad or something. Maybe one day. But I definitely feel most connected to my art, the client, and the energy of the piece when creating simply by hand. Is it wrong to say I tend to love my rough pencil sketch more than the crisp, completed piece? I don’t think so.”

Inspiring Calligraphers: Authentic by Frani

This wedding suite that Frani created for an October bride featured so many creative favorites on one wish list: handmade paper, gold foil lettterpress printing, warm and muted tones, silk ribbon, wax seals, and vintage stamps. No surprise why this was a dream project to work on!

Inspiring Calligraphers: Authentic by Frani

Photo Credit: Klaire Dixius

Frani likes to experiment with non-paper surfaces, too. On her favorites, she shares:

“In my spare time, I do some chalkboard lettering. It’s such a fun medium, and it stretches me creatively— between designing interesting layouts and then properly measuring and planning to ensure my ideas are portrayed accurately. I’m amazed by people who have a serious knack for it. I also appreciate lettering on fabric and embroidering my calligraphy as well.”

Inspiring Calligraphers: Authentic by Frani

Inspiring Calligraphers: Authentic by Frani

Another design medium she loves: designing tattoos. Frani shares, “It gives me so much life to illustrate florals and encouraging words as it is, but the fact that people want something I’ve drawn on their bodies permanently totally blows my mind. There really aren’t accurate words for it.”

Thanks so much to Frani for sharing a peek into her work and process as a calligrapher!

Photo Credits: All images via Authentic By Frani, except where noted.

Want to be featured in our calligraphy column? Reach out to us at submissions [at] ohsobeautifulpaper [dot] com with the subject line “Calligraphy Feature” for more details!

DIY No Carve Terrazzo-Inspired Pumpkins

When it comes to pumpkin decorating ideas, I tend to draw my inspiration from design trends. Last year it was Matisse-inspired pumpkins, the year before that it was fun iridescent pumpkins. Terrazzo is my favorite design trend this year, so naturally I decided to do a terrazzo-inspired pumpkin! These DIY no carve terrazzo-inspired pumpkins are super easy to make, only require a couple of easy-to-find materials, and are a great way to bring a pop of color to your holiday décor!

DIY No Carve Terrazzo-Inspired Pumpkins

DIY No Carve Terrazzo-Inspired Pumpkins

Aren’t they so cute?? I just love the colors! I used white pumpkins since the colors would pop more against a white surface, but you could also paint orange pumpkins and go for ALL the color. Oooh, that would be so fun – someone please do it and send me photos!

DIY No Carve Terrazzo-Inspired Pumpkins

DIY No Carve Terrazzo-Inspired Pumpkins

DIY No Carve Terrazzo-Inspired Pumpkins

I actually started with the intent of making these pumpkins just with craft vinyl, but I was a bit frustrated by the lack of control over my color palette. I really wanted to use some nature-inspired fall tones along with soft muted pinks and greens. Color is so important for anything terrazzo inspired! You can still make these pumpkins with craft vinyl (especially if you’re decorating faux pumpkins), but you’ll probably want to choose a brighter color palette. The pink and purple pumpkin above was made entirely with craft vinyl on a faux white pumpkin.

DIY No Carve Terrazzo-Inspired Pumpkins

Materials

Craft paint in your chosen color palette

Paint brushes (the smaller the better! Size 0 and 1 for corners and smaller pieces, probably no larger than size 4 or 5 for some of the larger pieces)

Paint palette or paper plate

Craft vinyl and scissors (optional)

Pumpkins in varying shapes and sizes

DIY No Carve Terrazzo-Inspired Pumpkins

To make the DIY No Carve Terrazzo-inspired Pumpkins:

Step 1. Choose your color palette. I recommend selecting 4-6 colors per pumpkin. You can keep the color palette the same for each pumpkin, or mix things up a bit and choose several color combinations with some overlapping colors. I chose a mix of pinks, peach, ochre (deep yellow), navy blue, shades of green, and rust. Each pumpkin had some pink and ochre, but otherwise I mixed things up a bit!

Step 2. Squeeze a small amount of each paint color onto a paint palette or paper plate. If necessary, mix colors to achieve the perfect shade of a particular color. Starting with the first color, paint a few terrazzo-inspired geometric shapes around the pumpkin. You want these shapes to look like stone fragments, so geometric shapes with softer corners are definitely your friend here. Trapezoids, diamonds, irregular circles and rectangles, and triangles. I found it easiest to paint a few larger shapes around the pumpkin to make sure the colors were evenly distributed, then fill in with smaller shapes. 

Note: If you’re using craft vinyl, you’ll basically do the same thing, except instead of painting you’ll use your scissors to cut terrazzo-inspired shapes from your craft vinyl. Once you have a variety of shapes and colors cut, carefully peel the adhesive backing and apply to the pumpkin like a sticker. I found it easiest to start with some of the larger shapes randomly scattered around the pumpkin surface, then fill in with the smaller shapes as I went. I really didn’t have a plan, so you can totally just wing it! If you place a shape and then change your mind, you should be able to move it by very carefully peeling the vinyl from the pumpkin and moving it to a new spot.

Step 3. Continue painting the entire pumpkin, and if necessary apply a second or third coat of paint to ensure full color coverage. Allow the paint to dry completely and enjoy!

DIY No Carve Terrazzo-Inspired Pumpkins

DIY No Carve Terrazzo-Inspired Pumpkins

DIY No Carve Terrazzo-Inspired Pumpkins

I scattered these pumpkins across our mantel and bookshelves, but these would be so cute as a holiday centerpiece. Paint a bunch (like a dozen) and line them all in a row down a table!

DIY No Carve Terrazzo-Inspired Pumpkins

DIY No Carve Terrazzo-Inspired Pumpkins

DIY No Carve Terrazzo-Inspired Pumpkins

Yay! Happy Halloween decorating everyone!

p.s. DIY Iridescent Pumpkins and DIY Rainbow Halloween Treat Bags

Photo Credits: Nole Garey for Oh So Beautiful Paper

Behind the Stationery: Fourteen-Forty

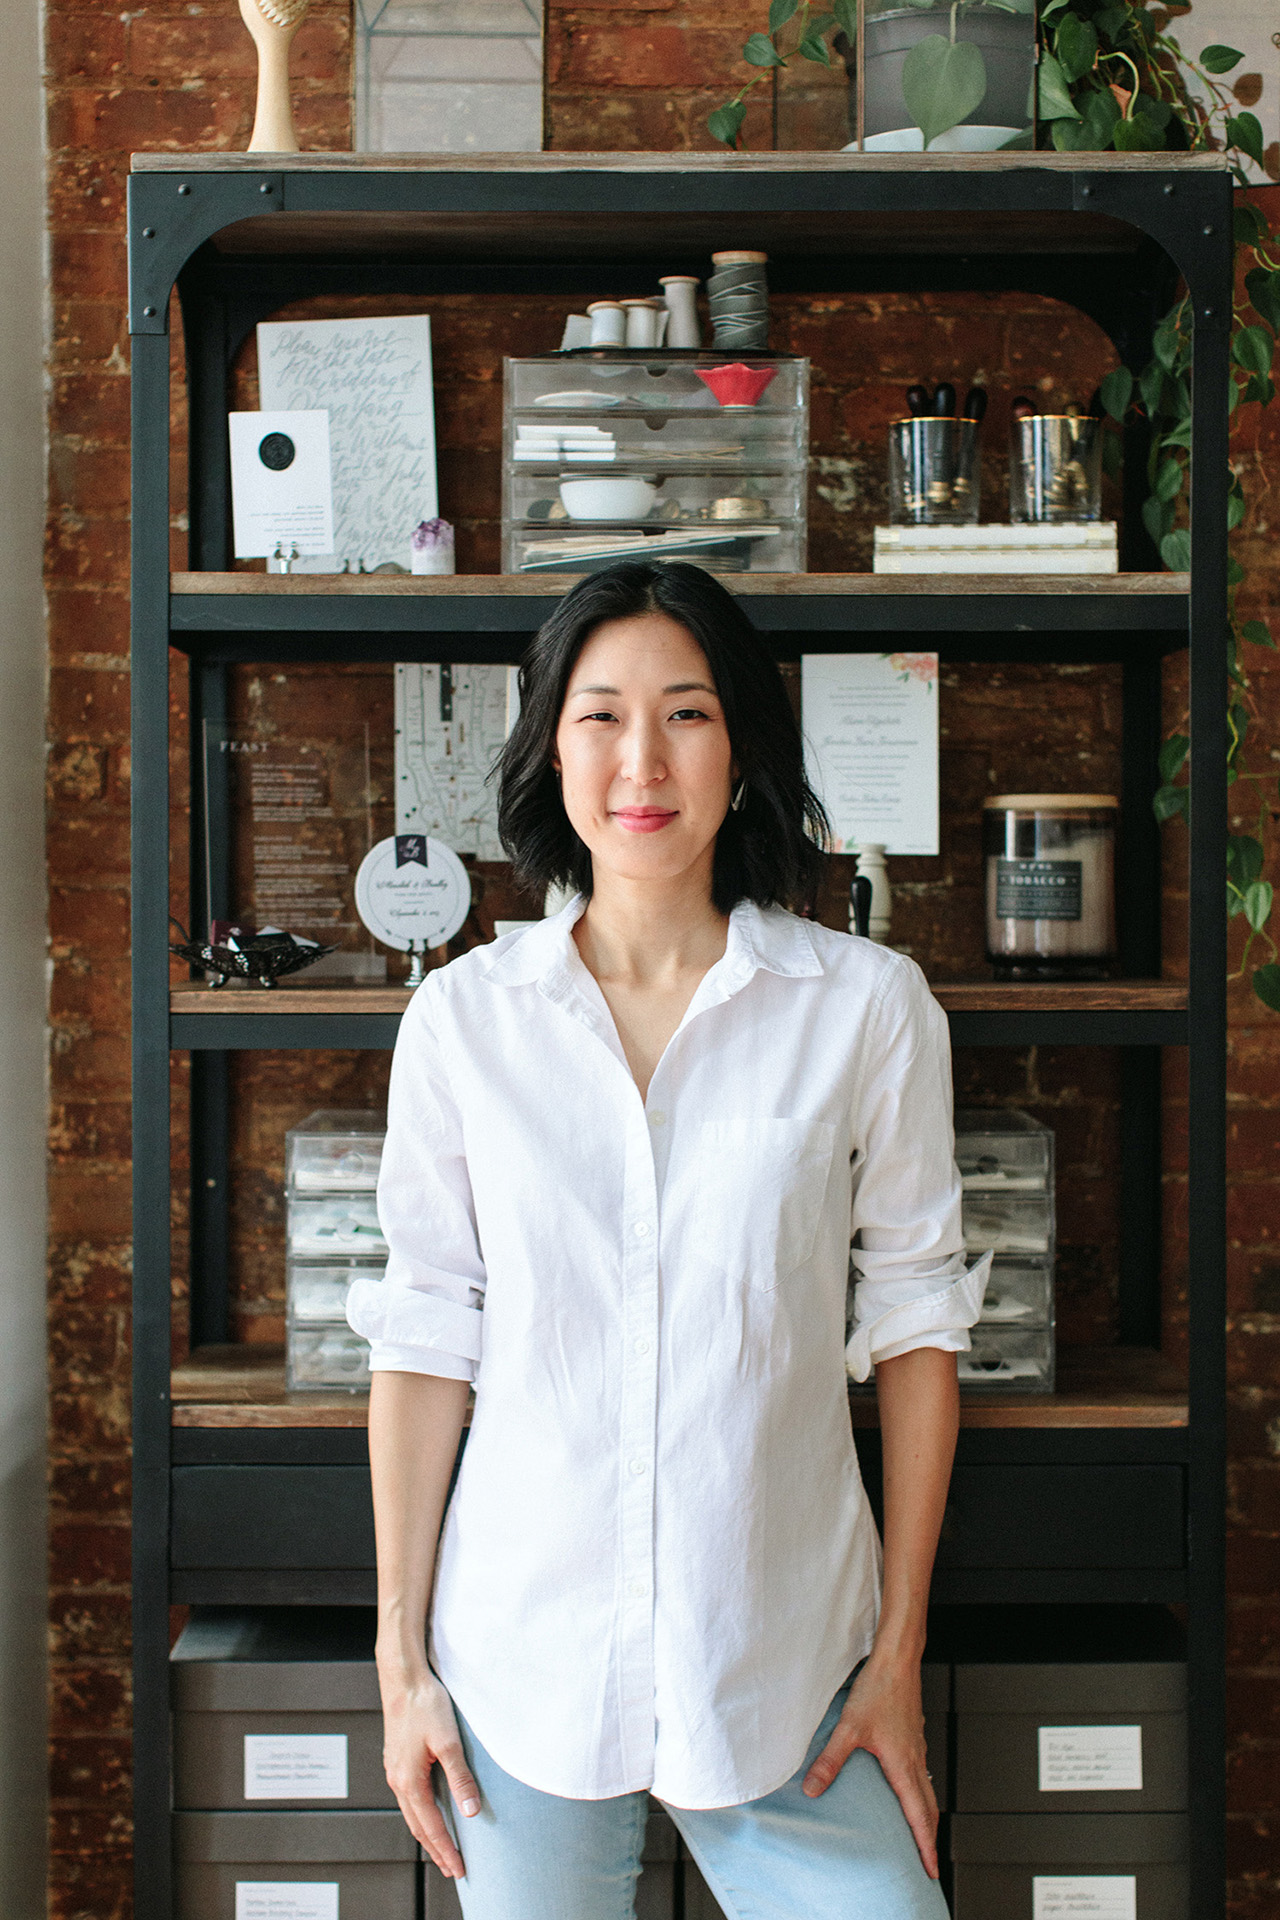
I’m thrilled to introduce our next stationery designer, Tricia Kim of Fourteen-Forty! Based here in New York, Tricia works with couples on custom wedding stationery and has grown her business focused in the wedding industry for many years now. She’s here to share about how learning about production processes informed her design process and how her growing team approaches the design process with each client. —Megan Soh

Behind the Stationery: Fourteen Forty

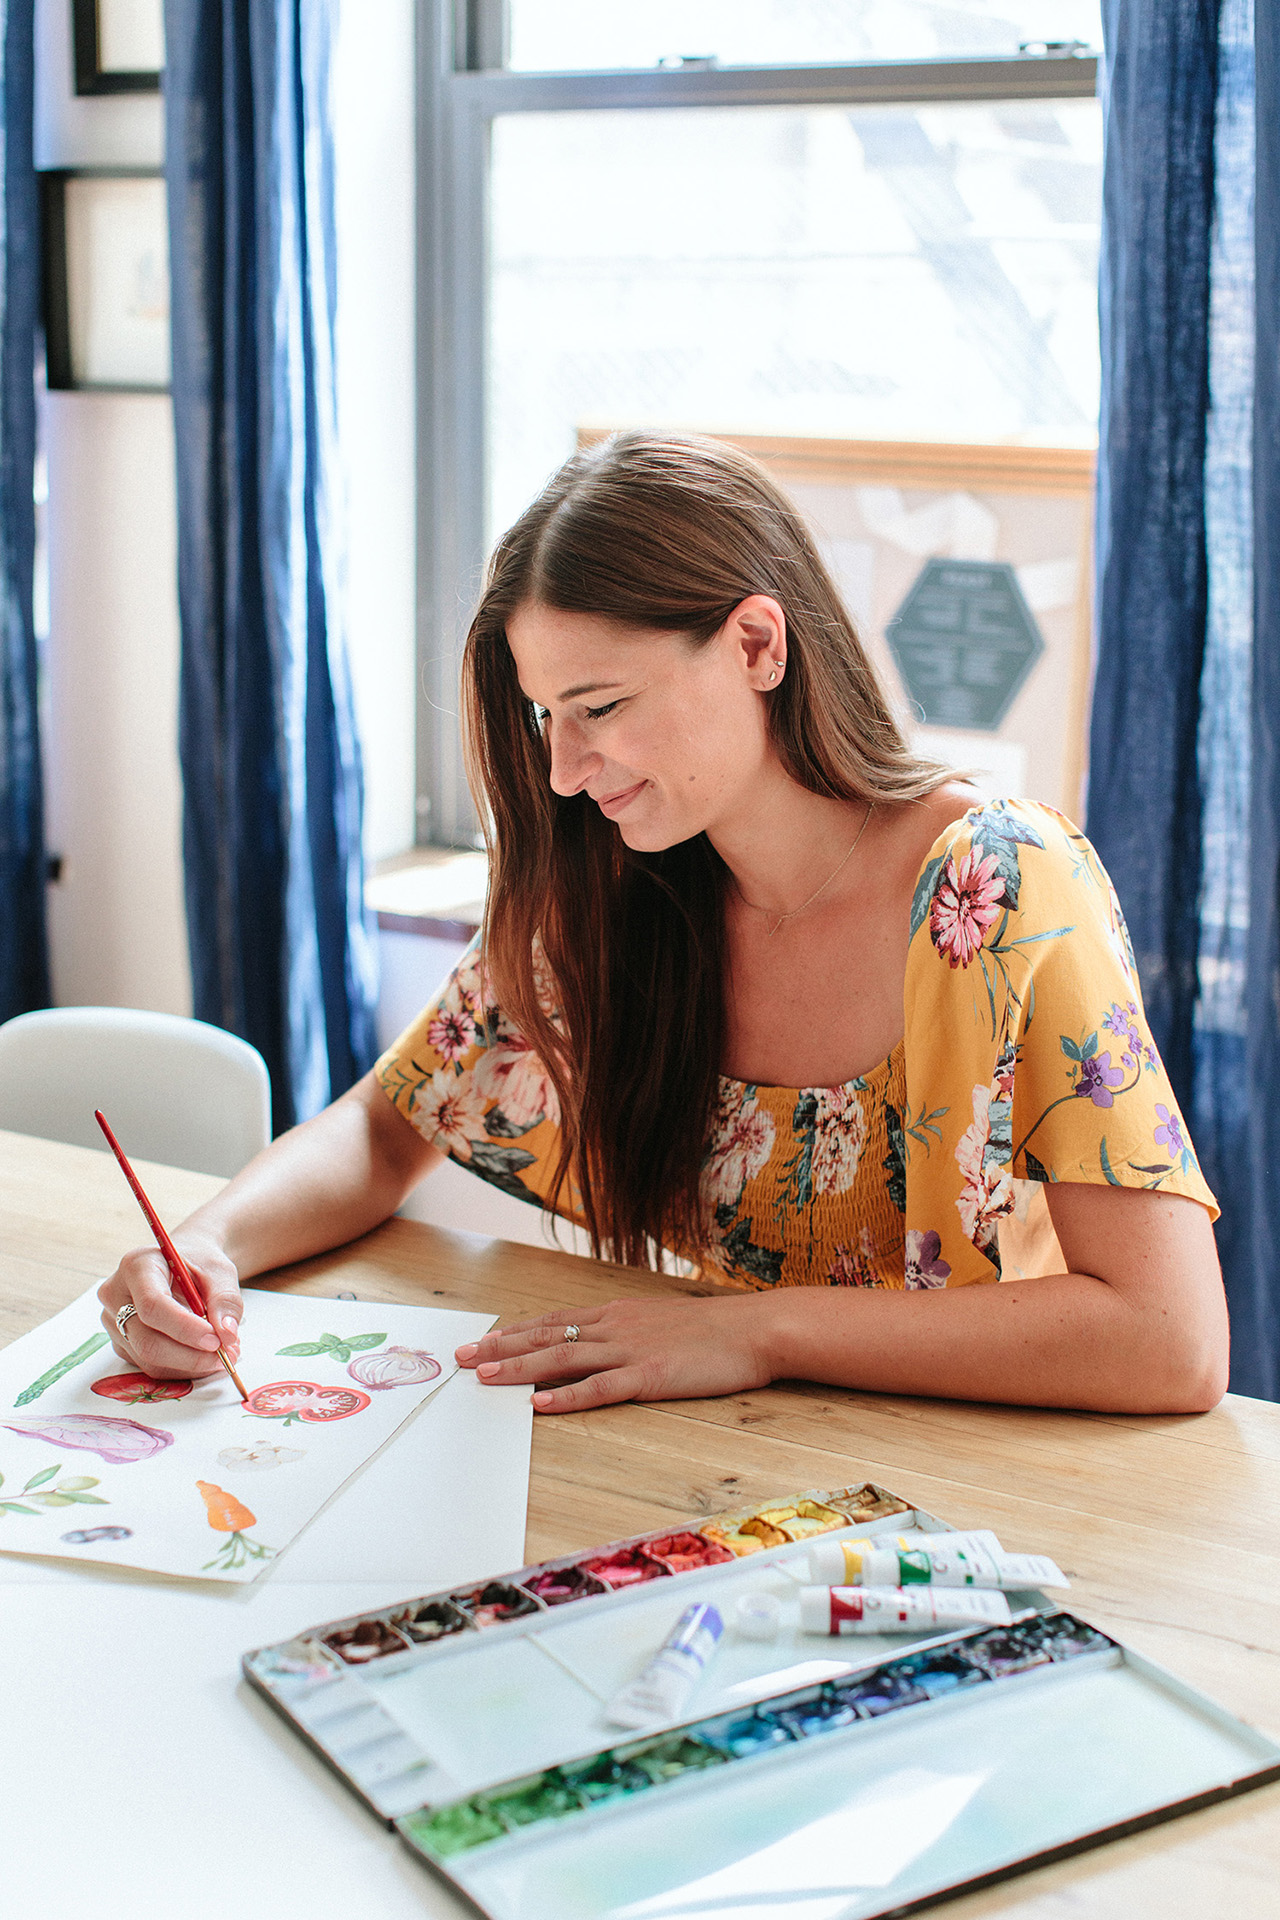
From Tricia: I started Fourteen-Forty about six years ago, after years of designing in the magazine industry. Funny enough, my first job was actually for a wedding publication! While what I learned at these companies was invaluable, working for large brands made me realize that I really wanted to take ownership of something that I could put my heart into. I’ve always loved making things with my hands, so letterpress printing with its mix of art and mechanics came naturally to me, which is where this obsession with stationery all began.

Behind the Stationery: Fourteen Forty

I was living in New York City when letterpress printing was really starting to emerge again as a craft, and I was able to find a lot of resources to start honing my skills as a printer. By no means did I ever completely master the art of printing, but it became a wonderful outlet for creativity and I loved the problem solving that it required. Looking back, I am so glad that I was able to learn the production side since understanding it from first hand experience has truly made me better equipped as a designer. Knowing the limitations, technical aspects, and possibilities helps me make good design decisions for my clients. As I gained experience at the press and became more embedded in the stationery community, the idea of Fourteen-Forty came to life (the name is an homage to the year moveable type was invented) and I slowly started building the company from the ground up.

Behind the Stationery: Fourteen Forty

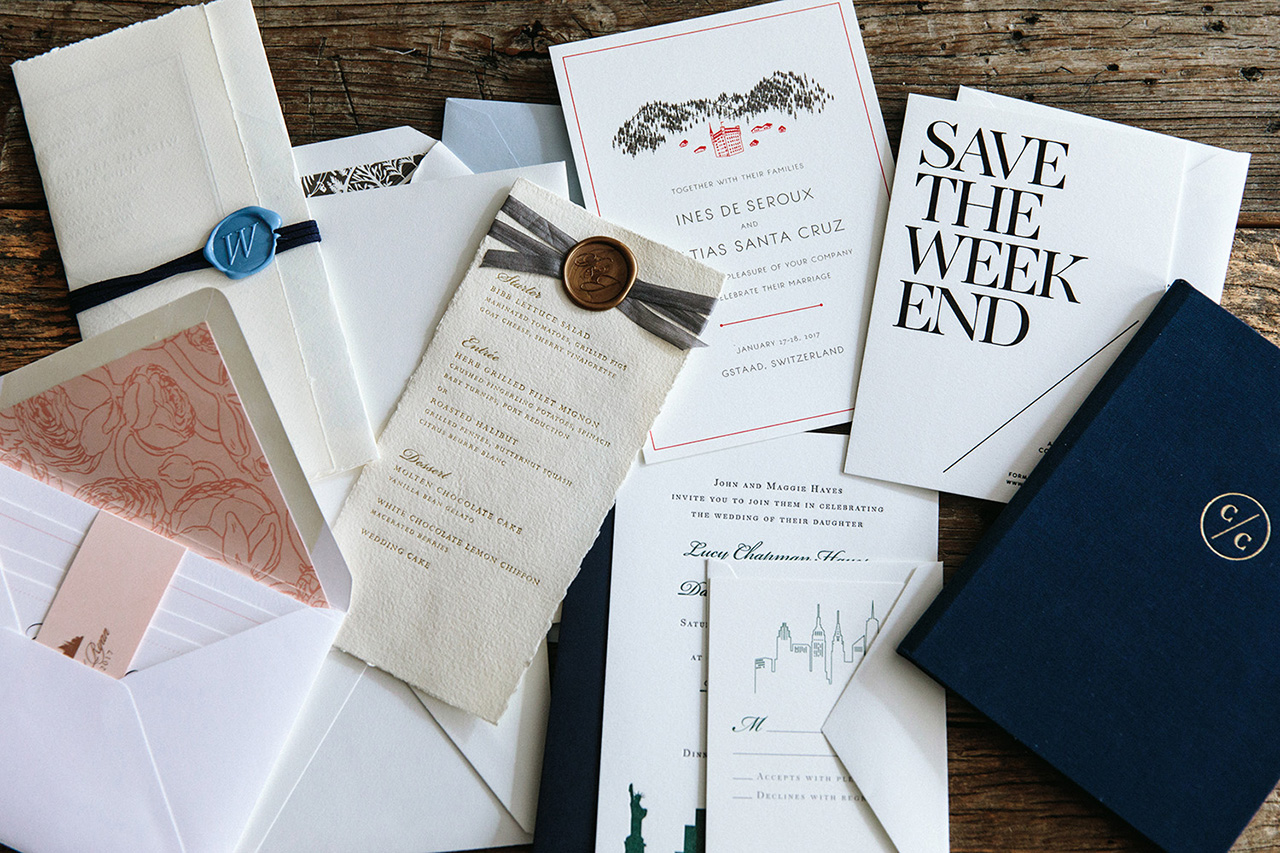
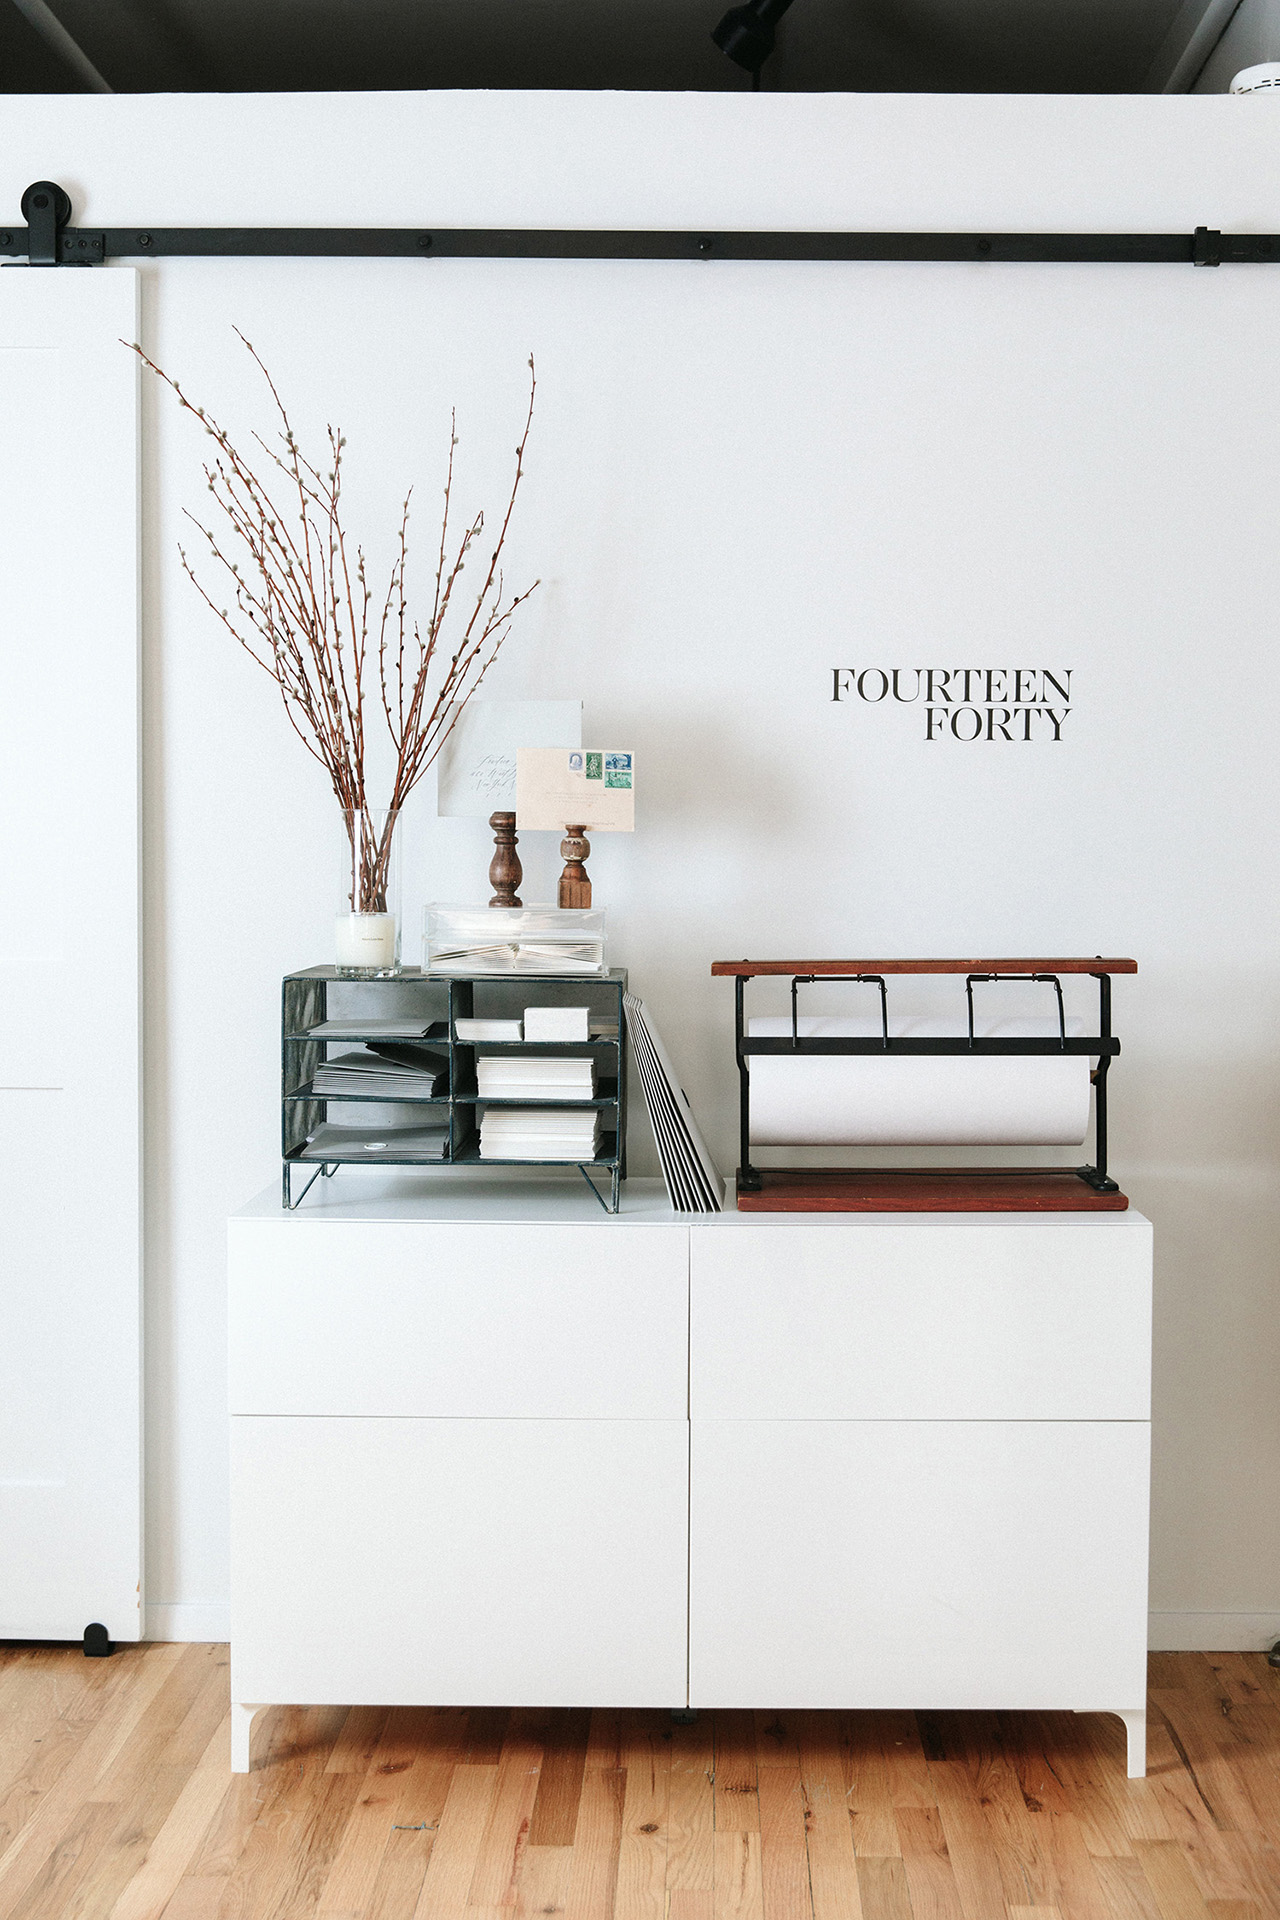
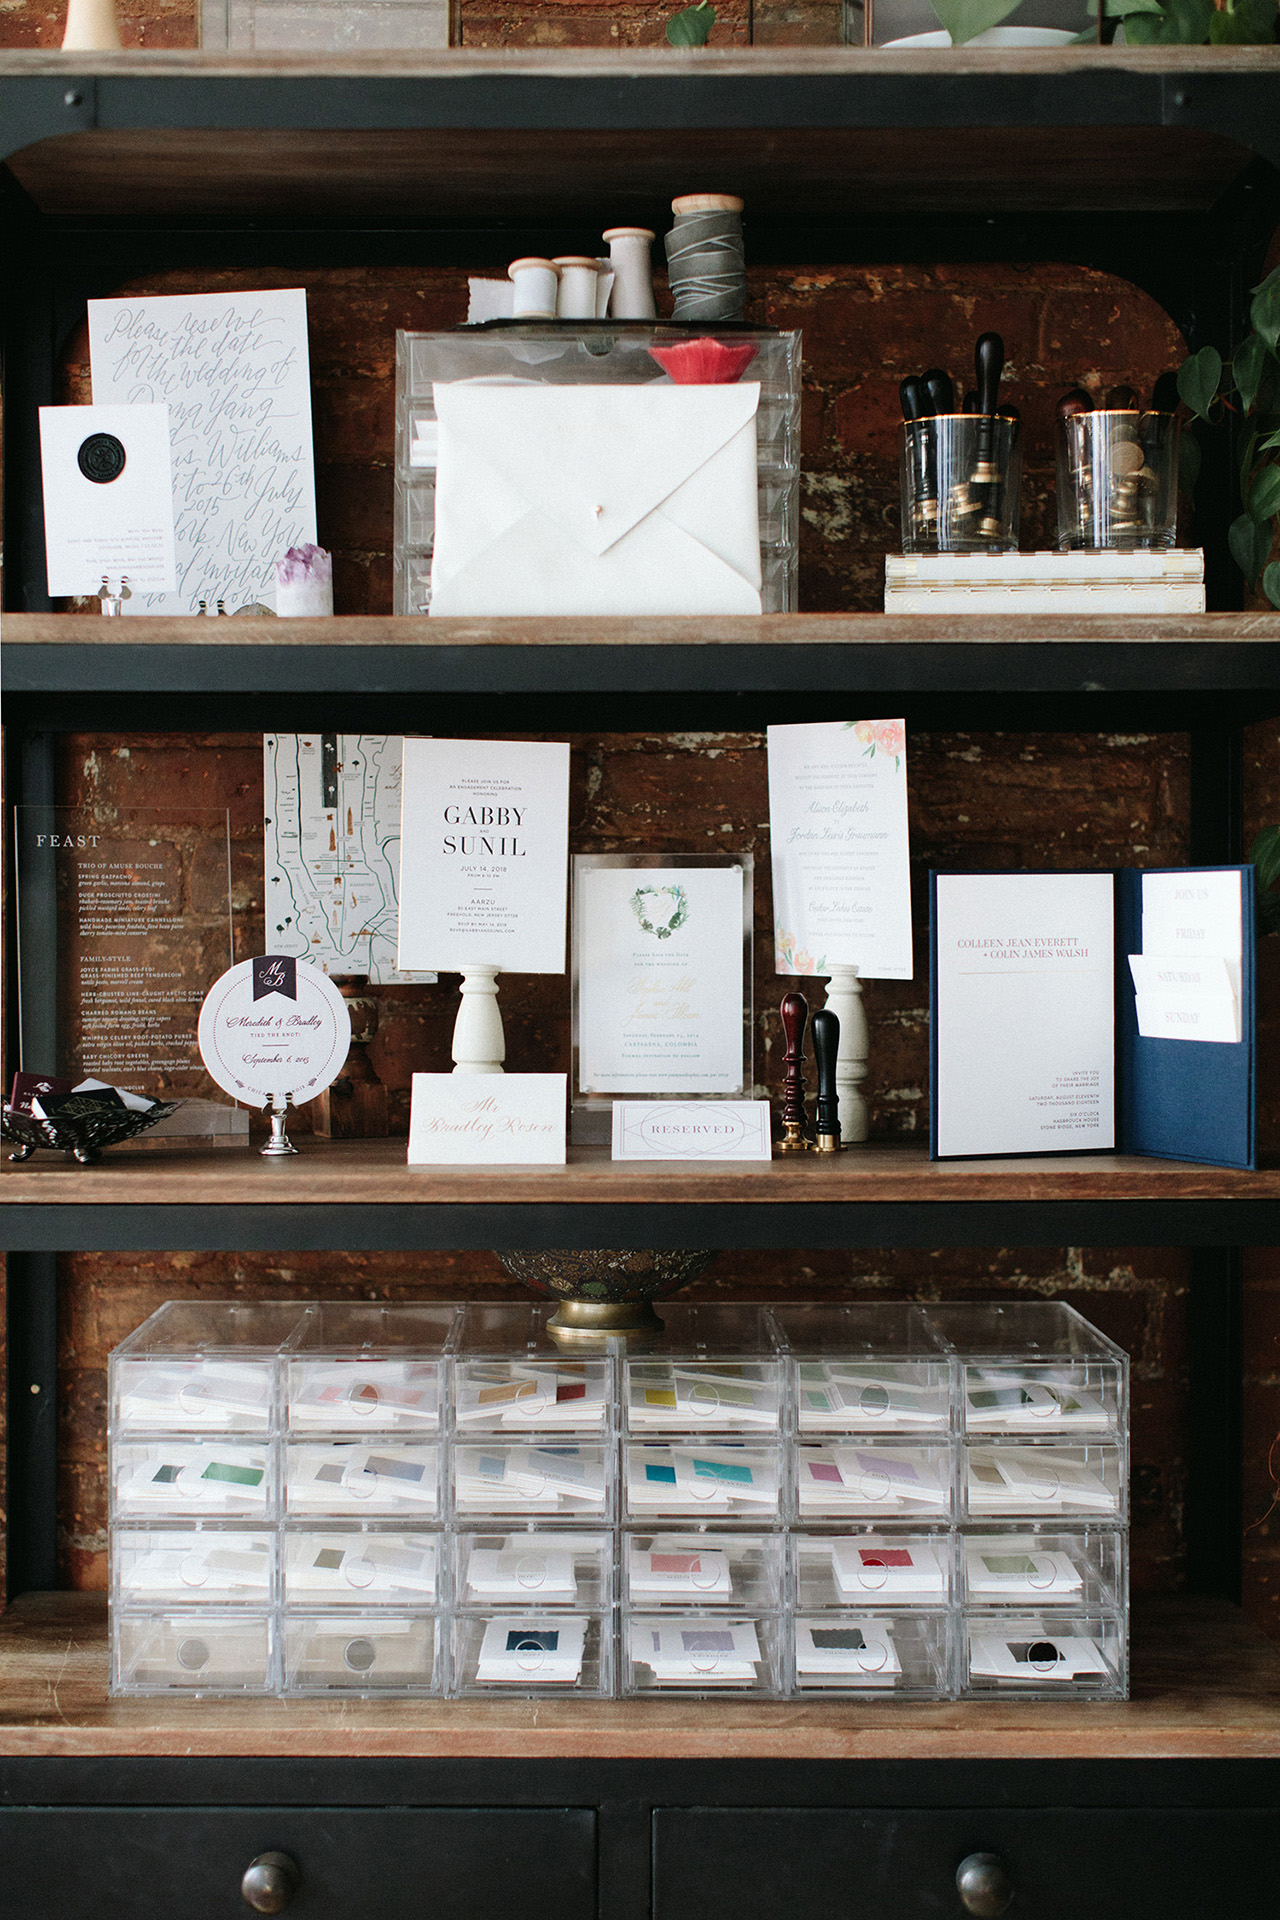
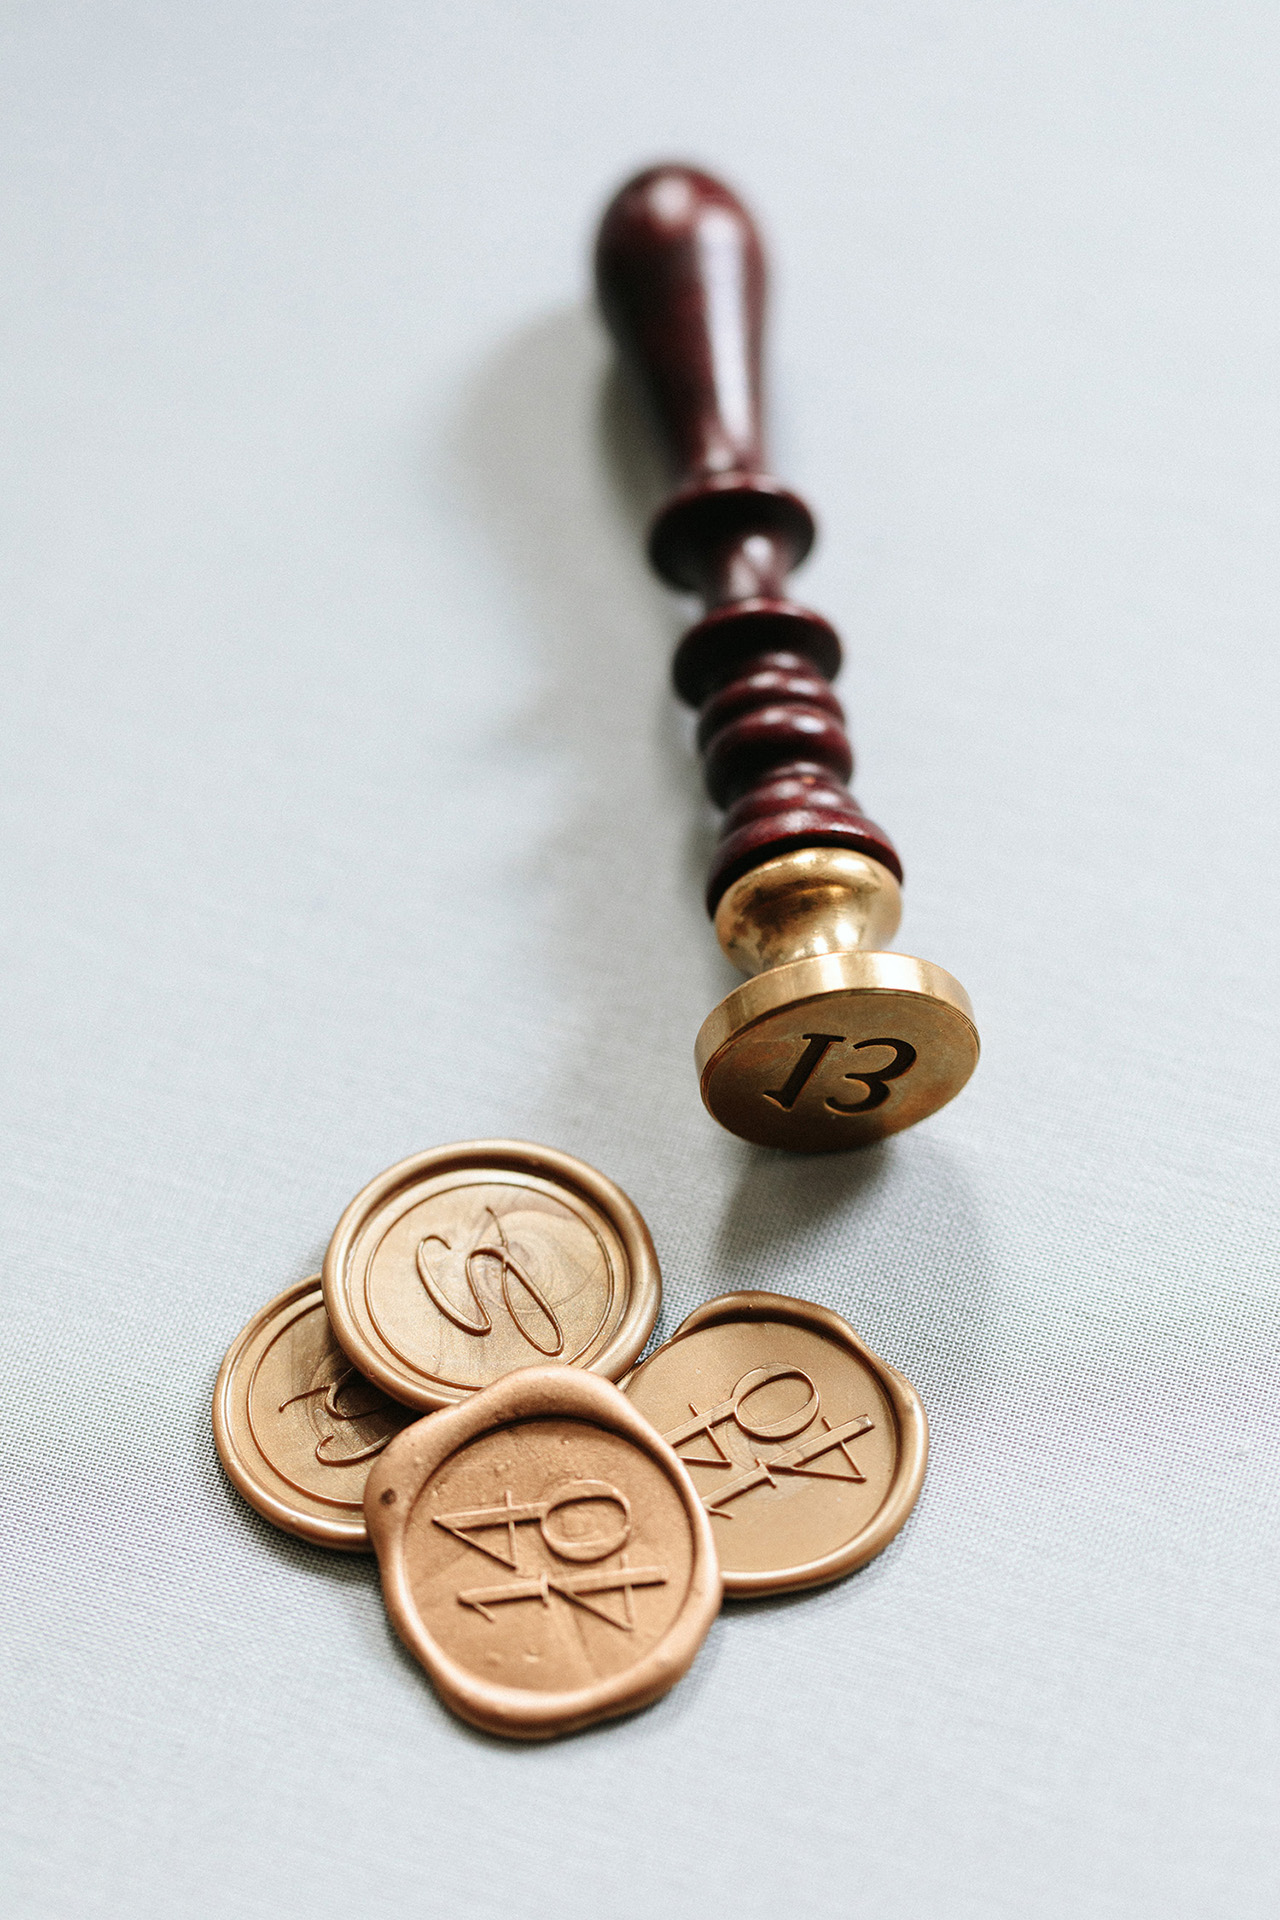
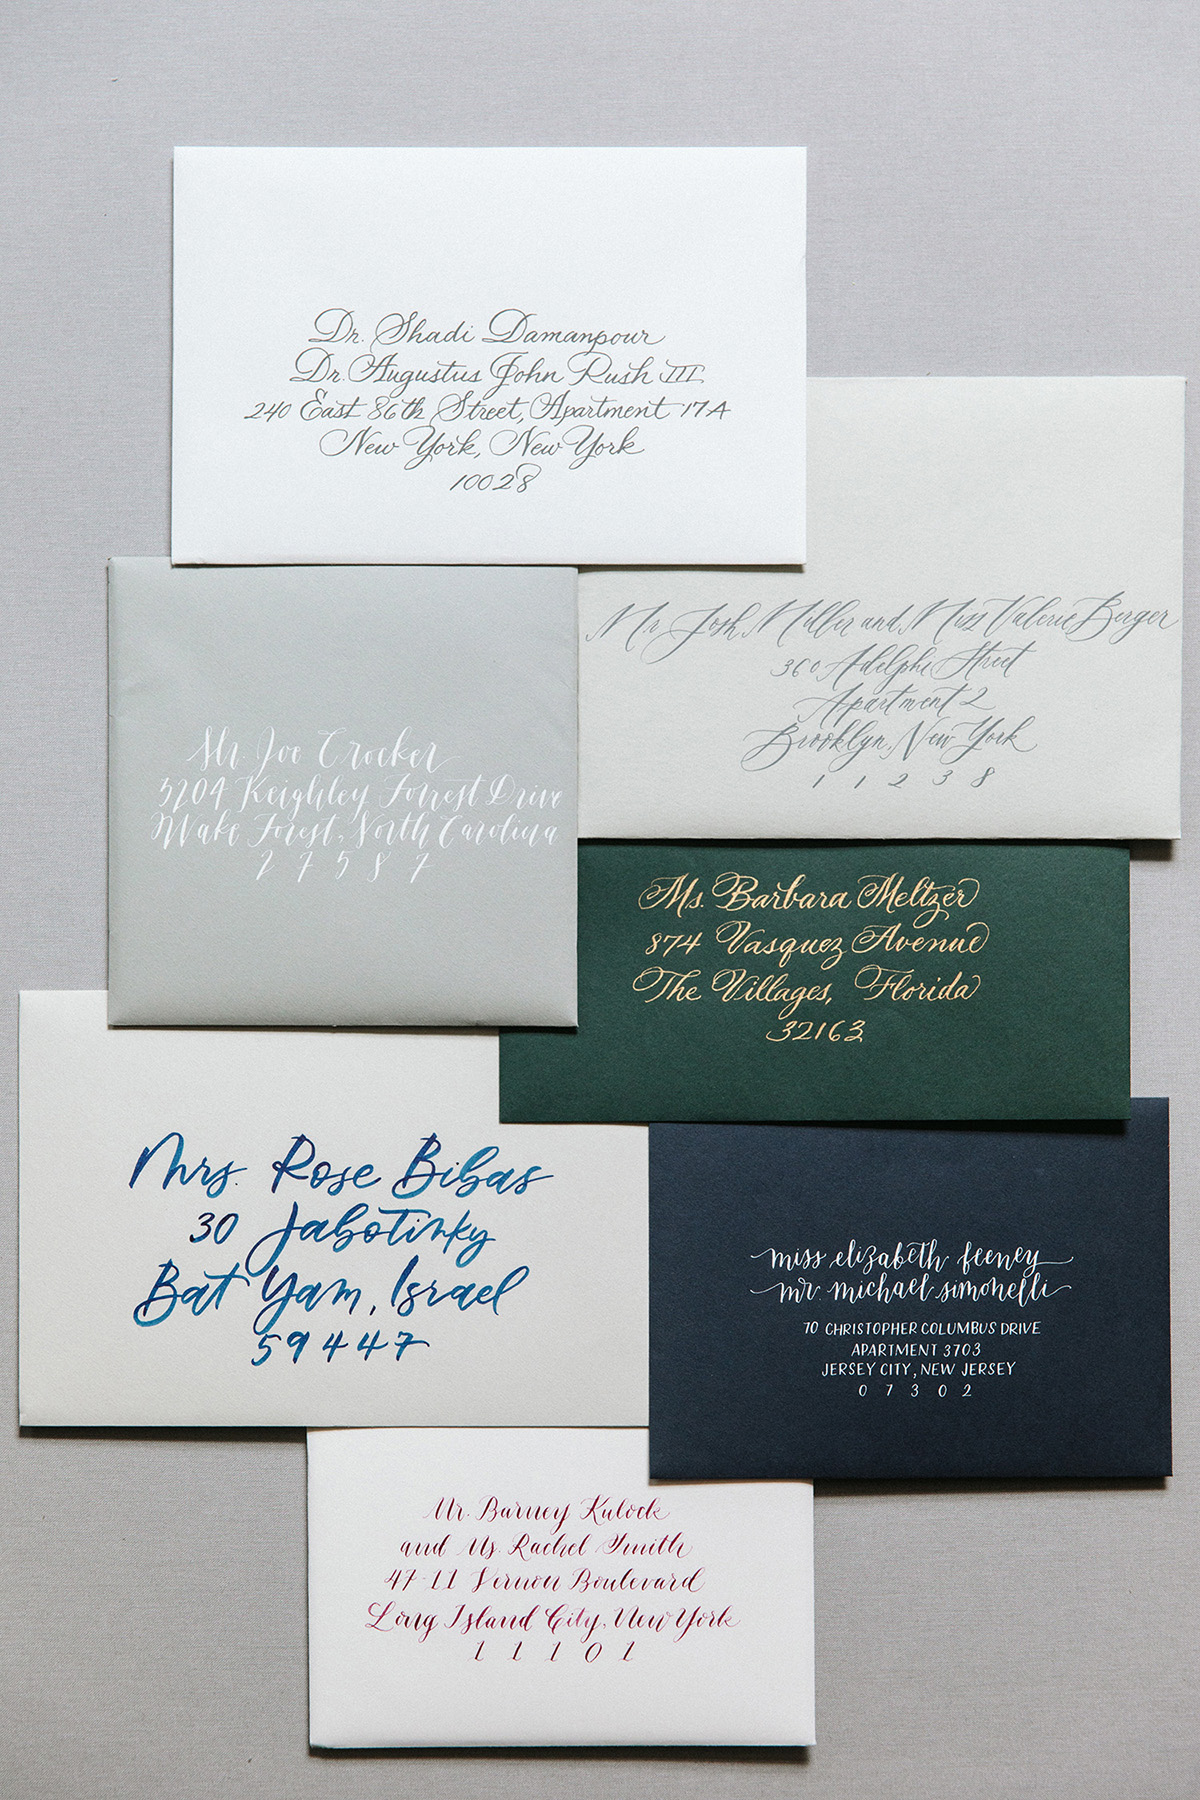
Fast forward six years, and today Fourteen-Forty is primarily focused on designing custom wedding invitations. Located in the downtown area of Manhattan, we are a hardworking group of creatives dedicated to dreaming up unique keepsakes. We offer custom illustration, watercolor, typographical designs, all kinds of specialty printing, calligraphy, wax sealing, and more. We love working with paper along with other materials, like leather, fabric, acrylic, and wood. And if we haven’t done it before, we’re always willing to try something new!

Behind the Stationery: Fourteen Forty

Behind the Stationery: Fourteen Forty

As the owner of the studio, I handle most of the client-facing and business duties, which pretty much means I am constantly on email. One of the most important things to us is customer service. I love connecting with clients on this level and helping them navigate the whole process, which is usually a completely foreign experience to them. On the business side, I am constantly brainstorming to expand the brand and refine our processes, enhance our client experience, and just meet the day to day challenges of running a small business—fielding emails, meetings, and calls, connecting with planners and vendors, strategizing on marketing initiatives and and checking in to see how different projects are going.

Behind the Stationery: Fourteen Forty

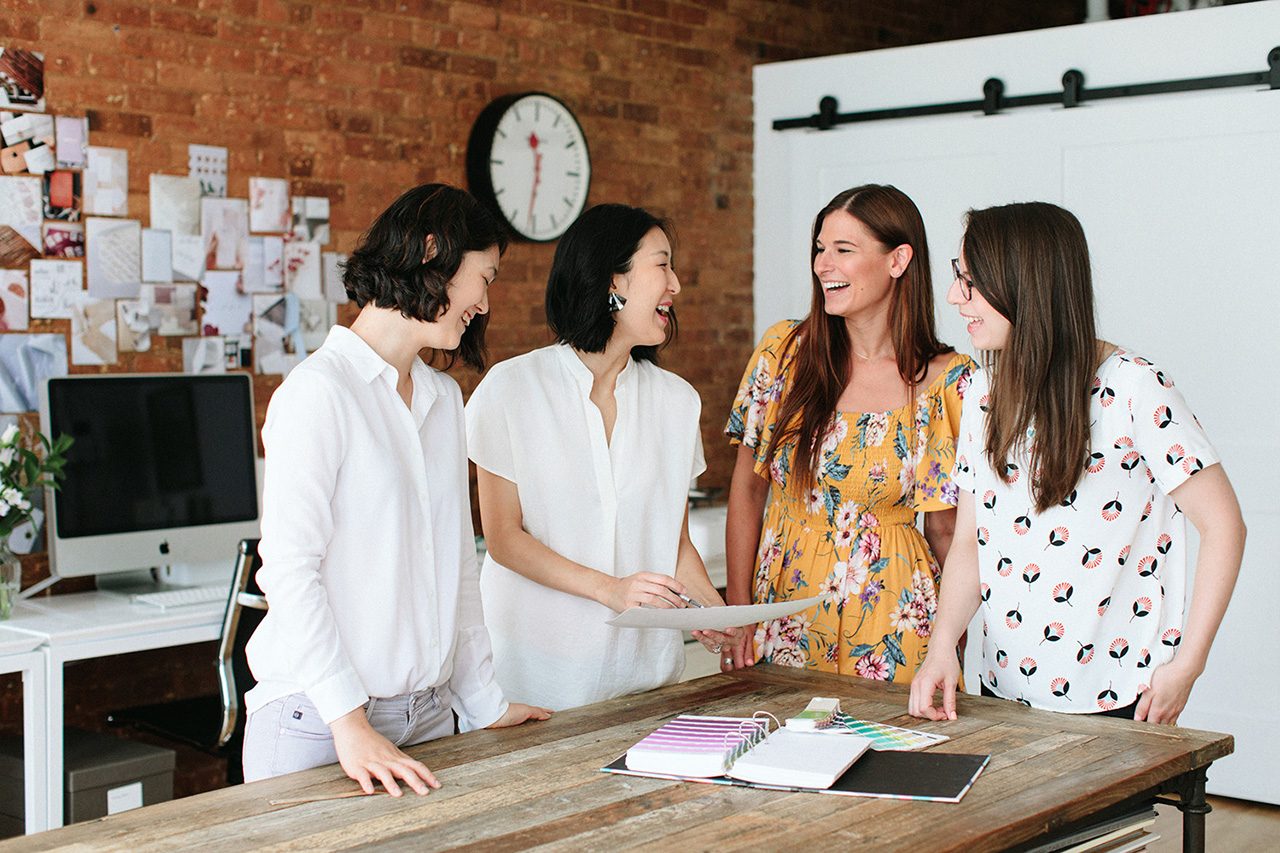
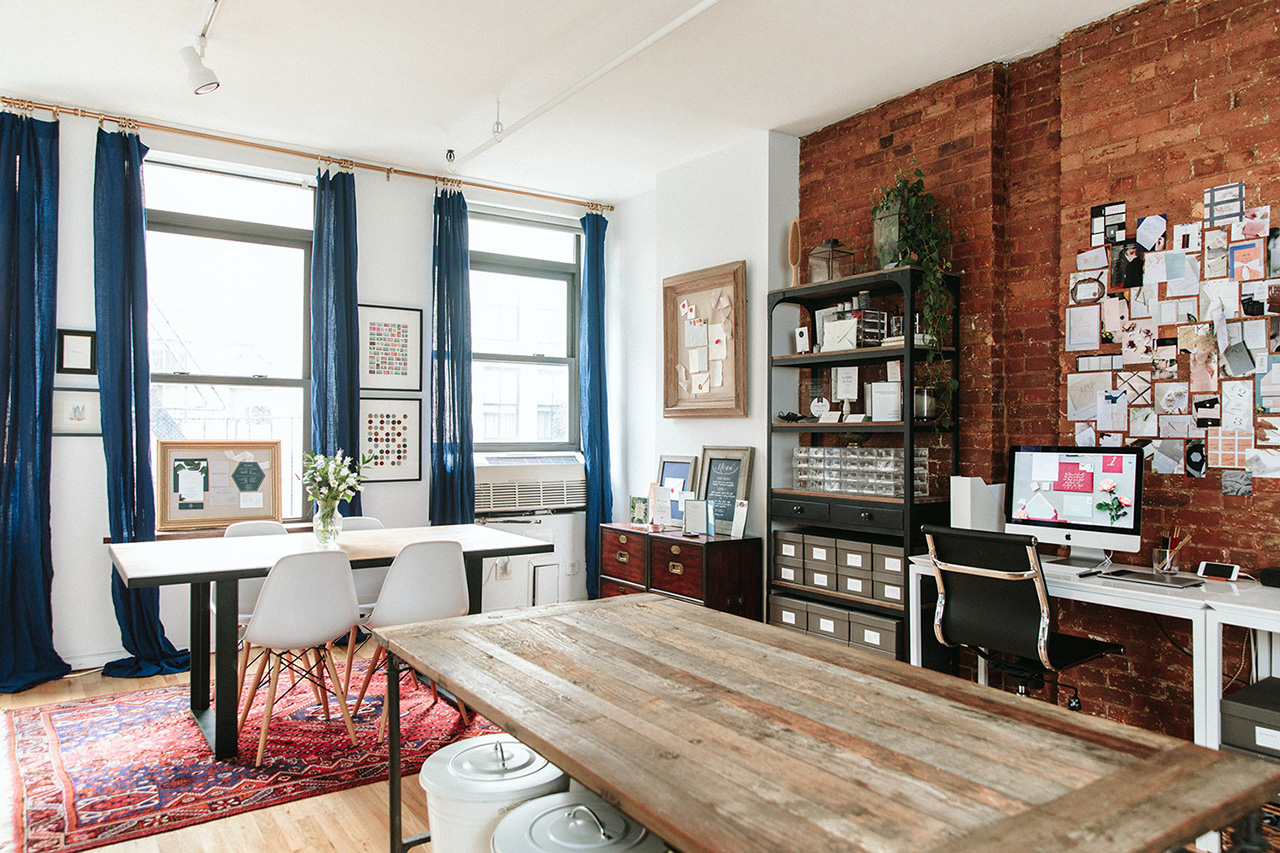
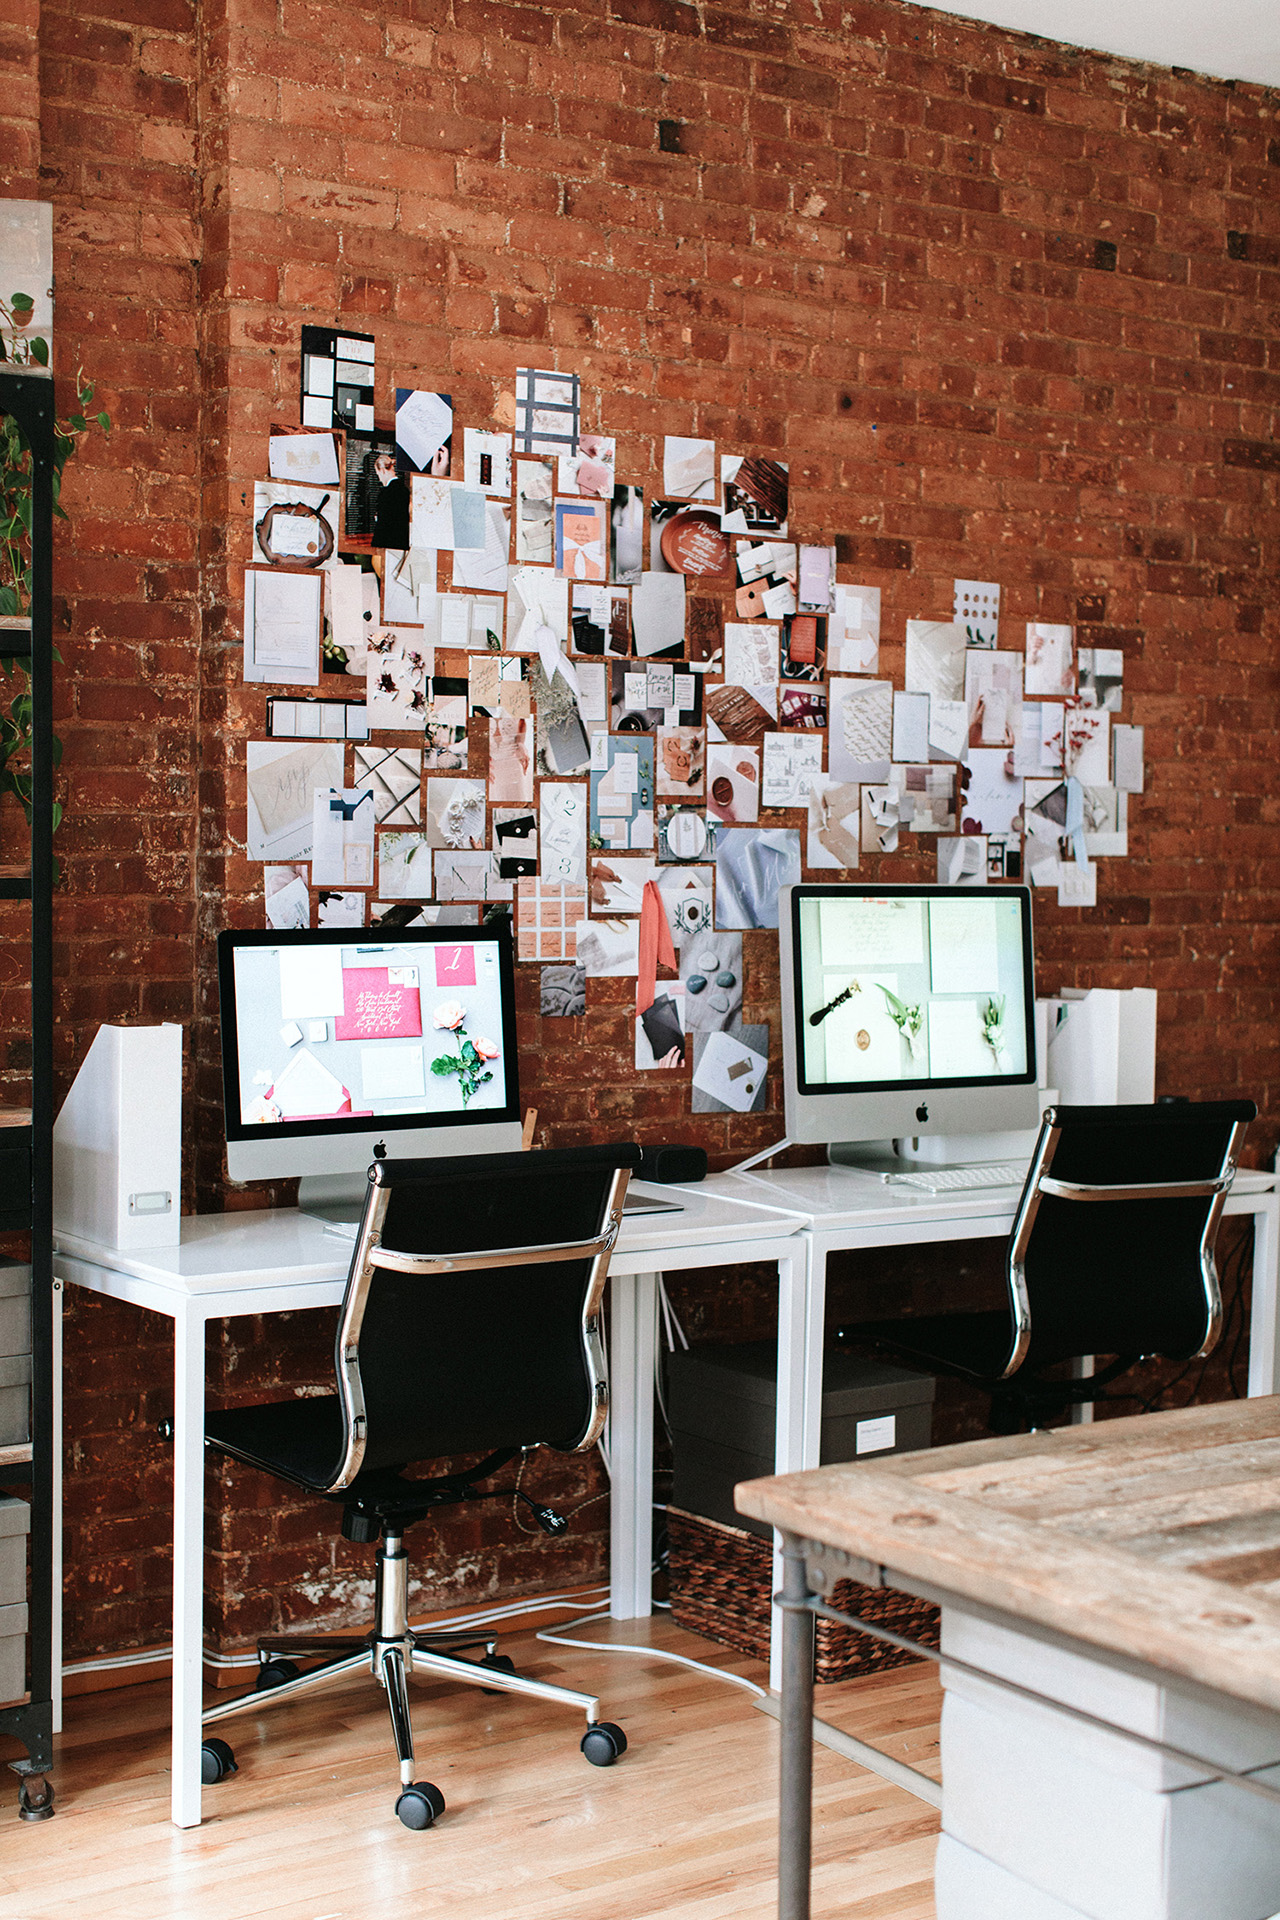
We all work together in an open plan studio, which I love because it promotes an incredible amount of collaboration, which is so key to this process. I find that this set up promotes efficiency as well as keeps everyone aware of the tasks at hand and the goals we need to meet.

Behind the Stationery: Fourteen Forty

One of the more difficult things to manage in a busy studio is prioritizing tasks and keeping the wheels moving for all our clients at the same time. There are days when the to-do list is overwhelming, and it’s so important to see clearly what needs to be done first, second, and so on down the line. That’s why timelines are so important to us—we set a timeline for each client and make sure we do everything we can to stick with the dates and prioritize appropriately.

Behind the Stationery: Fourteen Forty

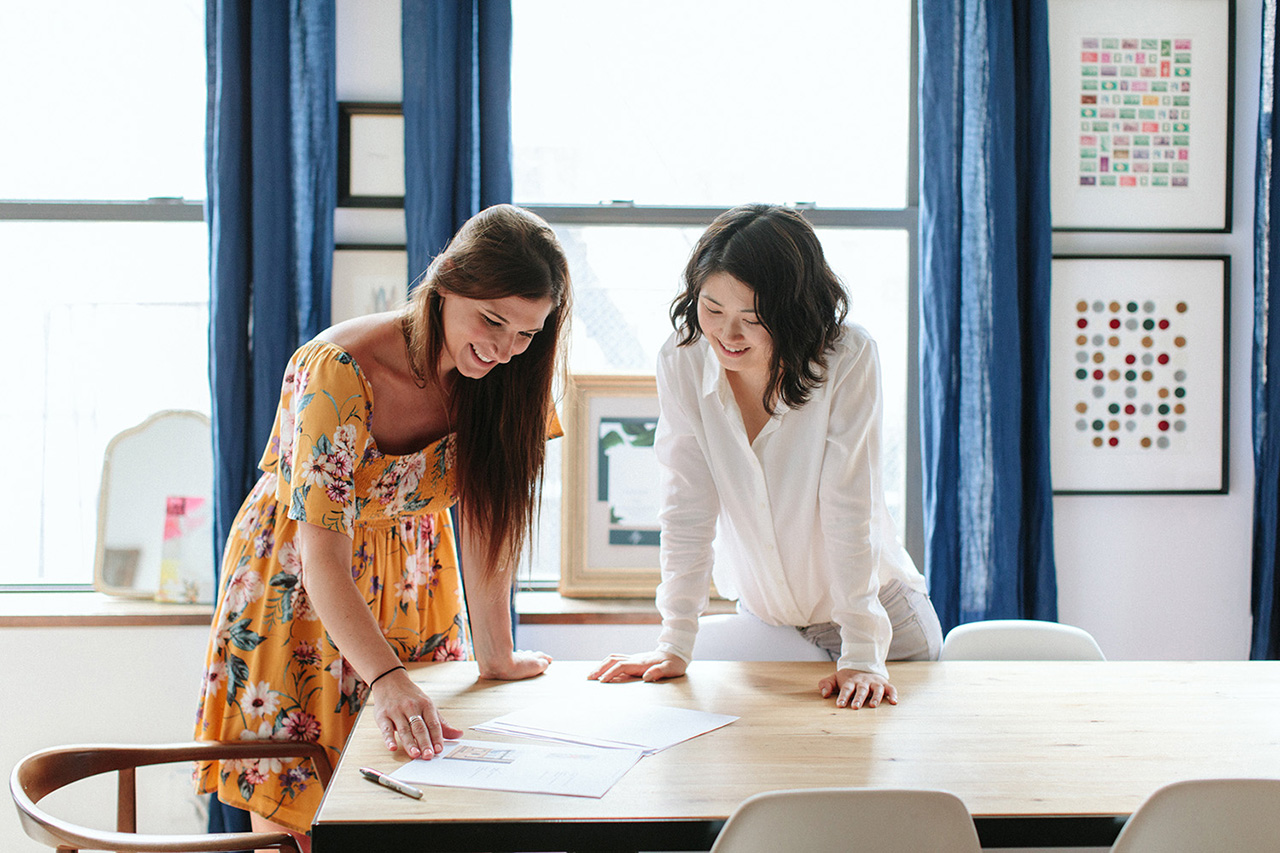
Our process typically starts with a call and/or client meeting, during which we really start drilling down into the client’s vision, and start sharing with them all of the possibilities. Once a plan is formulated, we begin the design process, during which we’re brainstorming and sketching out ideas, and presenting them in a series of proofs. There is a period of back and forth when we integrate changes, really listening to our client’s feedback, and hone everything to perfection.

Behind the Stationery: Fourteen Forty

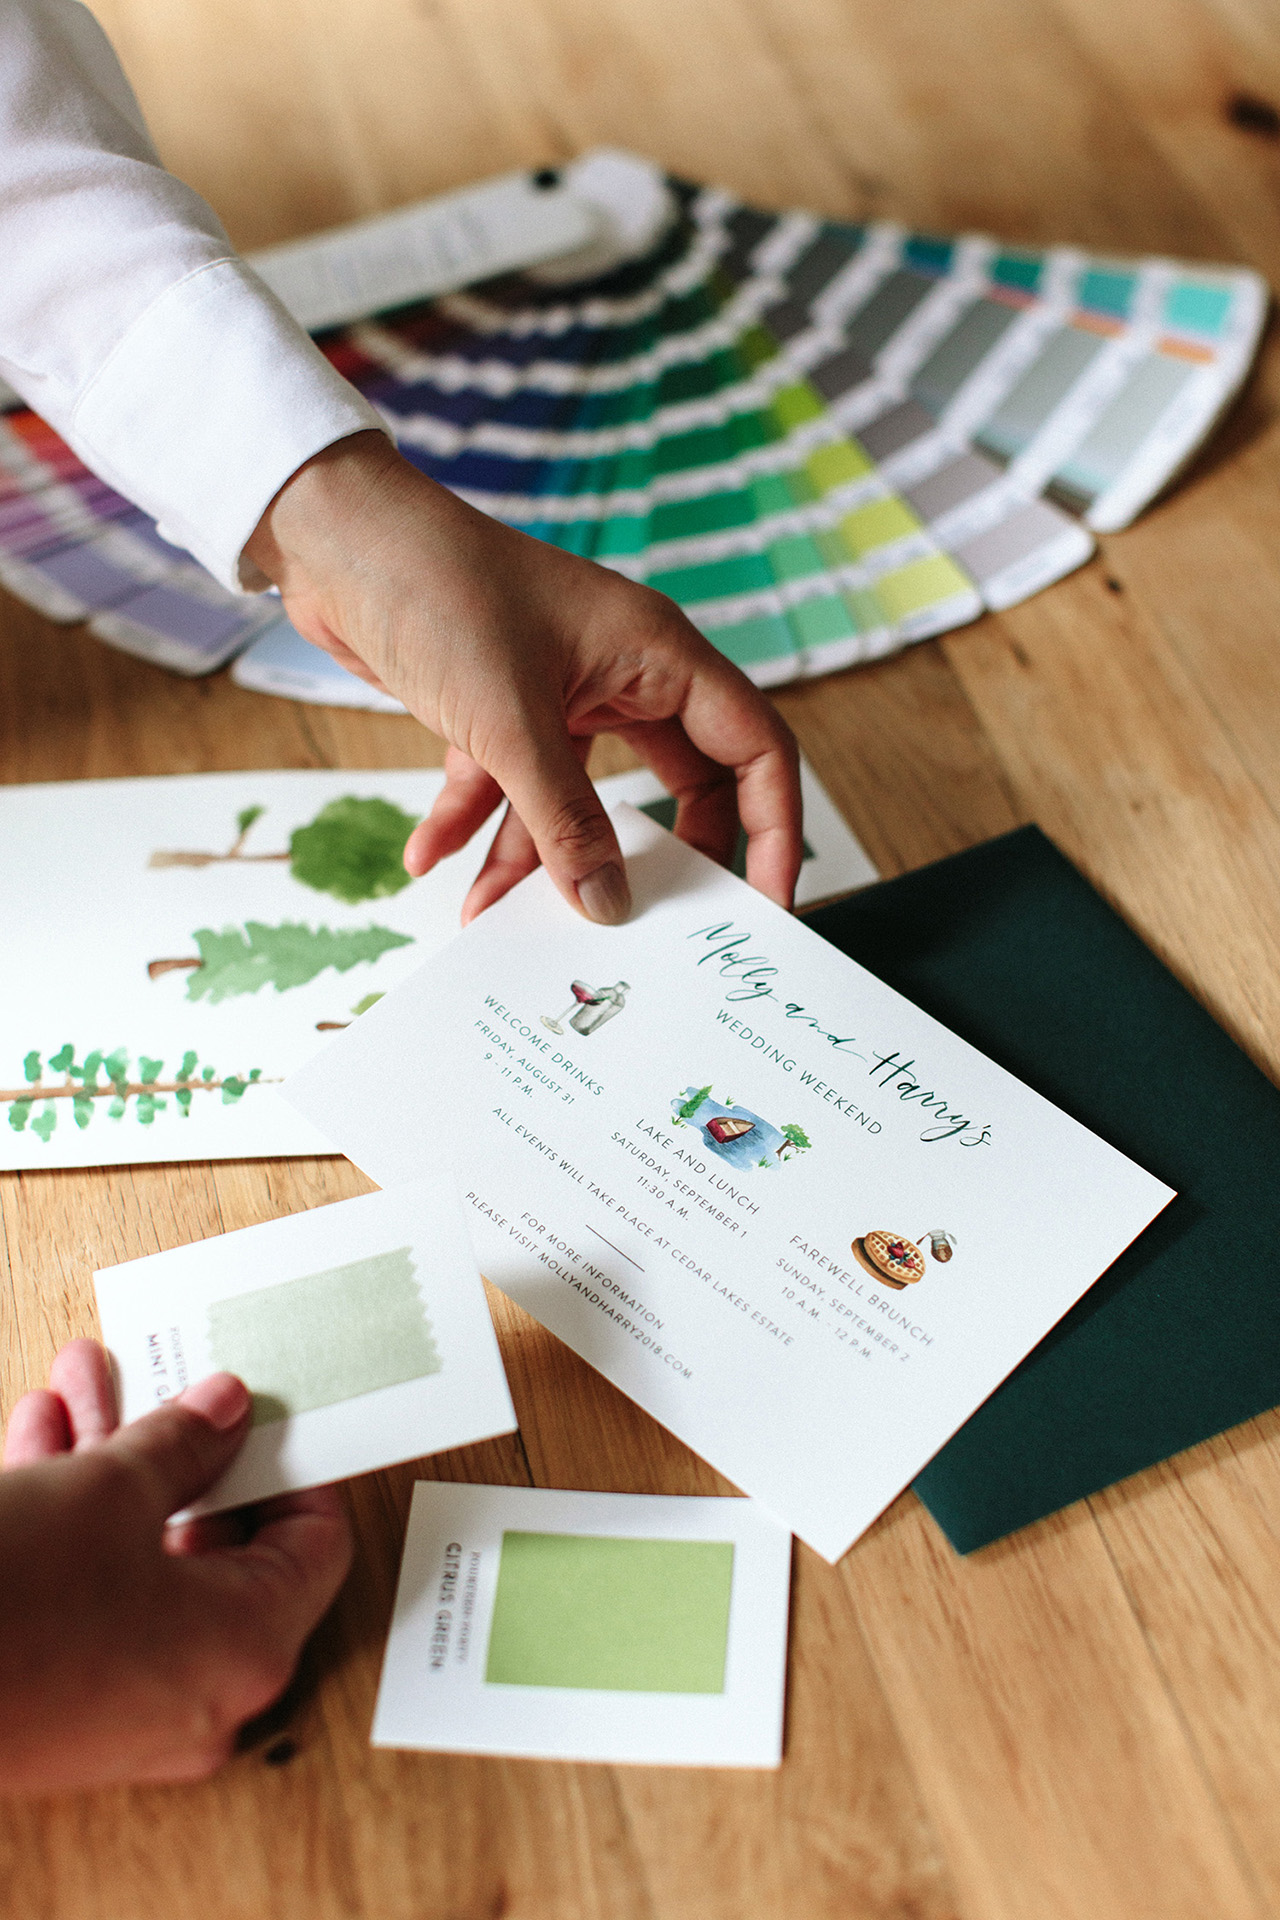
Then we are signing off on the designs and sending them to print. Depending on the project, the next phase can actually be the most intense for us. This is when production begins, and we are spending on average one to five weeks (sometimes more!) actually producing the designs. With more elaborate projects, we may be getting supplies and finishing techniques done by 5-10 different artisans during this phase, which takes time and a lot of coordination to get right.

Behind the Stationery: Fourteen Forty

Behind the Stationery: Fourteen Forty

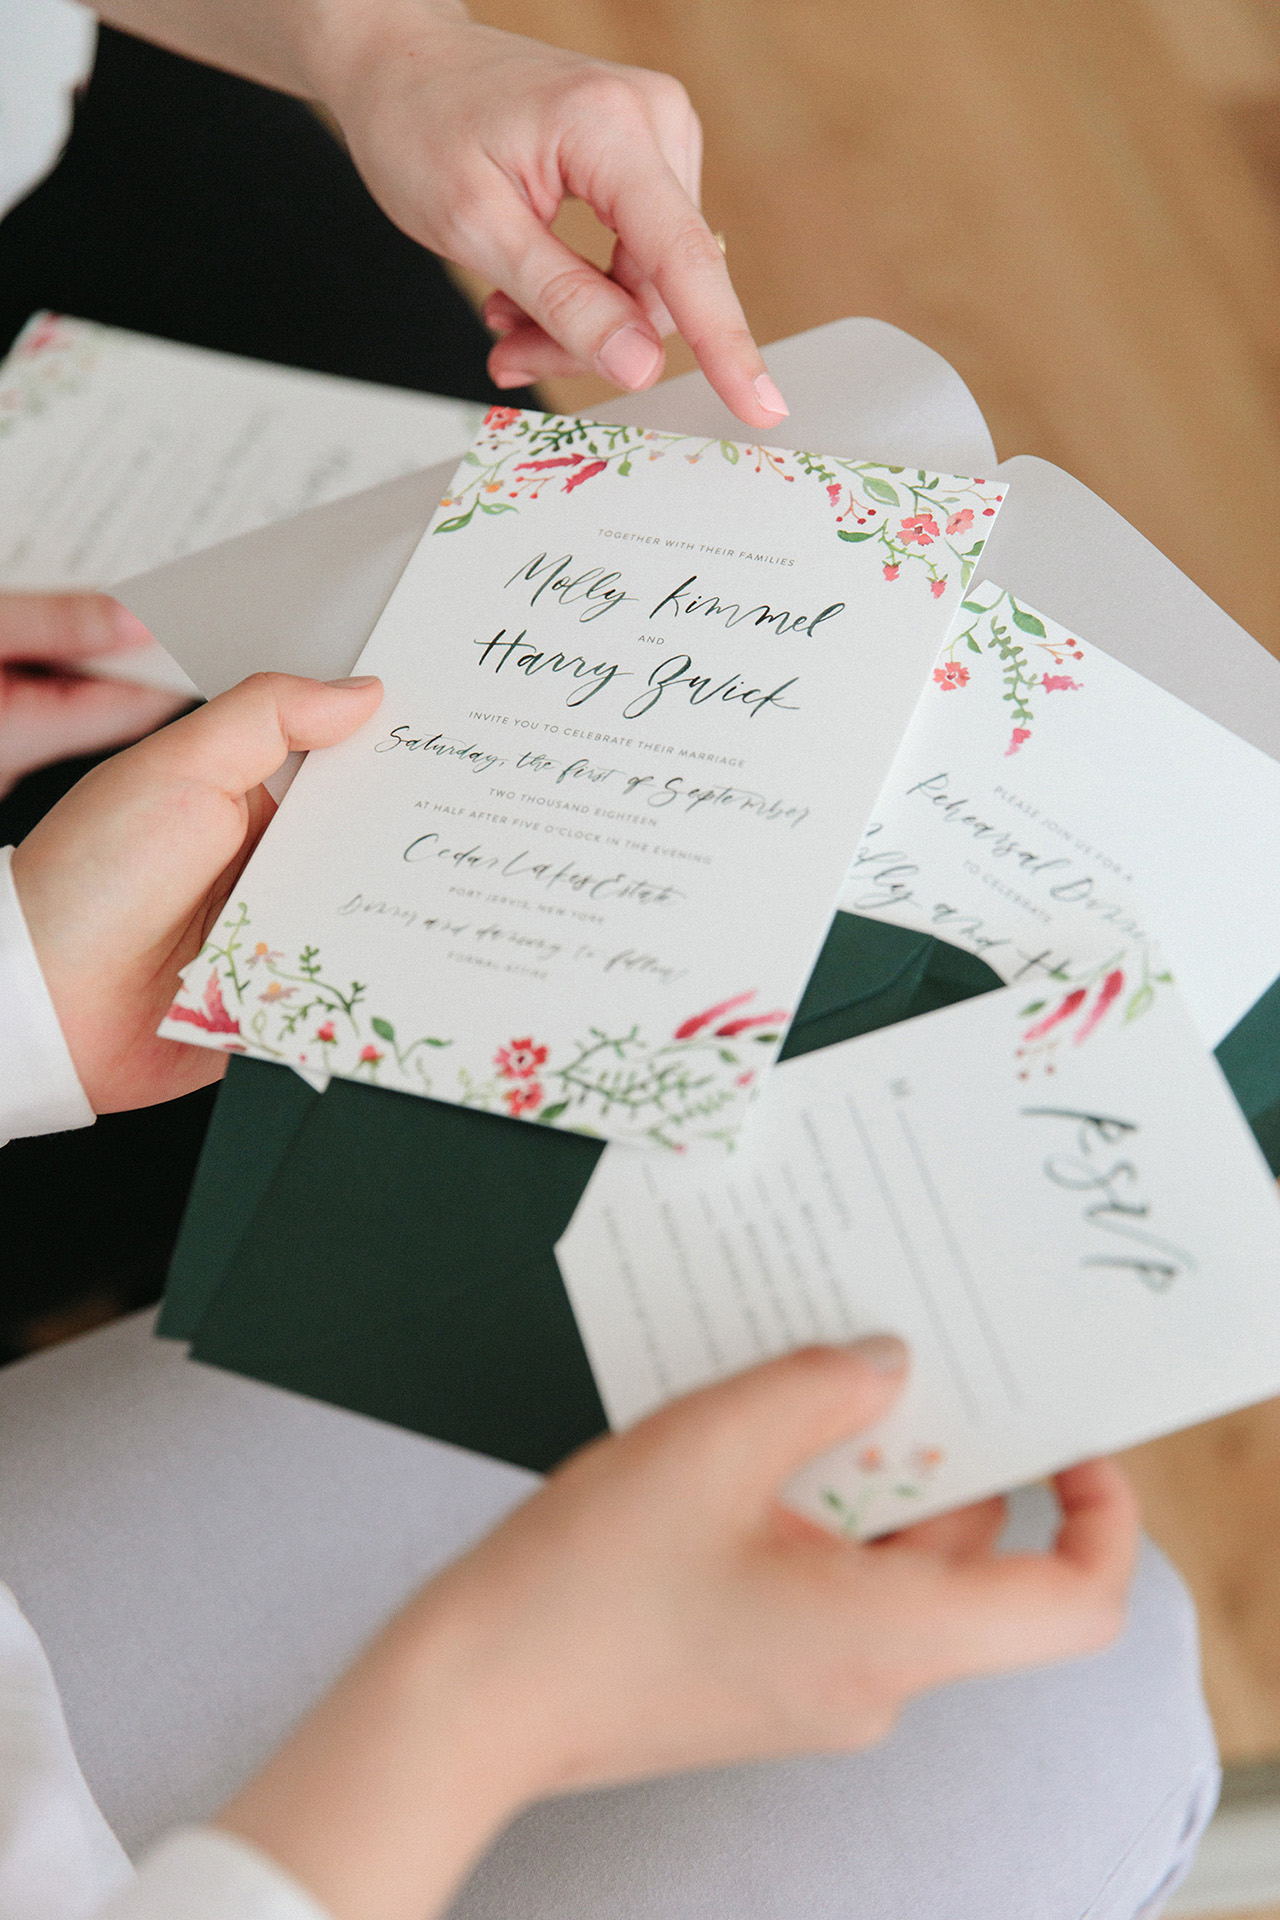
In addition, some of the assembly that we do (liners, vintage stamps, calligraphy, wax seal ties, and even simply collating the right items into a particular guest’s envelope) take an enormous amount of time and precision to achieve.

Behind the Stationery: Fourteen Forty

Behind the Stationery: Fourteen Forty

In the end, it’s all worth it to reach our goal—a design that is new, special, and specific to each client. There is no better moment then when we present the finished suite after months of hard work, and see our client look at their dream invitation for the first time!

Behind the Stationery: Fourteen Forty

All photos by Sasithon Photography except where noted.

Want to be featured in the Behind the Stationery column? Reach out to Megan at megan [at] ohsobeautifulpaper [dot] com for more details.