Happy Weekend!

Happy Friday everyone! Sending you wishes for a warm and cozy weekend from snowy and slushy DC! But in the meantime…

Angela-Liguori-Cotton-Ribbon-Instagram

Image by Angela Liguori

…a few links for your weekend!

This week on Oh So Beautiful Paper:

Check back this afternoon for this week’s cocktail recipe! Have a wonderful weekend, and I’ll see you back here on Monday! xoxo

Bold Black and White Floral Wedding Invitations

I love a good floral pattern, especially a bold black and white floral pattern. Mattie from Green Tie Studio sent over some photos of one of her newest wedding invitation suites – Avett – that mixes modern diagonal elements with a hand painted floral envelope liner!

Bold-Black-White-Floral-Wedding-Invitations-Green-Tie-Studio6

From Mattie: Avett is inspired by my love of both modern and vintage design. There are few things I love more than a bold black and white pattern. Our 2015 wedding collection is full of just that. Avett features a simple diagonal design and clean typography, paired with my hand-painted floral pattern liner.

Bold-Black-White-Floral-Wedding-Invitations-Green-Tie-Studio2

Bold-Black-White-Floral-Wedding-Invitations-Green-Tie-Studio4

Bold-Black-White-Floral-Wedding-Invitations-Green-Tie-Studio9

Thanks Mattie!

Photo Credits: Green Tie Studio

DIY Tutorial: Copper and Gold Gilded Wedding Invitations

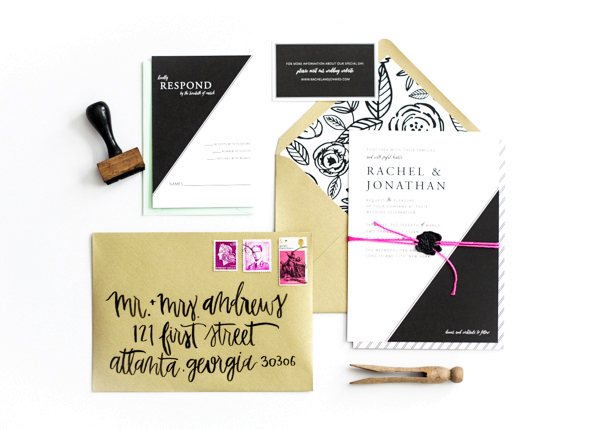
Gold has been a very popular accent in wedding stationery for some time now (and we couldn’t be happier about it!). In today’s DIY tutorial, we created a high end wedding invitation suite that incorporates mixed metallics and a gilding technique that you can absolutely do yourself! When you use multiple metallic shades, you are able to get a wonderful textural dimension that using only one tone just cannot give. We hope these copper and gold gilded wedding invitations inspire you to incorporate some shine into your own invitations! –Bailey and Emma of Antiquaria

DIY Gold and Copper Gilded Wedding Invitations by Antiquaria via Oh So Beautiful Paper

Materials

Modern Type Invitation Stamp

Modern Type Reply Card Stamp

Art Deco Return Address Stamp

Seal Initial Monogram Stamp

A9 Cards (we used Papaya)

6×9 String tie envelopes (we used Milkweed)

4bar Cards (we used Old Lace)

4bar envelopes (we used Paper Bag)

Small Paper Tags (we found ours locally – but these kraft paper tags are similar)

Embossing Stamp Pad

Embossing Heat Tool

Embossing Powder in Gold

Glue Stick or PVA glue

Copper Sheets

Soft brush for gilding

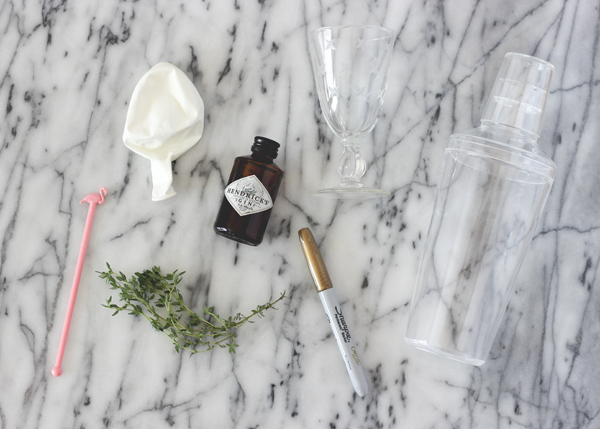
Finetec metallic watercolor set

Fine pointed brush

DIY Gold and Copper Gilded Wedding Invitations by Antiquaria via Oh So Beautiful Paper

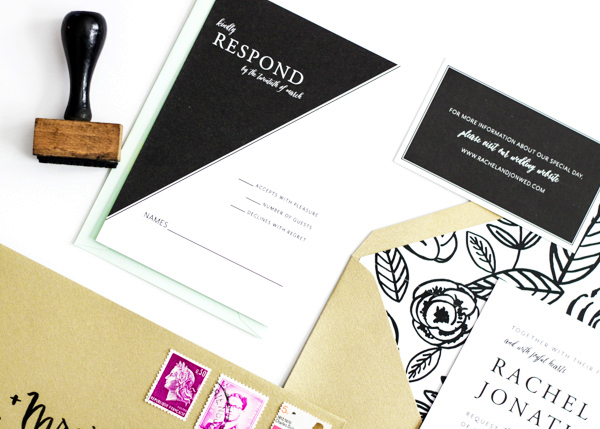
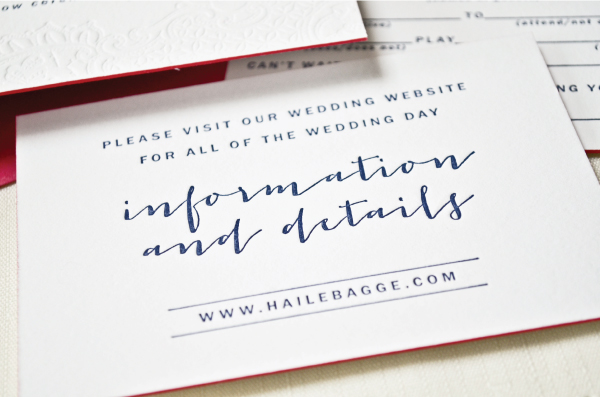
Step One: First, you’ll want to rubber stamp and emboss all of your cards. We used our Modern Type Invitation Stamp and Modern Type Reply Card Stamp for this design. On the cute little tag, we embossed our Seal Monogram Stamp. All of the pieces were embossed with our favorite gold embossing powder which gives lovely, fine results. Simply stamp your designs on each card (either in matching ink or with Versamark glue ink, as pictured), dust the powder over it, tap off the excess, and heat set the print. For more information about how to emboss using stamps, please watch this instructional video.

DIY Gold and Copper Gilded Wedding Invitations by Antiquaria via Oh So Beautiful Paper

mixed media invite-1 DIY Gold and Copper Gilded Wedding Invitations by Antiquaria via Oh So Beautiful Paper

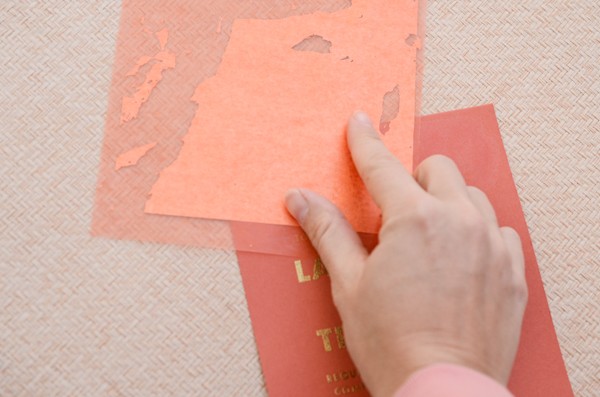
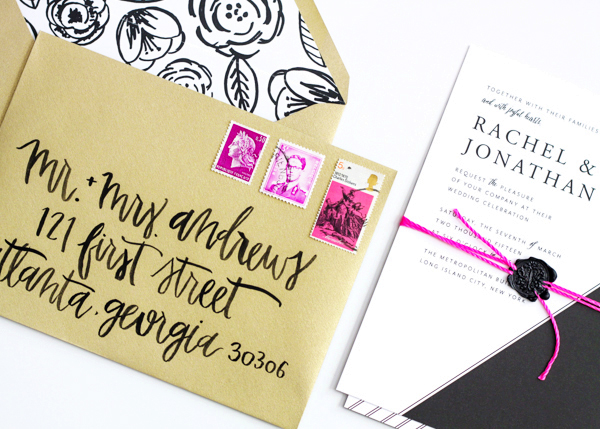
Step Two: Now for the fun part…gilding! We used copper (yes COPPER!) sheets to gild the top of our invitation design to lend an organic, worn, metallic look. With a glue stick smear the adhesive at the top of the invitation and quickly, very quickly put the copper sheet face down on top of the adhesive. Rub the paper backing on the copper sheet with your fingers to make sure that it sticks. Peel off the backing and rub the foil gently with your fingers to smooth any edges.

DIY Gold and Copper Gilded Wedding Invitations by Antiquaria via Oh So Beautiful Paper

Step Three: Lightly brush off excess with your soft brush. Repeat steps 2 and 3 with more adhesive if needed.

DIY Gold and Copper Gilded Wedding Invitations by Antiquaria via Oh So Beautiful Paper

Step Four: Emboss your return address using the same technique as used in step one. We used our Art Deco Return Address Stamp for this design on both our reply envelope and outer envelope.

DIY Gold and Copper Gilded Wedding Invitations by Antiquaria via Oh So Beautiful PaperStep Five: Address your invitations! We used a beautiful finetec metallic paint palette with a pointed brush for this design. Experiment with styles until something feels natural to you! There’s a bit of a learning curve when lettering with a brush, just be patient with yourself and remember to have a light touch.

DIY Gold and Copper Gilded Wedding Invitations by Antiquaria via Oh So Beautiful Paper

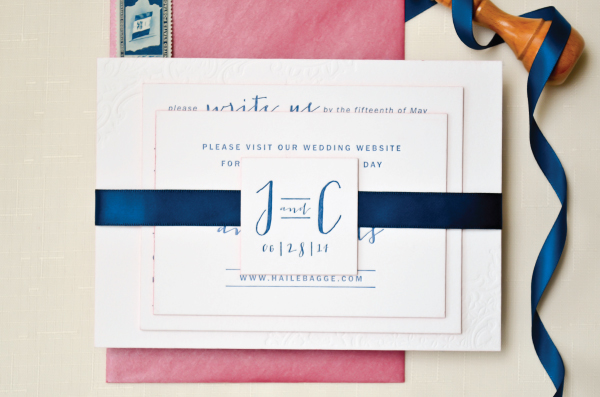
Step Six: Now all that’s left is to put the suite together! We tied ours together with golden thread (wrapped around 4-5 times) and tied it with our tag. Add your postage and send your metallic creations to your lovely guests!

DIY Gold and Copper Gilded Wedding Invitations by Antiquaria via Oh So Beautiful Paper

DIY Gold and Copper Gilded Wedding Invitations by Antiquaria via Oh So Beautiful Paper

Photography by Antiquaria for Oh So Beautiful Paper

DIY Tutorial: Balloon Engagement Cocktail Party Invitation

It’s clear by the details that go into wedding and event invitations that the goal is to get guests excited for what’s to come. And I can’t think of anything that will get them more excited than receiving a small gift with – or even within – the invitation. This DIY balloon party invitation is a gift in and of itself as a mini cocktail kit. I love this idea for an engagement cocktail party! – Lauren

DIY Tutorial: Balloon Party Invitation and Mini Cocktail Kit by A Fabulous Fete for Oh So Beautiful Paper

cocktail-party-balloon-invite-1

Supplies

Clear plastic cocktail shaker

Small cocktail glass

Mini bottle of your favorite liquor (I used Hendricks)

Fresh herbs that will mix well with the liquor (I chose thyme to go with the gin)

Balloon

Cocktail stirrer

Permanent Pen (I used a gold Sharpie)

DIY Tutorial: Balloon Party Invitation and Mini Cocktail Kit by A Fabulous Fete for Oh So Beautiful Paper

Step 1. Start by designing the main part of the package, the invitation! Blow up the balloon and secure (temporarily), I used a clothespin.

DIY Tutorial: Balloon Party Invitation and Mini Cocktail Kit by A Fabulous Fete for Oh So Beautiful Paper

Step 2. Letter your invitation text straight onto the balloon with your permanent pen and let dry.

DIY Tutorial: Balloon Party Invitation and Mini Cocktail Kit by A Fabulous Fete for Oh So Beautiful Paper

Step 3. Once they have dried, deflate the balloons.

DIY Tutorial: Balloon Party Invitation and Mini Cocktail Kit by A Fabulous Fete for Oh So Beautiful Paper

Step 4. Pack all of the pieces inside of the clear cocktail shaker. You can even write the directions for making your cocktail on the outside of the shaker.

DIY Tutorial: Balloon Party Invitation and Mini Cocktail Kit by A Fabulous Fete for Oh So Beautiful Paper

Step 5. Deliver and let your guests enjoy!

DIY Tutorial: Balloon Party Invitation and Mini Cocktail Kit by A Fabulous Fete for Oh So Beautiful Paper

What ingredients would you include in a pre-party cocktail kit?

Photo Credits: A Fabulous Fete for Oh So Beautiful Paper

Jessica + Chris’s Navy and Hot Pink Lace-Inspired Wedding Invitations

Navy and hot pink is such a classic color combination – especially when paired with beautiful lace-inspired details! Jackie from Sincerely, Jackie sent over this elegant invitation suite with modern hot pink edge painting and blind impression lace patterns. So pretty!

Navy-Hot-Pink-Blind-Impression-Lace-Wedding-Invitations-Sincerely-Jackie-OSBP

From Jackie: I absolutely love when couples come to me looking for classic, elegant designs with a fun, individual twist. Jessica and Chris wanted their invitations to exude simplicity at first glance, but a bit of fun and whimsy when you look a bit closer. The entire suite is letterpress printed on 220lb double thick bright white Crane’s Lettra cotton paper and feature classic navy blue ink, blind (no ink) lace impressions, and then accented with a perfectly playful pop of hot pink edging. The blind lace impression is my personal favorite detail, which gives a sweet nod to Jessica’s all-lace gown.

Navy-Hot-Pink-Blind-Impression-Lace-Wedding-Invitations-Sincerely-Jackie-OSBP7

Navy-Hot-Pink-Blind-Impression-Lace-Wedding-Invitations-Sincerely-Jackie-OSBP2

Navy-Hot-Pink-Blind-Impression-Lace-Wedding-Invitations-Sincerely-Jackie-OSBP8

Jess and Chris really wanted their guests to be a part of the invitation experience, so we came up with a unique and fun way for guests to reply. A mad-lib style reply card, allowing the guests to get creative in their responses – guests even got to tell the DJ what to play, or not to play! The reply cards were printed in a slightly larger size, giving plenty of room for guests to fill in the blanks.

Navy-Hot-Pink-Blind-Impression-Lace-Wedding-Invitations-Sincerely-Jackie-OSBP9

Navy-Hot-Pink-Blind-Impression-Lace-Wedding-Invitations-Sincerely-Jackie-OSBP10

The suite was finished off with an information card pointing guests to the wedding website, and a simple monogram tag and navy blue ribbon tying it all together. The pink edging is such a fun detail when the items are assembled!

Navy-Hot-Pink-Blind-Impression-Lace-Wedding-Invitations-Sincerely-Jackie-OSBP6

Navy-Hot-Pink-Blind-Impression-Lace-Wedding-Invitations-Sincerely-Jackie-OSBP4

Thanks Jackie!

Check out the Designer Rolodex for more tal­ented wed­ding invi­ta­tion design­ers and the real invi­ta­tions gallery for more wedding invitation ideas!

Photo Credits: Sincerely, Jackie