DIY Tutorial: Rustic Monogram Rubber Stamp Wedding Invitations

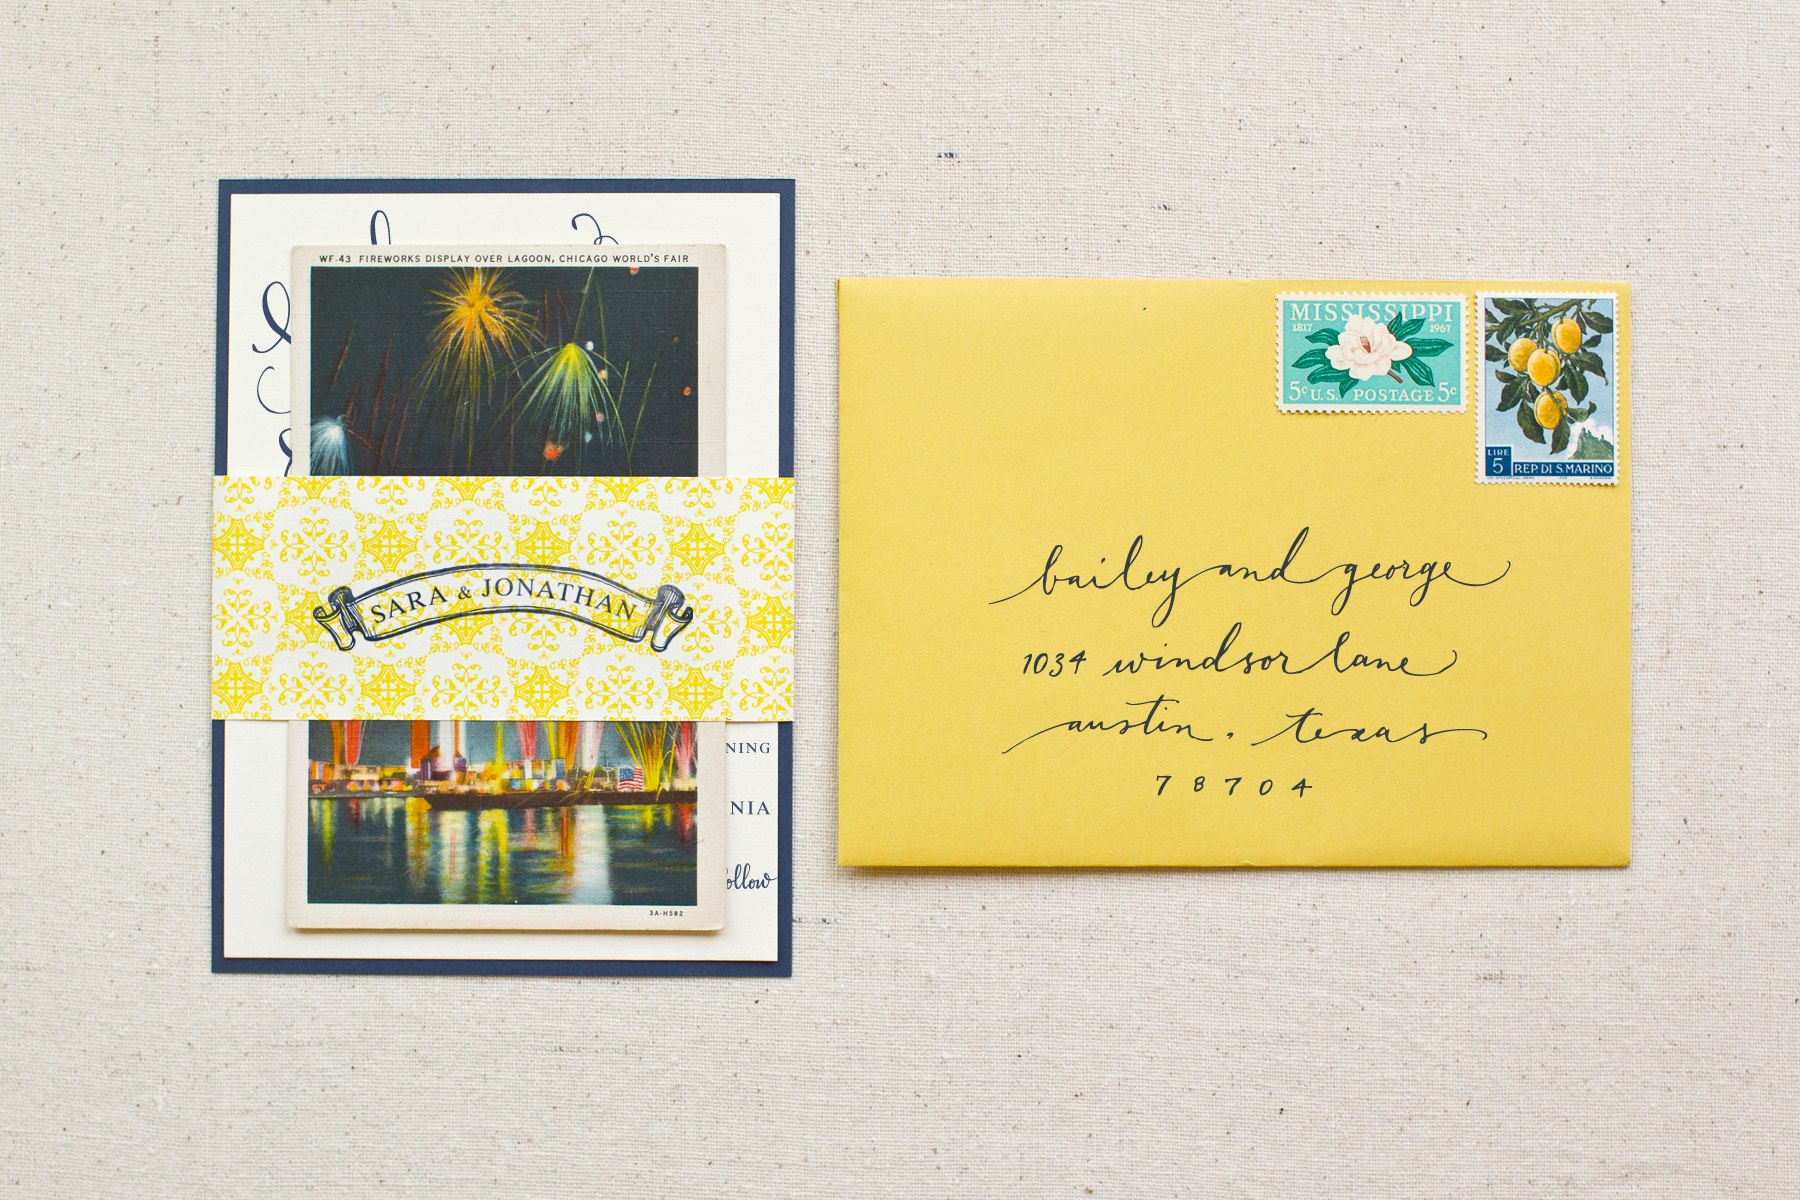
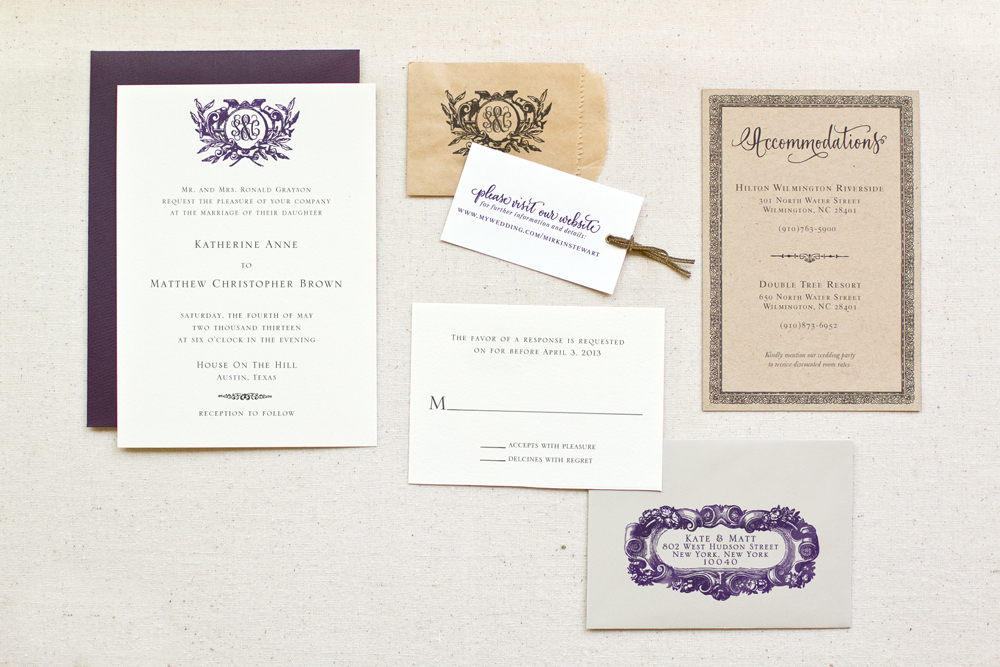
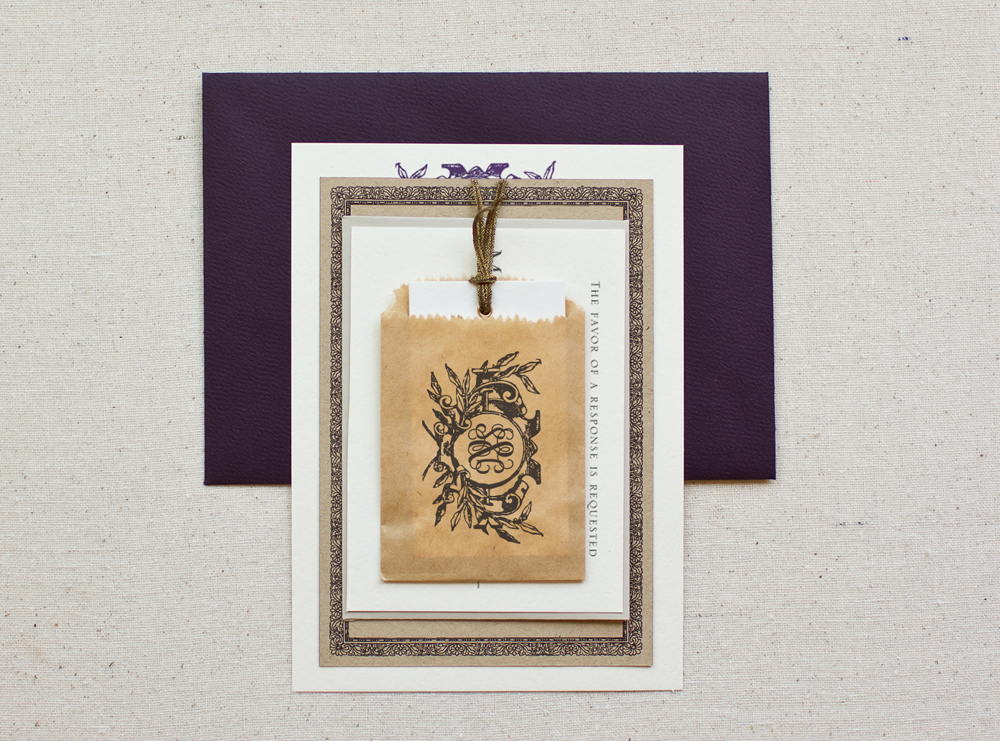
This week we’re showing you how to create a rustic twist on a classic wedding invitation using a palette of eggplant, ivory, and kraft – a beautiful color combination for late summer and fall weddings!  Using a variety of papers, ink colors, and stamps, we gave some additional depth to an otherwise classic invitation.  – Bailey and Emma of Antiquaria

DIY Tutorial: Kraft Paper Rubber Stamp Wedding Invitations by Antiquaria via Oh So Beautiful Paper

DIY Tutorial: Kraft Paper Rubber Stamp Wedding Invitations by Antiquaria via Oh So Beautiful Paper

DIY Tutorial: Kraft Paper Rubber Stamp Wedding Invitations by Antiquaria via Oh So Beautiful Paper

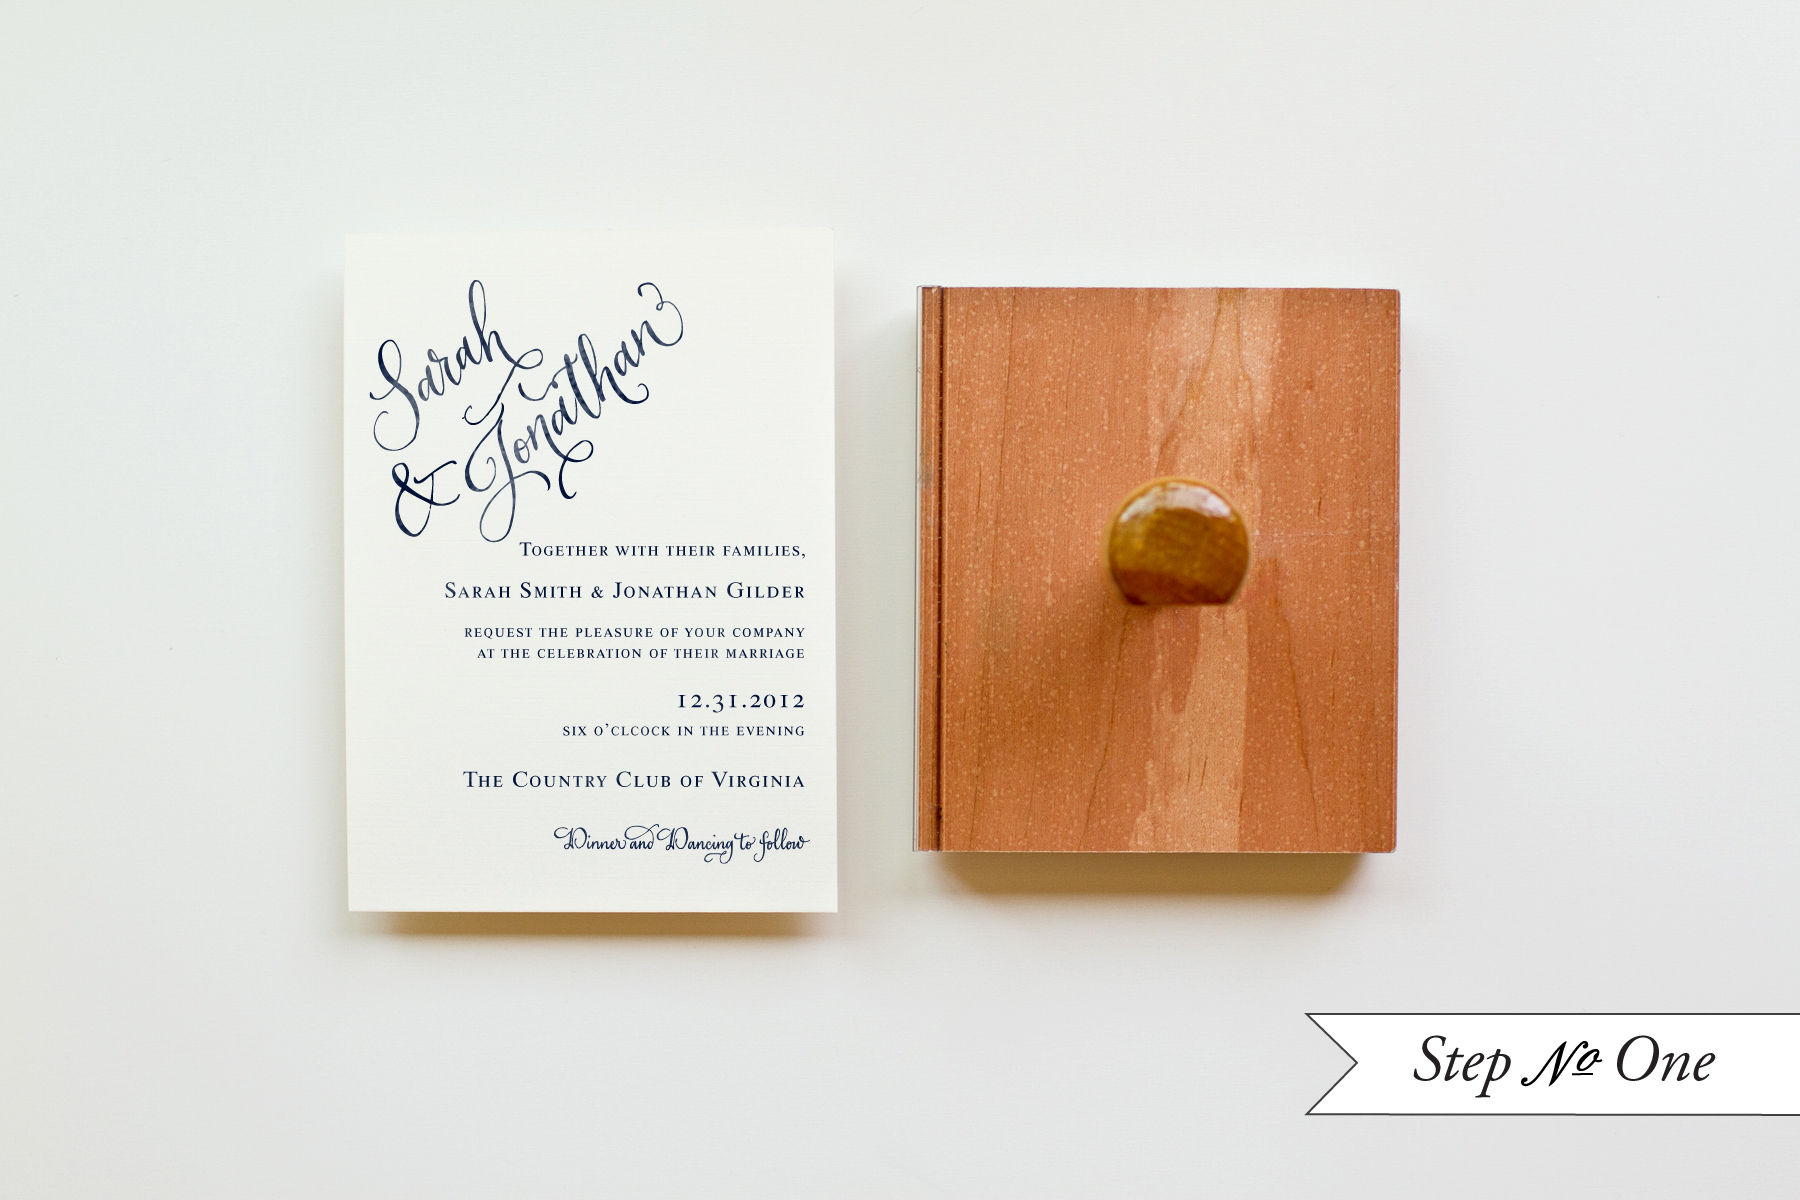
Step One: Set an A7 (5″x7″) piece of card stock on a hard, clean surface.  Ink your invitation stamp (we used our Classic Invitation Stamp) thoroughly with a black stamp pad.  Center stamp over card stock, leaving room for your monogram.  Carefully set the stamp down.  Press moderately on the stamp.  Too firm and it will smudge and too softly will not give a clear print.  Remove stamp and let the ink dry.  Repeat, using eggplant ink, with the monogram stamp (we used our Crest Monogram stamp) centering it at the top.

DIY Tutorial: Kraft Paper Rubber Stamp Wedding Invitations by Antiquaria via Oh So Beautiful Paper

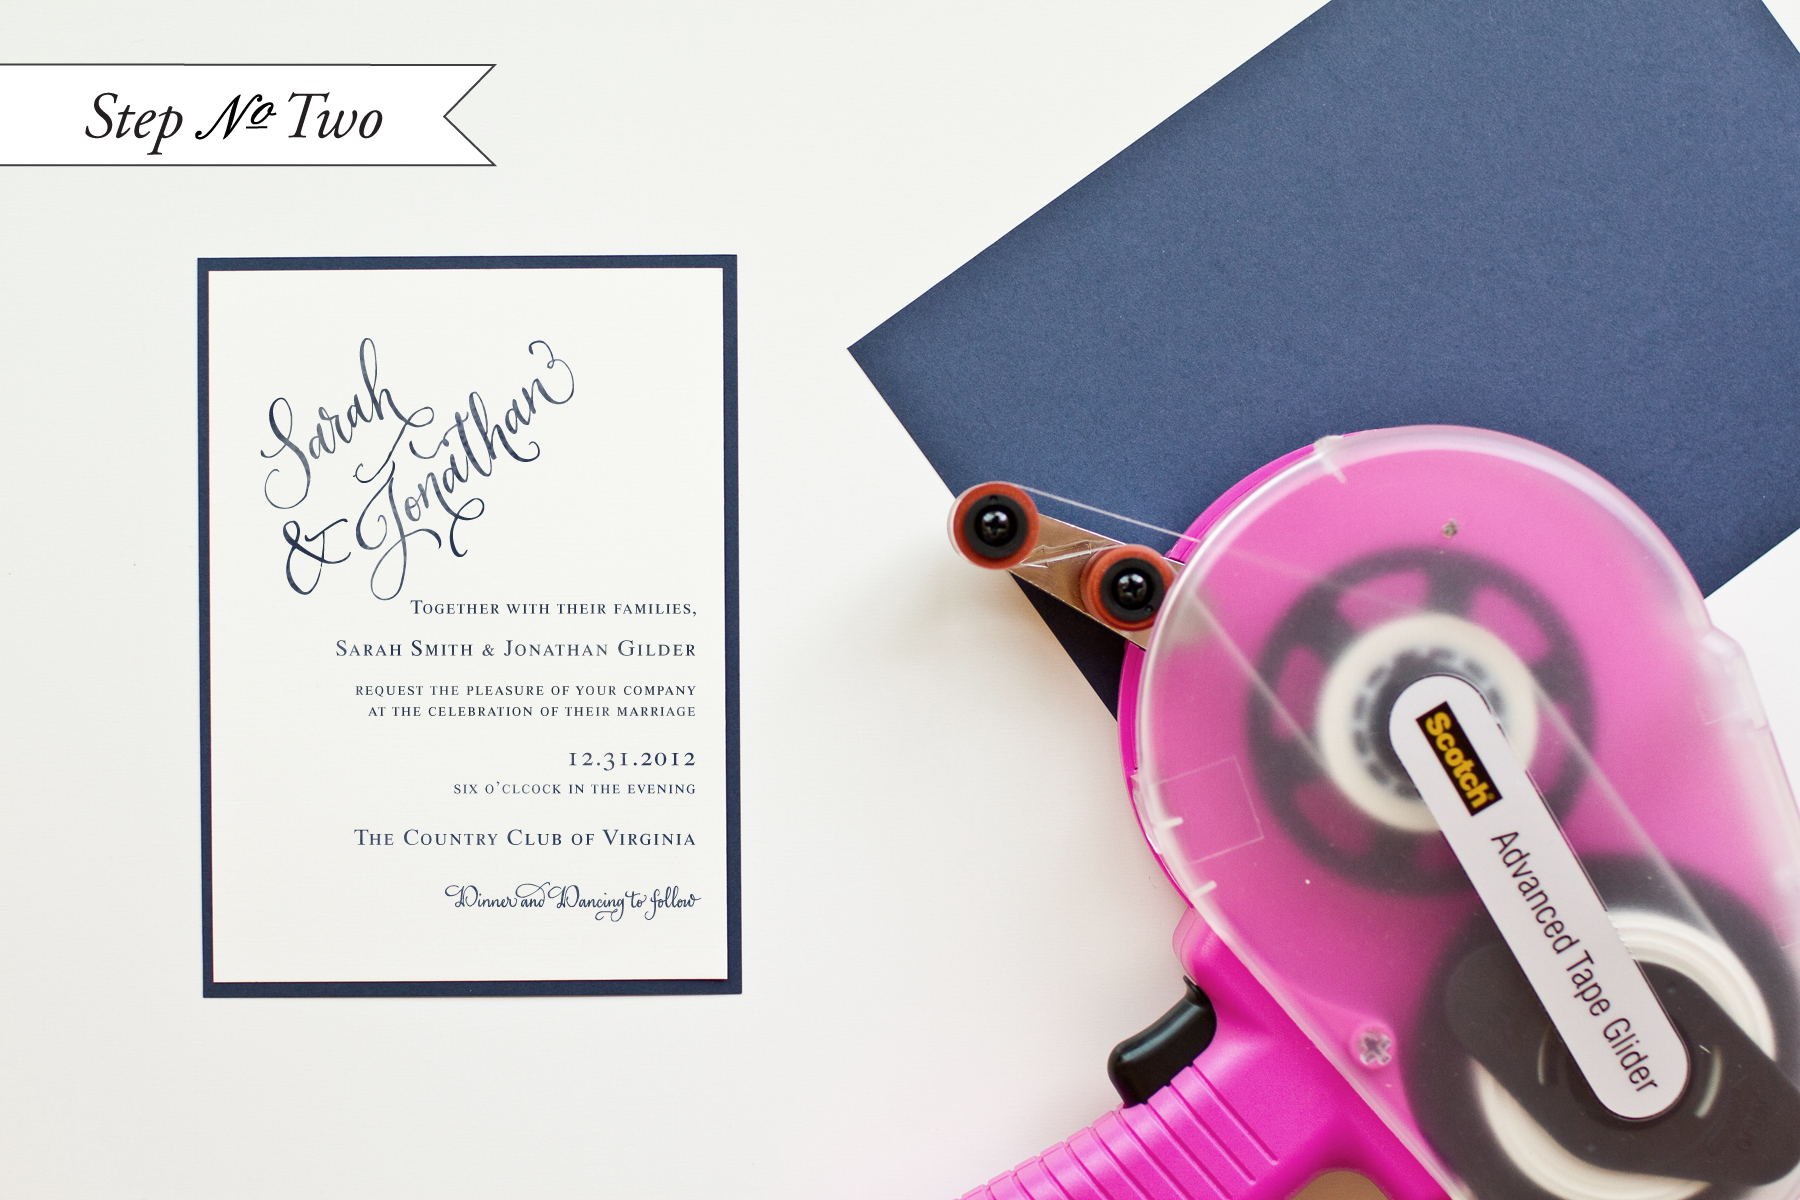
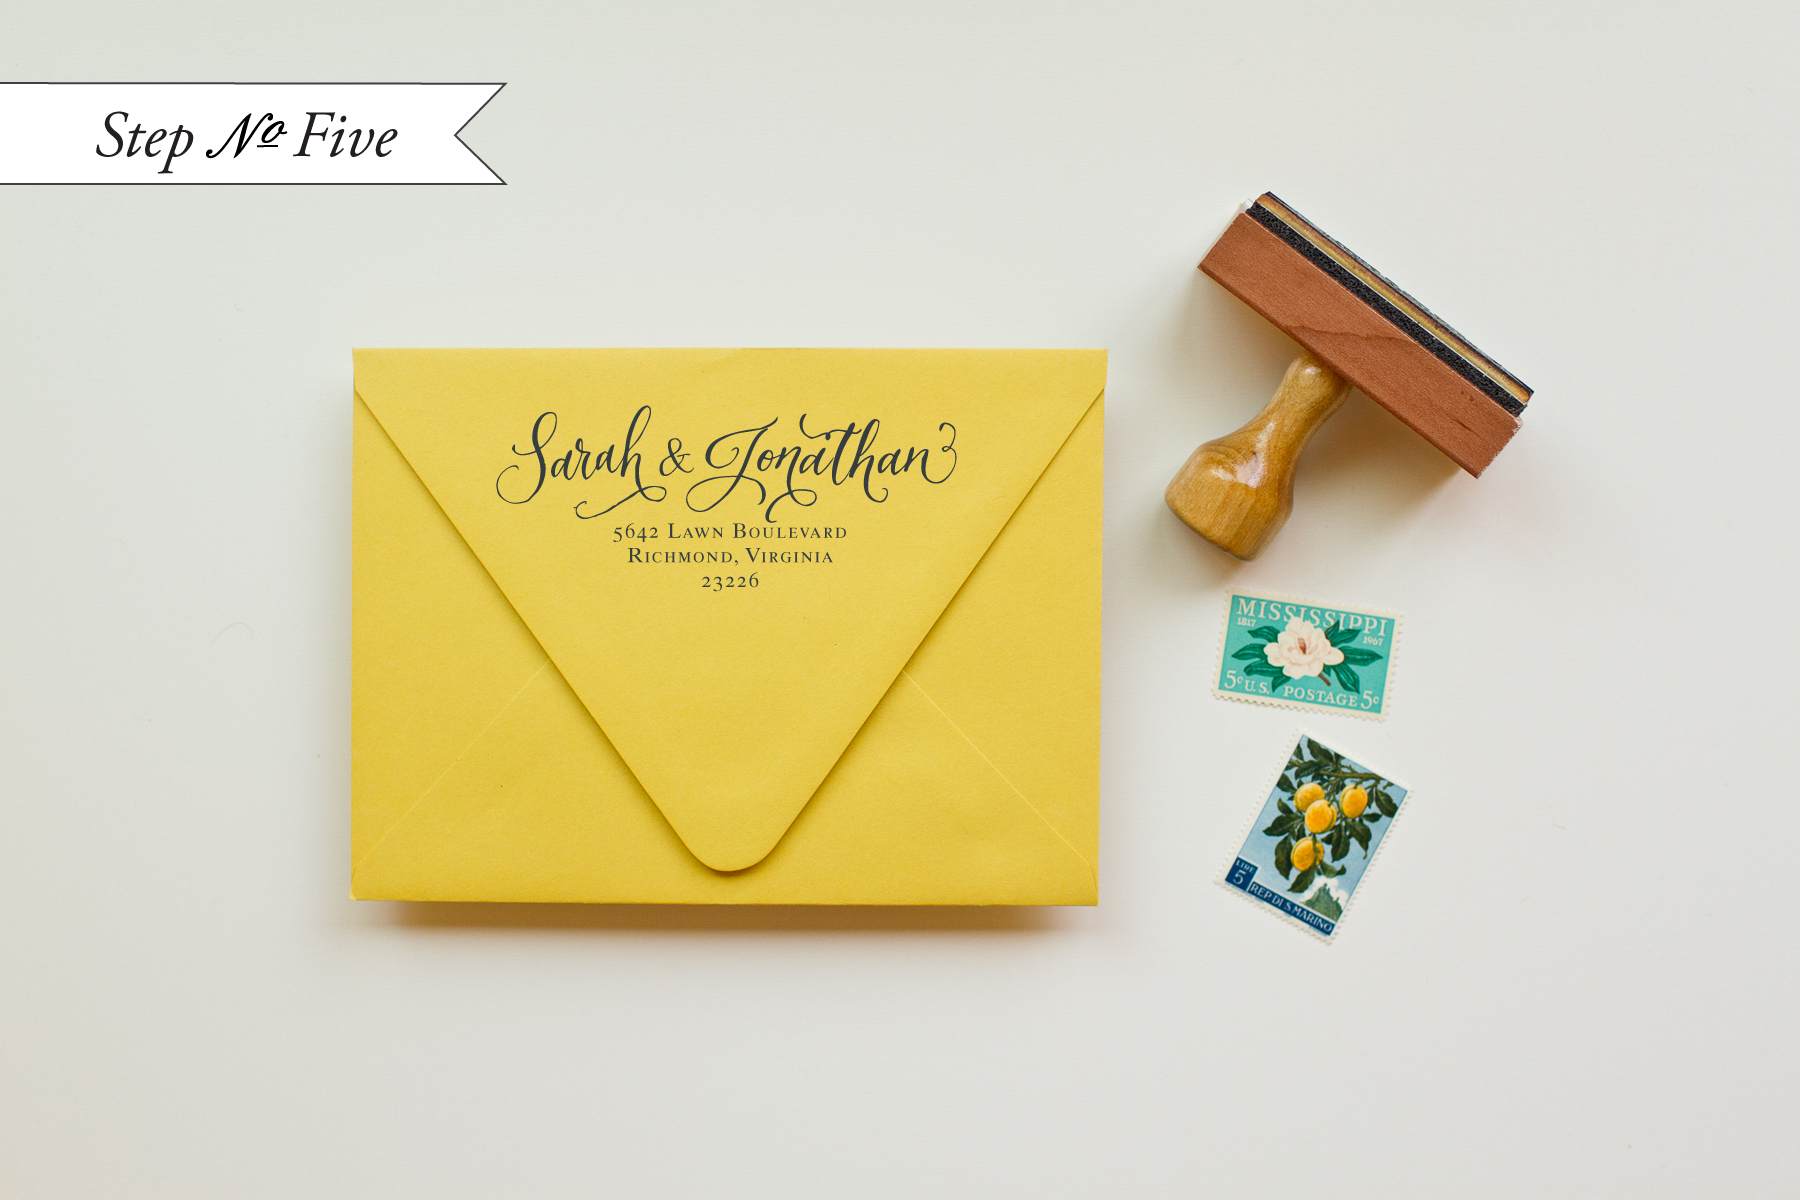
Step Two: Using the same technique as in step one, stamp your reply card (we used our Classic Reply Card stamp) & reply address (we used our Baroque Frame return address stamp).  You’ll want to use a 4 bar card (3 1/2 x 4 7/8″) and a 4 bar envelope (3 5/8 x 5 1/8″) for these pieces.

DIY Tutorial: Kraft Paper Rubber Stamp Wedding Invitations by Antiquaria via Oh So Beautiful Paper

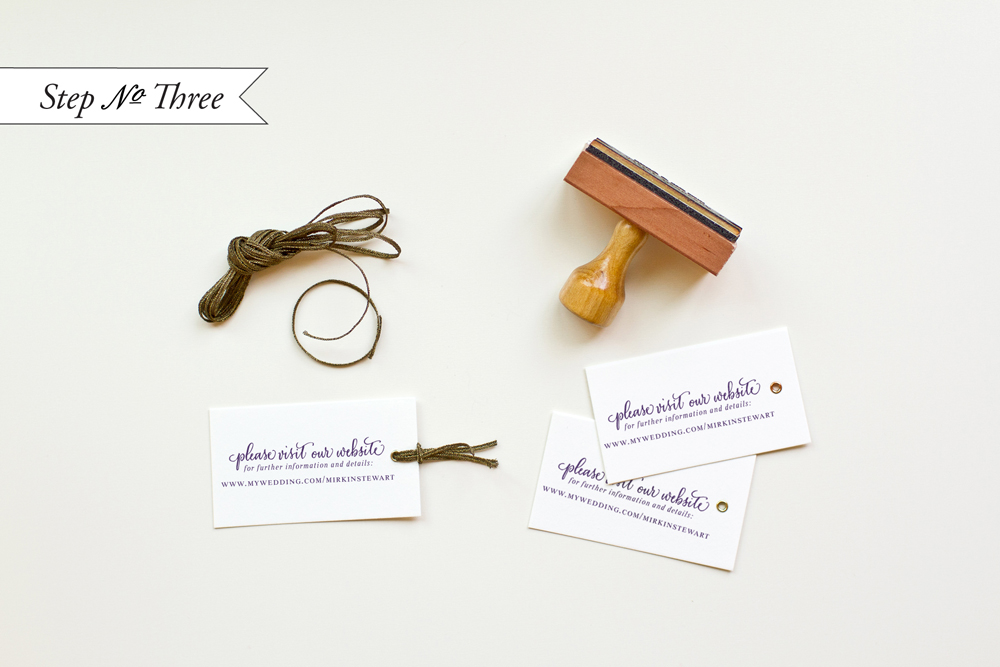
Step Three: Nowadays, it is increasingly important to include your wedding website within your invitation suite.  Guests rely on the wedding website for travel info, locations, and addresses – not to mention your registry!  We stamped our website card (we used our Calligraphy Accent Web Card stamp) on grommeted gift tags to add some interest to the suite.  We then tied some decorative gold ribbon through the hole to finish it off!

DIY Tutorial: Kraft Paper Rubber Stamp Wedding Invitations by Antiquaria via Oh So Beautiful Paper

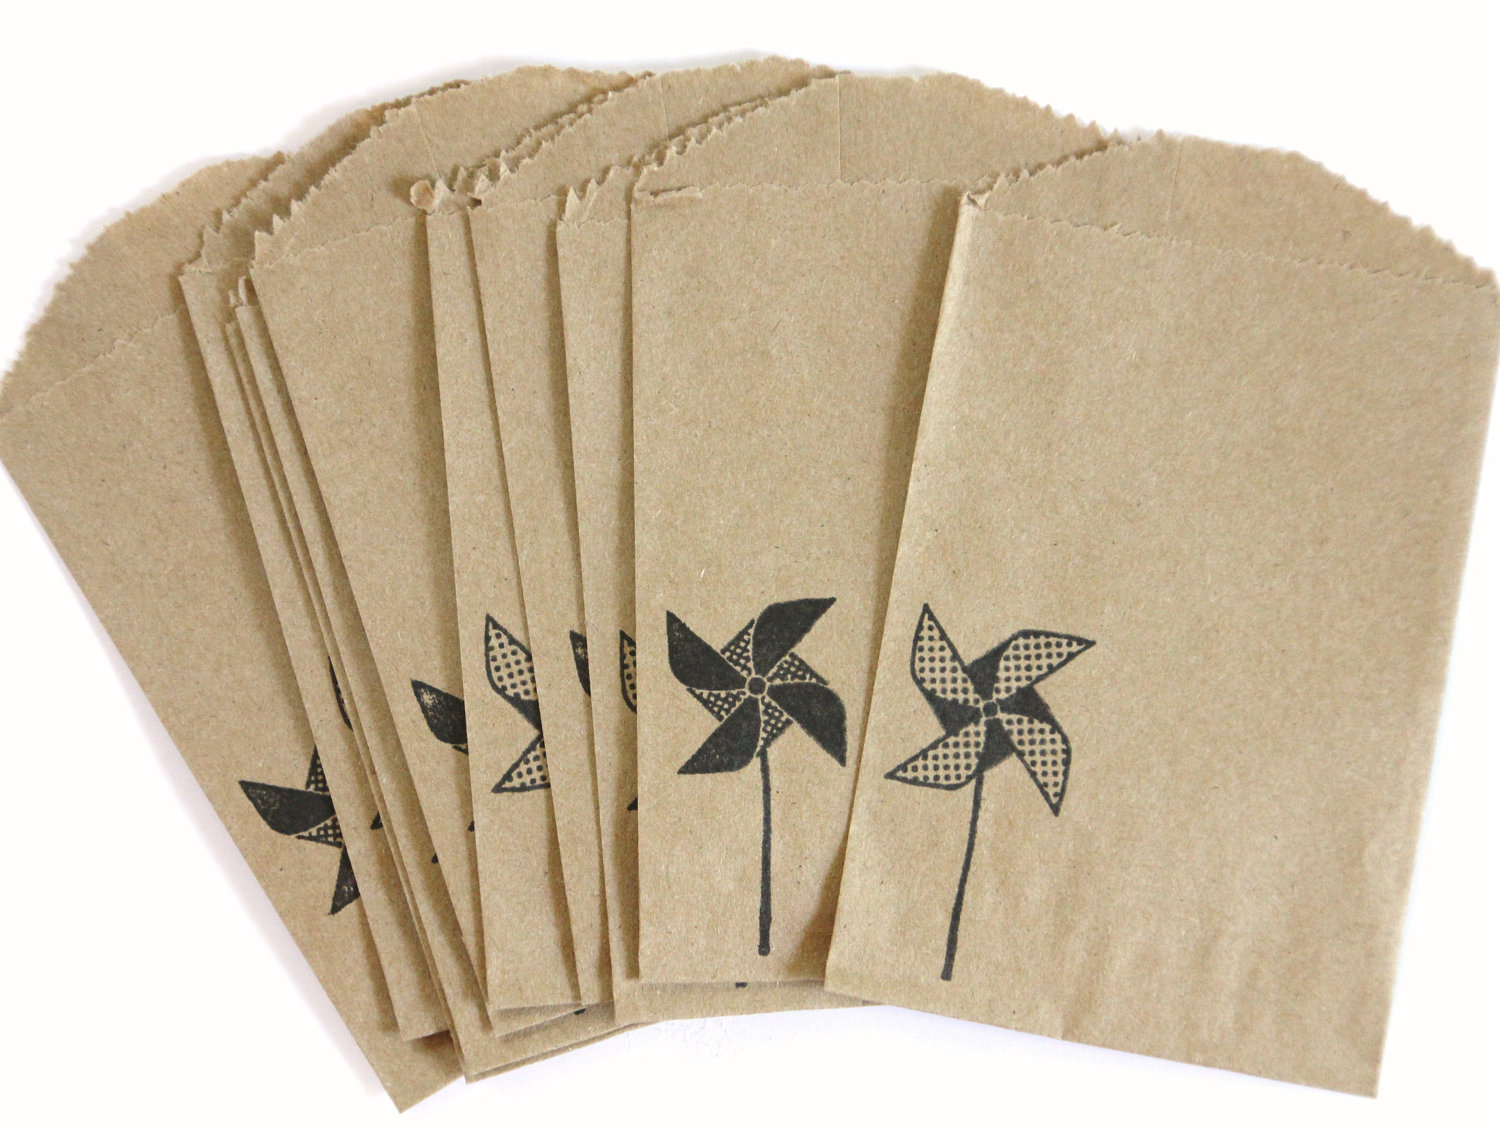
Step Four: We love to used things unexpectedly within an invitation suite… so when we ran across these tiny kraft sacks, we knew they would be perfect to incorporate into our next design!  Using the same monogram from your invitations (our Crest Monogram rubber stamp) – see budget savings!! – stamp it horizontally onto your tiny kraft bag.  Let dry.

Anti­quaria is a mem­ber of the Designer Rolodex – you can see more of their beau­ti­ful work right here or visit the real wedding invitations gallery for more wedding invitation ideas or to inquire about custom design services!

Materials:

Classic Invitation Stamp

Crest Monogram Stamp

Classic Reply Card Stamp

Baroque Frame Return Address Stamp

Calligraphy Accent Web Card Stamp

A7 Cards

4Bar Cards

A7 Envelopes

4Bar Envelopes

Paper Bags

Metal Eyelet Tags

Photo Credits: Intertwyned for Antiquaria

Wedding Stationery Inspiration: Pinwheels

Happy first day of summer!  It’s hard to believe my favorite time of the year is officially upon us, but I’m certainly not complaining.  In honor of the season change, I’m talking pinwheels today!  If you’re holding a summer wedding, incorporating a few of these fun, nostalgic summer signifiers is sure to please guests of all ages.  And for all you true paper lovers out there, it’s a great excuse to bring paper elements into so many more day-of items.  Not only can you have pinwheel place cards and table numbers, but they make great boutonnieres, cake toppers and oh so much more, too! — Kelly

Day-Of Wedding Stationery Inspiration and Ideas: Pinwheels via Oh So Beautiful Paper

Photo by The Why We Love, Pinwheels by Smock via 100 Layer Cake

Day-Of Wedding Stationery Inspiration and Ideas: Pinwheels via Oh So Beautiful Paper Day-Of Wedding Stationery Inspiration and Ideas: Pinwheels via Oh So Beautiful Paper

Photo by Three Photographers, Boutonniere by Twirlie Whirlies via Ruffled (left), Photo by Sara Gray Photography (right)

Day-Of Wedding Stationery Inspiration and Ideas: Pinwheels via Oh So Beautiful Paper

Cocktail Napkins by Reflections by Lola

Day-Of Wedding Stationery Inspiration and Ideas: Pinwheels via Oh So Beautiful Paper

Photo by Elyse Hall Photography via Style Me Pretty

Day-Of Wedding Stationery Inspiration and Ideas: Pinwheels via Oh So Beautiful Paper Day-Of Wedding Stationery Inspiration and Ideas: Pinwheels via Oh So Beautiful Paper

Escort Cards by Rule42 (left), Escort Cards by Lisa Leonard Designs via Kitchen Belleicious (right)

Day-Of Wedding Stationery Inspiration and Ideas: Pinwheels via Oh So Beautiful Paper

Photo by Hyer Images via Delightfully Engaged

Day-Of Wedding Stationery Inspiration and Ideas: Pinwheels via Oh So Beautiful Paper Day-Of Wedding Stationery Inspiration and Ideas: Pinwheels via Oh So Beautiful Paper

Escort Cards by Jordan Ferney for Project Wedding (left), Table Number by Rule42 (right)

Day-Of Wedding Stationery Inspiration and Ideas: Pinwheels via Oh So Beautiful Paper

Favors by Estefi Machado for Dotcoms for Moms

Day-Of Wedding Stationery Inspiration and Ideas: Pinwheels via Oh So Beautiful Paper

Food Label and Photo by A Subtle Revelry

Day-Of Wedding Stationery Inspiration and Ideas: Pinwheels via Oh So Beautiful Paper Pinwheel-Wedding-Cake-Topper-Marianne-Wilson-Photography

Photo by Sewell Photography via Style Me Pretty (left), Photo by Marianne Wilson Photography via Wedding Chicks (right)

Day-Of Wedding Stationery Inspiration and Ideas: Pinwheels via Oh So Beautiful Paper

Favor Bags by Bahana Splits Boutique

Day-Of Wedding Stationery Inspiration and Ideas: Pinwheels via Oh So Beautiful Paper

Thank You Card by Jill Means at Minted

Will you be incorporating the fun and whimsical pinwheel into your summer wedding?  Let us know how!

{images via their respective sources}

DIY Tutorial: Rubber Stamp Fireworks Invitation

We love the challenge of creating an invitation suite based off of a unique theme, venue or color palette.  For this DIY tutorial, we were inspired by a fabulous vintage firework postcard (that we found while hunting at a local thrift shop)!  This combo would be so perfect for New Years Eve or July 4th nuptials – or even a Fourth of July party!  The mixture of colors and patterns is sure to make a statement to all of your guests. – Bailey and Emma of Antiquaria

DIY Tutorial: Rubber Stamp Fireworks Invitation by Antiquaria

DIY Tutorial: Rubber Stamp Fireworks Invitation by Antiquaria

Step One: Lay a 4.25 x 6″ card (preferably a heavyweight card stock) on a stable and hard surface.  Ink your invitation stamp (we used our Calligraphy Accent Invitation Stamp) and center it over card.  Press down firmly with moderate pressure, using the handle as the anchor point.  Lift off the stamp and set card aside to dry.

DIY Tutorial: Rubber Stamp Fireworks Invitation by Antiquaria

Step Two: Cut a navy sheet of paper into a 4.5 x 6.25″ rectangle.  Once the printed invitation piece is dry, flip over and adhere double stick tape to each edge.  Center over the navy card and stick it down pressing the edges to make sure that the two pieces are stuck together properly.

DIY Tutorial: Rubber Stamp Fireworks Invitation by Antiquaria

Step Three: In order to use our found postcard for all of our guests, we scanned the front image into the computer and printed out enough cards to suit our quantity.  (The cards ended up being 3.5 x 5.5″ rectangles).  We stamped the back of each card using our Calligraphy Accent Reply Postcard Stamp.  Of course, let the cards dry after inking.

DIY Tutorial: Rubber Stamp Fireworks Invitation by Antiquaria

Step Four: To make the belly band, cut a fun, patterned paper into 2 x 11″ or 2 x 12″ (depending on the length of your paper) strips.  Stamp a monogram (we used our Banner Name Monogram Stamp) in the middle and wrap the band around your invitation suite, securing it in the back with double sided or decorative washi tape.  Now all of your pieces will stay together and look cute at the same time!

DIY Tutorial: Rubber Stamp Fireworks Invitation by Antiquaria

Step Five: Stamp an A6 envelope with your return address (we used our Calligraphy Ampersand Return Address stamp), address the front, pick out your postage and send them on their way!

Materials:

Calligraphy Accent Invitation Stamp

Calligraphy Accent Reply Card Stamp

Calligraphy Ampersand Return Address Stamp

Banner Name Stamp

Stamp Pad (we used Midnight)

Cream Cardstock cut to 4.25 x 6 inches

Vintage Postcard measuring 3.5 x 5.5 inches, found locally

Navy Blue Cardstock cut to 4.5 x 6.25 inches

Patterned Paper (ours was custom designed and printed by Antiquaria)

A6 Envelope (we used Curry)

Double sided tape

Washi Tape

Tape Gun (optional but definitely helpful in taping on the navy backers)

Photo Credits: Jamie of Intertwyned

National Stationery Show 2012, Part 2

As promised, I’m back with more from the National Stationery Show – with a lot still yet to come.  After exhibiting as part of the Ladies of Letterpress booth last year, Elizabeth from Wildhorse Press moved to her own booth full of adorable greeting cards and prints.  I even love the illustrations Elizabeth drew around each group of prints and cards – so sweet!


Wildhorse Press

I couldn’t wait to see the new cards and invitations from Claudia at Fig. 2 Design Studio in person.  I’m completely smitten with the color-dipped initial note cards and new neon gift wrap sheets!


Fig. 2 Design Studio

The booth design from Mr. Boddington’s Studio is always amazing, and this year was no exception – the team covered the walls in huge tissue paper flowers!   Mr. Boddington’s Studio also introduced a lot of new stationery at this year’s show, from patterned boxed stationery sets to day-of wedding stationery like escort cards and table number cards to large-scale wedding guest books and birth certificates.


There were so many beautiful new cards and prints from Sycamore Street Press this year.  I’m loving the pops of color, foil-stamped details, and sweet illustrations!

Sycamore Street Press

Even though they just introduced a ton of new products at NYIGF back in January, Rifle Paper Co. had so many fun new things in their booth for the Stationery Show!  I love the new boxed stationery sets, coasters, gift wrap sheets, and particularly the fun holiday stickers (I’m pretty sure my little niece would be all over those stickers if she had the chance!).


Rifle Paper Co.

Last, but definitely not least for today, fun new goodies from Susy Jack*!  The beautiful new collection includes gorgeous recipe card sets, tea towels, calendars, and cards and notepads featuring Susy’s signature patterns.  So pretty!


Susy Jack*

That’s it for today!  I’ll be back with more from the show tomorrow!

 Photo Credits: Stephen Michael Garey and Nole Garey for Oh So Beautiful Paper; please ask permission prior to reposting any photos.

Stationery Show Sneak Peek: Smock

It’s the day before the big show, and I have just a couple more sneak peeks to share!  First up today are some of the new goodies from Smock (Booth 2241).  I always love seeing the letterpress goodies at the Smock booth, but I’m really excited about some of the new products launching at this year’s show, including gold foil stamped cards, new calendars, pretty new double-sided gift wrap sheets, and my personal favorite – spiral bound workbooks!  The workbooks feature both lined and unlined pages for notes and doodles.  So fun!

Stay tuned for more from Smock at the National Stationery Show in a couple of days!

Photo Credits: Smock

*Smock is a sponsor of Oh So Beautiful Paper