Melissa + Todd’s DIY Vintage-Inspired Wedding Invitations

Every couple of weeks, Bailey and Emma of Antiquaria stop by to share some fun DIY ideas using rubber stamps – and today they’re here to share a wedding collaboration with a recent bride!  Designer (and bride) Melissa La Pietra created the vintage-inspired designs for her wedding save the dates and invitations but needed a bit of help with the production.  Bailey and Emma created a rubber stamp that Melissa used for her handkerchief save the dates, then letterpress printed Melissa’s designs for the invitation suite.  Let’s take a look!

DIY Rubber Stamp Wedding Invitations and Save the Dates via Oh So Beautiful Paper (1)

From Bailey and Emma: Melissa + Todd’s wedding venue was The French Laundry in Napa Valley, so the graphics for the invitation were inspired by antique french apothecary labels.  For the invitations, we had Melissa’s designs letterpress printed in charcoal grey ink.  We designed a custom map of Yountville of her favorite places to accompany the suite.

DIY Rubber Stamp Wedding Invitations and Save the Dates via Oh So Beautiful Paper (4)

DIY Rubber Stamp Wedding Invitations and Save the Dates via Oh So Beautiful Paper (7)

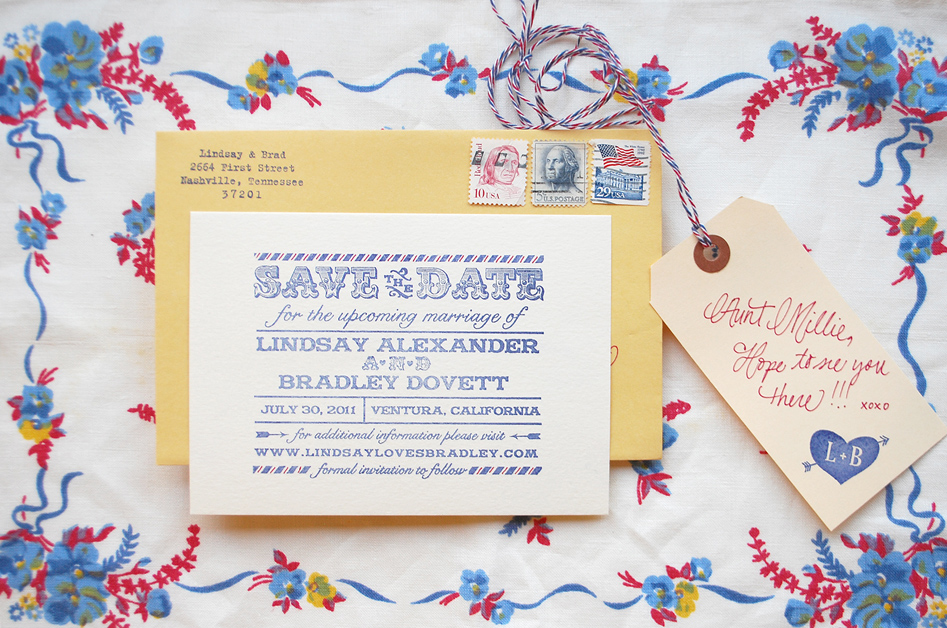
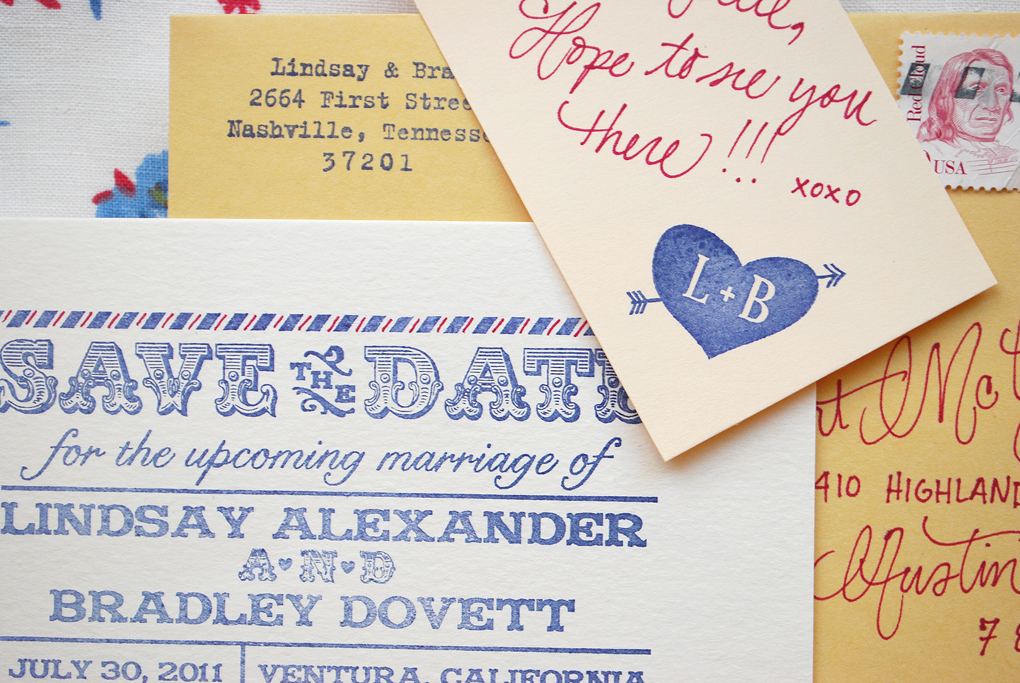
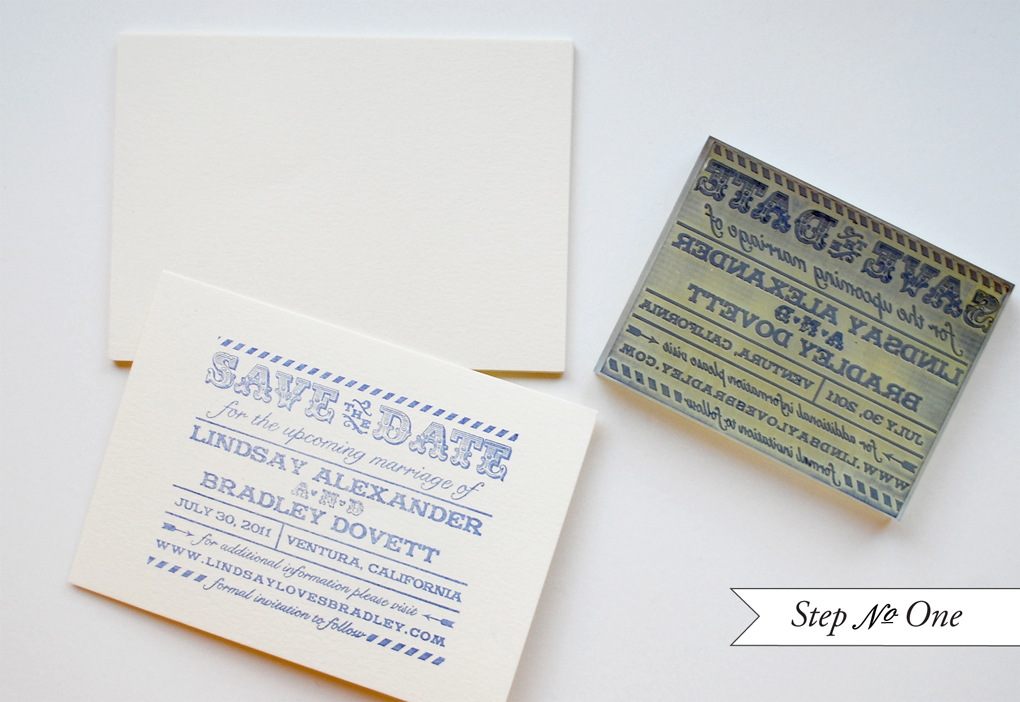
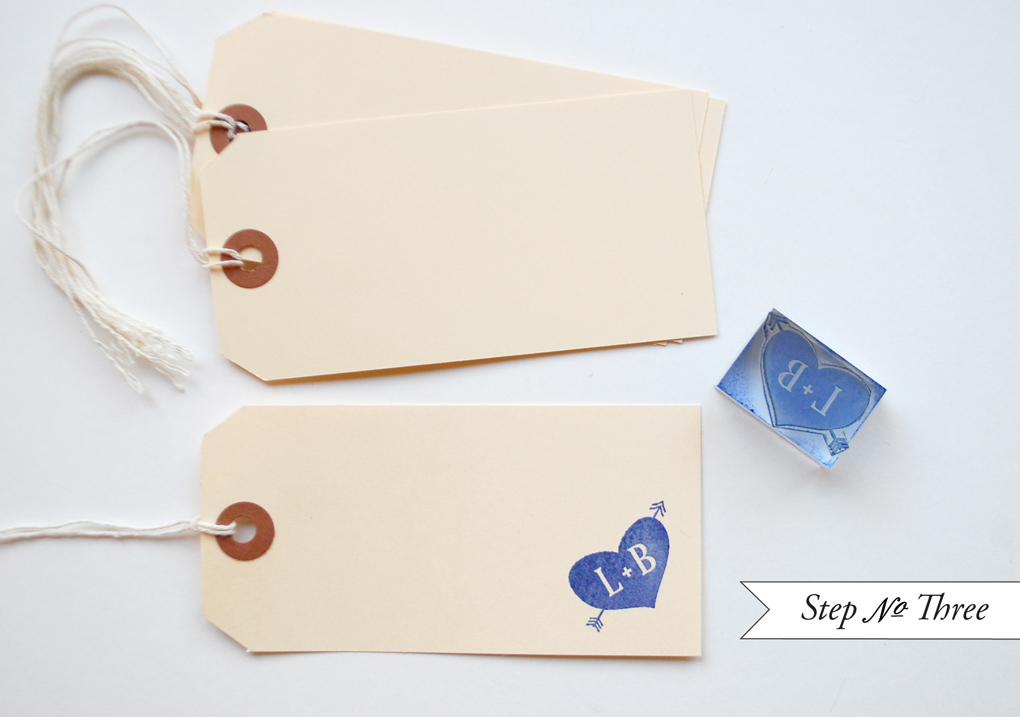
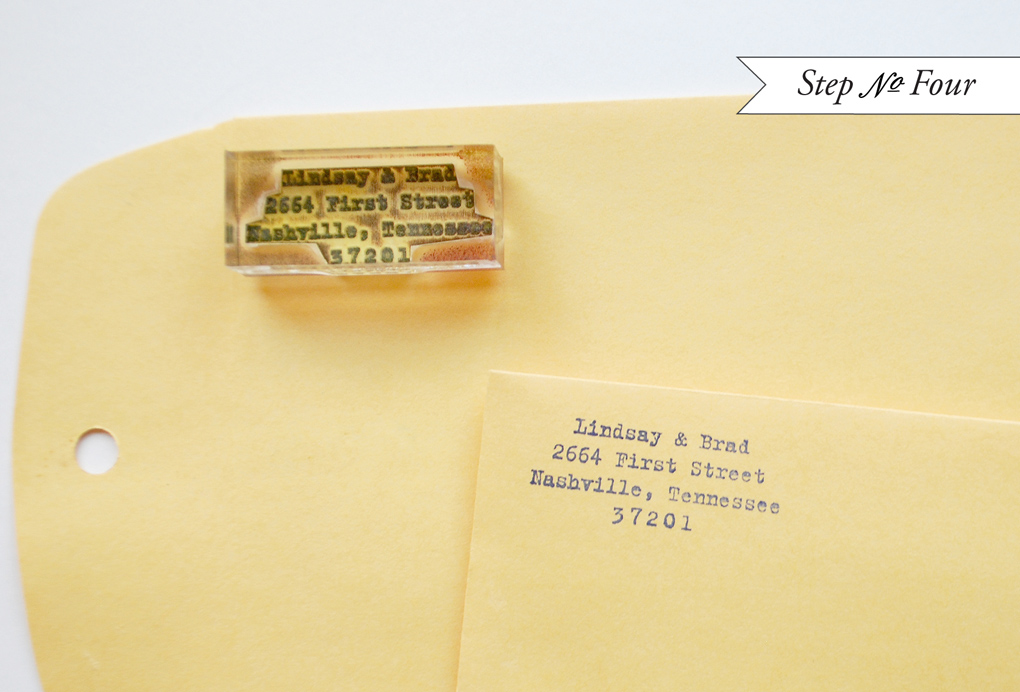
The save the dates were sent out in A6 box mailers wrapped in kraft paper and tied with twine.  We made rubber stamps of her save the date designs, which Melissa used to stamp on vintage handkerchiefs.  Mel also embossed their logo on the front of the box and stamped the return address.

DIY Rubber Stamp Wedding Invitations and Save the Dates via Oh So Beautiful Paper (9)

The hankies were wrapped in a variety of patterned papers, tied with bakers twine, and secured with a wooden close pin (from the French Laundry).

DIY Rubber Stamp Wedding Invitations and Save the Dates via Oh So Beautiful Paper (6)

DIY Rubber Stamp Wedding Invitations and Save the Dates via Oh So Beautiful Paper (10)

Thanks Bailey and Emma!

Invitation + Save the Date Design: Melissa LaPietra
Map Design + Rubber Stamps: Antiquaria

Anti­quaria is a mem­ber of the Designer Rolodex – you can see more of their beau­ti­ful work right here or visit the real wedding invitations gallery for more wedding invitation ideas!

Photo Credits: Melissa LaPietra and Intertwyned

Molly’s Zoo Theme Holiday Card + Moving Announcement

After moving to a new home and welcoming a second child, Molly from Paisley Quill decided to get super creative with her family’s annual holiday card – combining all three into one package!  Molly embraced the recent chaos, going with a fun zoo theme for the entire package accented with cute plastic zoo animals and lots of fun vintage stamps.

Paisley Quill Holiday Card/Moving Announcement via Oh So Beautiful Paper (7)

From Molly:  This year has been rather crazy for us.  We had another baby and purchased a new home that required lots of renovations in a short amount of time.  Needless to say, I fell behind on my correspondence.  So this year, I decided that it was high time I got caught up and sent everything out together.

Paisley Quill Holiday Card/Moving Announcement via Oh So Beautiful Paper (6)

In a little blue box, I sent our son’s birth announcement, our moving announcement, and Christmas card all together.  Tied up in a pretty little package and mailed to family and friends with lots of vintage stamps.  My friend Holly from the Paper Nickel gifted me the baby buggy stamp in honor of Callahan.

Paisley Quill Holiday Card/Moving Announcement via Oh So Beautiful Paper (2) Paisley Quill Holiday Card/Moving Announcement via Oh So Beautiful Paper

Paisley Quill Holiday Card/Moving Announcement via Oh So Beautiful Paper (8)

Since having two kids, our life has been a ZOO!  So I ran with the concept, creating both a birth announcement and moving announcement modeled after an information card from the zoo.  I had a custom stamp made and stamped all of the glassine envelopes with our new family “crest.”  I sealed the moving announcement with the zoo animals inside the envelopes and taped them shut with fabric tape.

Paisley Quill Holiday Card/Moving Announcement via Oh So Beautiful Paper (5)

Paisley Quill Holiday Card/Moving Announcement via Oh So Beautiful Paper (9)

Thanks so much Molly!

Photo Credits: Paisley Quill

*Paisley Quill is a sponsor of Oh So Beautiful Paper

DIY Tutorial: Rubber Stamp Airmail Save the Dates

While digging though Emma’s stash of vintage stamps a while back, we stumbled across old airmail that she had received from a long lost pen pal.  It made us nostalgic for the days of hand written correspondence – which in turn made us think it would be the perfect thing to inspire this save the date design and tutorial!  Best of all….it’s super simple to put together.  – Bailey and Emma of Antiquaria

DIY Tutorial: Rubber Stamp Airmail Save the Date by Antiquaria via Oh So Beautiful Paper

DIY Tutorial: Rubber Stamp Airmail Save the Date by Antiquaria via Oh So Beautiful Paper

DIY Tutorial: Rubber Stamp Airmail Save the Date by Antiquaria via Oh So Beautiful Paper

Step One: Lay out an A6 piece of cream heavyweight card stock on a smooth, hard surface.  Ink your save the date stamp (we used our Airmail Save the Date Stamp) with navy ink.  Center your stamp over the card and press firmly down to make the print.  Since there are no longer handles on our stamps (see note at the bottom of the post), you will want to make sure that you apply even pressure to all of the stamp, especially the center.  Lift stamp off and let the card dry.

DIY Tutorial: Rubber Stamp Airmail Save the Date by Antiquaria via Oh So Beautiful Paper

Step Two: To add an authentic airmail feel, draw lines with a red felt tipped marker or pen in between the blue stamped lines.

DIY Tutorial: Rubber Stamp Airmail Save the Date by Antiquaria via Oh So Beautiful Paper

Step Three: Personalizing your wedding stationery makes your guests feel special and really sets the tone for your upcoming event.  Let them know how you want much them there by adding a note to each guest on a monogrammed manila shipping tag.  We used our (Cross my Heart Initials Monogram Stamp) in navy ink on the corner of the tag to coordinate the tag & the save the date.  We then used the same red pen to write a note to each guest!

DIY Tutorial: Rubber Stamp Airmail Save the Date by Antiquaria via Oh So Beautiful Paper

Step Four: Sometimes simple is best.  On the left hand corner of our envelope, we stamped our return address using our Old Typewriter Return Address Stamp.

DIY Tutorial: Rubber Stamp Airmail Save the Date by Antiquaria via Oh So Beautiful Paper

Step Five: We finished off the save the date design by tying the pieces together using this awesome airmail twine!  It couldn’t be more perfect.  We addressed the envelopes in red and sent them on their way!

Note: We at Antiquaria are thrilled to announce that we’ve made the switch to acrylic mounts for all of our stamp designs.  Not only do the mounts make the product look clean, sleek and beautiful, they vastly improve their functionality & make printing the stamps easier!

Materials:

Airmail Save the Date Stamp

Cross my Heart Initials Monogram Stamp

Old Typewriter Return Address Stamp

Stamp Pad in Midnight

A6 Cards in Luxe Cream

Manila Shipping Tags 4 3/4″ x 2 3/8″

Manilla Envelopes – ours were vintage but this is a similar product

Airmail Twine

Red Pen

Anti­quaria is a mem­ber of the Designer Rolodex – you can see more of their beau­ti­ful work right here or visit the real wedding invitations gallery for more wedding invitation ideas!

Photo Credits: Antiquaria

Jody + Rain’s Eastern-Inspired Lasercut Wood Wedding Invitations

Designer Kate Holgate sent over these fantastic invitations that she designed for a recent destination wedding in the mountains of Colorado.  I love the way Kate combine two very different influences – a woodsy outdoor wedding venue and Eastern-inspired elements – within the framework of a very cool lasercut wood veneer design.  So unique!

Lasercut Wedding Invitations by Kate Holgate via Oh So Beautiful Paper (1)

From Kate: Jody and Rain contacted me about designing their save the date and invitation for an outdoor mountain destination wedding in Durango, Colorado.  Jody and Rain wanted something that was outdoorsy, but not the commonly used rustic cowboy theme.  Jody is an accomplished yogi and Rain used to teach Tae Kwon Do, so they wanted something unique and natural that also carried an Eastern vibe.  They loved the idea of incorporating real wood, lots of texture and ornate Eastern patterns.  Their color palette was inspired by the purple wildflowers of the Rocky Mountains: aster, bachelor buttons, wild lupine with accents of bright green.

Lasercut Wedding Invitations by Kate Holgate via Oh So Beautiful Paper (11) Lasercut Wedding Invitations by Kate Holgate via Oh So Beautiful Paper (10)

Lasercut Wedding Invitations by Kate Holgate via Oh So Beautiful Paper (9)

For the save the date, we printed cherrywood veneer cards from Cards of Wood and attached a small envelope teaser.  I designed a monogram that contained the bride and grooms initials in a modernized Eastern-influenced font.  Rain sent me a photo of a tapestry that he and Jody loved thus inspiring the custom lotus pattern used throughout the suite.  Attached to the save the date card was a folded trail map of the wedding destination: Durango Mountain Resort.

Lasercut Wedding Invitations by Kate Holgate via Oh So Beautiful Paper (5)

Lasercut Wedding Invitations by Kate Holgate via Oh So Beautiful Paper (12)

For the wedding invitation, I designed a custom lasercut wood piece.  Candyspotting did a phenomenal job producing the intricate design on matching cherrywood veneer.  Rain mention that he was fond of a particular mountain called The Diamond at Longs Peak.  I used this mountain’s profile in the design and surrounded it with Eastern ornaments and floral shapes.  I enclosed the lasercut card in a deep purple petal pouchette, fastened shut by a lotus-motif pattern sticker and tied in twine.

Lasercut Wedding Invitations by Kate Holgate via Oh So Beautiful Paper (6)

The RSVP card was a printed wood piece slipped inside a bright green mini envelope.  The entire set was contained by a monogram-stamped muslin bag.  Using the monogram and lotus pattern, we also printed ceremony programs backed by matching cherrywood.

Lasercut Wedding Invitations by Kate Holgate via Oh So Beautiful Paper (8)

Lasercut Wedding Invitations by Kate Holgate via Oh So Beautiful Paper (7)

Thanks so much Kate!

Check out the Designer Rolodex for more tal­ented wed­ding invi­ta­tion design­ers and the real invi­ta­tions gallery for more wedding invitation ideas!

Photo Credits: Kate Holgate

Emma’s Modern Orange Bat Mitzvah Invitations

Bar and Bat Mitzvah invitations can be really tough: they have to walk a fine line, trying to stay away from being too adult or too childish while also remaining respectful of the tradition itself.  Aubrey from J. Papers created these fantastic  invitations for a recent Bat Mitzvah in Connecticut.  The invitations combine bright orange with white foil for a crisp and modern design that is simultaneously youthful and sophisticated.

Modern Bat Mitzvah Invitations by J. Papers via Oh So Beautiful Paper (3)

From Aubrey:  This invitation suite has so much style and sophistication while remaining age appropriate – we love that!  The main invitation panel is made with extra thick orange stock.  The invitation was foil stamped to get the crisp, opaque white text and border.

Modern Bat Mitzvah Invitations by J. Papers via Oh So Beautiful Paper (4) 

Modern Bat Mitzvah Invitations by J. Papers via Oh So Beautiful Paper (1)

We also designed a basket weave pattern in Emma’s signature orange color to use for the envelope liner.  There were two inserts: a letter flat printed on vellum paper; and an rsvp card on bright white cotton stock.  Both the reply envelope and the invitation outer envelope were adorned with a custom stamp featuring the custom Bat Mitzvah event logo we designed specifically for Emma.

Modern Bat Mitzvah Invitations by J. Papers via Oh So Beautiful Paper (2)

Thanks Aubrey!

Photo Credits: J. Papers