Bourbon Pear Vanilla Bean Smash

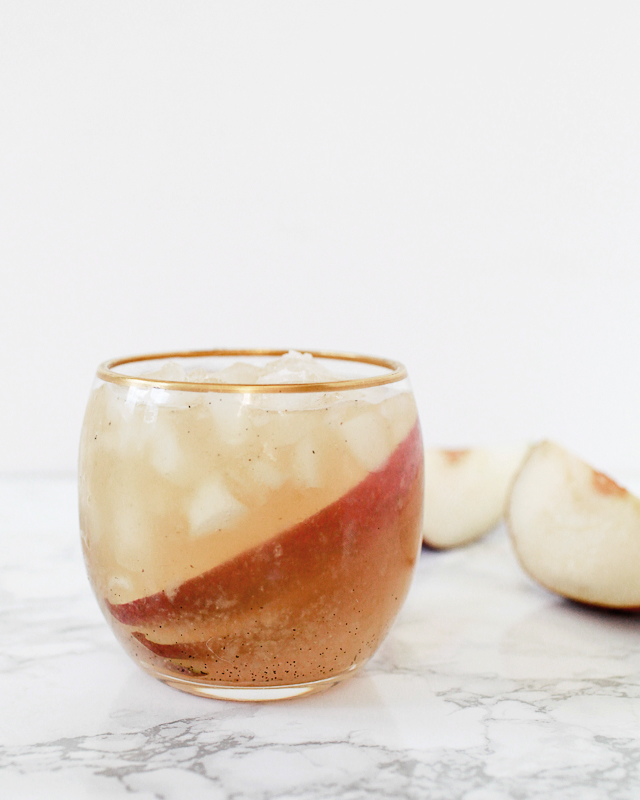
It’s nearly Thanksgiving, and I’m thinking about cocktails I’d like to drink during my most favorite of all holidays. Fruit, spice, and the warmth of bourbon – all those woodsy and caramel and vanilla notes – that’s what I’m looking for right now. So I decided to – literally – smash all those together in one really fantastic drink that I hope you try this turkey day. – Andrew

Bourbon Pear Vanilla Bean Smash Cocktail Recipe / Liquorary for Oh So Beautiful Paper

Vanilla-Pear Bourbon Smash

2 oz Bourbon Whiskey
1/2 oz Simple Syrup
1/2 oz Lemon Juice
1/4 of a Pear, Diced
1 piece of Vanilla Bean, about an inch long
Perry (optional)

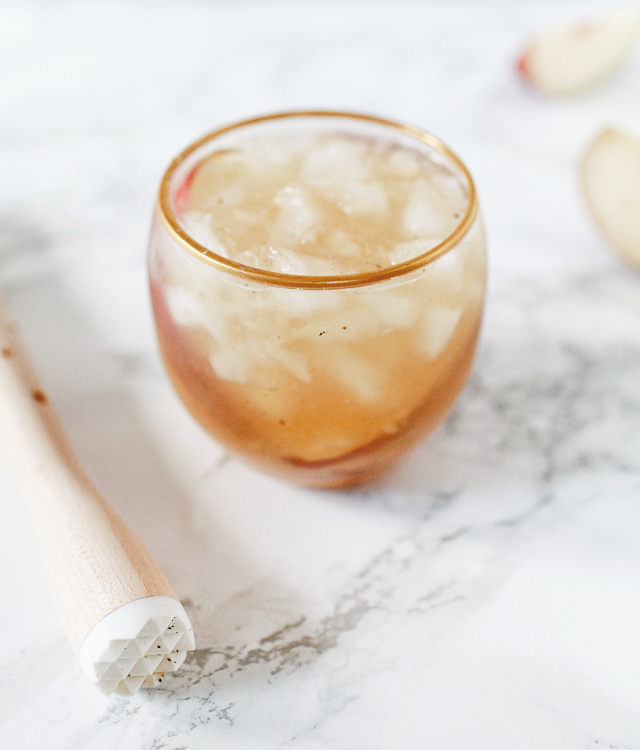
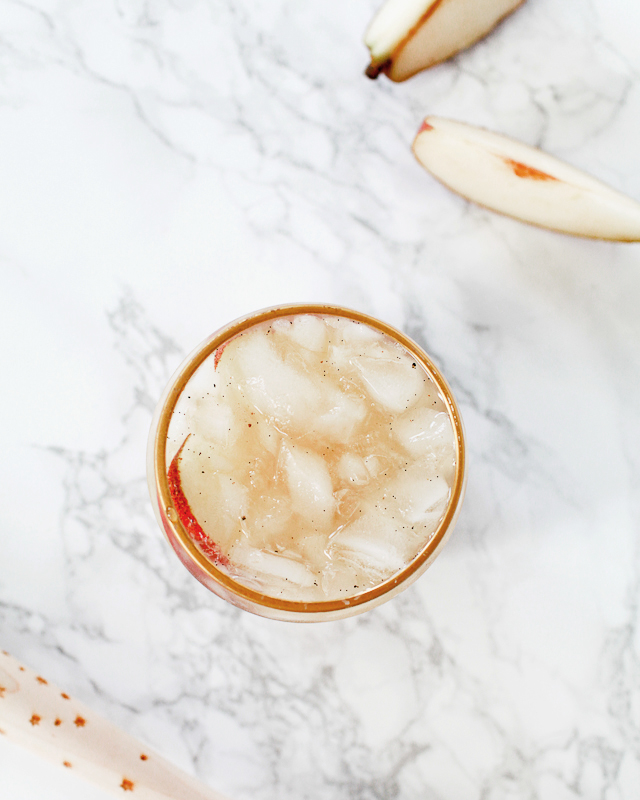
In a dry cocktail shaker, grind up the vanilla bean with a muddler, then add the pear and muddle that too. Add the bourbon, simple syrup, and lemon juice. Put a few big pieces of ice in the shaker and shake well. Strain into a glass filled with fresh cracked ice. Enjoy!

Bourbon Pear Vanilla Bean Smash Cocktail Recipe / Liquorary for Oh So Beautiful Paper

This drinks works just fine like this, with lots of fruit and warm vanilla spice flavors, and just enough tart zing from the lemon to balance out the sweetness of the pears and bourbon. But I also really like it topped with a splash of perry, an alcoholic drink made from fermented pears the way (hard) cider is made from apples. The perry adds an edge of crisp, dry fruit and a sparkling fizz that really peps up the drink.

Bourbon Pear Vanilla Bean Smash Cocktail Recipe / Liquorary for Oh So Beautiful Paper

But look: this is Thanksgiving. There’s no need to stress about the drinks.

(Don’t forget to follow us on Instagram, where we’ve been posting our experiments before they make their way onto this column!)

Glassware by Liquorary

Photo Credits: Nole Garey for Oh So Beautiful Paper

DIY Paper Flower Advent Calendar

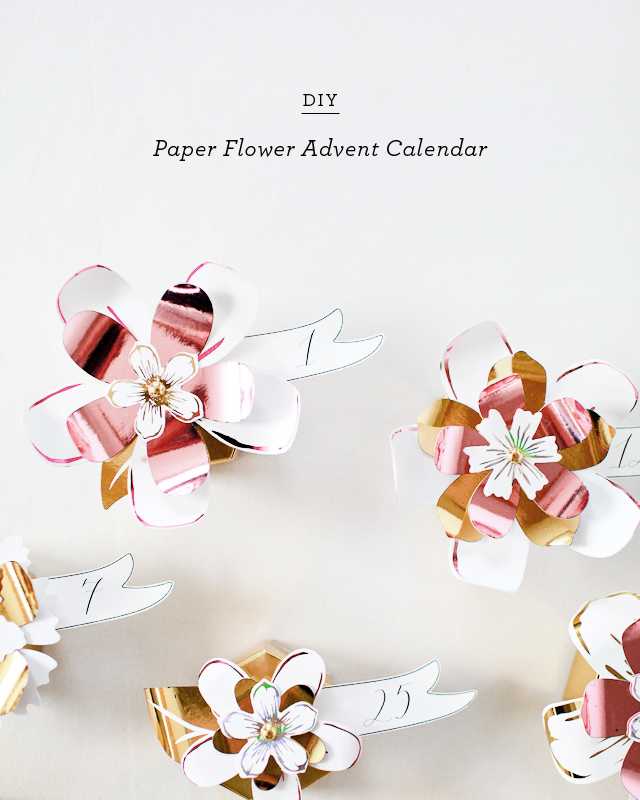
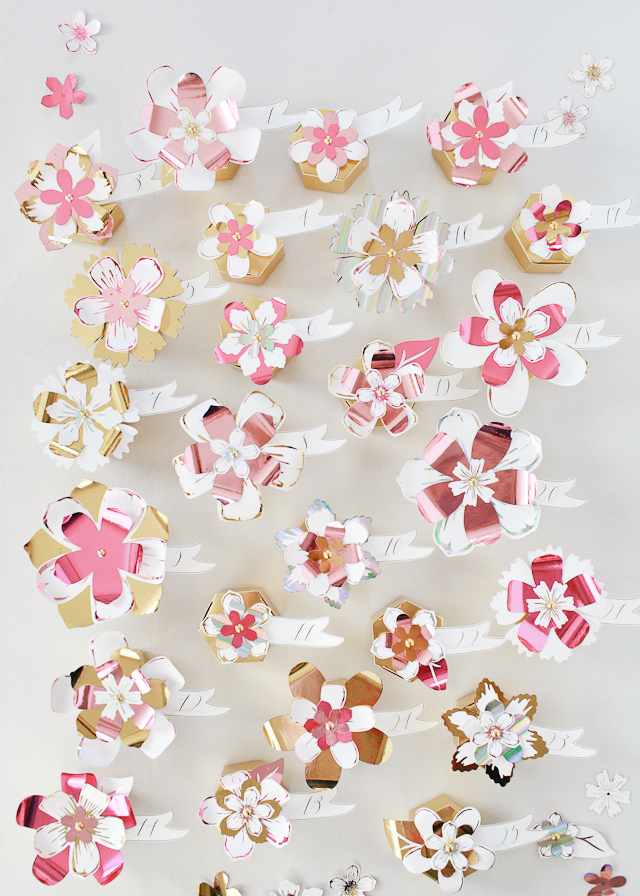
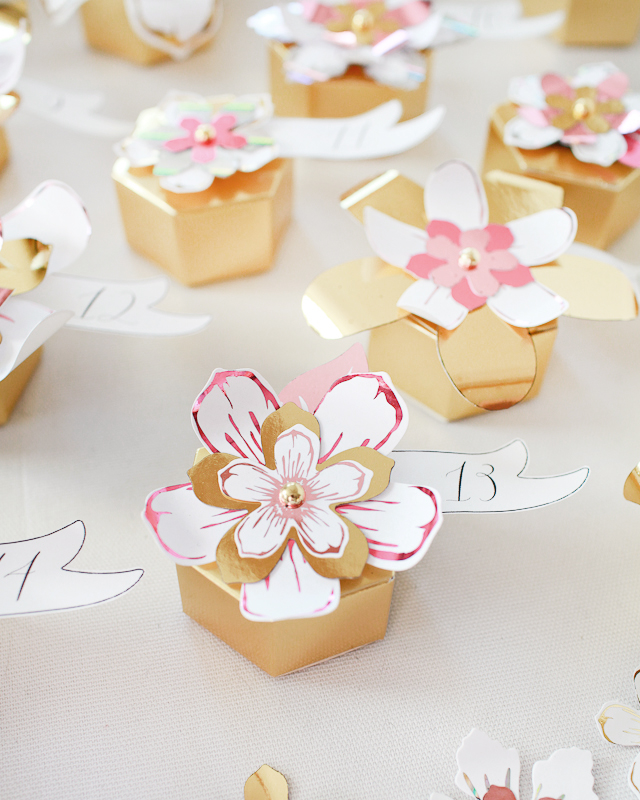
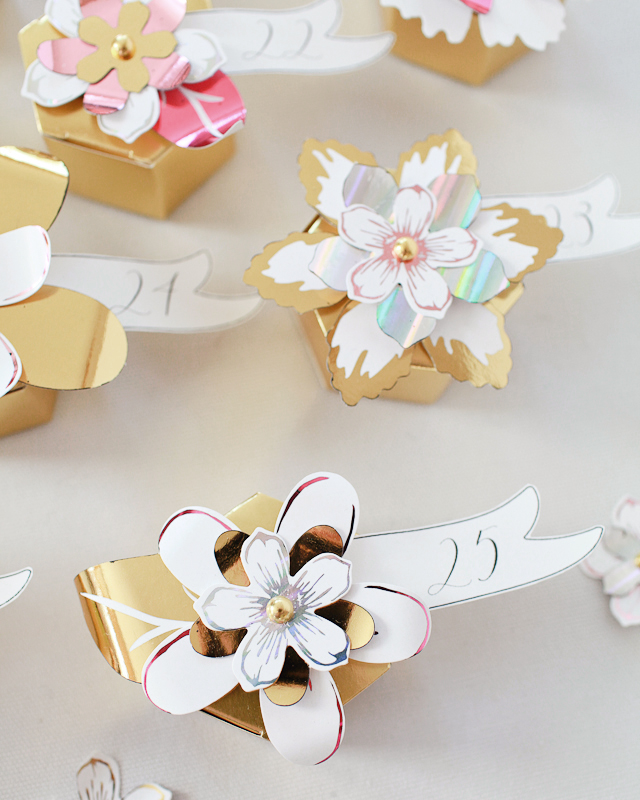
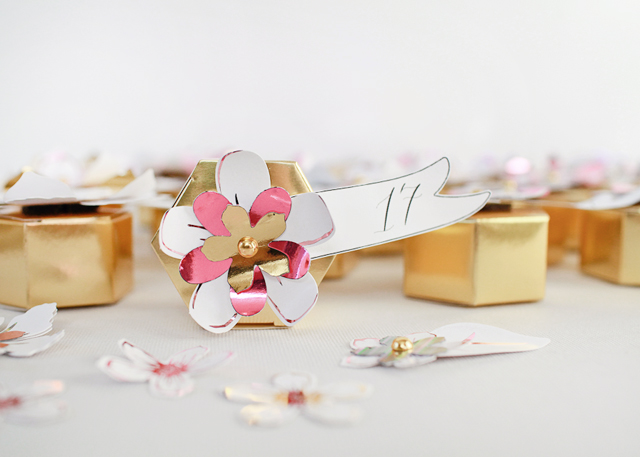
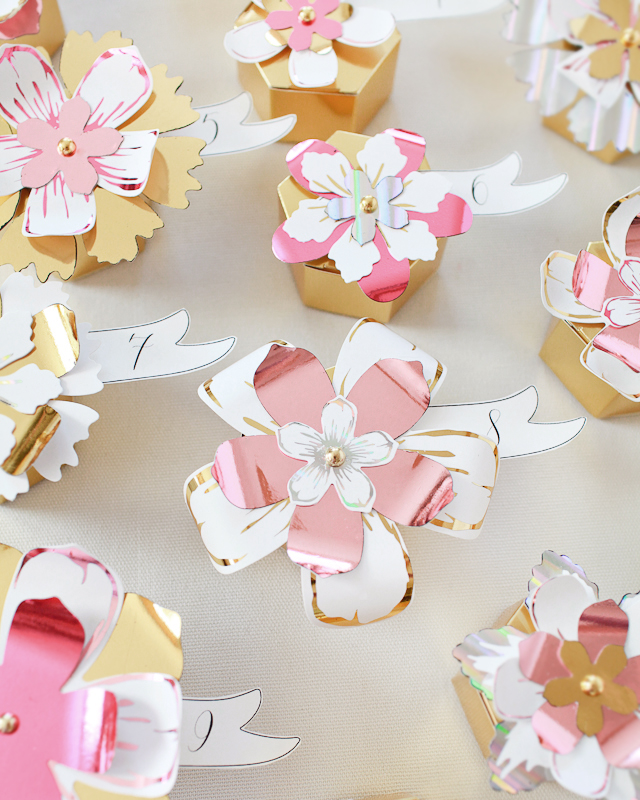
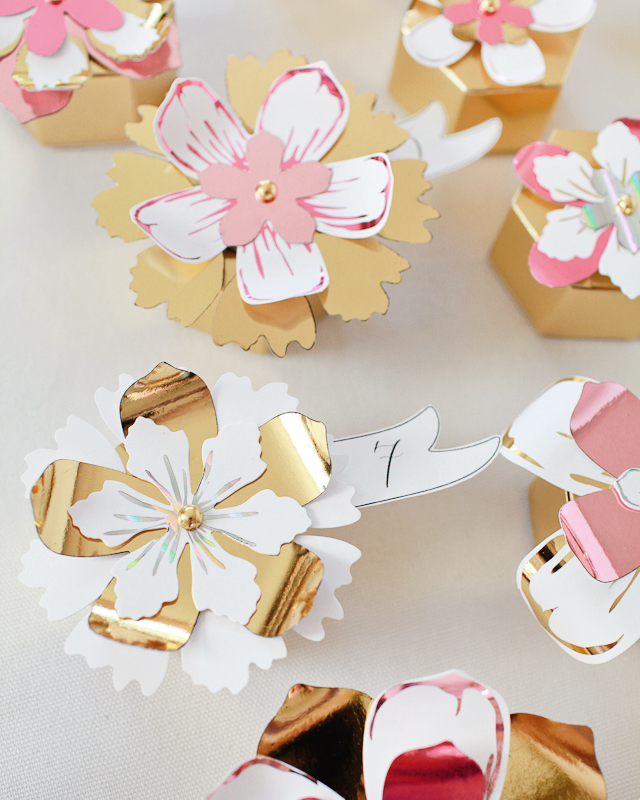
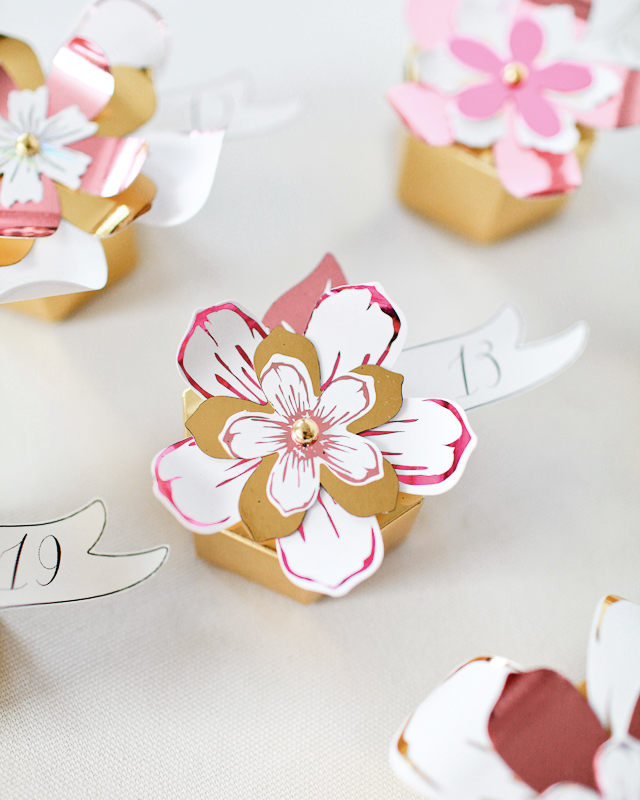
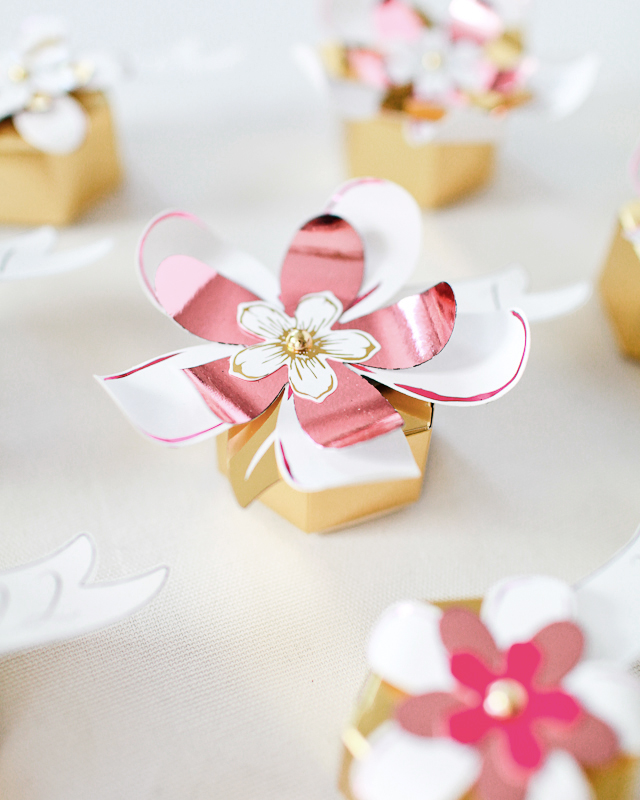
You guys! I’m SO excited to share today’s DIY post! I’ve been wanting to make an advent calendar for years, but I never really found something that felt quite like “me.” Well, along came my favorite Heidi Swapp Minc foil applicator and all of a sudden it just clicked! I shared a couple of DIY projects over the summer involving the Minc, but if you want to create your own DIY projects with the Minc you need access to a laser printer or copier since it works with toner ink. Well, for those of us that might not have regular access to a laser printer or copier, Heidi Swapp offers a few ready made DIY kits – including these amazing 3D flowers! I decided to pair the 3D flowers with some gold hexagon favor boxes from the Oh Happy Day party shop to create a DIY paper flower advent calendar of my dreams!

DIY Paper Flower Advent Calendar / Oh So Beautiful Paper

DIY Paper Flower Advent Calendar / Oh So Beautiful Paper

DIY Paper Flower Advent Calendar / Oh So Beautiful Paper

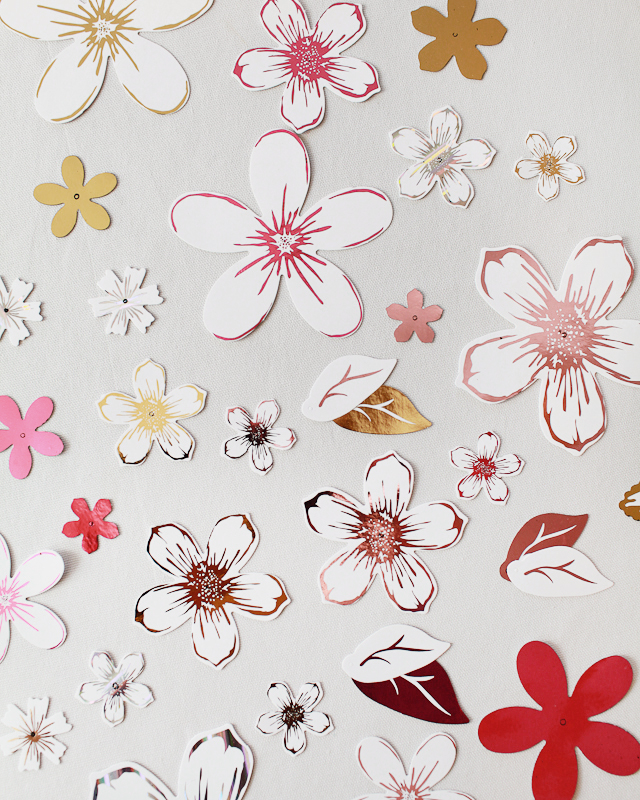
The Minc has easily become my favorite DIY tool in the last few months. You can find the Minc at Michael’s and craft stores, or pick one up right here. This was my first time experimenting with one of the readymade kits and I’m now completely obsessed with these 3D flowers. They come flat in sheets with pre-printed toner ink, so you just run them through the Minc to apply the foil – then pop them out and assemble the layers into beautiful flowers! I kind of want to do an entire backdrop using these gorgeous metallic flowers! But I’m getting ahead of myself. The holidays are just around the corner: advent calendars first!

DIY Paper Flower Advent Calendar / Oh So Beautiful Paper

DIY Paper Flower Advent Calendar / Oh So Beautiful Paper

DIY Paper Flower Advent Calendar / Oh So Beautiful Paper

To make the DIY paper flower advent calendar:

Step 1. Cut sheets of foil just big enough to fit over each flower sheet. We chose light pink, hot pink, gold, and silver hologram foil, and we were able to fit three sheets of flowers at a time in the Minc folder. Run the flowers through the Minc foil applicator on high heat (at least the “4” setting).

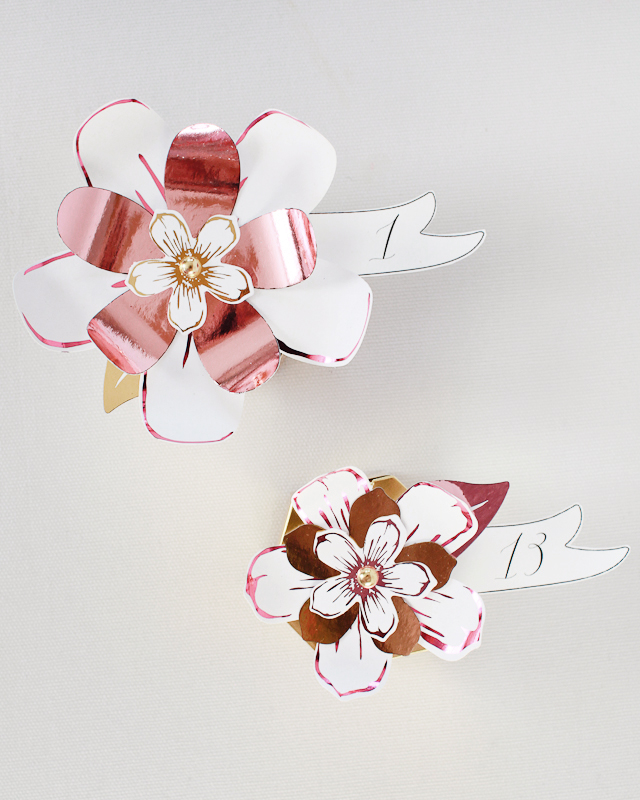
Step 2. Pop the foiled flowers out of each sheet and assemble flowers according to package instructions. You’ll want a total of twenty-five flowers with a nice mix of large, medium, and small flowers for the advent calendar.

Step 3. Print the advent calendar number template on text weight paper and cut out each number. Place a number under each flower, then adhere to the gold hexagon boxes using double-sided tape or removable mounting squares.

Step 4. Fill each box with candy or small trinkets! You can use removable mounting squares to mount the boxes to the wall, or just set them out on a side table to open and enjoy!

DIY Paper Flower Advent Calendar / Oh So Beautiful Paper

DIY Paper Flower Advent Calendar / Oh So Beautiful Paper

DIY Paper Flower Advent Calendar / Oh So Beautiful Paper

DIY Paper Flower Advent Calendar / Oh So Beautiful Paper

DIY Paper Flower Advent Calendar / Oh So Beautiful Paper

DIY Paper Flower Advent Calendar / Oh So Beautiful Paper

I can’t wait to start the advent calendar tradition with Sophie – she already spotted the flowers on my desk and she’s so excited to open all the little boxes! Are any of you planning to do an advent calendar this year?

This post was created in partnership with American Crafts. All content and opinions are my own. Thank you for supporting the sponsors that make Oh So Beautiful Paper possible!

Photos by Nole Garey for Oh So Beautiful Paper

Handwritten Holiday Traditions with Shutterfly

This post is sponsored by Shutterfly. This post is sponsored by Shutterfly. Share and celebrate your family update. Shop Shutterfly for personalized holiday cards that are unique, meaningful and that are just the way you want.

The holidays are all about tradition. Both the old traditions we grew up with and the new traditions we establish as we marry and grow our own families, like sending beautiful holiday cards with a thoughtful handwritten note to family and friends! Laura is a recent newlywed, longtime OSBP reader, and a stationery enthusiast. Laura and her husband Jeremy eloped earlier this summer, but celebrated their marriage a few weeks ago with a big, epic, DIY wedding for all of their family and friends. This will be Laura and Jeremy’s first time sending holiday photo cards as a married couple and we were super excited to work with Shutterfly to start this new tradition!
Handwritten Holiday Traditions with Shutterfly Holiday Photo Cards with Gold Foil / Oh So Beautiful Paper

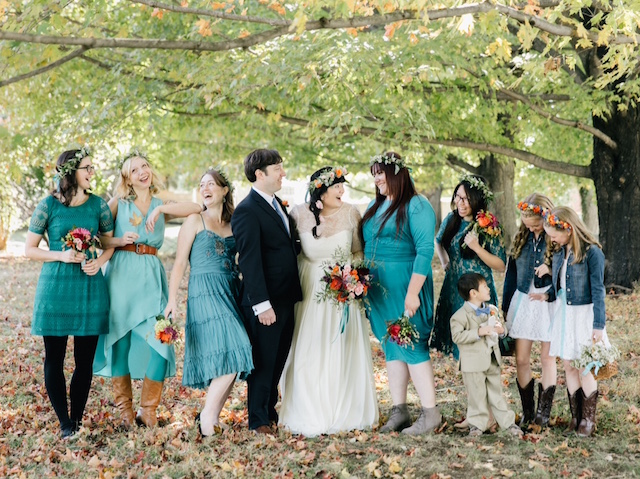
Laura and Jeremy's DIY Backyard Wedding with Flower Crowns / Photo by Emily Wren / Oh So Beautiful Paper

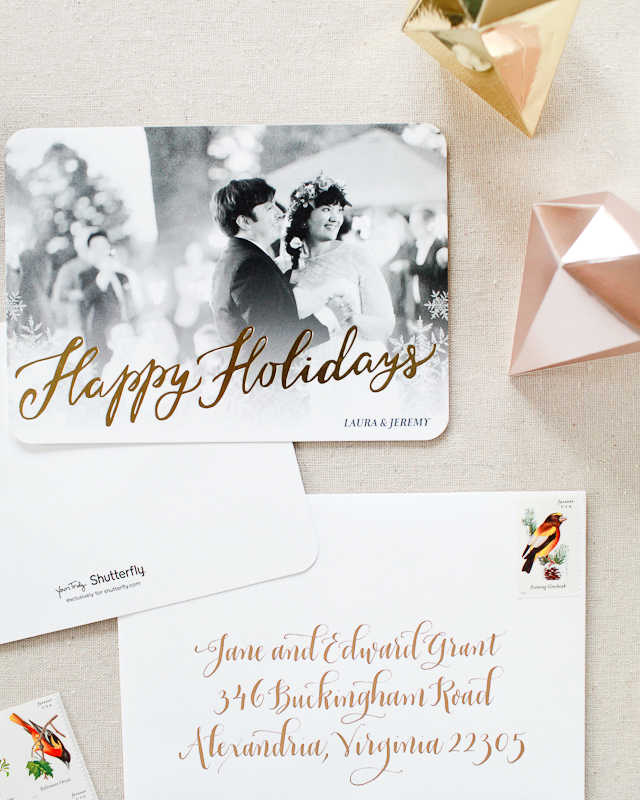
Laura and Jeremy did everything for their wedding by hand – enlisting the help of their very talented friends to hand dye lanterns, wrap favors, create flower crowns and bouquets, and so much more. The gorgeous wedding photos by Emily Wren were just begging to make an appearance on her holiday cards! Shutterfly’s beautiful foil-stamped holiday photo cards were the perfect way to share a favorite wedding photo with friends and family. Laura was immediately drawn to Shutterfly’s Susurration of Snow design with rounded edges and a simple holiday message in gold foil, which paired beautifully with a photo from Laura and Jeremy’s first dance.
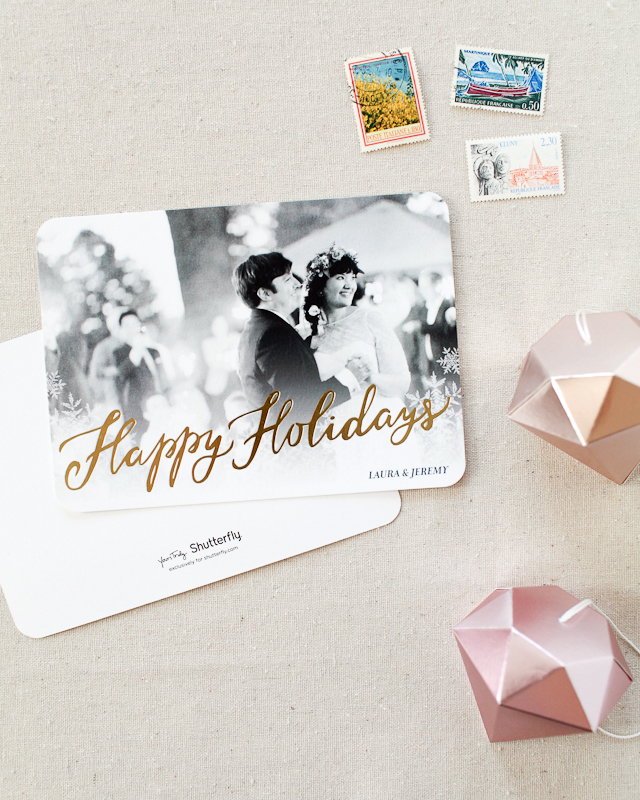
Handwritten Holiday Traditions with Shutterfly Holiday Photo Cards with Gold Foil / Oh So Beautiful Paper

From Laura: This is our first time sending holiday photo cards! I love all things paper, so I was really excited to start the tradition of sending holiday cards as a married couple. I’m the kind of person that likes to do things myself and our wedding was an epic DIY affair, so it was important to me that our holiday cards included calligraphy elements and had a space for a handwritten message.
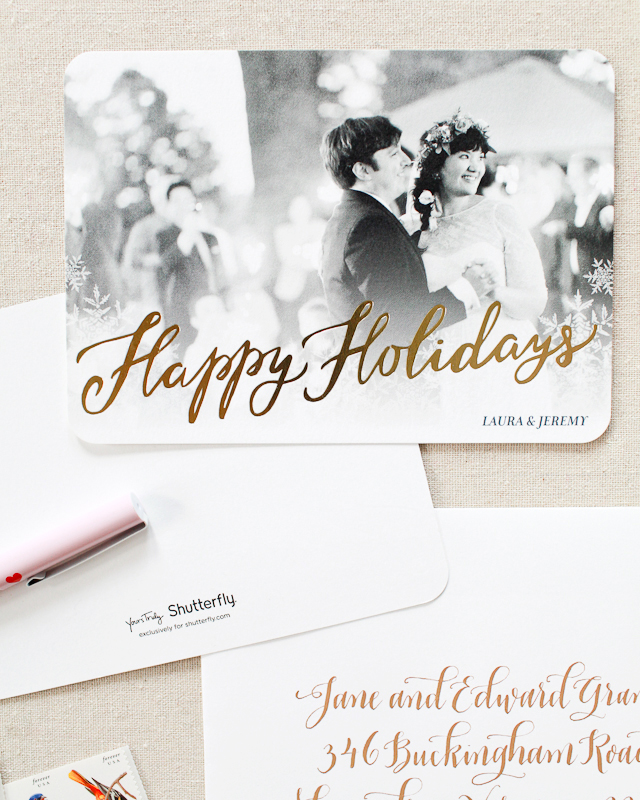
Handwritten Holiday Traditions with Shutterfly Holiday Photo Cards with Gold Foil / Oh So Beautiful Paper

I fell for the Susurration of Snow design because it reminded me of all the things I love about the holidays. I was really attracted to the gold foil and the handwritten calligraphy elements, which made the card feel extra special. When we paired our first dance photo with that particular design I felt like the snow flakes really warmed up the photo visually – like a cozy hug. I also loved how the snowflakes and snow dust blended seamlessly with the sparklers in the background. The cheerful envelope liners were also a big bonus! The liners make the holiday cards feel extra special for everyone receiving them and bring a sense of importance to our holiday cards. The overall design feels very warm and inviting – and will remind our families of what a happy year 2015 has been for us.
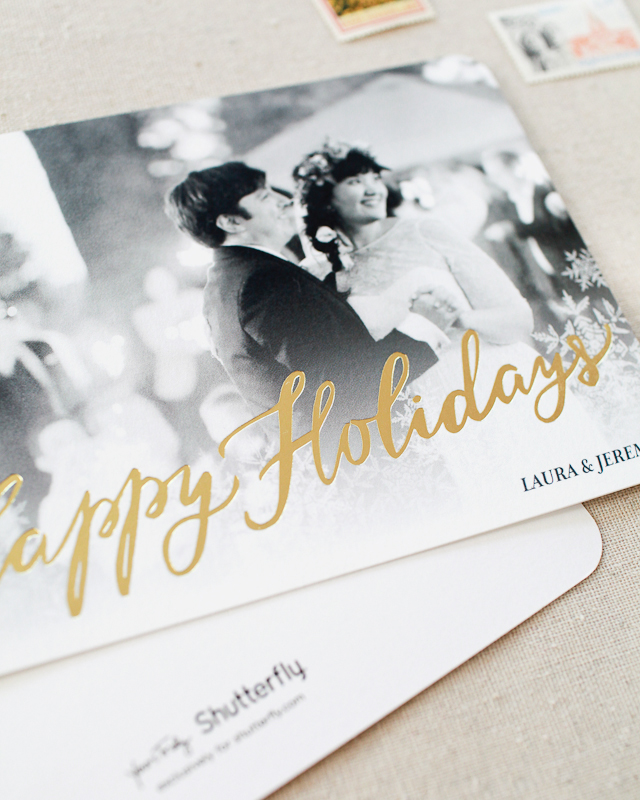
Handwritten Holiday Traditions with Shutterfly Holiday Photo Cards with Gold Foil / Oh So Beautiful Paper

The gold foil with a black and white wedding photo? So gorgeous. When it comes to holiday photo cards, I prefer a matte photo printed directly onto the paper. It just feels so much more luxe and special. Also, I’m completely obsessed with Laura’s flower crown, and the fact that Laura and Jeremy are positively glowing made it the perfect choice for her holiday photo cards.
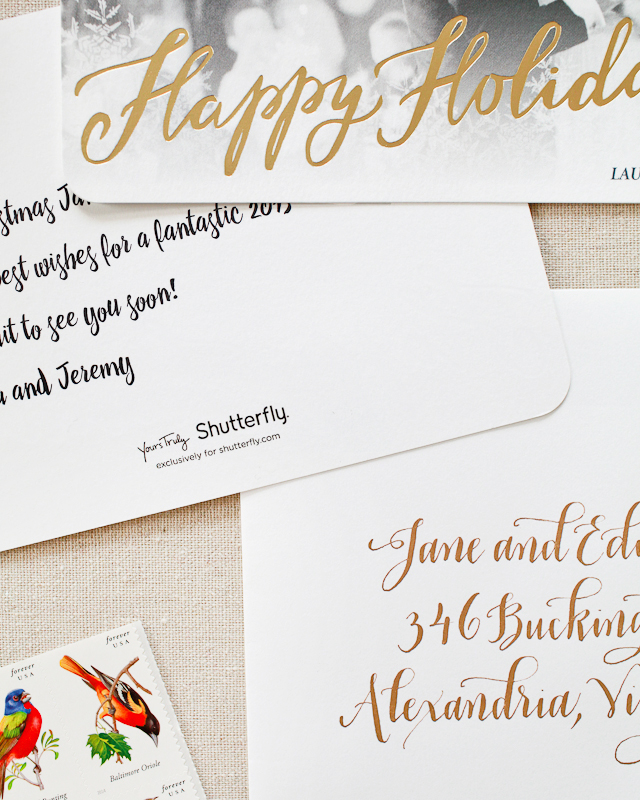
Handwritten Holiday Traditions with Shutterfly Holiday Photo Cards with Gold Foil / Oh So Beautiful Paper

We left the back of the card blank to allow for a handwritten message to friends and family and picked out an adorable envelope liner to complement the design. White envelopes addressed in shimmery gold ink by Meant To Be Calligraphy and paired with songbird postage stamps were the perfect finishing details!
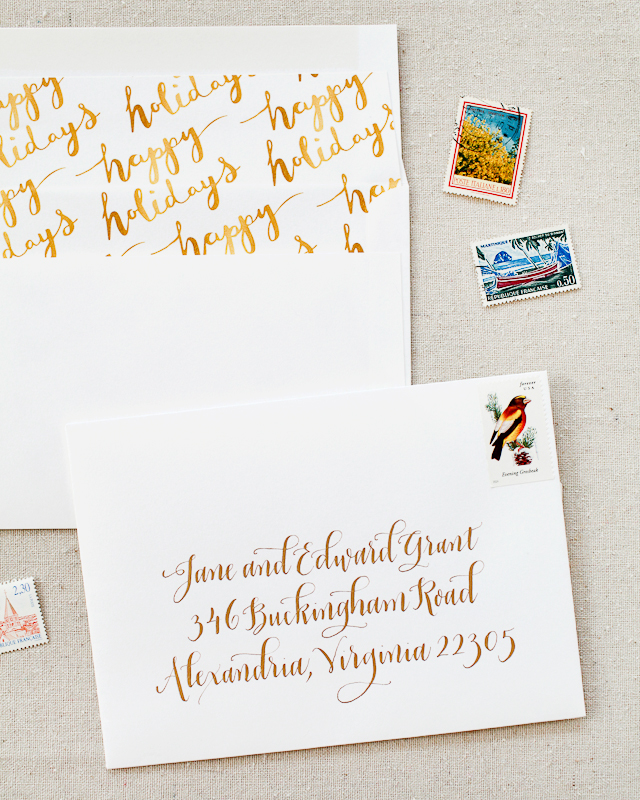
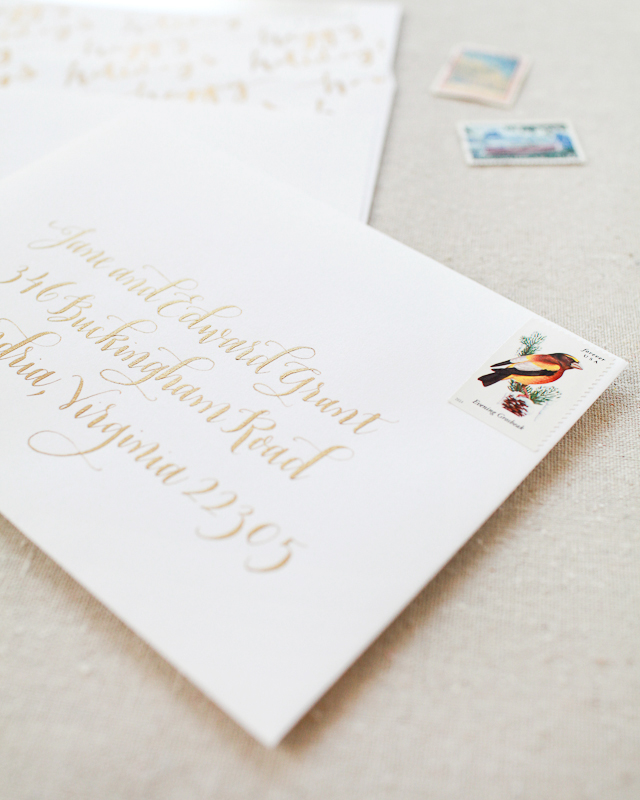
Handwritten Holiday Traditions with Shutterfly Holiday Photo Cards with Gold Foil / Oh So Beautiful Paper

Handwritten Holiday Traditions with Shutterfly Holiday Photo Cards with Gold Foil / Oh So Beautiful Paper

Laura and I are both thrilled with how her holiday photo cards turned out, and I know her friends and family will love receiving a card that represents such a joyful moment in their life together!

This post is sponsored by Shutterfly. Share and celebrate your family update. Shop Shutterfly for personalized holiday cards that are unique, meaningful and that are just the way you want.

Photo Credits: Laura’s wedding photos by Emily Wren, all other photos by Nole Garey for Oh So Beautiful Paper
Wedding Stationery Inspiration: Fall Wedding Details

Fall weddings are my favorite. I love the rich color palettes and warm details inspired by the cool and crisp weather. Here are some simple ways to incorporate the season into your wedding. – Annie

Wedding Stationery Inspiration: Fall Wedding Details / Oh So Beautiful Paper

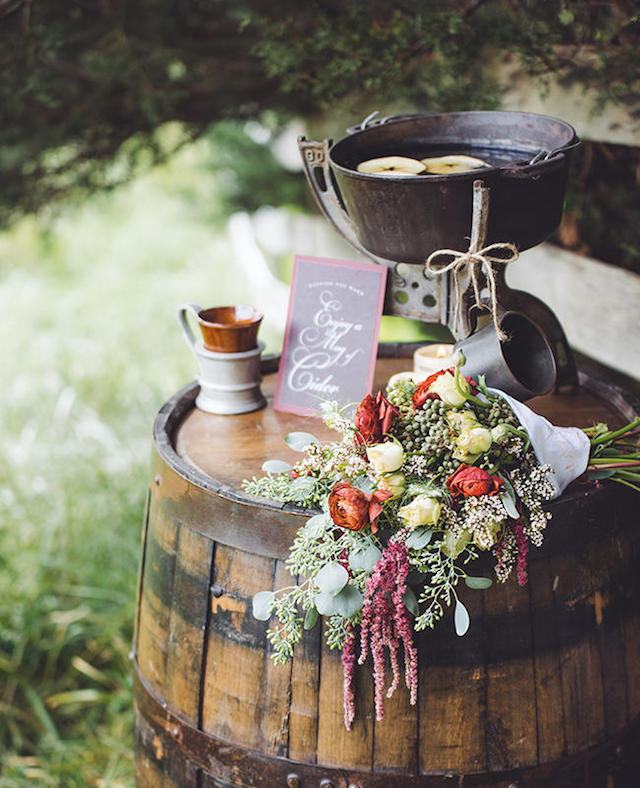
Create a drink station with hot apple cider, fall florals, and bold signage. | Photography: Aster & Olive Photography via The Knot

Wedding Stationery Inspiration: Fall Wedding Details / Oh So Beautiful Paper

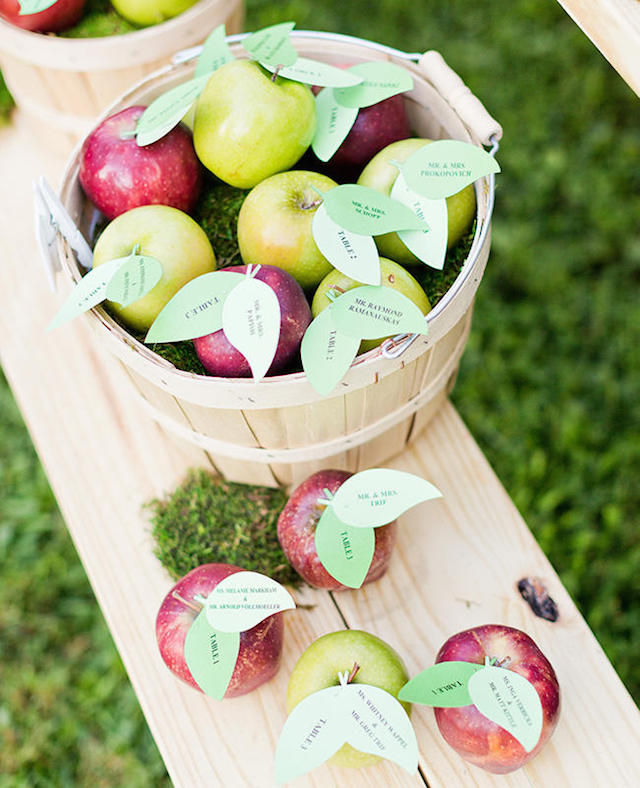
Use apples with paper leaves as escort cards. | Photography: Cassi Claire Photography via The Knot

Wedding Stationery Inspiration: Fall Wedding Details / Oh So Beautiful Paper

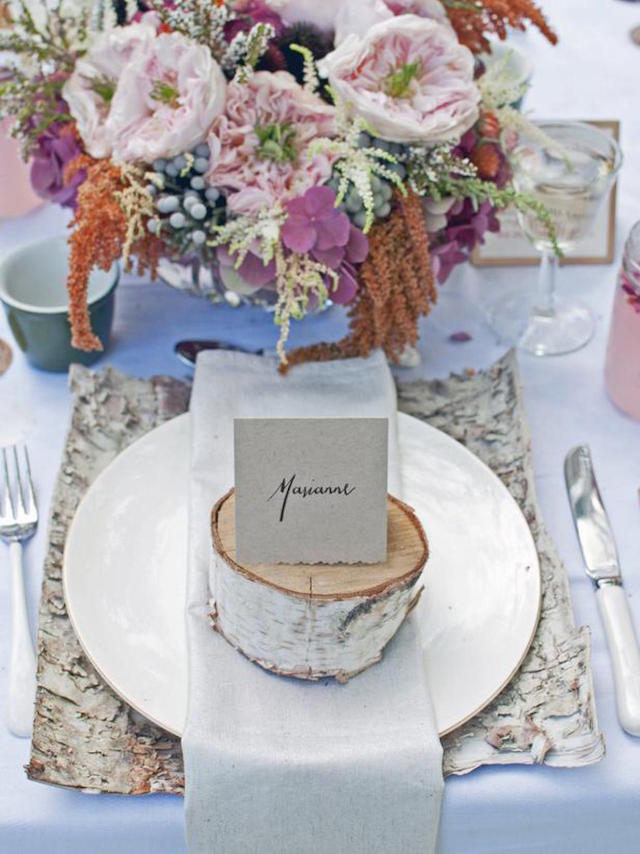
Use birch wood to create unique place settings. | Source: HGTV

Wedding Stationery Inspiration: Fall Wedding Details / Oh So Beautiful Paper

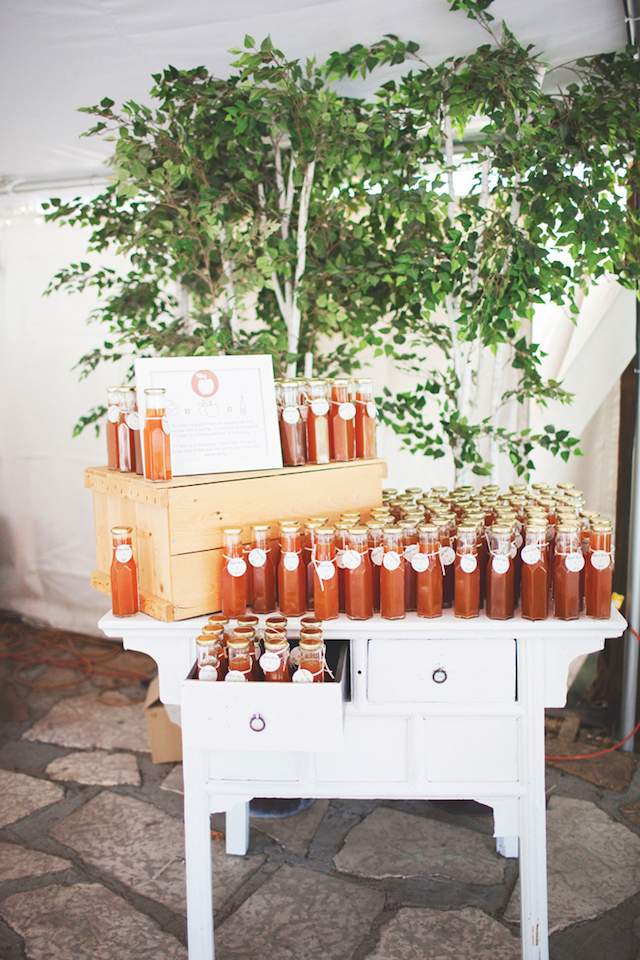
Bottle homemade apple cider and add personalized tags for favors. | Photography: This Sweet Love Photography via Weddings In Winnipeg

Wedding Stationery Inspiration: Fall Wedding Details / Oh So Beautiful Paper

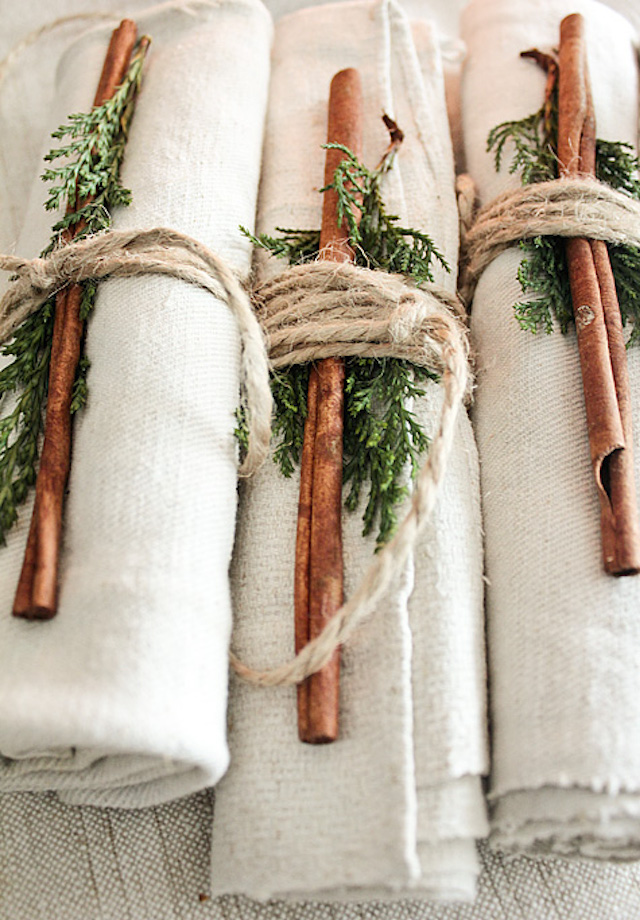
Create napkin ties by wrapping tree trimmings and cinnamon sticks with twine. | Source: Vintage House

Wedding Stationery Inspiration: Fall Wedding Details / Oh So Beautiful Paper

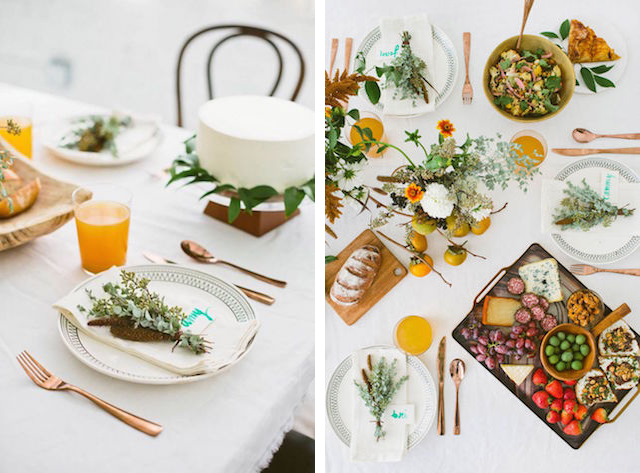
Add floral bundles and watercolor place cards to each plate. | Photography: Brittany Wood, Florals: Moon Canyon via designlovefest

Wedding Stationery Inspiration: Fall Wedding Details / Oh So Beautiful Paper

Add a copper wax seal to escort cards for a timeless touch. | Photography: Sylvie Gil, Invitation Suite: Little Miss Press via Style Me Pretty

Wedding Stationery Inspiration: Fall Wedding Details / Oh So Beautiful Paper

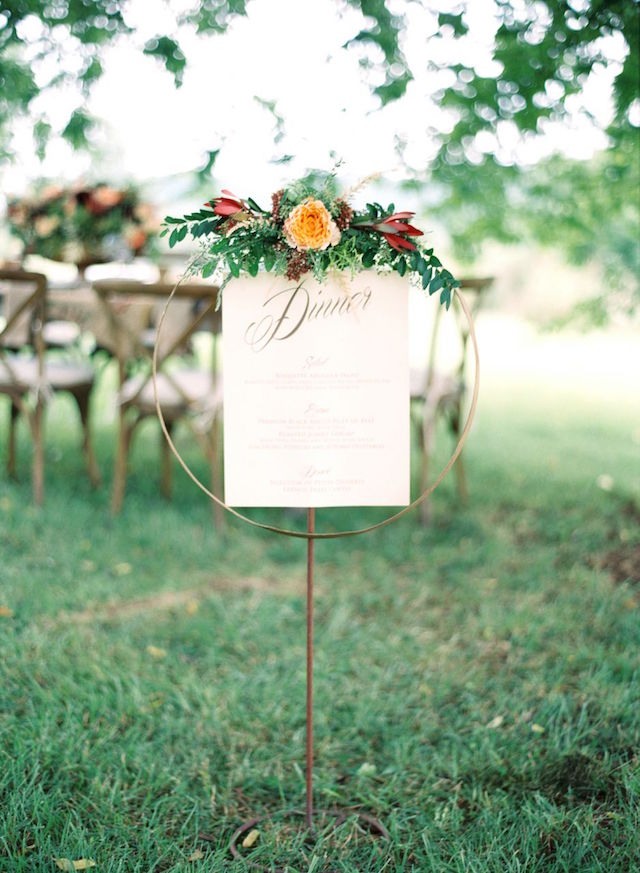
Display menus and other signs in metallic hoops adorned with florals. | Photography: Elisa Bricker, Paper Suite: Southall Eden via 100 Layer Cake

Wedding Stationery Inspiration: Fall Wedding Details / Oh So Beautiful Paper
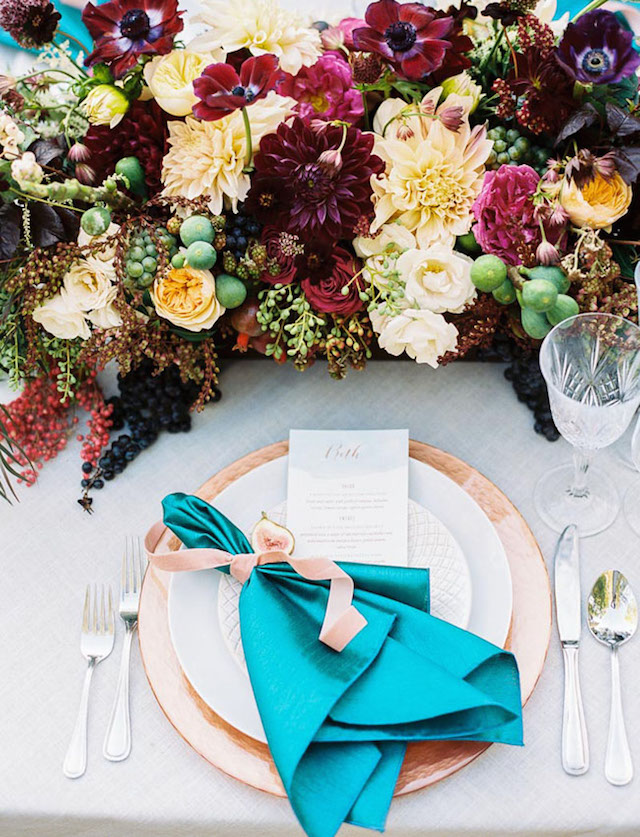
Use deep, rich colors for the florals while keeping the paper goods more neutral (but still beautiful). | Photography: Danielle Poff Photography, Paper Goods: Little Miss Press via Green Wedding Shoes

Wedding Stationery Inspiration: Fall Wedding Details / Oh So Beautiful Paper
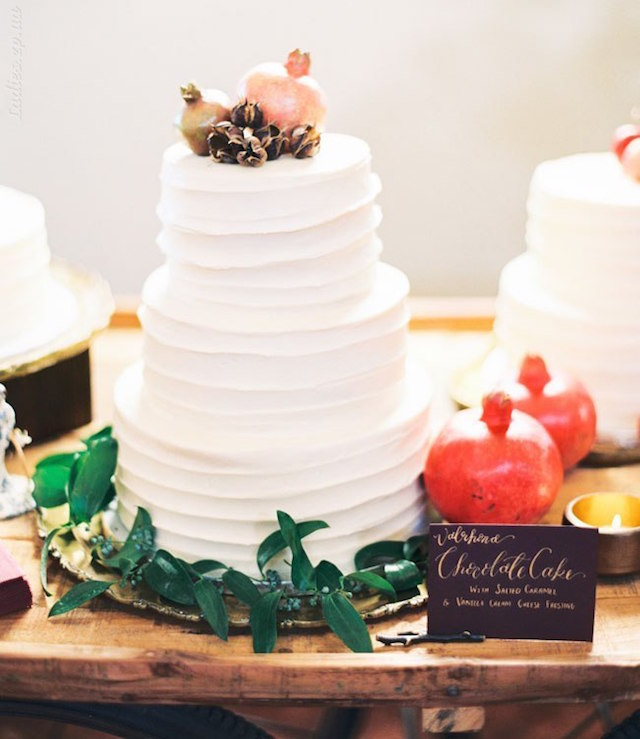
Add pomegranates, greenery, and black food label cards with gold calligraphy to the dessert table. | Photography: Taylor Lord, Design, Florals, & Stationery: The Nouveau Romantics, Calligraphy: Crown and Clover via Green Wedding Shoes

What time of year is your favorite for weddings?

Midnight in San Francisco Wedding Invitations + A Little Behind the Scenes

Emily and Eric’s wedding invitation design is one of my favorites! They were such a fun couple with a great eclectic design style. And today I wanted to add a little something extra and share a little from behind the scenes of this particular design. –Kim from Bright Room Studio

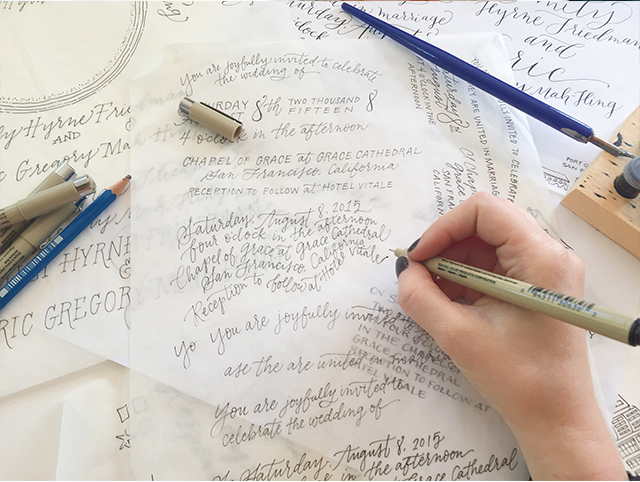
This design is completely hand-lettered, which means lots of sketching, drawing and scanning! I switch off between using tracing paper and just regular printing paper (often scrap paper from something else) for my lettering, depending on how much I want to sketch before hand. I also use a high-quality marker paper when I use a pointed calligraphy pen. This pile of scans became a bunch of different designs for the bride to choose from.

Behind the Design: Midnight in San Francisco Watercolor Hand Lettered Wedding Invitations by Bright Room Studio / Oh So Beautiful Paper
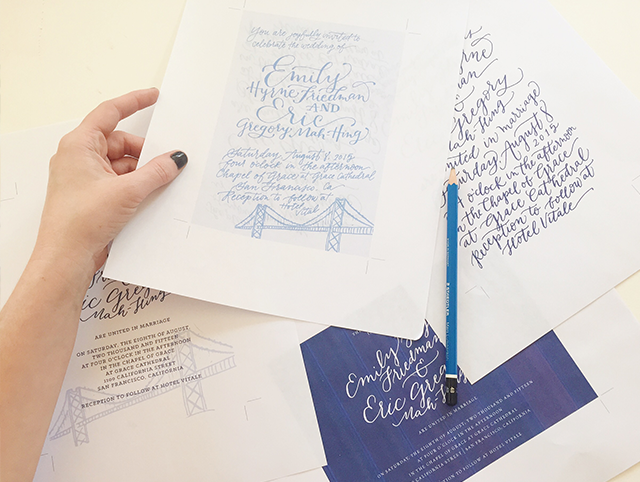
I typically explore a bunch of different design directions and present many different options to my clients. I think it really helps for them to see a variety of ideas… some that are more formal, more rustic, or more whimsical, depending on the vision they initially share with me. I find that even the designs that the clients don’t choose help them hone in on their aesthetic. From there, we narrow it down, tweak, mix and match until the design is perfect. But not everything makes the cut! The ones that don’t sometimes become elements of the RSVP or details card, sometimes are repurposed for other designs – and sometimes just go to the design graveyard.

Behind the Design: Midnight in San Francisco Watercolor Hand Lettered Wedding Invitations by Bright Room Studio / Oh So Beautiful Paper
My clients and I work together to refine the invitation suite until it is perfect. To me that means that it is cohesive, unique, clean and special. We finesse the little details like envelope color and twine as that can really make a difference in the whole product.

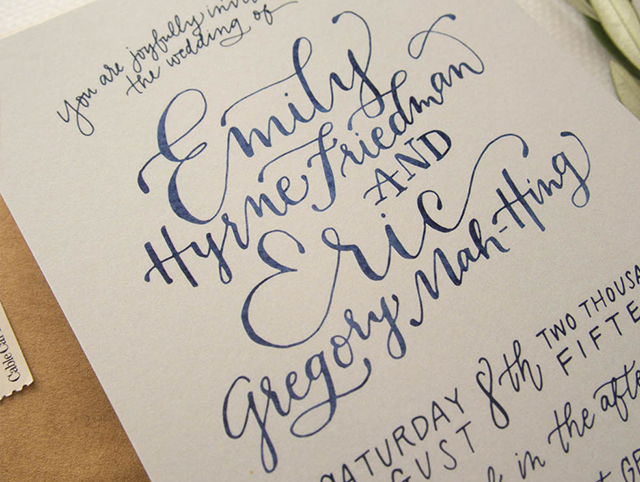
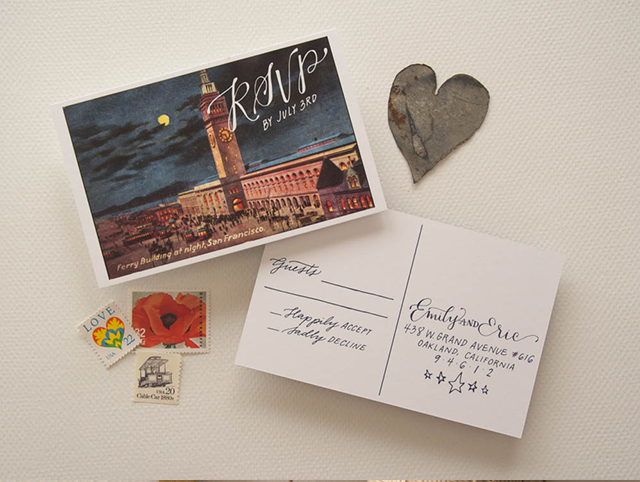
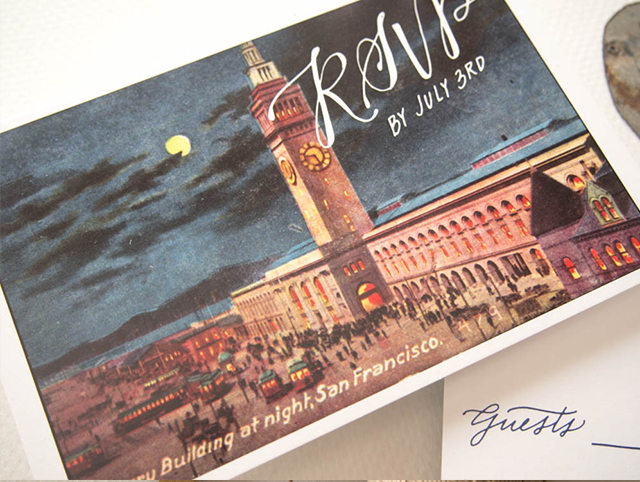
Here is where we landed with Emily and Eric. I like to call this one “Midnight in San Francisco.” I love the personal details, unique textures and cool California vibe.

Midnight in San Francisco Watercolor Hand Lettered Wedding Invitations by Bright Room Studio / Oh So Beautiful Paper
Midnight in San Francisco Watercolor Hand Lettered Wedding Invitations by Bright Room Studio / Oh So Beautiful Paper
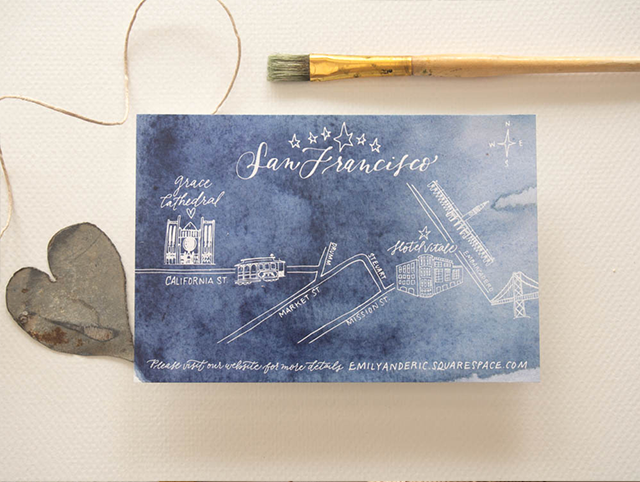
The design was digitally printed to  showcase the depth of the watercolor textures. I love how the map has a subtle feeling of tie-dye, which winks at San Francisco’s Summer of Love.

Midnight in San Francisco Watercolor Hand Lettered Wedding Invitations by Bright Room Studio / Oh So Beautiful Paper

Midnight in San Francisco Watercolor Hand Lettered Wedding Invitations by Bright Room Studio / Oh So Beautiful Paper
The details really brought this together. The perfectly sourced vintage stamps, old postcard and subtly-rustic details made this eclectic suite come to life!

Midnight in San Francisco Watercolor Hand Lettered Wedding Invitations by Bright Room Studio / Oh So Beautiful Paper
Midnight in San Francisco Watercolor Hand Lettered Wedding Invitations by Bright Room Studio / Oh So Beautiful Paper
Design by Bright Room Studio

Printing by Mercurio Brothers

Bright Room Studio is a member of the Designer Rolodex  – you can see more of Kim’s beautiful work right here or visit the real invi­ta­tions gallery for more wedding invitation ideas!
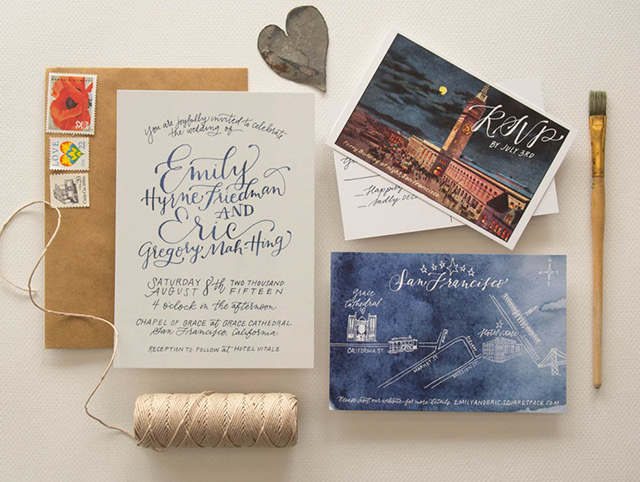
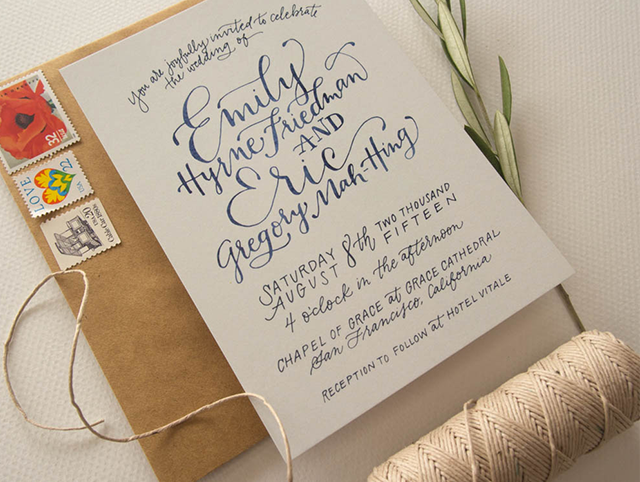
Photo Credits: Bright Room Studio