You guys! I’m SO excited to share today’s DIY post! I’ve been wanting to make an advent calendar for years, but I never really found something that felt quite like “me.” Well, along came my favorite Heidi Swapp Minc foil applicator and all of a sudden it just clicked! I shared a couple of DIY projects over the summer involving the Minc, but if you want to create your own DIY projects with the Minc you need access to a laser printer or copier since it works with toner ink. Well, for those of us that might not have regular access to a laser printer or copier, Heidi Swapp offers a few ready made DIY kits – including these amazing 3D flowers! I decided to pair the 3D flowers with some gold hexagon favor boxes from the Oh Happy Day party shop to create a DIY paper flower advent calendar of my dreams!
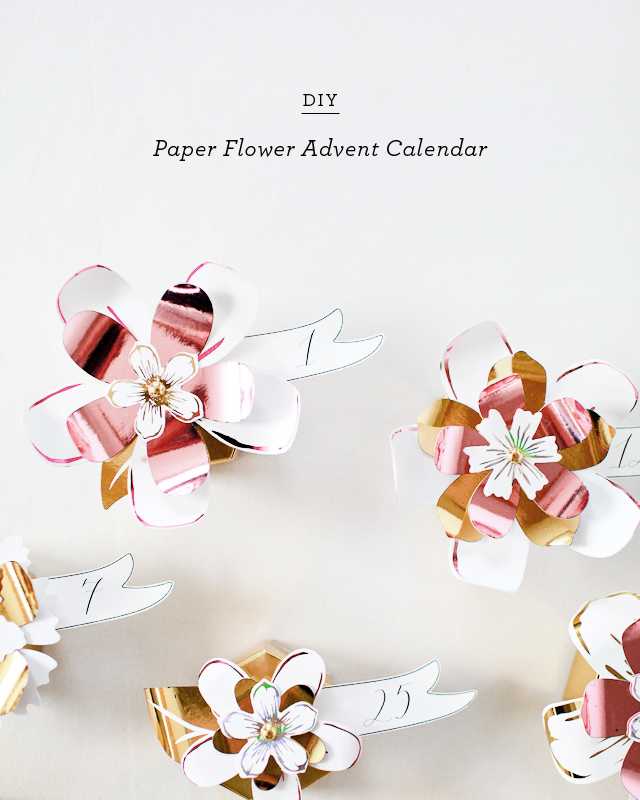


The Minc has easily become my favorite DIY tool in the last few months. You can find the Minc at Michael’s and craft stores, or pick one up right here. This was my first time experimenting with one of the readymade kits and I’m now completely obsessed with these 3D flowers. They come flat in sheets with pre-printed toner ink, so you just run them through the Minc to apply the foil – then pop them out and assemble the layers into beautiful flowers! I kind of want to do an entire backdrop using these gorgeous metallic flowers! But I’m getting ahead of myself. The holidays are just around the corner: advent calendars first!


To make the DIY paper flower advent calendar:
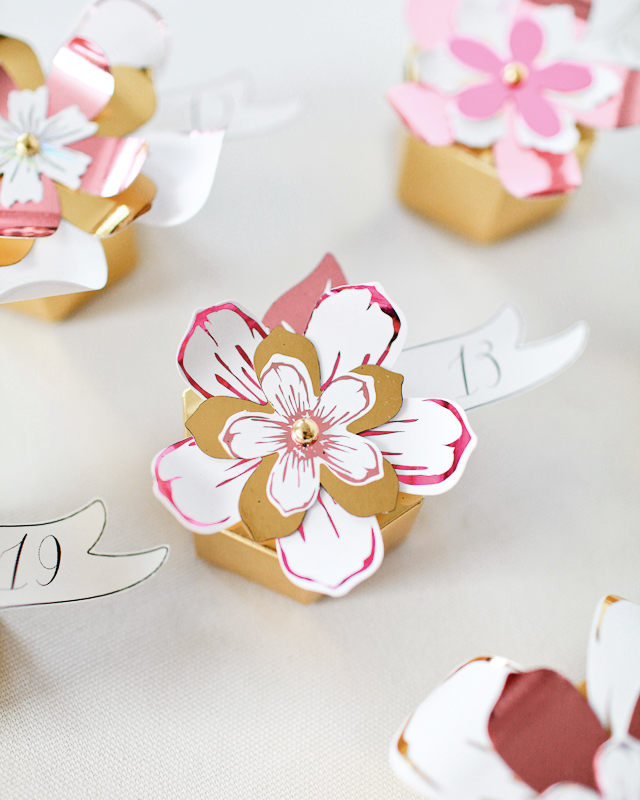
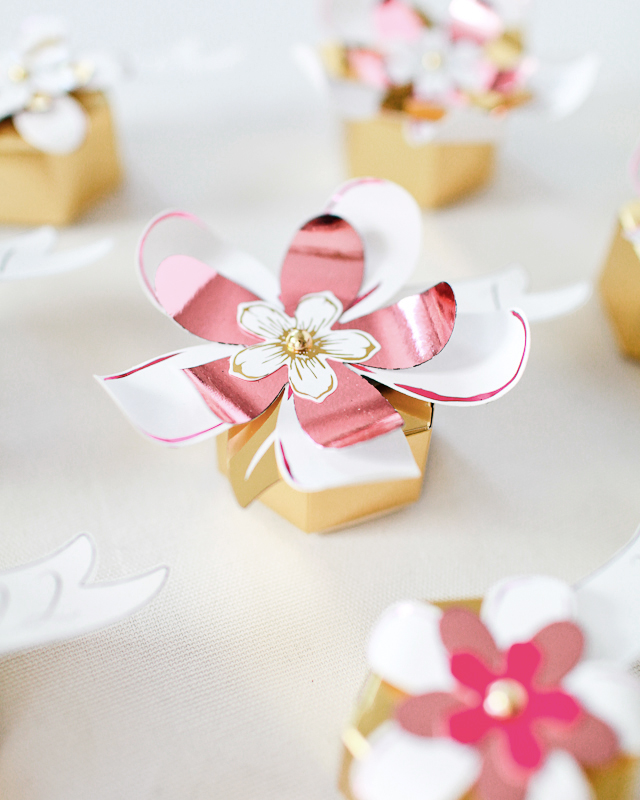
Step 1. Cut sheets of foil just big enough to fit over each flower sheet. We chose light pink, hot pink, gold, and silver hologram foil, and we were able to fit three sheets of flowers at a time in the Minc folder. Run the flowers through the Minc foil applicator on high heat (at least the “4” setting).
Step 2. Pop the foiled flowers out of each sheet and assemble flowers according to package instructions. You’ll want a total of twenty-five flowers with a nice mix of large, medium, and small flowers for the advent calendar.
Step 3. Print the advent calendar number template on text weight paper and cut out each number. Place a number under each flower, then adhere to the gold hexagon boxes using double-sided tape or removable mounting squares.
Step 4. Fill each box with candy or small trinkets! You can use removable mounting squares to mount the boxes to the wall, or just set them out on a side table to open and enjoy!


I can’t wait to start the advent calendar tradition with Sophie – she already spotted the flowers on my desk and she’s so excited to open all the little boxes! Are any of you planning to do an advent calendar this year?
This post was created in partnership with American Crafts. All content and opinions are my own. Thank you for supporting the sponsors that make Oh So Beautiful Paper possible!
Photos by Nole Garey for Oh So Beautiful Paper
OMG. SOOOOOOO pretty!