How to Create Calligraphy and Floral Frames

We design lots of calligraphy frames in the studio for wedding invitations, art prints, stamps… we just can’t get enough! We thought it would be fun today to show you a little bit about the process of making a frame with a pointed calligraphy pen and a brush pen. You can really explore this topic in so many variations, which is what makes it so much fun! We hope that this little lesson helps springboard you into making designs that are your own! –Bailey and Emma of Antiquaria

How to Create Calligraphy and Floral Frames for Wedding Invitations and Art Prints / Antiquaria for Oh So Beautiful Paper

Materials

Hot press watercolor paper

Calligraphy pen, pointed nib, and Sumi ink

Brush Pen

Monogram Rubber Stamp – we used our Handwritten Calligraphy Names Monogram

Stamp Pad

Pencil

How to Create Calligraphy and Floral Frames for Wedding Invitations and Art Prints / Antiquaria for Oh So Beautiful Paper

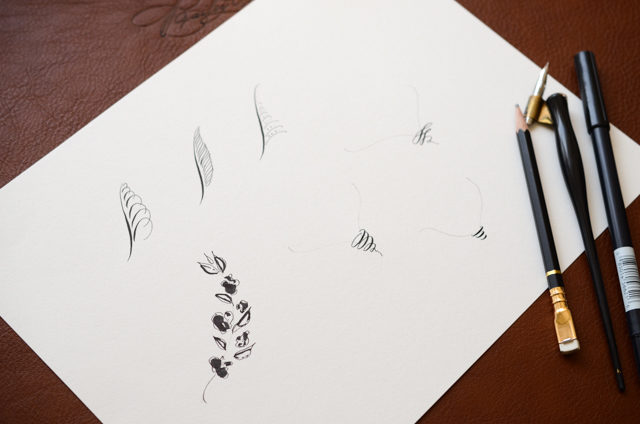
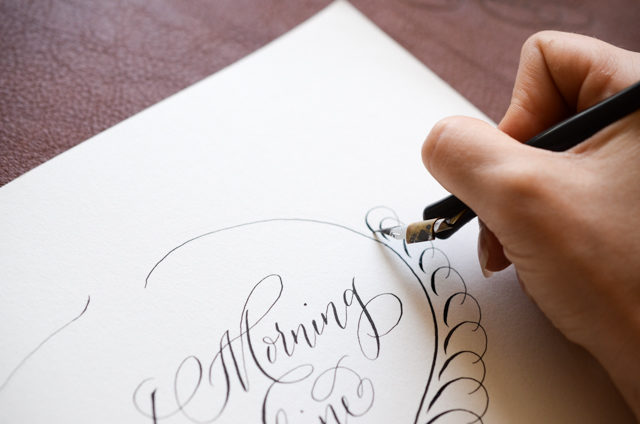
There are endless techniques you can use to make illustrated borders, and today we’re only going to dip into a few of the basics. We recommend taking a few minutes (or hours) to peruse IAMPETH, which has amazing resources and inspirations for pointed pen work, since that is the tool that we’re going to primarily use today. Most of these decorations start with a compound curve (the main stem that will border your image) and are decorated off of that curve. Here’s a little bit about each decoration:
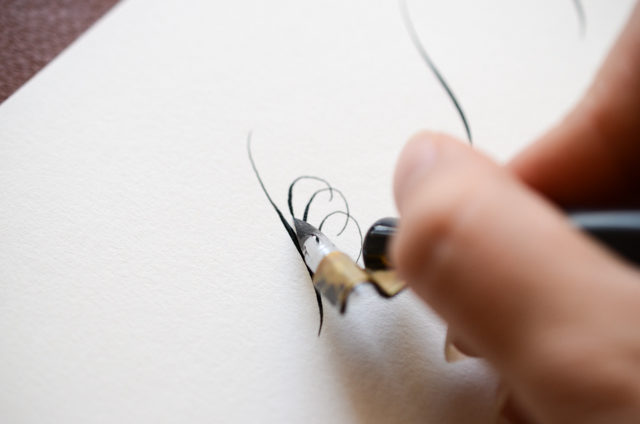
How to Create Calligraphy and Floral Frames for Wedding Invitations and Art Prints / Antiquaria for Oh So Beautiful Paper

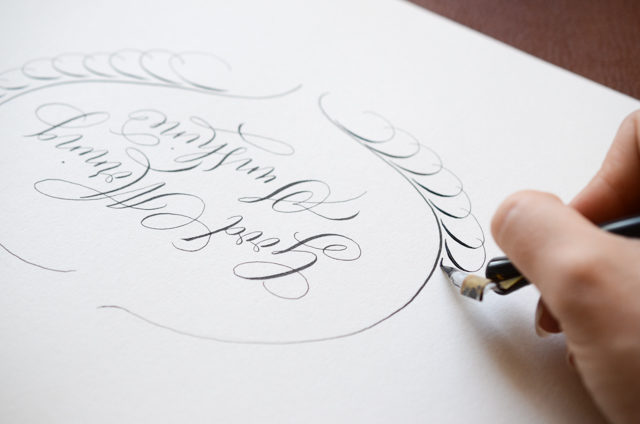
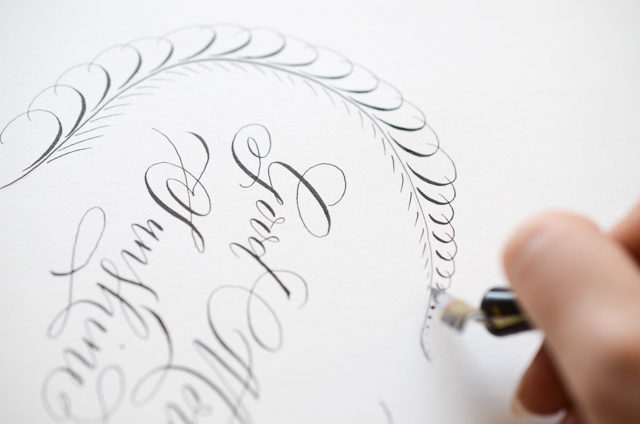
For this plume-like decoration, you want the thick stroke (using pressure) to be on the inside, next to the main stem, as shown above. Make the little loops smaller as you go up the stem.
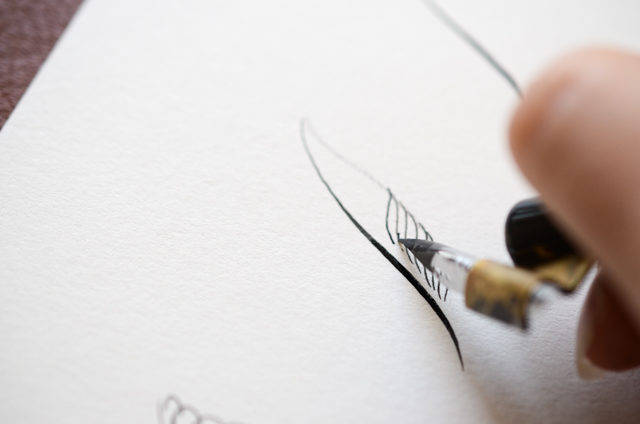
How to Create Calligraphy and Floral Frames for Wedding Invitations and Art Prints / Antiquaria for Oh So Beautiful Paper

This decoration resembles a feather. With a pencil, draw a shape on the side of your main stem, as a guide. Then fill in the shape with light compound curves, moving up the stem.
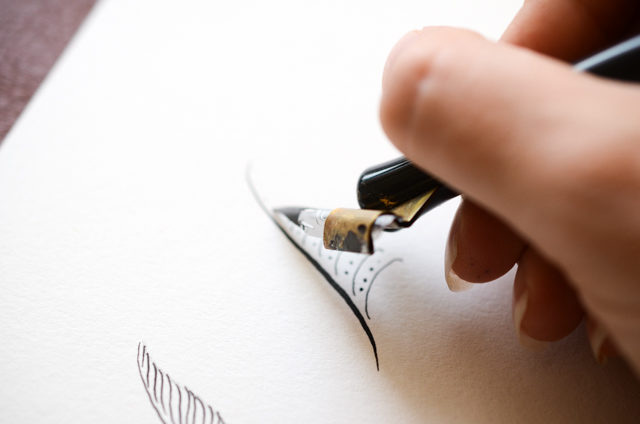
How to Create Calligraphy and Floral Frames for Wedding Invitations and Art Prints / Antiquaria for Oh So Beautiful Paper

This simple little leaf decoration just has arches up the side of the stem. In the middle of each, we drew in little dots.
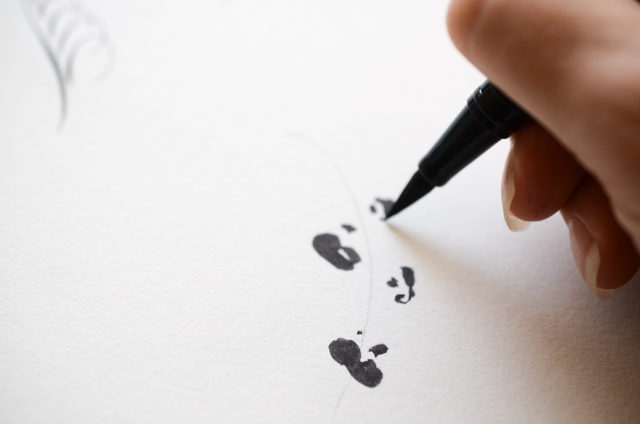
How to Create Calligraphy and Floral Frames for Wedding Invitations and Art Prints / Antiquaria for Oh So Beautiful Paper

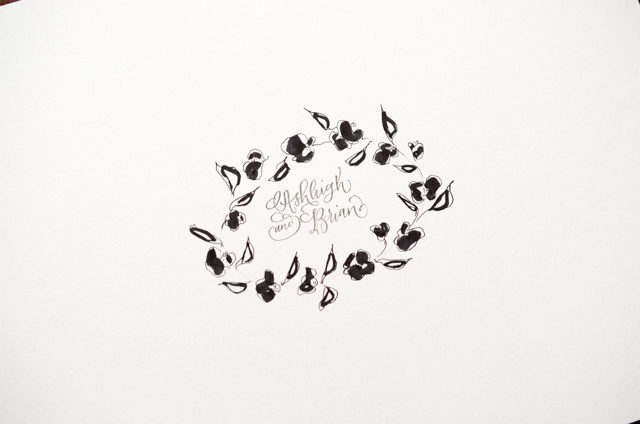
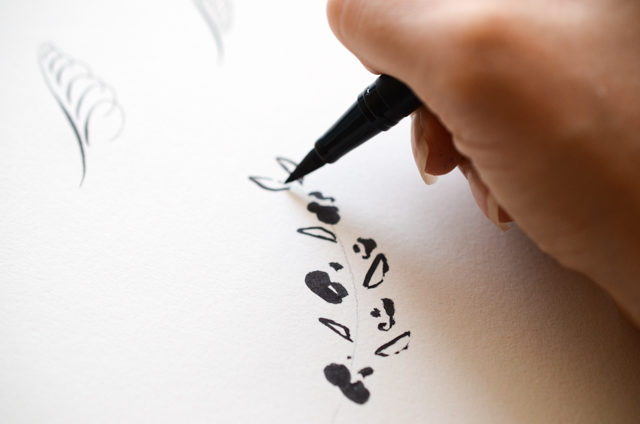
The abstract floral border is done off of a pencil line, with no main stem. Start with a pencil line. Then, using a brush pen, or a small paint brush and ink, make little petal shapes up the pencil line.
How to Create Calligraphy and Floral Frames for Wedding Invitations and Art Prints / Antiquaria for Oh So Beautiful Paper

Next, add in your leaves.

How to Create Calligraphy and Floral Frames for Wedding Invitations and Art Prints / Antiquaria for Oh So Beautiful Paper

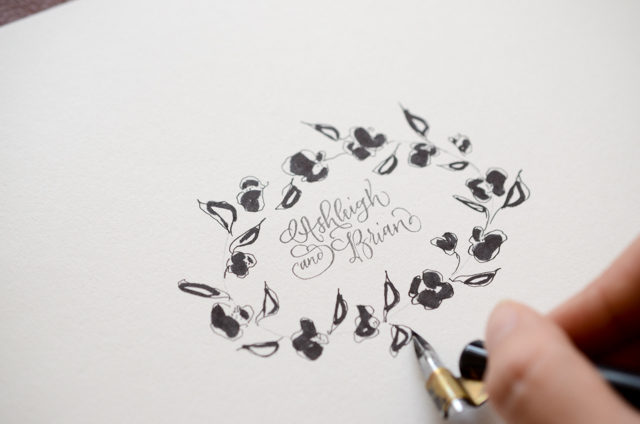
Lastly, add in some details with your calligraphy pen. Outline around the shapes to define them and add the centers of the abstract flowers.

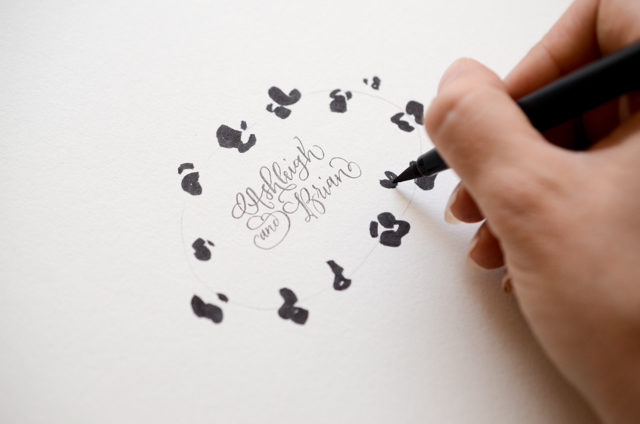
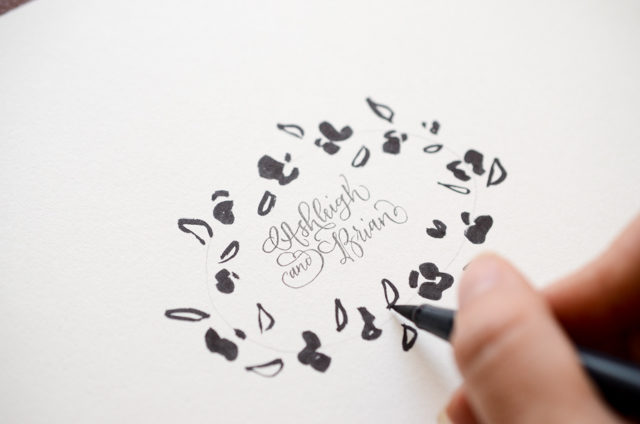
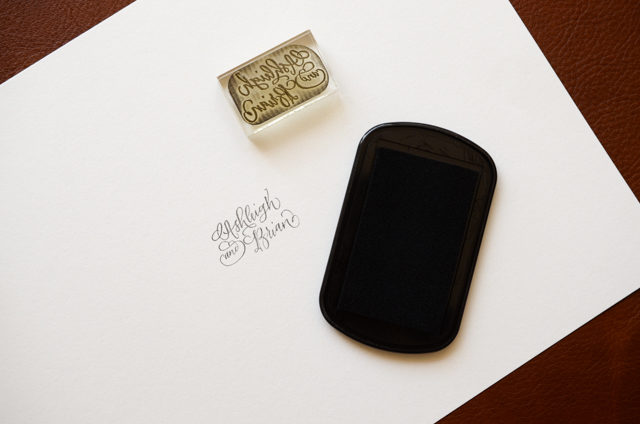
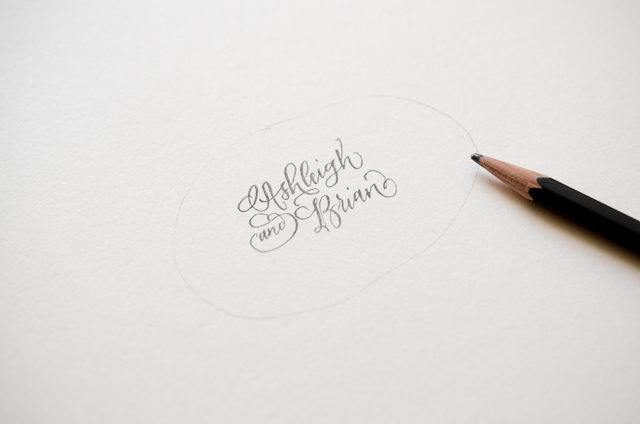
Decorated Monogram. In the series of pictures below, we use the above techniques (specifically the abstract floral border) to embellish one of our Monogram Stamps (our Handwritten Calligraphy Names Monogram). You could do the same thing around an invitation, single initial monogram or to address an envelope!
How to Create Calligraphy and Floral Frames for Wedding Invitations and Art Prints / Antiquaria for Oh So Beautiful Paper

How to Create Calligraphy and Floral Frames for Wedding Invitations and Art Prints / Antiquaria for Oh So Beautiful Paper

How to Create Calligraphy and Floral Frames for Wedding Invitations and Art Prints / Antiquaria for Oh So Beautiful Paper

How to Create Calligraphy and Floral Frames for Wedding Invitations and Art Prints / Antiquaria for Oh So Beautiful Paper

How to Create Calligraphy and Floral Frames for Wedding Invitations and Art Prints / Antiquaria for Oh So Beautiful Paper

How to Create Calligraphy and Floral Frames for Wedding Invitations and Art Prints / Antiquaria for Oh So Beautiful Paper

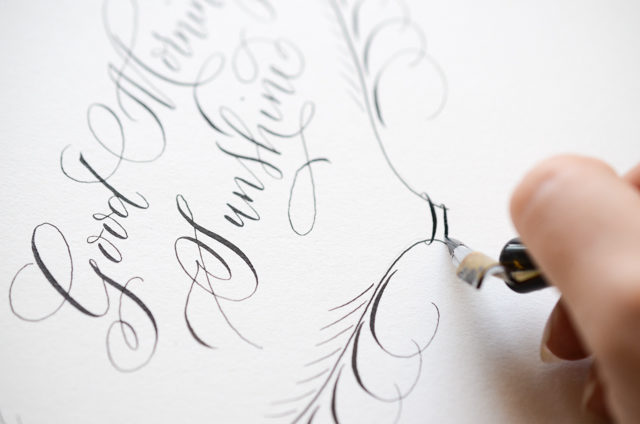
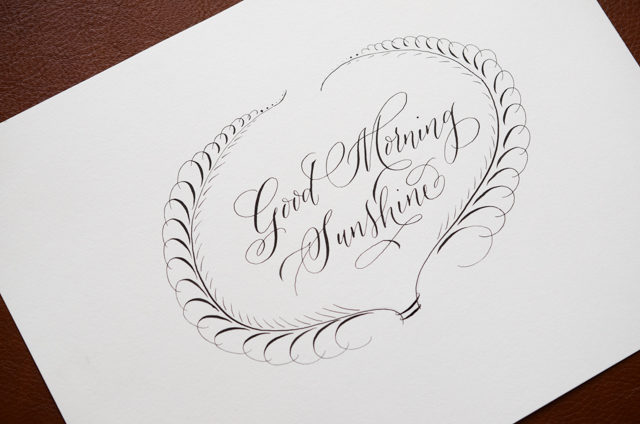
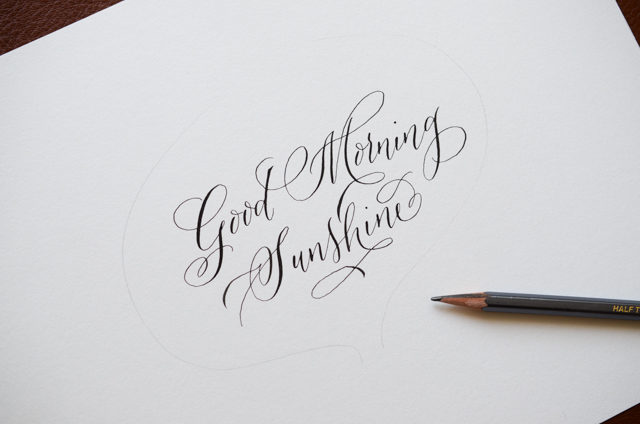
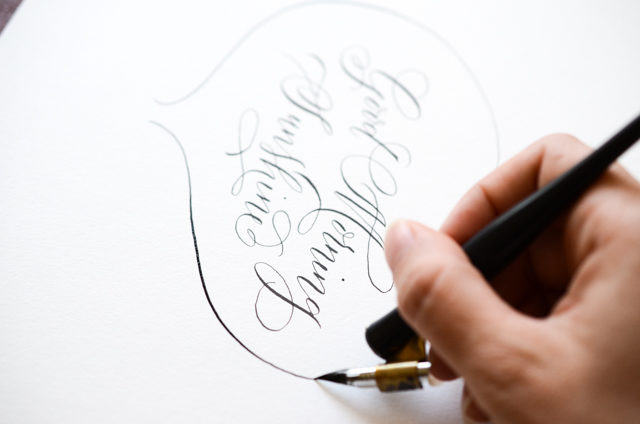
Calligraphy Wall Art. After lettering a phrase, we decorated the border using the same pointed pen that it was written with (mainly the plume technique). Alternatively, you could use a fine tip Micron pen to draw any of the lettering or borders that we’ve shown here. You could also use color or gold to embellish your work!
How to Create Calligraphy and Floral Frames for Wedding Invitations and Art Prints / Antiquaria for Oh So Beautiful Paper

How to Create Calligraphy and Floral Frames for Wedding Invitations and Art Prints / Antiquaria for Oh So Beautiful Paper

How to Create Calligraphy and Floral Frames for Wedding Invitations and Art Prints / Antiquaria for Oh So Beautiful Paper

How to Create Calligraphy and Floral Frames for Wedding Invitations and Art Prints / Antiquaria for Oh So Beautiful Paper

How to Create Calligraphy and Floral Frames for Wedding Invitations and Art Prints / Antiquaria for Oh So Beautiful Paper

How to Create Calligraphy and Floral Frames for Wedding Invitations and Art Prints / Antiquaria for Oh So Beautiful Paper

How to Create Calligraphy and Floral Frames for Wedding Invitations and Art Prints / Antiquaria for Oh So Beautiful Paper

How to Create Calligraphy and Floral Frames for Wedding Invitations and Art Prints / Antiquaria for Oh So Beautiful Paper

We hope you have tons of fun playing around with the techniques! Be sure to show us your interpretation on Instagram by tagging us @antiquariadesign! We can’t wait to see what you come up with.

Printable Tropical Envelope Liners

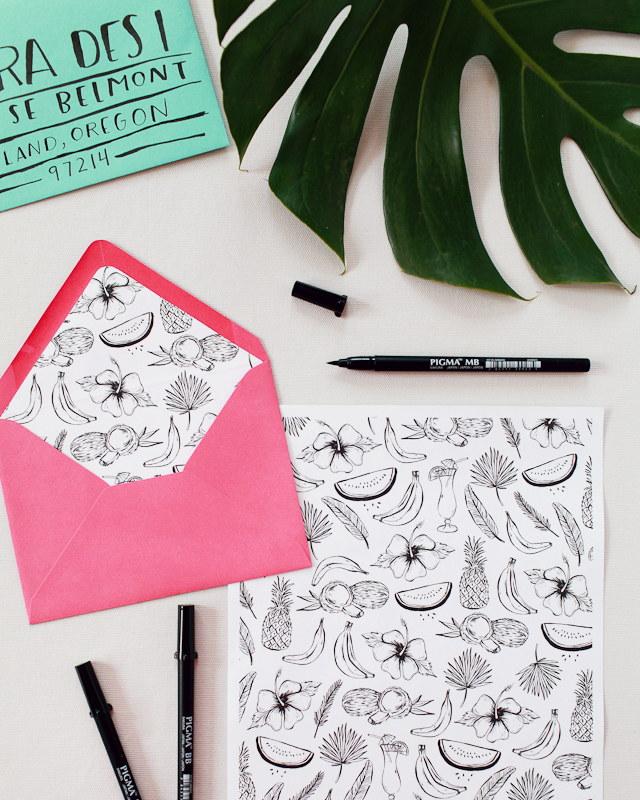
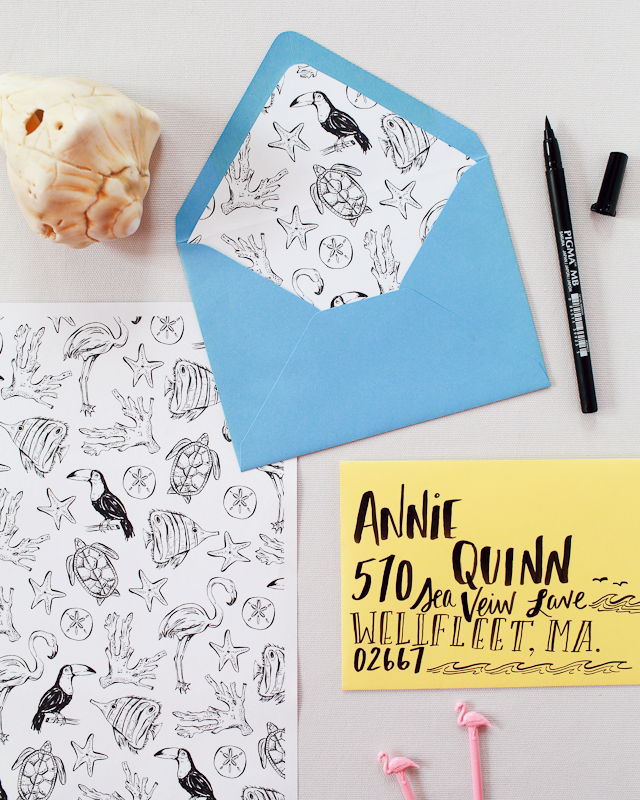
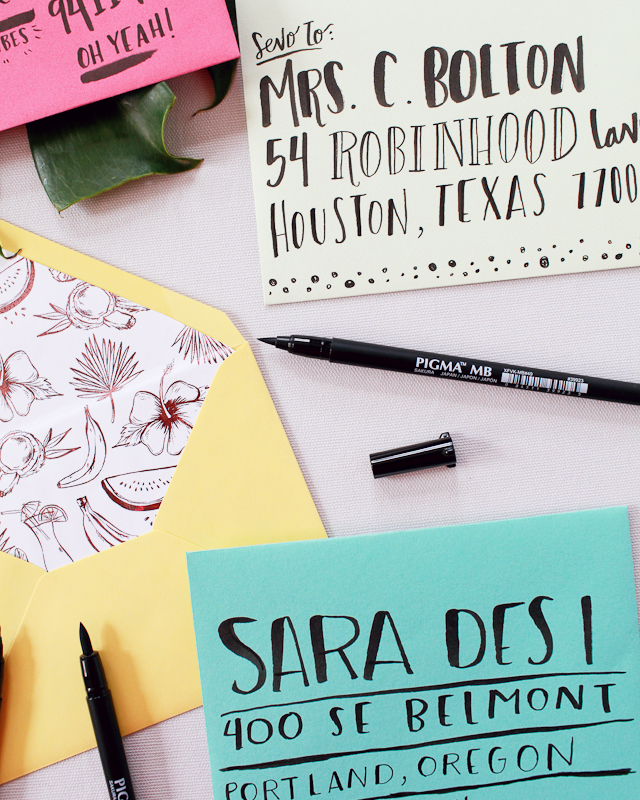
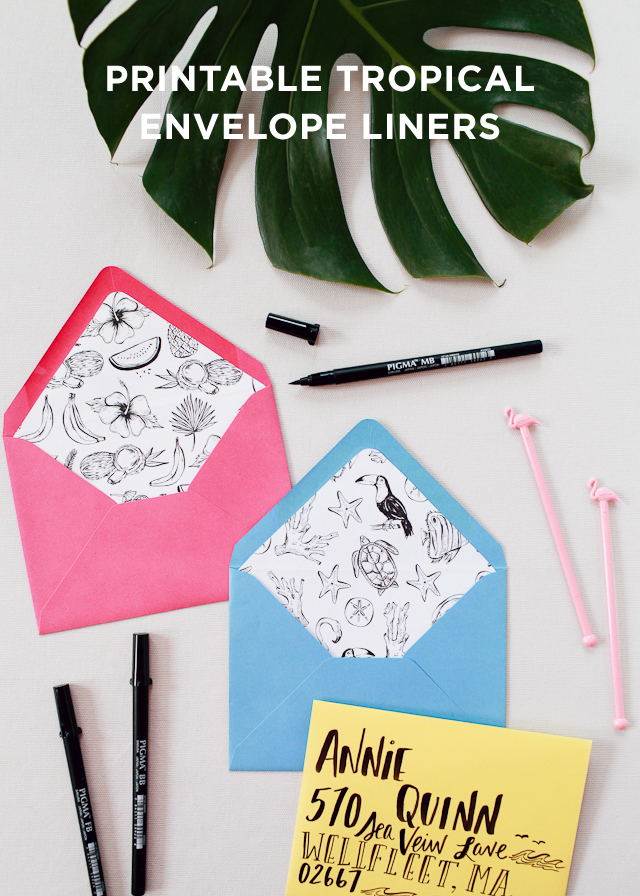
Are you ready for something SUPER fun?!? Sakura of America recently released a set of amazing new brush pens called the Pigma Professional Brush, and we wanted to do something really awesome to show you what these babies can do! Nothing makes me smile more than a colorful envelope and patterned envelope liner – and today we have printable tropical envelope liners in TWO gorgeous patterns for you to enjoy!

Printable Tropical Envelope Liners / Illustrated by Swiss Cottage Designs with Sakura Pigma Professional Brush Pens / Oh So Beautiful Paper

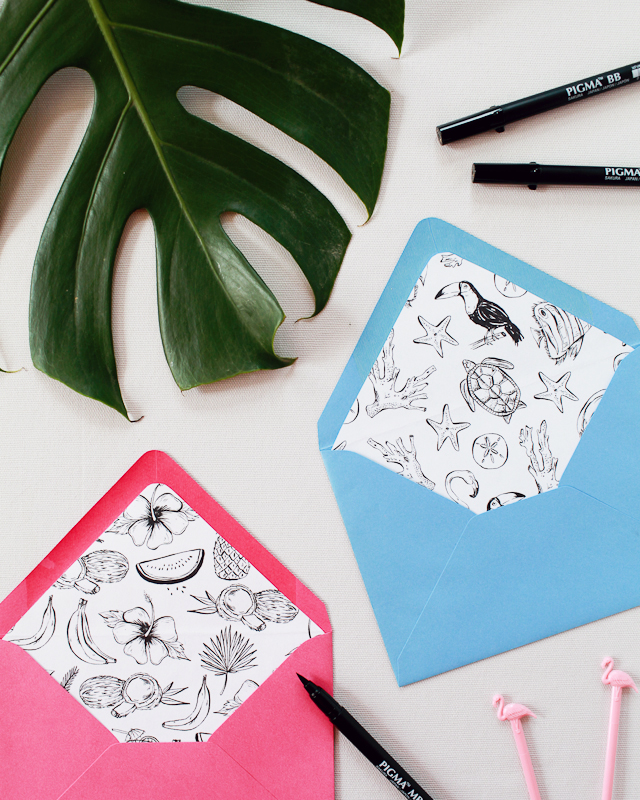
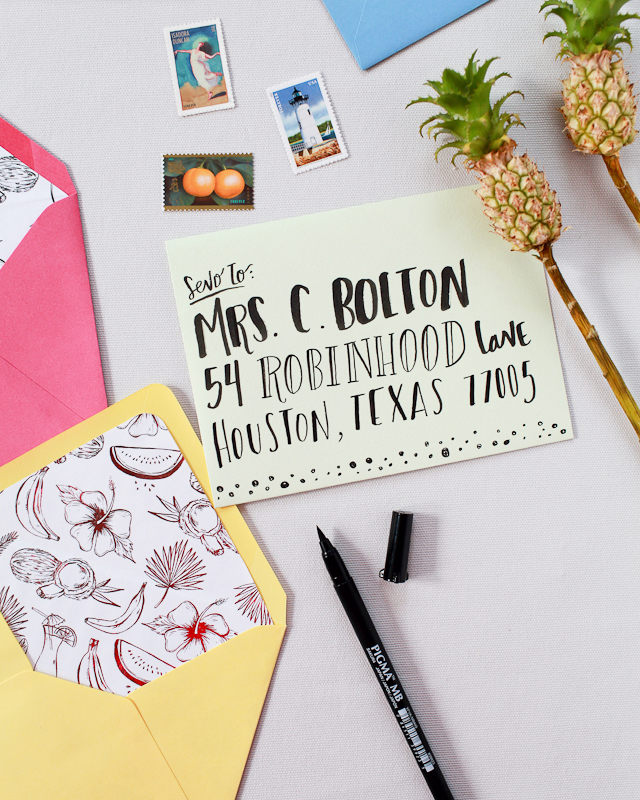
Courtney from Swiss Cottage Designs illustrated the tropical patterns using all three Pigma Professional Brush pen weights – fine, medium, and bold. Courtney and I are still feeling the tropical vibe from the Paper Party so we decided to keep on running with a tropical theme. One pattern features illustrations of watermelons, pineapples, and palm fronds, and the other has flamingos, toucans, coral, and fish! Both patterns make me wish I was somewhere on a beach with a tropical drink in hand!

Printable Tropical Envelope Liners / Illustrated by Swiss Cottage Designs with Sakura Pigma Professional Brush Pens / Oh So Beautiful Paper

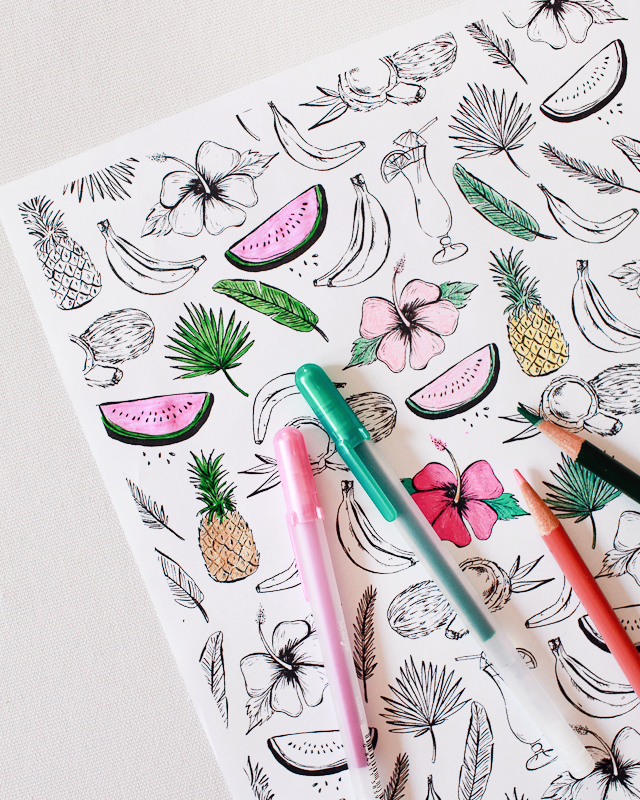
You can print the envelope liner patterns on text weight letter size paper. You can leave the patterns black and white – or add a dose of color using colored pencils or your favorite Gelly Roll pen! The Glaze pens almost look like watercolor and are great for coloring in those fine details! You can even use the patterns as coloring sheets just for fun!

Printable Tropical Envelope Liners / Illustrated by Swiss Cottage Designs with Sakura Pigma Professional Brush Pens / Oh So Beautiful Paper

Here are the instructions for making the envelope liners:

Step 1. Lightly trace an outline of the envelope on the back of the liner page. If you’re using Paper Source envelopes, you can use one of these handy envelope liner template kits. Cut out the liner, being careful to cut on the inside of the lines. Trim an additional 1/16″ off each side and 3/4″ off the bottom of the liner.

Step 2. Place the liner in the envelope. Use a glue stick or double sided tape on the back of the liner (along the top triangle and just above the crease) to adhere the liner to the envelope.

Printable Tropical Envelope Liners / Illustrated by Swiss Cottage Designs with Sakura Pigma Professional Brush Pens / Oh So Beautiful Paper

Printable Tropical Envelope Liners / Illustrated by Swiss Cottage Designs with Sakura Pigma Professional Brush Pens / Oh So Beautiful Paper

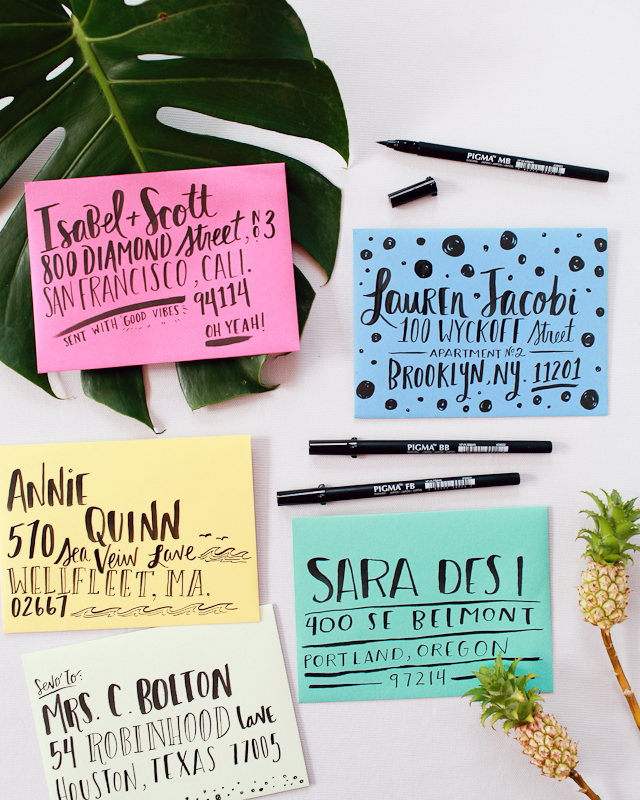
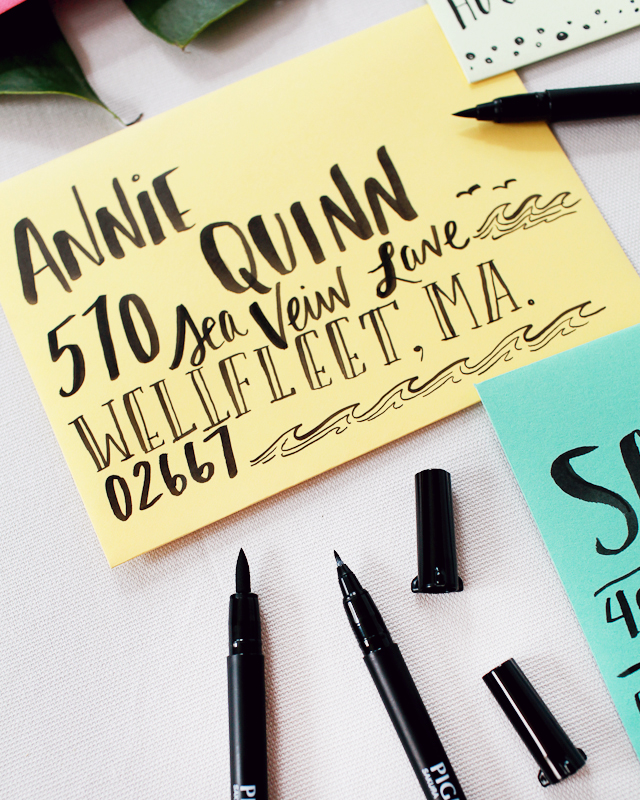
The Pigma Professional Brush pens use archival waterproof ink, which also makes them my new favorite pen for addressing envelopes. The brush nibs respond to changes in pressure or direction while maintaining smooth and consistent ink flow, so they’re super easy to use! The flexible brush nibs offer both thin and thick brush strokes and they won’t smear, feather, or bleed through on most paper. Courtney addressed a few envelopes using the different pen weights – I love the subtle gradient in the bold brush!

Printable Tropical Envelope Liners / Illustrated by Swiss Cottage Designs with Sakura Pigma Professional Brush Pens / Oh So Beautiful Paper

Printable Tropical Envelope Liners / Illustrated by Swiss Cottage Designs with Sakura Pigma Professional Brush Pens / Oh So Beautiful Paper

Printable Tropical Envelope Liners / Illustrated by Swiss Cottage Designs with Sakura Pigma Professional Brush Pens / Oh So Beautiful Paper

And yes, I may have foiled an envelope liner or two (in light pink metallic foil) using my Minc foil applicator. The Minc works with toner ink, so just print the liner patterns on a laser printer, or use a copying machine to make as many copies of the liner as you’ll need, and foil away!

Printable Tropical Envelope Liners / Illustrated by Swiss Cottage Designs with Sakura Pigma Professional Brush Pens / Oh So Beautiful Paper

Download the envelope liner patterns from Swiss Cottage Designs right here! And you can pick up a set of the Pigma Professional Brush pens right here!

All artwork © 2015 Swiss Cottage Designs created exclusively for Oh So Beautiful Paper. All artwork is made available for personal use only. By downloading the patterns you agree to the terms of use.

Swiss Cottage Designs is a mem­ber of the Designer Rolodex â€“ you can see more of Courtney’s beau­ti­ful work right here!

Photos by Nole Garey for Oh So Beautiful Paper

This post is sponsored by Sakura of America. All content and opinions are my own. Thank you for supporting the sponsors that make Oh So Beautiful Paper possible!

DIY Printed Fabric with Rubber Stamps

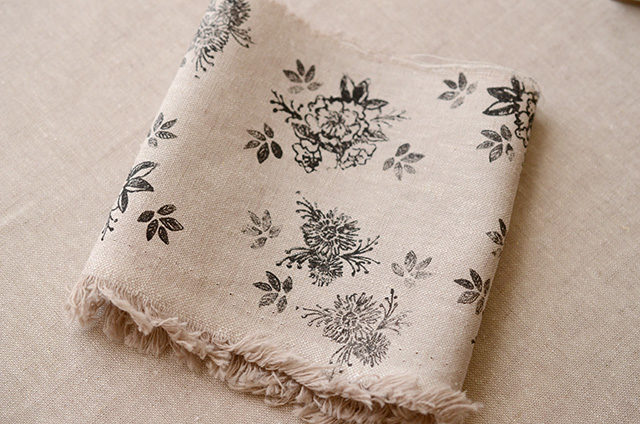
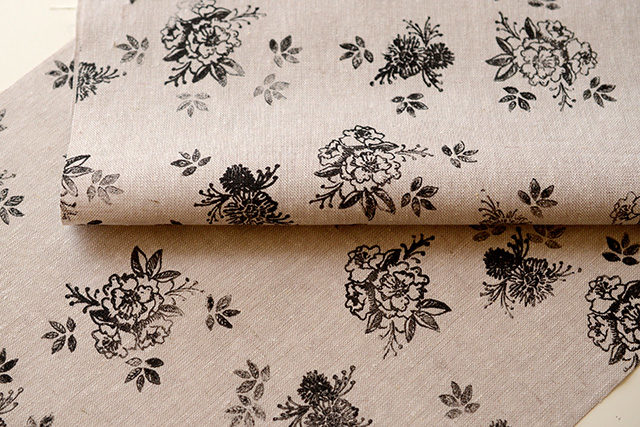
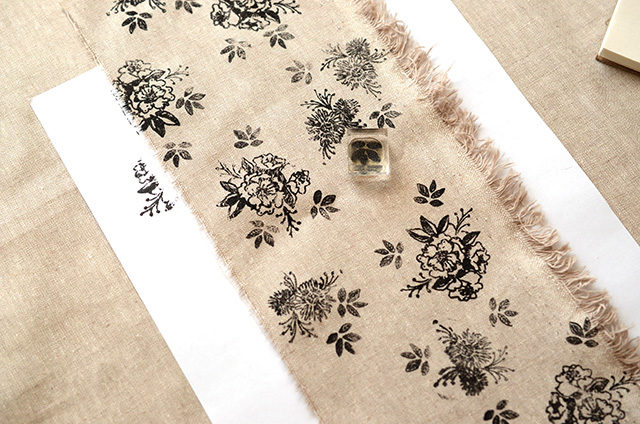
We had a ton of fun experimenting with today’s tutorial. After hearing feedback from clients over the years that have used screen printing ink and an ink brayer to print with their stamps vs. using a stamp pad, we figured that it was high time to try it for ourselves. The process and results are fun and the options for using the technique are endless. Today, we’re using three of our pattern stamps on linen fabric to make a gorgeous, custom floral print! –Bailey and Emma of Antiquaria

DIY Printed Fabric with Rubber Stamps / Antiquaria for Oh So Beautiful Paper

DIY Printed Fabric with Rubber Stamps / Antiquaria for Oh So Beautiful Paper

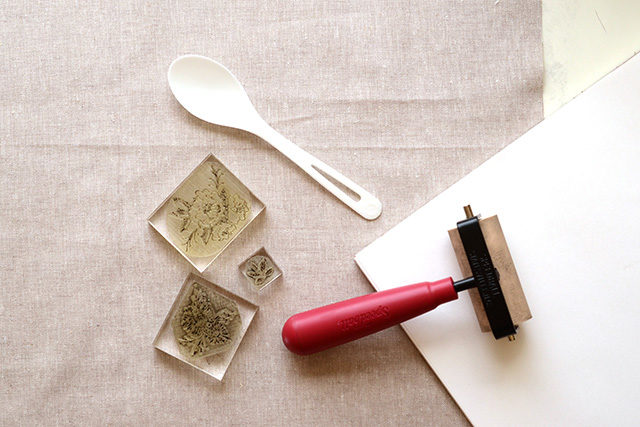
Materials

Fabric (we used linen – but cotton fabric would also work)

Camellia Pattern Stamp

Daisy Pattern Stamp

Small Leaves Pattern Stamp

Ink

Brayer

Disposable spoon (or one you don’t plan to eat with again)

Disposable Palette

Scrap Paper

Iron & Scrap of Cloth

DIY Printed Fabric with Rubber Stamps / Antiquaria for Oh So Beautiful Paper

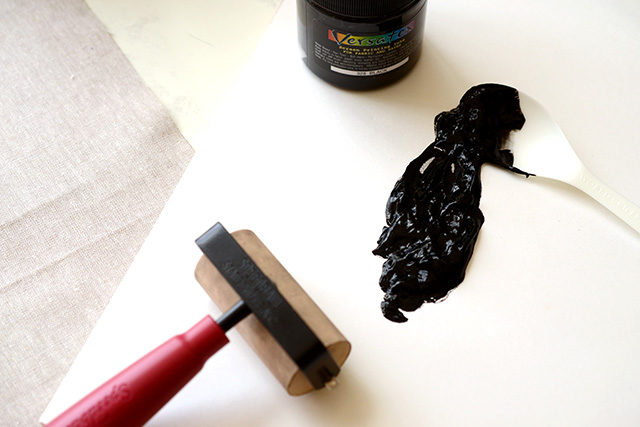
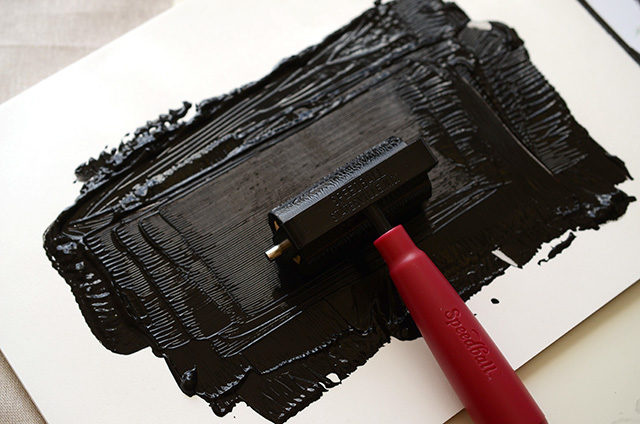
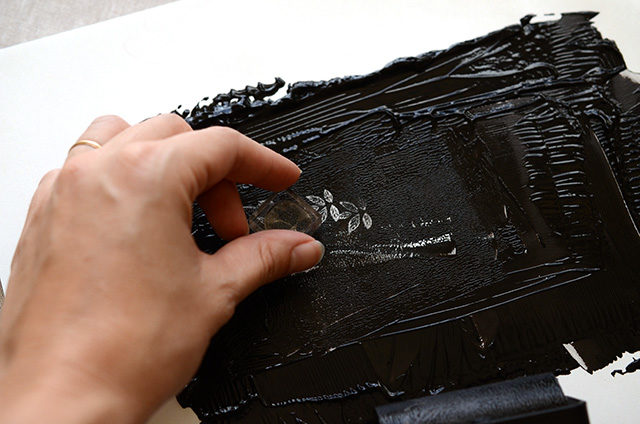
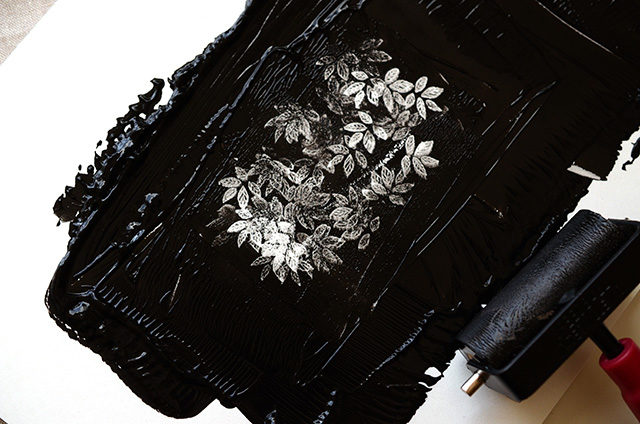
Step 1. Spoon some of ink onto the disposable palette. With the back of the spoon, smear the ink in a rectangle, down the center. Using the brayer, roll the ink onto the palette until you get a thin film of ink in the center. Now you’re ready to start printing!

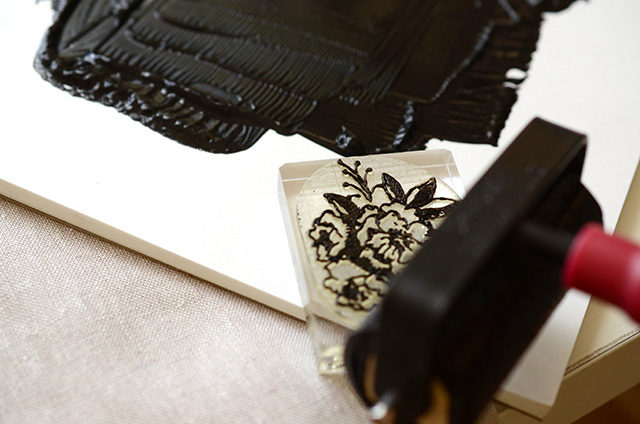
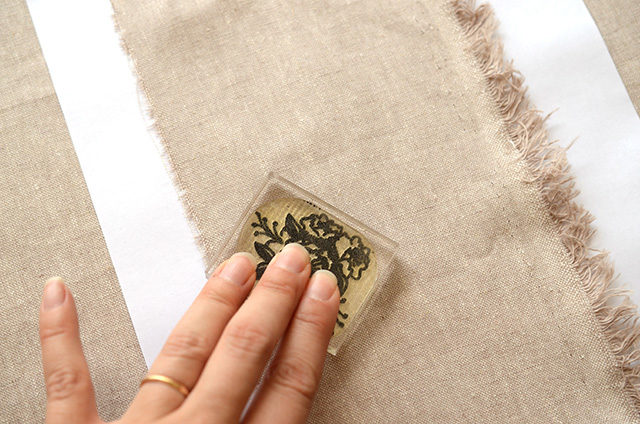
Step 2. First test your overall pattern on a small piece of fabric. Lay the fabric over a scrap piece of paper to protect the table from ink stains. Lightly use the brayer to roll ink onto your stamp. Start with the largest (most dominant) stamp, before using smaller stamps to fill in the pattern. Place the stamp down, and stamp it as if you were printing on a sheet of paper using moderate and even pressure. Lift the stamp and re-apply ink.

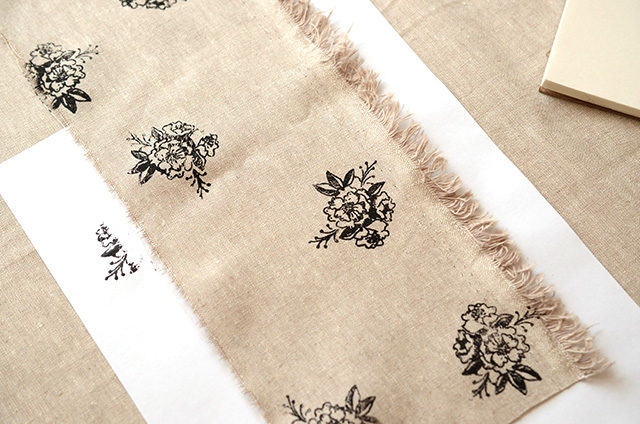
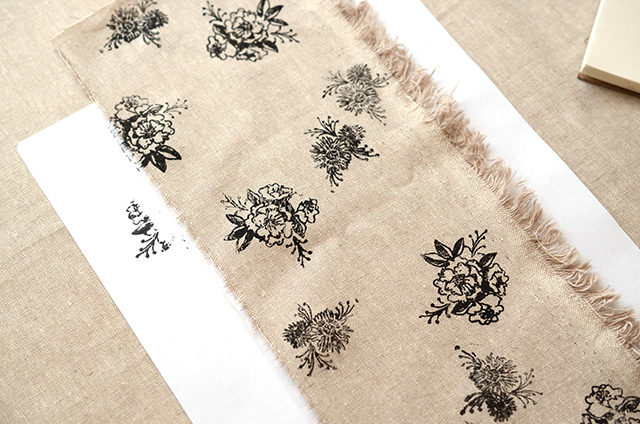
Step 3. Begin stamping on your fabric. Start with the largest stamp (we used our Camellia pattern stamp) until you’ve covered your entire piece of fabric. Use the next smallest stamp (we used our Daisy pattern stamp) to start filling in the negative spaces. The last stamp was our Small Leaves Pattern stamp. Because it’s small, it make a wonderful filler and allows you to really balance the overall design. We found that dipping into the thin layer of ink works best for the small stamps vs. using the brayer.

Step 4. Heat set the ink once you’ve finished printing all of your fabric according to the manufacturers instructions. In our case, we used a dry iron and a scrap piece of fabric.

DIY Printed Fabric with Rubber Stamps / Antiquaria for Oh So Beautiful Paper

DIY Printed Fabric with Rubber Stamps / Antiquaria for Oh So Beautiful Paper

DIY Printed Fabric with Rubber Stamps / Antiquaria for Oh So Beautiful Paper

DIY Printed Fabric with Rubber Stamps / Antiquaria for Oh So Beautiful Paper

DIY Printed Fabric with Rubber Stamps / Antiquaria for Oh So Beautiful Paper

DIY Printed Fabric with Rubber Stamps / Antiquaria for Oh So Beautiful Paper

DIY Printed Fabric with Rubber Stamps / Antiquaria for Oh So Beautiful Paper

DIY Printed Fabric with Rubber Stamps / Antiquaria for Oh So Beautiful Paper

DIY Printed Fabric with Rubber Stamps / Antiquaria for Oh So Beautiful Paper

DIY Printed Fabric with Rubber Stamps / Antiquaria for Oh So Beautiful Paper

This technique excites us so much and we can’t help thinking of all of the possible uses for our very own customized fabric! Imagine stamping your monogram onto linen napkins for your wedding, making tote bags for your bridesmaids, incorporating the print into your handmade wardrobe or even making custom print fabric envelopes for your invitation!

Photo Credits: Antiquaria for Oh So Beautiful Paper

DIY Gold Foil Place Cards

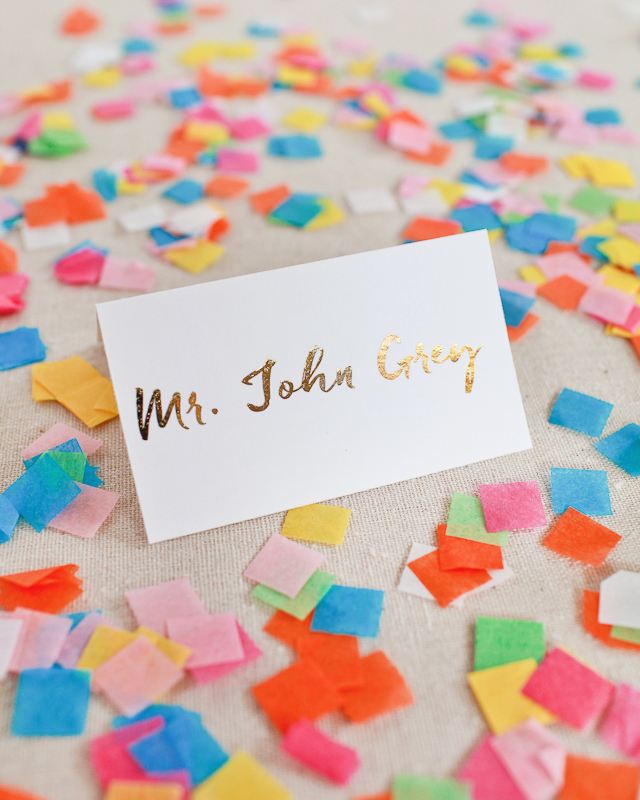
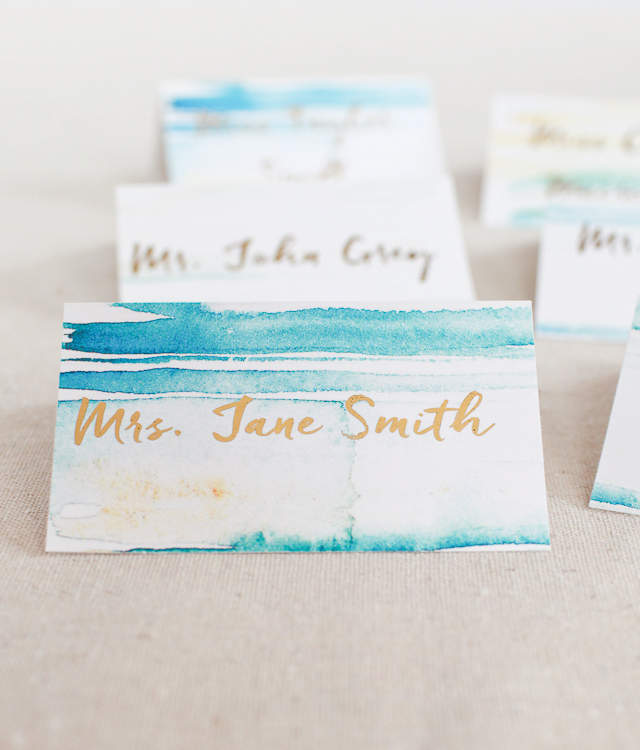
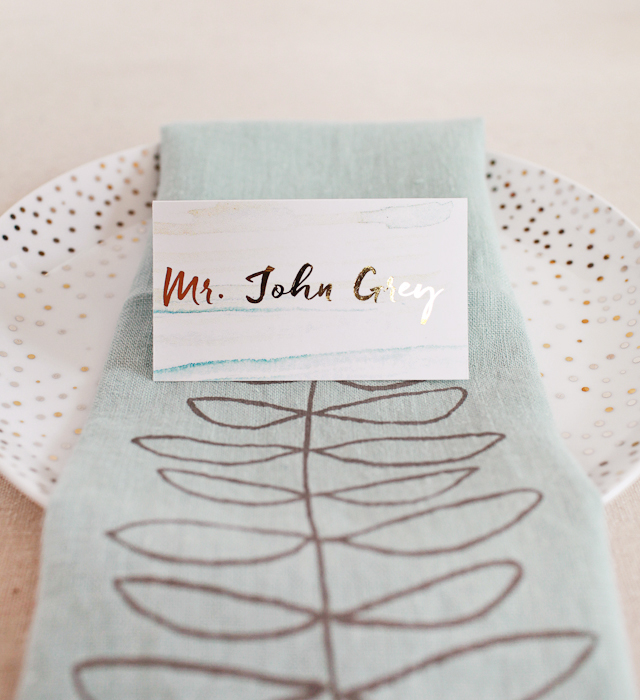
You heard me. DIY. Gold. Foil! At the National Stationery Show in May, I wandered upon a demo in the American Crafts booth of the amazing new Heidi Swapp Minc foil applicator – and I’m pretty sure my jaw dropped all the way to the floor. The Minc makes it possible to foil pretty much anything – you could even foil a spreadsheet if you wanted! Today I’m sharing the first in a series of projects using the Minc foil applicator: DIY gold foil place cards! Just think of all the new foil place card possibilities, from bridal showers to holiday dinners!

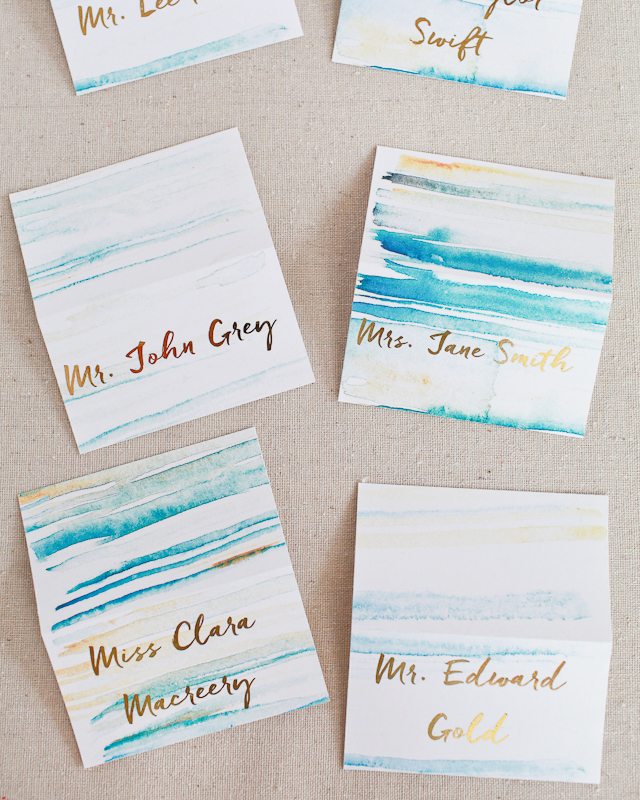
DIY Gold Foil Place Cards with Watercolor Background / Heidi Swapp Minc Foil Applicator / Oh So Beautiful Paper

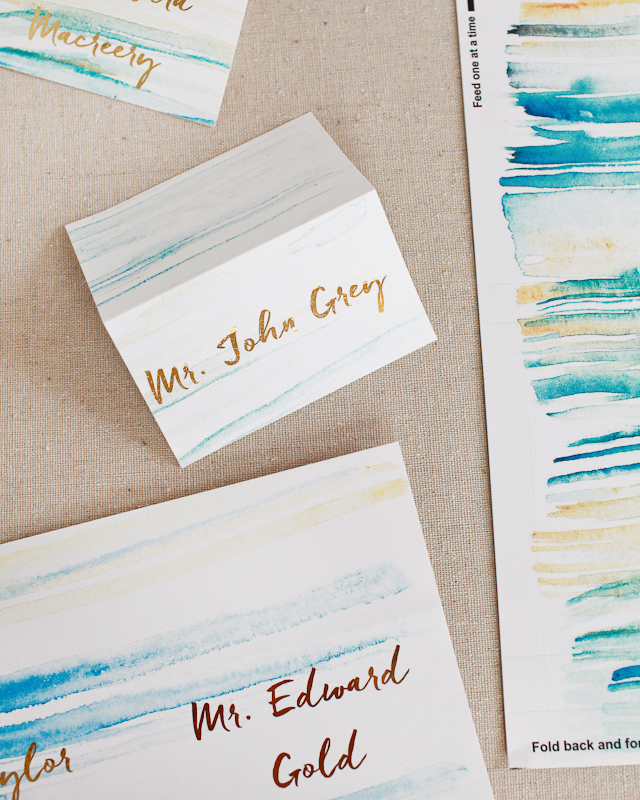
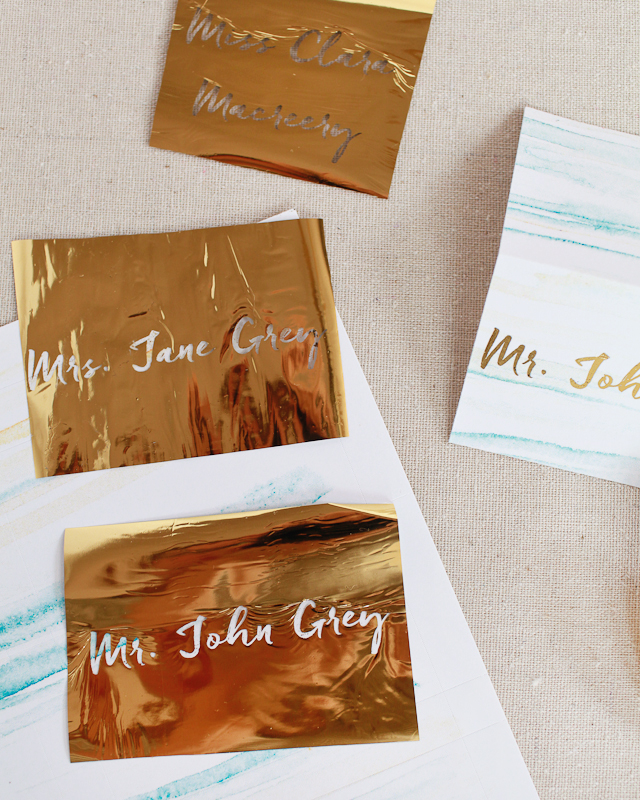
The Minc works with a special type of reactive foil that adheres to toner ink. For custom designs, you need to be able to print the foil portion of your design on a laser printer or copier but you don’t need any special design software. You can use Photoshop, Illustrator, or even Word – as long as you can print it out using toner ink you can foil it with the Minc! Heidi Swapp also offers a range of products that you can use for non-custom designs!

DIY Gold Foil Place Cards with Watercolor Background / Heidi Swapp Minc Foil Applicator / Oh So Beautiful Paper

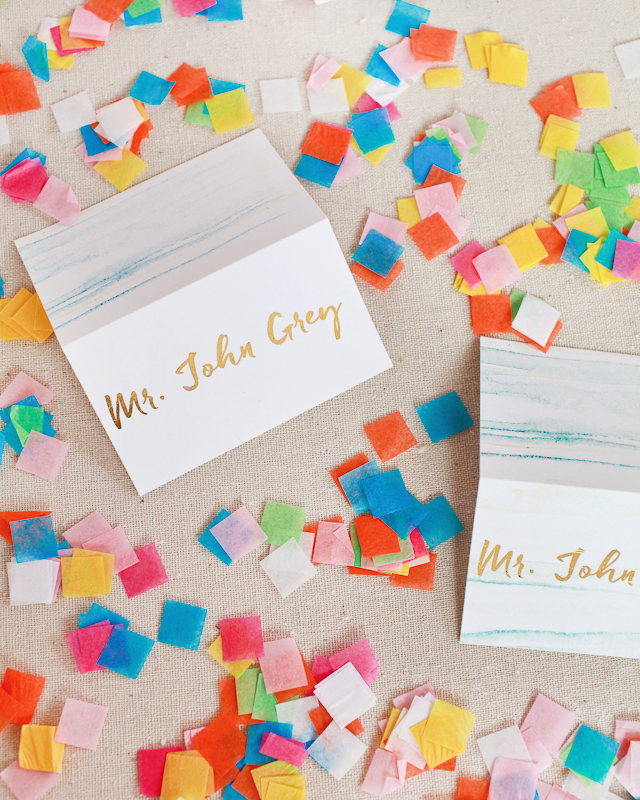
These place cards would look gorgeous and completely classic with just gold foil against white paper, but I decided to make things a bit more interesting with a whimsical watercolor background! I used a printable watercolor download from one of Antiquaria’s past DIY tutorials – you could also hand paint your watercolor background!

Supplies

Minc foil applicator and transfer folder

Reactive gold foil

Printable tent cards

DIY Gold Foil Place Cards with Watercolor Background / Heidi Swapp Minc Foil Applicator / Oh So Beautiful Paper

Instructions

1. Download the watercolor background right here and print it onto the printable tent cards using an ink jet printer. Print your text in a favorite font on the tent cards (you can find templates right here) using a laser printer. Black toner ink works best with the reactive foil.

2. Cut strips of gold foil just big enough to cover the text you want to foil. Place the foil strips over the printed tent cards, then place everything in the transfer folder foil side up.

3. Run the transfer folder with your tent cards and gold foil through the Minc foil applicator. Peel away any excess foil and voila!

DIY Gold Foil Place Cards with Watercolor Background / Heidi Swapp Minc Foil Applicator / Oh So Beautiful Paper

DIY Gold Foil Place Cards with Watercolor Background / Heidi Swapp Minc Foil Applicator / Oh So Beautiful Paper

DIY Gold Foil Place Cards with Watercolor Background / Heidi Swapp Minc Foil Applicator / Oh So Beautiful Paper

DIY Gold Foil Place Cards with Watercolor Background / Heidi Swapp Minc Foil Applicator / Oh So Beautiful Paper

Photos by Oh So Beautiful Paper

This post was created in partnership with American Crafts. All content and opinions are my own. Thank you for supporting the sponsors that make Oh So Beautiful Paper possible!

NSS 2015 Mailers

Back in March, Emily and I shared some thoughts on pre-trade show mailers along with some of our favorite mailers from the 2014 National Stationery Show. I shared this year’s mailers over on Instagram, but I thought I’d share them here, too, so that you all have them in one place! I put them in alphabetical order just for my own sanity – and I’m loving the range of design styles and formats reflected in the mailers for this year’s show!

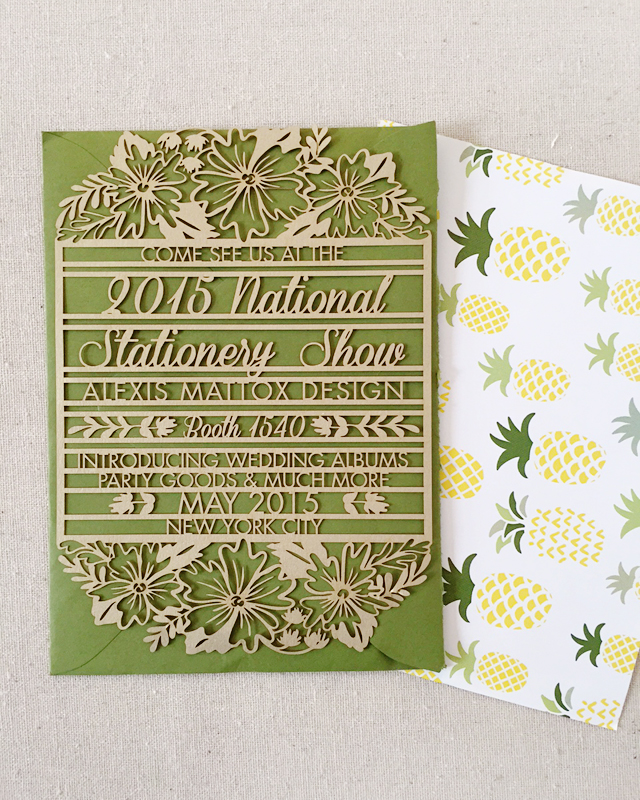
OSBP-NSS-2015-Mailer-Alexis-Mattox-Design

A beautiful tropical laser cut mailer from Alexis Mattox Design (and how great is that pineapple envelope liner?!)

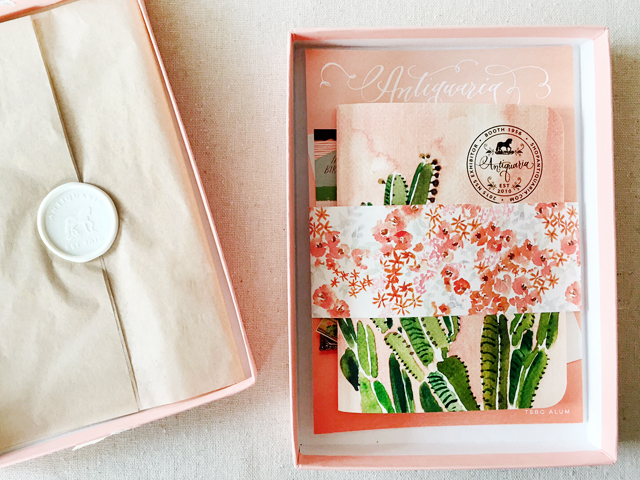
NSS-2015-Mailers-Antiquaria-OSBP

I loved Antiquaria‘s peach box mailer with a little sample notebook inside – and that beautiful wax seal!

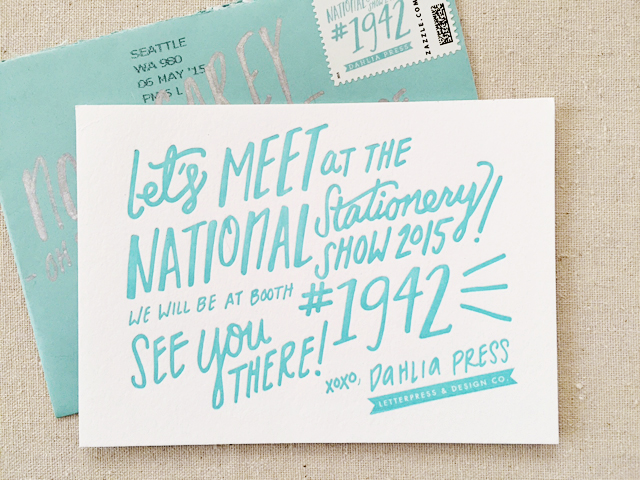
OSBP-NSS-2015-Mailer-Dahlia-Press

Dahlia Press

Continue reading