National Stationery Show 2015, Part 1

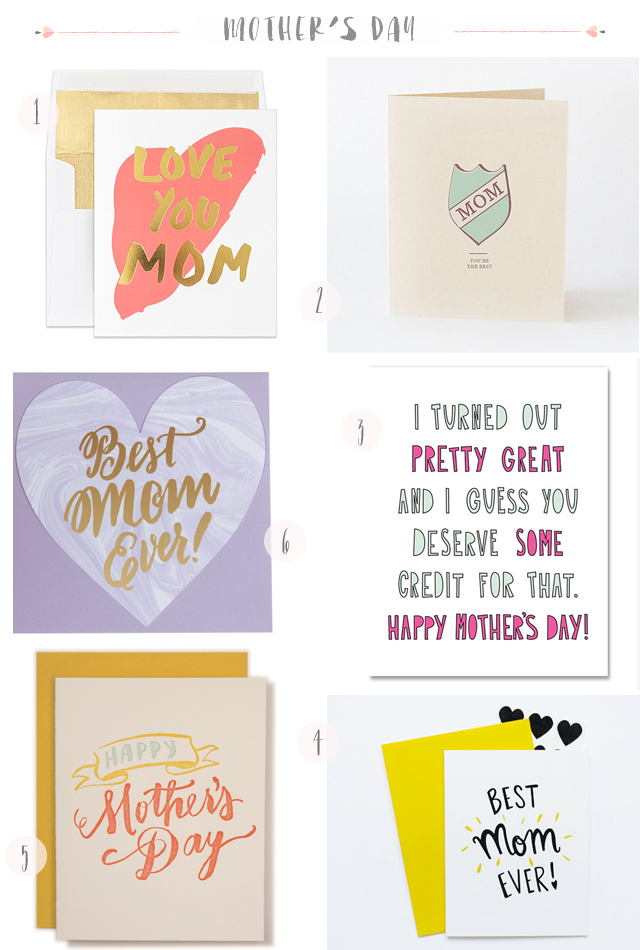
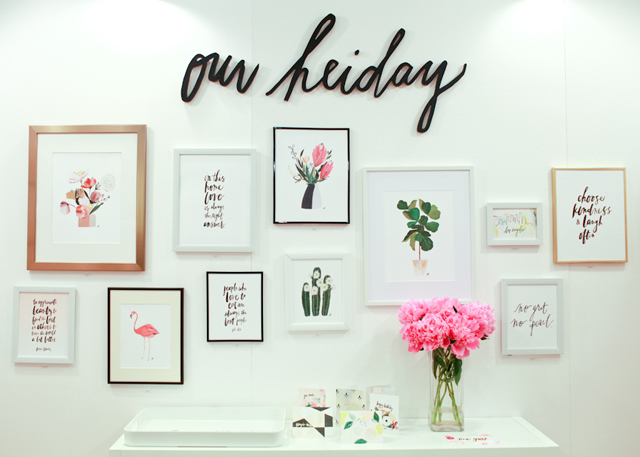
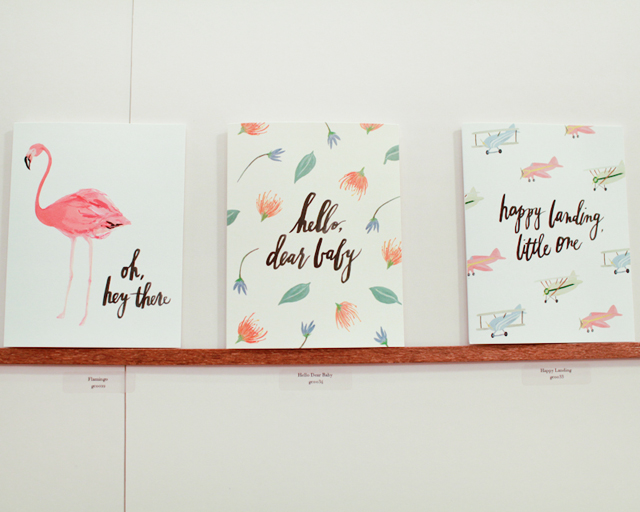
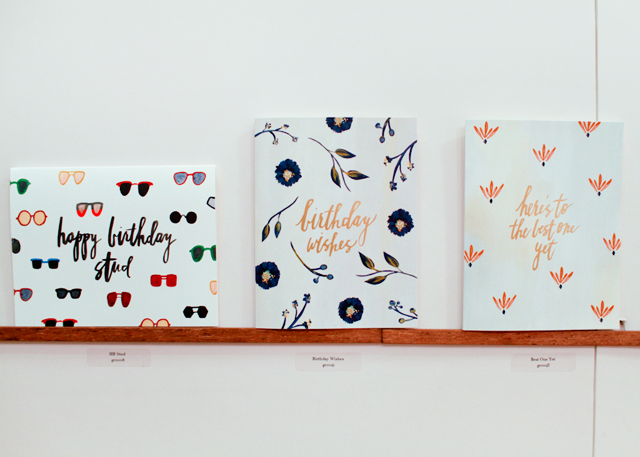
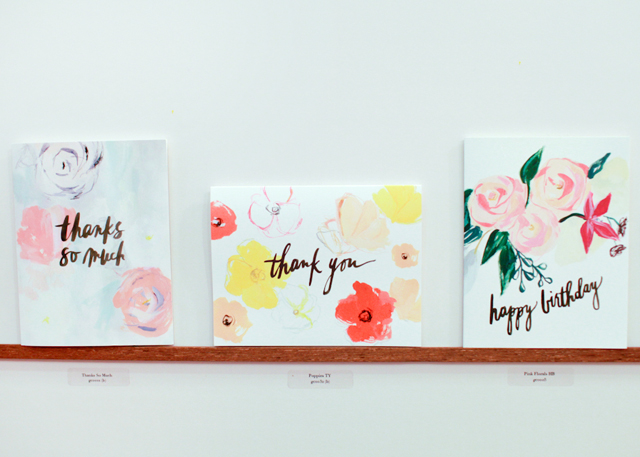
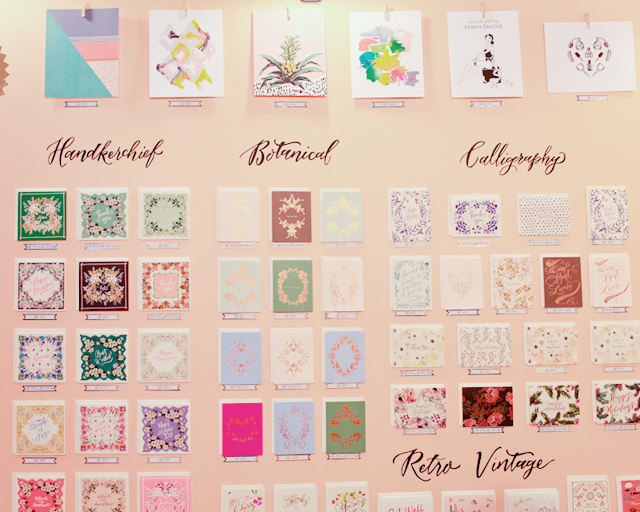
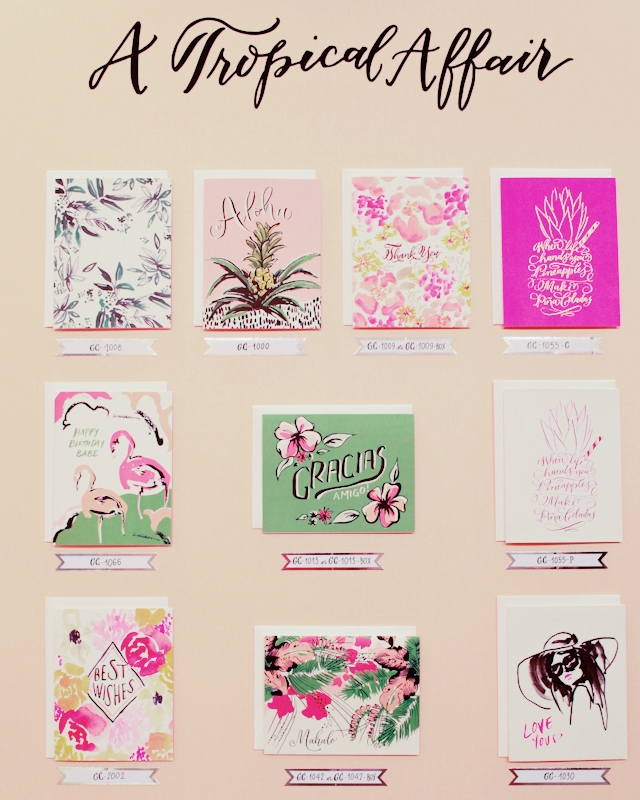
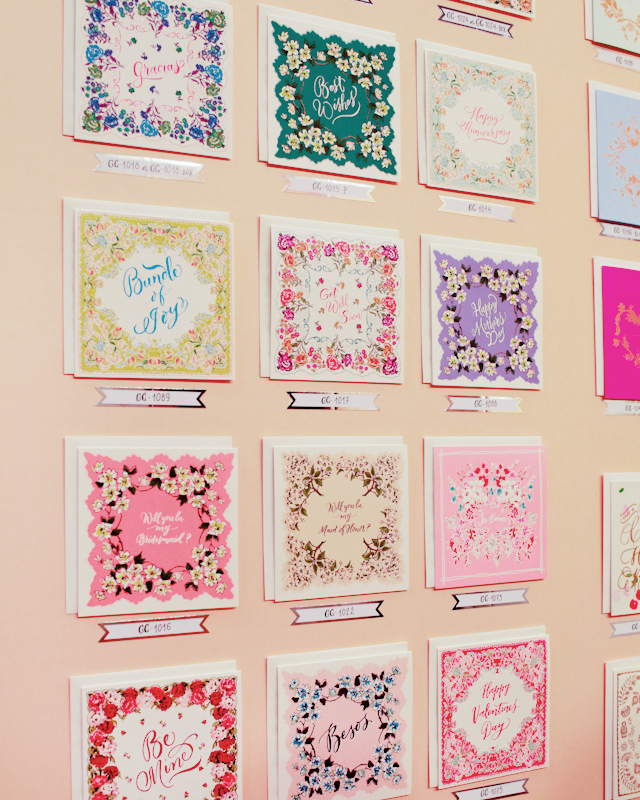
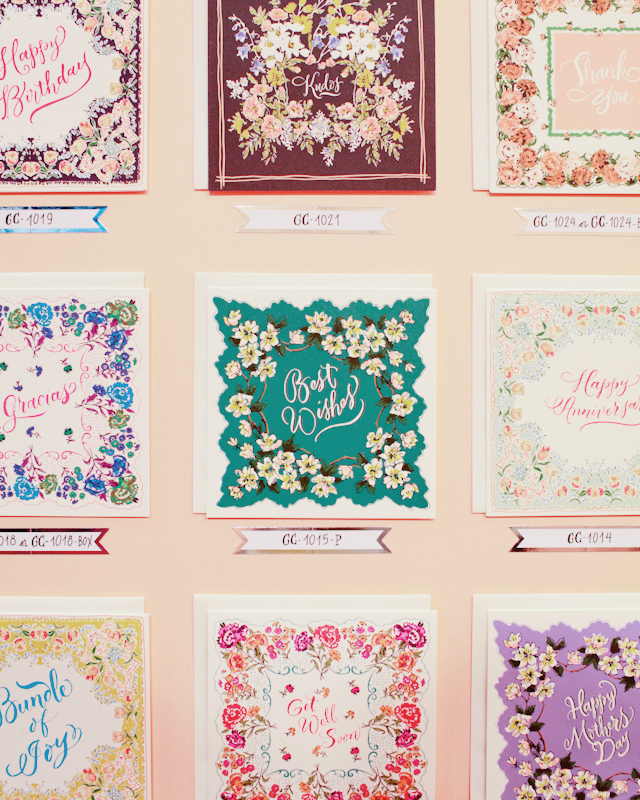
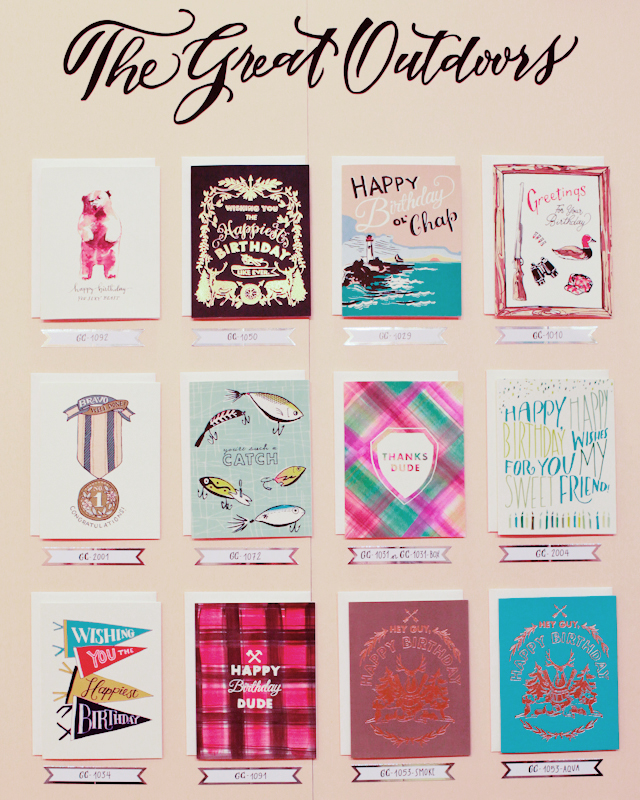
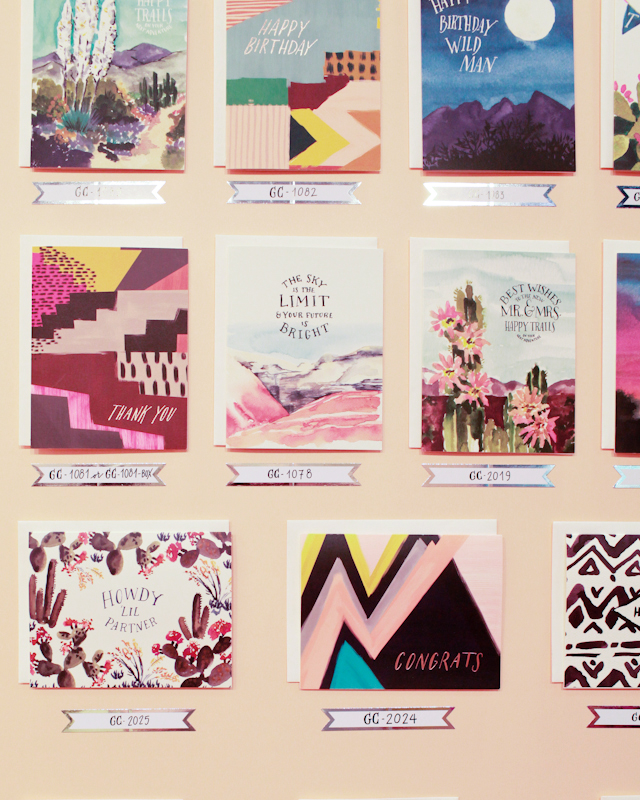
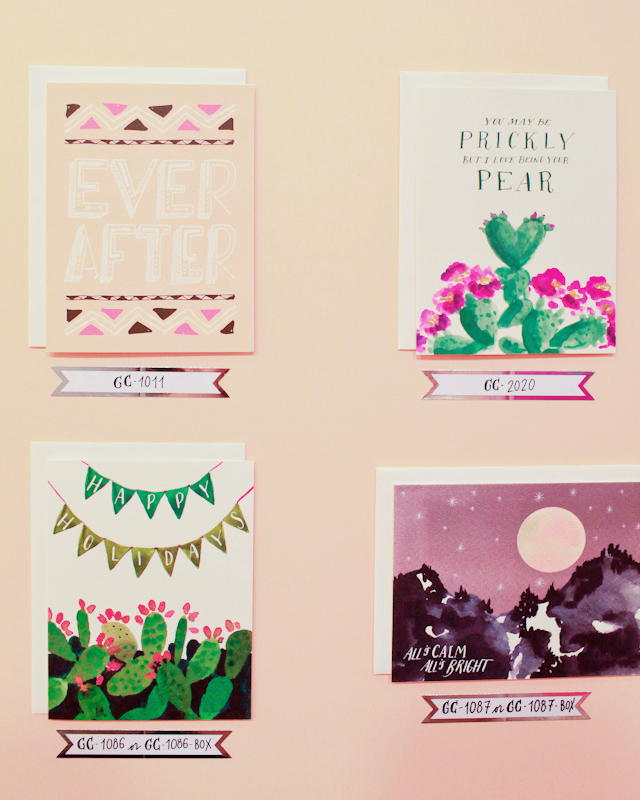
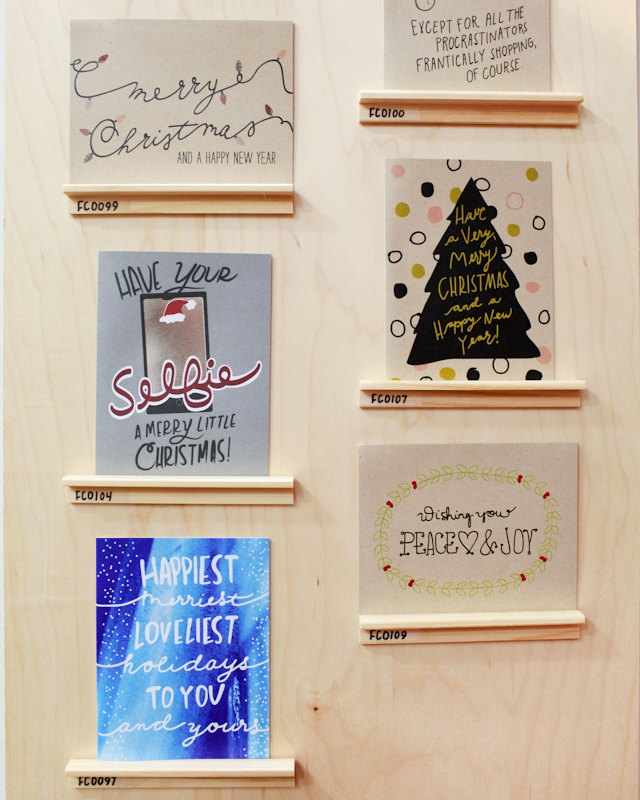
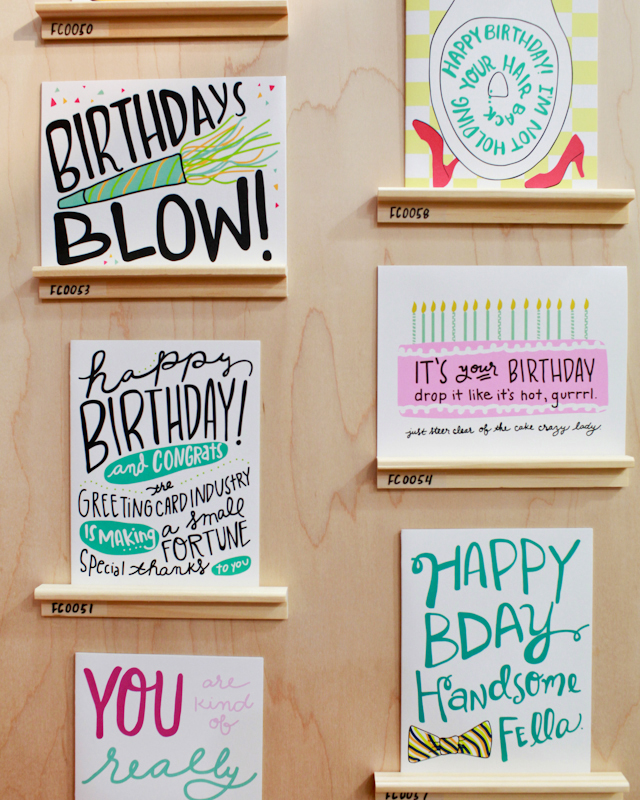
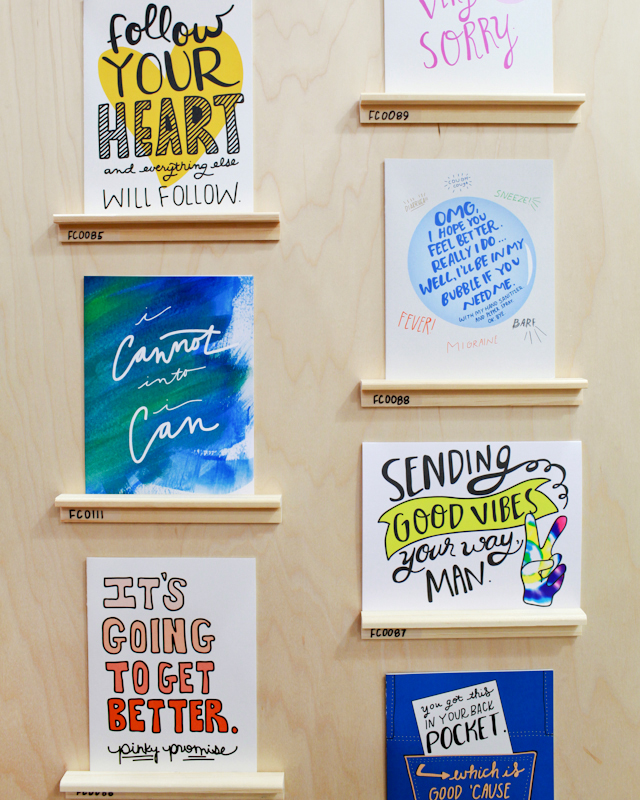
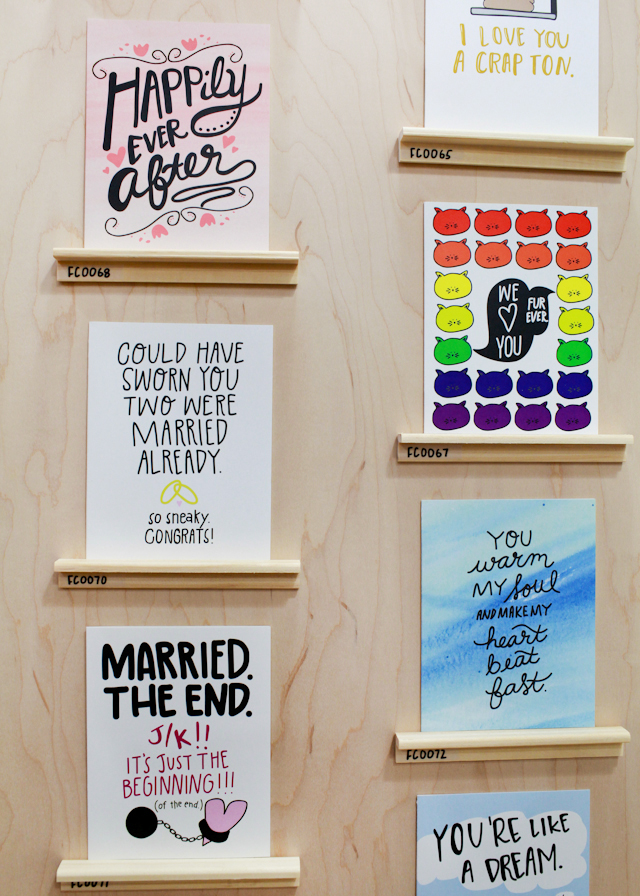
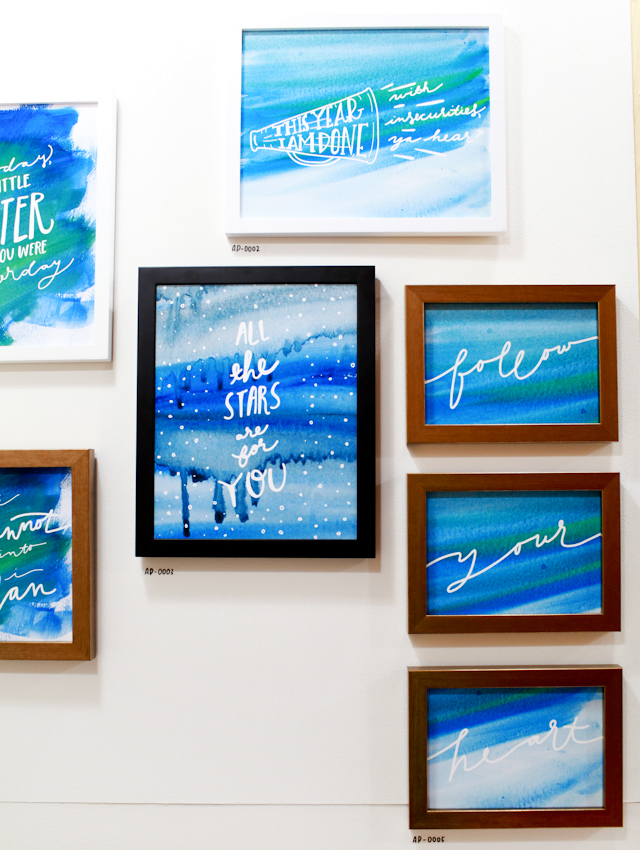
Okay! We’re back from the long weekend and ready to kick off recaps from the 2015 National Stationery Show! There were a ton of new exhibitors at this year’s show, so I thought we’d start with a few of those debuts for our first recap post. From familiar faces around OSBP – including our very own Bailey and Emma from Antiquaria and Bespoke Press – to newer companies like Our Heiday, Sea & Lake, and Hen Pen Paper Co., it was fun to see such strong debuts at this year’s show. We’ll begin with the beautiful hand painted and hand lettered designs from Our Heiday!

NSS-2015-Our-Heiday-OSBP-5

NSS-2015-Our-Heiday-OSBP-15

NSS-2015-Our-Heiday-OSBP-4

NSS-2015-Our-Heiday-OSBP-6

NSS-2015-Our-Heiday-OSBP-8

NSS-2015-Our-Heiday-OSBP-9

NSS-2015-Our-Heiday-OSBP-16

NSS-2015-Our-Heiday-OSBP-17

NSS-2015-Our-Heiday-OSBP-18

NSS-2015-Our-Heiday-OSBP-21

NSS-2015-Our-Heiday-OSBP-24

NSS-2015-Our-Heiday-OSBP-26

NSS-2015-Our-Heiday-OSBP-28

Our Heiday

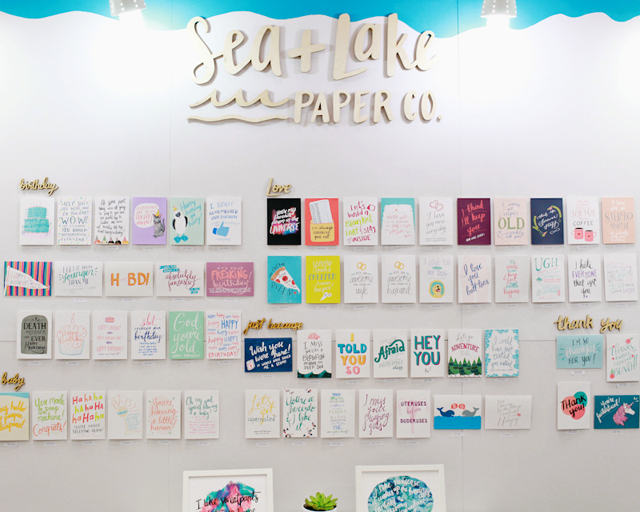
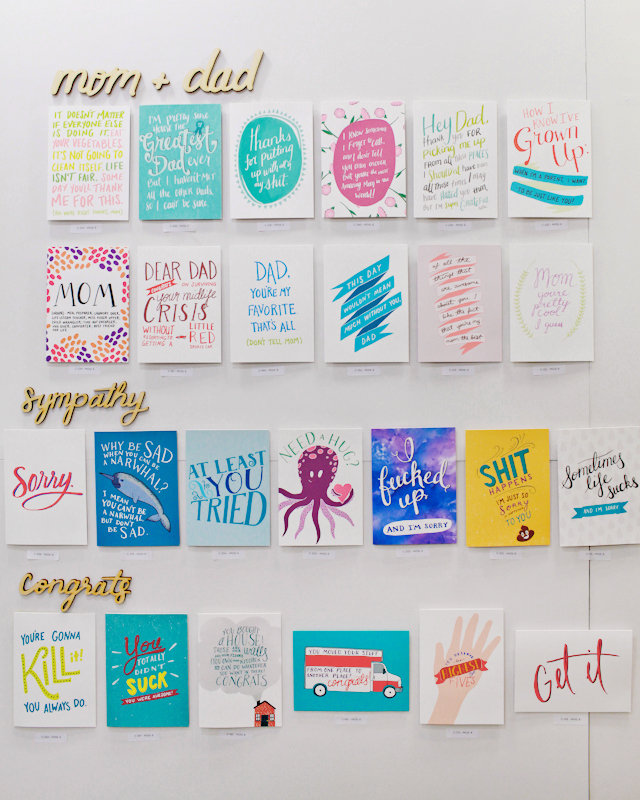
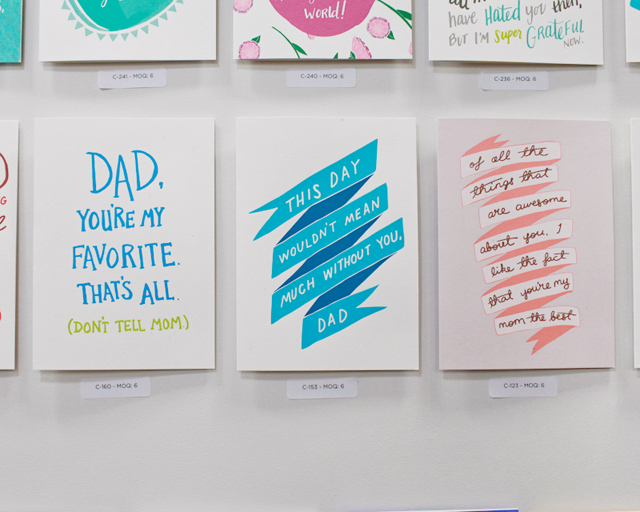
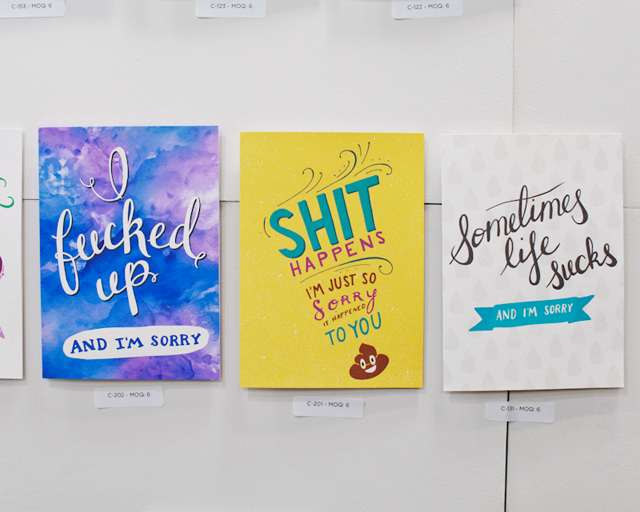
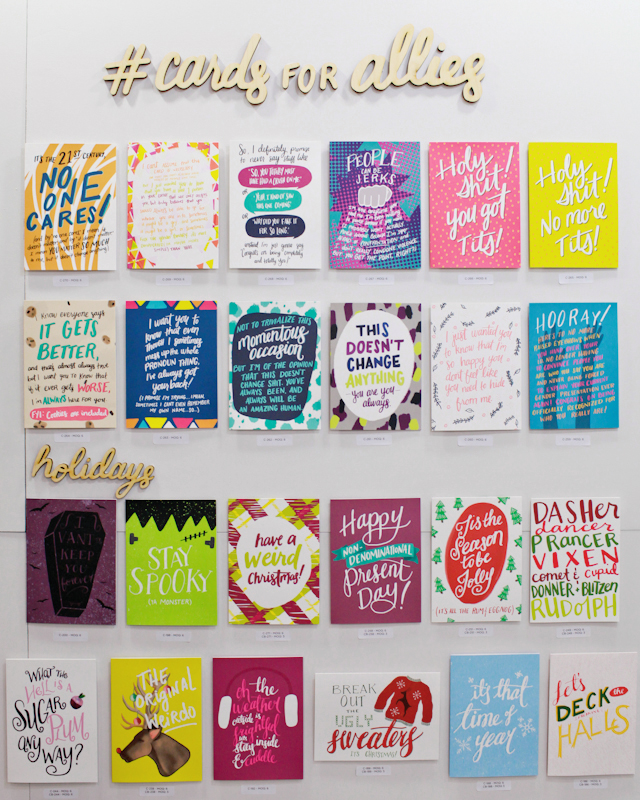
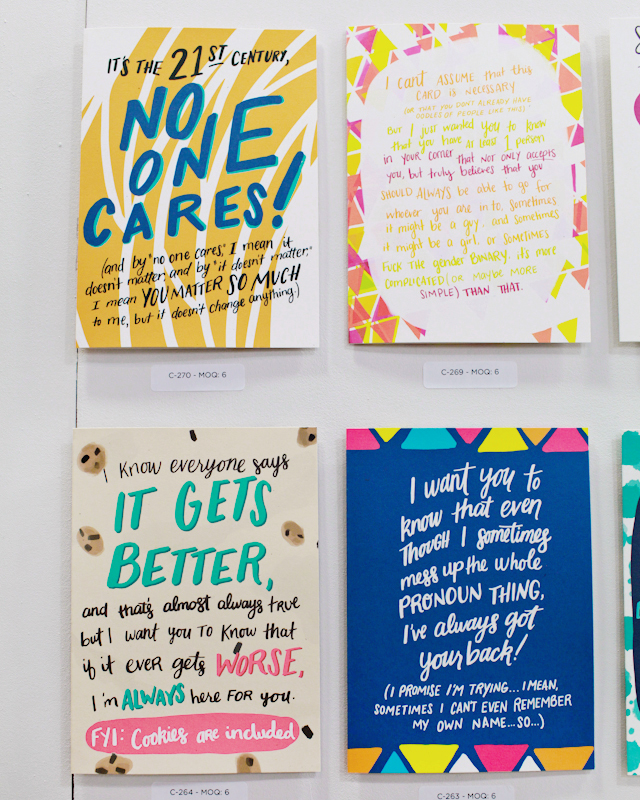
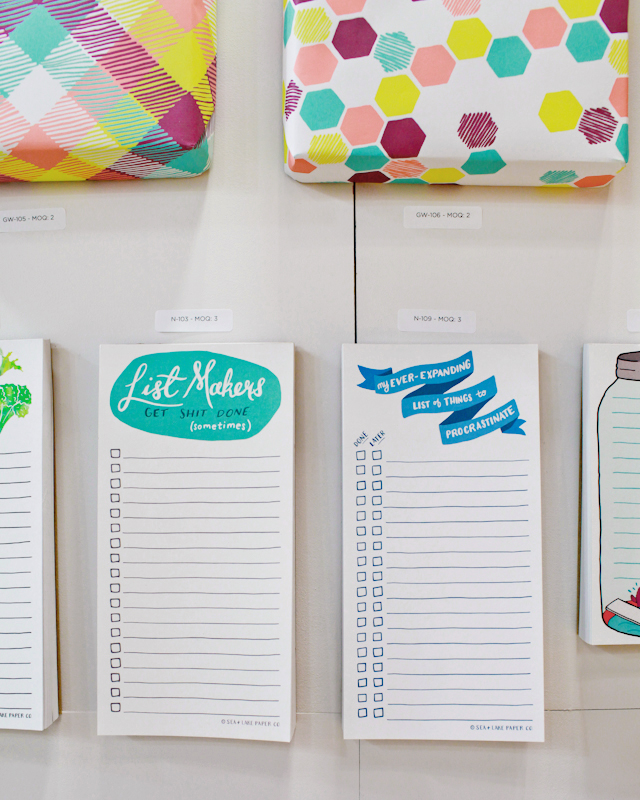
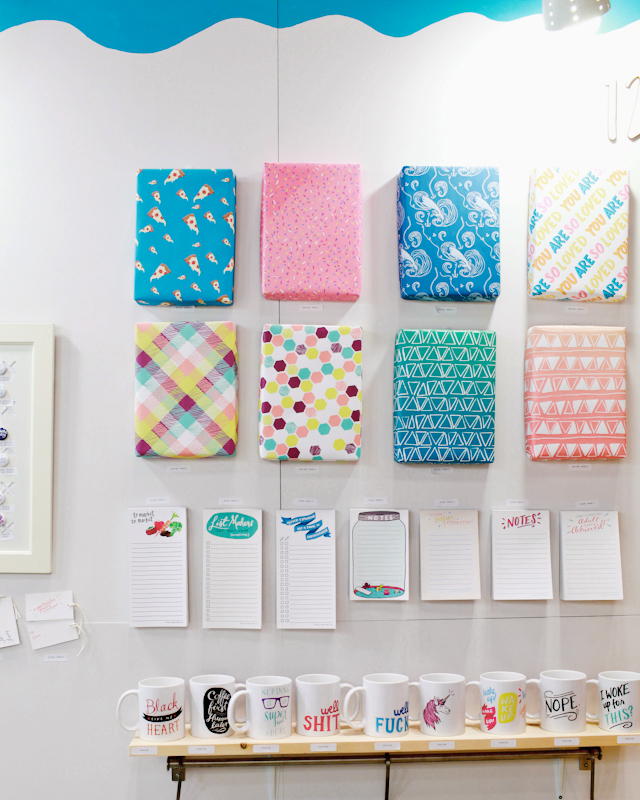
You might remember Sea & Lake‘s awesome narwhal card from this post a couple of months ago – and there’s a lot more where that came from! These ladies have a way with words (I love their Cards for Allies series), from greeting cards and notepads to gift wrap and mugs!

NSS-2015-Sea-and-Lake-OSBP-24

NSS-2015-Sea-and-Lake-OSBP-2

NSS-2015-Sea-and-Lake-OSBP-8

NSS-2015-Sea-and-Lake-OSBP-6

NSS-2015-Sea-and-Lake-OSBP-9

NSS-2015-Sea-and-Lake-OSBP-10

NSS-2015-Sea-and-Lake-OSBP-11

NSS-2015-Sea-and-Lake-OSBP-15

NSS-2015-Sea-and-Lake-OSBP-17

NSS-2015-Sea-and-Lake-OSBP-21

NSS-2015-Sea-and-Lake-OSBP-25

NSS-2015-Sea-and-Lake-OSBP-27

NSS-2015-Sea-and-Lake-OSBP-28

NSS-2015-Sea-and-Lake-OSBP-31

Sea & Lake

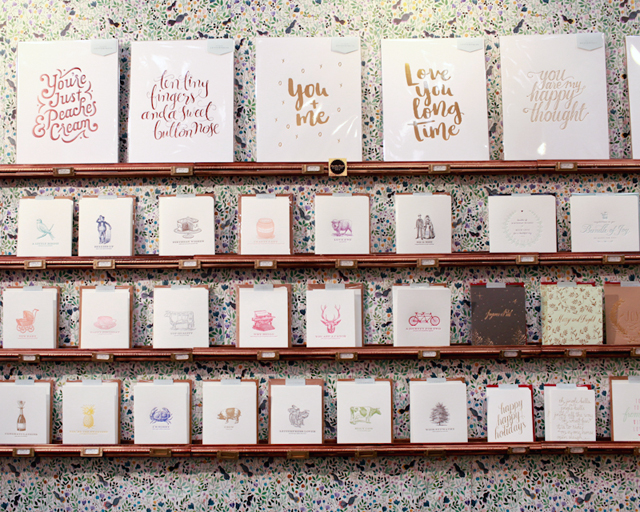
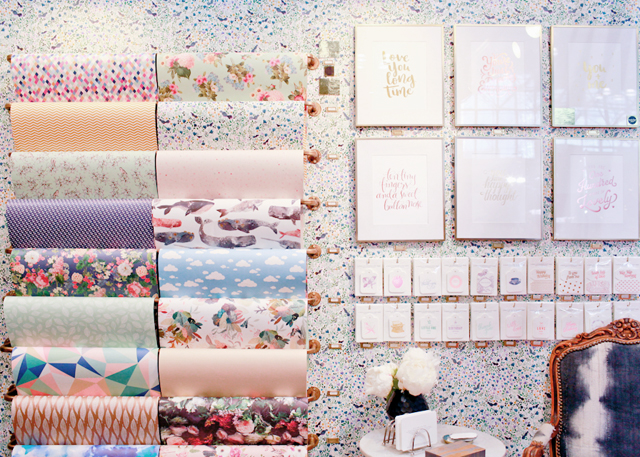
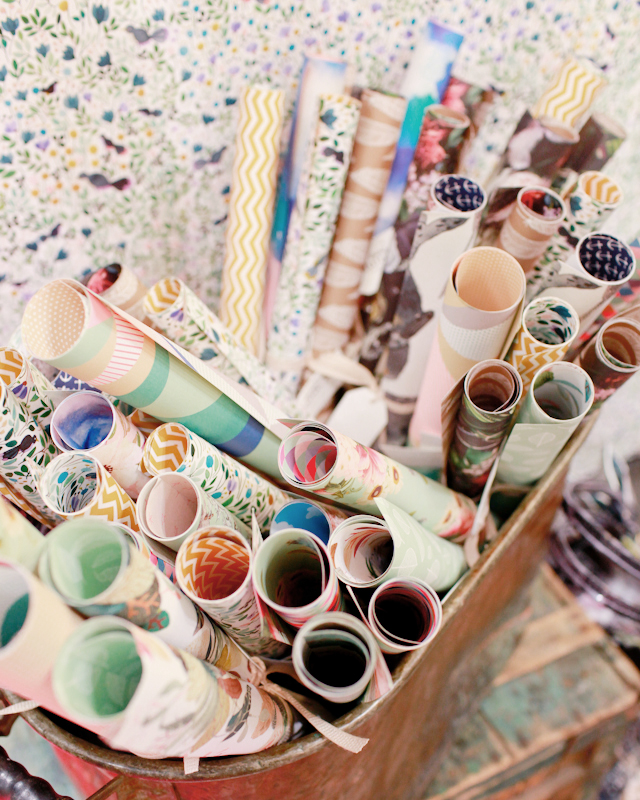
I’ve been following the beautiful work of Alischa from Bespoke Letterpress out of Australia for years – it was so wonderful to finally see everything in person! I loved the foil art prints and greeting cards (including a fun sparkly gold foil!) and double sided gift wrap. Alischa even wallpapered her entire booth in one of her gift wrap patterns!
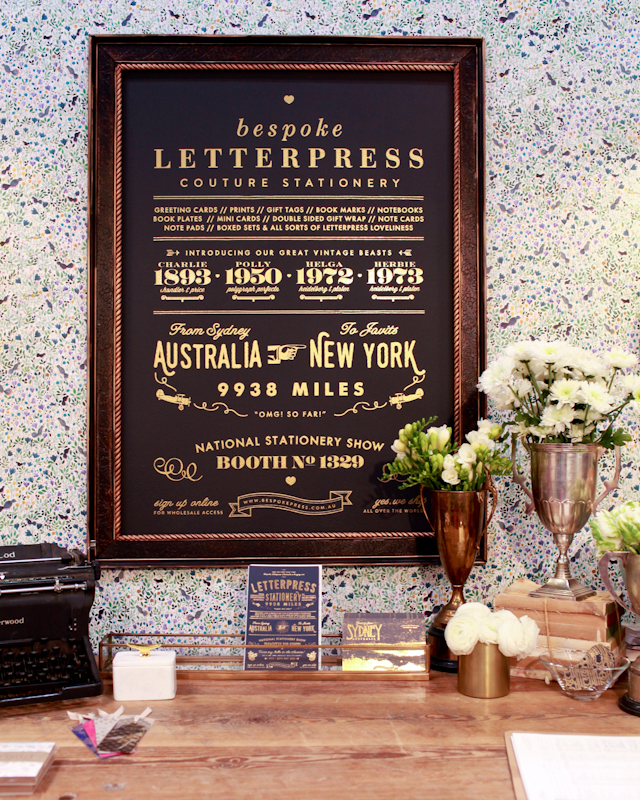
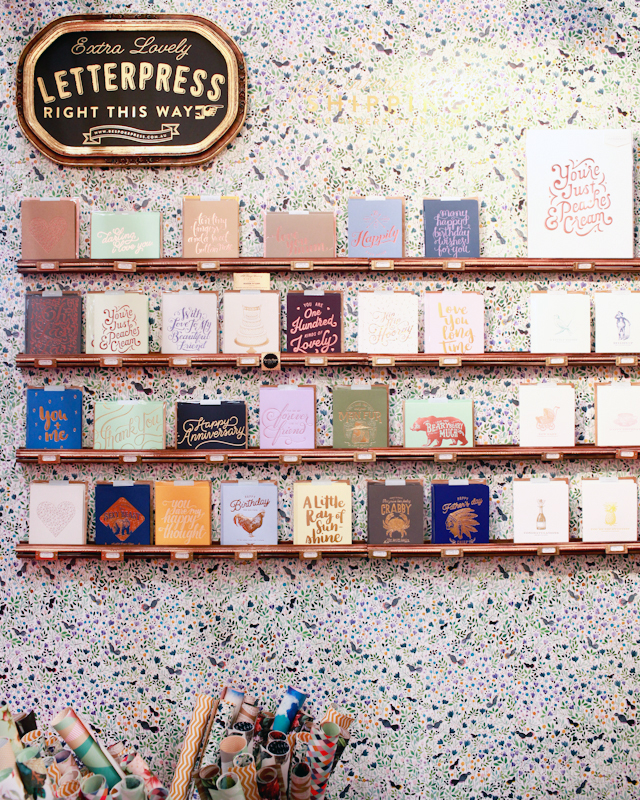
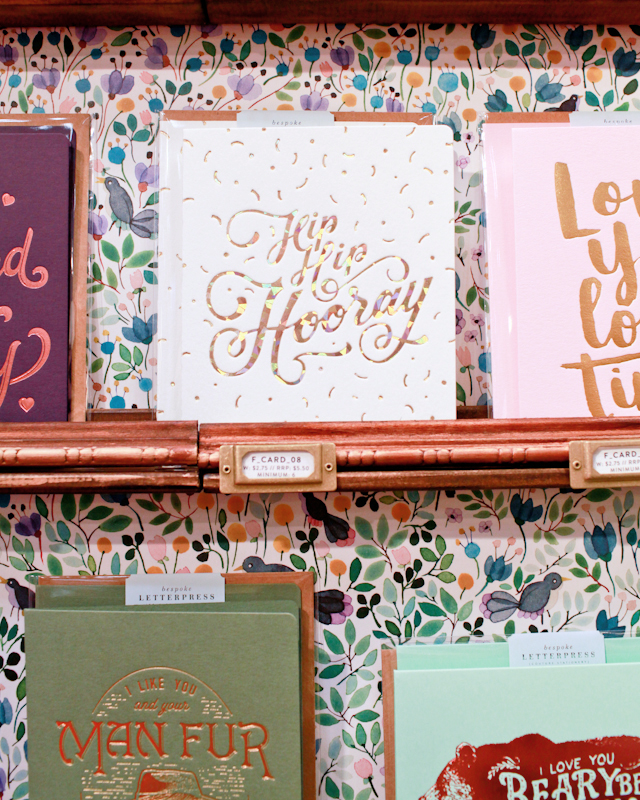
NSS-2015-Bespoke-Press-OSBP-28

NSS-2015-Bespoke-Press-OSBP-19

NSS-2015-Bespoke-Press-OSBP-16

NSS-2015-Bespoke-Press-OSBP-21

NSS-2015-Bespoke-Press-OSBP-23

NSS-2015-Bespoke-Press-OSBP-32

NSS-2015-Bespoke-Press-OSBP-13

Bespoke Press

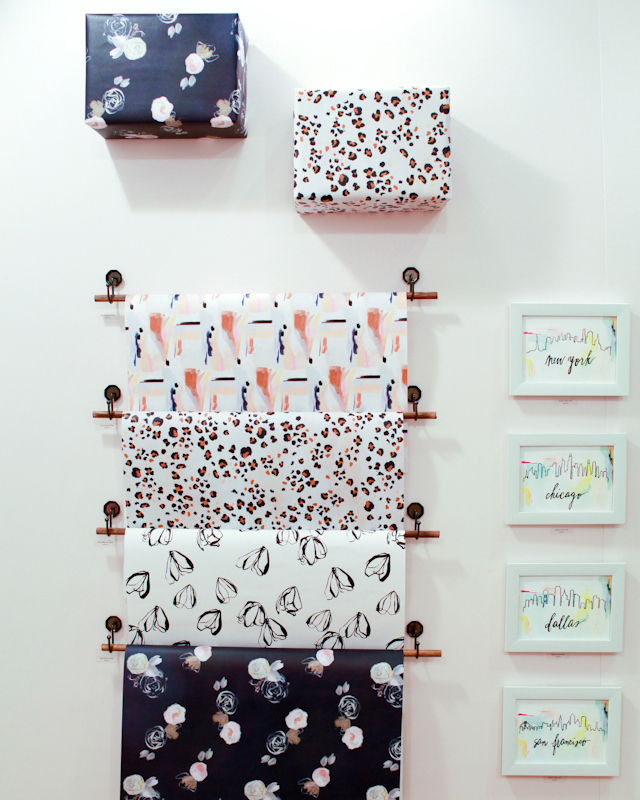
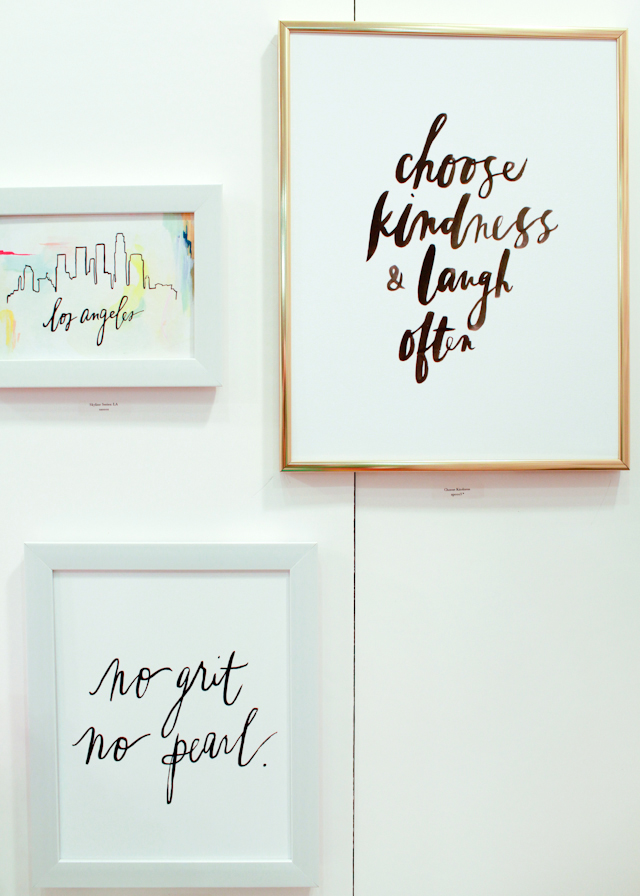
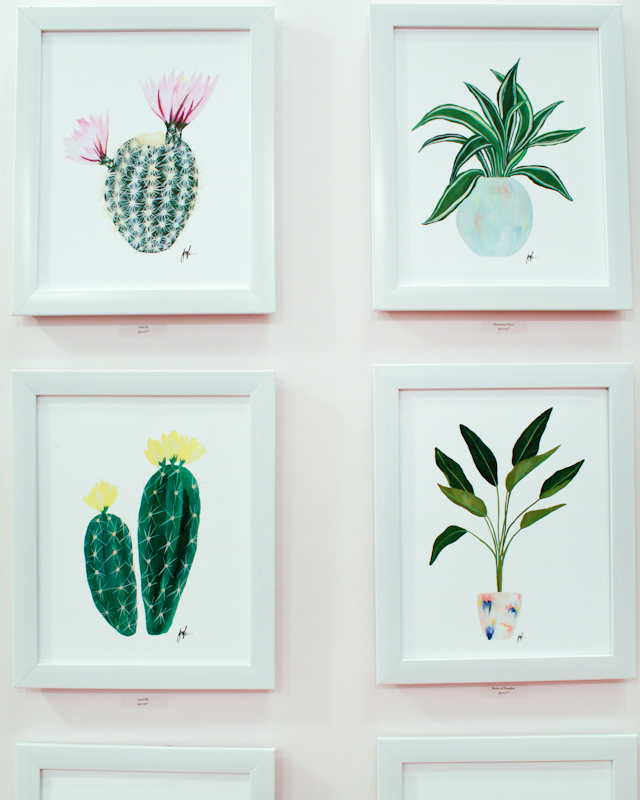
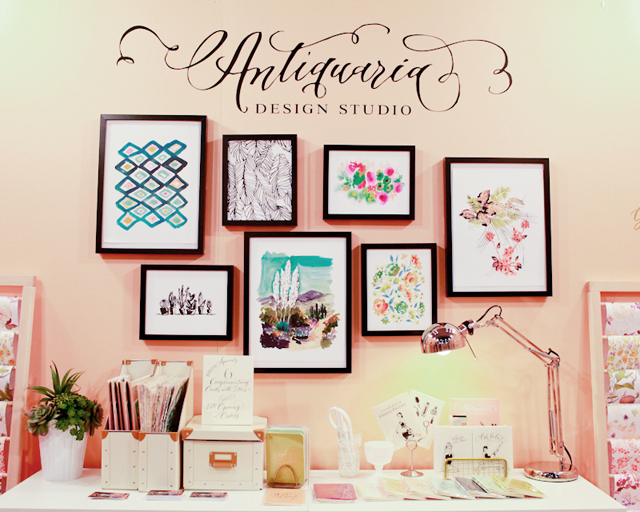
Antiquaria’s debut booth was absolutely stunning – and full of gorgeous stationery, art prints, and gift wrap! Bailey and Emma had every base covered in their booth, from tropical botanicals to western cactus designs to delicate floral patterns. It has been so fun to watch Antiquaria grow over the last few years, and I can’t wait to see where they go from here!

NSS-2015-Antiquaria-Design-OSBP-10

NSS-2015-Antiquaria-Design-OSBP-30

NSS-2015-Antiquaria-Design-OSBP-13

NSS-2015-Antiquaria-Design-OSBP-8

NSS-2015-Antiquaria-Design-OSBP-29

NSS-2015-Antiquaria-Design-OSBP-15

NSS-2015-Antiquaria-Design-OSBP-23

NSS-2015-Antiquaria-Design-OSBP-24

NSS-2015-Antiquaria-Design-OSBP-28

NSS-2015-Antiquaria-Design-OSBP-35

Antiquaria

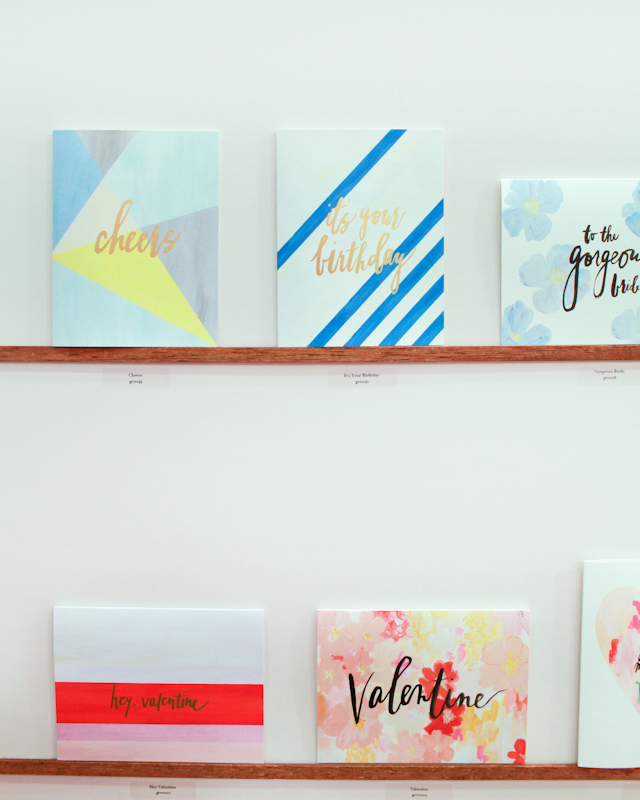
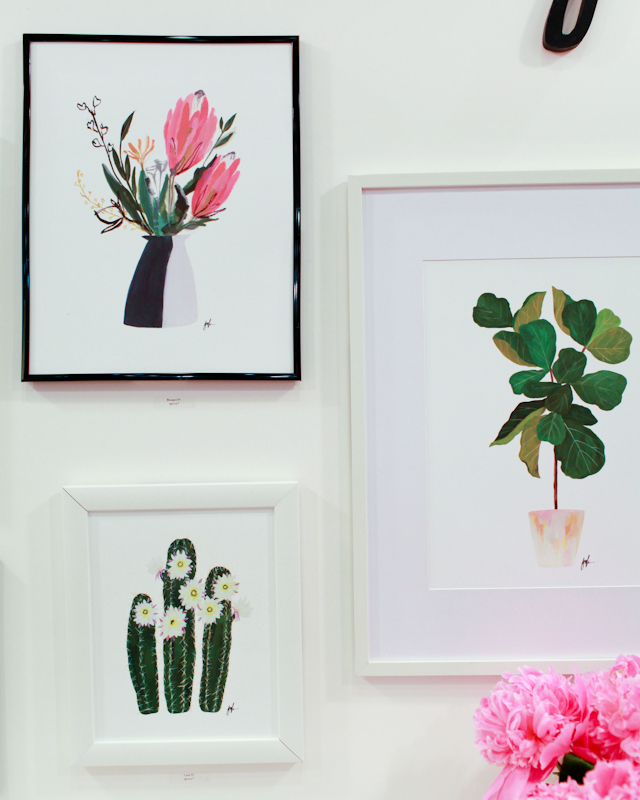
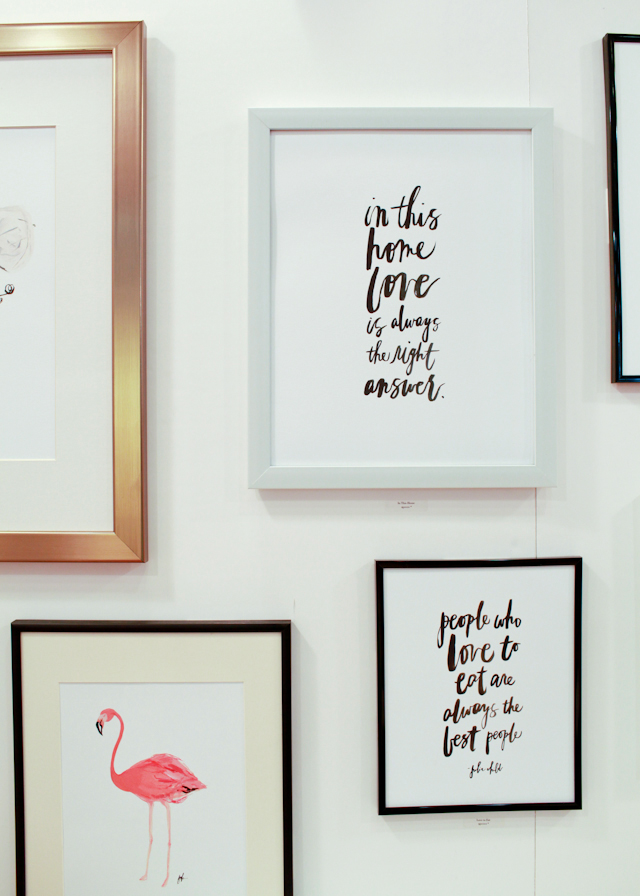
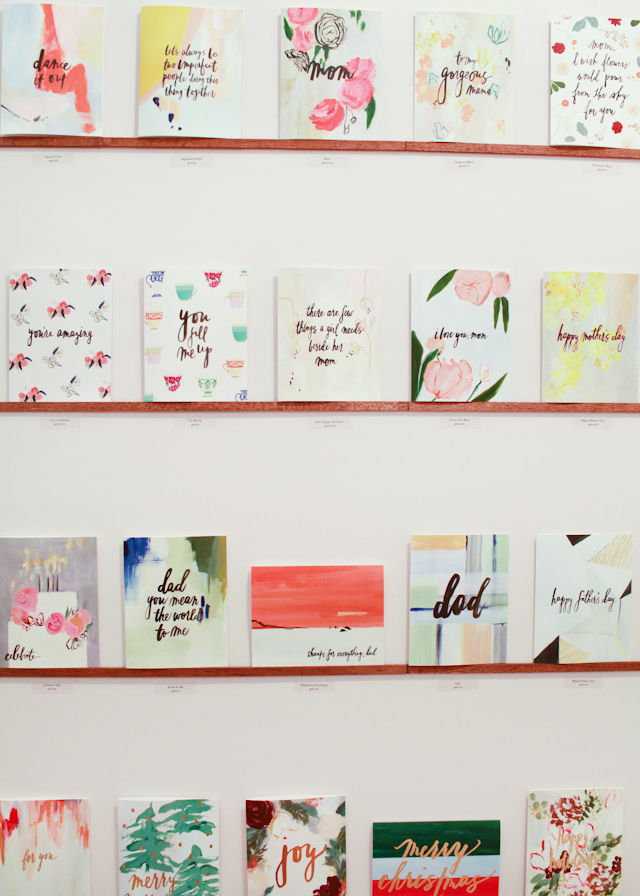
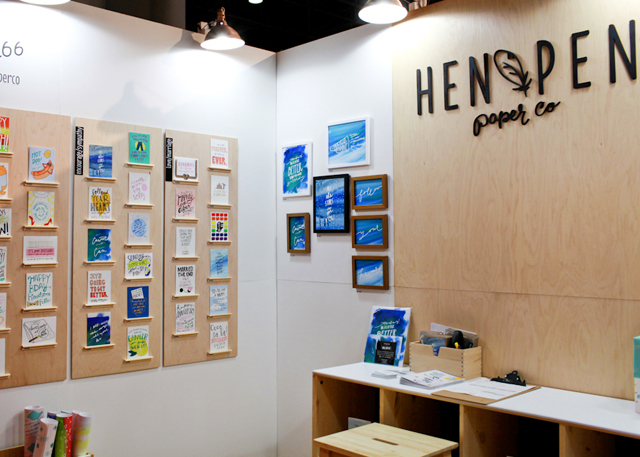
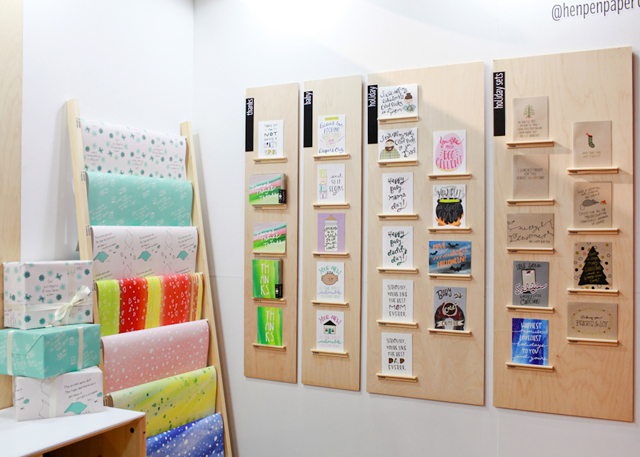
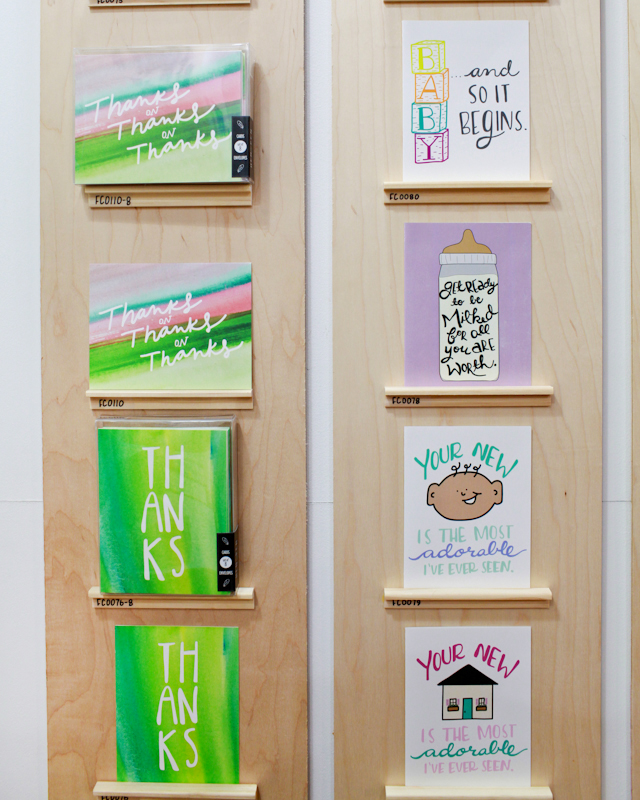
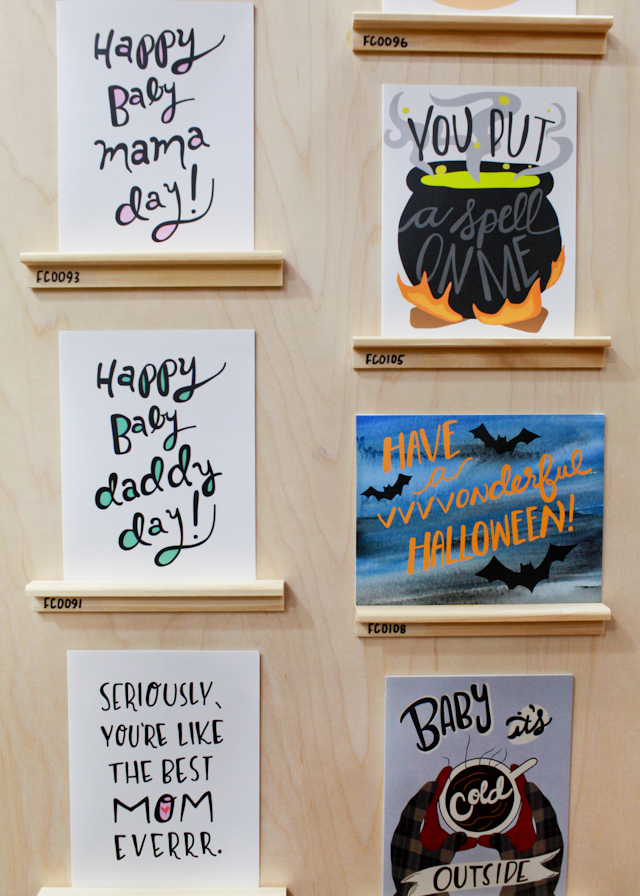
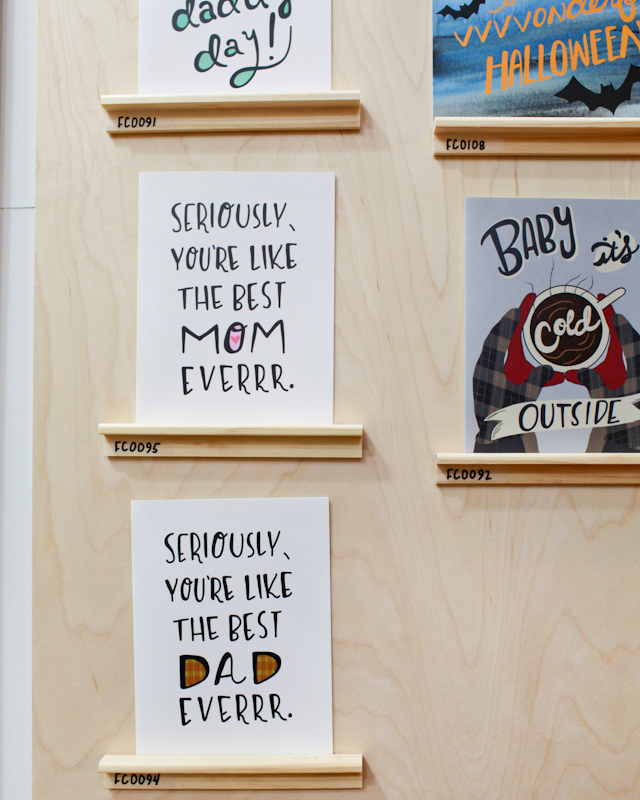
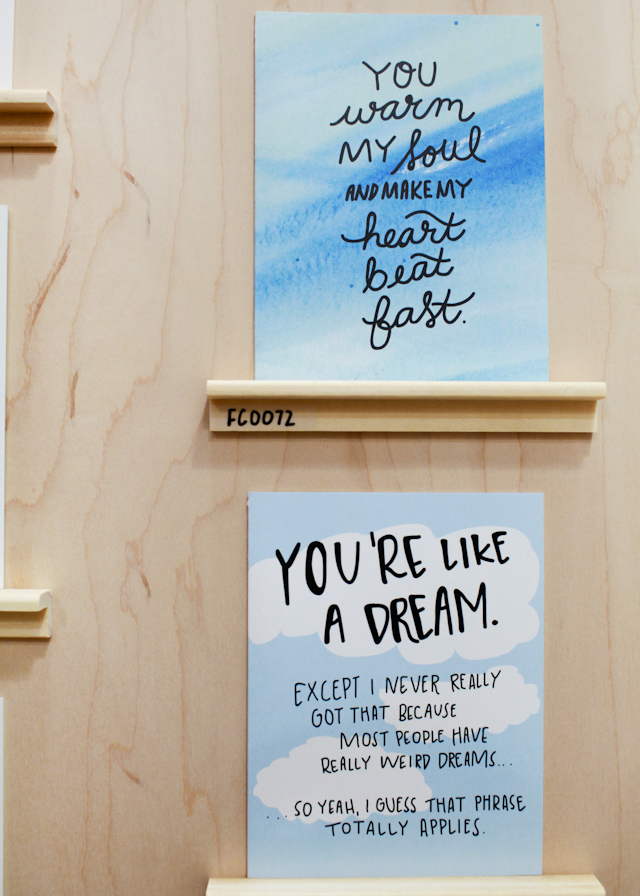
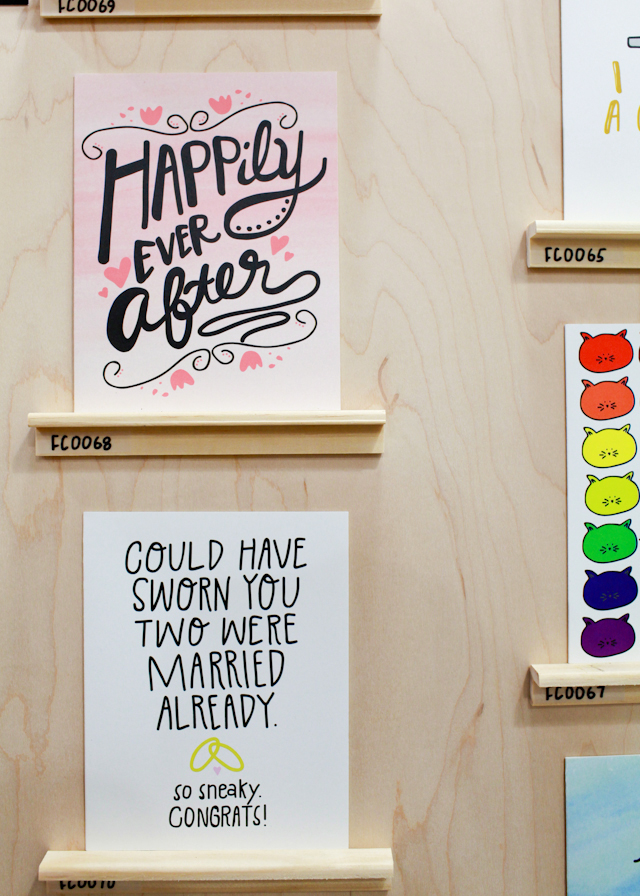
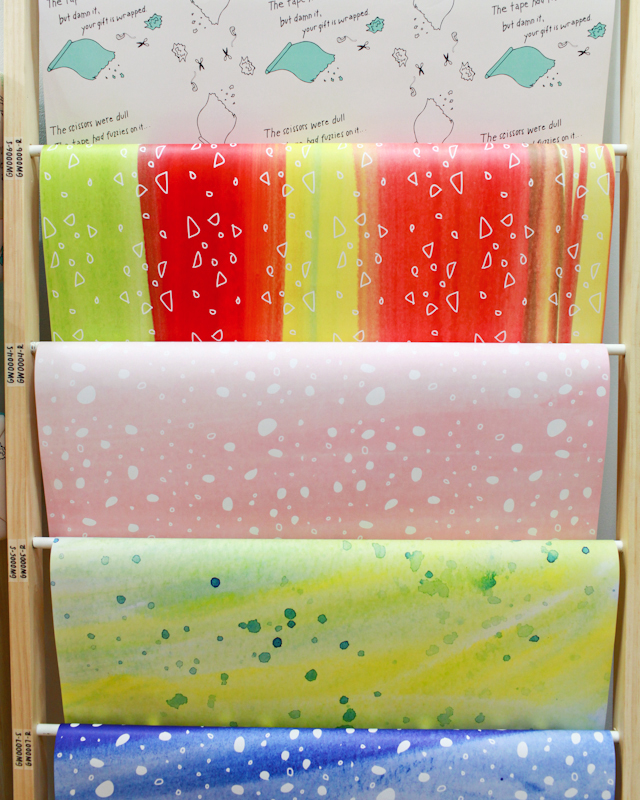
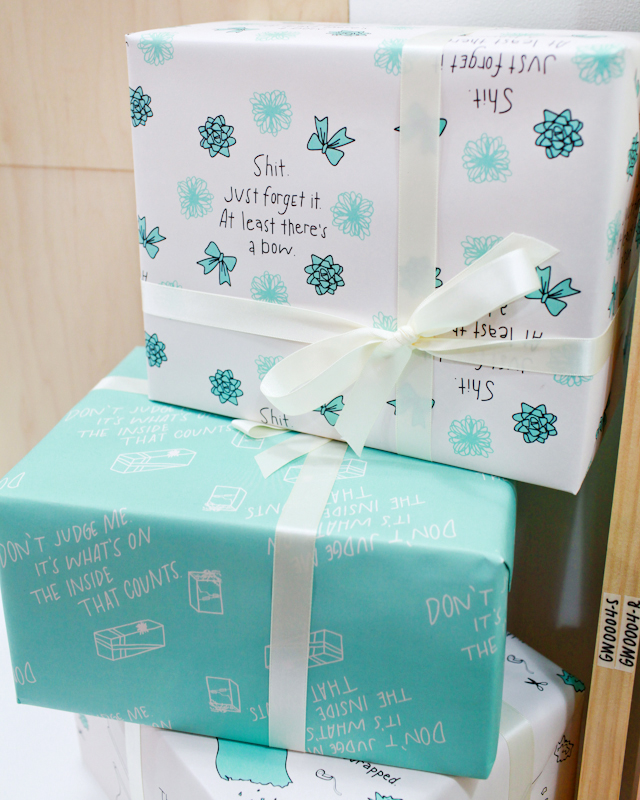
Last up for today – sweet hand lettered greeting cards, hand painted gift wrap, and art prints from Hen Pen Paper Co.!

NSS-2015-Hen-Pen-Paper-Co-OSBP-3

NSS-2015-Hen-Pen-Paper-Co-OSBP-4

NSS-2015-Hen-Pen-Paper-Co-OSBP-5

NSS-2015-Hen-Pen-Paper-Co-OSBP-9

NSS-2015-Hen-Pen-Paper-Co-OSBP-10

NSS-2015-Hen-Pen-Paper-Co-OSBP-12

NSS-2015-Hen-Pen-Paper-Co-OSBP-14

NSS-2015-Hen-Pen-Paper-Co-OSBP-15

NSS-2015-Hen-Pen-Paper-Co-OSBP-17

NSS-2015-Hen-Pen-Paper-Co-OSBP-19

NSS-2015-Hen-Pen-Paper-Co-OSBP-20

NSS-2015-Hen-Pen-Paper-Co-OSBP-21

NSS-2015-Hen-Pen-Paper-Co-OSBP-24

NSS-2015-Hen-Pen-Paper-Co-OSBP-25

Hen Pen Paper Co.

More from the 2015 National Stationery Show tomorrow!

Photos by Nole Garey for Oh So Beautiful Paper

Seasonal Stationery: Mother’s Day Cards, Part 4

We’re getting down to the wire – but I just had to share a few more awesome Mother’s Day cards with you!

2015-Mothers-Day-Cards-Part7

1. laLa Grace

2. Sideshow Press

3. Near Modern Disaster (I also really love this one)

4. Paperfelt

5. Ladyfingers Letterpress

6. The Social Type

2015-Mothers-Day-Cards-Part8

7. Worthwhile Paper

8. The Great Lakes Goods

9. Antiquaria

10. Whimsy & Wild

11. Gold Teeth Brooklyn

12. Snow & Ivy

If you’re looking for something else – you can find 200+ beautiful Mother’s Day cards in the OSBP Market List right here!


Inspired By: Tropical Foliage

Pineapples, watermelons, and flamingos all had a very large presence at last year’s National Stationery Show, but this year I’m expecting an explosion of tropical foliage! From palm fronds to philodendron leaves to banana leaves – I just can’t get enough!

OSBP Trendspotting: Tropical Foliage Round Up

1. Hartland Brooklyn

2. Kertis gold + silver leaf pattern leather clutch

3. Ferme à Papier palm triangle note pad

4. Antiquaria Mahalo card

5. The Aestate banana leaves watercolor print

6. Philodendron leaf pillow

DIY Hand Lettered Wall Art

We’re in the middle of prepping for the National Stationery Show in May, which for us means finalizing our latest product designs and finishing the catalogs. In the process, we have been designing new art prints for our line and shop – so we definitely have wall art on the brain! Our tutorial today is a break down of how to make your very own, one-of-a-kind hand lettered wall art for your house or to give as a gift. Just find your favorite quote and get pencil to paper! –Bailey and Emma of Antiquaria

DIY Hand Lettered Wall Art by Antiquaria for Oh So Beautiful Paper

Materials

High quality archival paper, such as Arches Watercolor Paper Hot Press

Pencil

Kneaded Eraser

Brush Pen

Fine Felt Tipped Pen

Gouache (optional)

Copy Paper (to draft layout)

DIY Hand Lettered Wall Art by Antiquaria for Oh So Beautiful Paper

DIY Hand Lettered Wall Art by Antiquaria for Oh So Beautiful Paper

Step One: Using sheets of copy paper, sketch out your quote in a variety of different layouts/styles. Look at some of your favorite fonts for letter-shape inspiration if you feel stuck about how to make the letters go together. Once you’ve settled on a layout that you like, re-draw it on your nice archival paper. So that it pressure isn’t too high, make sure that you have a couple of sheets of the nice paper-in case you need to make a couple of drafts of the piece.

DIY Hand Lettered Wall Art by Antiquaria for Oh So Beautiful Paper

Step Two: Before putting any ink down onto your piece, you want to lift up the pencil lines so that they can act as a light guide for you but will not require heavy force once the ink is in place. A kneaded eraser does this job easily by rolling over the pencil and picking up the excess lead, as shown above.

DIY Hand Lettered Wall Art by Antiquaria for Oh So Beautiful Paper

Step Three: Take a deep breath and do your lettering with ink using your very light pencil lines as a guide. You can use a brush pen as we did here, a brush and ink, a felt tipped pen or a calligraphy pen. Each of these will yield a different looking result so it’s worth figuring out what you like best (a great thing to do while your drafting your design on copy paper). We like the boldness that a brush pen gives, especially when it meant to be viewed from a distance, which it will be when hanging on the wall!

DIY Hand Lettered Wall Art by Antiquaria for Oh So Beautiful Paper

Step Four: To give some polish to the lettering, we like to go in with a fine tipped felt pen and do “touch-ups” to the outline. We typically smooth out any ending flourishes, tops of letters (like the “t”) and light areas that the brush didn’t get. The step is optional. You may achieve exactly the look you’re going for in step three! Once you’re happy with the lettering, gently erase the remaining light pencil lines.

DIY Hand Lettered Wall Art by Antiquaria for Oh So Beautiful Paper

Step Five: We added a pop of color with a hot pink heart painted with gouache (opaque water color). This step is also optional and will depend on your design!

We hope that you have fun creating your own pieces and that you let your imagination run wild! If you’re new to lettering, it’s probably best to start with one word or a short phrase so that you can practice the process without the layout being too difficult. Have fun and Happy Lettering!

All artwork © 2015 Antiquaria, with DIY tutorials created exclusively for Oh So Beautiful Paper and intended for personal, non-commercial use only.

Photo Credits: Antiquaria for Oh So Beautiful Paper

DIY Blue and Gold Embossed Save the Dates

In our last DIY post, we shared a gorgeous free pattern download for envelopes liners and place cards. We thought it would be fun this week to actually use the pattern as a launching point and design an awesome save the date that utilizes it in the design. The mixed shades of blue feels fresh and spring-y and we used our favorite embossing technique to incorporate lots of gold into the design (our favorite if you haven’t noticed). The result is a stunning and custom looking suite which can all be easily accomplished on your own with a few key materials! –Bailey and Emma of Antiquaria

DIY Blue and Gold Wedding Save the Dates by Antiquaria for Oh So Beautiful Paper

Materials

Laurel Wreath Save the Date Stamp

Laurel Wreath Return Address Stamp

Embossing Stamp Pad

Embossing Heat Tool

Embossing Powder in Gold

A2 Cards (we used Lake)

A2 Envelopes (we used Bluebell)

Gold Dot Washi Tape

Gold Glitter Heart Stickers

Liner (free download, printed on white text weight paper)

Envelope Liner Templates

Pencil and Scissors

Stick Glue or Double Sided Tape

Gold Calligraphy Ink

Vintage Postage

DIY Blue and Gold Wedding Save the Dates by Antiquaria for Oh So Beautiful Paper

DIY Blue and Gold Wedding Save the Dates by Antiquaria for Oh So Beautiful Paper

Step One: We embossed our Laurel Wreath Save the Date stamp and our Laurel Wreath Return Address Stamp for this save the date design. All of the pieces were embossed with our favorite gold embossing powder which gives lovely, fine results. Simply stamp your design on your card (Lake A2) and envelope (Bluebell A2) (either in matching ink or with Versamark glue ink, as pictured), dust the powder over it, tap off the excess, and heat set the print. For more information about how to emboss using stamps, please watch this instructional video.

DIY Blue and Gold Wedding Save the Dates by Antiquaria for Oh So Beautiful Paper

DIY Blue and Gold Wedding Save the Dates by Antiquaria for Oh So Beautiful Paper

Step Two: To add personality to the design, we added an envelope liner made from our latest free pattern download. It really helps dress up the whole suite! Print the pattern out on your home printer using a high quality text weight paper, then trace the A2 envelope liner template onto the paper and cut it out with scissors. To install, simply use stick glue or double sided tape to adhere them into your envelope.

DIY Blue and Gold Wedding Save the Dates by Antiquaria for Oh So Beautiful Paper

Step Three: All that’s left now is the finishing touches! We addressed them using our favorite gold calligraphy ink and a dip pen – but your could also use a gold gel pen and your prettiest cursive to achieve a similar look. We added gold polka dot washi tape, a glitter heart sticker and vintage postage to tie everything together and make the envelope just as gorgeous as the save the date.

DIY Blue and Gold Wedding Save the Dates by Antiquaria for Oh So Beautiful Paper

We know your guests will love getting these beauties in the mail!

All artwork © 2015 Antiquaria, with DIY tutorials created exclusively for Oh So Beautiful Paper. All artwork is made available for personal use only. Anti­quaria is a mem­ber of the Designer Rolodex – you can see more of their beau­ti­ful work right here!

Photo Credits: Antiquaria for Oh So Beautiful Paper