Giada + Davide’s Kraft Paper and Lace Wedding Invitations

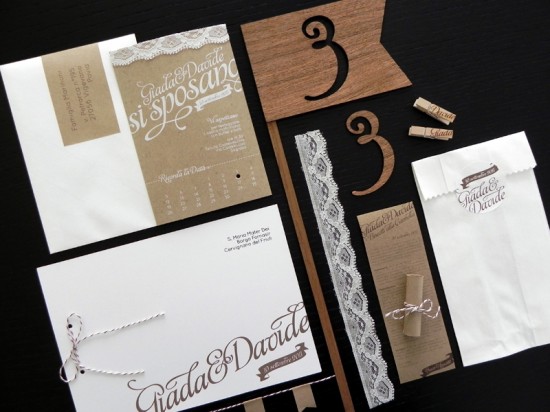
As much as I love bright pops of color, I’m just as easily blown away by a beautiful wedding invitation suite done all in soft and natural colors.  Valentina from Cut and Paste created these beautiful invitations for a recent wedding in Friuli, Italy, combining kraft paper, lace, and even lasercut wood into the wedding invitations and day-of stationery!

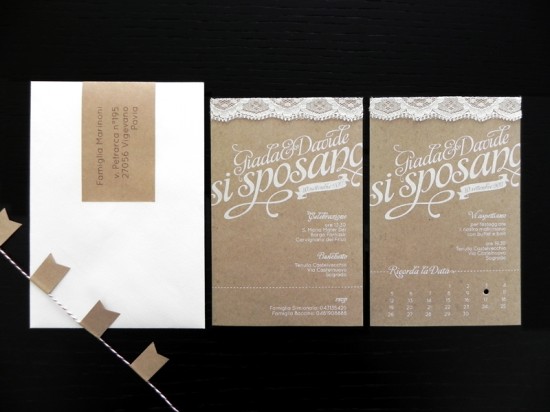
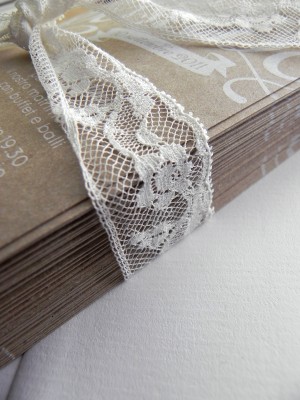
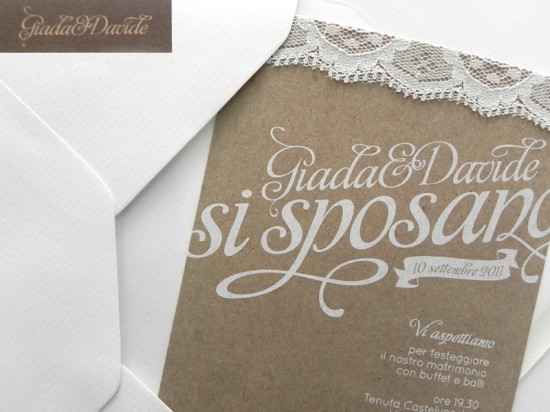
From Valentina:  Giada and Davide wanted a soft boho style wedding with lots of little flags and banners.  I created an invitation suite with a natural color palette, incorporating lace, kraft paper, and wood.  The kraft paper invitations were screen printed in white ink with a lace overlay at the top, then paired with white envelopes and kraft paper wrap-around address labels.

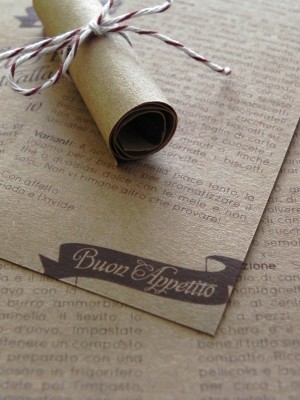
For favors, we printed copies of Giada and Davide’s favorite biscuit recipe on kraft paper and bound them to small jars of cinnamon.


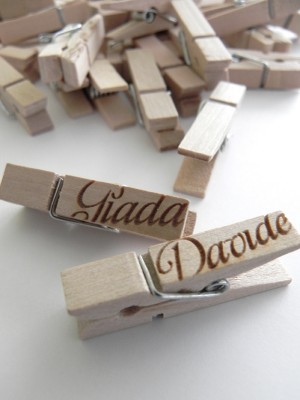
Lasercut wooden flags served as table numbers, while laser engraved clothespins functioned as place cards.


Thanks Valentina!

Check out the Designer Rolodex for more tal­ented wed­ding invi­ta­tion design­ers and the real invi­ta­tions gallery for more wedding invitation ideas!

Photo Credits: Valentina | Cut and Paste

Lauren + Daniel’s Country Elegance Fabric Pocket Wedding Invitations

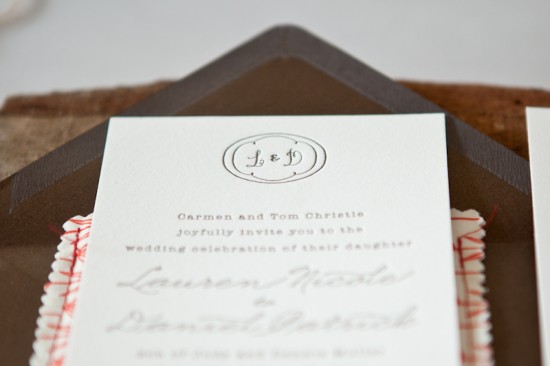
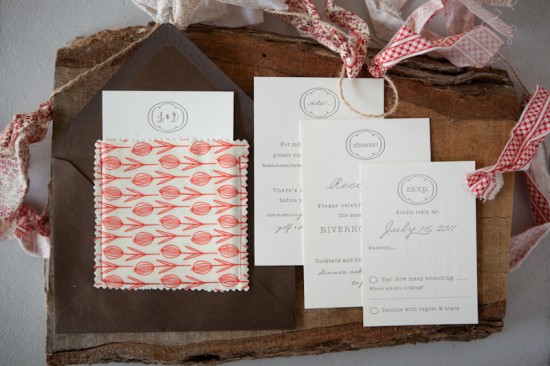
Happy Monday everyone!  We’re starting the week off with a beautiful suite of wedding invitations from recent bride Lauren – Lauren worked with Lesley from Inclosed Studio for both the design and letterpress printing of her wedding invitations.  I love the clean and simple invitation design paired with fabric pockets and a few bright pops of color!

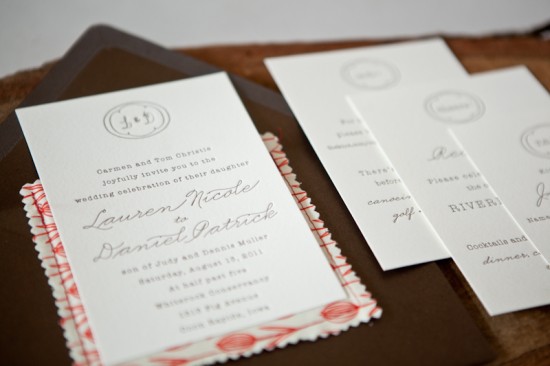
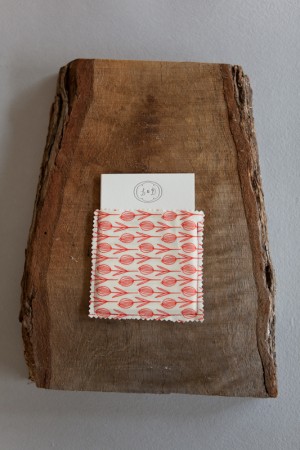
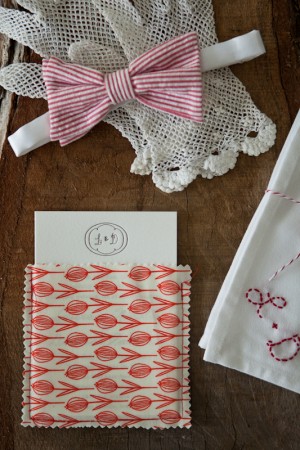
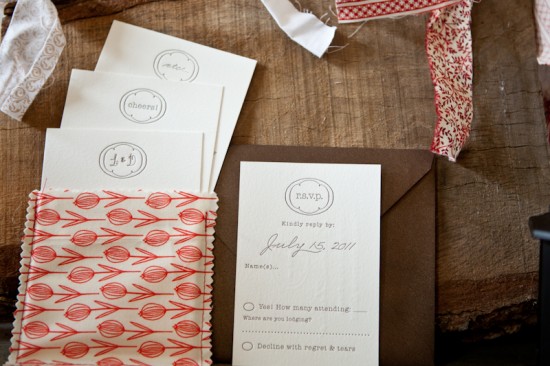
From Lauren: Our wedding took place in a barn in rural Iowa.  We were going for classic country elegance with lots of DIY details.  Lesley at Inclosed Studio blew us away with her creativity and attention to detail.  The invitations were composed of three detail cards and an RSVP postcard – all letterpress printed by Lesley.  A fabric pocket encased the cards perfectly.


We loved the combination of the elegance of the letterpress design paired with the rustic hand-sewn pocket.  Several fabric patters were chosen for the pocket in keeping with our wedding colors of red and tan.  The variety of fabrics and patterns made each invitation different and special.


The fabric was a huge inspiration for the rest of our decor decisions.  I took the extra pocket fabric mixed with other patterns to create banners for the eating area.  They looked so pretty blowing in the breeze!  The day was full of love and laughter and we are so thankful to Lesley for setting the tone for a perfect day with these beautiful invitations.

Thanks Lauren!

Design and Letterpress Printing: Inclosed Studio

Check out the Designer Rolodex for more tal­ented wed­ding invi­ta­tion design­ers and the real invi­ta­tions gallery for more wedding invitation ideas!

Photo Credits: dpmuller photography

Friday Happy Hour: A Traditional Daiquiri

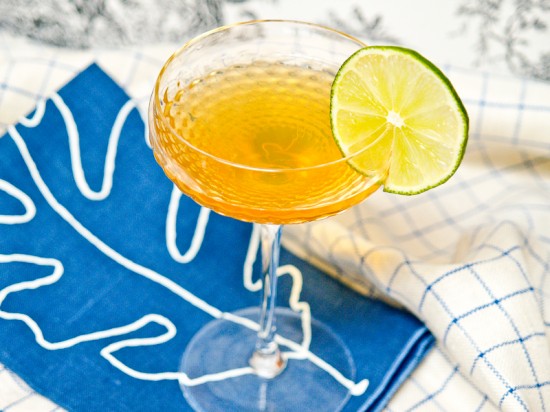
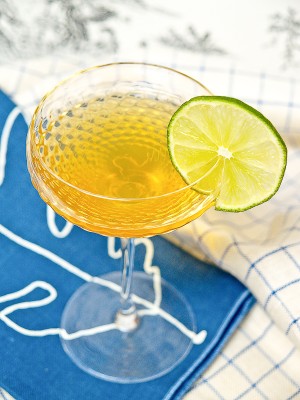
Me again! I’m popping back in for just a quick second with something a bit different. Over the past couple of months, my husband has been having fun experimenting with different cocktail recipes – and I have to admit, I was kind of skeptical at first, but it’s amazing how good a well crafted cocktail tastes compared to the kind of drinks I was used to before. So today I thought I’d share one of his new recipes with you! This cocktail is a slight twist on a classic daiquiri – not a fru-fru thing with a tiny umbrella, but a citrus-y sweet cocktail right out of the Caribbean.

Cocktail-Recipe-Traditional-Daiquiri

Read below for the full recipe!

The Traditional Daiquiri

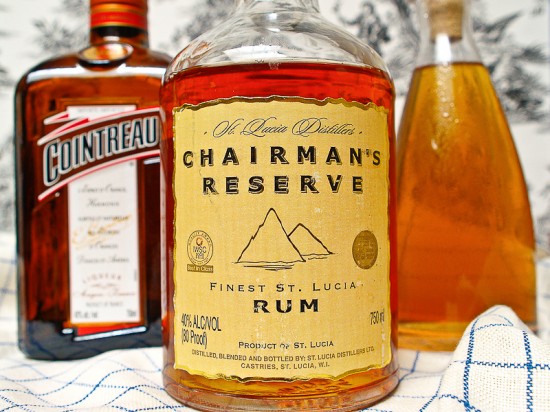
2 oz rum
1 oz fresh lime juice
1/4 oz Cointreau
1/4 oz simple syrup

The daiquiri that most people meet is basically a fruit smoothie with alcohol – colorful, filled with ground ice, and overly sweet.  This is not that daiquiri.  This daiquiri is an old drink from Cuba, a natural development from the island’s history of sugar and citrus growing.  It balances sweet and sour, alcohol and citrus, and is remarkably crisp and refreshing.

Cocktail-Recipe-Traditional-Daiquiri

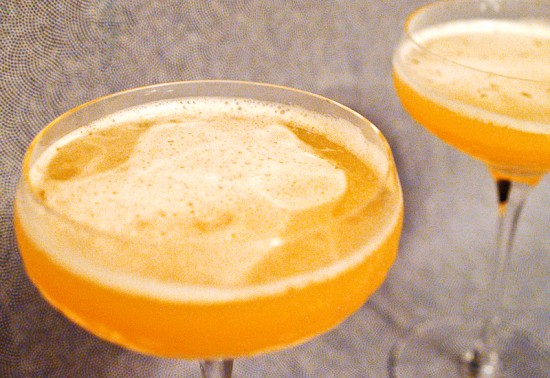
A classic daiquiri is made with just rum, lime juice, and simple syrup.  I usually substitute Cointreau – a liqueur made from dried orange peels – for about half the simple syrup called for in a traditional recipe.  The Cointreau adds both sweetness and a beautiful citrus flavor that pairs really well with the lime in the daiquiri.  Pour all of the ingredients into a shaker filled about halfway with ice.  Shake – hard – for 20 seconds.  Pour into chilled glasses.

Cocktail-Recipe-Traditional-Daiquiri Cocktail-Recipe-Traditional-Daiquiri

A couple of cocktail tips:

A general rule for mixing drinks: if the drink is all spirits, stir it; if it includes spirits and other ingredients, like juice, sugar, or a egg, shake it.  Shaking with ice cools the drink, aerates it to improve the texture, and makes sure all the ingredients are fully blended so they won’t separate out in your glass.  For daiquiris, I like to shake them vigorously, resulting in a nice frothy foam and little slivers of ice on top of the drink.

Cocktail-Recipe-Traditional-Daiquiri

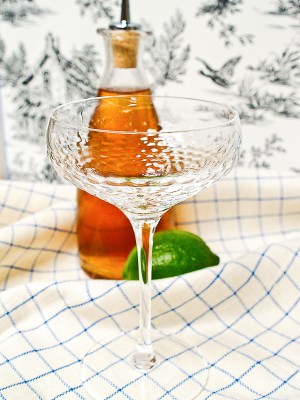
You can mix large batches of simple syrup and store them in a bottle in the refrigerator for up to a month.  Just mix equal parts sugar with water, then gently heat them in a pan on the stove, stirring frequently, until the sugar has dissolved into the water.  Brown sugar or cane sugar are best for mixed drinks, especially the daiquiri.

Enjoy!

Photo Credits: Nole Garey for Oh So Beautiful Paper

{happy weekend!}

Happy Friday everyone!  It’s finally starting to feel like fall here in DC; the leaves are changing colors everywhere and the skies have been mostly gray and rainy the last few days.  I think it’s all beautiful, and I love listening to the rain while I sit at my computer all day.  Right now I’m looking forward to a quick trip up to New York for a few days for Bridal Market – it’ll be nice to get out of DC for a couple of days!  But in the meantime…

Photo Credit: Nguyễn Hà

…a few links for your weekend!

This week on Oh So Beautiful Paper:

That’s it for me this week!  Don’t forget to enter the custom journal giveaway from Paper + Cup – the contest ends at midnight tonight!  I hope you all have a wonderful weekend, and I’ll see you all back here on Monday! xoxo

DIY Rubber Stamp Fabric Pocket Wedding Invitations

It’s the ladies of Anti­quaria, back with another fab­u­lous and cre­ative DIY project for you!  To celebrate the launch of their new custom wedding invitation design studio, this week they’re here with a tutorial for a full wedding invitation suite!

We are so excited for this DIY tutorial because this week, we’ve taken on an entire invitation suite!!!  When we are out and about shopping for vintage house-wares to stock our shop, we like to also pick up remnants of old curtains, sheets, and scarves when we can find them in patterns that we love.  We dug into our stash, using an old fitted sheet to create a lovely fabric pocket that holds all of our invitation suite components.  We love the idea of  using different patterns for each pocket!
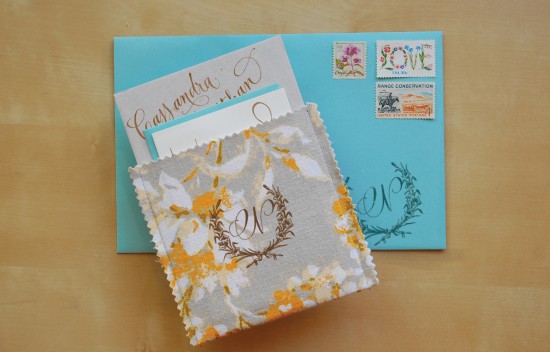
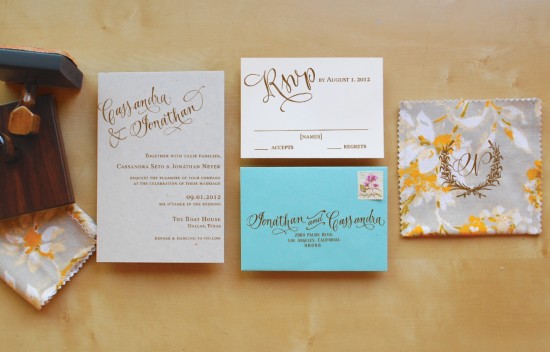
Hand Stamped Wedding Invitation Suite

Steps1-3

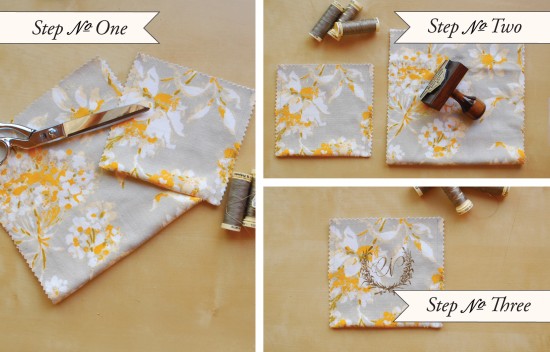
Step One: Using pinking shears, cut pieces of fabric into 5″ x 9 3/4″ rectangles (for a finished pocket that fits into an A7 envelope).

Step Two: Fold each cut piece of fabric in half and stamp with a monogram stamp (we used our wreath monogram, size large).

Step Three: With the fabric folded, stitch up each side 1/8″ from the edge, creating a pocket that the invitation pieces will slide into.  We suggest that you make one to test the size before you cut all of the pockets.
Step 4

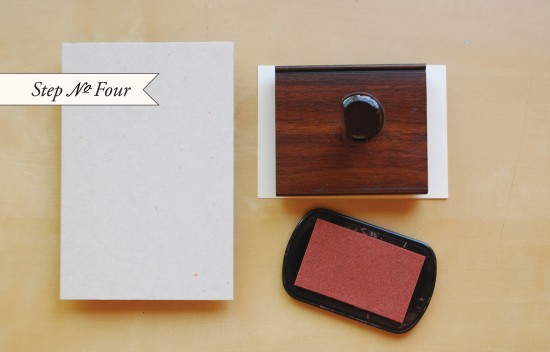
Step Four: For the invitations, cut chipboard to 4.5″ x 6.75″ to fit in the pouch.  Cut the RSVP card to a standard 4 bar size, 3.5″ x 5″.  Ink and print the invitation (we used our Calligraphy Accent Invitation Stamp) and RSVP (we used our Calligraphy Accent Reply Stamp) stamps using even pressure on a hard surface.
Step 5

Reply Envelopes

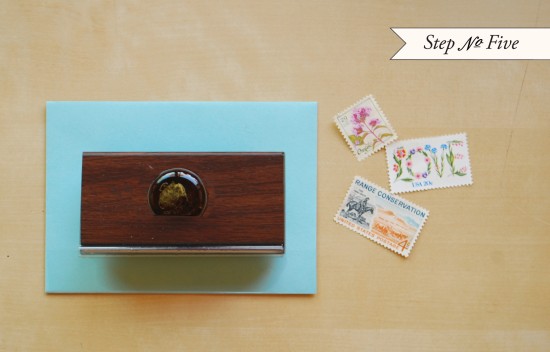
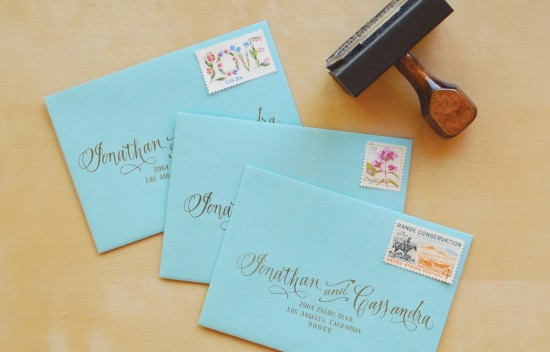
Step Five: Ink and print return address stamp (we used our Calligraphy Accent Return Address Stamp) on 4 bar envelopes to house your reply cards. Again, using even pressure on a hard surface.  Vintage stamps throughout help complete the overall look!


Materials:

Stamps – Calligraphy Accent Collection (invitation, reply card and return address), wreath monogram, large

Fabric – Either use “found” fabric like we did, or , if you would prefer to buy yardage, we love the prints from Purl Soho.

Pinking shears, sewing machine & thread

Chipboard or Kraft paper – If needed, enlist a framing shop to help you cut chipboard.  Their cutting tools should be able to do the job if you can’t at home.

Envelopes, A7 & 4 bar

Stamp Pad – we used a chestnut brown color

Vintage Postage Stamps

Anti­quaria is a mem­ber of the Designer Rolodex – you can see more of their beau­ti­ful work right here!

Photo Credits: Antiquaria

 p.s. Have you entered the custom journal giveaway from Paper + Cup?  The contest closes tomorrow!