Cassie + Ariel’s Navy and White Calligraphy Letterpress Wedding Invitations

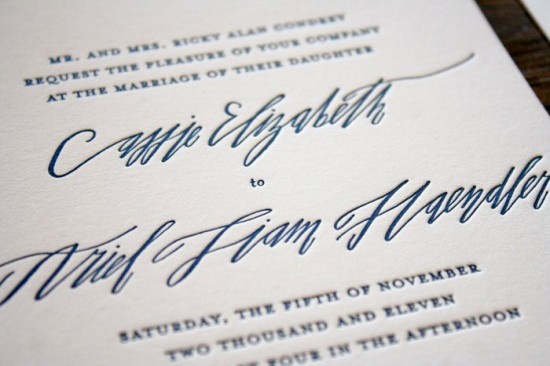
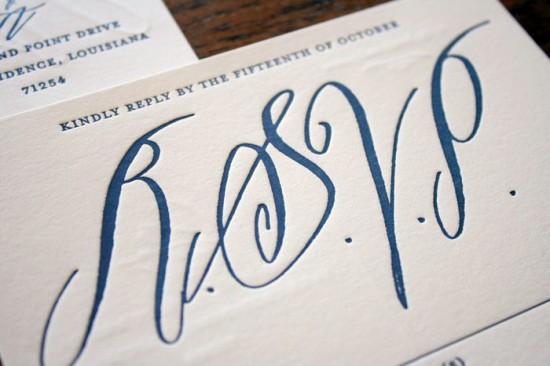
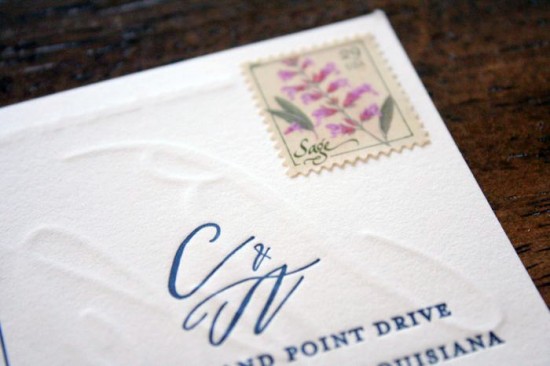
I haven’t been able to get these gorgeous navy and white wedding invitations out of my mind since spotting them on the Parrott Design Studio blog last week.  Sarah from Parrott Design Studio incorporated the bride’s favorite vintage wallpaper into the suite, using a scanned, resized version of the wallpaper pattern as backing for the super thick invitations.  The invitation suite also includes a double-sided RSVP postcard and an enclosure card pointing guests to Cassie and Ariel’s wedding website.

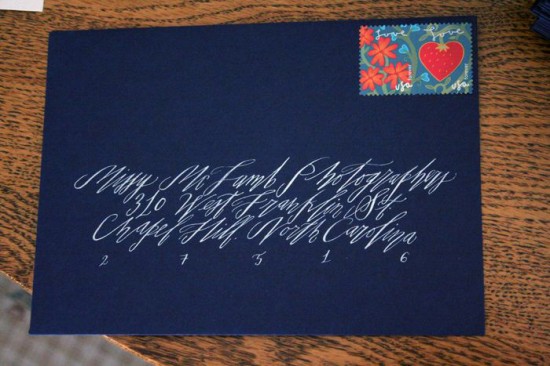
Betsy Dunlap provided lovely calligraphy accents for the invitation suite, including the names of the bride and groom, their initials, and rsvp card lettering.  Betsy also addressed 250 deep navy envelopes in a beautiful silver ink.  Simply stunning!

I love that Sarah used strips of fabric and custom wax seals to hold the assembled invitation suite together!

Check out more details on the invitations right here!

Design and Letterpress Printing: Parrott Design Studio

Calligraphy: Betsy Dunlap

Parrott Design Studio is a mem­ber of the Designer Rolodex – you can see more of Sarah’s beau­ti­ful work right here!

Photo Credits: Parrott Design Studio

DIY Rubber Stamp Edge Painted Save the Date Tags

It’s the ladies of Anti­quaria, back with another fab­u­lous and cre­ative DIY project for you!  This week they’re here with instructions on how to create a rubber stamp save the date tag!

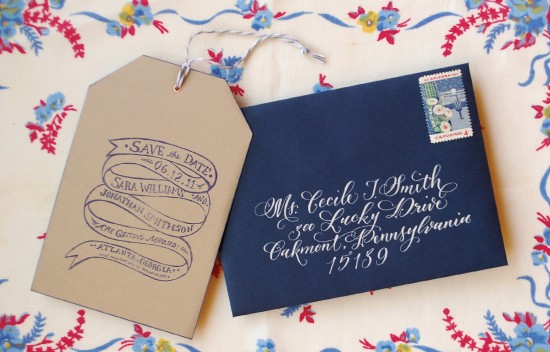
At Antiquaria, we love everything vintage!!  In this save the date DIY, we were inspired by the look of old luggage and parcel tags.  There is something very lovely and familiar about this tag shape but to have it professionally die cut can be quite costly.  We emphasized the shape with “edge painting” using a very nifty and easy trick!!

DIY Rubber Stamp Edge Painted Save the Dates

DIY Rubber Stamp Edge Painted Save the Dates
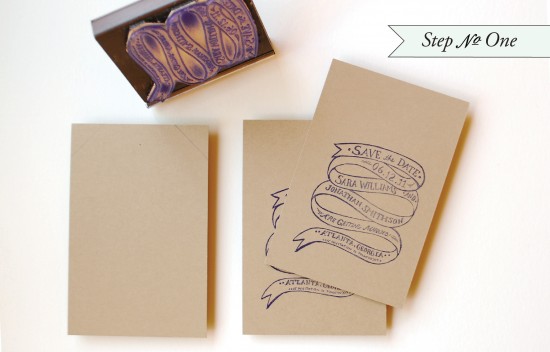
Step One: Cut your kraft paper into a 4.5″x6″ rectangle.  Ink your save the date stamp (we used our “Ribbons and Banners” stamp) with your desired ink and make a print on your paper.  Be sure to press evenly on a hard work surface.  Let the ink dry overnight.

DIY Rubber Stamp Edge Painted Save the Dates

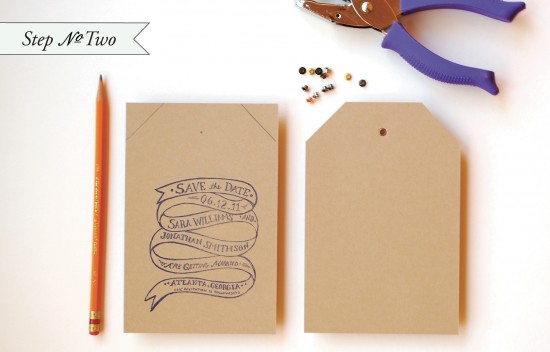
Step Two: Next, draw 1.5″ diagonal lines on the top corners of the save the date.  Also draw a small dot in the center, about 3/4″ from the top.  Once you have your markings in place, cut off the corners with a pair of scissors or an X-Acto knife & ruler.  Punch a 1/8″ hole where you have placed the dot.  Insert a small craft grommet and install using a grommet tool.

DIY Rubber Stamp Edge Painted Save the Dates

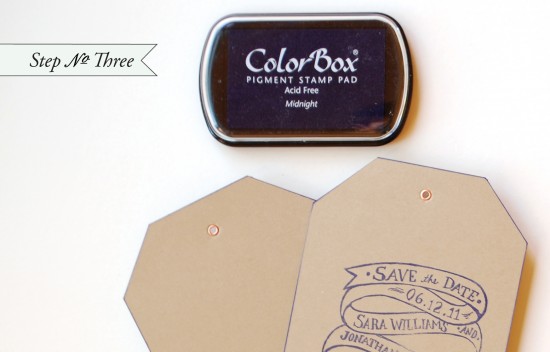
Step Three:  Using the same or a coordinating ink color, drag edges smoothly through the pad to create the “edge painted” effect.  Let dry overnight.

DIY Rubber Stamp Edge Painted Save the Dates

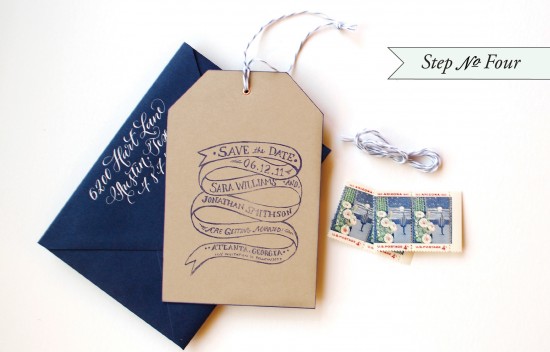
Step Four:  Assemble the save the date. Tie twine or ribbon through the brad and add fun postage and calligraphy to bring it all together!!

Materials:

“Ribbons & Banners” Save the Date Stamp

Kraft Card Stock, cut into 4.5″x6″ rectangles

Stamp Pad (we used navy)

Pencil

Scissors or X-acto & Self Healing Craft Mat

1/8″ Hole Punch

A6 Envelopes

Gray Striped Twine

Photo Credits: Antiquaria

Modern Green + White Nautical Moving Announcements

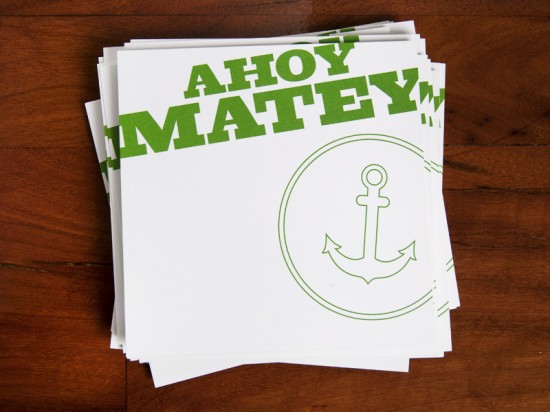
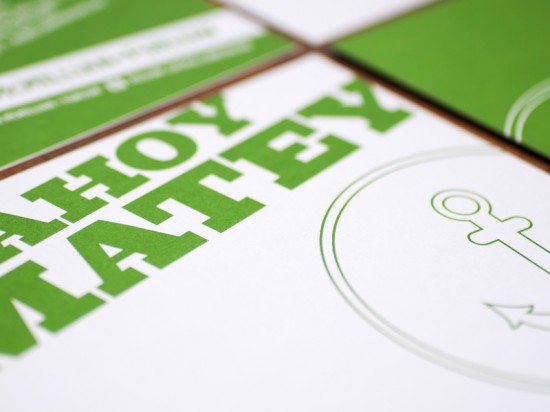
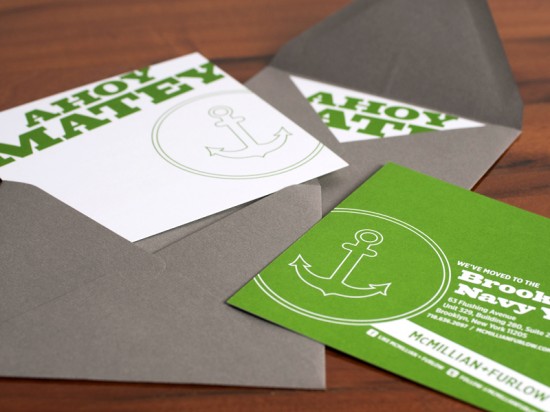
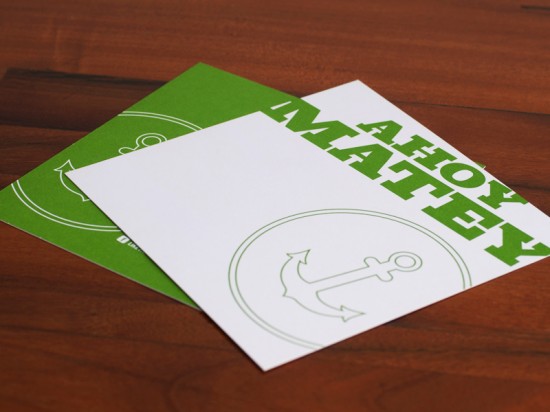
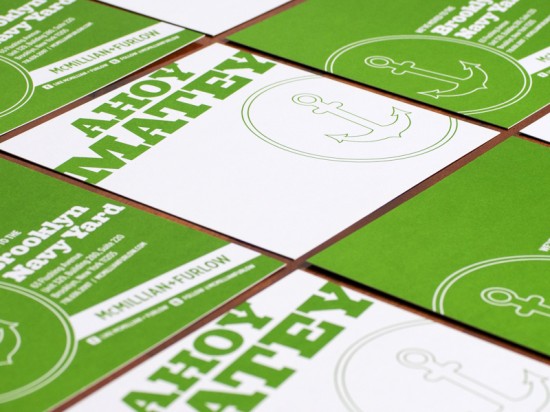
Lindsay from McMillian and Furlow, a Brooklyn-based design firm, sent over these modern announcements that she designed for the firm’s recent move to a new studio in the Brooklyn Navy Yard.  Lindsay used the firm’s signature green and white color palette, but was inspired by the new studio location and decided to incorporate an anchor for a fun twist on a nautical theme.

Modern-Green-White-Nautical-Moving-Announcements

From Lindsay:  When designing our moving announcements, I chose a nautical theme in an effort to honor our majestic new home in the Brooklyn Navy Yard.  Spread out over 300 acres on the Brooklyn waterfront, this modern industrial park with such rich history, emerging business, and creative energy, is a welcome environment for M+F.  I’ve always loved the anchor as an icon, whether used in logos, tattoos, t-shirts, street art, etc., so I jumped at the chance to incorporate one into the layout of our moving announcements.

Modern-Green-White-Nautical-Moving-Announcements

The balance between the slab serif industrial font and the delicate style of the anchor, along with the angled typography and playful vernacular, creates a cheerful design, communicating a sense of excitement and enthusiasm for our new home.  I printed the announcements on a heavy stock bright white paper with a smooth finish, using our Pantone green, and completed the suite with charcoal gray envelopes.

Modern-Green-White-Nautical-Moving-Announcements

Modern-Green-White-Nautical-Moving-Announcements

Modern-Green-White-Nautical-Moving-Announcements

Thanks Lindsay!

Photo Credits: McMillian and Furlow

DIY Embossed Custom Stationery

It’s the ladies of Anti­quaria, back with another fab­u­lous and cre­ative DIY project for you all!  This week they show us how to use rubber stamps to create beautiful custom stationery!

How on Earth can you achieve the high end look of engraving on a shoestring budget??  Answer: Embossing!

When we first launched our rubber stamp collection, we tried everything we could think of to achieve a legible white ink on dark (or kraft) paper and we quickly found out that regular inks don’t do a very good job.  We were thrilled when one of our clever customers used this technique on the cover of her wedding programs, embossing white on navy paper.  From there we started experimenting and found it looked awesome on all sorts of colorful paper!
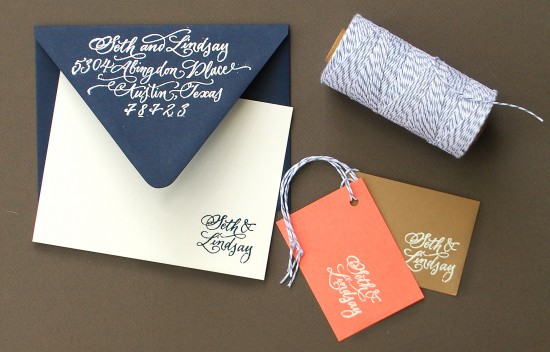
Rubber Stamp Embossed Custom Stationery

Rubber Stamp Embossed Custom Stationery

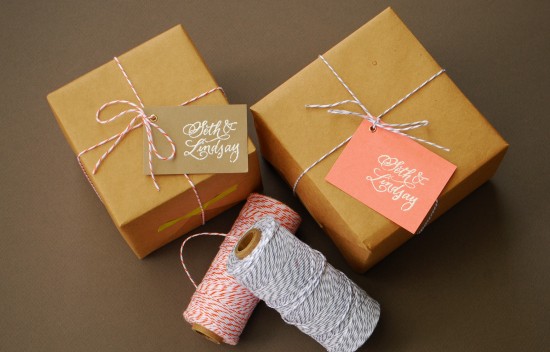
You can use this embossing technique on lots of different projects, such as these fabulous and simple gift tags.  We also used it to create a set of custom stationery, perfect for thank you notes!!  For the gift tags, we used our Calligraphy Names Stamp.
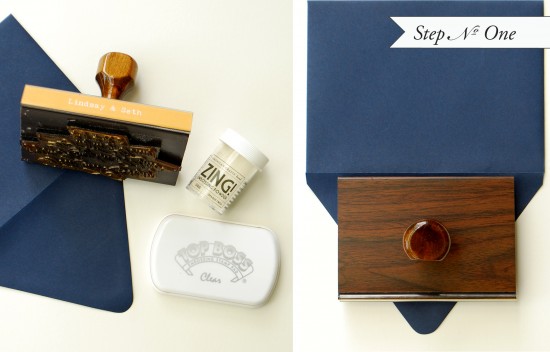
Rubber Stamp Embossed Custom Stationery

Step One: Get your supplies ready.  Unscrew the top to the embossing powder and uncover the stamp pad.  Make sure your envelope is set on a (really) hard surface, with a piece of scrap paper set underneath (to catch excess powder).  Using the embossing (clear) stamp pad, ink the stamp thoroughly.  Center the stamp and press down with even pressure.  We used our Calligraphy Return Address Stamp on this envelope.
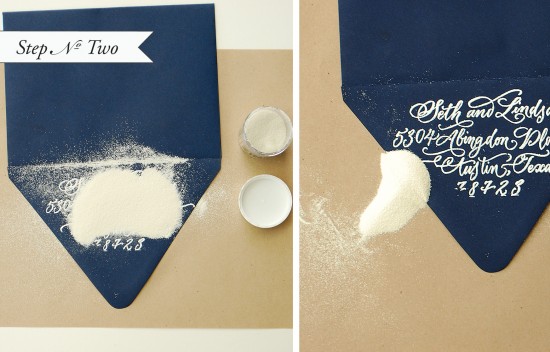
Rubber Stamp Embossed Custom Stationery

Step Two: Immediately following stamping the image, pour on a healthy amount of embossing powder.  Shift powder around a bit to ensure your image is completely covered.  When you are satisfied, pour the excess onto the piece of paper underneath and lightly tap off any excess (not too hard or the powder will loose hold of the sticky ink).  Pour the powder back into the jar.

Rubber Stamp Embossed Custom Stationery

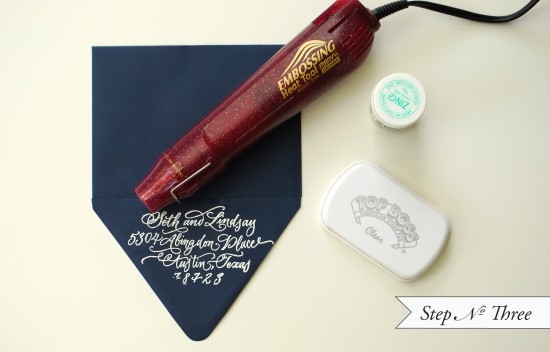
Step Three:  Using your embossing heat tool, heat image (holding the gun 3-5 inches from the surface) until the powder has melted into a solid, approximately 30 seconds.  Let cool.

*Be careful not to burn yourself on this very hot tool.  Also, if you hold the embossing heat tool too close to the paper, it could scorch or warp.


Materials:

Rubber Stamps: We used Calligraphy Names Stamp and Calligraphy Return Address to create the personal stationery and gift tags.

Clear Embossing Stamp Pad

Embossing Powders

Embossing Heat Tool

A2 Envelopes in Navy

Assorted Paper

For Gift Tags:

Small hole punch

Bakers twine

Photo Credits: Antiquaria

{happy weekend!}

Whew!  It was a wonderful week, but also a busy one!  I’m feeling good as we head into the weekend… because we’re finally under 50 days until my husband comes home!  Five months have already gone by, and now we have just a month and a half until he comes back home.  I can’t wait to have him home – but I also have a bunch of house projects that I want to finish up before he gets here, so I definitely need to get a move on.  I’ll definitely be spending some quality time with my to do list this weekend, but first I get to grab lunch with this awesome lady.  I hope you all have a wonderful weekend!  But in the meantime…

…some links for your weekend!

This week on Oh So Beautiful Paper:

That’s it for me this week!  Don’t forget to check back bright and early on Monday for our next summer contest and to win some beautiful letterpress goodies.  I hope you all have a wonderful weekend, and I’ll see you all back here on Monday!  xoxo

Photo Credit: Alicia Bock