Getting Started in Calligraphy

By now you all probably know that we do a lot of calligraphy and hand lettering in our studio at Antiquaria. Whether it’s for wedding clients, our rubber stamps, greeting cards or just to send snail mail to friends, we’ve got a pen in hand every day. In the spirit of back to school, we thought it would be really fun to give you a little jump-start into calligraphy in case you want to take on a little studious action of your own! This post has a trove of info about the tools, resources and basics you’ll need to get started in practicing calligraphy. We hope you have fun and use your newfound skill useful in your daily life too! –Bailey and Emma of Antiquaria
Getting Started in Calligraphy / Antiquaria for Oh So Beautiful Paper

If you’ve never done calligraphy before, you may find it all a little daunting. No lies…we did too. Simply speaking, calligraphy materials are not common anymore (because they are not at all necessary to daily life).  Most of the tools that are being made now are sub-par and you will never, EVER succeed with them, especially if you are a beginner.

Bailey learned this the hard way (even though she was told as much by her very first teacher). It was only a day after her first class when she sought out the nearest art shop and bought hundreds of dollars worth of “calligraphy” supplies. How much of that has she used over the years? Not a darn thing. What did she use? What her teacher gave her. Consider lesson learned. We’re here to set it all straight and hopefully get you started on the right path to calligraphy success!
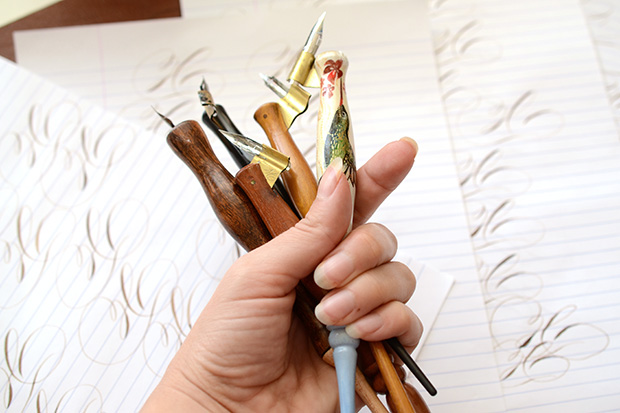
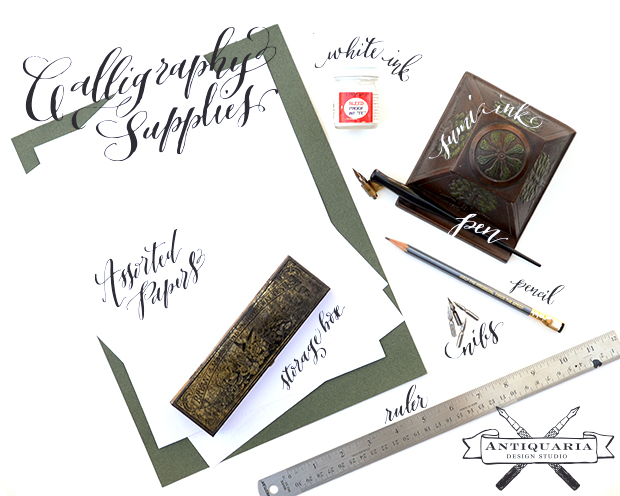
Getting Started in Calligraphy / Antiquaria for Oh So Beautiful PaperThe basic supplies that you need to get started in calligraphy are pretty simple and inexpensive.

You’ll need:

  • a pen (otherwise called a pen holder); this is what you insert your nib into and hold while writing, we also have a whole blog post dedicated to picking a pen, here.
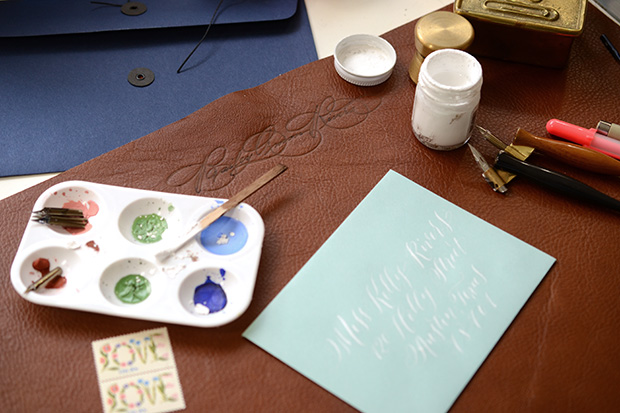
  • nibs those little pointy metal things that flex to create gorgeous letters (we like the Nikko G, Zebra G, Brause EF66 and Leonardt Principle)
  • paper the key is that it’s well sized (so that ink doesn’t bleed), arches, rhodia and canson make great papers. DO NOT BUY THAT ART-STORE CALLIGRAPHY PAPER. It’s bad news bears. Just because it says “calligraphy” on it does not mean it’s good for it.
  • sumi ink many things work for black ink and many don’t, we like sumi ink best for practice (and reproduction)
  • white ink it not necessary but it’s super fun to use, we like Dr. Martin’s Bleedproof white
  • ruler  for making straight lines to letter on
  • pencil great for practicing letter shapes, making lines, marking corrections, taking notes
  • storage box it’s not crucial but definitely helps keep your nibs together so they don’t get lost
  • writing surface writing with a dip pen is so different than normal writing – as anyone that’s practiced the art-form well knows. One thing that is very different is that you need to have a good writing surface so that the edges of the nib connect properly with the paper, giving you lovely letters.
    For beginners, we suggest writing on a stack of paper, so that you have a nice padded surface. Another option is using a craft foam pad, like this one. This is what we used for years…until discovering the awesome leather ones, made by Mr. M.G. Ward, shown below.

Resources

Books: Mastering Copperplate Calligraphy (still use this one ALL the time), by Eleanor Winters
Mastering Calligraphy: The Complete Guide to Hand Lettering (which features our very own, Bailey Rivera!!) by the lovely Gaye Godfrey-Nicholls
Our friend Molly Suber Thorpe of Plurabelle’s beauty, Modern Calligraphy

Online: The IAMPETH (or The International Association of Master Penman, Engrossers and Teachers of Handwriting) website is a trove of amazing resources from the best calligraphers in the world. This site could easily suck up days, even weeks of your life. They also have awesome teaching videos too! This one’s too good to miss.

The Flourish Forum has rapidly grown to be a massive community of calligraphers sharing resources, tips, and exemplars both new and old. It can be a little bit overwhelming since it has such an immense amount of material – but it’s a fabulous place to get involved. There are always snail mail exchanges to keep you practicing and connecting with other stationery and calligraphy enthusiasts. The mastermind behind the site, Erica McPhee, also publishes a calligraphy magazine that is wonderful, called Dasherie! It’s totally worth a read.

The Curious Calligrapher is a gorgeous site dedicated to ALL this calligraphy, servicing the calligraphy community. Here you’ll find more resources, forums and gorgeous eye candy!

Locally: You never know, you may just have a calligraphy mentor down the street! Google-ing “__your city__ calligraphy guild” is the best and fastest way to find local letter-lovers nearby. Plus, these non-profit organizations also offer workshops, get togethers and moral support (when you just can’t get your letters to look quite right).
Getting Started in Calligraphy / Antiquaria for Oh So Beautiful Paper

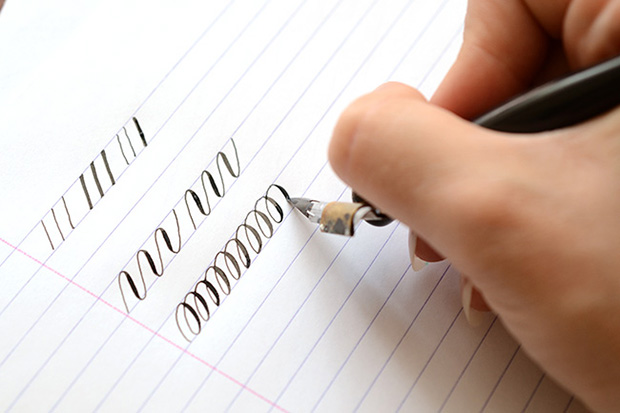
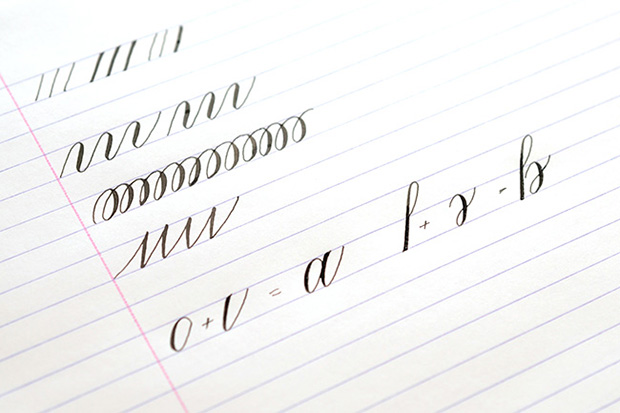
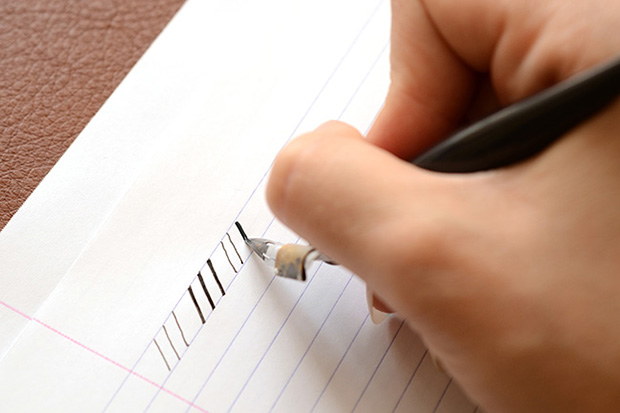
Warm Ups: Before diving into letterforms, it’s good to get familiar with your pen and ink. It will feel weird, really, really weird in your hand. That’s okay and totally normal.

1. Make thin lines (no pressure) and thick lines (full pressure) seeing just how thin and thick you can possibly flex your nib.

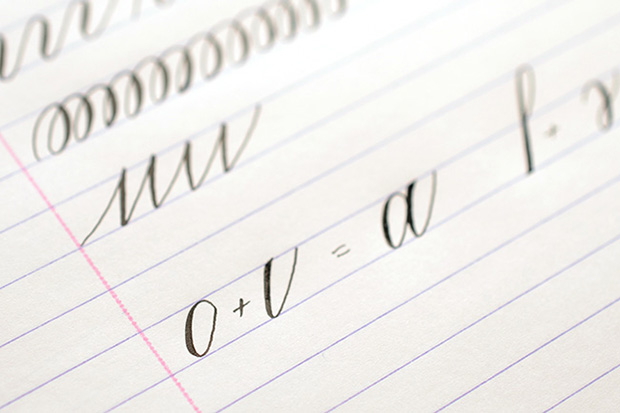
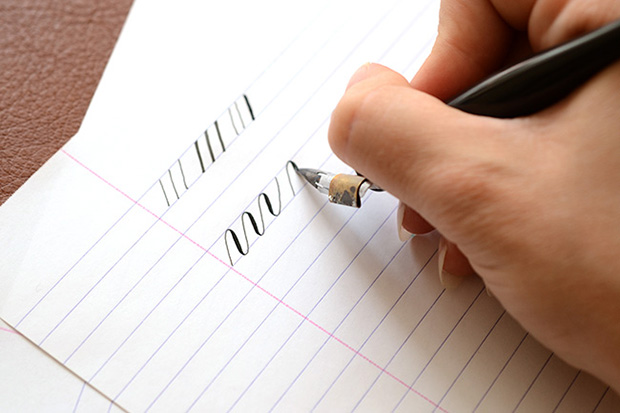
2. Next, make “waves” where on all of your upstrokes you have no pressure (a thin line) and on the down stroke you have a thick line (with pressure). The key to beautiful letters will be smoothly transitioning from thick to thin.

3. Lastly, we’ll make “loops” where again your upstrokes will be thin and the downstrokes will be thick. Pay attention to the transitions again and repeat these warm ups until the pen feels normal in your hand.
Getting Started in Calligraphy / Antiquaria for Oh So Beautiful Paper

Getting Started in Calligraphy / Antiquaria for Oh So Beautiful Paper

Getting Started in Calligraphy / Antiquaria for Oh So Beautiful Paper

Getting Started in Calligraphy / Antiquaria for Oh So Beautiful Paper

Getting Started in Calligraphy / Antiquaria for Oh So Beautiful Paper

Getting Started in Calligraphy / Antiquaria for Oh So Beautiful Paper

Getting Started in Calligraphy / Antiquaria for Oh So Beautiful Paper

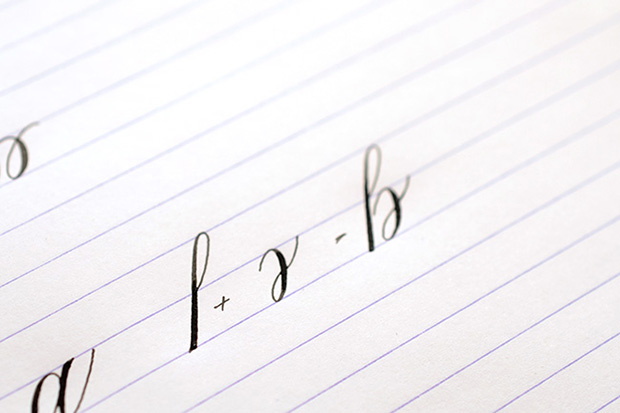
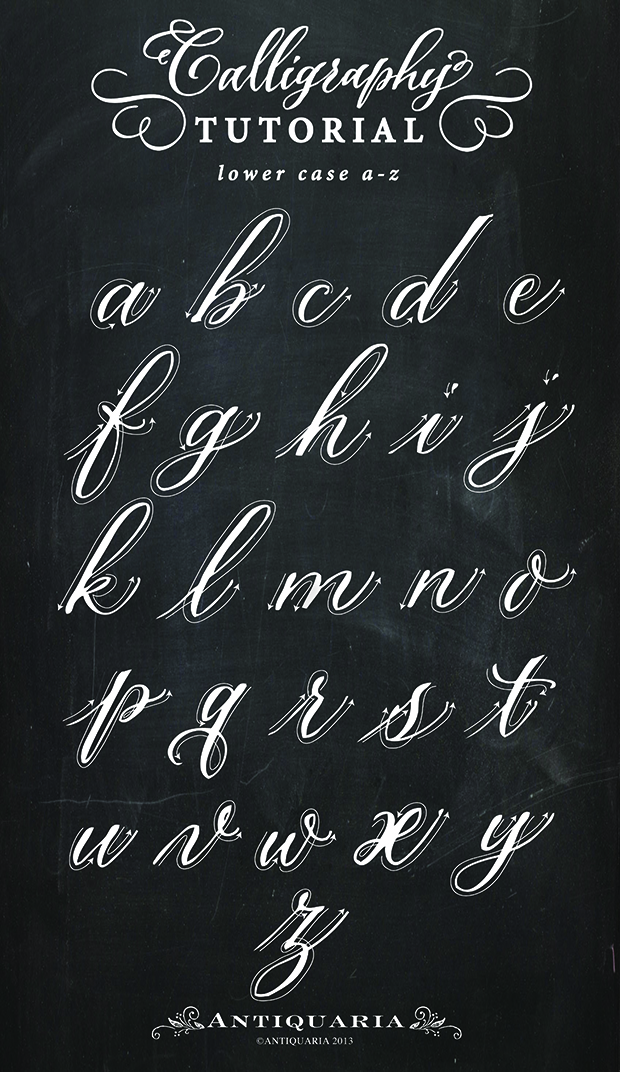
This little exemplar is the “nuts and bolts” foundation to all pointed pen calligraphy. If you’ve never seen one before…you may be scratching your head thinking, “How does this differ from the cursive I learned in grade school?” 

Well, the main difference is the in the flexible nib pen. This awesome tool is what allows you get those desirable, lovable and gorgeous thick and thin lines we started playing with in the warm-ups. Without writing a book here, getting the thick and thin lines in your letters is both simple and difficult. It’s simple because all it takes is PRESSURE. It’s difficult because you have to learn how the pen behaves and make the pressure smooth. Only then will you have swoon-worthy letters.

To use the this exemplar, follow the directional arrows (from left to right), and press down on the pen when the line is thick and lift off of the pressure when it’s thin. Below, we show you how to “construct” the letters. There’s a lot of stopping and starting when doing calligraphy, which is certainly different from writing normally. Need more help? You can watch Bailey letter a-z in real-time in this video! Happy lettering folks! We’ll leave you with our favorite Calligraphy Truths…

Calligraphy Truths

Calligraphy takes Practice. And not just a little…but a whole lot.

You’ll know within a few hours of classes (or practice) whether or not calligraphy is for you.

It takes LASER-LIKE focus – especially if you want to spell things right.

Writing something meaningful is much more inspiring than the alphabet. Get the basics down and move onto “real” words. (Like a song, poem, recipe, ode to your cat…whatever speaks to you)

You’ll never, NEVER stop learning. Calligraphy is a vast and fascinating subject. Once you start…it’s like getting sucked into the rabbit hole with no turning back.

Buy quality supplies. It make all of the difference.

Calligraphers are the most friendly and awesome bunch of folks on the planet (kinda biased here) – but they’re truly the best resource out there. Find a mentor and ask questions!

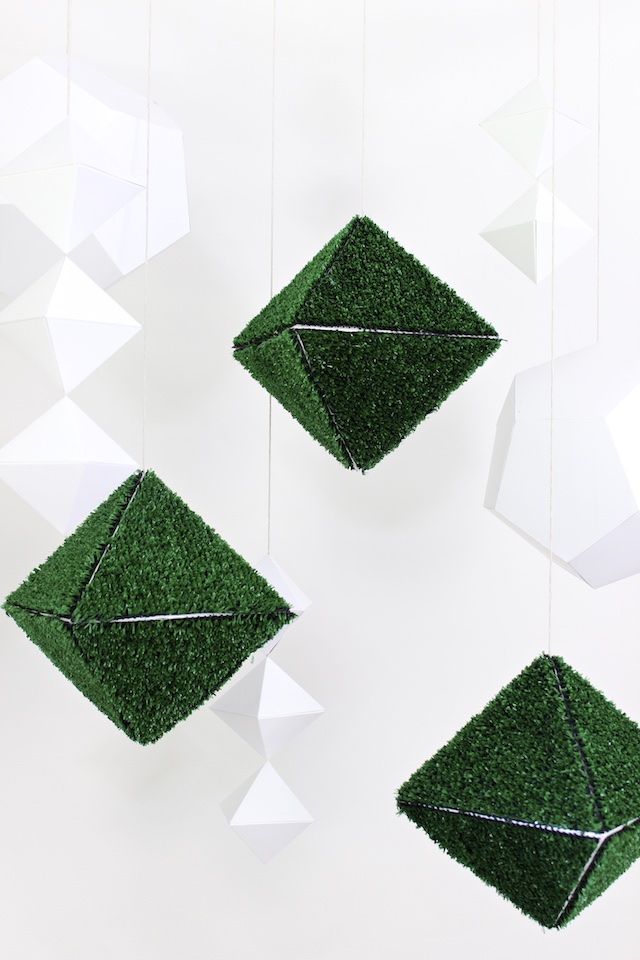
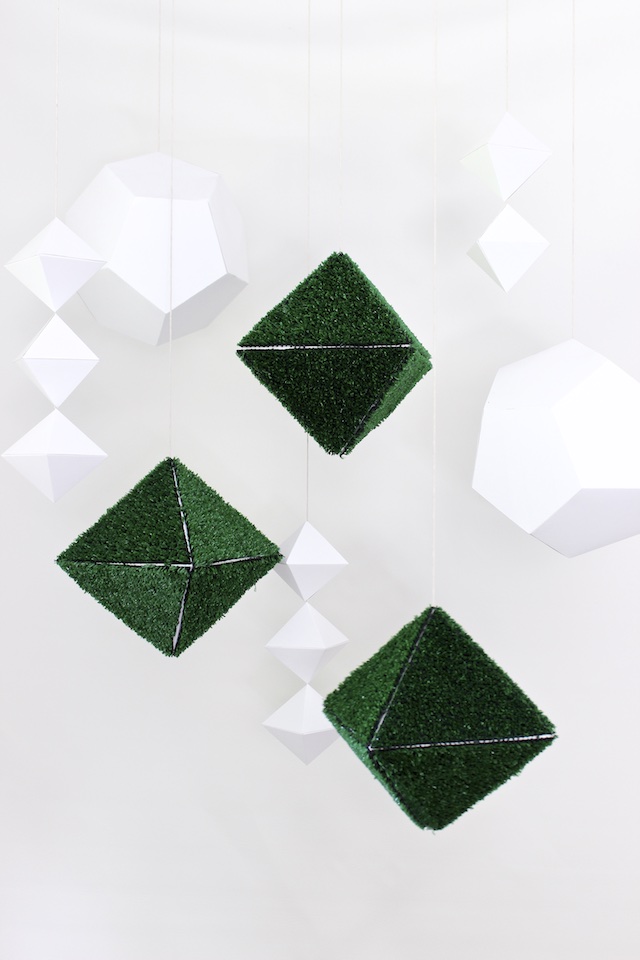
DIY Faux Grass Hanging Gems

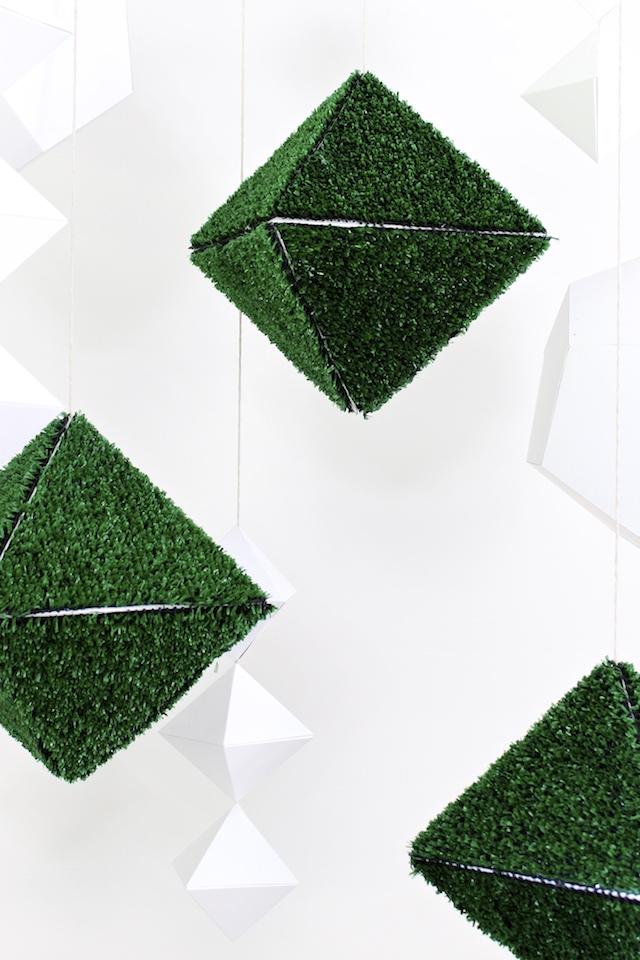
Craftcourse basically made its handmade event decor ‘debut’ with garlands of larger-than-life hanging paper gems for a local maker market here in Nashville last winter. Even though we’ve made all kinds of things since then, they’ve kind of become our signature creation, which we’ve been known to say could be used just about anywhere for any occasion. What space or event couldn’t be made better by some hanging gems?! Although we’ve never formally given away our ginormous paper gem secrets, I’m slipping a little today by showing you how to make some medium-sized hanging diamonds covered in faux grass – a fun summer take on our plain ole gems. Enjoy! –Mandy Pellegrin of Craftcourse

DIY Faux Grass Hanging Gems Party Decorations / Craftcourse for Oh So Beautiful Paper

Materials
Template
Poster Board
Pencil
Craft Knife
Metal Ruler
Cutting Surface
Hot Glue and Glue Gun
String
Small Wooden Bead
A Cheap Artificial Grass Rug (like this or this)
Scissors

DIY Faux Grass Hanging Gems Party Decorations / Craftcourse for Oh So Beautiful Paper

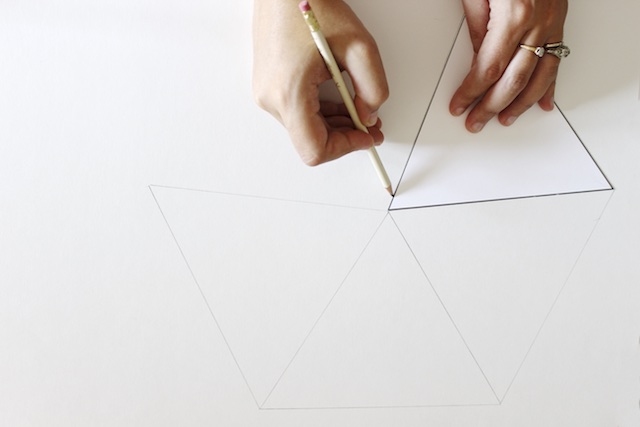
Step One: After you’ve downloaded and cut out the template, trace the template onto poster board. Trace four templates edge-to-edge as shown here and in the template file with the top points (that is, the point opposite the arrow on the template) meeting in the middle. Each diamond-shaped gem will require two of these four-triangle sets. I was able to fit six sets (or enough for three gems) onto two pieces of poster board.

DIY Faux Grass Hanging Gems Party Decorations / Craftcourse for Oh So Beautiful Paper

DIY Faux Grass Hanging Gems Party Decorations / Craftcourse for Oh So Beautiful Paper

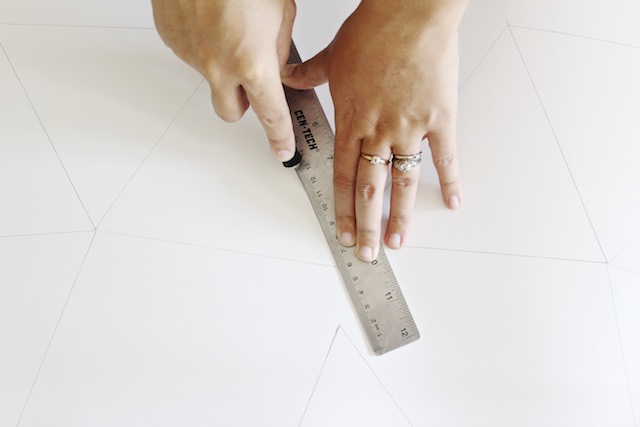
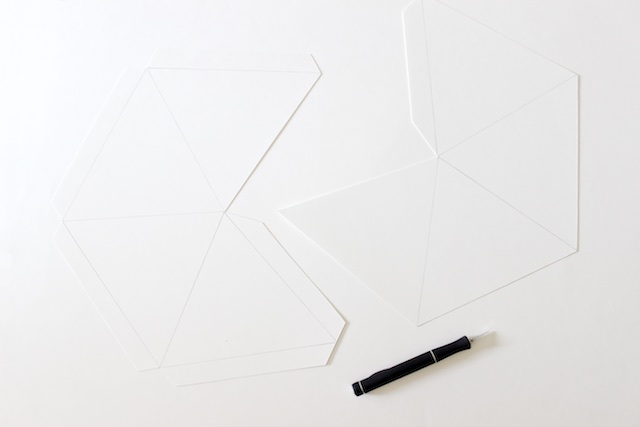
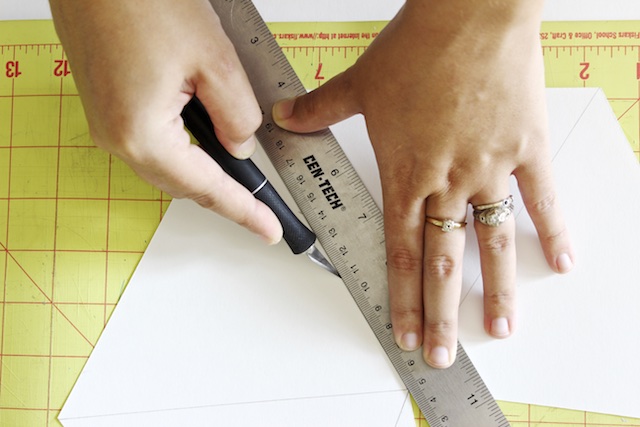
Step Two: Cut out using a craft knife and a metal ruler. When cutting them out, you’ll need to add tabs for assembly. On one of the four-triangle sets, add only one tab along the side of one of the outer triangles as shown here (on the right) and in the template file. On the other set, you’ll need to add tabs both on an outer triangle like for the other set and along the bottom edge (i.e. the edge denoted with a triangle on the template) of each triangle. Again, this is shown here (on the left) and in the template file.

DIY Faux Grass Hanging Gems Party Decorations / Craftcourse for Oh So Beautiful Paper

Step Three: Score all the lines by gently tracing each one with the back-side of the blade of the craft knife. This will give you a nice clean score, but don’t push so hard that you cut through your poster board.

DIY Faux Grass Hanging Gems Party Decorations / Craftcourse for Oh So Beautiful Paper

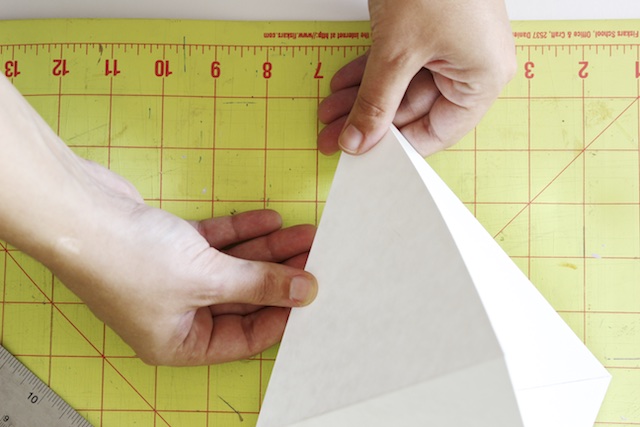
Step Four: Crease each of the scores by folding inward so that your pencil marks will be on the inside of the finished gem.

DIY Faux Grass Hanging Gems Party Decorations / Craftcourse for Oh So Beautiful Paper

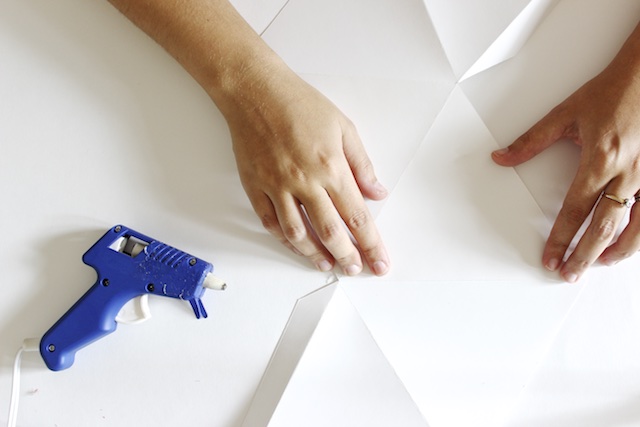
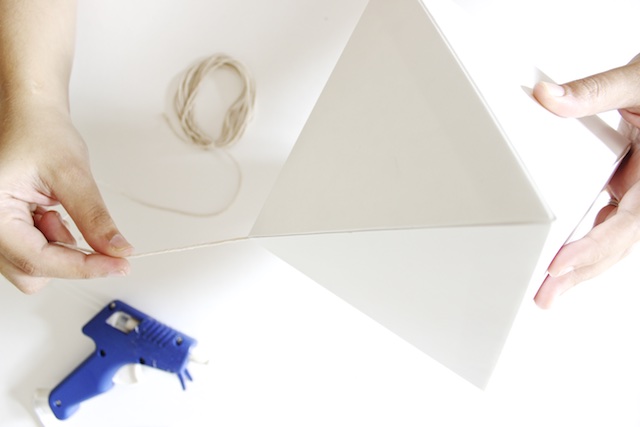
Step Five: Assemble the gem by first hot gluing the four bottom edge tabs of the one piece to the four bottom edges of the other piece.

DIY Faux Grass Hanging Gems Party Decorations / Craftcourse for Oh So Beautiful Paper

DIY Grassy Hanging Geometric Gems by OSBP 9

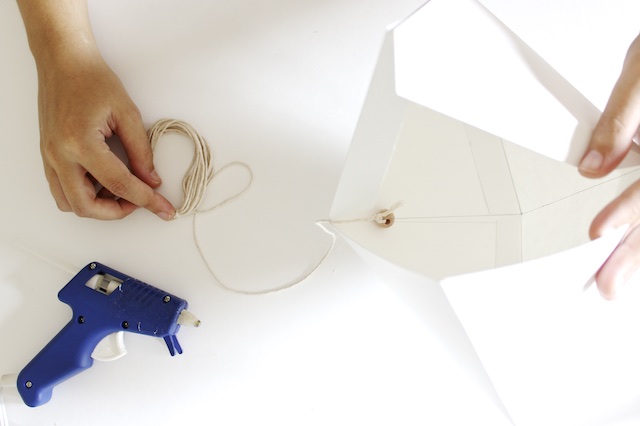
Step Six: Before glueing shut the edge tabs, slip a string with a small wooden bead tied onto the end inside the gem. Apply glue to the tabs, and gently squeeze shut and apply some pressure to the area on top of the tabs to get them to adhere. You now have a plain hanging gem!

DIY Faux Grass Hanging Gems Party Decorations / Craftcourse for Oh So Beautiful Paper

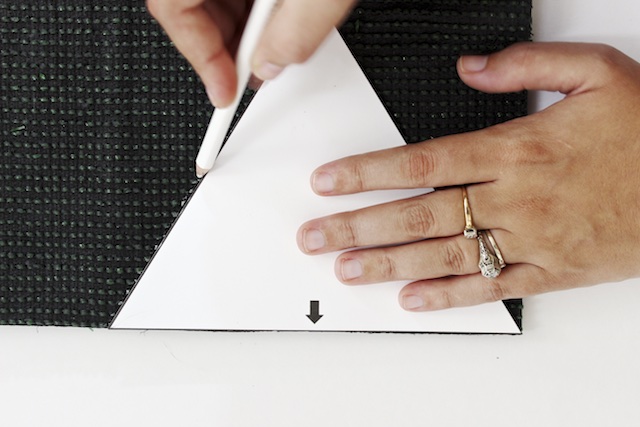
Step Seven: For each hanging gem, trace eight triangle templates onto the back of your artificial grass rug.

DIY Faux Grass Hanging Gems Party Decorations / Craftcourse for Oh So Beautiful Paper

Step Eight: Cut out each of the ‘grass’ triangles.

DIY Faux Grass Hanging Gems Party Decorations / Craftcourse for Oh So Beautiful Paper

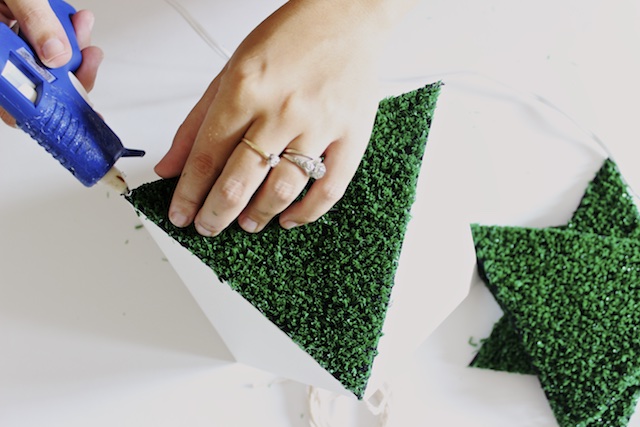
Step Nine: Hot glue the triangles onto the plain finished gem. If you want to cover all of the poster board, make sure you cut your triangles out slightly bigger than the template. A little white peeks through on mine, but I sort of liked how it helped define the geometric shape a bit more.

For a full-on hanging gem installation, combine the ‘grass’ gems with other plain gems. Make a smaller diamond gem by shrinking the template provided, and assemble multiple on a single string. Make larger ones by blowing the template up.

DIY Faux Grass Hanging Gems Party Decorations / Craftcourse for Oh So Beautiful Paper


DIY Faux Grass Hanging Gems Party Decorations / Craftcourse for Oh So Beautiful Paper

Photo Credits: Mandy Pellegrin for Oh So Beautiful Paper

Urbanic Faves | Rose Gold Everything

Hello Hello!  Delighted to be back here once again and sharing yet another one of our latest obsessions with you from around here at Urbanic.  Today’s topic is this darling little equation:

>>  Pink  +  Gold  =  Rose Gold!  <<

It’s pretty. It’s timeless. It’s now! We’ve hand-picked some of our favorite things from around the shop and beyond for your viewing pleasure. We’re talking about decorative arrows, bottle openers, desk lamps, candles, sticky notes, telegram pads … and even tape!  So basically, rose gold everything. âœ§

xo – Audrey

Urbanic Gift Guide: Rose Gold Everything

1.  The Social Type

2. Thimble Press

3. Chronicle Books

4. Kate Spade

5. Cool Material

6. Kate Spade

7. West Elm

8. Mineral and Matter

9. Uline

10. Kate Spade

11. Mine Design

12. Clover and Bloom

13. Kikkerland

Watermelon Mint Gin Rickey

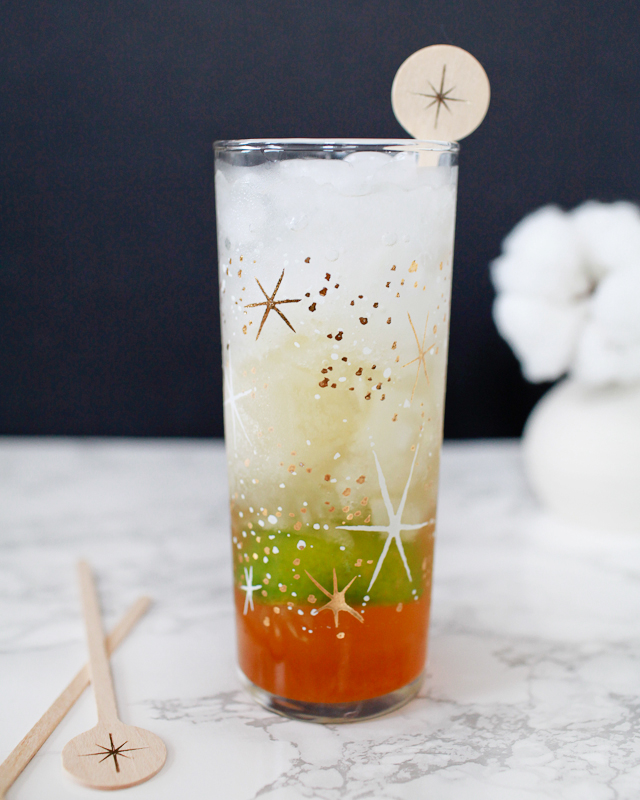
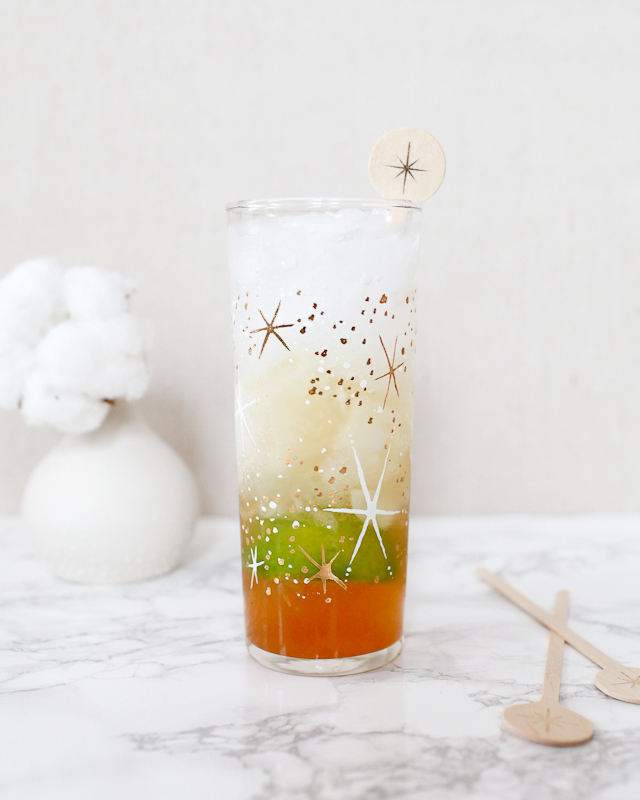
After last week’s amazing Clover Cub, we’ve decided to stick with gin as our theme this month. Unlike last week, we’re going to stray away from the classic formula and try something a little different. We’ve featured the Gin Rickey – Washington DC’s official cocktail, for obviously good reasons – more than once in our Friday Happy Hour column. So instead of revisiting a classic again, we’re going to update it a bit. The result is somewhere between a Rickey, a shrub, and a Pimm’s Cup, but it’s all awesome. – Andrew

Watermelon-Mint-Gin-Rickey-Cocktail-Recipe-Liquorary-OSBP-6

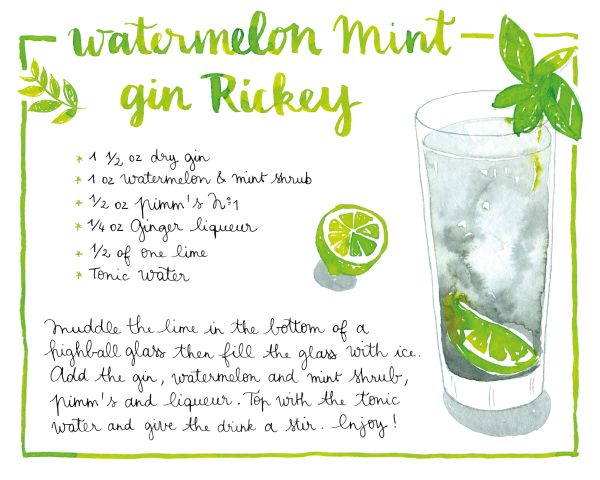
Watermelon-Mint-Gin-Rickey-Cocktail-Recipe-Card-Nathalie-Ouederni-OSBP

Illustration by Nathalie Ouederni

Watermelon Mint Gin Rickey

1 1/2 oz Dry Gin
1 oz Watermelon & Mint Shrub

1/2 oz Pimm’s No. 1
1/4 oz Ginger Liqueur
1/2 a Lime
Tonic Water

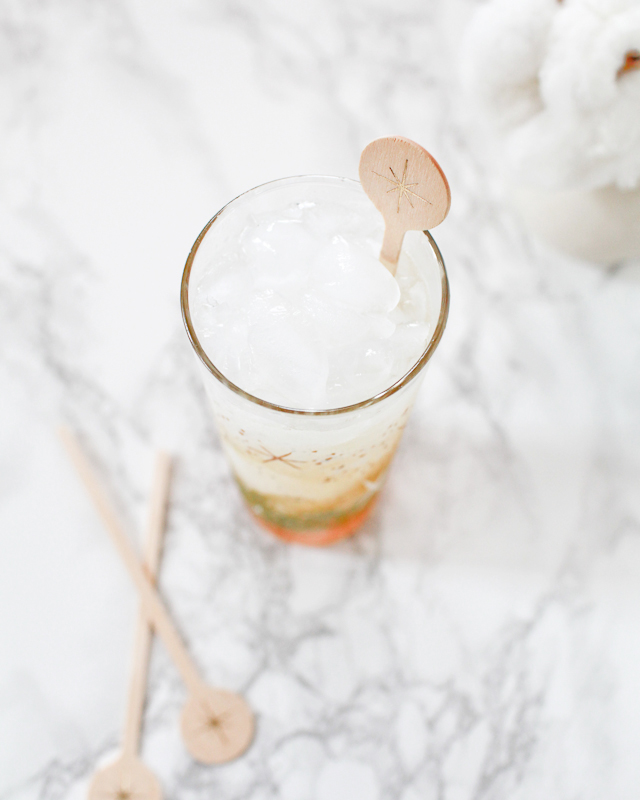
Muddle the lime in the bottom of a highball glass, then fill the glass with ice. Add the gin, shrub, Pimm’s, and liqueur. Top with the tonic water and give the drink a stir. Enjoy!

This is a fun, peppy, complex play on the Rickey. There’s a lot going on in this glass, in contrast to the original Rickey’s simplicity, and I think a more delicate gin works best here to bind all of the flavors together. Try Plymouth, easily one of our favorite English Dry Gins, or Hendrick’s, which adds cucumber and rose to its list of botanicals, or Aviation, which is made with a bit less juniper to let all its other complex botanicals shine. One of my newest favorites is Heritage Soft Gin, which is made by skipping a second round of distillation that leaves the gin without a sharp juniper edge. (These last two, in contrast to the English Dry style of gin, fall under the category of New American Gins, which focus less on juniper and more on all those other herbs and spices that lend their flavor to gin.)

Watermelon-Mint-Gin-Rickey-Cocktail-Recipe-Liquorary-OSBP-1

That watermelon and mint shrub comes from 1821 Bitters, whom I mentioned back when we featured our Amaretto Sour. It’s very tart, made with a base of apple cider vinegar, but also tastes richly of sweet watermelon (the mint gets a bit lost, more of an accent, but that’s ok for my purposes). It adds a nice zing and a hint of summery fruit to the glass. Same goes for the Pimm’s, which I normally associate closely with summer drinking. And the ginger liqueur – something like Domaine de Canton or Barrow’s – adds just a bit of sharp ginger spiciness. Like I said, there’s a lot going on in this drink, and then you pour bitter tonic on top. (Make sure you give a stir after that, or your first taste will be all tonic…)

Watermelon-Mint-Gin-Rickey-Cocktail-Recipe-Liquorary-OSBP-10

And on that tonic: after spending all that time putting together all these great ingredients, you don’t want to dump just any generic tonic in your glass. Most tonic for sale these days is made without any quinine, the essential ingredient that gives tonic its bitterness (tonic started its life as a way of getting British sailors and soldiers assigned to tropical locales to take their quinine, a natural anti-malarial drug) and sweetened with corn syrup. Fortunately, there’s a growing availability of tonics made with quality ingredients. It’s worth putting in a little leg work as the weather gets nicer and your highballs start demanding to be filled with Rickeys and Gin & Tonics.

(Don’t forget to follow us on Instagram, where we’ve been posting our experiments before they make their way onto this column!)

Photo Credits: Nole Garey for Oh So Beautiful Paper

Gold Quilled Wedding Anniversary Certificate

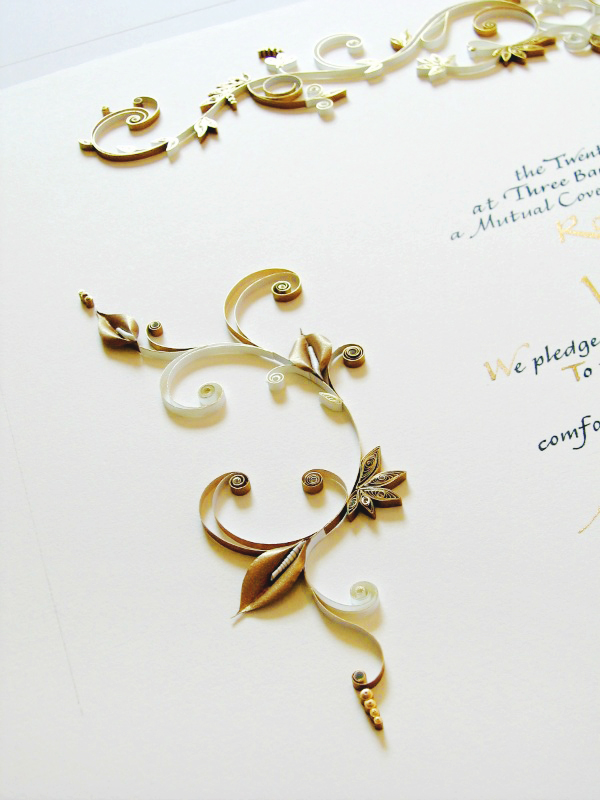
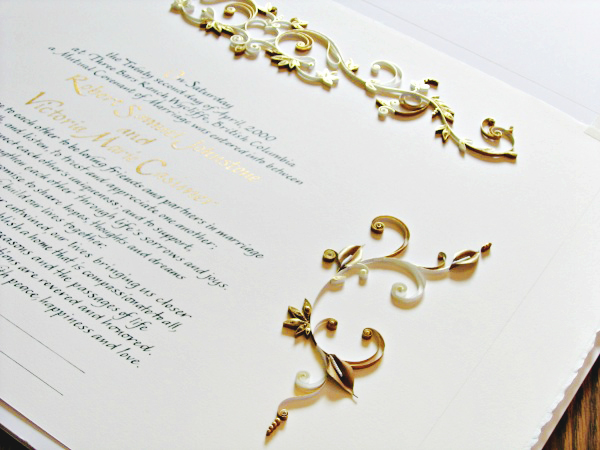
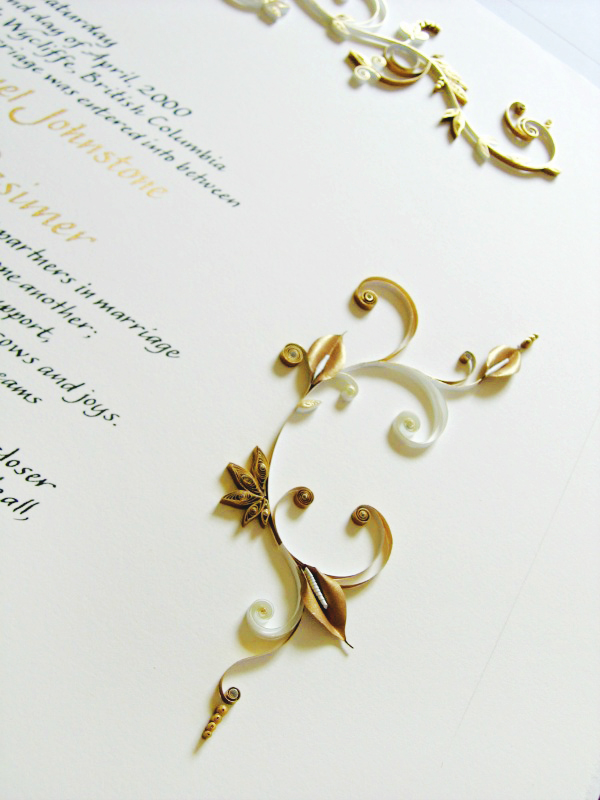
I’ve had the pleasure of featuring several of Ann Martin‘s beautiful quilled wedding keepsakes over the years – from ketubahs to framed wedding invitations. Today I have the privilege of sharing a gold and white marriage certificate that Ann created to celebrate a 15th wedding anniversary!

Gold-Quilled-Wedding-Certificate-Ann-Martin-OSBP7

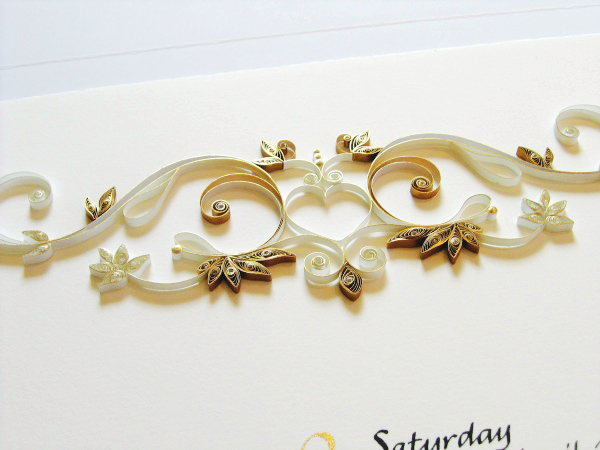
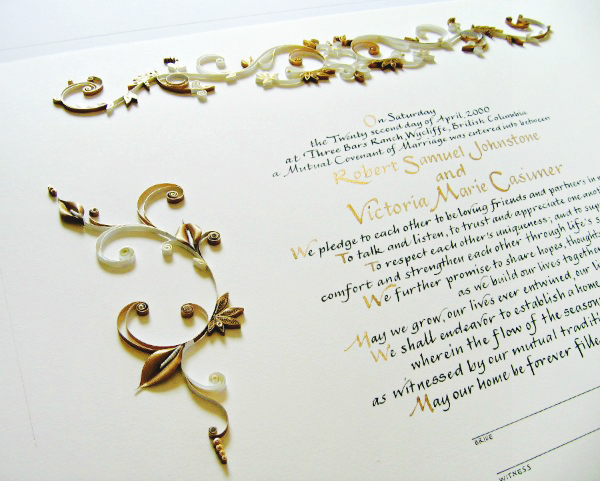
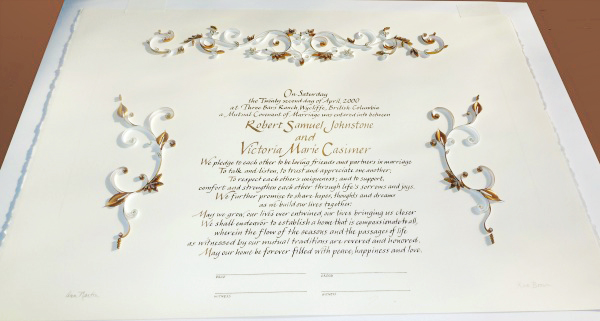
From Ann: Quilling is the art of rolling narrow strips of paper to create a variety of shaped coils and scrolls. The technique dates back hundreds of years and has changed very little with the passage of time. For this certificate, the couple’s 15th anniversary is coming up in April. As a celebration of the occasion, I was asked to create a design based on their wedding invitation. Calligrapher Riva Brown of Living Letters Studio did the lettering. She used shimmering gold gouache for the names and also the first letter of each vow.

Gold-Quilled-Wedding-Certificate-Ann-Martin-OSBP3

All of the quilling was done with gilded-edge gold and white quilling paper. The bride carried lilies in her bouquet, so she asked me to include them in the design. I used metallic gold paper to make sculptured peace lilies. The certificate is 15 x 22 inches, about half the size of the Quaker marriage certificates Riva and I often collaborate on, as they require additional space for guest signature lines. A marriage certificate can also function as an alternative guest book that can later be framed as a reminder of the day.

Gold-Quilled-Wedding-Certificate-Ann-Martin-OSBP

Gold-Quilled-Wedding-Certificate-Ann-Martin-OSBP4

Gold-Quilled-Wedding-Certificate-Ann-Martin-OSBP5

Gold-Quilled-Wedding-Certificate-Ann-Martin-OSBP6

Thanks so much Ann!

Photo Credits: Ann Martin | All Things Paper