How to Find the Perfect Vintage Rug

This post is sponsored by eBay.

I’ve been working really hard to get everything all finished up over at Common Room Studio â€“ I can’t wait to share the full reveal with you soon! Vintage rugs are one of my favorite ways to add color and texture to a room, and I always planned to bring a bunch of them into the studio. Of course, I went straight to eBay to find the perfect vintage Persian lilihan rug. So today I thought I’d share my tips for how to find the perfect vintage rug so you can bring your own gorgeous rug into your space!

How to Find the Perfect Vintage Rug from eBay

You guys, I can’t even begin to tell you how much I adore this rug. It has hot pink details (!!!), and the intricate pattern isn’t too busy and will only grow more beautiful with age. If you aren’t familiar with the Persian lilihan rug style, it’s 100% wool and is seriously the perfect low pile, but still soft underfoot, accent rug. I’m completely obsessed with this 1930s beauty, and everyone who visits the studio falls in love with it. I can guarantee there will be many more Persian lilihan rugs in my future!

How to Find the Perfect Vintage Rug from eBay

How to Find the Perfect Vintage Rug from eBay

If you’re looking for a gorgeous accent rug, you’re bound to find the perfect fit on eBay. There are approximately 1.1 billion listings on eBay at any given time, which means plenty of gorgeous rugs to go around. Vintage rug sizes are often quite different from our standard modern sizes, but you can usually find everything from small-ish accent rugs to long runners to larger rugs that would look amazing in a bedroom or living room. Just look at this 16 foot stunner!

How to Find the Perfect Vintage Rug from eBay

This little plant-filled corner of the studio makes me so happy! Many rugs can be purchased instantly with the “Buy it Now” feature – so you don’t even have to worry about getting into a bidding war! I have absolutely no patience once I’ve found my perfect rug, so I absolutely love the no hassle instant purchasing option and super fast shipping. I’m currently loving this navy and red 15 foot runner, this gorgeous 3×5 accent rug, and this unique rug with teal blue and peach accents. I may just have to scoop that last rug up for the studio!

How to Find the Perfect Vintage Rug from eBay

When searching for vintage rugs, I like to look for unexpected details like non-traditional color palettes (hello hot pink!), unique patterns, or even visible wear on the rug like worn spots and fading. Each of these little elements will help a vintage rug work in a modern home, along with helping add interest and character to a room. There are new vintage rugs added to eBay every day, so start shopping now to find the perfect rug for your space!

This post is sponsored by eBay. All opinions are my own. Thank you for supporting the sponsors that make Oh So Beautiful Paper possible!

Romantic Wildflower Inspired Wedding Invitations

We love it when wedding invitation designers draw heavily upon the wedding venue for design inspiration! Michelle of Honey Paper (a member of our Designer Rolodex, naturally) designed these romantic wildflower inspired wedding invitations with the lush wildflower varieties of California’s Santa Ynez Valley in mind. From crisp honeysuckle to bristly blue fiesta flowers and pale leopard lilies, the delicate foliage in this suite is spot on – and so pretty paired with equally delicate text in pale green script!

Romantic Wildflower Inspired Wedding Invitations by Honey Paper

From Michelle: Nicholas proposed to Katherine under the open skies of California’s Santa Ynez Valley in Santa Barbara County as the heads of lupines and poppies unfurled like antique quilts shaken out and smoothed. As native Coloradans, the couple felt a connection to this peaceful land between the mountains and wanted to share the gentle, pastoral countryside and local culture with their loved ones on their wedding day.

Romantic Wildflower Inspired Wedding Invitations by Honey Paper

The venue, florals, stationery details, and seasonal menu all drew inspiration from the generous, natural beauty of the region and the couple’s shared interest in sustainable food and love of the outdoors. I created original watercolor illustrations for the stationery and dinner menu inspired by the wildflowers of the region. An oval wreath of native ferns, chaparral nightshade, lilies and blue fiesta flower with its bristly foliage encircled the text of the invitation. An elegant script in green, the color of weathered copper, suggests the wandering stems of California honeysuckle.

Romantic Wildflower Inspired Wedding Invitations by Honey Paper

The deckled edges of the invitation and response card highlight the artistry of the mould-made paper by Fabriano, a distinguished Italian paper company wholly dedicated to renewable energy and sustainable business practices.

Romantic Wildflower Inspired Wedding Invitations by Honey Paper

Bright white envelopes with old-world flaps were lined with my original watercolor illustration of the pale leopard lily, an abundant native plant often found alongside hedge nettles and stream orchid. Long, billowy stems with silky petals gracefully reach toward the first hints of the morning sun. Fess Parker Wine Country Inn and The Bear and Star were a perfect venue pair. Nestled among meadow, hill and stream, The Bear and Star restaurant boasts a closed-circuit ecosystem, meaning its menu is entirely crafted from the harvest yielded by Fess Parker Home Ranch. While quail, pig and cattle roam pasture, heirloom vegetables and fruit cling to vine and branch like baubles and gemstone.

Romantic Wildflower Inspired Wedding Invitations by Honey Paper

As favors, guests took home some of the garden spoils in packets filled with heirloom seeds from the year’s previous yield which read, “Let Love Grow,” with a running border of leopard lilies. The Bear and Star’s Chef John Cox prepared a family style dinner which started with a farm fresh hors d’oeuvres bar and the local Pinot Noir, Riesling and Syrah. Guests gathered at long tables on the veranda under a gentle sky and helped themselves to scoops of heirloom beans, quail egg and spring radish.

Romantic Wildflower Inspired Wedding Invitations by Honey Paper

Envelopes were addressed using a romantic script the unmistakable green of spring’s first sweet pea shoots and paired with monochromatic vintage stamps. What an absolute delight to be part of this beautiful wedding day that was both a celebration of love and an homage to the riches of the earth.

Romantic Wildflower Inspired Wedding Invitations by Honey Paper

Thanks Michelle!

Design: Honey Paper
Paper: Fabriano Paper

Honey Paper is a member of the Designer Rolodex – check out more of their beautiful work right here or visit the real invi­ta­tions gallery for more wedding invitation ideas!

Photo Credits: Ashleigh and Erik

Common Room Studio: Design Inspiration!

This post was sponsored, and paid for, by SunTrust. All opinions are my own. Thank you for supporting the sponsors that make Oh So Beautiful Paper possible!

Alright y’all, it’s time to talk about the design inspiration for Common Room Studio! You’ve already seen some of the before photos, and today I want to share our color palette and the overall vibe for the space. November is National Entrepreneurship Month, so it feels like the perfect time to talk about this new facet of my business. I’m partnering with SunTrust to share some tips from their Small Business Best Practices Guide, including a few tips that I wish I’d known when I first started Oh So Beautiful Paper! As entrepreneurs and small business owners, our businesses are always evolving, so it’s never too late to incorporate good advice and best practices into your business plan!

Common Room Studio Style Board and Color Palette

Some of the materials and colors for Common Room Studio: Sherwin-Williams paint in Alyssum, Snowbound, Zircon, Extra White // Scallop Marble Tile // Semihandmade Supermatte Black cabinet fronts // Butcher block kitchen countertop // Quadrostyle Harlow vinyl floor sticker (using these in the bathroom!) // Fireclay mint green tile samples

Because I started Oh So Beautiful Paper as a creative outlet, I spent the first couple of years treating the blog more like a hobby than a creative business. I didn’t even set up a business banking account until I had already quit my previous job to focus on Oh So Beautiful Paper full time. Oops! I wish I’d been able to read SunTrust’s Small Business Best Practices Guide when I first started my business; it definitely would have made things a lot easier in those early years. If I could go back and do things over, here are three things I would tell myself on day one based on what I know now:

  1. Establish good bookkeeping and banking practices from the very beginning. Keep all of your personal and business accounts totally separate, and invest in bookkeeping software that connects to your various financial institutions to keep track of expenses and spending habits. It can be a lot of work to set everything up at the very beginning, but it will save you so much time and energy down the road!
  2. As your business grows, focus your time and energy on the things that you enjoy the most and truly do best, then outsource the things that you either aren’t good at or really don’t enjoy. For most small businesses, bookkeeping is one of the first things that gets hired out. But you could also consider investing in a part time assistant to help manage your social media, or handle all shipping and mailing responsibilities.
  3. Review your pricing strategy on a regular basis to make sure your pricing reflects the full value of your products or services. If you’re a service-based business, remember that it’s totally okay to raise your prices as your business grows and evolves. Just because you start out offering a product or service for one price doesn’t mean that you’re stuck at that price forever!

Anything's possible if you've got enough nerve - JK Rowling

The SunTrust Small Business Best Practices Guide covers six important financial management topics to help small business owners navigate their entrepreneurial journey. With the addition of Common Room Studio, I’m in a growth and expansion stage of my business – so I found the section on Growing Your Small Business to be really helpful. I was particularly interested in the points on evaluating options for accessing funds to finance business growth, because hello build-out expenses! There is lots of seriously good financial advice for entrepreneurs and small business owners at every stage in their business. You can check out the full guide here!

Start Somewhere

Start Somewhere

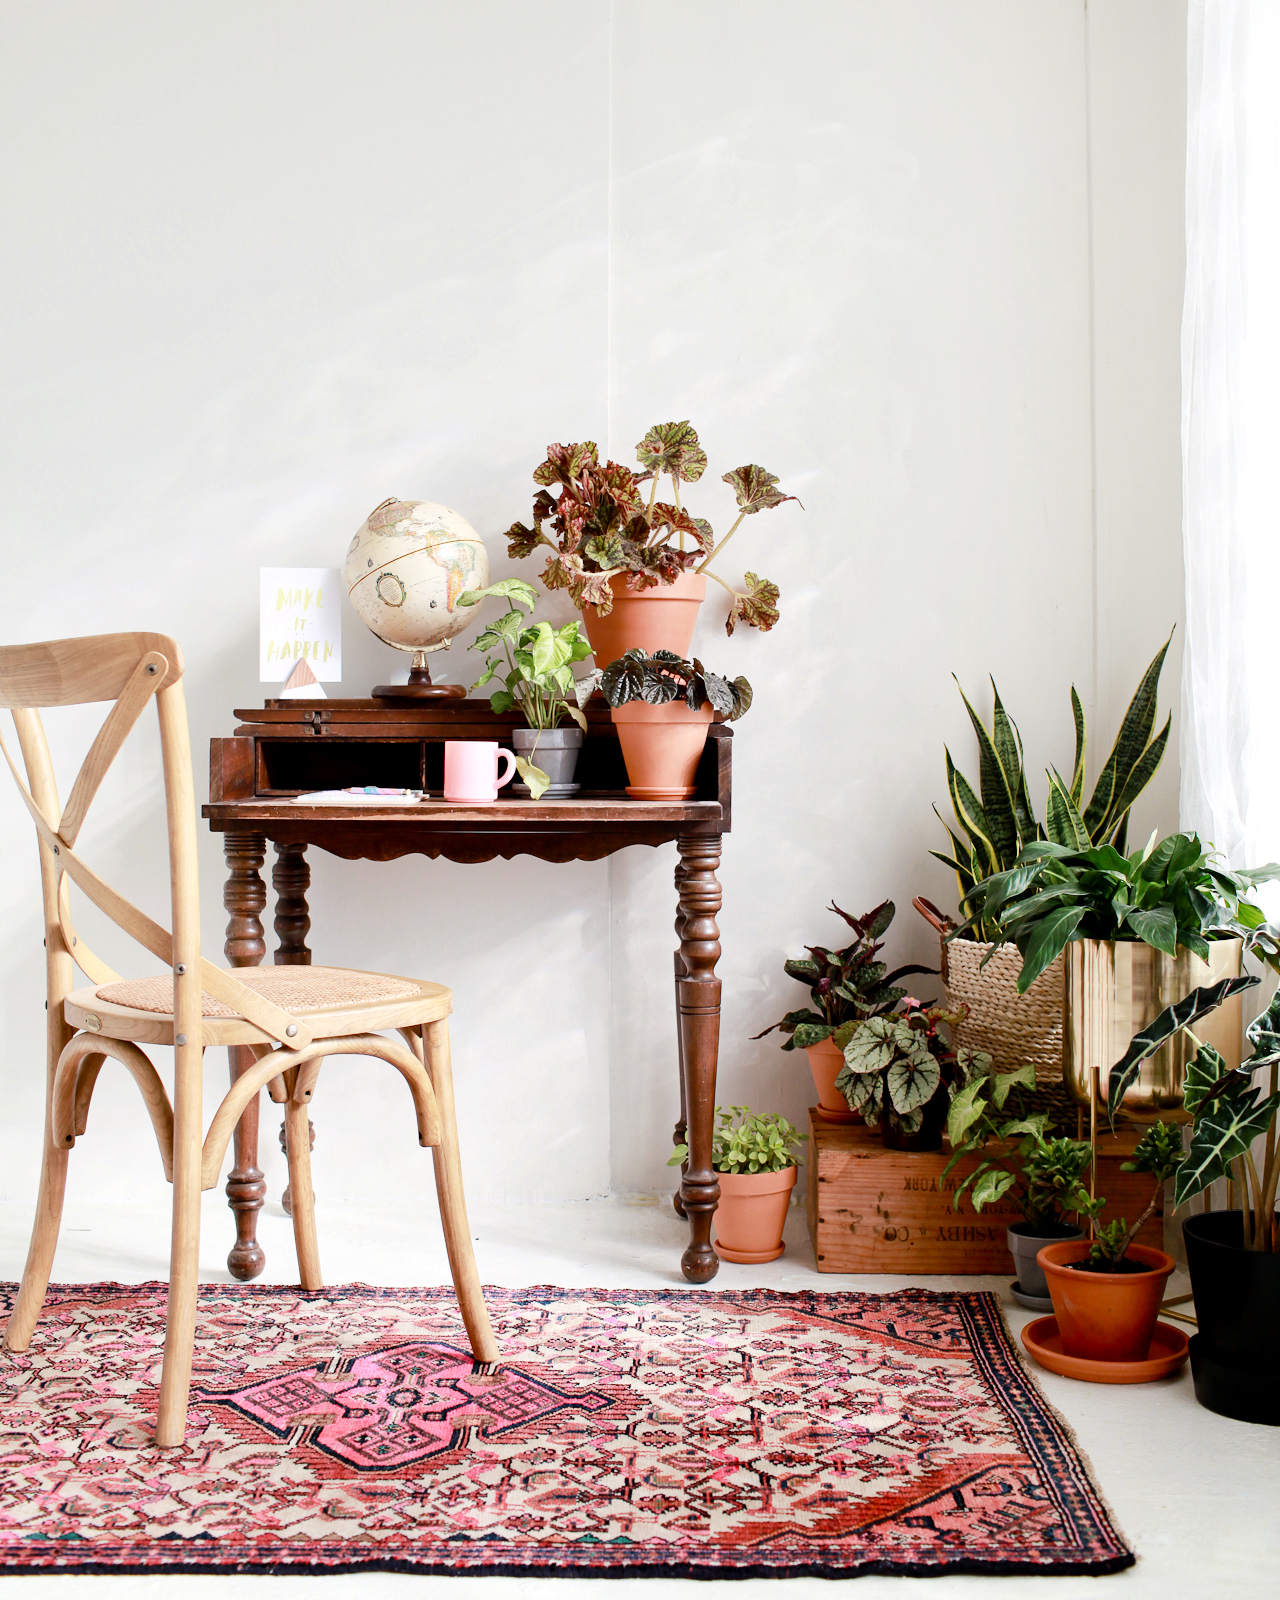
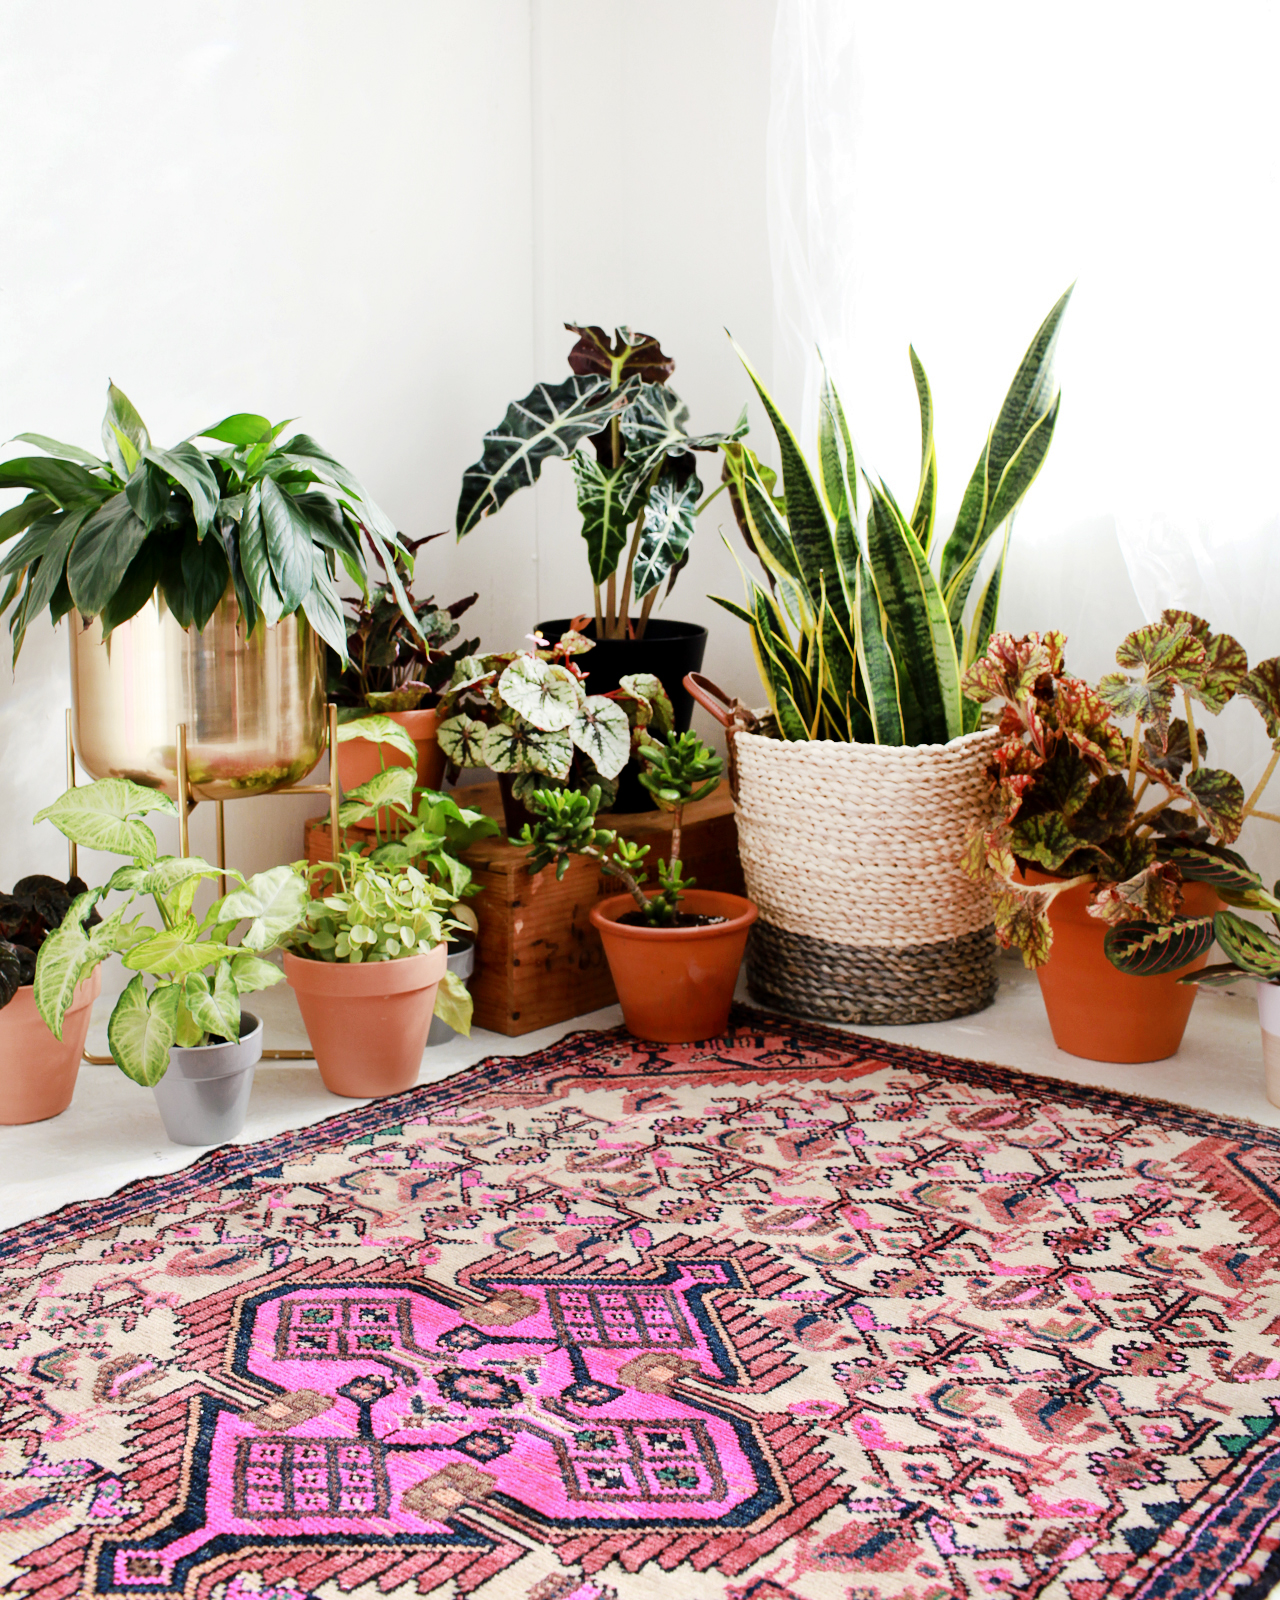
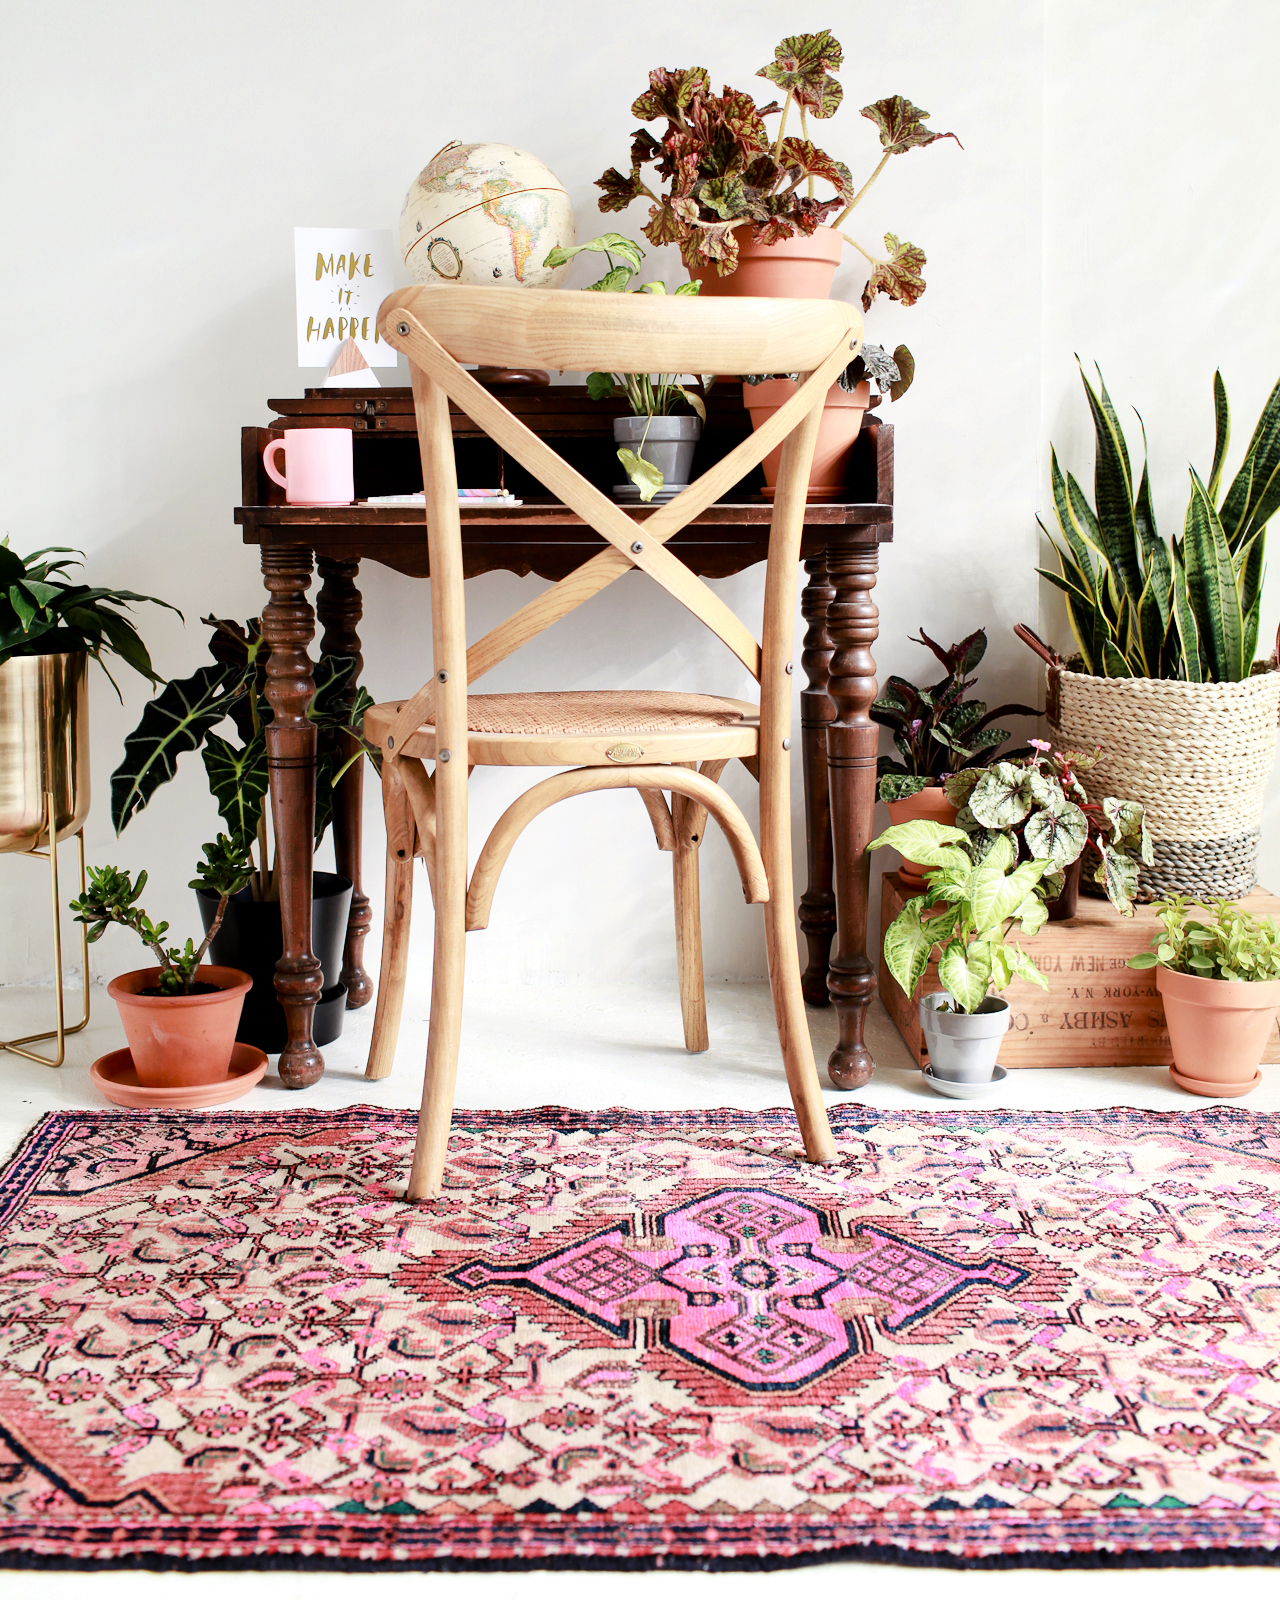
Now that the big construction phase is behind us at Common Room Studio, our current challenge is to finish decorating the space! I’ve decorated plenty of apartments and my current home, but I’ve never decorated a commercial space before. Turns out, the process for decorating a commercial space is quite different from decorating a house! I want Common Room Studio to be a bright and open space that can serve lots of different purposes, but I also want it to be an inspiring place that creates a warm and inviting impression the minute you walk inside. I started by thinking about the colors, materials, and textures that I wanted to bring into the space, along with how I wanted the space to function as a whole.

I always create moodboards to help define my vibe and guide future design decisions, but I also roped in my friend and interior stylist Michelle Solobay to help me finish the space. I’ve been collecting inspiration on this board since I first started hunting for studio spaces, and then continued adding to it with this particular space in mind once I had signed the lease. Here’s what we’ve got so far!

Common Room Studio Moodboard

Sources (clockwise from top left): Jenna Kutcher; Light Lab; My Scandinavian Home; Pigment‘s workshop space via Mon Voir; garlands in the Pigment retail space; pink plaster kitchen by Jersey Ice Cream Co.; Sarah Sherman Samuel

Here are my goals for the space:

– Create a bright and open space that can serve as a blank box for photo shoots, workshops, and other events. Furniture in the workshop space must be able to serve multiple purposes and be easily moved and/or easily taken apart and stored to suit the needs of different events. 

– Because the space needs to be visually neutral, our color palette is pretty limited: bright white walls and floors to bounce natural light around, with accents of pink, green, navy blue, and black. Copper, brass, and matte black for metal and hardware.

– Incorporate natural materials, textures, and plants to soften the industrial vibe of the space. Butcher block countertops for the kitchenette, wood chairs, woven baskets and pendants, and house plants in varying sizes scattered throughout the space.

– Hang garlands from the ceiling and woven wall hangings to bring in bright pops of color and add additional texture/visual interest.

– Create a cozy seating area in the front room to welcome guests and provide a space where people can sit and socialize during events.

So there you have it: Common Room Studio, coming very very soon! I am BEYOND excited to bring it to life and share the whole process here!! If you have any decorating or layout advice, lay it on me in the comments. I’m all ears!

Photo Credits: Nole Garey for Oh So Beautiful Paper

This post was sponsored, and paid for, by SunTrust. All opinions are my own. Check out the SunTrust Small Business Best Practices Guide right here!

DIY Moon and Stars Pumpkins

Last year, I made these really fun swirly galaxy-inspired iridescent pumpkins. This year, I wanted to do another spin on a celestial-inspired pumpkin using my new favorite material: hologram vinyl! So today I’m teaming up with one of my favorite crafting partners, Fiskars, to make these beautiful DIY moon and stars pumpkins. This DIY couldn’t be easier – all you need are some scissors, a few craft punches, and vinyl! Oh, and pumpkins of course. And since the vinyl essentially functions like a sticker, it’s also a super fun activity for kids. Are you ready? Let’s go!

DIY Moon and Stars Pumpkins

I always like to incorporate hand drawn shapes into my projects, so these pumpkins feature a quirky crescent moon and cute little stars that I cut by hand using my favorite Orange-handled Scissors – which just celebrated their 50th anniversary! (Did you catch the Matisse-inspired garland that I made to celebrate??) For those of you with little helpers at home that are anxious to help out, they can cut a few hand drawn stars using Fiskars Kids Scissors! I made the rest of the stars using the Fiskars Star Thick Materials Shape Punches and mixed them with the hand cut shapes. I love the idea of having one big pumpkin with the crescent moon surrounded by lots of little pumpkins with tiny hologram foil stars!

DIY Moon and Stars Pumpkins

I’m always drawn to black and white pumpkins for Halloween, but for these moon and star pumpkins I added dark navy blue and charcoal gray to the mix. I’m all about those non-traditional holiday color palettes! You can use faux pumpkins and/or real pumpkins for this tutorial (I used both), but the hologram foil is particularly striking against dark colors, so I’d recommend painting any real pumpkins with navy blue or black matte craft paint before applying the hologram foil stars.

DIY Moon and Stars Pumpkins

Supplies

Fiskars Original Orange-handled Scissors

Fiskars Kids Scissors (for those of you with little helpers!)

Fiskars Star Thick Materials Shape Punch in small, medium, and large

Hologram vinyl, hologram glitter self-adhesive sheets, and matte white vinyl

Pencil

Real or faux pumpkins

Matte craft paint and paintbrush

DIY Moon and Stars Pumpkins

DIY Moon and Stars Pumpkins

To make the DIY Moon and Stars Pumpkins:

Step 1. Paint your pumpkins using a matte craft paint in a dark color (like navy blue, charcoal gray, or black) and allow them to dry completely. If you like, you can also use faux black pumpkins and skip this step!

Step 2. Use a pencil to lightly sketch the shape of a crescent moon on the back of the white vinyl. The size of the crescent moon will vary depending on the size of your pumpkin, but my crescent moon was just over 5″ tall on an 8″ tall faux pumpkin. Use the Orange-handled Scissors to cut the crescent moon shape from the white vinyl.

Step 3. Use the Star Thick Materials Shape Punches to make lots of stars in varying sizes from the hologram vinyl and hologram glitter self-adhesive sheets. You can also punch some stars out of the matte white vinyl and add those to the mix!

A couple quick tips for punching the star shapes from the vinyl: I found it easiest to cut 3″ strips of vinyl from the roll using my Orange-handled Scissors, then punch the star shapes from those strips. When operating the punch, I had the best luck when the vinyl was facing up and I moved the blades really quickly. If you try to punch the vinyl too slowly, the vinyl can get stuck in the blades and create rough edges. Punching quickly creates nice clean edge lines!

Step 4. Use a pencil to draw some stars on the back of the hologram vinyl and glitter sheets, then cut those by hand using the Orange-handled Scissors. If you have little helpers, they can also cut out a few hand drawn stars using Fiskars Kids Scissors!

Step 5. Peel the protective backing off the white crescent moon and apply the vinyl shape to your largest pumpkin. Then peel the protective backing off the star shapes and apply them to your pumpkins one by one. Try to cluster a bunch of the smallest stars together and incorporate the larger stars in random patterns, just like you’d see in the night sky. For the smallest pumpkins, use only the smallest star shape and place them in a staggered line around the pumpkin. Continue placing stars (and punching new stars as needed) until you’ve covered all of your pumpkins!

DIY Moon and Stars Pumpkins

DIY Moon and Stars Pumpkins

DIY Moon and Stars Pumpkins

DIY Moon and Stars Pumpkins

Aaaaaah! These are so cute I can barely stand it! And so pretty when mixed with a few undecorated white (or even orange!) pumpkins. Add in some colorful fall flowers and you’re pretty much guaranteed to have the prettiest front porch on the block. Happy Halloween crafting!

p.s. Printable Halloween favor bags and a fun DIY eyeball Halloween door cover!

This post was created in partnership with Fiskars. All content and opinions are my own. Thank you for supporting the sponsors that make Oh So Beautiful Paper possible!

Photos by Nole Garey for Oh So Beautiful Paper

Favorite DIY Halloween Ideas!

I have a couple of fun DIY pumpkin projects that I can’t wait to share with you – but first, I thought I’d revisit some of my favorite DIY Halloween ideas from years past! First up, these DIY hologram galaxy pumpkins are SO much fun to make – and the results are SO cool! This method will work on pretty much any dark pumpkin, from matte black to a deep navy blue!

DIY Hologram Galaxy Pumpkins

DIY Hologram Galaxy Pumpkins

DIY Hologram Galaxy Pumpkins

Everything’s coming up rainbows! These colorful Halloween treat bags would be perfect for a non-traditional Halloween party:

Colorful DIY Halloween treat bags

Colorful DIY Halloween treat bags

For those of you with school-aged kids, I created these fun printable Halloween classroom treat bags with some of my favorite Halloween puns. Print them on any paper color (I used kraft paper and vellum), and fill them with sweet (or healthy) treats! You can also use white Pen-touch paint markers to add a few fun patterns on black treat bags!

Printable Halloween Classroom Treat Bags

Printable Halloween Classroom Treat Bags

And for those of you planning an adult Halloween party – printable calligraphy treat bags


Printable Calligraphy Halloween Favor Bags / A Fabulous Fete for Oh So Beautiful Paper

Printable Calligraphy Halloween Favor Bag / A Fabulous Fete for Oh So Beautiful Paper

Printable Calligraphy Halloween Treat Bags

My kids aren’t quite ready for the super scary side of Halloween, so I created this quirky DIY eyeball Halloween door cover using circle craft punches in a variety of sizes! Wouldn’t this be completely adorable on a classroom door??

DIY Eyeball Halloween Door Cover

DIY Eyeball Halloween Door Cover

Any requests for specific Halloween DIY projects? I’m all ears!