Happy Weekend!

Happy Friday everyone! It’s my birthday today – I’m 33! – and while I’m excited to celebrate another birthday, I’m truthfully more excited to enjoy these final few weeks as a family of three. We had a bit of an early labor scare over the Labor Day weekend, which thankfully turned out to just be a false alarm (at just under 36 weeks), but it made us realize this baby could decide to appear very soon! So now we’re focused on making our final preparations and tying up any loose ends – all while giving Sophie some pre-baby love and attention. But in the meantime…

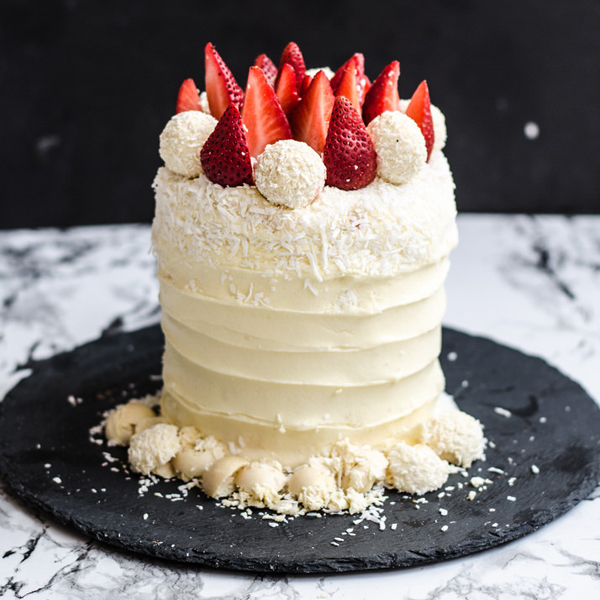
Strawberry-White-Velvet-Cake-Moonblush-Baker

Cake by The Moonblush Baker

…a few links for your weekend!

This week on Oh So Beautiful Paper:

Check back soon for this week’s cocktail! I hope you all have a wonderful weekend, and I’ll see you back here next week! xoxo

DIY Tutorial: Modern Hand Painted Floral Wedding Invitations

Black and white is always classic. It seems like no matter what design you choose you can’t go wrong with this simple, sophisticated palette. We typically gravitate towards bright pops of color, soft pastels, or neutrals – but for this tutorial we wanted to explore the modern, less traditional, side of good old black and white.  We added hand painted floral elements to bring in our signature style and make each invitation unique. With the days getting shorter and autumn knocking on the door, this wedding invitation suite feels just right to us. – Bailey and Emma of Antiquaria
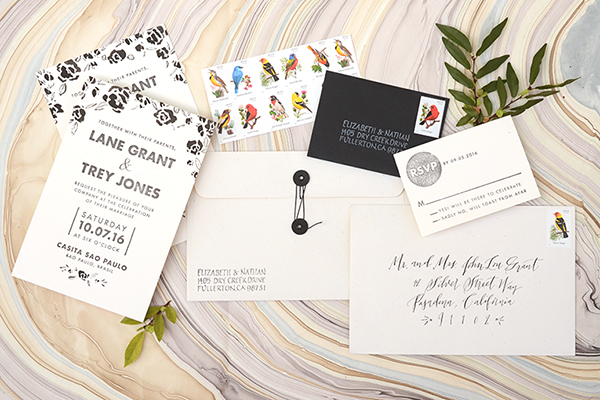
DIY Tutorial: Modern Hand Painted Floral Wedding Invitations by Antiquaria for Oh So Beautiful Paper

Materials

Modern Type Invitation Stamp and Reply Card Stamp
Art Deco Return Address Stamp
Watercolor Paper – we used 22″ x 30″ Smooth Hot Press Arches Watercolor Paper
Pencil and ruler
Sumi Ink
Paint Brushes
Stamp Pads in Black and Frost White
Craft knife and cutting mat
6×9 String Tie Envelopes
4bar Envelopes
DIY Tutorial: Modern Hand Painted Floral Wedding Invitations by Antiquaria for Oh So Beautiful Paper

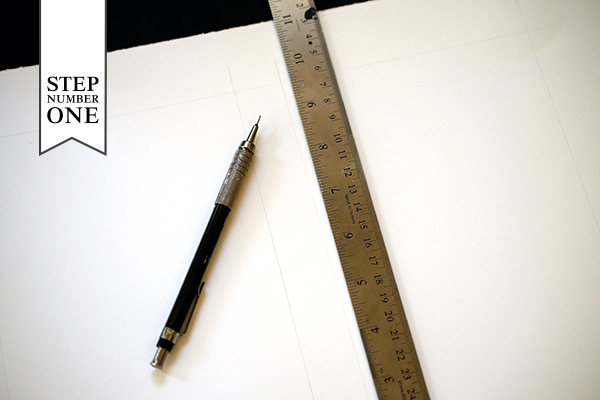
Step One: Since we will be hand painting with a bleed (a design that continues off the side or page) for this invitation tutorial, we will start by drawing our frames on hot press watercolor paper. For this design, we marked up two 5 ½” x 8 ½” rectangles spaced about an inch apart from one another. We used artist paper, which instead of coming in a pad, comes in large sheets, usually around 22″ x 30.” To make them workable, we tear that size down into four sections, resulting in sheets that are 11″ x 15.” You can also purchase watercolor paper in pads or blocks. Use what you like best!
DIY Tutorial: Modern Hand Painted Floral Wedding Invitations by Antiquaria for Oh So Beautiful Paper

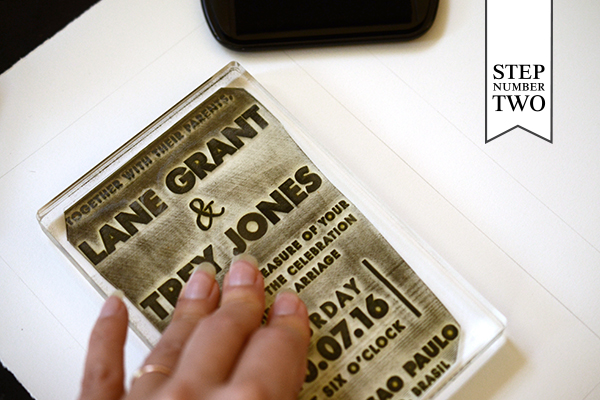
Step Two: Next, stamp your invitation (we used our Modern Type Invitation) in the center of each penciled rectangle. Press firmly but moderately when printing on a flat surface, using your hands to make sure that the entire stamp has been printed. Let dry.
DIY Tutorial: Modern Hand Painted Floral Wedding Invitations by Antiquaria for Oh So Beautiful Paper

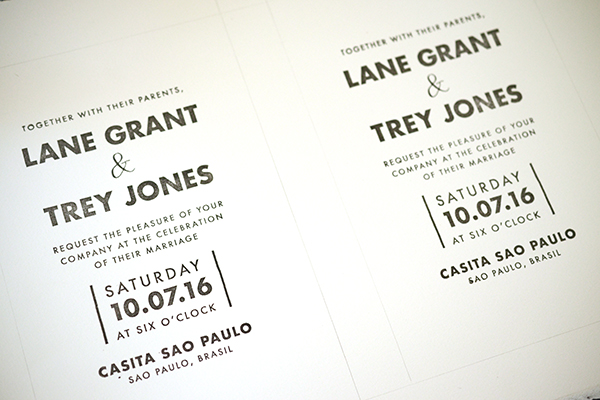
This sheet is stamped and awaiting floral painted details. Before you start painting, make sure that the stamped ink is totally dry.
DIY Tutorial: Modern Hand Painted Floral Wedding Invitations by Antiquaria for Oh So Beautiful Paper

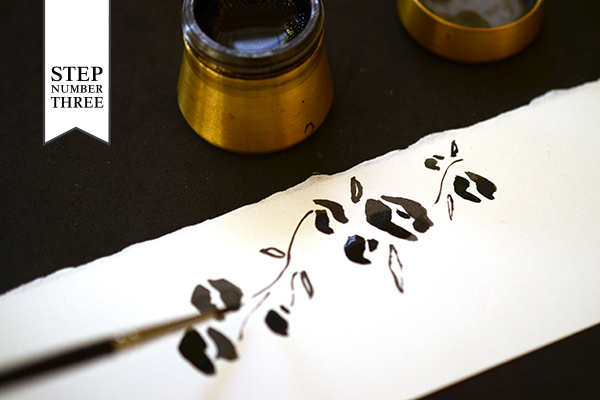
Step Three: It’s always a good idea to warm up and practice before painting, especially on something as important as your wedding invitations! Get a scrap piece of watercolor paper (preferably the exact same paper as your invitations) and get creative! Grab some flowers and foliage from your yard and start working out a design that you like. We used Sumi Ink instead of paint for this design, but any type of gouache (opaque watercolor) or watercolors will work too! Experimentation is the key to getting a result that you’re happy with.

DIY Tutorial: Modern Hand Painted Floral Wedding Invitations by Antiquaria for Oh So Beautiful Paper

Step Four: Get to work painting your invitations once you feel warmed up and know what you want to paint. We started by painting clusters of flowers and foliage along the top of each invitation, as shown above. You could also do something as simple as a single flower at the top or as ornate as a wreath around the entire invitation. The nice part is that it’s totally up to you! It can also help to pencil in a rough design prior to painting on your invitation if you’re not 100% confident going freeform on the design.
DIY Tutorial: Modern Hand Painted Floral Wedding Invitations by Antiquaria for Oh So Beautiful Paper

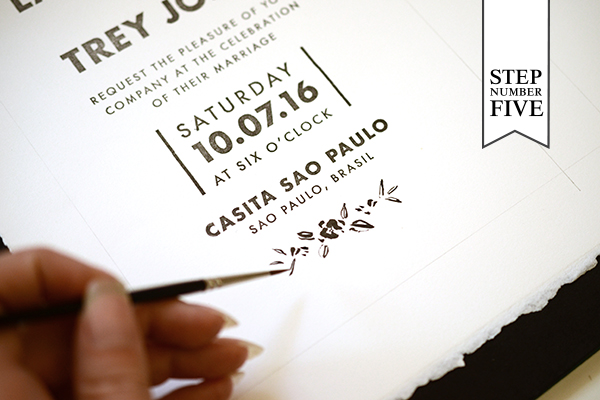
Step Five: We decided to add a very small floral accent right below the location on our design, so after the top was dry, we added one to each invitation. Let your finished design dry completely.

DIY Tutorial: Modern Hand Painted Floral Wedding Invitations by Antiquaria for Oh So Beautiful Paper

Once all of your paintings are complete, all that’s left to do on the invitation is cut it out! Use a craft knife and metal ruler (or very precise paper cutter) to cut along your pencil lines…et voila! An invitation with a full bleed!
DIY Tutorial: Modern Hand Painted Floral Wedding Invitations by Antiquaria for Oh So Beautiful Paper

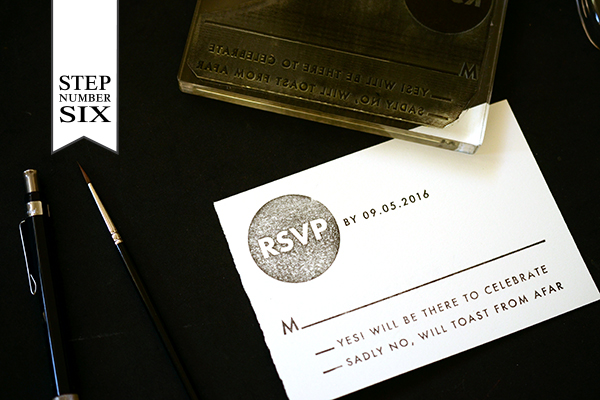
Step Six: Stamp your reply card (we used our Modern Type Reply) on a 4bar size card made of the same watercolor paper used on the invitation or a card of a similar color (soft white). We used the same black stamp pad as on the invitation design.
DIY Tutorial: Modern Hand Painted Floral Wedding Invitations by Antiquaria for Oh So Beautiful Paper

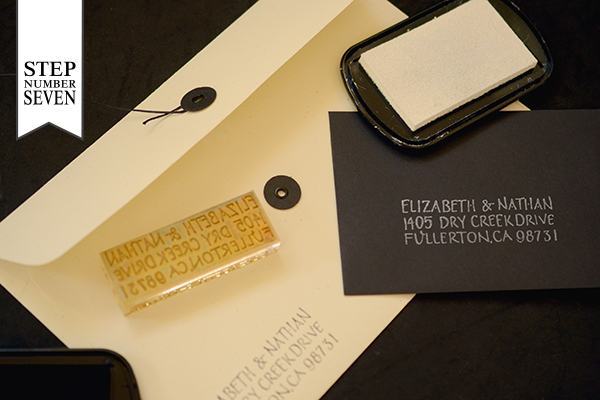
Step Seven: Stamp your return address in black (we used our Art Deco Return Address) on the back of a 6″ x 9″ envelope and reply address in white on the front of a black 4bar envelope. We’re in love with these gorgeous string tie envelopes and love how the milkweed color softens the look of what is otherwise a 100% black and white design.

Now all that’s left is to address them to your loved ones, add postage, and send them on their way! We guarantee that your guests will be floored by the beauty of your hand crafted work of art!

Photo Credits: Antiquaria for Oh So Beautiful Paper

Designs and artwork copyright Antiquaria, with DIY tutorials created exclusively for Oh So Beautiful Paper. All artwork and DIY tutorials are for personal use only. Anti­quaria is a mem­ber of the Designer Rolodex – you can see more of their beau­ti­ful work right here!
Autumn’s Hermès-Inspired Baby Announcements

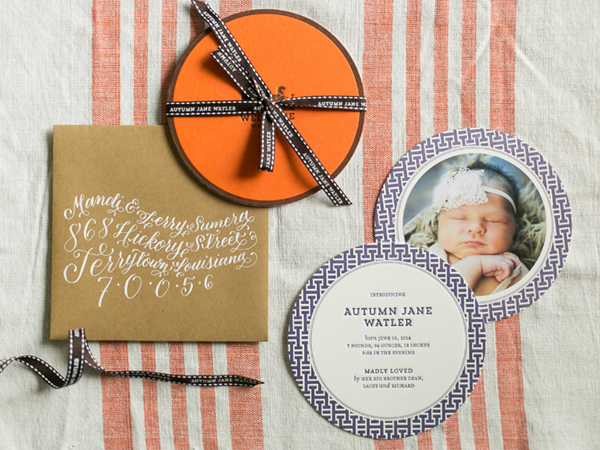
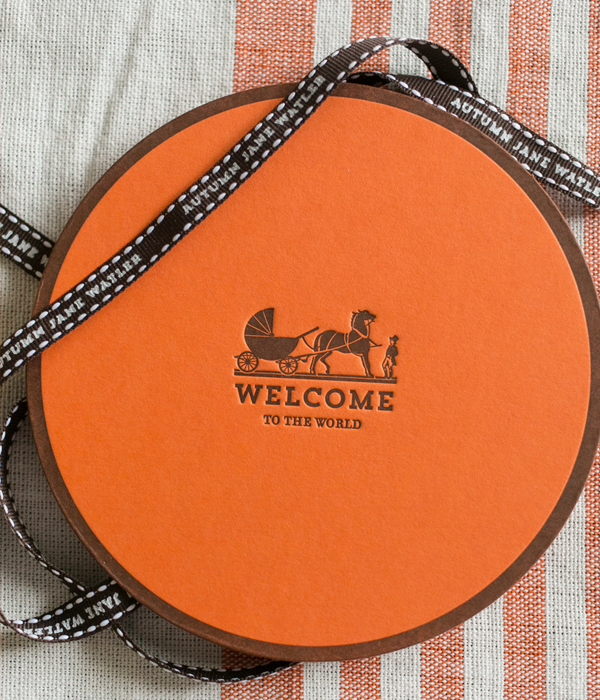
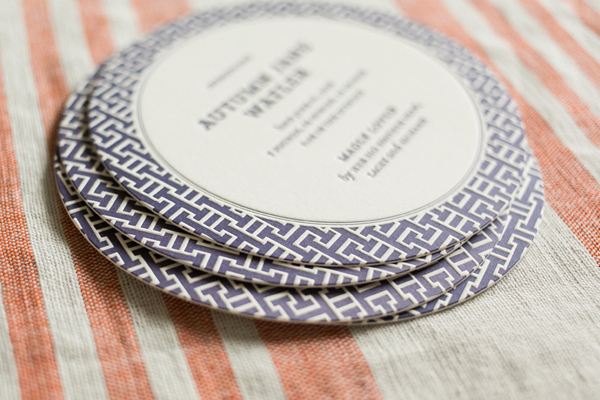
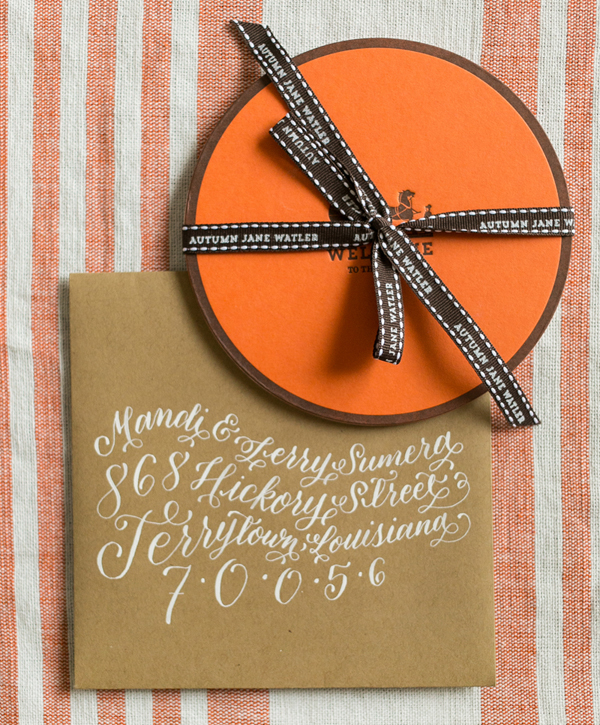
When Melissa from Atheneum Creative was asked to create a birth announcement inspired by the luxury brand Hermès, she was up for the challenge! Melissa drew her inspiration from the brand’s iconic boxes, creating a layered baby announcement tied together with custom ribbon and mailed in kraft paper envelopes to evoke shipping boxes. So cute!

Hermes-Inspired-Baby-Announcement-Atheneum-Creative

From Melissa: When Autumn’s parents called and asked for Hermès-inspired baby announcements for their daughter we were super excited… I love a new challenge! We based the whole announcement design around the signature Hermès boxes.

Hermes-Inspired-Baby-Announcement-Atheneum-Creative7

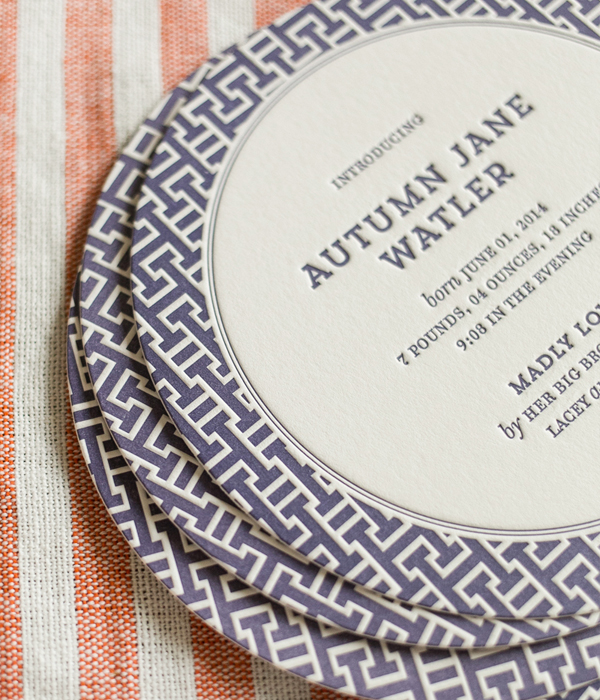
The announcement features three separate pieces. First things first, the logo. We re-imagined the classic Hermès logo to be a baby carriage. This first card in the set represents the top of the signature Hermès box. The second card contains Autumn’s birth details and represents the inside bottom of the signature boxes. Of course we had to squeeze a photo “in the box” (between the two cards) as this little angel is a gift her her parents.

Hermes-Inspired-Baby-Announcement-Atheneum-Creative4

Hermes-Inspired-Baby-Announcement-Atheneum-Creative9

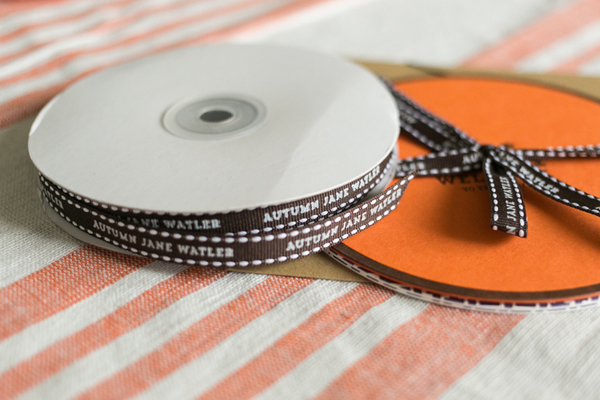
The wrap it all up we created a custom ribbon with the baby’s name. The entire suite was mailed in a kraft paper envelope addressed with a whimsical calligraphy style by Jenna Blazevich.

Hermes-Inspired-Baby-Announcement-Atheneum-Creative5

Hermes-Inspired-Baby-Announcement-Atheneum-Creative8

Thanks Melissa!

Design: Atheneum Creative

Calligraphy: Jenna Blazevich

Atheneum Creative is a member of the Designer Rolodex – you can see more of their beautiful work right here!

Photo Credits: Chelsea Davis Photography

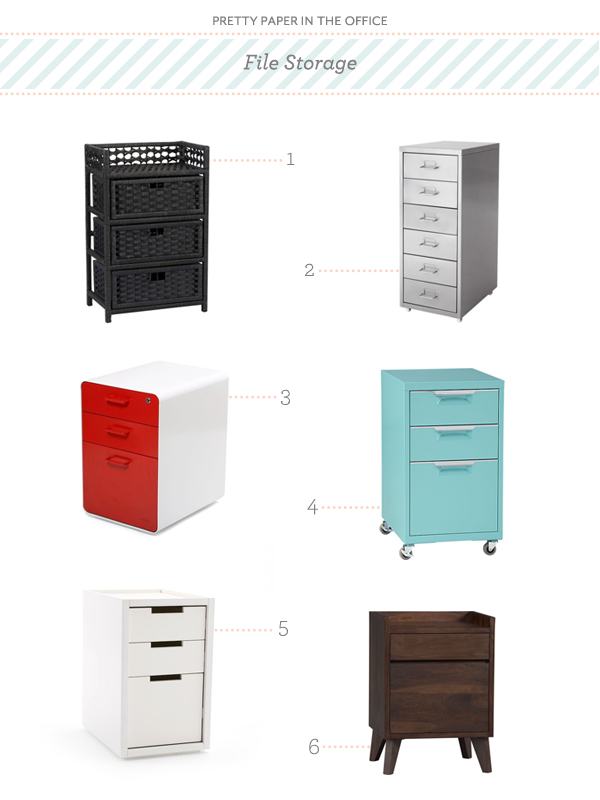
Pretty Paper in the Office: File Storage

I’ve had a huge, standard filing cabinet for years. I hate the thing, but if you have papers or important documents that you need organized — something that’s always right where it should be when you need it — a filing cabinet gets the job done. Thankfully, things have changed in the past decade since I got mine. Replacing it will be difficult simply because it’s so hard to choose! Whether you’re looking for a certain style, one that stands out, or one that’s disguised as a piece of furniture, this round up shows you just a small selection of what’s out there! – Julie
Pretty Paper in the Office: File Storage Round Up via Oh So Beautiful Paper

 No. 1 Paper Rope drawer chest from Target; No. 2 Helmer drawer unit by IKEA; No. 3 West 18th filing cabinet from Poppin; No. 4 TPS drawer filing cabinet from CB2; No. 5; No. 6 Strut filing cabinet from Crate & Barrel

{images via their respective sources}