Pretty Paper in the Office: Aqua + Gold

The season of celebration has come and gone. This is the time of year when we wait out the thaw, daydreaming of far off lands, clear blue waters and golden beaches. While a few of us are lucky enough to make those dreams come true, I thought I’d try and help out the rest of us with this month’s round-up. With those tranquil retreats of water and sand as my inspiration, I’ve put together a few aqua and gold goodies for the office. Granted it won’t help you with your tan, but hopefully it will make your workspace a little sunnier!

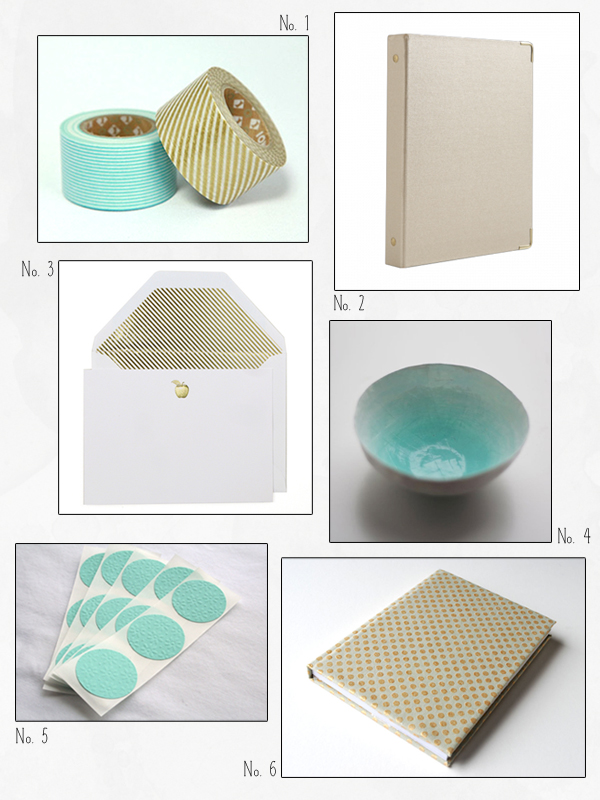
Aqua and gold office round up

No. 1 Wide washi tape from Little Happy Things; No. 2 Gold mini binder by Russell + Hazel; No. 3 Apple noteset by Sugar Paper; No. 4 Aqua paper bowl by Up in the Air Somewhere; No. 5 Aqua envelope seals from Keeley Behling Studios; No. 6 Gold dots customized journal by Bartlett & Craft

Aqua and gold office stationery

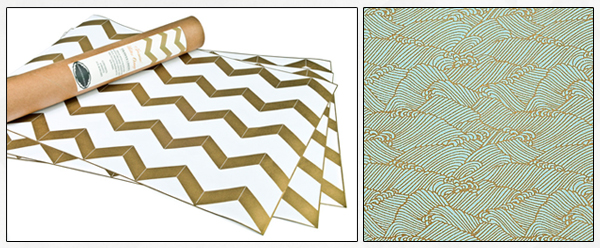
With all the lovely things going on your desk, it would be nice to have something just as lovely inside, don’t you think?  I really love these scented chevron drawer liners by Hammocks & High Tea.  You could also try sheets of fine paper, like this gold waves print from Paper Source.  A little really does go a long way. You’ll be surprised by the difference a surprise print like this can make!

{images via their respective sources}

DIY “Little Blue Box” Inspired Rubber Stamp Wedding Invitations

It’s the ladies of Anti­quaria, back with another cre­ative DIY project for you!  Today they’re sharing a wedding invitation tutorial inspired by the signature blue color of Tiffany & Co.

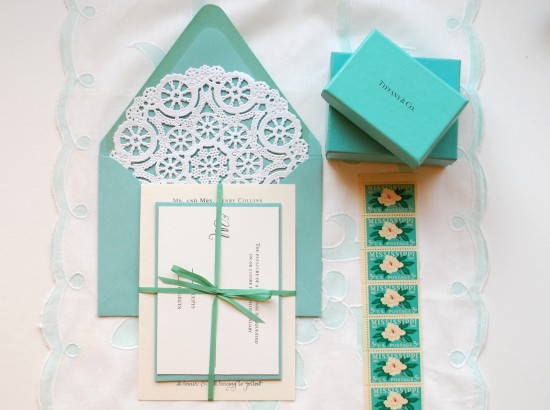
Have you ever felt the rush of excitement when a special friend, spouse, or loved one presents you with a gift packaged in the little blue box?  This wedding invitation suite was designed to elicit that feeling when your guest receives it in the mail.  Imagine their excitement when this feminine and traditional invitation finds its way into their mailbox.  This DIY is fairly simple yet the colors and packaging tie the whole thing together and give it a feeling of luxury.

Tiffany Blue DIY Wedding Invitation Suite

Tiffany Blue DIY Wedding Invitation Suite

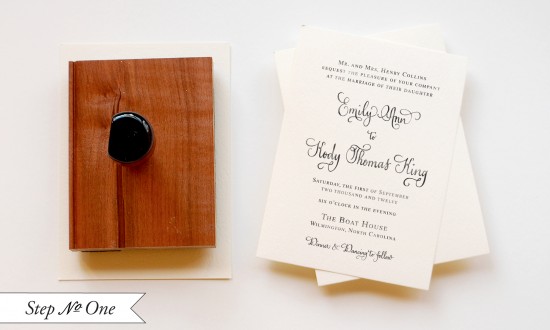
Step One: Cut your paper to size A6 (4.5″x6.25″).  Since this is a luxurious suite, we would suggest a thick high quality cotton watercolor paper.  Ink your stamp (we used our Vintage Calligraphy Invitation Stamp) thoroughly and center it over your card.  Press down moderately to make the print.  Too hard, the image may be blurry and too light and it may be splotchy.  Let dry.

Tiffany Blue DIY Wedding Invitation Suite

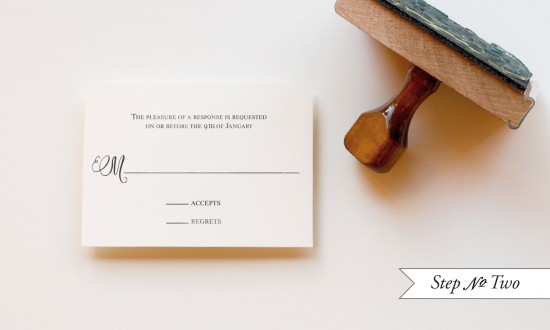
Step Two: In a similar fashion to printing the Invitation piece, you will now print the reply card.  For this piece, you will want to cut a 4bar (3.5″x5″) card out of the same paper used for the invitation.  Again, ink your stamp (we used our Vintage Calligraphy Reply Card stamp) thoroughly and make the print.  Let dry.

Tiffany Blue DIY Wedding Invitation Suite

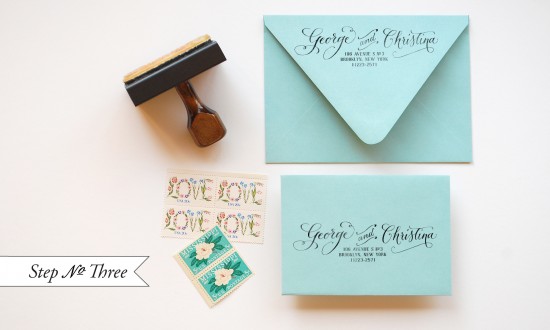
Step Three: Using your return address stamp (we used our Calligraphy Accent Return Address stamp), stamp both the back flap of your A7 envelope and the front of your 4bar envelope.  This is such a great place to pinch pennies in your stationery budget as you are able to use one stamp for both envelopes and you will have it to use after the event is over!

Tiffany Blue DIY Wedding Invitation Suite

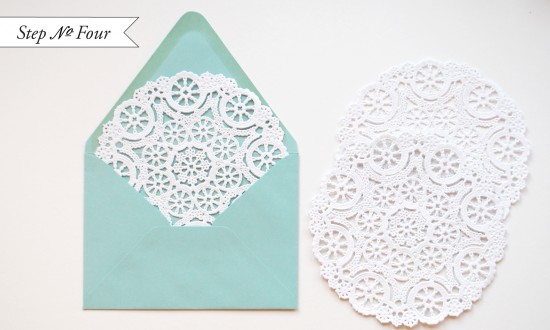
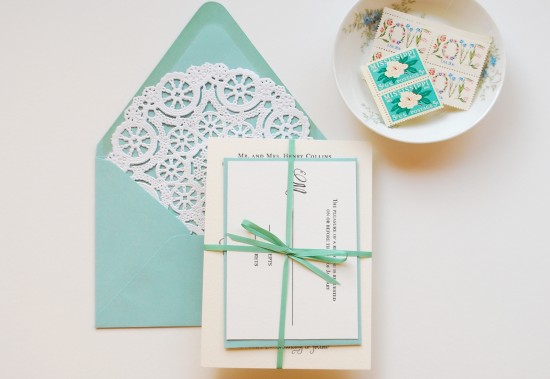
Step Four: To add a little extra flourish to the suite, we’ve used regular round doilies as an envelope liner.  We love the way that the aqua peeks through the lace and think it would be so fun to be the recipient and have this surprise await us once the seal was broken.  To install the doily liners, you will use spray adhesive.  Make sure to do this outside (or in an extremely well ventilated room).  Spray the back of the doily with a light mist of adhesive.  Slide the doily into the envelope, making sure not to press until the doily is placed in its intended spot (as shown above).  Let them dry & cure overnight.

Tiffany Blue DIY Wedding Invitation Suite

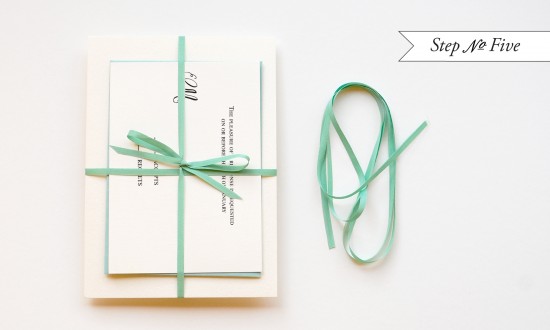
Step Five:  Use a thin ribbon to tie the suite together.  This will keep the components together and give your guest the thrill of “unwrapping” your invitation.

Tiffany Blue DIY Wedding Invitation Suite

Materials

Stamps:

Vintage Calligraphy Invitation stamp

Vintage Calligraphy Reply Card stamp

Calligraphy Accent Return Address stamp

Stamp Pad (we used black)

Heavy Watercolor Paper (for invitations & reply cards)

A6 Envelopes

4bar Envelopes

Ribbon, 1/8″ thickness

6″ Medallion Lace Paper Doilies

Spray Adhesive

Photo Credits: Antiquaria

Michele’s Hot Air Balloon Baby Shower Invitations

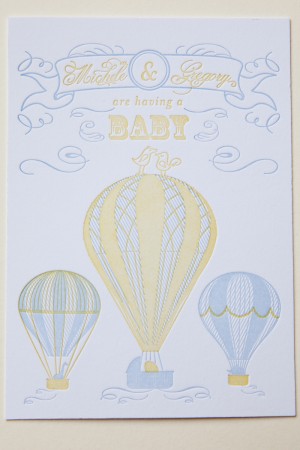
These adorable baby shower invitations come to us from Michele of Smitten Owl, a letterpress and design studio in New York City.  When it came time to the invitations for their baby shower, Michele and her husband Greg were inspired by their grand new adventure, incorporating hot air balloons into a two-color letterpress design.  So sweet!


From Michele: When my husband and I found out we were having a baby, among the many thoughts running through my head was “away we go!”  This inspired our hot air balloon and animal family design.  The two birds sitting on top of the center balloon were repurposed from our wedding invitations.  Our family was so excited to see the little “Greg and Michele” birds again!


The invitation includes a two-piece letterpress suite with a digital print registry card and custom envelope liners.  The announcement card and invitation are two-color letterpress printed on 220lb Reich Savoy.  In an effort to reduce the number of plates needed but still keep the design dynamic we added hash marks to the main balloons.  This also added a beautiful texture to the two color design.

Thanks Michele – and congratulations!

Photo Credits: Bia Sampaio

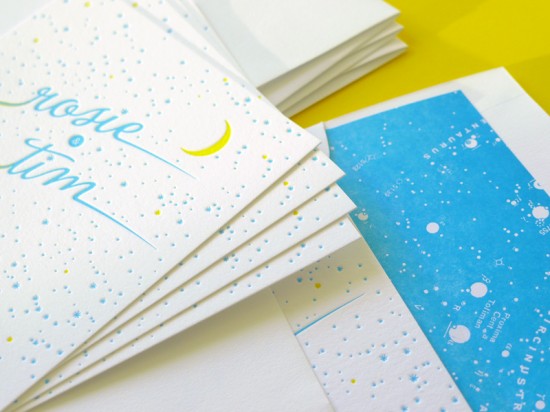
Rosie + Tim’s Constellation Engagement Party Invitations

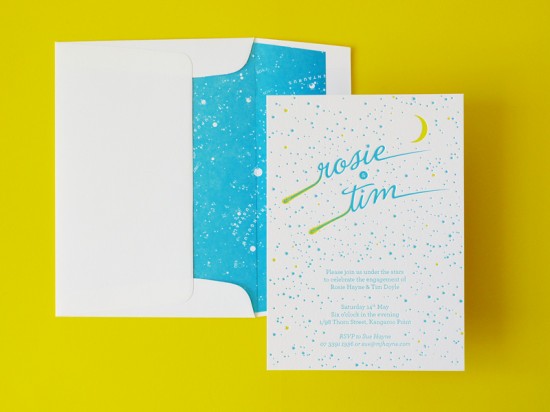
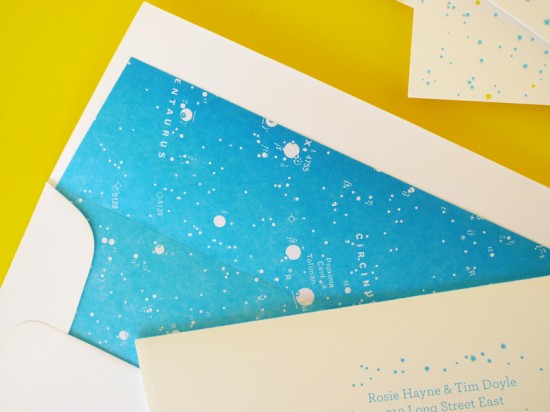
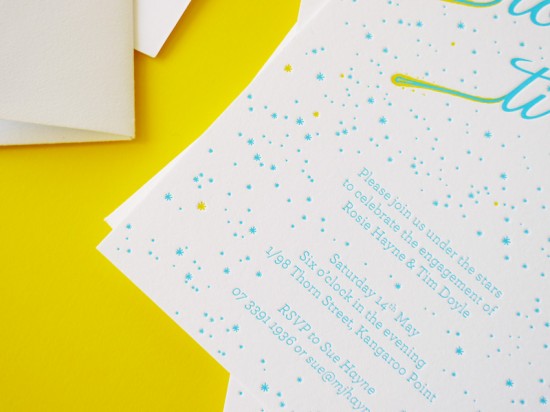
I’ve had a thing for constellations, well, pretty much forever – so naturally, I’m completely in love with these constellation-inspired engagement party invitations by The Hungry Workshop.  Simon and Jenna from The Hungry Workshop were inspired by the clients’ description of the night as a “celebration with friends under the stars,” incorporating shooting star details and a matching custom envelope liner fashioned from an antique constellation map.  So beautiful!

For Rosie and Tim’s names, Jenna modified La Portenia into two shooting stars, with the remaining type set in Archer Light.  Simon illustrated and arranged the stars for the background.  The entire invitation suite was letterpress printed on Crane Lettra 300 gsm cotton paper.

For the envelope liners, Jenna and Simon found an old star map in the New Concise Atlas of the Universe, which they modified and letterpress printed on text weight paper in the same matching blue ink used in the invitation.

Lovely!  For more from The Hungry Workshop, check out their portfolio and blog!

Check out the Designer Rolodex for more tal­ented wed­ding invi­ta­tion design­ers and the real invi­ta­tions gallery for more wedding invitation ideas!

Photo Credits: The Hungry Workshop

DIY Rubber Stamp “Banner” Wedding Invitations

It’s the ladies of Anti­quaria, back with another fab­u­lous and cre­ative DIY project for you!  This week they’re here with some awe­some DIY rubber stamp wedding invitations!

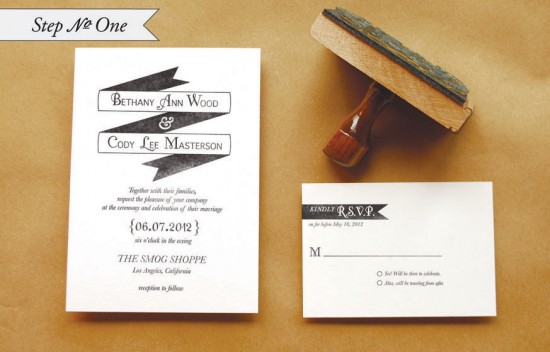
This invitation suite is simple, but it packs a graphic punch!  We wanted to design a suite that looked modern and was easy to execute.  There aren’t any fancy techniques or tools needed for this one, but when all the pieces come together, it looks very high end and custom!  There are so many color options for this invitation suite.  In addition to black and white, think about navy and gray or eggplant and kraft!
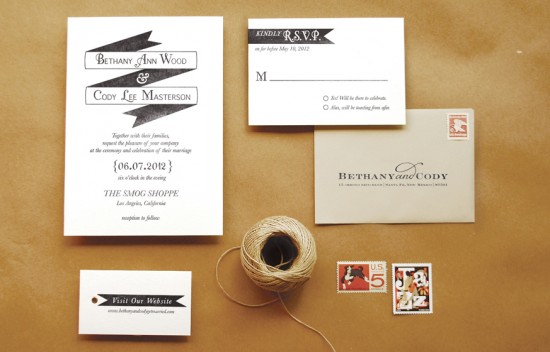
Step One: Stamp the invitation cards.  For the invitation, you will use an A7 card; for the reply, you will use a 4bar card.  When making a print, ink the stamp throughly and apply even pressure for the best results.  On the large stamps, such as the“Modern Banner” invitation and “Modern Banner” reply, cover stamp with both palms and press, focusing on the center (near the handle).  Moderate pressure is required but too much can make for a muddy print.
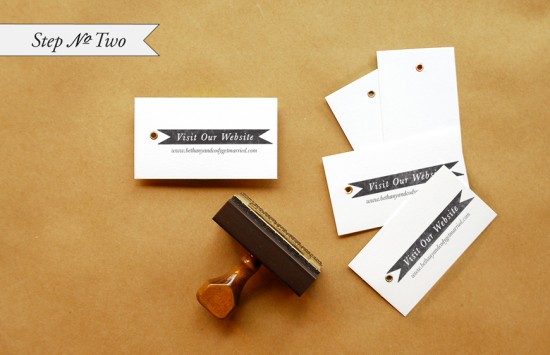
Step 2: Stamp the website cards.  We used our small “Modern Banner” Website stamp.  Follow the directions above for making a good print.

Step 3: Cut your envelope liners.  We used tan text weight paper for a monochromatic neutral look.  To make the liner, trace a template and cut on the traced line.  Be sure to stamp your monogram (we used our “Seal Initial” monogram) on the liner so that when your guests open the envelope there is a lovely surprise!
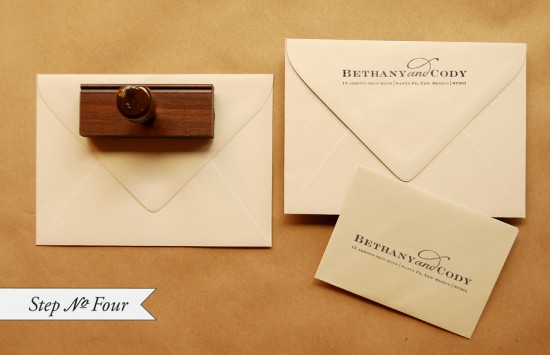
Step 4: Stamp return and reply addresses on the envelopes.  We used our “Sophisticate” Return Address stamp for this suite.  It’s a great money saving tool to be able to use one stamp for both your return and reply address.
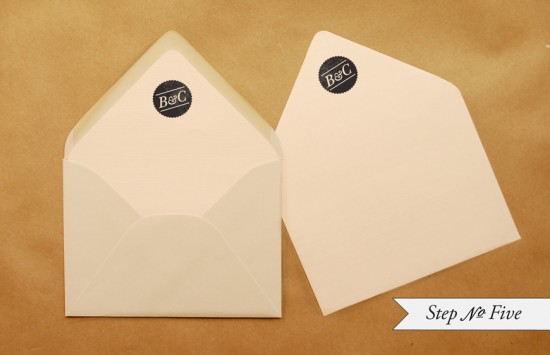
Step 5: To install the liner into the envelope, apply double sided tape (or use a glue stick) around the top triangle of the liner (on the back).  Slide the liner into the envelope, holding the taped edge away from the envelope.  Once the liner is positioned correctly, press down on the tape to adhere.
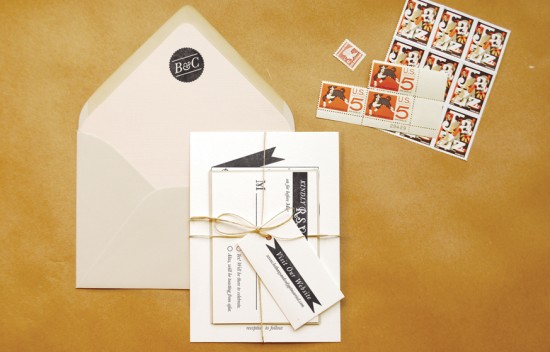
Finishing touches: Tie the whole suite up with twine, address, and add postage!

Materials:

“Modern Banner” Invitation Stamp from Antiquaria 

“Modern Banner” Reply Card Stamp from Antiquaria

“Modern Banner” Website Card Stamp-Large  from Antiquaria

“Seal Initial” Monogram Stamp from Antiquaria

“Sophisticate” Return Address Stamp from Antiquaria

Color Box Stamp Pad in Black

Metal Eyelet Tags for website card

A7 Cardstock,

4Bar Cardstock

A7 Envelopes

4 bar Envelopes

Envelope liner templates

81/2″ x 11″ text paper, for liners

Twine

Postage (we used the Jazz Forever Stamps mixed with vintage stamps)

Photo Credits: Antiquaria