Nicole + Chris’s Watercolor Photo Save the Dates

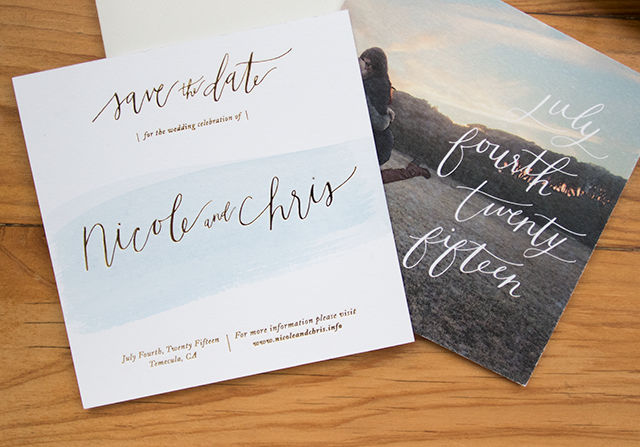
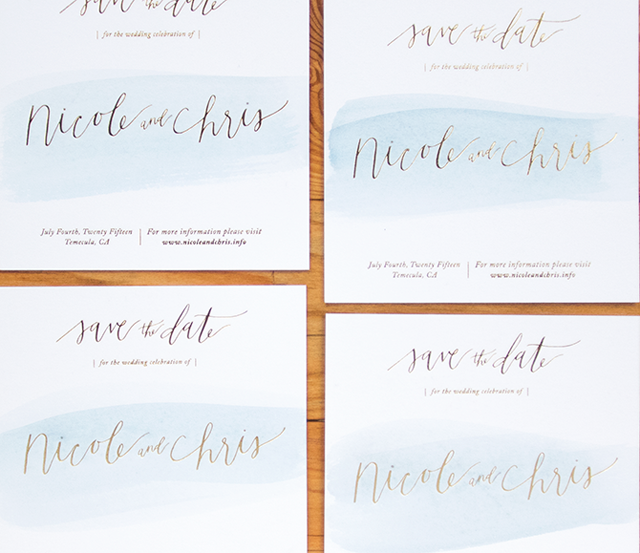
It’s so fun to include an engagement photo on a wedding save the date – especially when done in a modern and refreshing way, like these save the dates from Alex of Goodheart Design!

Watercolor-Photo-Save-the-Dates-Goodheart-Design-OSBP8

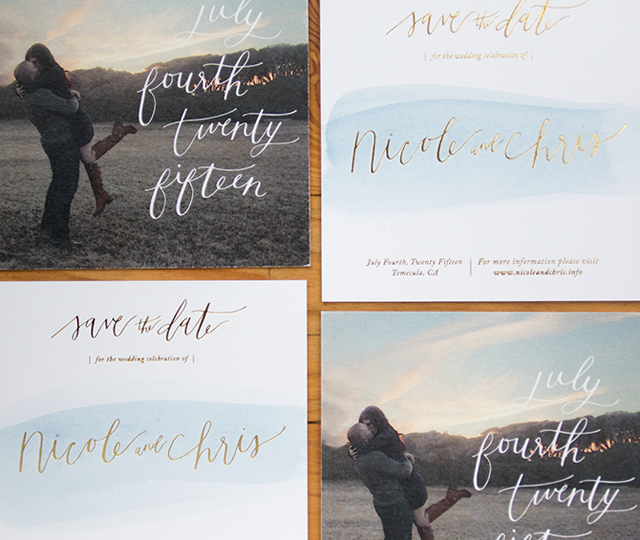
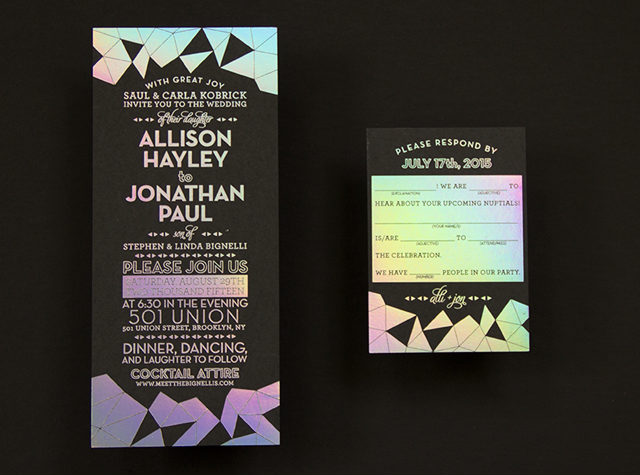
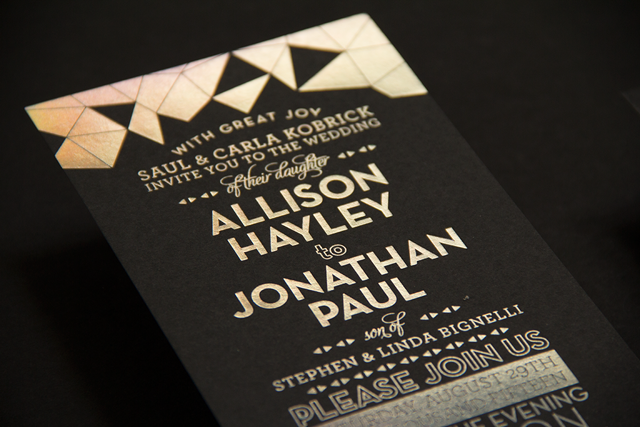
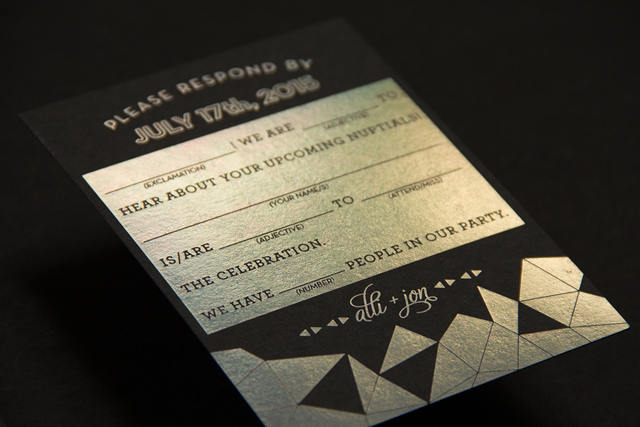
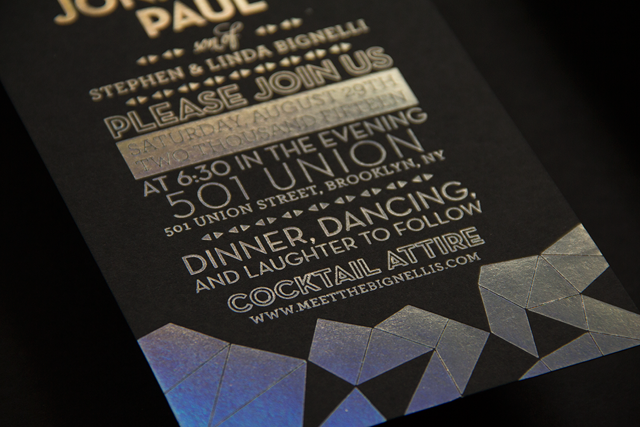
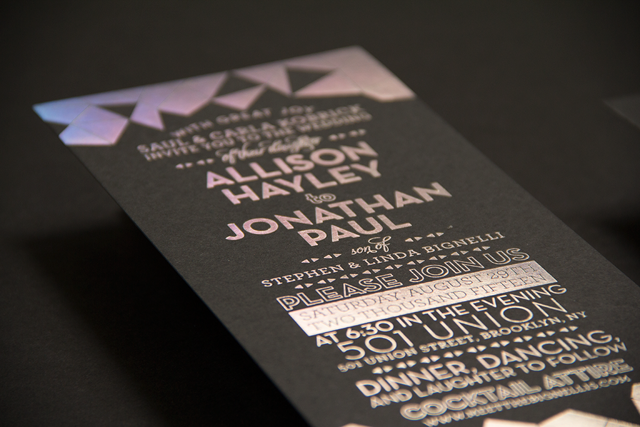
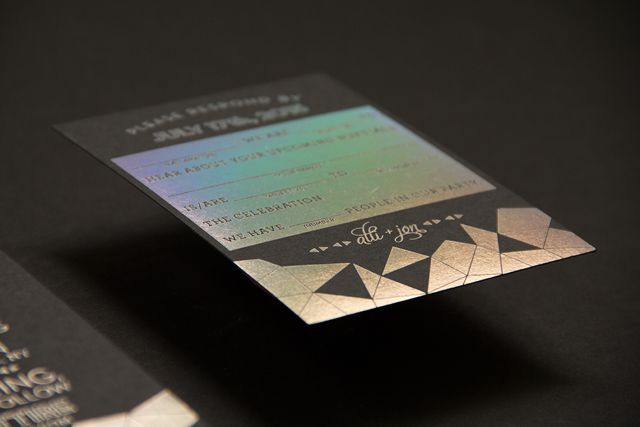
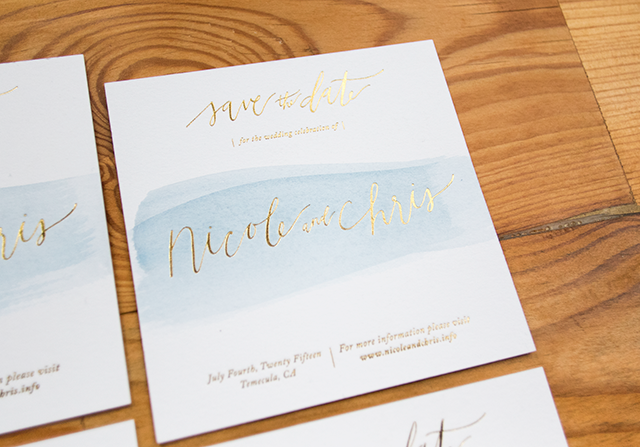
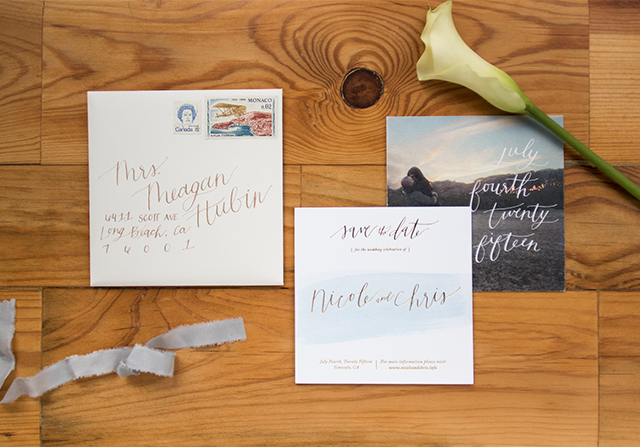
From Alex: Over the past couple years, I have done tons of save the date styles that entailed lettering over an engagement photo and making it into a cute postcard or fold over card. This time I wanted to put a creative spin on it! I wanted to still include the engagement photo but I didn’t want it to be the main focus of the design or be printed on glossy photo paper. I loved the idea of each one being slightly different so I individually watercolored the front of each save the date! The front was gold foil printed on 110# Fluorescent Lettra paper and the back was digitally printed on the same paper and then duplexed together by Czar Press. I also really loved the idea of showcasing the lettering in two different mediums, gold foil and digital printing. Each one was placed in an off-white envelope and addressed in gold ink.

Watercolor-Photo-Save-the-Dates-Goodheart-Design-OSBP5

Watercolor-Photo-Save-the-Dates-Goodheart-Design-OSBP

Watercolor-Photo-Save-the-Dates-Goodheart-Design-OSBP3

Watercolor-Photo-Save-the-Dates-Goodheart-Design-OSBP9

Thanks Alex!

Design + Lettering: Goodheart Design

Letterpress Printing: Czar Press

Check out the Designer Rolodex for more tal­ented wed­ding invi­ta­tion design­ers and the save the date gallery for more wedding save the date ideas!

Photo Credits: Goodheart Design

Alli + Jon’s Holographic Geometric Wedding Invitations

Forget metallic foils – after this past National Stationery Show, I’m officially obsessed with some of the more non-traditional foil options! Hologram foil, oil slick foil, sparkly iridescent foil… so many options! And today we get to see it in a wedding invitation! These invitations designed by Blake and Irene at Sparkvites and printed by Mama’s Sauce combine holographic foil on black paper with geometric shapes. And the wedding itself sounds like a SUPER fun night!

Black-Holographic-Geometric-Wedding-Invitations-Sparkvites-Mamas-Sauce

From Irene: This invitation set was super fun to design. Alli and Jon wanted to incorporate as much color possible in their invitations to reflect their wedding style. From Alli: “If I had to come up with a theme to describe it I’d say…elegant burning man?! 501 Union is already a gorgeous space, but the walls and floor have a dark swanky supper club feel, so I am adding lots of whimsy with glowing multicolor LED orbs on the tables, a DIY LED installation for a large wall with faux fur and LED light strips underneath. The colors of the wedding are ALL THE COLORS. Lots of pops of color with pom poms mixed with flowers.”

Black-Holographic-Geometric-Wedding-Invitations-Sparkvites-Mamas-Sauce2

Black-Holographic-Geometric-Wedding-Invitations-Sparkvites-Mamas-Sauce3

Black-Holographic-Geometric-Wedding-Invitations-Sparkvites-Mamas-Sauce4

Black-Holographic-Geometric-Wedding-Invitations-Sparkvites-Mamas-Sauce5

Black-Holographic-Geometric-Wedding-Invitations-Sparkvites-Mamas-Sauce6

Thanks Blake + Irene!

Design: Sparkvites

Printing: Mama’s Sauce

Check out the Designer Rolodex for more tal­ented wed­ding invi­ta­tion design­ers and the real invi­ta­tions gallery for more wedding invitation ideas!

Photo Credits: Sparkvites

Happy Monday!

Hi again everyone! I’m so happy to be back after spending a few days in Salt Lake City for Alt Summer! I loved the more relaxed vibe of the summer conference and it was so nice to see so many old friends! A huge thanks to Brannon for holding down the fort while I was away – weren’t her posts awesome?!? Since I missed my weekly link round up last week, I thought we’d start the week off with a little round up of some favorites from last week!

Hartland-Brooklyn-Annies-Blue-Ribbon-Store-Windows-Instagram-OSBP

Photo by Hartland Brookyn / I’m obsessed with these windows that Emily painted for Annie’s Blue Ribbon General Store!

And in case you missed it – last week on Oh So Beautiful Paper:

The Maypole

We’re back with some more infusions this week. I mentioned last week how wonderful it can be to keep an herb garden for your cocktails. But this week I’ll do more than tell: I’ll show. We used two of our homegrown, fresh herbs to turn what could have been a simple Sour into a lush cocktail that tastes like a blooming garden in a glass: the Maypole. – Andrew

Opal-Basil-St-Germain-Cocktail-Recipe-Liquorary-OSBP-14

The-May-Pole-Cocktail-Recipe-Illustration-Liquorary-Shauna-Lynn-Illustration-OSBP

Illustration by Shauna Lynn for Oh So Beautiful Paper

The Maypole

2 oz Apple-Mint White Rye
1 oz Opal Basil St-Germain
3/4 oz Lemon Juice

Combine the apple-mint white rye, opal basil St-Germain, and lemon juice in a cocktail shaker filled about two-thirds with ice and shake well. Strain into a chilled cocktail glass and garnish with an apple slice. Enjoy!

Opal-Basil-St-Germain-Cocktail-Recipe-Liquorary-OSBP-17

We used green apples and freshly picked mint to infuse our rye. The white rye – unaged rye whiskey – has a sharp, spicy flavor. The infusion mellowed the rye without losing that pungency. It’s more herbaceous than fruity. We also used freshly picked opal basil to infuse our St-Germain, and that combination of savory, spicy opal basil and St-Germain’s floral sweetness is a real knockout.You could definitely try out different whiskeys here, as apple and mint seem like natural parings for whiskeys and not just white rye, but that opal basil feels like it belonged with the St-Germain. Seriously, I’m thinking about infusing an entire bottle because wow this one was good.

Opal-Basil-St-Germain-Cocktail-Recipe-Liquorary-OSBP-13

Opal-Basil-St-Germain-Cocktail-Recipe-Liquorary-OSBP-20

Put them together in a Maypole and you have a drink that’s brightly tart and a bit sweet and richly layered with spice and fruit and herbs. There’s a lot going on but somehow it all comes together. And the freshness of those herbs, straight from our garden, means clean and clear favors in our infusions. Tastes like summer.

(Don’t forget to follow us on Instagram, where we’ve been posting our experiments before they make their way onto this column!)

Glassware by Liquorary 

Photo Credits: Nole Garey for Oh So Beautiful Paper

So You Want to Get into the Stationery Business: A Brief Overview

It’s been such a fun week guest blogging here at OSBP. Thanks for following along with me! (Don’t forget, OSBP readers get 25% off all items in the Happy Cactus shop through June 15. Use code OSBP25 at checkout.) I am often asked how I got my start in this industry and thought that as we wrap things up I could offer some thoughts and pieces of advice for those of you who may be thinking of launching your own stationery or greeting card line.

One of the greatest things I love about the community of stationery and greeting card designers is that it is truly is a welcoming community that supports newbies. I received so much advice and assistance when I launched Happy Cactus Designs’ first collection in 2011. I never imagined how nice and helpful fellow designers would be to me. I was also fortunate enough to take a continuing ed class on launching a greeting card business at New York’s School of Visual Arts with Joyce Wan and shortly thereafter took Tradeshow Bootcamp’s webinars. Both helped immensely and introduced me to many good friends I’ve made in this industry.

gardenblues

One of my very first card designs that is still a best seller years later!

So, Where to Begin?

Do you have dreams of crafting a collection of greeting cards? Have you just opened an online shop? Are you thinking about exhibiting at a tradeshow? Here’s some valuable tips I’ve learned along the way.

  • Create a cohesive collection that exemplifies your own personal style. Think about what distinguishes your work from everyone else’s out there. Is it your spectacular hand lettering? Your innovative printing method? Your funny puns and play on words? Play to your strengths and focus on what makes your work unique. It takes a lot of work to build an initial collection, but debuting with 20+ designs will help give people a greater sense of what your work is all about.
  • Do your own research on the industry and build relationships with vendors. I can’t tell you how much time I spent Googling questions as I designed my initial collection and laid the groundwork for what would become Happy Cactus Designs. (Full disclosure: I still spend a ton of time with my pal Google. The struggle never ends.)
  • Invest in getting samples of your work from various printers if you are outsourcing the job. Research local printers and online printing options. Don’t be afraid to ask questions either. Coming from a non-design school background, I had no idea what the difference between RGB and CMYK was or how to set up a file with bleeds. Just ask!
  • Trial and error: Trust me, it takes a LOT of trial and error to get things right. Every designer has a story about the cards that were printed incorrectly, or the catalogs with horrible ink bleeds, or the printing press that broke down just as a big print run was to begin. Just remember it’s all part of the learning process!
  • Observe what is happening in the stationery industry. OSBP is the best resource for doing this as Nole has her finger on the pulse of all things paper. Stationery Trends, a quarterly magazine targeted specifically to the trade, is another great place to scope out new trends and to read interviews with both designers and shop owners.
  • Be respectful of other designers. Each has been in your position and while some may freely share their sources/vendors, others may be reticent to share this information as they have spent a lot of time working to get things right (see the points above!).

foil

I introduced a line of foil stamped cards at the National Stationery Show in 2013. Adding a new method of printing to my collection took many, many hours of research, not to mention a large investment. That big gold balloon makes me so happy.

happycactusflats

Over the years I’ve learned techniques to improve my product photography. It takes a lot of time and practice and many outsource this job.  You can imagine my surprise when the shot above was featured on the cover of Stationery Trends!

  • Think about how you want to sell your cards:
    • Research and sign up for local craft fairs. Listen closely to customers as they can provide a wealth of feedback on your products. Are they looking for particular types of cards? What designs are they responding to? Are your price points on target?
    • Consider an online storefront: Etsy or your own shop, or both. I could write an entire post on my thoughts about the two (I run my own e-commerce site via Shopify and have an Etsy storefront that plays second fiddle to my store). Each has its own set of pros and cons and building an online shop takes a tremendous amount of work upfront. From product photography and marketing to packaging and shipping, it’s no small feat to open an e-commerce site, but it’s one of the best ways to establish your brand.
    • If you are thinking about dipping your toes in the wholesale pool, seek out opportunities to learn how it all works. It is an entirely different beast. My personal favorite learning tools include Tradeshow Bootcamp, Eva Jorgensen of Sycamore Street Press’ class on Atly, local continuing ed classes, Emily’s brilliant Brick and Mortar column here on OSBP, and Meryl Hooker and Rob Fortier’s book on the industry. I’ve also found that talking to shop owners I’ve grown friendly with is a great way to get pointed advice about the world of wholesale.

first-booth

My first booth at the National Stationery Show in 2012. Exhibiting at a tradeshow takes a tremendous amount of work. Looking back, there’s many things about my debut that I’m proud of and many things I’d change. Drawing on the walls, while risky, was my favorite part.

  • Say yes to new opportunities! Some of my best learning experiences came from just saying yes to new projects, inquiries, professional development opportunities, and events.

Please feel free to offer your own words of wisdom or ask questions in the comments below!