A New Year’s Eve Cocktail Dinner Party with St-Germain

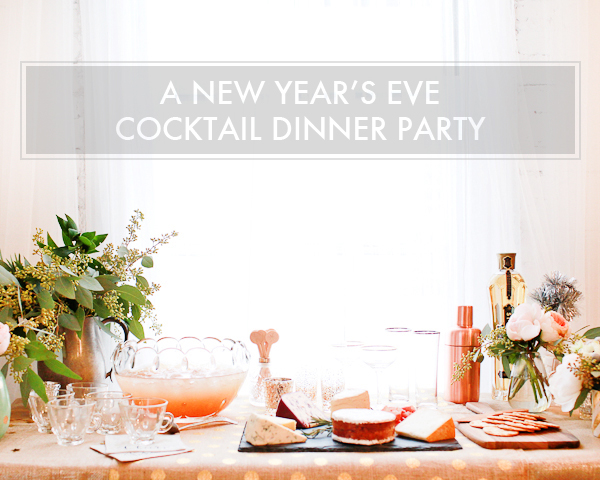
Only a couple more weeks left in 2013! I always look forward to New Year’s Eve – both as an opportunity to celebrate with friends and as a chance to welcome change with open arms. Ever since I read The Night Circus earlier this year (so good!), I’ve been intrigued by the idea of formal midnight dinner parties. Invite a few close friends, give them an excuse to dress up in their best party clothes (something I don’t get to do nearly often enough), and have a wonderful evening full of great food and cocktails. And what better occasion for a midnight dinner than New Year’s Eve? So we’ve teamed up with our friends at St-Germain, Karson Butler Events, and Meant to Be Calligraphy to offer some inspiration for those of you planning some New Year’s Eve festivities: a cocktail dinner party!

OSBP-St-Germain-New-Years-Eve-Cocktail-Party-Ideas-Title1

OSBP-St-Germain-New-Years-Eve-Cocktail-Party-Ideas-Recipes-300

OSBP-St-Germain-New-Years-Eve-Cocktail-Party-Ideas-Recipes-297

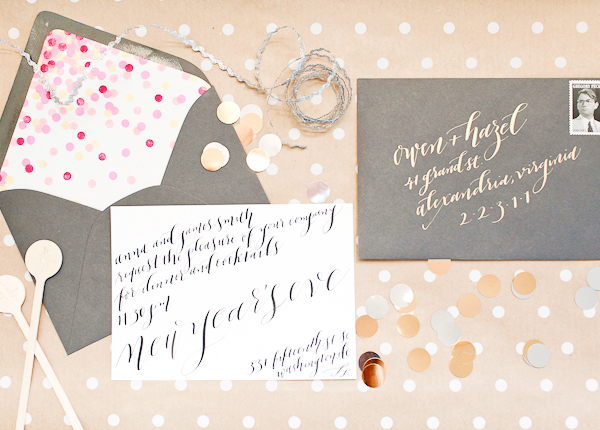
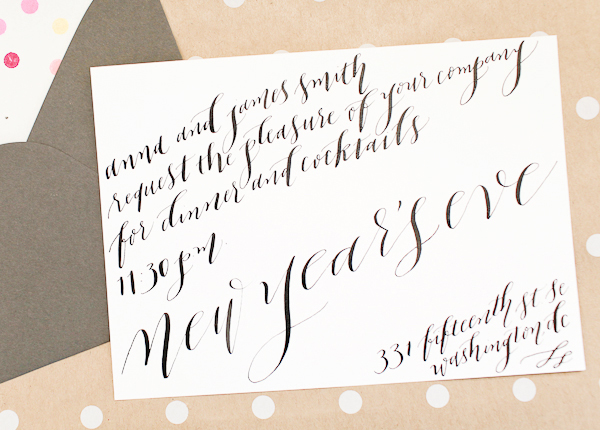
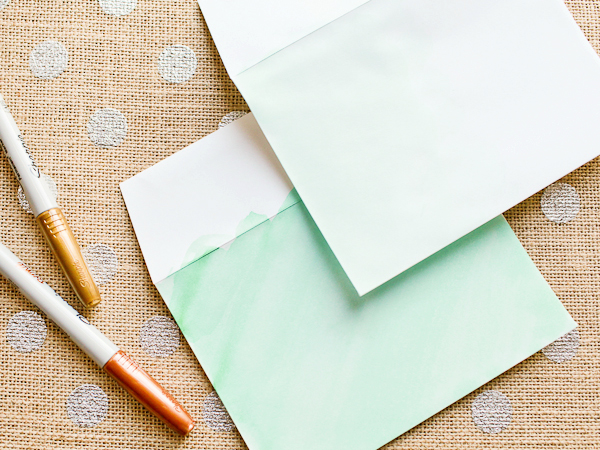
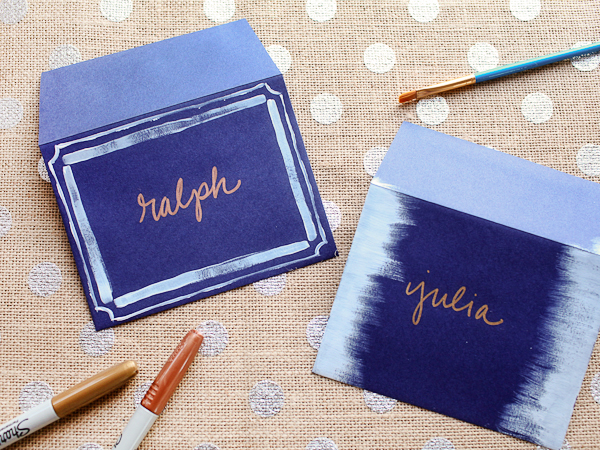
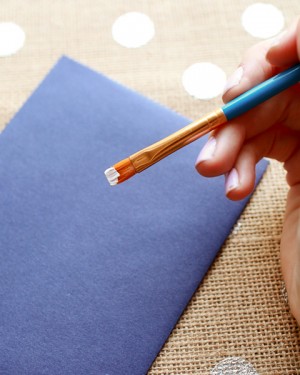
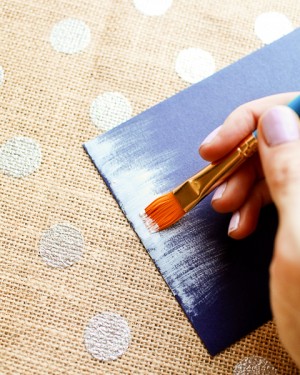
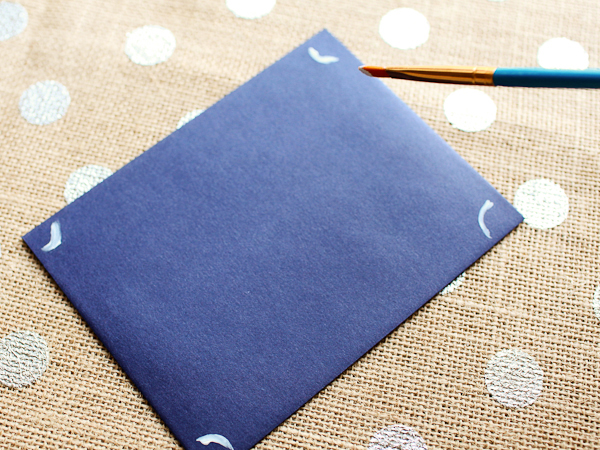
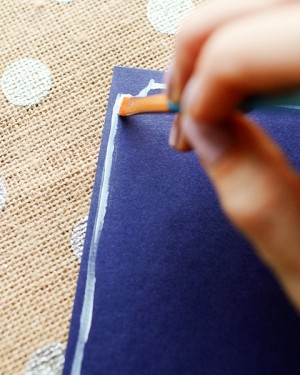
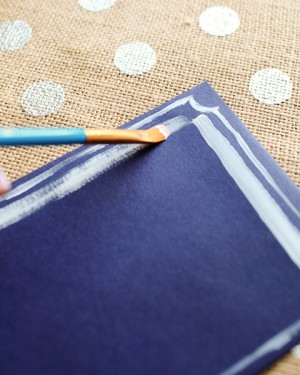
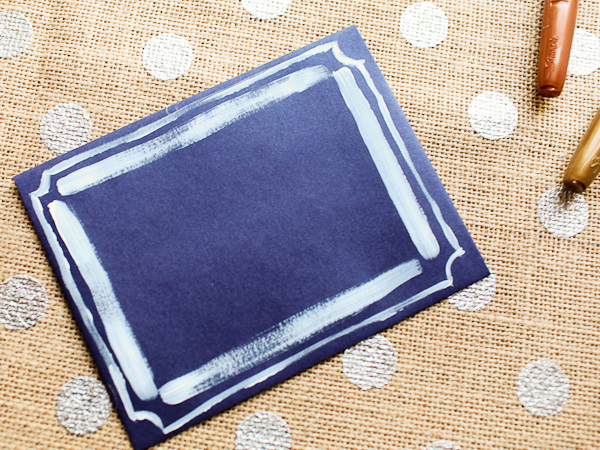
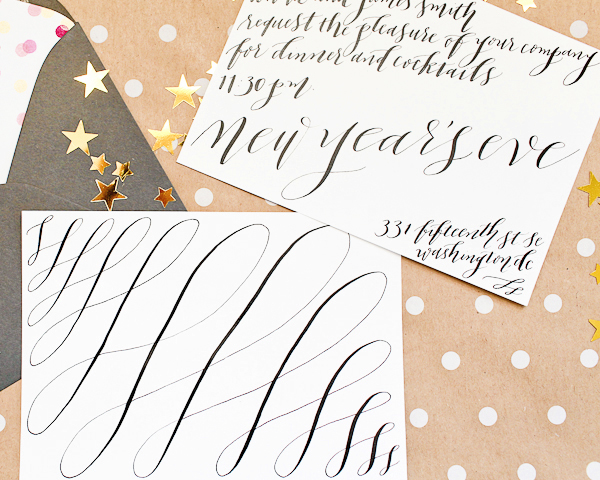
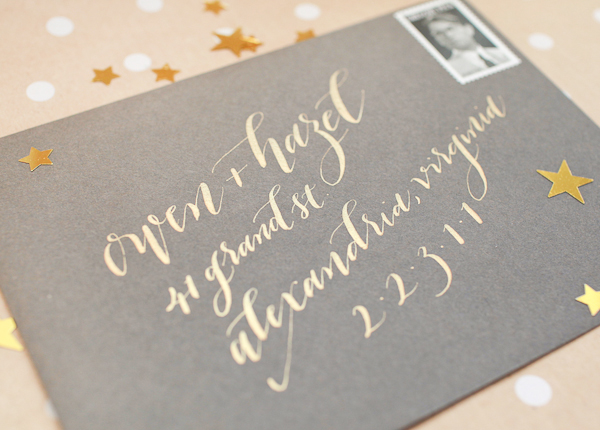
As always, let’s start with the invitations! Because we were aiming for something a bit more formal this time around, I decided to go with calligraphy from start to finish. Michele from Meant to Be Calligraphy created a stunning invitation in classic black ink on white paper and a calligraphy flourish on the back. We paired the invitations with slate gray envelopes (with a colorful DIY envelope liner) addressed in shimmery gold ink.

OSBP-St-Germain-New-Years-Eve-Cocktail-Party-Ideas-Recipes-337

OSBP-St-Germain-New-Years-Eve-Cocktail-Party-Ideas-Recipes-321

OSBP-St-Germain-New-Years-Eve-Cocktail-Party-Ideas-Recipes-208

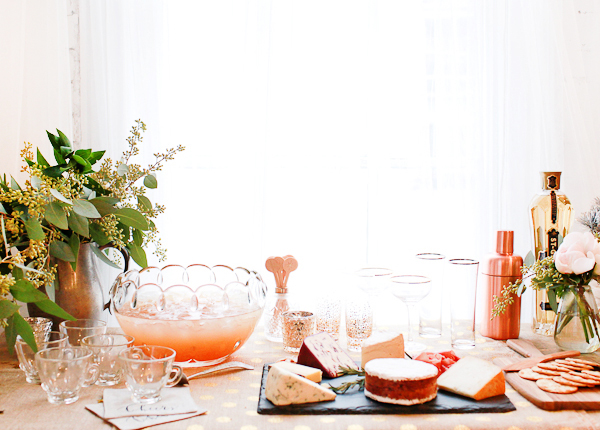
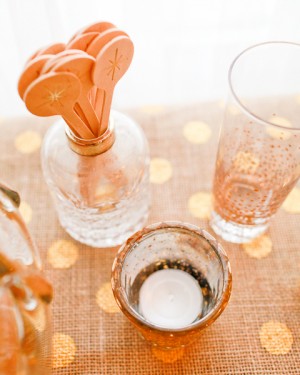
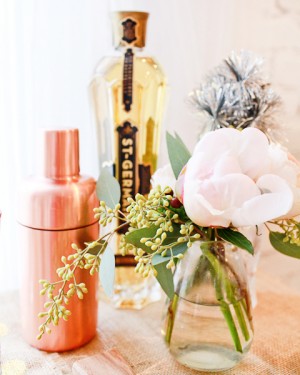
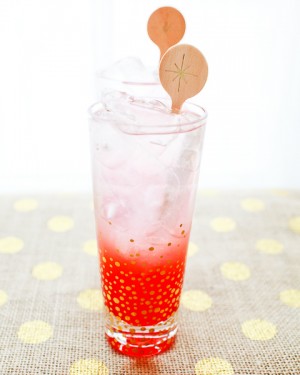
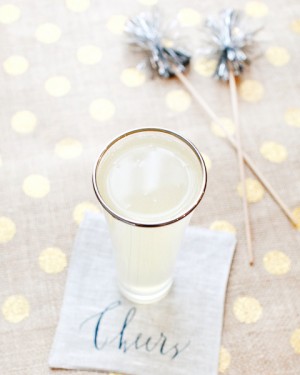
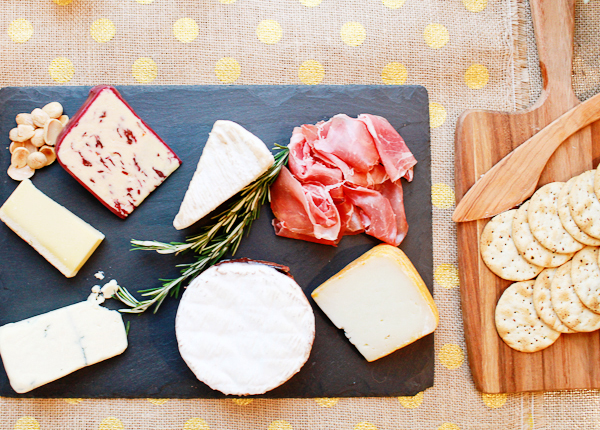
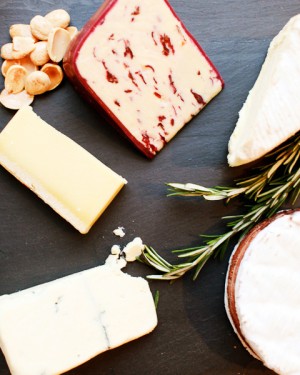
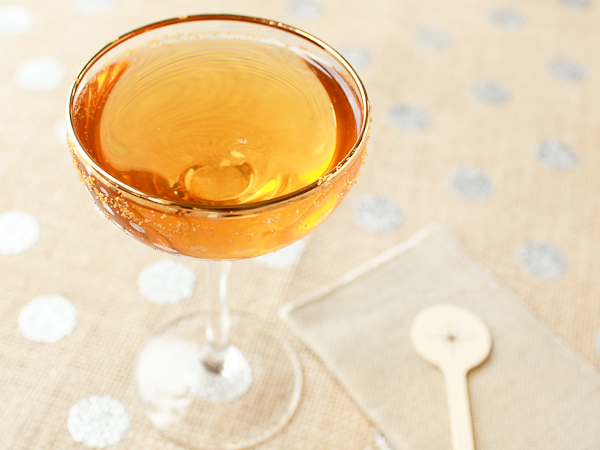
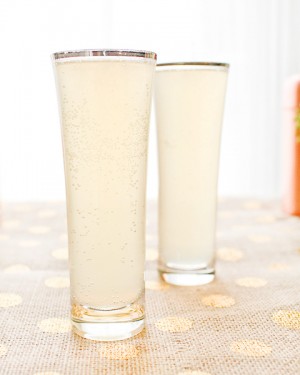
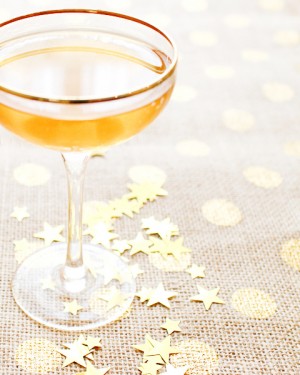
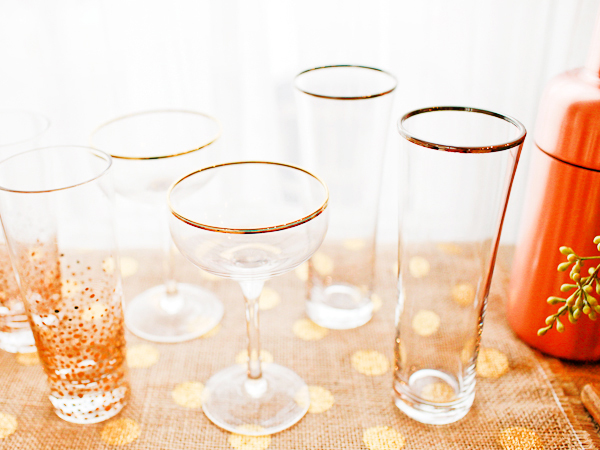
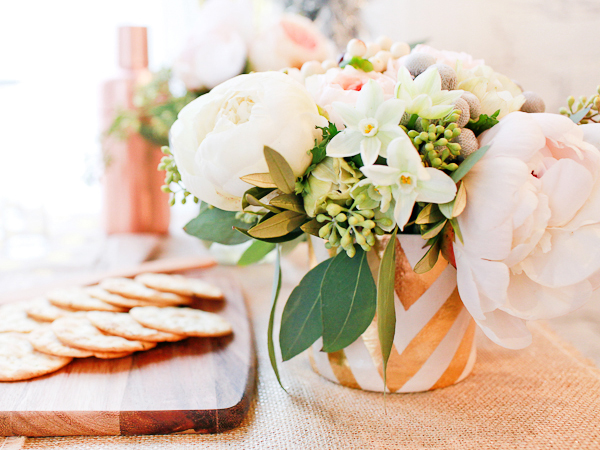
We set up a side table as a makeshift bar to welcome guests with cocktails and appetizers – a little something to keep everyone happy through the countdown to midnight! We’ll be sharing the recipes a little bit later, but our menu included a cheese plate (a party requirement, yes?), a punch, a classic cocktail recipe, a champagne cocktail, and a mocktail for any designated drivers.

OSBP-St-Germain-New-Years-Eve-Cocktail-Party-Ideas-Recipes-237OSBP-St-Germain-New-Years-Eve-Cocktail-Party-Ideas-Recipes-218

OSBP-St-Germain-New-Years-Eve-Cocktail-Party-Ideas-Recipes-21OSBP-St-Germain-New-Years-Eve-Cocktail-Party-Ideas-Recipes-63

OSBP-St-Germain-New-Years-Eve-Cocktail-Party-Ideas-Recipes-230

Slate from Brooklyn Slate Company / Wood serving board from Target

OSBP-St-Germain-New-Years-Eve-Cocktail-Party-Ideas-Recipes-243OSBP-St-Germain-New-Years-Eve-Cocktail-Party-Ideas-Recipes-219

OSBP-St-Germain-New-Years-Eve-Cocktail-Party-Ideas-Recipes-460

OSBP-St-Germain-New-Years-Eve-Cocktail-Party-Ideas-Recipes-53OSBP-St-Germain-New-Years-Eve-Cocktail-Party-Ideas-Recipes-85

OSBP-St-Germain-New-Years-Eve-Cocktail-Party-Ideas-Recipes-236

OSBP-St-Germain-New-Years-Eve-Cocktail-Party-Ideas-Recipes-211OSBP-St-Germain-New-Years-Eve-Cocktail-Party-Ideas-Recipes-289

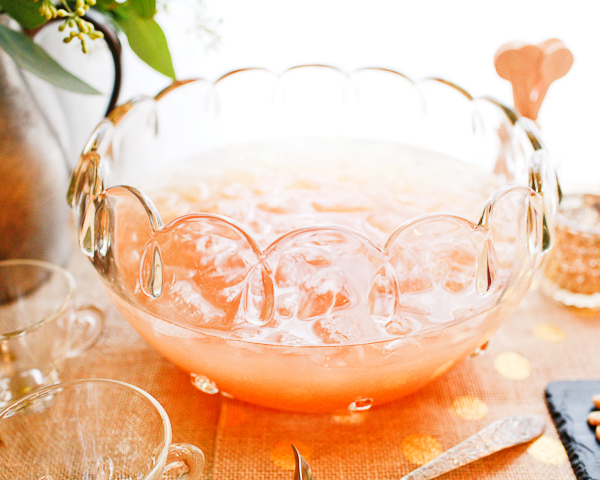
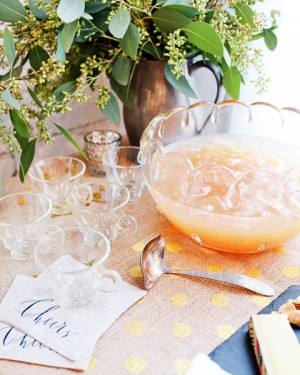
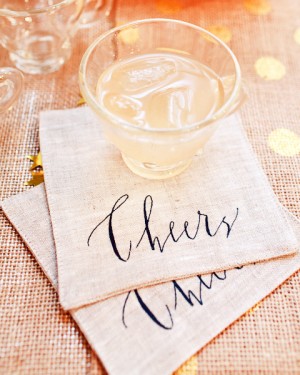
Vintage punch bowl set and ladle / Coasters from Linea Carta

OSBP-St-Germain-New-Years-Eve-Cocktail-Party-Ideas-Recipes-238

OSBP-St-Germain-New-Years-Eve-Cocktail-Party-Ideas-Recipes-260

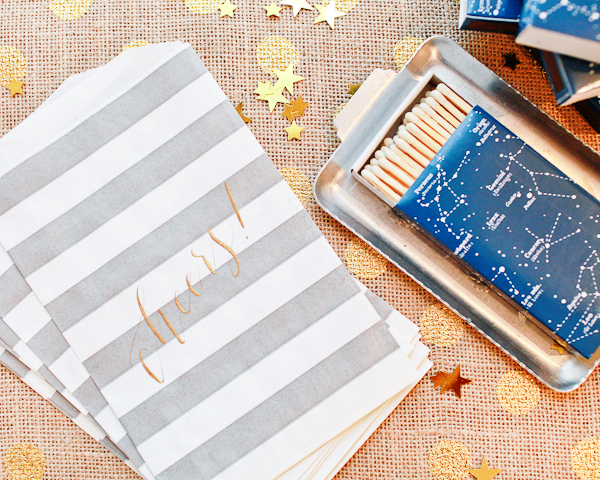
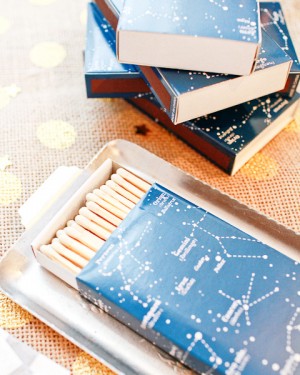
I’ve been obsessed with these constellation matchboxes for the longest time – they seemed like the perfect favors for a New Year’s Eve party! We paired them with gray and white striped favor bags from Shop Sweet Lulu with Michele’s calligraphy in gold ink.

OSBP-St-Germain-New-Years-Eve-Cocktail-Party-Ideas-Recipes-265OSBP-St-Germain-New-Years-Eve-Cocktail-Party-Ideas-Recipes-280

OSBP-St-Germain-New-Years-Eve-Cocktail-Party-Ideas-Recipes-222

OSBP-St-Germain-New-Years-Eve-Cocktail-Party-Ideas-Recipes-449

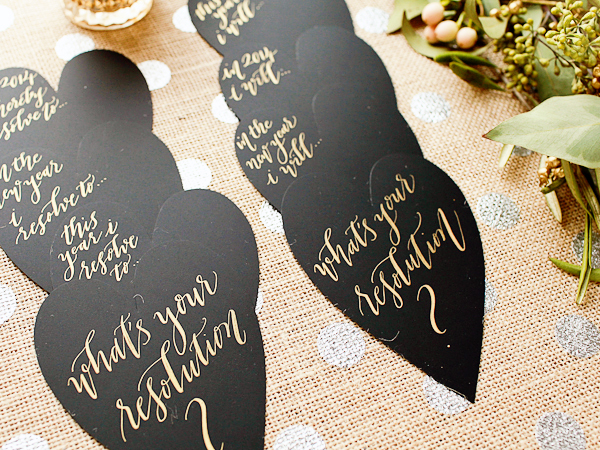
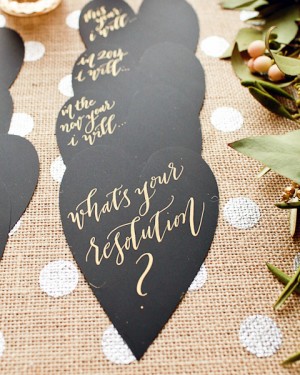
I found these heart shaped cards at Paper Source a while back (sadly no longer available in black), but wasn’t quite sure what to do with them. Michele came up with the brilliant idea of giving them to guests to inspire resolutions for the new year and conversations with fellow guests. Michele wrote out phrases on each card, again in gold ink – they’re now pretty much my favorite thing ever!

OSBP-St-Germain-New-Years-Eve-Cocktail-Party-Ideas-Recipes-442OSBP-St-Germain-New-Years-Eve-Cocktail-Party-Ideas-Recipes-428

OSBP-St-Germain-New-Years-Eve-Cocktail-Party-Ideas-Recipes-120

OSBP-St-Germain-New-Years-Eve-Cocktail-Party-Ideas-Recipes-130OSBP-St-Germain-New-Years-Eve-Cocktail-Party-Ideas-Recipes-135

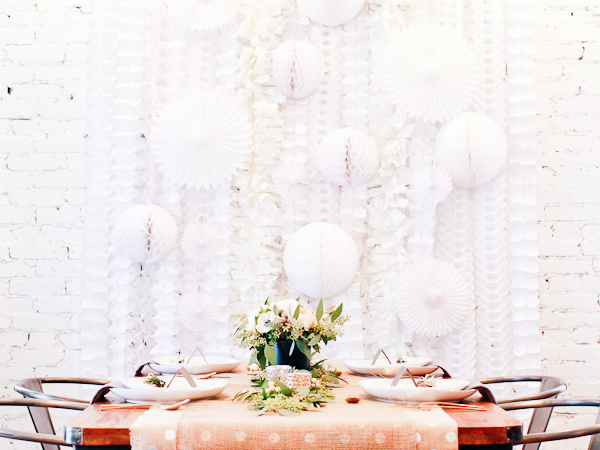
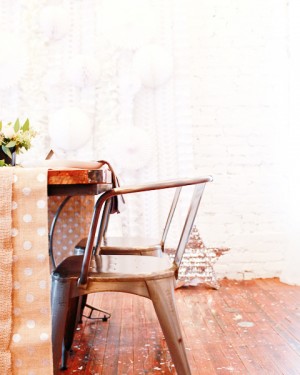
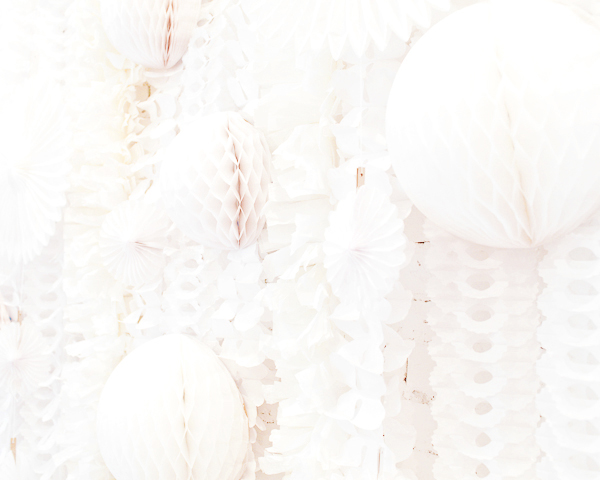
After midnight, time for dinner! Amber and Emily from Karson Butler Events created a backdrop of white streamers and a mixture of tissue paper fans and honeycombs in various sizes for a really beautiful layered texture. It’s so pretty against the white brick wall!

OSBP-St-Germain-New-Years-Eve-Cocktail-Party-Ideas-Recipes-138

OSBP-St-Germain-New-Years-Eve-Cocktail-Party-Ideas-Recipes-192

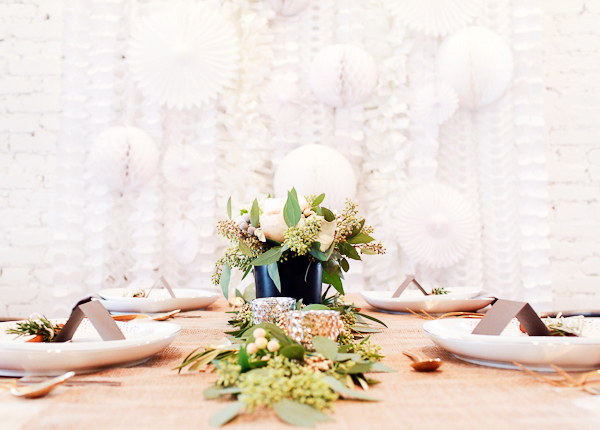
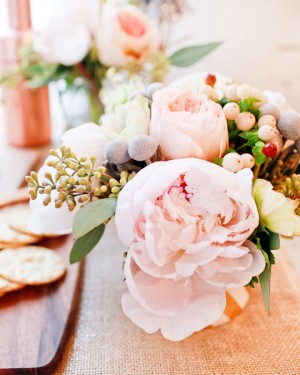
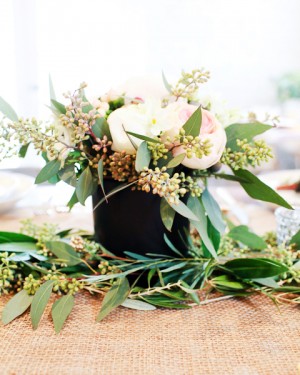
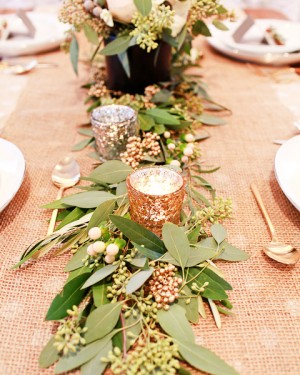
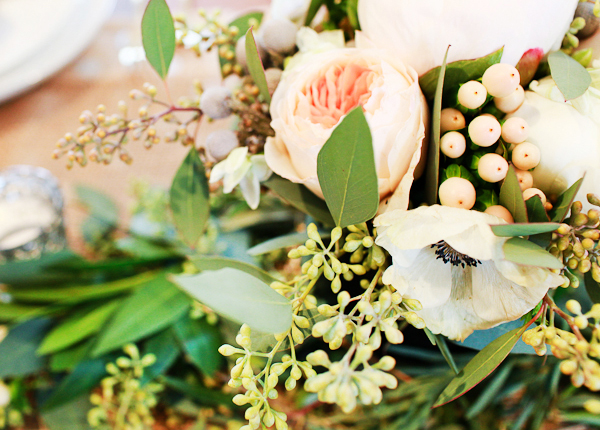
I had so much fun with the floral arrangements! I created a single centerpiece for the dinner table with peonies, garden roses, black and white anemones, paperwhites, silver brunia, white hypericum berries, and seeded eucalyptus. Smaller arrangements with the same flowers were sprinkled around the bar, along with a large bunch of seeded eucalyptus and bay leaves in an antique metal pitcher.

OSBP-St-Germain-New-Years-Eve-Cocktail-Party-Ideas-Recipes-180

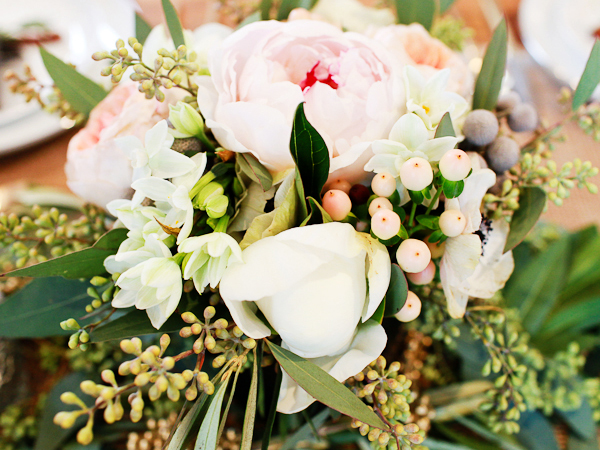
I also did a simple swag of greenery down the center of the dinner table using small clippings of seeded eucalyptus, bay leaves, olive leaves, hypericum berries, and gold spray painted pepper berries (for a bit of extra sparkle) – all tucked around the centerpiece floral arrangement and small mercury glass votives. No floral wire necessary! We also created a table runner using layers of burlap – a plain loose weave burlap over silver polka dot burlap from Joann Fabrics.

OSBP-St-Germain-New-Years-Eve-Cocktail-Party-Ideas-Recipes-181OSBP-St-Germain-New-Years-Eve-Cocktail-Party-Ideas-Recipes-245

OSBP-St-Germain-New-Years-Eve-Cocktail-Party-Ideas-Recipes-202

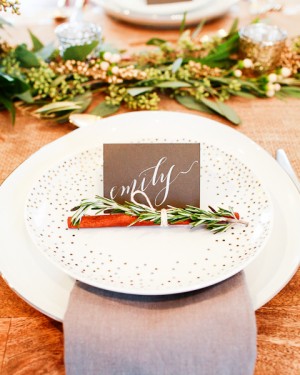
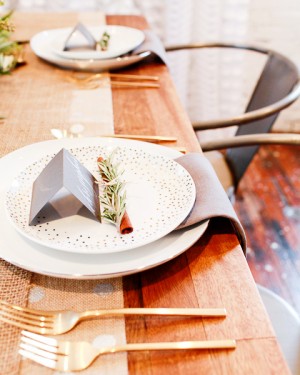
Our place settings included place cards with Michele’s calligraphy in silver ink on slate gray paper, metallic rimmed plates with gray linen napkins, and gold flatware.

OSBP-St-Germain-New-Years-Eve-Cocktail-Party-Ideas-Recipes-163OSBP-St-Germain-New-Years-Eve-Cocktail-Party-Ideas-Recipes-189

OSBP-St-Germain-New-Years-Eve-Cocktail-Party-Ideas-Recipes-171

Full cocktail and mocktail recipes are coming up in just a bit!

Styling: Oh So Beautiful Paper and Karson Butler Events

Invitations and Calligraphy: Meant to Be Calligraphy

Floral Design: Oh So Beautiful Paper

Location: Karson Butler Events Design Studio

Photo Credits: Nole Garey for Oh So Beautiful Paper

DIY Hand Painted Envelopes

We all love to dress up our envelopes with beautiful postage stamps, gorgeous calligraphy, and pretty address labels. But what about cards (and envelopes) delivered in person? I always try to personalize the front of my hand delivered envelopes, whether it’s a simple hand drawn border or a pretty flourish around the recipients’ names. This week I thought I’d share a few of the ways I’m personalizing my hand delivered holiday cards, although you can totally use these ideas year round. These aren’t really tutorials – just a few ideas that I wanted to share. Today we’re starting with my favorite idea: hand painted envelopes!

OSBP-DIY-Tutorial-Painted-Envelopes-6

Watercolor paints are one of my favorite ways to dress up light color envelopes – the pattern options are endless! I’m partial to stripes and line borders, but you can also create a watercolor wash by using more water to dilute your chosen color. For this example, I used a deep cobalt blue and emerald green on Mohawk Superfine White envelopes.

OSBP-DIY-Tutorial-Painted-Envelopes-55OSBP-DIY-Tutorial-Painted-Envelopes-45

OSBP-DIY-Tutorial-Painted-Envelopes-54

You’ll probably want to play around with colors and patterns on some scrap paper before moving on to your envelopes. Normally, watercolors would be used on super thick paper, so depending on your particular envelopes there will most likely be some warping/wrinkling in the paper. I’m not bothered by this, but just make sure that the envelopes are completely dry before you insert your card or address the finished envelope.

OSBP-DIY-Tutorial-Painted-Envelopes-46

OSBP-DIY-Tutorial-Painted-Envelopes-16

OSBP-DIY-Tutorial-Painted-Envelopes-26

For darker envelopes, I like to use opaque acrylic paint for a fun light-on-dark effect. Here I used white acrylic paint on Mohawk antique vellum envelopes (in Iris) paired with my favorite gold and copper metallic Sharpie markers.

OSBP-DIY-Tutorial-Painted-Envelopes-29OSBP-DIY-Tutorial-Painted-Envelopes-40

To create a dry brush effect along the edge, simply start out with a small amount of paint on the edge of your brush. Too much paint, and you’ll loose the feathery texture. Starting at the top left corner of your envelope, paint a horizontal stroke – moving in a single motion until your brush runs out of paint. Repeat down each side of the envelope. Let dry, then write the name of your recipient on the envelope!

OSBP-DIY-Tutorial-Painted-Envelopes-31

For the border effect, I like to start with the small curves in each corner to serve as guides. Then draw lines to connect the ends of each curve. I used the flat edge of my brush for the outer frame to achieve a thinner line, then switched to the broad edge of the brush for a thicker inner frame. Don’t worry about painting perfectly straight lines – any wobbly lines or changes in texture will only add to the hand painted charm. Let dry, then write in the name of your recipient – and done!

OSBP-DIY-Tutorial-Painted-Envelopes-32OSBP-DIY-Tutorial-Painted-Envelopes-34

OSBP-DIY-Tutorial-Painted-Envelopes-38

I’ll be back with a couple more ideas later in the week!

Photo Credits: Nole Garey for Oh So Beautiful Paper

Happy Weekend!

Happy Friday everyone! It has been a cold and wintery week here in DC – with more snow on the way this weekend, eeek! Last winter was incredibly mild and I kind of forgot what a real winter is like. The one bonus? Sophie looks adorable in the puffy winter coat we bought for her once we realized her little fleece sweatshirt wasn’t going to cut it this winter. Right now I’m looking forward to a mostly unscheduled weekend, except for checking out Holiday Heap in Baltimore tomorrow. But in the meantime…

Little-Owl-Design-Typographic-Map-Print

Typographic Map Print by Little Owl Designs

…a few links for your weekend!

This week on Oh So Beautiful Paper:

Check back soon for this week’s cocktail! I hope you all have a wonderful weekend, and I’ll see you back here next week! xoxo

Mona + Bassim’s Calligraphy and Floral Vow Renewal Invitations

Mona of Birds & Honey Events recently celebrated ten years with her husband Bassim – so they decided to renew their wedding vows as part of their anniversary celebrations! Mona worked with Sarah at The Stationery Bakery to create a gorgeous invitation suite featuring lush floral watercolor illustrations and calligraphy. So pretty!

Floral-Calligraphy-Vow-Renewal-Invitations-Stationery-Bakery2

From Mona: I recently renewed my vows and I just couldn’t get over the beauty of my invitation suite. My dear friend Sarah Donovan from the lovely Stationery Bakery designed the suite of my dreams. I knew that I wanted to incorporate my love of birds on our stationery suite. I also adore anything written by Rumi and Khalil Gibran so it meant the world to me that she incorporated some of my favorite quotes into the invitation.

Floral-Calligraphy-Vow-Renewal-Invitations-Stationery-Bakery4

Floral-Calligraphy-Vow-Renewal-Invitations-Stationery-Bakery5

Floral-Calligraphy-Vow-Renewal-Invitations-Stationery-Bakery7

Thanks Mona!

Invitation Design: The Stationery Bakery

Check out the Designer Rolodex for more tal­ented wed­ding invi­ta­tion design­ers and the real invi­ta­tions gallery for more wedding invitation ideas!

Photo Credits: Katch Studios

Happy Weekend!

Happy Friday everyone! It’s always busy the first week back after a holiday weekend, and this week was no exception! I’m busy preparing for a big project this weekend, which I’m excited to share with all of you soon! Andy and I also went over to meet the most adorable two-week old baby – who also happens to be the most chill newborn in the universe. I’m still trying to wrap my head around the fact that Sophie was ever that small! Amazing. Anyway, I’m heading off to prep for our big weekend project! But in the meantime…

OSBP-Paper-Snowflakes

Photo by me via Instagram

…a few links for your weekend!

This week on Oh So Beautiful Paper:

Check back soon for this week’s cocktail! I hope you all have a wonderful weekend, and I’ll see you back here next week! xoxo