DIY Tutorial: Seed Packet Wedding Ceremony Program

By the time most couples get around to finalizing their wedding program, they’ve waited until the last minute. They’re also desperately trying to stay within their budget since the big day is right around the corner. But making your own ceremony programs at home doesn’t have to yield ho-hum results! In our tutorial today, we’ll show you an adorable way to make custom programs every guest is sure to love. – Bailey and Emma of Antiquaria

DIY Tutorial: Seed Packet Wedding Program by Antiquaria for Oh So Beautiful Paper

DIY Tutorial: Seed Packet Wedding Program by Antiquaria for Oh So Beautiful Paper

Step One: First, you’ll need to gather your papers together and fold them exactly in half, using a bone folder. The cover of this program uses 8.5″ x 11″ patterned text weight paper (we used a version of our popular Paloma pattern). You could also use a scrapbook paper, so long as nothing is printed on the back side. For the text inside, you can use a design program, such as Illustrator or InDesign or simply use Word to lay out all of your information in two columns. We printed front and back by flipping the paper and re-running it through our home printer. You could also send the file to a copy store and have them print it for you.

DIY Tutorial: Seed Packet Wedding Program by Antiquaria for Oh So Beautiful Paper

Step Two:  Assemble your booklets with the cover on the back and the inner pages in the middle. Use paper clips to hold them together in preparation for sewing. This helps prevent shifting when you’re running a stitch down the center.

DIY Tutorial: Seed Packet Wedding Program by Antiquaria for Oh So Beautiful Paper

Step Three: With your needle in the middle position, sew straight down the center fold. Trim off any thread ends after the booklet is finished.

DIY Tutorial: Seed Packet Wedding Program by Antiquaria for Oh So Beautiful Paper

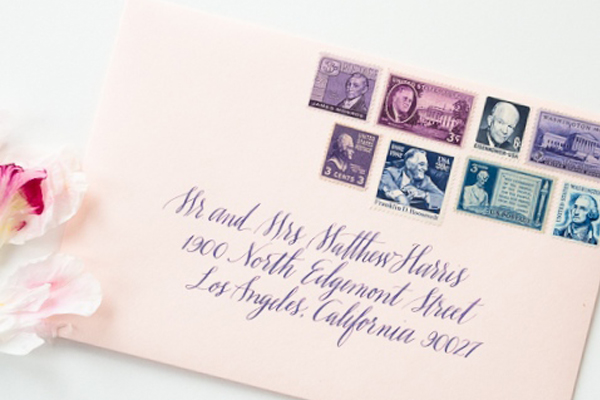
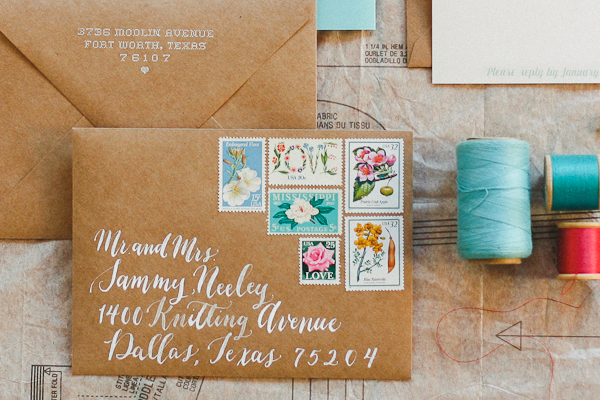
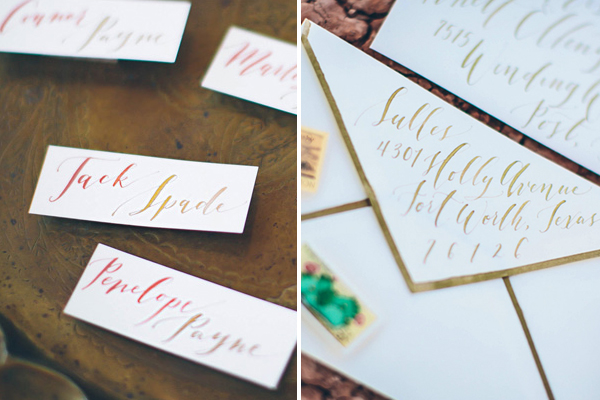
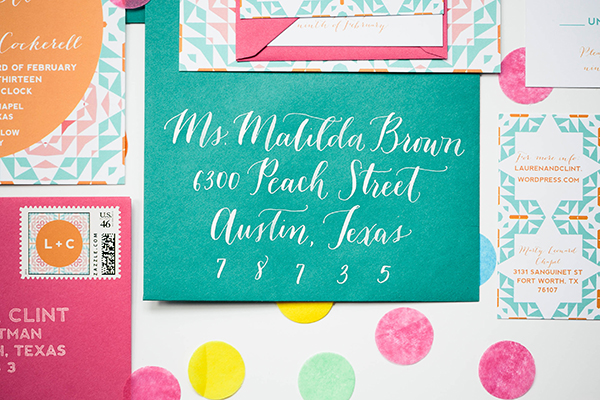
Step Four: We wanted to gussy up our program a bit by adding a little envelope containing home-grown seeds to the front for guests to take home. Instead of leaving the envelope blank, we added the couple’s name and wedding date in white calligraphy on the back flap. Don’t feel comfortable tackling calligraphy on your own? You could also use a monogram stamp with white ink to get a similar result!

DIY Tutorial: Seed Packet Wedding Program by Antiquaria for Oh So Beautiful Paper

Step Five: Adhere the envelope to the front cover (approximately in the center) using double sided tape or stick glue. We found that our  ATG Tape Gun worked the best on this project.

DIY Tutorial: Seed Packet Wedding Program by Antiquaria for Oh So Beautiful Paper

Step Six: Give your guests a little take away with your program! We spooned hand-harvest seeds into the envelopes so that each guest could plant flowers in honor of the couple. You could also fill the envelope with rice, confetti or anything else you can dream of! Have fun making it suit your own special day.

We also included a little note about the gift in the program itself, “Help our love grow! You’ll find hand-harvested seeds in the front envelope. Plant them and share the love.” Be sure to also include the type of seeds and some general growing instructions as well, either in the envelope itself or on the back page of your program.

DIY Tutorial: Seed Packet Wedding Program by Antiquaria for Oh So Beautiful Paper

Step Seven: Lastly, you’ll just need to close up the envelope so that the seeds don’t spill out. We used a fun patterned washi tape, which is easy to remove yet stays put!

Materials

Patterned paper in 8.5″ x 11″ text weight

Text weight paper in sage

Home Printer

Paper Clips

Sewing Machine and Thread – have fun with your thread color selection!

Mini Envelopes

Calligraphy Pen and Ink, or Monogram Stamp and White Stamp Pad

ATG Tape Gun

Seeds (or rice or confetti)

Washi Tape

Photography: Antiquaria for Oh So Beautiful Paper

Michelle + Renzo’s Elegant Gold Foil Save the Dates

Do you like gold? Good! Then you’ll love these save the dates! Created by the talented ladies at Papellerie feature lots of gold foil, an elegant die cut shape, and hand tied gold ribbons with a handy magnet for displaying on the fridge. I can’t wait to see the invitations!

Ornate-Marie-Antoinette-Gold-Foil-Save-the-Dates-Papellerie4

From Papellerie: We designed Michelle and Renzo’s save the dates with inspiration from Marie Antoinette. We wanted to really touch on this very decadent, lavish feel for all of their items. They came to us right from the start and we got to design all of their pieces, from save the dates to shower invitations, their wedding invitation, and all of their day-of items.

Ornate-Marie-Antoinette-Gold-Foil-Save-the-Dates-Papellerie7

Their save the date features a custom die cut shape with a gold foil pattern on the back and two color letterpress and gold foil on the front. It was mailed to guests with hand tied ribbons and a magnet for hanging on the fridge! The envelope had an antique gold paper liner and gold foil on the flap.

Ornate-Marie-Antoinette-Gold-Foil-Save-the-Dates-Papellerie3Ornate-Marie-Antoinette-Gold-Foil-Save-the-Dates-Papellerie

Ornate-Marie-Antoinette-Gold-Foil-Save-the-Dates-Papellerie5

Ornate-Marie-Antoinette-Gold-Foil-Save-the-Dates-Papellerie6

Thanks ladies!

Design: Papellerie

Calligraphy: Abany Bauer of Brown Linen Design

Check out the Designer Rolodex for more tal­ented wed­ding invi­ta­tion design­ers and the real invi­ta­tions gallery for more wedding invitation ideas!

Photo Credits: Adam Nyholt

Stationery Inspiration: Mixing Vintage Postage

I’m a big big fan of using vintage postage stamps on everything from wedding invitations to baby announcements. So when Cara from Underwood Letterpress and Anne Robin Calligraphy sent over a few tips for mixing vintage postage to create little art collections on your envelopes, I couldn’t resist! These envelopes definitely make an impression and, especially when combined with stunning calligraphy, are a beautiful keepsake for the recipients!

How-To-Mix-Vintage-Postage-Underwood-Letterpress-Anne-Robin-Calligraphy-Pink-and-Beige

From Cara of Underwood Letterpress: Your wedding invitation sets the tone for your special event. The vintage postage on these envelopes takes first impressions to the next level by mixing genre, color and technique. Here are a few tips for ways to turn your outer envelope in to a piece of art that will leave a lasting impression!

How-To-Mix-Vintage-Postage-Underwood-Letterpress-Anne-Robin-Calligraphy-Sweet-Pea2

Don’t Be Afraid of Color!
Pops of color are essential to any design palette. Go bold with these fun and out there envelope designs. Mixing traditional design with Pop Art never looked so good. Each of these fabulous postage collages in the “In Love” line come with an eclectic mix of vintage postage plus a special Love stamp to celebrate the occasion!

How-To-Mix-Vintage-Postage-Underwood-Letterpress-Anne-Robin-Calligraphy-Love

How-To-Mix-Vintage-Postage-Underwood-Letterpress-Anne-Robin-Calligraphy-Love2

Tone on Tone
Tone on tone is all the rage this season and there is no better way to maximize your wedding colors than by using multiple shades of your favorite hues. Check out these vintage postage collages with purple tones, blues and greens. Your guests might just decide to put these envelopes in a frame.

How-To-Mix-Vintage-Postage-Underwood-Letterpress-Anne-Robin-Calligraphy-Black-Tie

How-To-Mix-Vintage-Postage-Underwood-Letterpress-Anne-Robin-Calligraphy-Golden-Sunshine

How-To-Mix-Vintage-Postage-Underwood-Letterpress-Anne-Robin-Calligraphy-Plum

How-To-Mix-Vintage-Postage-Underwood-Letterpress-Anne-Robin-Calligraphy-Something-Blue

Mix Your Mediums
Try mixing techniques on your envelopes with this beautiful watercolor calligraphy design. The watercolor adds a whimsical touch while the modern address provides the perfect amount of juxtaposition.

How-To-Mix-Vintage-Postage-Underwood-Letterpress-Anne-Robin-Calligraphy-Sweet-Pea

Vintage Postage: Underwood Letterpress

Calligraphy: Anne Robin

Photography: Stephanie Collins Photography

Happy Weekend!

Happy Valentine’s Day everyone! I hope you’re able to spend time with your special people this weekend! We got a few more inches of snow here in DC on Wednesday night and are expected to get even more this weekend, so we’re hunkered down for a quiet weekend at home. Is it spring yet?? Sigh. But in the meantime…

Julie-Song-Ink-Calligraphy-Love-Quote

Printable calligraphy quote by Julie Song Ink (see below for a discount!)

…a few links for your weekend!

This week on Oh So Beautiful Paper:

Check back soon for this week’s cocktail! I hope you all have a wonderful weekend, and I’ll see you back here next week! xoxo

Calligraphy Inspiration: Blue Eye Brown Eye

Love must be in the air as I recently fell head over heels when I came across the work of Blue Eye Brown Eye‘s Lauren Essl. A designer and calligrapher, Lauren’s portfolio of work is as impressive as it is beautiful. Her pitch perfect invitation design and calligraphy turns something as everyday as a paper and envelopes into a beloved keepsake. Her blog is filled with stunning peeks of her work along with tips and resources for the beginning calligraphers. She’s also sharing her talent with the world through calligraphy classes!  – Julie

Blue Eye Brown Eye calligraphy invitation suite

blueeyebrowneye_2

blueeyebrowneye_3

I really love how Lauren utilizes space; corners and flaps are filled with ribbons of ink and creates a nice balance for a colorful array of stamps.

blueeyebrowneye_4

blueeyebrowneye_5

blueeyebrowneye_6

To see more of her beautiful calligraphy be sure to check out Lauren’s portfolio and blog. You can also register for her calligraphy classes if you’re located in Texas! More information is available on her website.

Photo credits: 1, 4 Amanda Marie Portraits; 2 Apryl Ann Photography; 3 l+r Heather Ann Design & Photography; 5 Lauren Essl; 6 left N.Barrett Photography, right Ben Q Photography