OSBP at Home: Our Old Apartment (Tour!)

I’m still easing my way back into a normal schedule after the holidays, and after two mid-week holidays I don’t have a regular Friday round up post to share today. So instead I’m doing something a bit different and sharing a little glimpse into my home(s), with a quick tour of our old apartment and a little introduction to our “new” house. First up, our old apartment! Considering it has been more than nine months since we moved out, this is way way way overdue – but better late than never, right? Also, I ran around taking photos of the apartment as we packed it up the last couple of weeks before the move, so these aren’t styled photos. You’ll see cords, remotes, and some ugly appliances – but hey, that’s life, right?

OSBP-Apartment-Tour-112

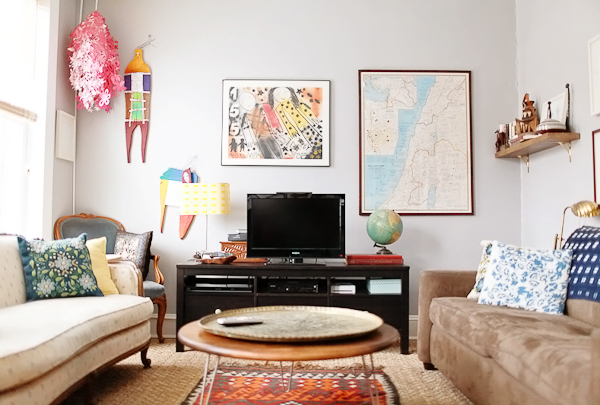
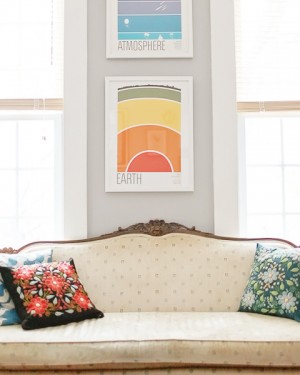
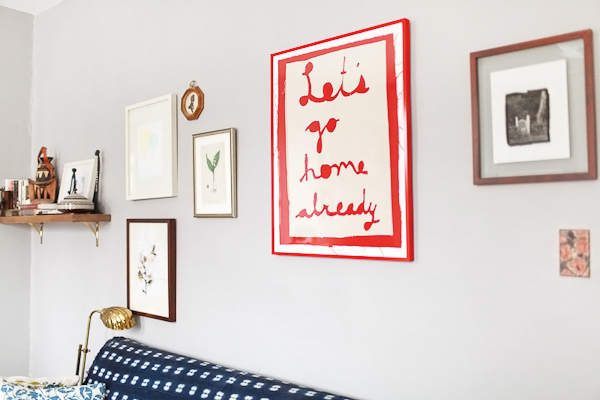
Starting in the front of the house with our living room. We spent most of our time in this room, and it’s probably the room that I miss the most now. It had three large southern-facing windows that let in the most beautiful morning and afternoon light, and it was just the right size for having friends and family over. Sigh. The furniture is a mix of flea market finds (like the brass tray and tribal rug), heirlooms that I inherited from my grandmother (the couch and chair on the left, both of which I’d eventually like to restore and recover), and modern items. If you have any specific questions about where we found something, please leave them in the comments and I’ll do my best to answer!

OSBP-Apartment-Tour-114OSBP-Apartment-Tour-116

OSBP-Apartment-Tour-113

OSBP-Apartment-Tour-118

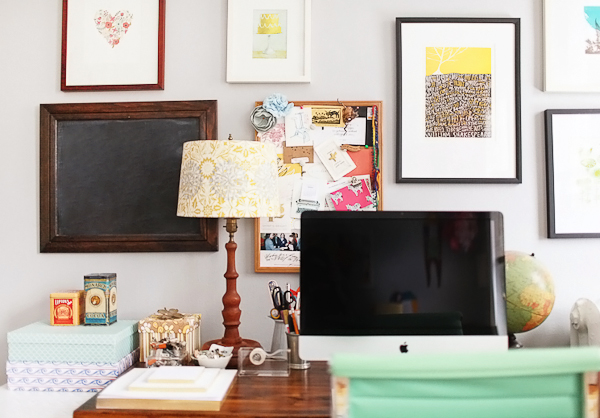
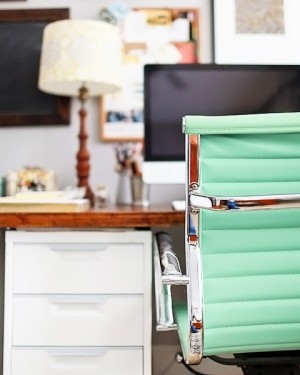
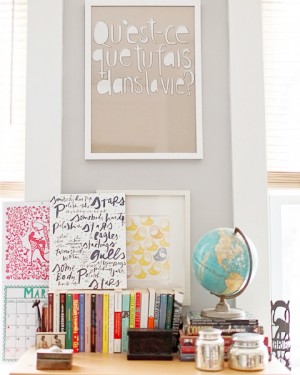
After Sophie arrived, we converted the second small bedroom into a nursery and I moved my office into a corner of the living room. It wasn’t a huge amount of space, but it worked at the time!

OSBP-Apartment-Tour-127OSBP-Apartment-Tour-125

OSBP-Apartment-Tour-124OSBP-Apartment-Tour-122

OSBP-Apartment-Tour-27

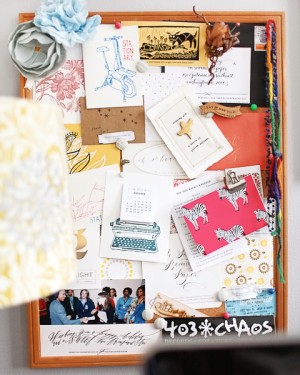
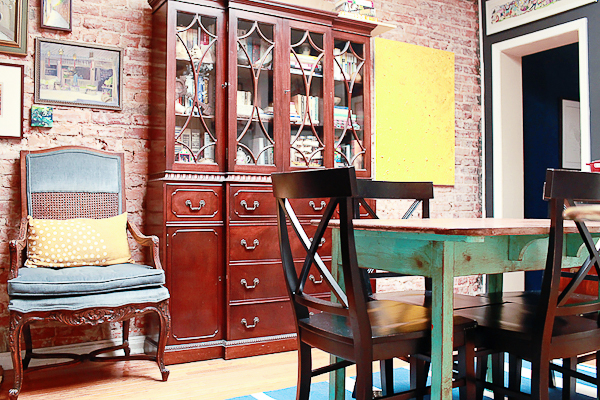
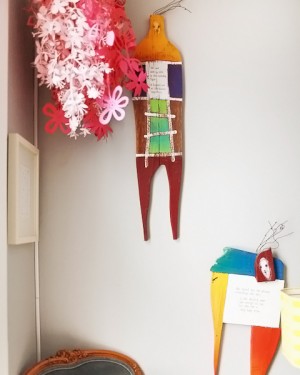
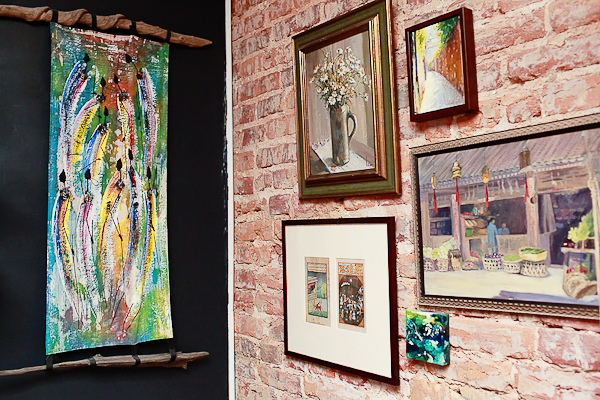
Moving towards the back of the house, we have our dining room. This room had a giant skylight, which avoided the typical dark middle room of DC rowhouses and made us feel so incredibly lucky to have a second floor apartment. The landlords exposed the brick wall years ago, and I painted the rest of the walls in black chalkboard paint to showcase our art collection. The large china cabinet and ornate chair are more heirlooms inherited from my grandmother, which she inherited from her mother. I love carrying pieces of them with me into my own home.

OSBP-Apartment-Tour-1

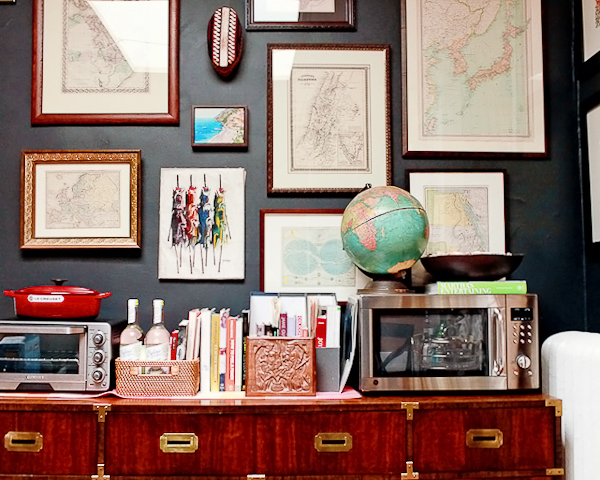
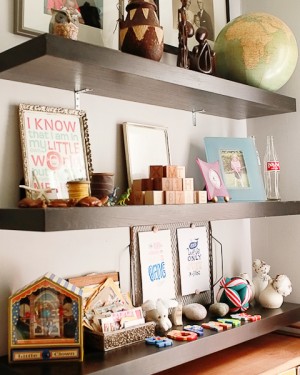
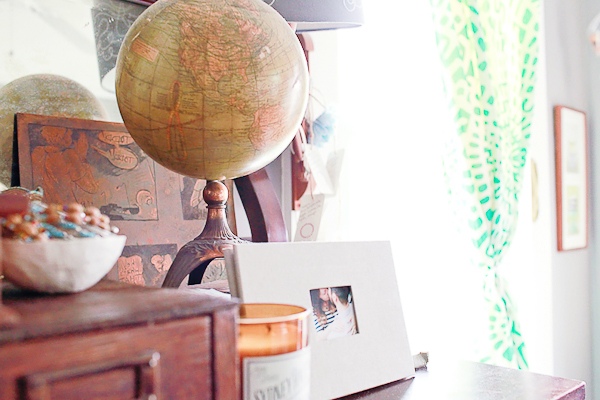
I didn’t manage to get any good photos of our kitchen, which lies directly to the right of this photo. The kitchen was pretty basic and small, so we moved the microwave and toaster oven out into the dining room to avoid taking up precious countertop space. The campaign dresser is one of my all time favorite flea market finds! Oh, and you might notice that we have a bit of a thing for antique maps and globes. It comes with the territory when two people with international backgrounds decide to get married.

OSBP-Apartment-Tour-23

OSBP-Apartment-Tour-9OSBP-Apartment-Tour-13

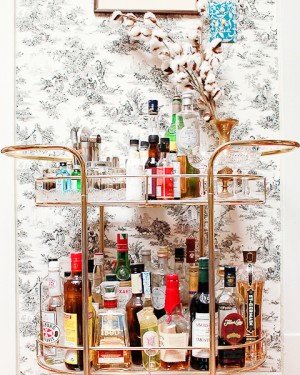
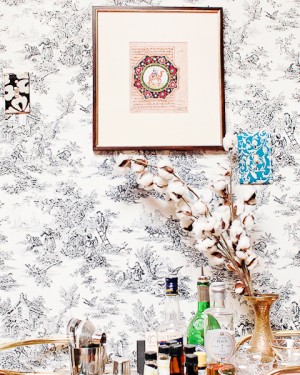
Our bar cart! I found this vintage brass beauty on craigslist: it was missing the original glass so we had pieces of acrylic cut down to fit the shelves instead. I used a combination of double-sided tape and painters tape to hang toile wallpaper (in a renter-friendly removable way) on this short little wall that connected our dining room and kitchen. This was another favorite nook of our old apartment.

OSBP-Apartment-Tour-108

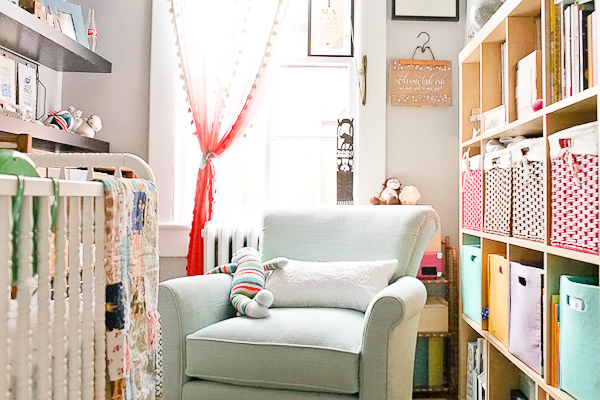
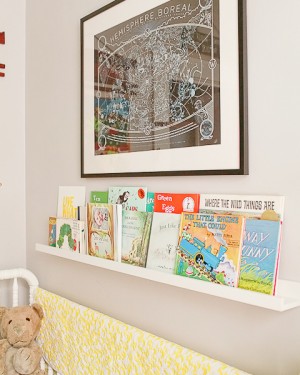
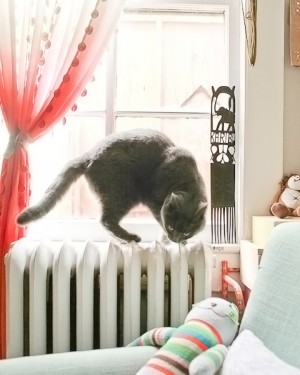
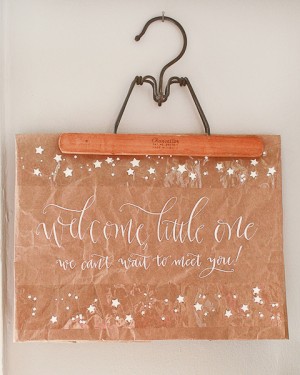
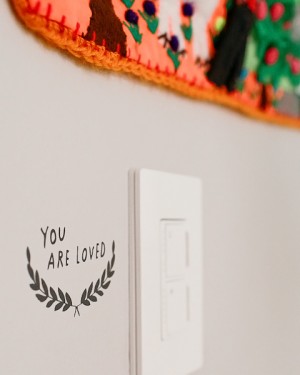
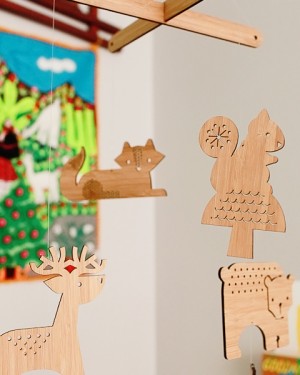
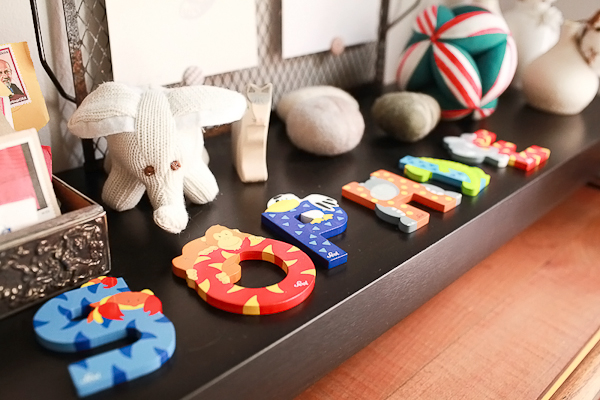
Next up, Sophie’s nursery! This room was so very tiny – we could barely fit the glider in next to the crib – so in retrospect I’m glad we didn’t have to use this room once Sophie was mobile. Hidden just to the right of the Expedit is a small vintage dresser that we used as our changing table.

OSBP-Apartment-Tour-87OSBP-Apartment-Tour-111

OSBP-Apartment-Tour-78OSBP-Apartment-Tour-75

OSBP-Apartment-Tour-79OSBP-Apartment-Tour-69

OSBP-Apartment-Tour-64OSBP-Apartment-Tour-62

OSBP-Apartment-Tour-73

OSBP-Apartment-Tour-31

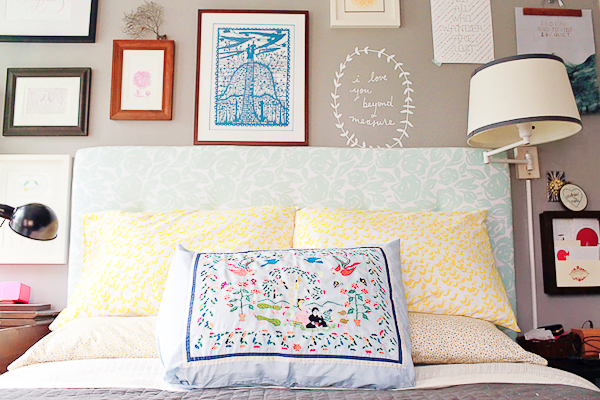
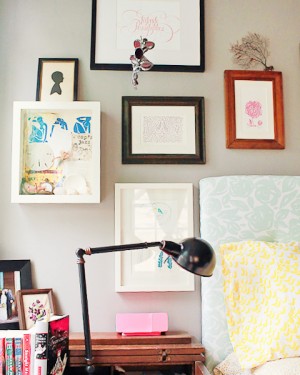
And finally, our bedroom! Also a small room and difficult to photograph without a wide angle lens (oops), but the room consisted of our bed, two nightstands, a dresser opposite the bed, and a closet with hanging storage and another dresser. This room had three north facing windows and also let in the most beautiful morning light. I do miss all those windows!

OSBP-Apartment-Tour-34OSBP-Apartment-Tour-55

OSBP-Apartment-Tour-46

And that’s it! Photos of our new house coming up next!

Photo Credits: Nole Garey for Oh So Beautiful Paper

Happy Holidays!

OSBP-Holiday-Wreath-2013

And just like that, it’s Christmas Eve! We’re spending a quiet Christmas right here in DC, just the three of us. And I can’t wait. The last few months have been such a crazy whirlwind, and I’m looking forward to a few days with nothing but my two favorite people in the world. It’s just what we need at just the right time.

I’ll be recapping some of my favorite posts from 2013 over the next week before returning with brand new content in 2014. I wish you all an absolutely wonderful holiday, and I’ll see you back here soon! xoxo

DIY Decorative Tape Envelopes

Last week, I shared two of my favorite ways to personalize hand delivered envelopes: with paint and rubber stamps. Today I’m sharing one final idea, and it’s the easiest one yet! Which is good, there’s no time to lose. Today’s idea involves something that we all have at home (or can easily grab on a quick trip to Target) – decorative tape!

OSBP-DIY-Colorful-Washi-Tape-Glitter-Tape-Envelopes-85

For these examples, I used some colorful washi tape and metallic glitter tape on Mohawk Loop kraft envelopes. I love pairing metallics with neutral kraft paper any time of year, but particularly during the holidays. I also had my little nieces and nephews in mind when creating these envelopes, so I wanted to keep things really bright and colorful.

OSBP-DIY-Colorful-Washi-Tape-Glitter-Tape-Envelopes-77

OSBP-DIY-Colorful-Washi-Tape-Glitter-Tape-Envelopes-81OSBP-DIY-Colorful-Washi-Tape-Glitter-Tape-Envelopes-93

I also picked up some silver, gold, and white alphabet stickers at my local office supply store to use instead of writing out the names by hand. They come in a variety of sizes, but I chose the 1″ tall size. Use just the first initial or spell out the entire name!

OSBP-DIY-Colorful-Washi-Tape-Glitter-Tape-Envelopes-88OSBP-DIY-Colorful-Washi-Tape-Glitter-Tape-Envelopes-43

My favorite patterns are diagonal stripes that start in front and run over the back envelope flap and horizontal stripes over the front of the envelope, but there are so many fun pattern options! Just place, smooth, trim with scissors – and have fun!

OSBP-DIY-Colorful-Washi-Tape-Glitter-Tape-Envelopes-37

OSBP-DIY-Colorful-Washi-Tape-Glitter-Tape-Envelopes-42

OSBP-DIY-Colorful-Washi-Tape-Glitter-Tape-Envelopes-21

Happy holiday card giving!

Photo Credits: Nole Garey for Oh So Beautiful Paper

Printable Pop Up Winter Forest Place Cards

The wonderful team behind Caravan Shoppe is stopping by again today – this time with some really fun place cards to bring extra cheer to your holiday celebrations! Inspired by snowy winter trees, Alma at Caravan Shoppe designed these beautiful printable pop up forest place cards. The artwork is available in four colorways – green, pink, blue, and gray – so just pick your favorite, follow a few basic instructions, and you’ll have a fun addition for Christmas dinner!

OSBP-DIY-Pop-Up-Winter-Forest-Place-Cards-Caravan-Shoppe-41

OSBP-DIY-Pop-Up-Winter-Forest-Place-Cards-Caravan-Shoppe-54

OSBP-DIY-Pop-Up-Winter-Forest-Place-Cards-Caravan-Shoppe-27

Materials

White Cover Weight Paper or Cardstock

Scissors

Double Sided Tape or Glue

Bone Folder (optional)

OSBP-DIY-Pop-Up-Winter-Forest-Place-Cards-Caravan-Shoppe-2OSBP-DIY-Pop-Up-Winter-Forest-Place-Cards-Caravan-Shoppe-7

Step 1: Print out the place cards in your chosen colorway, then cut out each card along the blue outline.

Step 2: Cut out the white space between each tree. Be sure to cut a line down to the base of each tree – you’ll use those when folding later!

OSBP-DIY-Pop-Up-Winter-Forest-Place-Cards-Caravan-Shoppe-13OSBP-DIY-Pop-Up-Winter-Forest-Place-Cards-Caravan-Shoppe-15

Step 3: Fold each card at the middle blue line. Depending on the thickness of your paper or cardstock, you may want to use a bone folder and ruler to score the lines at each folding point (optional).

Step 4: Fold each tree backwards along the base.

OSBP-DIY-Pop-Up-Winter-Forest-Place-Cards-Caravan-Shoppe-24OSBP-DIY-Pop-Up-Winter-Forest-Place-Cards-Caravan-Shoppe-57

Step 5. Use glue or double sided tape to secure the underside of each tree to the place card base.

Step 6. Fold the snow line up.

OSBP-DIY-Pop-Up-Winter-Forest-Place-Cards-Caravan-Shoppe-40

Step 7: Write a name in the snow area, and you’re done!

OSBP-DIY-Pop-Up-Winter-Forest-Place-Cards-Caravan-Shoppe-37

OSBP-DIY-Pop-Up-Winter-Forest-Place-Cards-Caravan-Shoppe-56

Thanks so much Alma!

Click here to download the files!

Artwork copyright Caravan Shoppe, created exclusively for Oh So Beautiful Paper. All artwork is for personal use only. Caravan Shoppe specializes in printable digital downloads – from calendars to prints to holiday goods. They have some wonderful Christmas products right here!

Photo Credits: Nole Garey for Oh So Beautiful Paper

Friday Happy Hour: Classic Egg Nog

When I was a kid, my mom used to make me egg nog. Well, “egg nog.” Into a blender would go milk, an egg, sugar, cinnamon, and some vanilla extract. Eight year old me loved the weird, unsanitary egg milkshake that resulted. Years later, I tried egg nog in a carton from a dairy chain that shall remain unnamed, a think syrupy glop that, I can say with confidence, was not fit for human consumption. So I can understand if people hear “egg nog” and think “no thanks!” Other than Punch, there’s probably no other drink that’s been so terribly abused over the years and bears so little resemblance to its original form. But bear with me! Egg nog has a long and illustrious pedigree and deserves your reconsideration. Done well, egg nog is a rich and tasty milk punch that definitely deserves a second chance. – Andrew

OSBP-Signature-Cocktail-Recipe-Classic-Egg-Nog-9

OSBP-Signature-Cocktail-Recipe-Classic-Egg-Nog-Shauna-Lynn-Illustration

Illustration by Shauna Lynn for Oh So Beautiful Paper

Egg Nog (serves 2)

4 oz Brandy
2 oz Aged Rum
1-2 oz Simple Syrup
1 Egg
Vanilla Extract (optional)
6-12 oz Milk

Add the egg and syrup to an empty shaker and shake thoroughly, without ice. Add the brandy, rum, milk, and ice, then shake again until everything is thoroughly mixed. Strain into a chilled tumbler or mug, grate some fresh nutmeg on top, and enjoy!

OSBP-Signature-Cocktail-Recipe-Classic-Egg-Nog-6OSBP-Signature-Cocktail-Recipe-Classic-Egg-Nog-47

This is adapted only slightly from the 1862 recipe by Jerry Thomas, one of history’s greatest bar tenders. (Milk Punch, of which this is a variant, goes back even farther to the 1600s.) And it’s not at all what you’d expect: it’s rich, with a smooth oaky depth thanks to the brandy and rum and just a bit of sweetness from the sugar and milk. The egg and milk give the drink a sturdy body and rich froth on top, but it’s something you can sip – not an egg milkshake.

OSBP-Signature-Cocktail-Recipe-Classic-Egg-Nog-38

Here are some additional thoughts, in no particular order of importance: used aged rum only, as clear rum absolutely will not do here. Consider bumping up the simple syrup to an ounce per serving, as the original egg nog was much less sweet than most drinks we’re familiar with now. Eggs in 1862 were also much smaller than eggs are todays, so you probably only need half an egg per serving – or use one egg  make two drinks at once. If you have some handy, a dash of Allspice Dram can jazz up your egg nog. And my mom was on to something: though it’s not historically authentic, a dash of vanilla extract is a pretty solid addition. So. It’s Christmastime. Go make some egg nog.

OSBP-Signature-Cocktail-Recipe-Classic-Egg-Nog-33OSBP-Signature-Cocktail-Recipe-Classic-Egg-Nog-27

Happy Holidays!

Photo Credits: Nole Garey for Oh So Beautiful Paper