Pascale + Maurice’s Colorful Cinco De Mayo Wedding Invitations

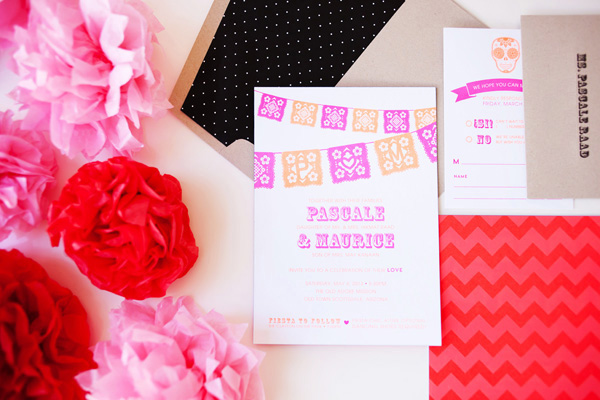
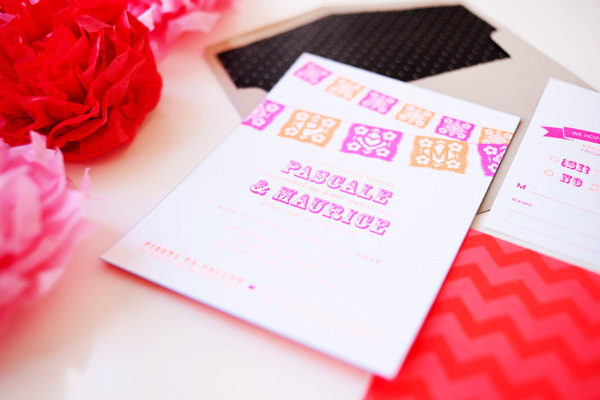
How about a little neon to brighten up your Wednesday? Heidi from idieh design sent over these vibrant invitations created for a Cinco de Mayo wedding, featuring neon fuchsia and neon orange paired with bright blue edge painting and kraft paper envelopes. So fun!
Cinco-De-Mayo-Wedding-Invitations-idieh-design

From Heidi: Pascale and Maurice wanted to merge tradition and trend in a fun and artistic way. Their wedding would take place on Cinco de Mayo weekend, so they chose to honor the Mexican holiday with a “fiesta-chic” theme. They wanted their invitation suite to incorporate a whimsical color scheme inspired by the very colorful Mexican culture.
Cinco-De-Mayo-Wedding-Invitations-idieh-design2

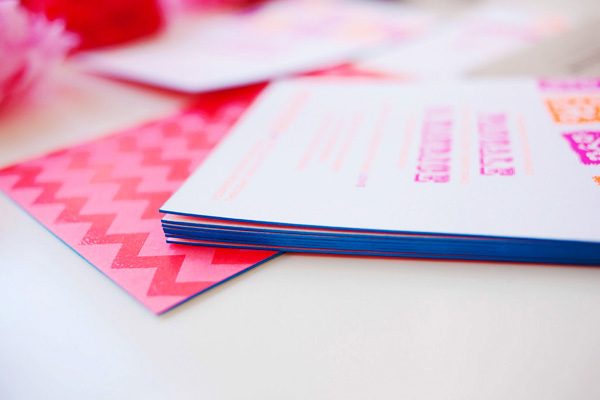
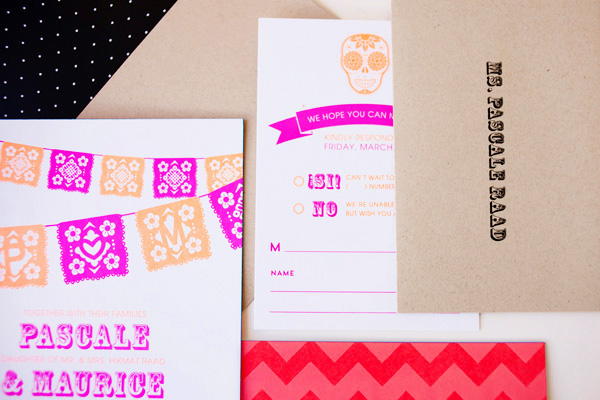
We decided on an extra-thick invitation with vibrant neon fuchsia and neon orange to let guests know it was going to be a fun, festive, and bold celebration. The graphic Mexican banner subtly enclosed the couple’s initials within the cuts of the design. The invitation was backed with a vibrant chevron pattern that utilized spot coating varnish for a glossy finish.
Cinco-De-Mayo-Wedding-Invitations-idieh-design3

Bright blue edge painting on the main invitation provided a finishing touch. The entire suite, including the adorable response card, was packaged in a kraft envelope lined with a black and white polka dot patterned liner. 

Cinco-De-Mayo-Wedding-Invitations-idieh-design4

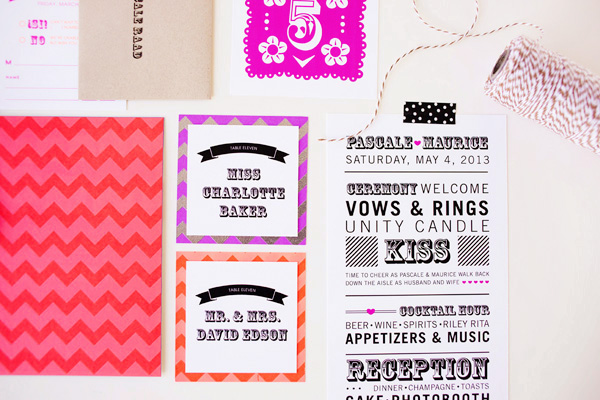
The bold graphics and colorful palette continued throughout the wedding day with the over-the-top playful ceremony programs, the whimsical table numbers, and the cheerful escort cards.
Cinco-De-Mayo-Wedding-Invitations-idieh-design8

Thanks Heidi!

Check out the Designer Rolodex for more tal­ented wed­ding invi­ta­tion design­ers and the real invi­ta­tions gallery for more wedding invitation ideas!

Photo Credits: Michelle Herrick Photography
April + Angelo’s Floral and Kraft Wedding Invitations

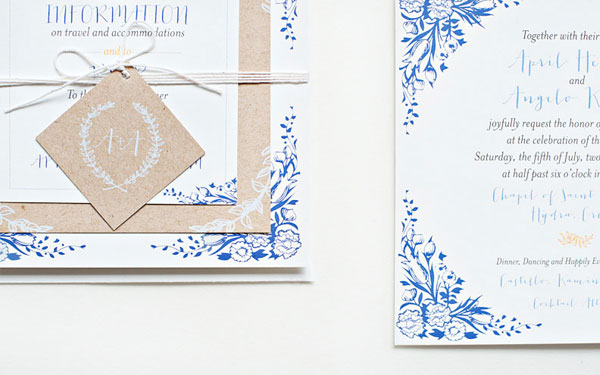
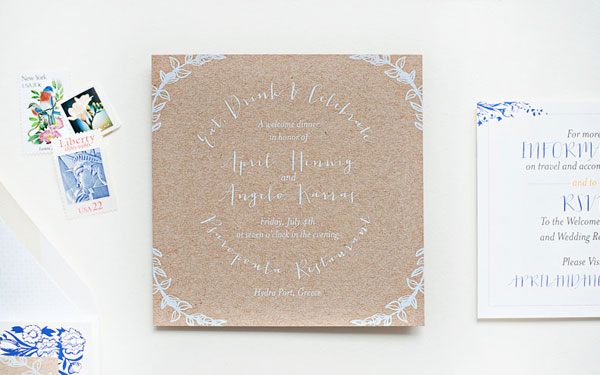
Becca from Suite Paperie sent over these beautiful invitations that she recently created for a destination wedding in Greece, inspired in part (naturally) by the groom’s Greek heritage. Becca paired blue floral details and text on white paper with kraft paper digitally printed in white ink. A stunning combination!

Blue-Floral-Kraft-Paper-Wedding-Invitations-Suite-Paperie

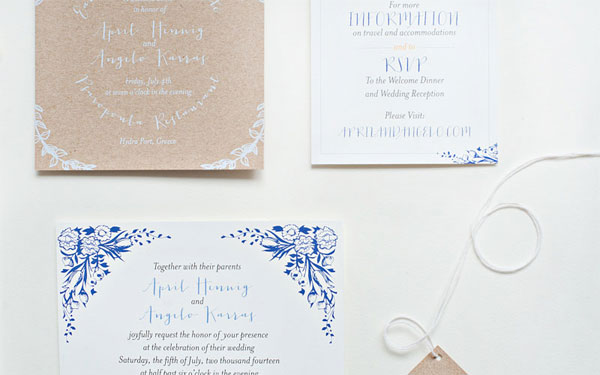
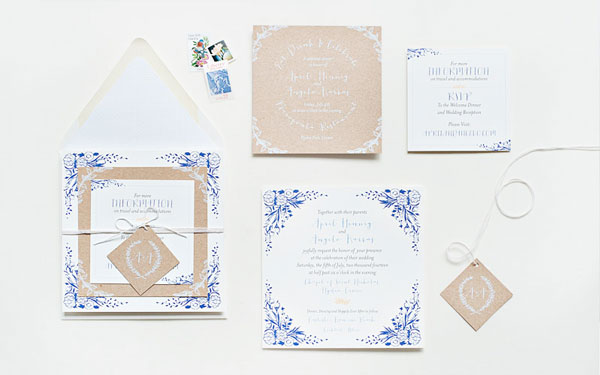
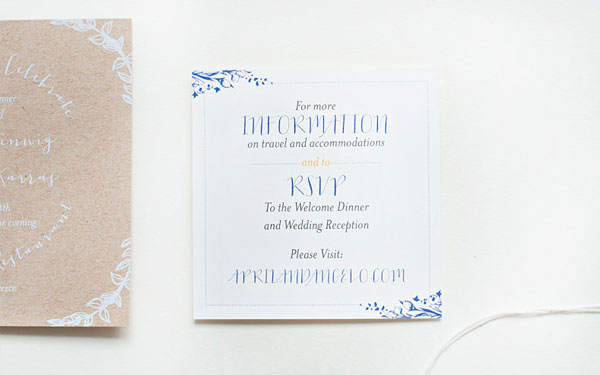
From Becca: Inspired by the groom’s Greek heritage, this blue, white, and kraft destination wedding suite is simply elegant. Floral details and a mix of whimsical typefaces are digitally printed on square double-mounted soft white card stock for the invitation and information cards.

Blue-Floral-Kraft-Paper-Wedding-Invitations-Suite-Paperie2

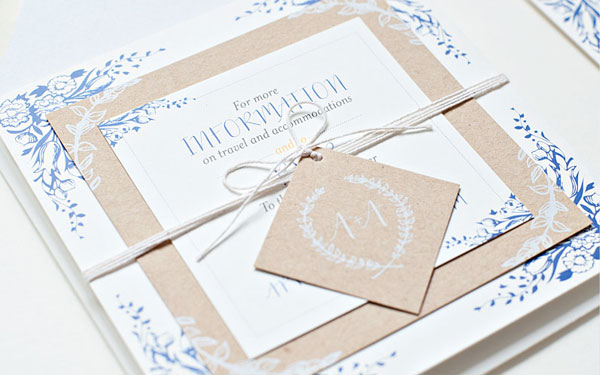
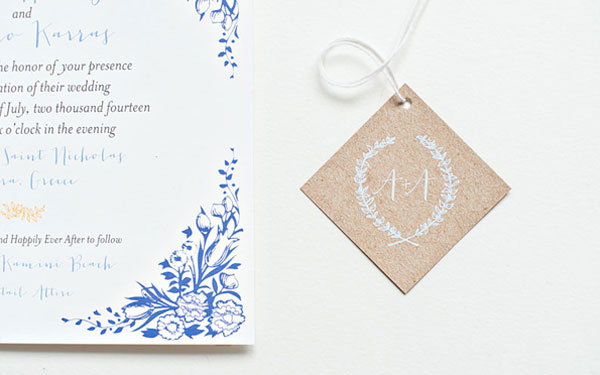
A rehearsal dinner insert and monogrammed tag are contrastingly printed in white ink on straw kraft stock, allowing the suite to stack beautifully. The pieces are tied together with cotton twine and tucked into a matching envelope that is lined with a subtle coordinating pattern.

Blue-Floral-Kraft-Paper-Wedding-Invitations-Suite-Paperie3

Blue-Floral-Kraft-Paper-Wedding-Invitations-Suite-Paperie5

Blue-Floral-Kraft-Paper-Wedding-Invitations-Suite-Paperie6

Blue-Floral-Kraft-Paper-Wedding-Invitations-Suite-Paperie7

Blue-Floral-Kraft-Paper-Wedding-Invitations-Suite-Paperie8

Thanks Becca!

Check out the Designer Rolodex for more tal­ented wed­ding invi­ta­tion design­ers and the real invi­ta­tions gallery for more wedding invitation ideas!

Photo Credits: Lindsay Nathanson

Happy Weekend!

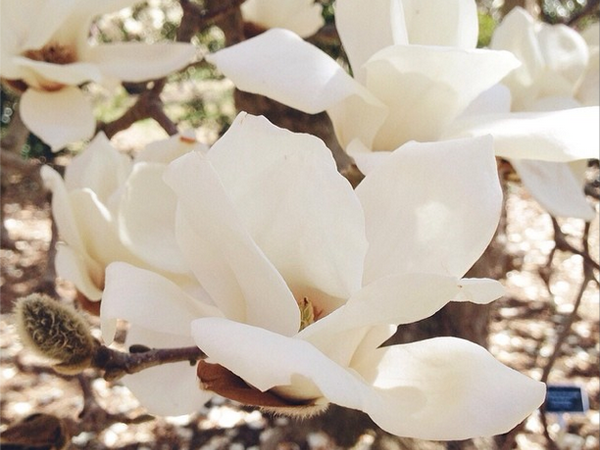
Happy Friday everyone! It’s officially spring here in DC – the cherry blossoms are blooming, there are buds on my lilacs, peonies are coming up, and green is slowly returning to our bare, brown yard. Yay! Sadly, Sophie came home early yesterday with a fever, so I’m heading out a bit early today to take care of my sweet girl – and hopefully she’ll be feeling well enough to enjoy some of this gorgeous spring weather soon. But in the meantime…

OSBP-Magnolias-Instagram

Photo by me via Instagram

…a few links for your weekend!

This week on Oh So Beautiful Paper:

Check back soon for this week’s cocktail! I hope you all have a wonderful weekend, and I’ll see you back here next week! xoxo

How to Back Invitations with Patterned Paper

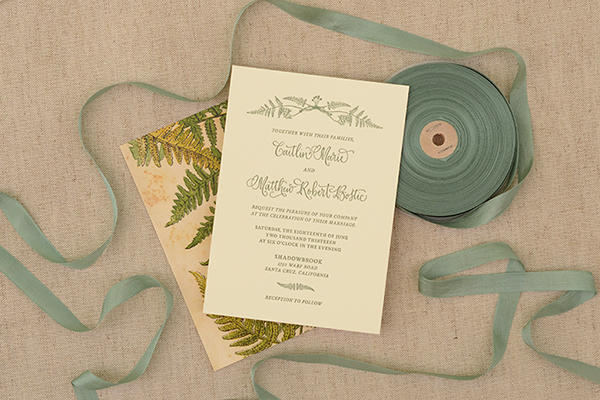
Sometimes it’s good to get back to DIY basics. Patterned invitation backers can break the budget for many couples because there is so much time and labor involved. We always like to encourage people to take matters into their own hands – and today we’ll show you exactly how to do that! Over the years, we’ve experimented with backers of all sorts as well as different methods to DIY-ing them. This simple tutorial yields beautiful results if you’re precise and don’t mind getting your hands a little dirty, so to speak! – Bailey and Emma of Antiquaria

DIY Tutorial: How to Back Invitations with Patterned Paper via Oh So Beautiful Paper

DIY Tutorial: How to Back Invitations with Patterned Paper via Oh So Beautiful Paper

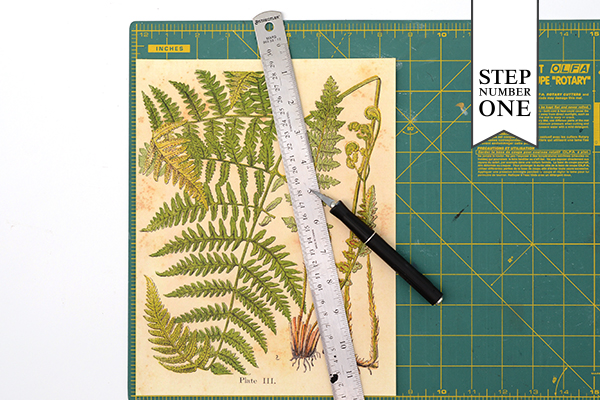
Step One: First you’ll want to decide what paper or material you’d like to use on the back of your invitations. We selected this Botanical Fern Paper in text weight to coordinate with the fern invitation design. Vertical directional patterns like this one mean that you’ll only get one backer out of each 8.5″ x 11″ sheet of text paper. If you’d like to get two backers per sheet, select a non-directional or horizontal pattern. Measure your invitation precisely (very, very precisely), and cut your text paper to that size. Our invitation was 5″ x 7″ so that is the size we cut our paper.

DIY Tutorial: How to Back Invitations with Patterned Paper via Oh So Beautiful Paper

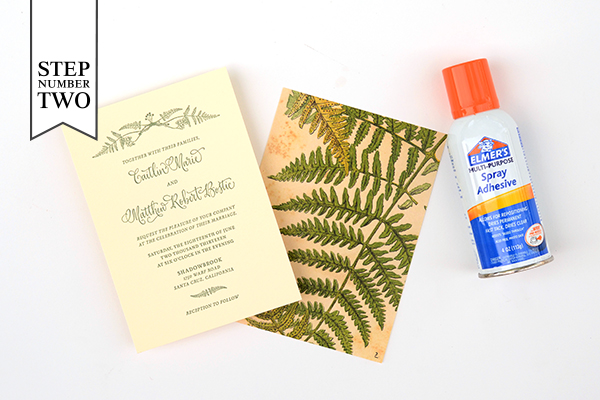
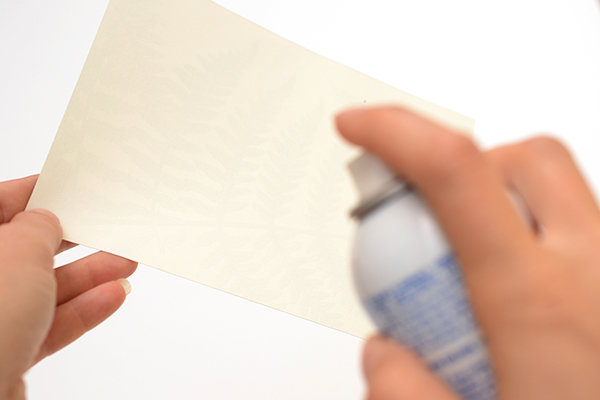
Step Two: Gather all of your materials together. This will be your invitation, pre-cut paper backers, and spray glue. When using spray glue, it is important that you do your project in a ventilated location, preferably outside. Make sure that you have a clean, sturdy table so that you can move immediately to the next step. Hold the patterned paper, back side facing you, and spray with a light coat of spray adhesive (see photo below). When the entire surface is covered, move immediately to Step Three.

DIY Tutorial: How to Back Invitations with Patterned Paper via Oh So Beautiful Paper

DIY Tutorial: How to Back Invitations with Patterned Paper via Oh So Beautiful Paper

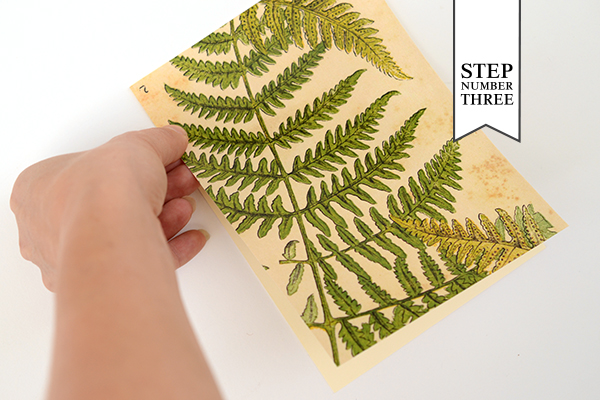
Step Three: On your clean and firm surface, place one invitation face down. Very carefully align the top corners of the backer to the top corners of the invitation. Slowly adhere the paper down the back until you’ve reached the bottom corners. Set aside. The key here is to really get the backer on carefully and straight. It’s just a matter of being precise and having the paper cut correctly to start.

Repeat Step Two and Three until all of your invitations are complete. Then move on to Step Four.

DIY Tutorial: How to Back Invitations with Patterned Paper via Oh So Beautiful Paper

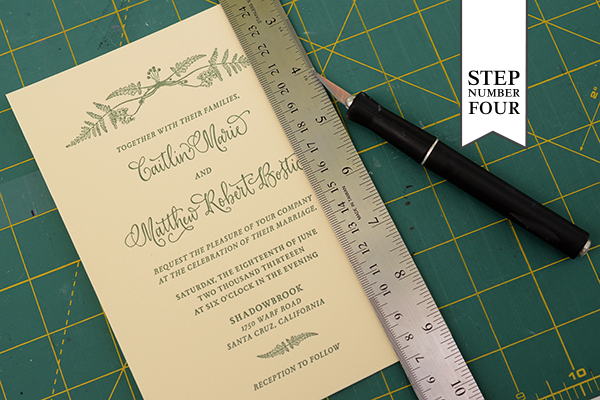
Step Four: Check your invitations and see if there are any paper edges peeking over the edge of the invitation. If there is, carefully trim them off with a ruler and craft knife, being certain not to cut into the invitation itself. Once you’ve checked them all, let them cure. Overnight is best and you can also weigh them down under a heavy book if you’d like. The key is to make certain that they’re really well adhered.

DIY Tutorial: How to Back Invitations with Patterned Paper via Oh So Beautiful Paper

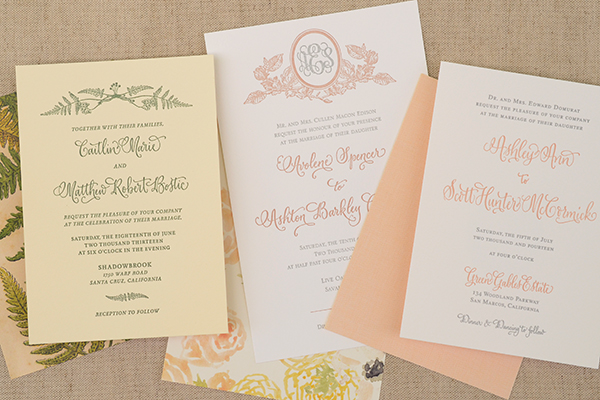
Bookbinding linen, which has a study paper back adhered, is another really beautiful and classic option for backing your invitation (see the blush linen backer in the photo above). There are numerous colors to choose from and it’s just as easy to use as paper! No fraying involved!

Materials

Invitations

Patterned Paper or Book Binding Linen

Spray Adhesive

Ruler and Craft Knife

Anti­quaria is a mem­ber of the Designer Rolodex – you can see more of their beau­ti­ful work right here or visit the real wedding invitations gallery for more wedding invitation ideas!

Photography: Antiquaria for Oh So Beautiful Paper

Mennat + Omar’s Bilingual English Arabic Wedding Invitations

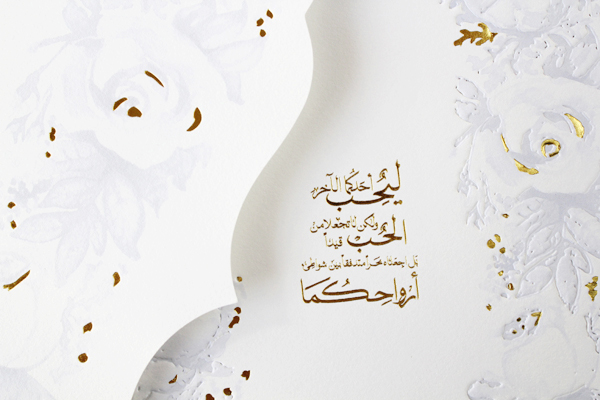
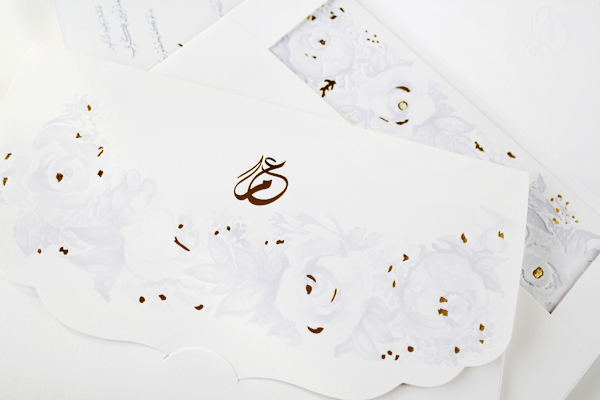
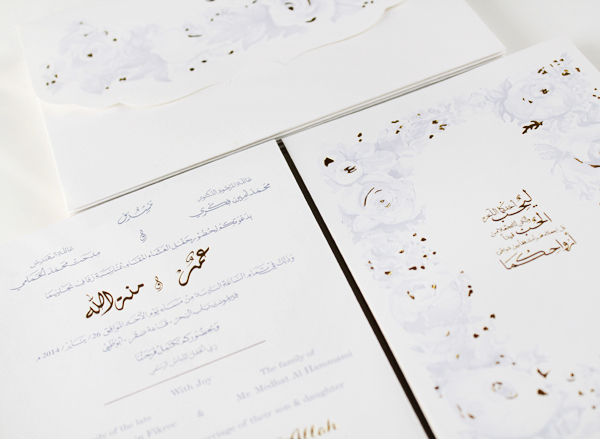
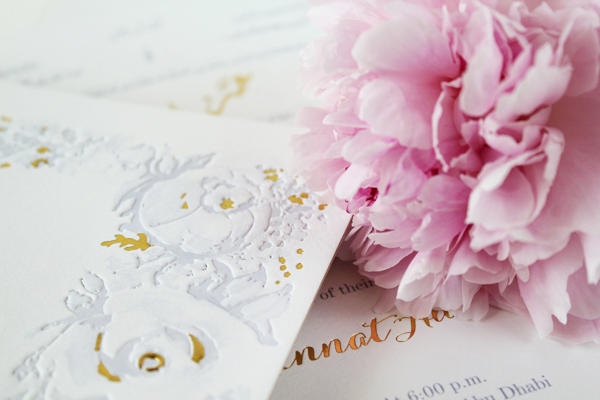
These romantic floral wedding invitations come to us all the way from Dubai! Mariam from Natoof Design created bilingual invitations with a sophisticated light blue and gold color palette, combining English text and Arabic calligraphy – and lots of gold foil. So pretty!

Bilingual-English-Arabic-Parisian-Chic-Wedding-Invitations-Natoof10

From Mariam: The bride and groom wanted a Parisian chic invitation with peonies and roses, and for the color palette to reflect seductive light blue hues with a light romantic touch.

Bilingual-English-Arabic-Parisian-Chic-Wedding-Invitations-Natoof2

Bilingual-English-Arabic-Parisian-Chic-Wedding-Invitations-Natoof6

The invitation is bilingual with Arabic calligraphy and English typography, with an Arabic calligraphy monogram on the envelope flap. On the back of the invitation is a quote by Gibran Khalil Gibran which reads in English as following: “Love one another, but make not a bond of love. Let it rather be a moving sea between the shores of your souls.”

Bilingual-English-Arabic-Parisian-Chic-Wedding-Invitations-Natoof4

Bilingual-English-Arabic-Parisian-Chic-Wedding-Invitations-Natoof11

The bride expressed her love for the letterpress style; however, letterpress printing isn’t available in Dubai and generally in the Middle East region. So with the little time that we had before the wedding we worked with our local printer to mimic letterpress results with offset equipment.

Bilingual-English-Arabic-Parisian-Chic-Wedding-Invitations-Natoof5

Bilingual-English-Arabic-Parisian-Chic-Wedding-Invitations-Natoof7

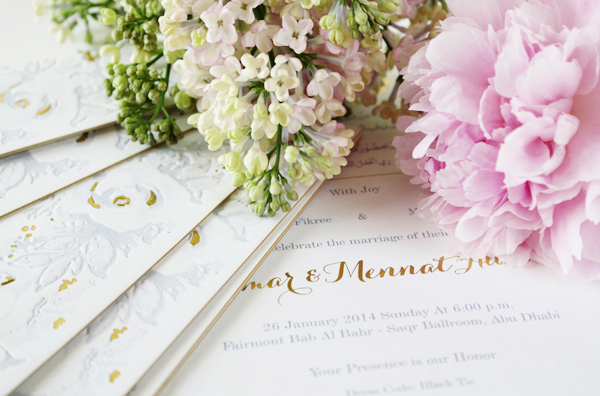
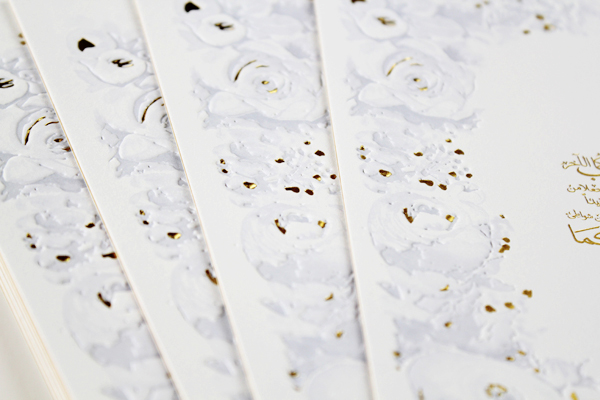
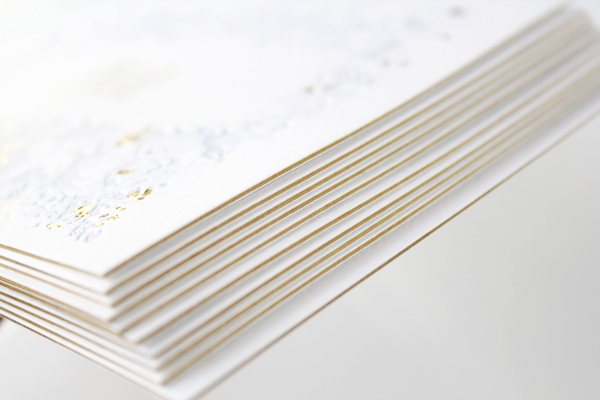
We duplexed the cotton paper with a layer of gold paper sandwiched between two layers of white cotton paper. The design incorporates gold foil, embossing, and debossing to achieve a dream wedding invitation suite.

Bilingual-English-Arabic-Parisian-Chic-Wedding-Invitations-Natoof9

Bilingual-English-Arabic-Parisian-Chic-Wedding-Invitations-Natoof12

Thanks Mariam!

Check out the Designer Rolodex for more tal­ented wed­ding invi­ta­tion design­ers and the real invi­ta­tions gallery for more wedding invitation ideas!

Photo Credits: Natoof