How to Send Beautiful Mail

I’m all about sending beautiful mail. And this goes beyond the adorable card on the inside (which, ahem, I’m assuming you already found the perfect card right here on OSBP) to include the actual envelope as a way of brightening someone’s mailbox. With the holiday season – and holiday cards – right around the corner, I thought we could all use a few tips on how to send beautiful mail, from colorful envelopes and envelope liners to quirky off-center address alignments! Let’s all step up our envelope game this year!

How to Send Beautiful Mail / Oh So Beautiful Paper for eBay

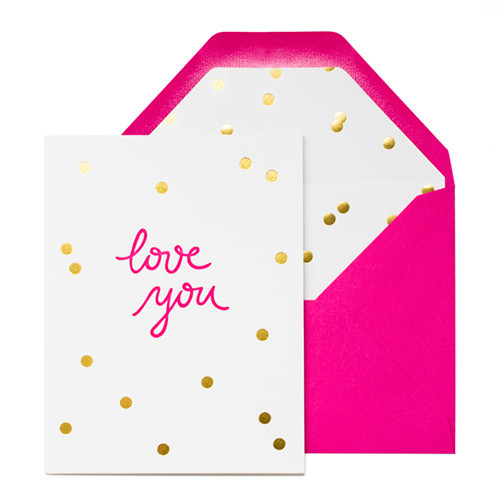
Sugar Paper / Love You

Card by Sugar Paper

1. Colorful Envelopes

I’m going to assume that you already have a super cute card picked out – or that you made your own. But if you can, ditch the white envelope in favor of a bright colorful envelope. It becomes a literal bright spot in an otherwise dreary mailbox.

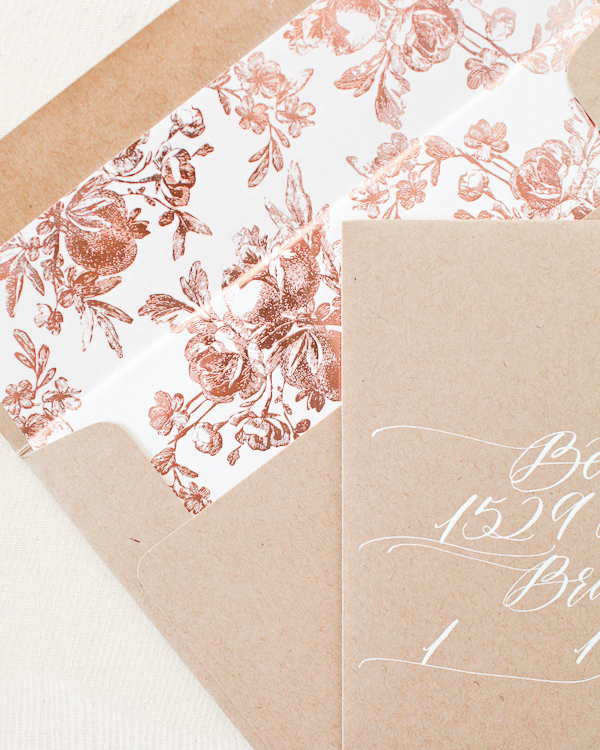
Rose Gold Foil Envelope Liner by Bella Figura / Photo Credit: Nole Garey for Oh So Beautiful Paper

Rose Gold Foil Envelope Liners by Bella Figura from Alice’s Birth Announcements


2. Envelope Liners

Envelope liners are a great way to signal that the contents of that envelope are particularly special. I like to use envelope liners for milestone stationery like birth announcements and wedding invitations – as well as our annual holiday cards. Vintage wallpaper and gift wrap sheets make fantastic DIY envelope liners!

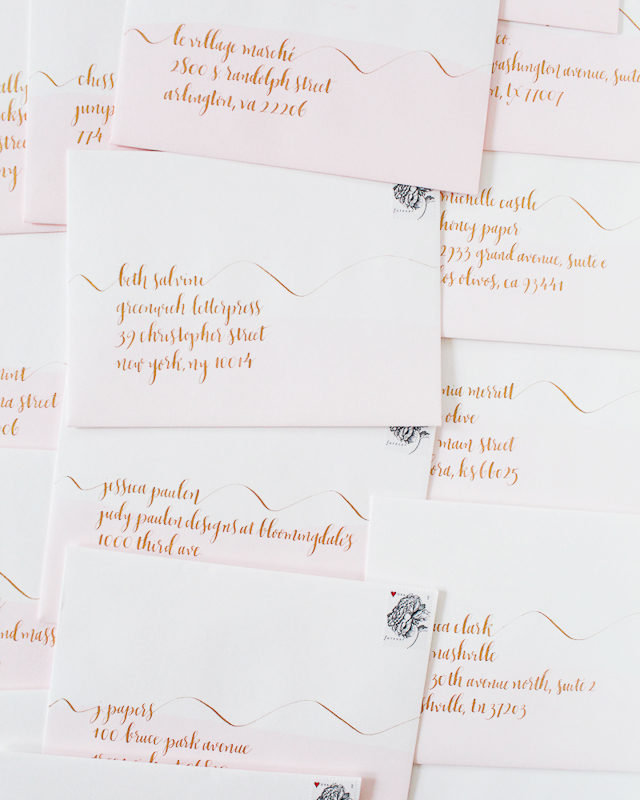
Creative Envelope Address Ideas by Antiquaria for Oh So Beautiful Paper

Photo Credit: Antiquaria Design for Oh So Beautiful Paper

3. Creative Addresses

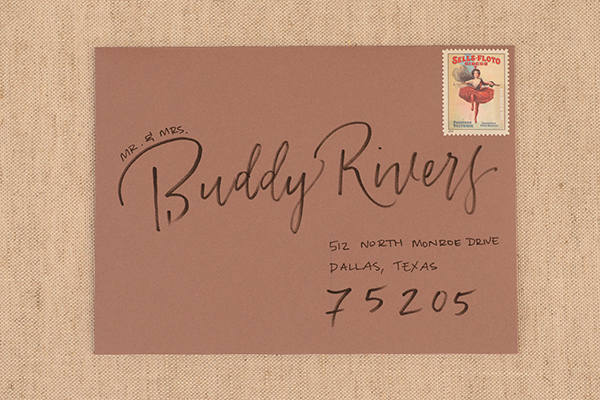
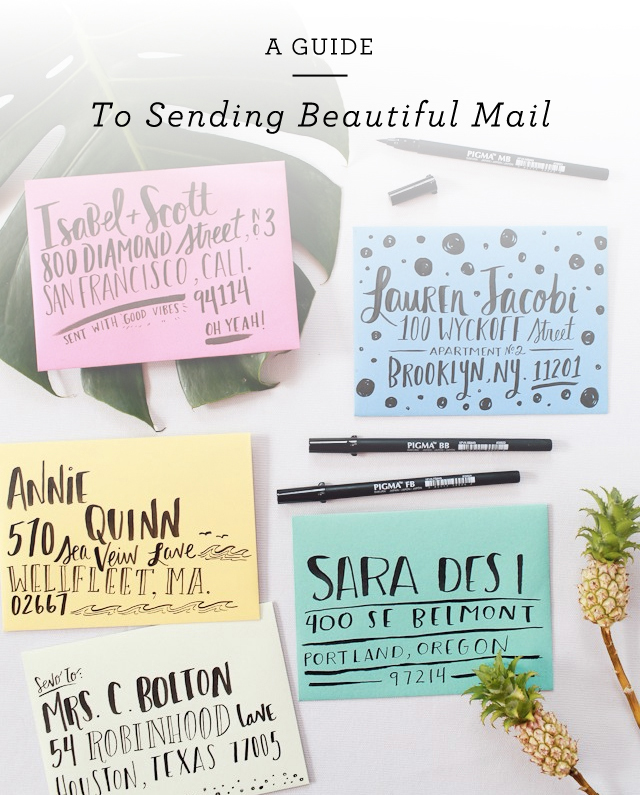
Now that you have the inside of the envelope sorted out it’s time to think about the outside of the envelope! It can be fun to think creatively when writing out the address – from asymmetrical alignments to incorporating brush pens (or even actual brushes!).

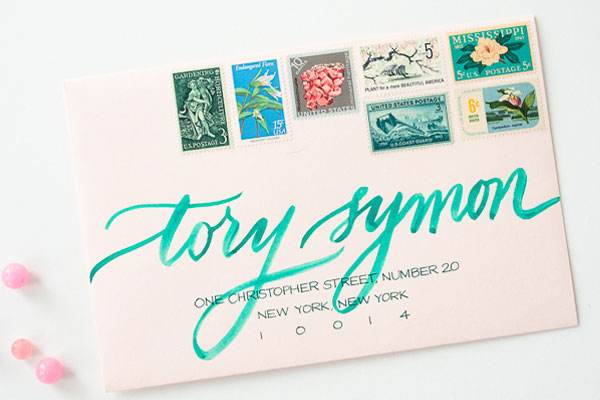
Brush Lettered Envelope Address by Anne Robin Calligraphy

Calligraphy by Anne Robin Calligraphy / Vintage Stamps by Underwood Letterpress / Photo Credit: Stephanie Collins Photography

This envelope features brush watercolor lettering for the name combined with a fine tip pen for the street address. Brush lettering requires a bit of practice to get a hang of the technique but isn’t as hard as you might think!

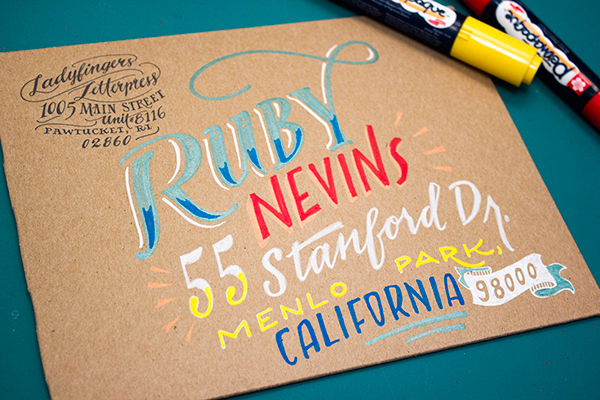
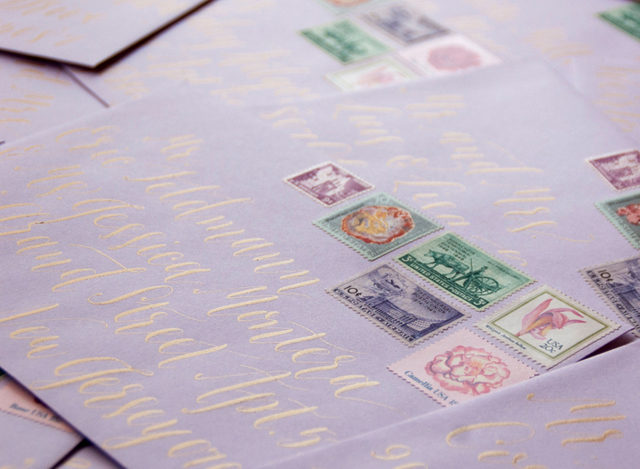
Hand Lettered Envelope Address Ideas by Ladyfingers Letterpress

Hand Lettered Envelope Address Ideas by Ladyfingers Letterpress

This envelope was addressed with paint pens – a wonderful way to add even more color to an envelope! A white paint pen is also the best way to address in white ink on a dark colored envelope.

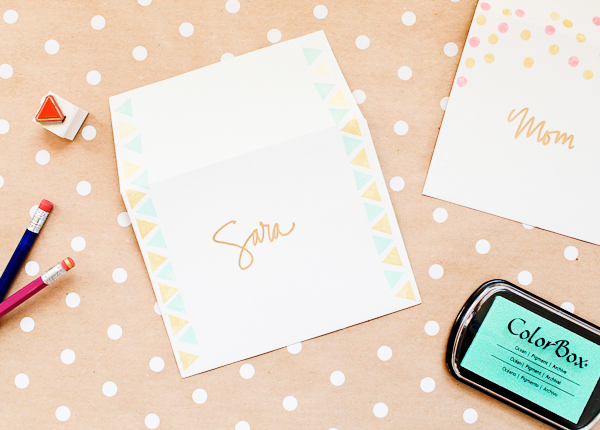
DIY Colorful Rubber Stamped Envelopes by Oh So Beautiful Paper

DIY Colorful Rubber Stamped Envelopes

4. Adorn the Envelope

Add a bit of decoration to your addressed envelope! Playful polka dots. Bold lines. Even an illustration or two! Rubber stamps (and pencil erasers in a pinch) work well for adding a colorful pattern to any envelope.

Dip Dyed Envelopes by Oh So Beautiful Paper

Dip dyed envelopes by Oh So Beautiful Paper with gold address calligraphy by Meant to Be Calligraphy

If you are working with white envelopes, dip dyeing is a quick and easy way to add a pop of color to your envelopes! You can use anything from food coloring and Kool-Aid to Rit Dye, so the colors are completely customizable!

Calligraphy by Letter Love Studio / Photo Credit: Sarah Carpenter Photography

Calligraphy by Letter Love Studio / Photo Credit: Sarah Carpenter Photography

5. Pretty Stamps

The final step! Pretty postage stamps are a surefire way to elevate any envelope into a work of art. Vintage postage stamps are readily available in large quantities and look amazing when grouped together – but you can also find some really beautiful stamps from USPS these days.

Now stick your beautiful card in the mail and make someone’s day instantly brighter! Isn’t sending (and receiving) mail the absolute best?!?

This post was created in partnership with eBay. All content and opinions are my own. Thank you for supporting the sponsors that make Oh So Beautiful Paper possible!

An End of Summer Picnic Party

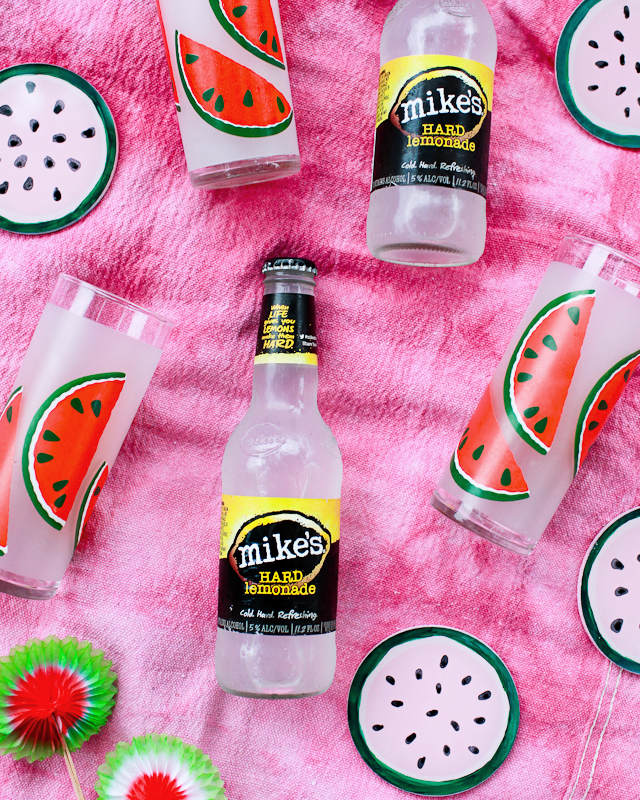
Anyone else not ready to let go of summer just yet?? The past few months in DC have been a ridiculously hot and humid, so I’ll admit that I’m looking forward to the arrival of cooler weather, but I’ll miss the slower pace and relaxed vibe of summer! I’ve been working with mike’s hard lemonade to celebrate backyard entertaining, and the long Labor Day weekend felt like the perfect excuse to throw an end of summer picnic. And since this was our last big summer hurrah, I thought I’d bring along some of my favorite vintage watermelon glasses and watermelon accessories!

End of Summer Watermelon and Flamingo Party with Mike's Hard Lemonade / Oh So Beautiful Paper

End of Summer Watermelon and Flamingo Party with Mike's Hard Lemonade / Oh So Beautiful Paper

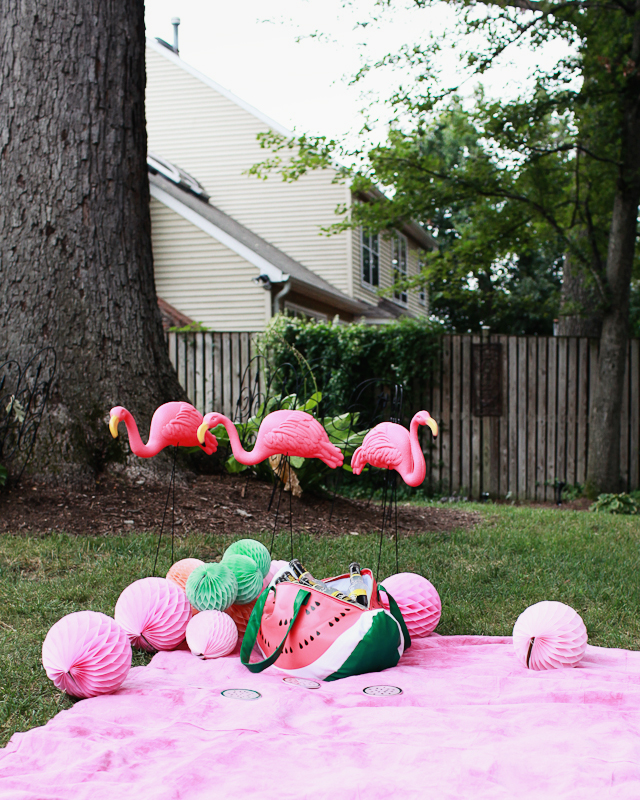
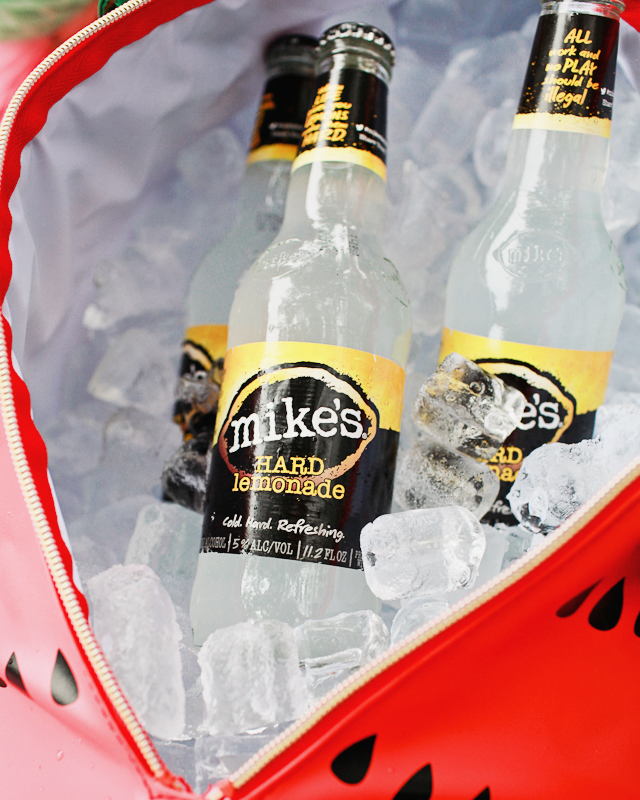
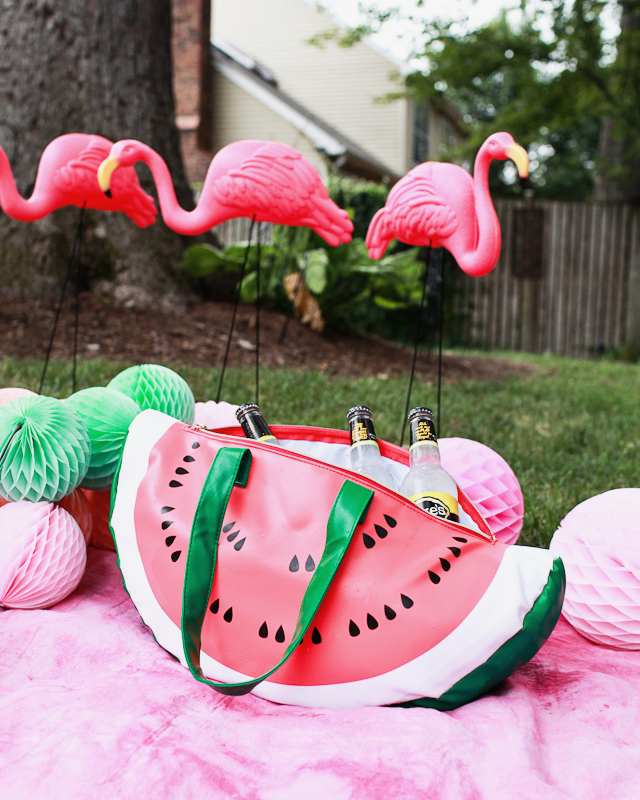
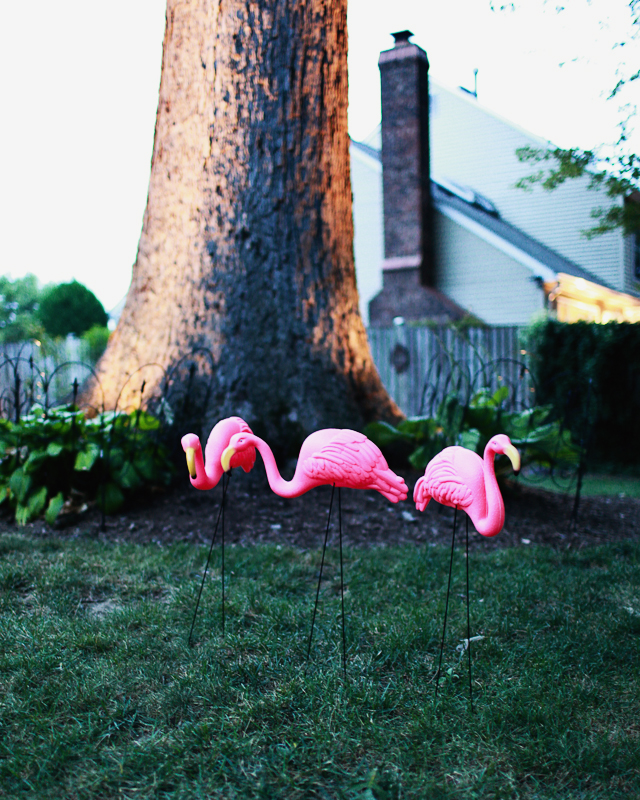
I love picnic parties because the set up is just so simple and easy! I made a bright pink picnic blanket from a tie dyed drop cloth using traditional Shibori dyeing techniques (more on that soon!) and added a few large honeycomb balls in shades of pink, peach, and mint green, some colorful napkins, and a couple lawn flamingos to create a fun and festive atmosphere. A watermelon cooler bag filled with ice kept drinks nice and cold through the afternoon and evening.

End of Summer Watermelon and Flamingo Party with Mike's Hard Lemonade / Oh So Beautiful Paper

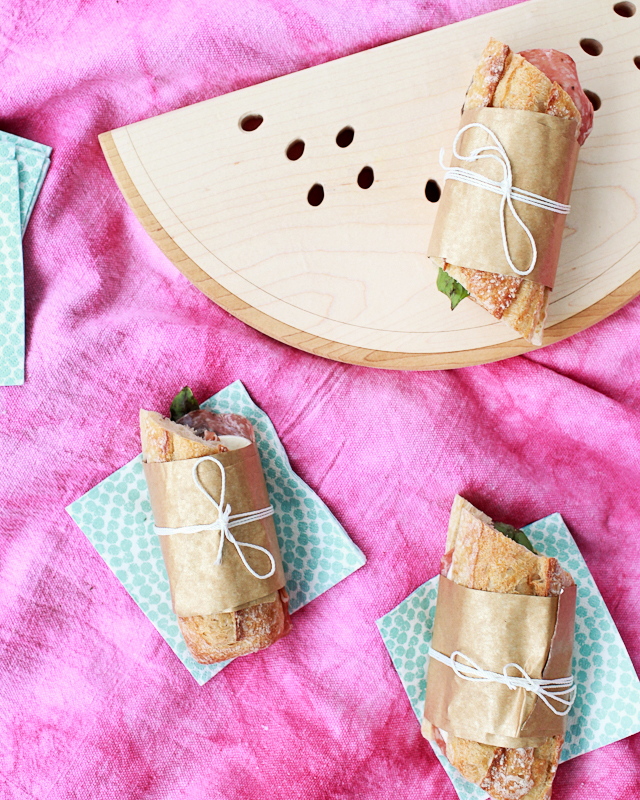
We wanted the food and drinks to match the laid back picnic vibe – no intricate cocktail recipes allowed! We also wanted to be able to prepare everything ahead of time and just pack it all into a couple baskets for everyone to enjoy at their own pace. We made these mini baguette sandwiches with salami, mozzarella, and basil for a picnic party last year and LOVED them – so we decided to make them again this year! No need to mess with a good thing. Just wrap the sandwiches in parchment or wax paper, tie everything up with a bit of twine, and you’ll be good to go!

End of Summer Watermelon and Flamingo Party with Mike's Hard Lemonade / Oh So Beautiful Paper

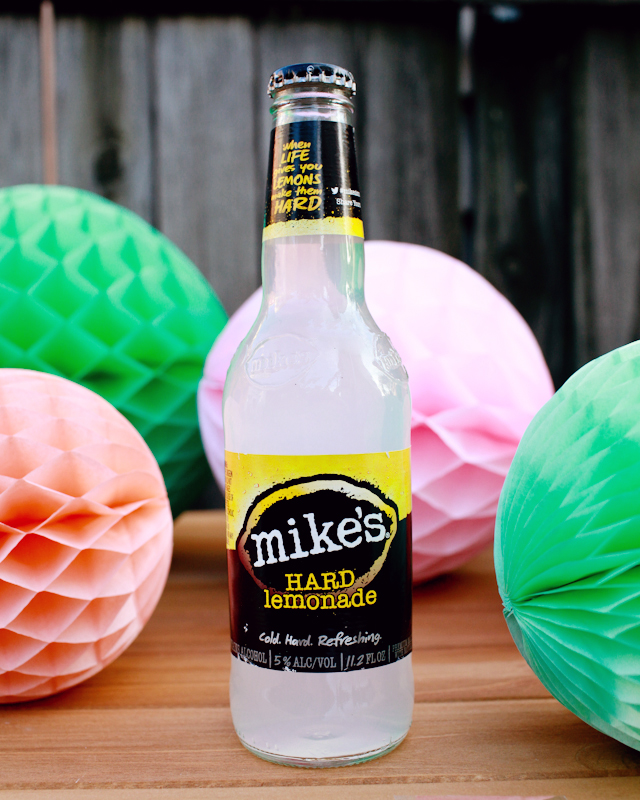
Normally we would have a few pre-made cocktails in large swing bottles to offer enough variety for a get together, but this time there was no need! There are plenty of mike’s hard lemonade flavor options to go around – from the new Flavors of America variety pack, which features four refreshing flavors inspired by the iconic flavors from different regions of the country, to the classic bottles of the original hard lemonade.

End of Summer Watermelon and Flamingo Party with Mike's Hard Lemonade / Oh So Beautiful Paper

End of Summer Watermelon and Flamingo Party with Mike's Hard Lemonade / Oh So Beautiful Paper

End of Summer Watermelon and Flamingo Party with Mike's Hard Lemonade / Oh So Beautiful Paper

I can’t believe how fast this summer flew by! As much as I’m looking forward to cooler weather, I know I’ll miss these summer nights with late sunsets, fireflies, and cool evening breezes. This past year with two young girls under age 3 has been a wee bit of a whirlwind, and I’m so grateful for late summer nights with good friends. But hopefully the end of summer doesn’t have to mean the end of backyard entertaining! Before I know it we’ll be gathering around the fire pit and drinking hot toddies!

End of Summer Watermelon and Flamingo Party with Mike's Hard Lemonade / Oh So Beautiful Paper

Sources: Vintage Watermelon Glasses | Watermelon Cooler Bag | Watermelon Cutting Board | DIY Watermelon Coasters

This post was created in partnership with Mike’s Hard Lemonade. All content and opinions are my own. Thank you for supporting the sponsors that make Oh So Beautiful Paper possible!

Photos by Nole Garey for Oh So Beautiful Paper

Getting Started in Calligraphy

By now you all probably know that we do a lot of calligraphy and hand lettering in our studio at Antiquaria. Whether it’s for wedding clients, our rubber stamps, greeting cards or just to send snail mail to friends, we’ve got a pen in hand every day. In the spirit of back to school, we thought it would be really fun to give you a little jump-start into calligraphy in case you want to take on a little studious action of your own! This post has a trove of info about the tools, resources and basics you’ll need to get started in practicing calligraphy. We hope you have fun and use your newfound skill useful in your daily life too! –Bailey and Emma of Antiquaria
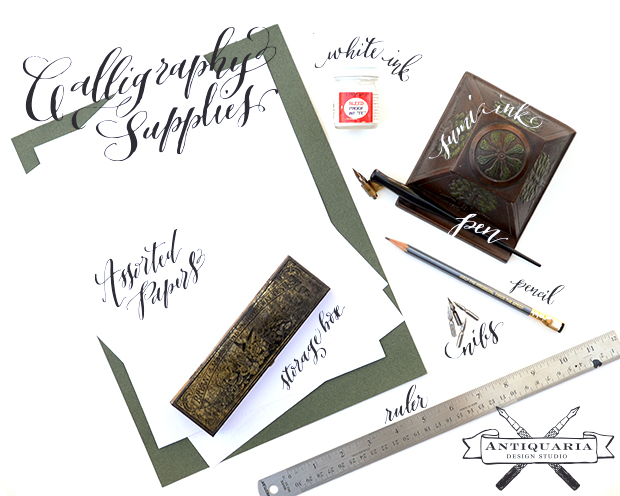
Getting Started in Calligraphy / Antiquaria for Oh So Beautiful Paper

If you’ve never done calligraphy before, you may find it all a little daunting. No lies…we did too. Simply speaking, calligraphy materials are not common anymore (because they are not at all necessary to daily life).  Most of the tools that are being made now are sub-par and you will never, EVER succeed with them, especially if you are a beginner.

Bailey learned this the hard way (even though she was told as much by her very first teacher). It was only a day after her first class when she sought out the nearest art shop and bought hundreds of dollars worth of “calligraphy” supplies. How much of that has she used over the years? Not a darn thing. What did she use? What her teacher gave her. Consider lesson learned. We’re here to set it all straight and hopefully get you started on the right path to calligraphy success!
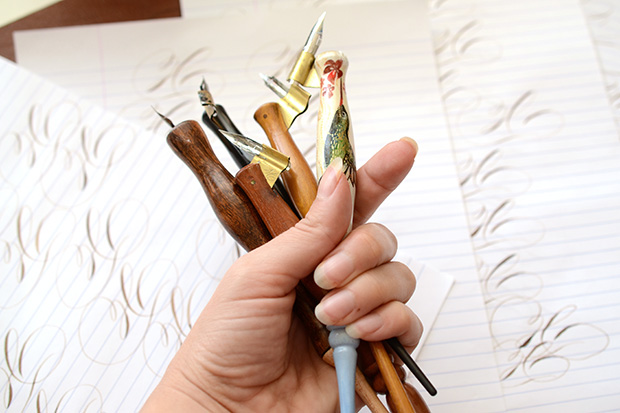
Getting Started in Calligraphy / Antiquaria for Oh So Beautiful PaperThe basic supplies that you need to get started in calligraphy are pretty simple and inexpensive.

You’ll need:

  • a pen (otherwise called a pen holder); this is what you insert your nib into and hold while writing, we also have a whole blog post dedicated to picking a pen, here.
  • nibs those little pointy metal things that flex to create gorgeous letters (we like the Nikko G, Zebra G, Brause EF66 and Leonardt Principle)
  • paper the key is that it’s well sized (so that ink doesn’t bleed), arches, rhodia and canson make great papers. DO NOT BUY THAT ART-STORE CALLIGRAPHY PAPER. It’s bad news bears. Just because it says “calligraphy” on it does not mean it’s good for it.
  • sumi ink many things work for black ink and many don’t, we like sumi ink best for practice (and reproduction)
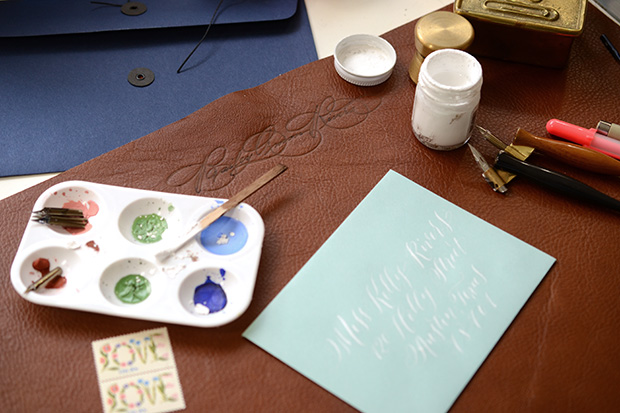
  • white ink it not necessary but it’s super fun to use, we like Dr. Martin’s Bleedproof white
  • ruler  for making straight lines to letter on
  • pencil great for practicing letter shapes, making lines, marking corrections, taking notes
  • storage box it’s not crucial but definitely helps keep your nibs together so they don’t get lost
  • writing surface writing with a dip pen is so different than normal writing – as anyone that’s practiced the art-form well knows. One thing that is very different is that you need to have a good writing surface so that the edges of the nib connect properly with the paper, giving you lovely letters.
    For beginners, we suggest writing on a stack of paper, so that you have a nice padded surface. Another option is using a craft foam pad, like this one. This is what we used for years…until discovering the awesome leather ones, made by Mr. M.G. Ward, shown below.

Resources

Books: Mastering Copperplate Calligraphy (still use this one ALL the time), by Eleanor Winters
Mastering Calligraphy: The Complete Guide to Hand Lettering (which features our very own, Bailey Rivera!!) by the lovely Gaye Godfrey-Nicholls
Our friend Molly Suber Thorpe of Plurabelle’s beauty, Modern Calligraphy

Online: The IAMPETH (or The International Association of Master Penman, Engrossers and Teachers of Handwriting) website is a trove of amazing resources from the best calligraphers in the world. This site could easily suck up days, even weeks of your life. They also have awesome teaching videos too! This one’s too good to miss.

The Flourish Forum has rapidly grown to be a massive community of calligraphers sharing resources, tips, and exemplars both new and old. It can be a little bit overwhelming since it has such an immense amount of material – but it’s a fabulous place to get involved. There are always snail mail exchanges to keep you practicing and connecting with other stationery and calligraphy enthusiasts. The mastermind behind the site, Erica McPhee, also publishes a calligraphy magazine that is wonderful, called Dasherie! It’s totally worth a read.

The Curious Calligrapher is a gorgeous site dedicated to ALL this calligraphy, servicing the calligraphy community. Here you’ll find more resources, forums and gorgeous eye candy!

Locally: You never know, you may just have a calligraphy mentor down the street! Google-ing “__your city__ calligraphy guild” is the best and fastest way to find local letter-lovers nearby. Plus, these non-profit organizations also offer workshops, get togethers and moral support (when you just can’t get your letters to look quite right).
Getting Started in Calligraphy / Antiquaria for Oh So Beautiful Paper

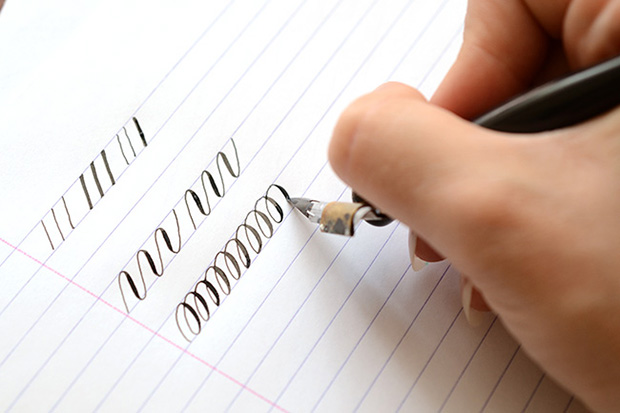
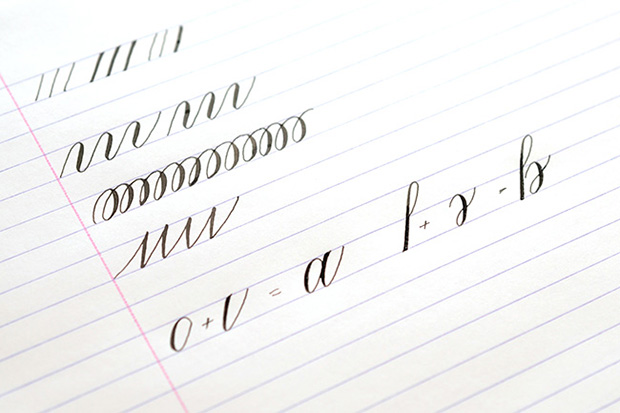
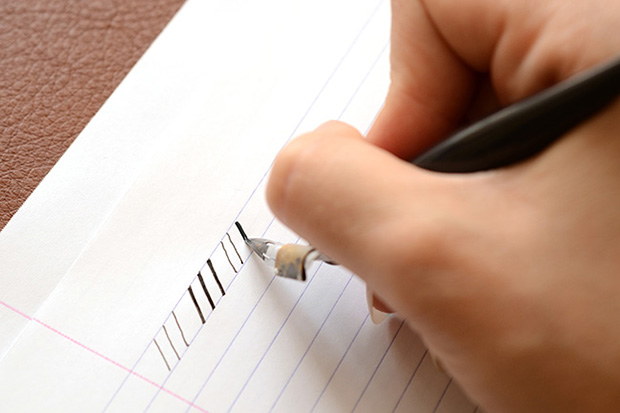
Warm Ups: Before diving into letterforms, it’s good to get familiar with your pen and ink. It will feel weird, really, really weird in your hand. That’s okay and totally normal.

1. Make thin lines (no pressure) and thick lines (full pressure) seeing just how thin and thick you can possibly flex your nib.

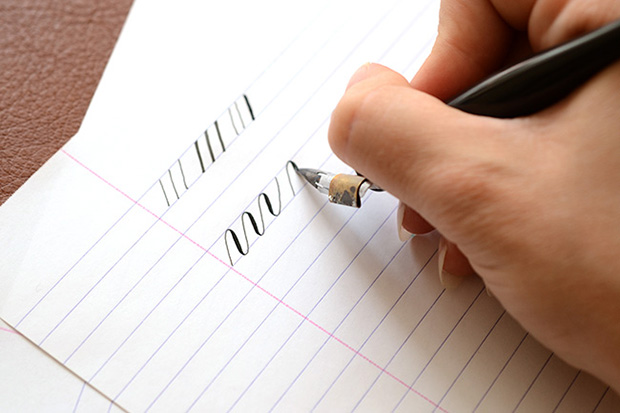
2. Next, make “waves” where on all of your upstrokes you have no pressure (a thin line) and on the down stroke you have a thick line (with pressure). The key to beautiful letters will be smoothly transitioning from thick to thin.

3. Lastly, we’ll make “loops” where again your upstrokes will be thin and the downstrokes will be thick. Pay attention to the transitions again and repeat these warm ups until the pen feels normal in your hand.
Getting Started in Calligraphy / Antiquaria for Oh So Beautiful Paper

Getting Started in Calligraphy / Antiquaria for Oh So Beautiful Paper

Getting Started in Calligraphy / Antiquaria for Oh So Beautiful Paper

Getting Started in Calligraphy / Antiquaria for Oh So Beautiful Paper

Getting Started in Calligraphy / Antiquaria for Oh So Beautiful Paper

Getting Started in Calligraphy / Antiquaria for Oh So Beautiful Paper

Getting Started in Calligraphy / Antiquaria for Oh So Beautiful Paper

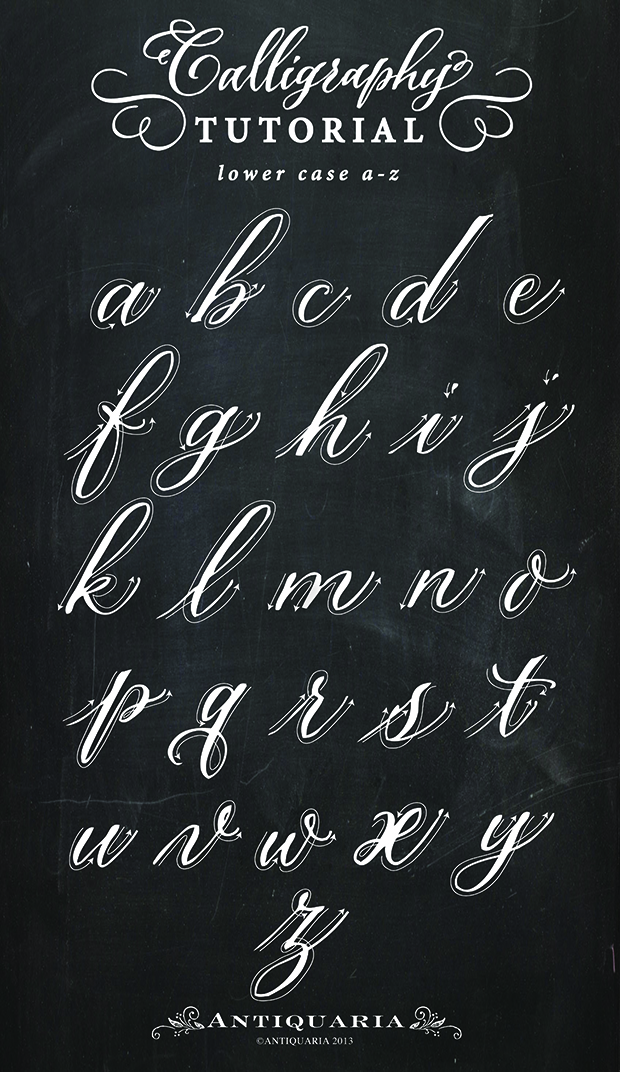
This little exemplar is the “nuts and bolts” foundation to all pointed pen calligraphy. If you’ve never seen one before…you may be scratching your head thinking, “How does this differ from the cursive I learned in grade school?” 

Well, the main difference is the in the flexible nib pen. This awesome tool is what allows you get those desirable, lovable and gorgeous thick and thin lines we started playing with in the warm-ups. Without writing a book here, getting the thick and thin lines in your letters is both simple and difficult. It’s simple because all it takes is PRESSURE. It’s difficult because you have to learn how the pen behaves and make the pressure smooth. Only then will you have swoon-worthy letters.

To use the this exemplar, follow the directional arrows (from left to right), and press down on the pen when the line is thick and lift off of the pressure when it’s thin. Below, we show you how to “construct” the letters. There’s a lot of stopping and starting when doing calligraphy, which is certainly different from writing normally. Need more help? You can watch Bailey letter a-z in real-time in this video! Happy lettering folks! We’ll leave you with our favorite Calligraphy Truths…

Calligraphy Truths

Calligraphy takes Practice. And not just a little…but a whole lot.

You’ll know within a few hours of classes (or practice) whether or not calligraphy is for you.

It takes LASER-LIKE focus – especially if you want to spell things right.

Writing something meaningful is much more inspiring than the alphabet. Get the basics down and move onto “real” words. (Like a song, poem, recipe, ode to your cat…whatever speaks to you)

You’ll never, NEVER stop learning. Calligraphy is a vast and fascinating subject. Once you start…it’s like getting sucked into the rabbit hole with no turning back.

Buy quality supplies. It make all of the difference.

Calligraphers are the most friendly and awesome bunch of folks on the planet (kinda biased here) – but they’re truly the best resource out there. Find a mentor and ask questions!
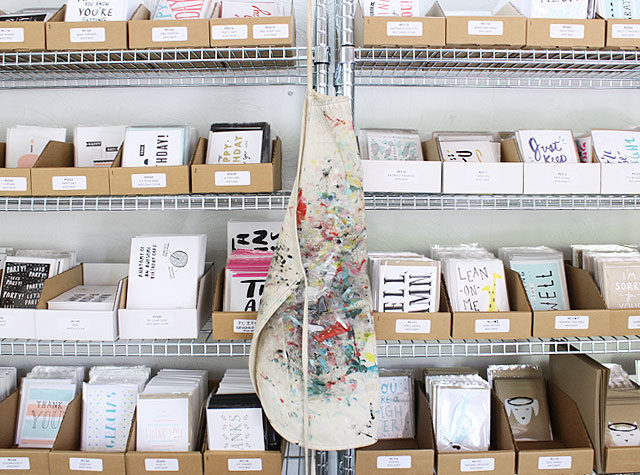
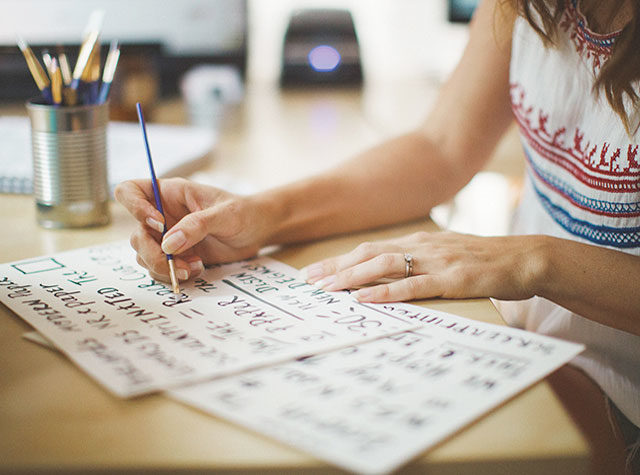
Behind the Stationery: The Paper Cub Co.

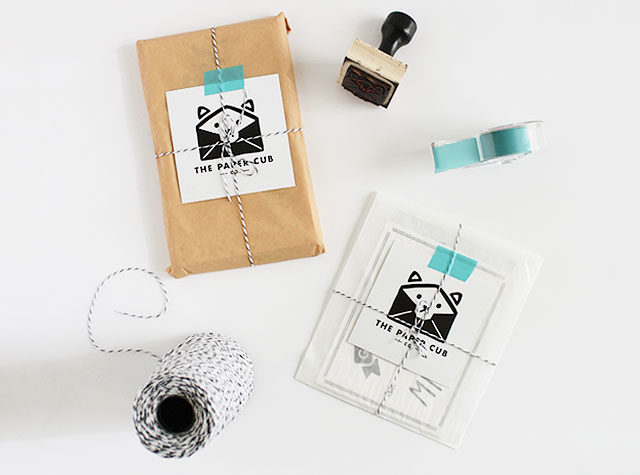
Known for playful hand lettering and vibrant colors, it’s hard to believe that The Paper Cub Co. is only a couple years old! Owner and designer Shannon Kennedy started out in apparel design before transitioning to work freelance and, ultimately, starting The Paper Cub Co. in 2013. Following her desire to be her own boss, Shannon has found ways to make her business scalable, primarily by outsourcing printing and focusing on designing – working smarter, not harder. Read the rest of her business story below! –Megan

Behind the Stationery: The Paper Cub Co. / Oh So Beautiful Paper

Prior to starting The Paper Cub Co., I had a collection of art prints and accessories for kids called sass&peril. Before that, I was an in-house Graphic Designer for a juniors apparel brand out in California. After working in the corporate design world for 4.5 years and experiencing the highs and lows associated with that, I began to feel the tides start to shift. I felt I wasn’t fully able to satisfy my creativity at the workplace, so I began pulling my own art prints at night and on the weekends. I realized I could actually create my own products to sell online and essentially become my own boss, which is what I had always wanted all along. Plus, paper was an exciting new medium for me after all those years in fashion!

Behind the Stationery: The Paper Cub Co. / Oh So Beautiful Paper

I went freelance for a number of years, which allowed me to pour more into my own creative endeavors but still have some steady work to rely on as I built things up. In the Spring of 2013, I showed a small collection of greeting cards along with my kid’s stuff at the National Stationery Show and the stationery side of the business really took off from there. A few months later I decided to consolidate the two brands into one and focus more on paper goods under The Paper Cub Co.

Behind the Stationery: The Paper Cub Co. / Oh So Beautiful Paper

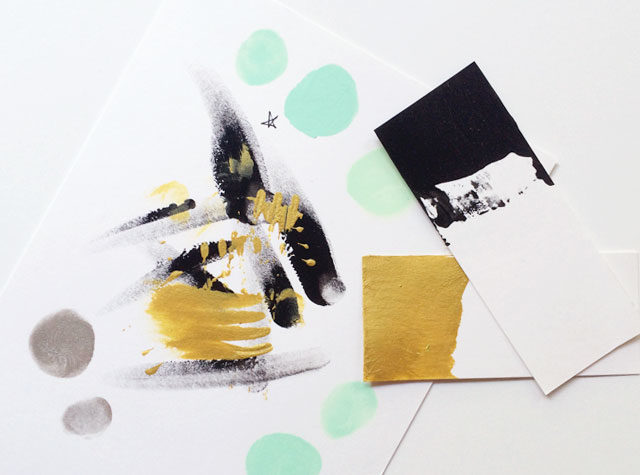
Each design originates in my sketchbook. If I am feeling the idea, I will work out the design elements using brush and ink and/or various pens on paper. Sometimes ideas are taken straight to the computer if it is a simple type-driven composition, but the majority of the designs in our collection have a hand-drawn element to them. My sketched elements get scanned into Photoshop where they are cleaned up and made into .tiff files to be used for mocking up designs in Illustrator. I finalize all designs using Illustrator as it is perfect for screen printing because it produces vector-based elements and nice solid shapes.

Behind the Stationery: The Paper Cub Co. / By the Robinsons / Oh So Beautiful PaperPhoto by By The Robinsons

Once designs are dialed in and colors are determined, I will pair them up with other designs of similar colors so that they can be “ganged up” on a sheet for printing. What this means is that I can print up to eight different designs as long as they share the same colors on a single sheet of paper. (No more printing one card at a time, how’s that for efficiency?)

Behind the Stationery: The Paper Cub Co. / Oh So Beautiful Paper

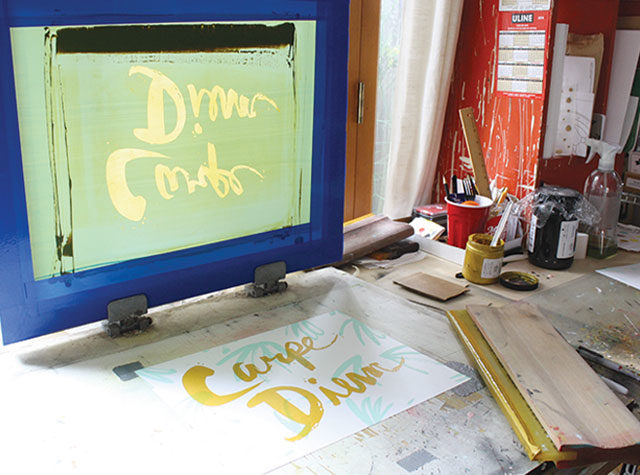
If I am doing the job myself, I have films printed for each color layer (called separations) and then I coat and burn screens using the films and photosensitive emulsion. This creates a “stencil” of the design in the screen for which ink is pulled through with a squeegee to create a print. It is quite a process, but so fun and rewarding!

Behind the Stationery: The Paper Cub Co. / Oh So Beautiful Paper

I used to screen print each one of our greeting cards, one at a time, by hand. It was a great way to utilize my skills while building the brand and creating initial inventory. I could kind of see how designs performed and create products on demand. When I entered the wholesale market and volume became an issue, I decided to get some help.

Behind the Stationery: The Paper Cub Co. / Oh So Beautiful Paper

Our friends over at Mama’s Sauce are amazing printers so it was a no-brainer to employ their screen printing services for our cards as they can fit many more designs per sheet. Since all they do is printing, they have access to bigger and better equipment and offer more professional-looking finishing services. Not to mention they are local and we can pop in for press checks or just to say hi! It’s a win-win. I still screen print our art prints and special projects, but the best decision I made was partnering with them for card printing as it leaves me with more time to design and market our brand.

Behind the Stationery: The Paper Cub Co. / By the Robinsons / Oh So Beautiful PaperPhoto by By The Robinsons

Switching to outsourcing has taught me how to work smarter and to really get the most bang for my buck out of every business decision I make. You know, pay attention to margins and all that fun stuff. I was spending so much of my own time and valuable billable design hours being the manufacturer when it was more efficient for me to be the designer.

I now have the ability to take on more freelance and commissioned work, which pays more per hour than me printing my own stuff, and it has allowed me to grow more creatively. I’m truly glad that I did it all in the beginning because investing in inventory can be a calculated risk, but partnering with the right people to help you grow your business is equally as important. Just because you can do something doesn’t mean you always should!

Behind the Stationery: The Paper Cub Co. / By the Robinsons / Oh So Beautiful Paper

Photo by By The Robinsons

All photos by The Paper Cub Co. except where noted.

Interested in participating in the Behind the Stationery column? Reach out to Megan at megan[at]ohsobeautifulpaper.com for more details.

Happy Weekend!

Happy Friday everyone! Today marks a big milestone – Sophie’s first day at preschool! Sophie has been in daycare since just after her first birthday, which after a rough transition period turned out to be an amazing experience for our entire family. She had some fantastic teachers and made her first real friends there, so we’re all feeling pretty emotional with this transition. But I keep telling myself that we’re not really saying goodbye since Alice will hopefully start at the same daycare soon. And we’re feeling good about Sophie’s preschool – we like her teachers and have already met some of the other kids in her class. My big girl is growing up so fast! Can we just ask the world to stop turning for a bit please? Well, in the meantime…

Autumn Clematis / Gossamer Vintage via Instagram

Photo by Gossamer Vintage via Instagram

…a few links for your weekend!

This week on Oh So Beautiful Paper: