Wedding Invitations from Antiquaria

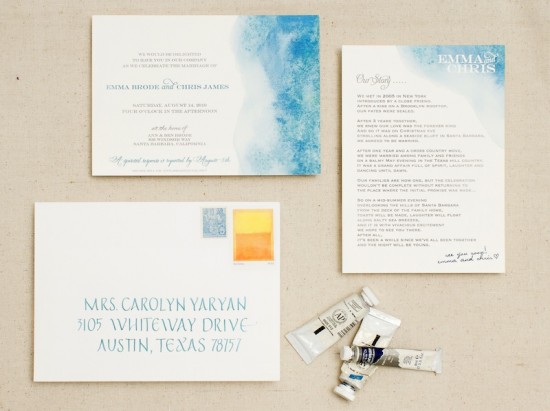
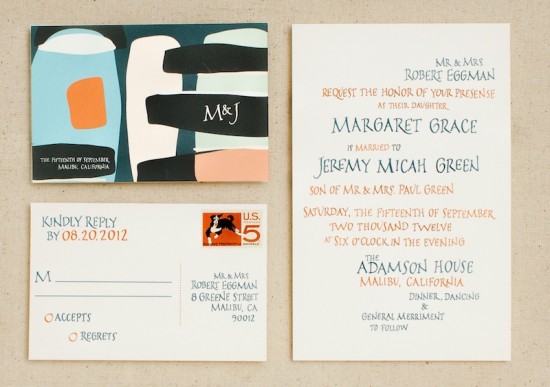
You already know Antiquaria from their awesome DIY rubber stamp tutorials right here on OSBP.  I’ve been a big fan of Antiquaria ever since co-founders Emma and Bailey first teamed up on Emma’s vintage-inspired southwestern wedding invitations in 2009.  Antiquaria just opened up their custom wedding invitation design studio – congrats ladies!  You can check out their full portfolio right here, and I’m including some of my favorite designs below.

Antiquaria is a mem­ber of the Designer Rolodex – you can see more of their beau­ti­ful work right here!

Photo Credits: Antiquaria

DIY Rubber Stamp Edge Painted Save the Date Tags

It’s the ladies of Anti­quaria, back with another fab­u­lous and cre­ative DIY project for you!  This week they’re here with instructions on how to create a rubber stamp save the date tag!

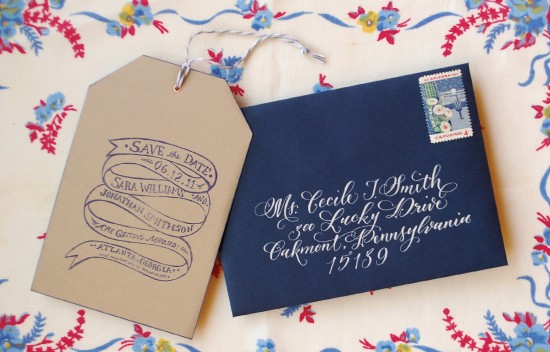
At Antiquaria, we love everything vintage!!  In this save the date DIY, we were inspired by the look of old luggage and parcel tags.  There is something very lovely and familiar about this tag shape but to have it professionally die cut can be quite costly.  We emphasized the shape with “edge painting” using a very nifty and easy trick!!

DIY Rubber Stamp Edge Painted Save the Dates

DIY Rubber Stamp Edge Painted Save the Dates
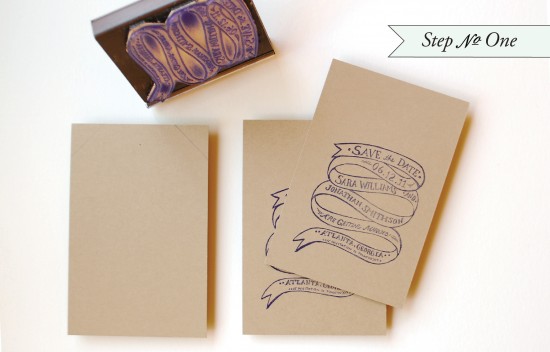
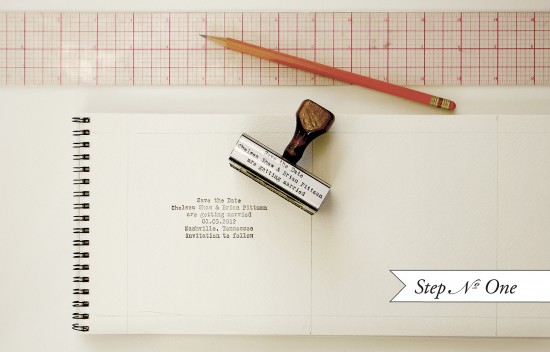
Step One: Cut your kraft paper into a 4.5″x6″ rectangle.  Ink your save the date stamp (we used our “Ribbons and Banners” stamp) with your desired ink and make a print on your paper.  Be sure to press evenly on a hard work surface.  Let the ink dry overnight.

DIY Rubber Stamp Edge Painted Save the Dates

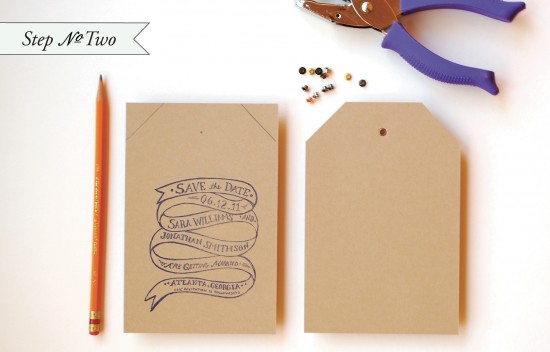
Step Two: Next, draw 1.5″ diagonal lines on the top corners of the save the date.  Also draw a small dot in the center, about 3/4″ from the top.  Once you have your markings in place, cut off the corners with a pair of scissors or an X-Acto knife & ruler.  Punch a 1/8″ hole where you have placed the dot.  Insert a small craft grommet and install using a grommet tool.

DIY Rubber Stamp Edge Painted Save the Dates

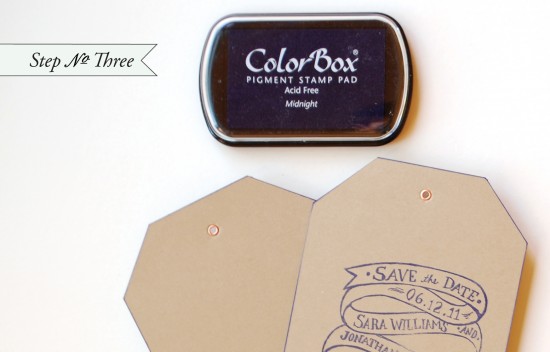
Step Three:  Using the same or a coordinating ink color, drag edges smoothly through the pad to create the “edge painted” effect.  Let dry overnight.

DIY Rubber Stamp Edge Painted Save the Dates

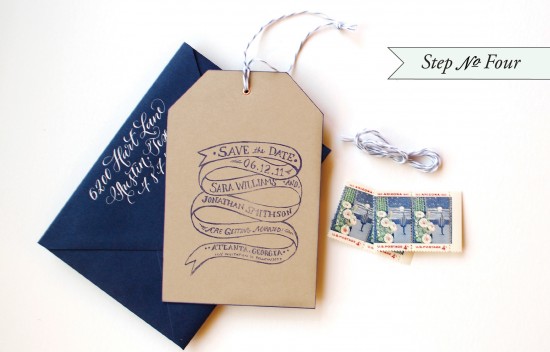
Step Four:  Assemble the save the date. Tie twine or ribbon through the brad and add fun postage and calligraphy to bring it all together!!

Materials:

“Ribbons & Banners” Save the Date Stamp

Kraft Card Stock, cut into 4.5″x6″ rectangles

Stamp Pad (we used navy)

Pencil

Scissors or X-acto & Self Healing Craft Mat

1/8″ Hole Punch

A6 Envelopes

Gray Striped Twine

Photo Credits: Antiquaria

DIY Rubber Stamp Calling Cards

The ladies of Anti­quaria took a quick break to relocate to California (congrats ladies!), but today they’re back with another fab­u­lous and cre­ative DIY project!  This week they’re here with three options for DIY rubber stamp calling cards!

After a studio relocation and move…we are back with more DIY stamp tutorials!!  This week, we are exploring the world of calling cards, a fun and unique way to make a lasting impression on someone you’ve just met.  By using a calling card rubber stamp, you can customize and really make them reflect you!  Also, because you can make them in small batches, you can change their design on a whim and reflect your current mood & style.

To create these three calling cards, we adapted techniques from our previous DIY posts (and one sneak peek).
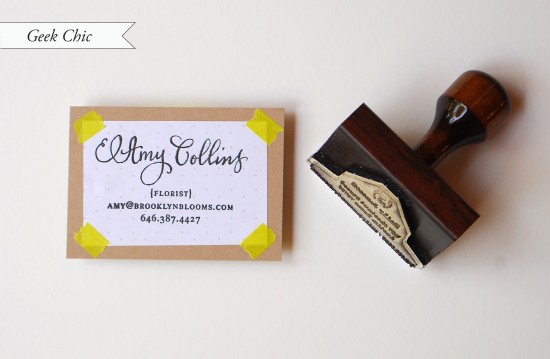
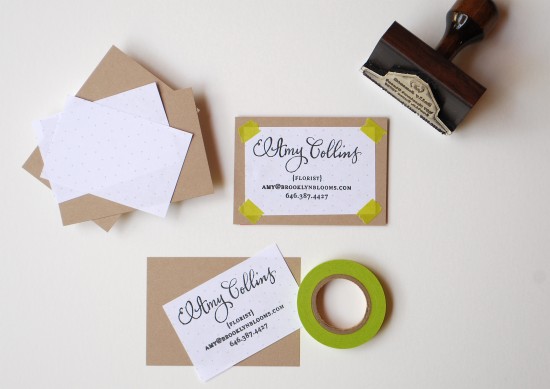
Our Geek Chic tutorial, is super easy and uses very inexpensive and resourceful materials!!

1. Find vintage, or download & print (we used Hex Dot for this calling card) graph paper. Cut into 2×3″ rectangles.

2. Cut kraft colored card stock into 3.5 x 2.5″ rectangles.

3. Ink stamp (we used our Calligraphy Accent Calling Card stamp) with desired color and make print using even pressure on a hard surface.

4. Using fun colored or patterned washi tape, affix the stamped graph paper to the kraft paper backing. (If more security is desired, use double stick tape to affix the two together and use the washi tape as decoration)
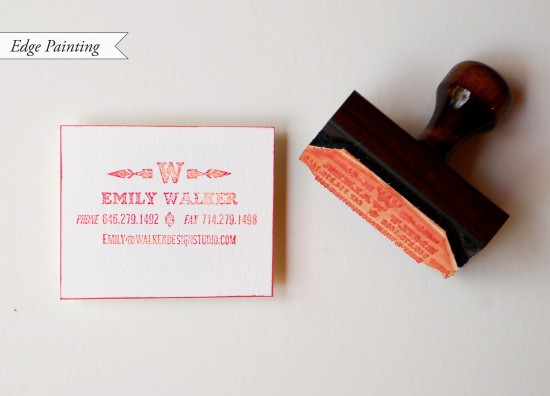
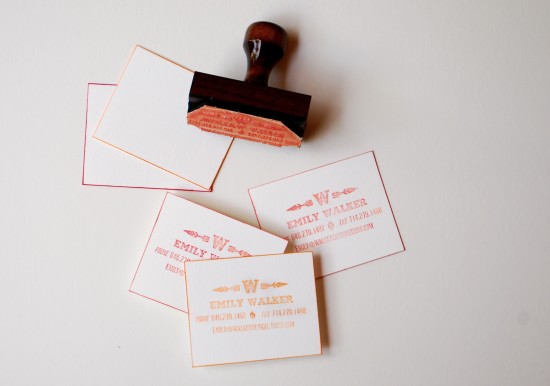
As a teaser for our next Save the Date tutorial, this calling card uses stamp pad edge painting to make the cards really pop.  This technique is so simple, you won’t believe it!

1. Using a heavy cotton paper, cut into 2.5×3″ rectangles.

2. To make the mixed ombre stamp image, use 2 different but similarly shaded colors (we used a mix of orange & red, one dark, one light).  Ink the stamp (we used our Navajo Calling Card stamp) lightly in the darker of the two, then ink over it in the lighter shade.  Stamp image with even pressure on a hard work surface.  Let the images dry overnight.

3. To paint the edges, grasp each card in the middle.  Drag the edges through your stamp pad, applying even pressure to ensure an even border…it’s that simple!!!
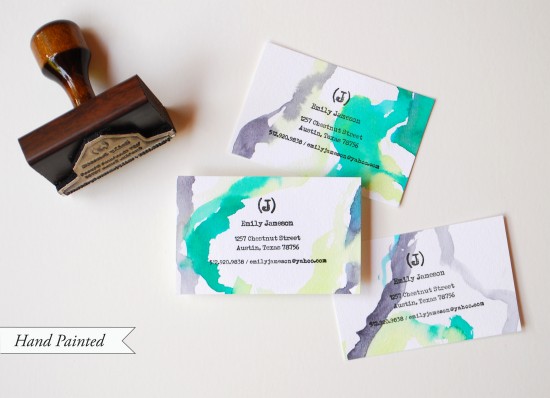
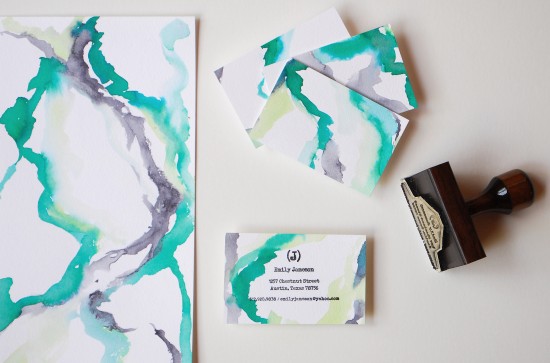
By far one of the most popular DIY posts we’ve done, this calling card uses the techniques from the Hand Watercolor Save the Dates & Thank You Card tutorial.  It astounds us how many different looks you can achieve with this technique!

1. Choose the colors you desire to paint with (a few similar shades and one contrasting always looks nice).

2. Paint random and uneven lines on sheets of watercolor paper. When dry, cut each sheet into 2 x 3.5″ rectangles. Admire how lovely and unique each one is!

3. Ink stamp (we used our Typewriter Calling Cardstamp) and print, pressing evenly on a hard work surface.

So, get stamping and be creative with the most important brand you represent….you!!

Photo Credits: Antiquaria for Oh So Beautiful Paper

DIY Hand Painted Watercolor + Rubber Stamp Save the Dates

Hi Everyone!  I’ll be starting my NYIGF recaps later this morning – but first, it’s the ladies of Anti­quaria, back with another fab­u­lous and cre­ative DIY project for you all!  This week they’re here with instruc­tions for a summer-inspired watercolor design for your invi­ta­tions or save the dates!

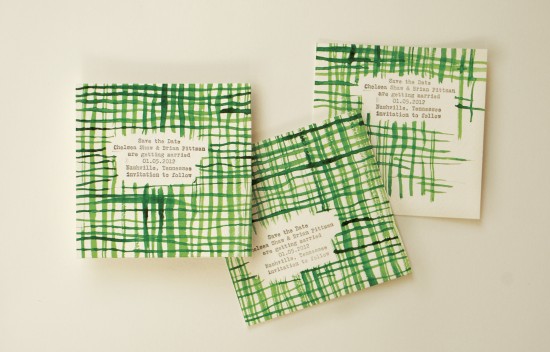
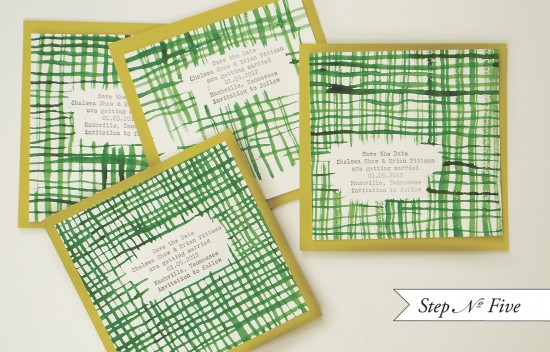
This week our DIY project is a twist off of our popular post “Hand Watercolored Save the Dates.”  Using watercolor we created an freehand crosshatch effect around the text.  By adding hand painted elements, each card becomes its own unique work of art.  You don’t have to have highly tuned artistic skills to achieve this look, in fact, the more uneven and irregular the lines turn out, the better it looks!  The combination of the watercolor lines and the vintage typewriter text of the stamp reminds us of cheery and picnic-filled days of summer.

DIY Watercolor Save-the-Date Step 1

Step One: Using a pencil and ruler, grid out 5×5 squares on a pad of watercolor paper.  Ink stamp and press evenly in each square, varying location makes for an even more interesting result.  For this save the date, we used our “Old Typewriter” stamp.

DIY Watercolor Save-the-Date Step 2

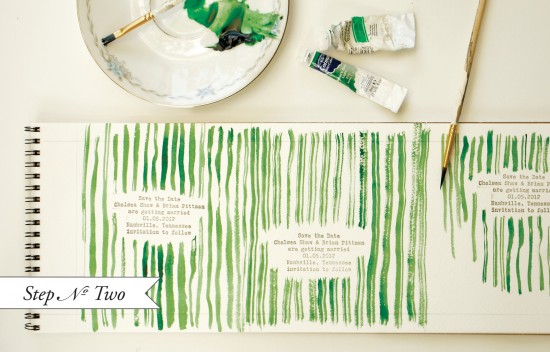
Step Two: With your choice of color, paint vertical lines in uneven and organic stripes, covering each 5×5″ stamped square invitation.  Again, try not to make each too uniform.  Let it dry (watercolors don’t take long).

DIY Watercolor Save-the-Date Step 3

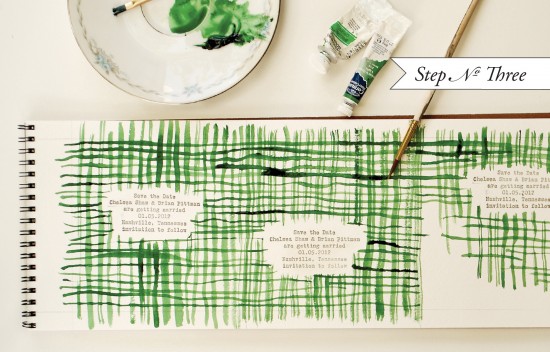
Step Three: With the same watercolor, go back over each 5×5″ square and the paint horizontal lines.

DIY Watercolor Save-the-Date Step 4

DIY Watercolor Save-the-Date Step 4

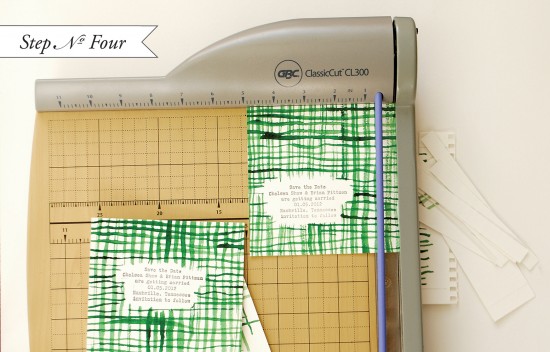
Step Four: Using your pencil lines as a guide, use a paper cutter or X-acto and self healing mat to trim each save the date into a 5×5″ square.

DIY Watercolor Save-the-Date Step 5

DIY Watercolor Save-the-Date Step 5

Step Five: Using double stick tape, mount each 5×5″ square on a 5.5×5.5″ square backer in a coordinating or complementing color.  You’re done!  These are quick and simple, yet make a huge statement!

Materials:

Custom Save the Date Stamp – “Old Typewriter” Save the Date

Watercolor Pad

Pencil & Ruler

Watercolor paint, color(s) of your choice.

Watercolor Brush – Spending a little more on a brush will pay off if you are producing a large quantity of save the dates.  Make sure that the brush you choose won’t lose its bristles.

Paper cutter or x-acto, self healing mat & ruler – Find at your local office supply or hobby store.
5.5×5.5″ square backers – We used moss green

Square Envelope

Photo Cred­its: Antiquaria

DIY Perforated Modern Save the Date

It’s the ladies of Anti­quaria, back with another fab­u­lous and cre­ative DIY project for you all!  This week they’re here with instructions on creating a perforated enclosure for your invitations or save the dates!

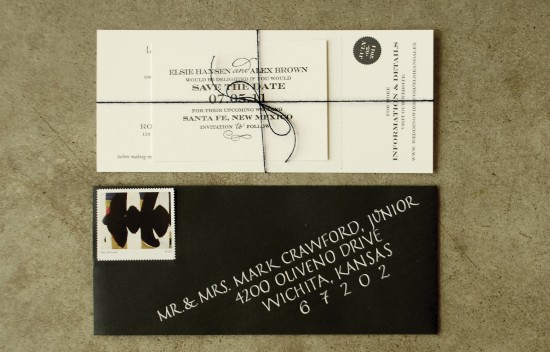
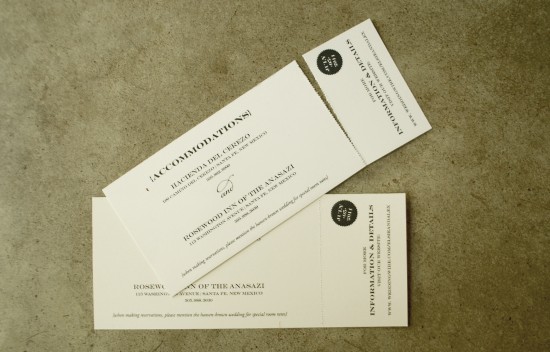
For this Save the Date DIY, we were inspired to create a suite that appealed to a more modern aesthetic.  The clean lines of  the black & white design create a classic look while the handmade touches add texture and personality to these otherwise simplistic pieces.  The most exciting part??  It’s so easy to do perforation yourself!!

DIY Perforated Black and White Wedding Save the Date

DIY Perforated Black and White Wedding Save the Date

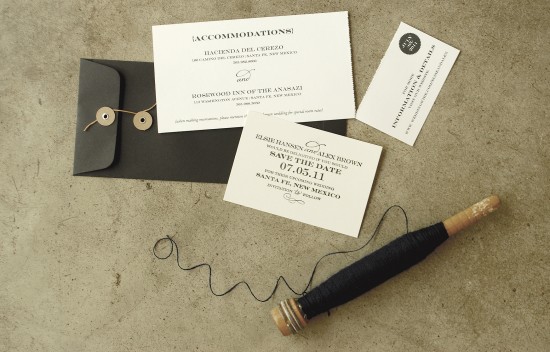
For this suite, we combined a printed accommodations/website card with our “Sophisticate” save the date stamp to provide layers of texture.  We recommend sending out the accommodations and website information with your save the date so that guests have plenty of time to make arrangements.  The perforated website card is small and useful.  Guests can take this small piece to the computer or travel agent to book their trip.

DIY Perforated Black and White Wedding Save the Date

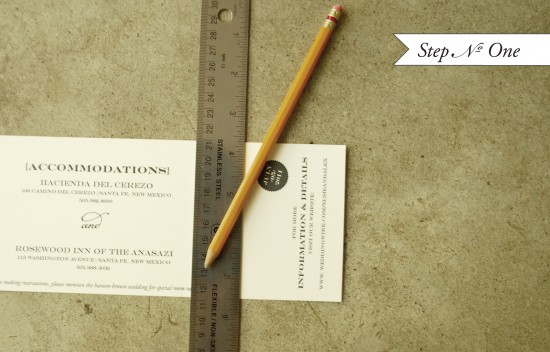
Step One: Using a pencil & ruler, faintly mark where you want the perforated line to be.

DIY Perforated Black and White Wedding Save the Date

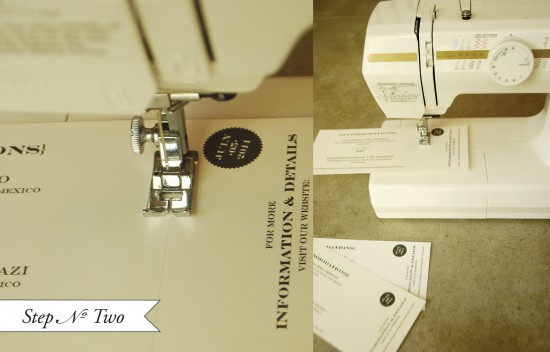
Step Two: Remove the thread from your sewing machine (top spool & bobbin).  Set your stitch length to be relatively small (we set it on 2 on a scale of 1-4).  Sew along the pencil line.  Since there is no thread in the machine, all that will be left are tiny needle holes that create the perforation.

DIY Perforated Black and White Wedding Save the Date

DIY Perforated Black and White Wedding Save the Date

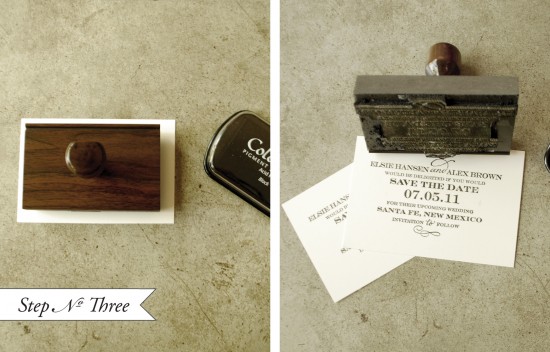
Step Three: On a hard, flat surface, lay out your paper that you want to stamp.  Ink your stamp (we used the “Sophisticate” save the date) in desired color, lay down gently on paper and give the stamp even pressure. Remove the stamp to reveal your inked image.

DIY Perforated Black and White Wedding Save the Date

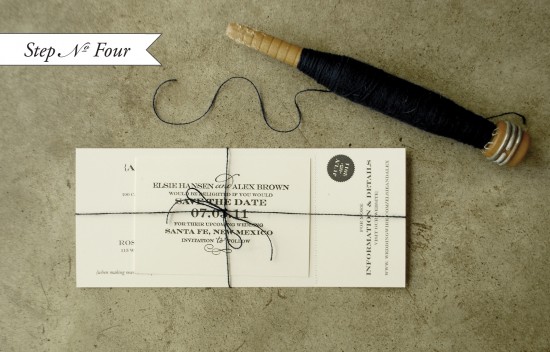
Step Four: Tie the pieces together with a string.  Now all that’s left is address and mail them!!

** Please make sure to “hand cancel” the postage if you use the string and button envelopes.  This will help to make sure the Save the Date arrives in pristine condition.


Materials:

Custom Rubber Stamp – we used our “Sophisticate” Save the Date stamp

Accommodations/website card – Use a word processing program or design software to create an #10 card.  We have also just recently added an accommodations rubber stamp to our webstore, see the whole collection here.

Paper – We used the Paper Source Luxe, white cover stock (8.5″x11″) for this tutorial. Have the paper cut to size to fit the #10 envelope (3.75″x9″) for the accommodations/website card. Have the paper cut to (3″x4″) for the Save the Date card.
Envelope – We love the string and button tie of this #10 envelope

Ink – We used black for this suite.

Black embroidery thread – you can find this at your local craft or fabric store.

Photo Credits: Antiquaria