Hi Everyone!  I’ll be starting my NYIGF recaps later this morning – but first, it’s the ladies of AntiÂquaria, back with another fabÂuÂlous and creÂative DIY project for you all!  This week they’re here with instrucÂtions for a summer-inspired watercolor design for your inviÂtaÂtions or save the dates!
This week our DIY project is a twist off of our popular post “Hand Watercolored Save the Dates.” Â Using watercolor we created an freehand crosshatch effect around the text. Â By adding hand painted elements, each card becomes its own unique work of art. Â You don’t have to have highly tuned artistic skills to achieve this look, in fact, the more uneven and irregular the lines turn out, the better it looks! Â The combination of the watercolor lines and the vintage typewriter text of the stamp reminds us of cheery and picnic-filled days of summer.

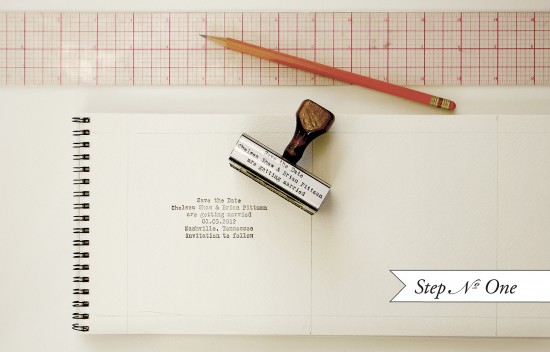
Step One: Using a pencil and ruler, grid out 5×5 squares on a pad of watercolor paper. Â Ink stamp and press evenly in each square, varying location makes for an even more interesting result. Â For this save the date, we used our “Old Typewriter” stamp.
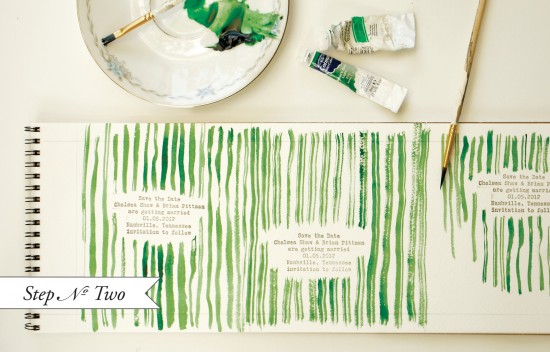
Step Two: With your choice of color, paint vertical lines in uneven and organic stripes, covering each 5×5″ stamped square invitation. Â Again, try not to make each too uniform. Â Let it dry (watercolors don’t take long).
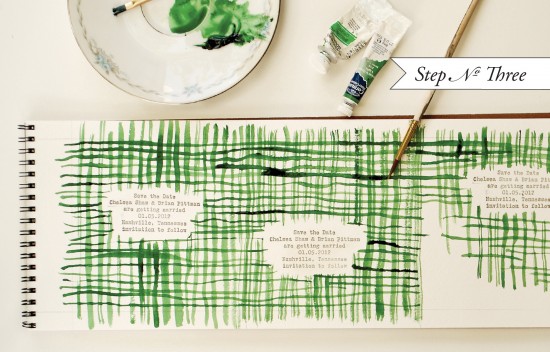
Step Three: With the same watercolor, go back over each 5×5″ square and the paint horizontal lines.
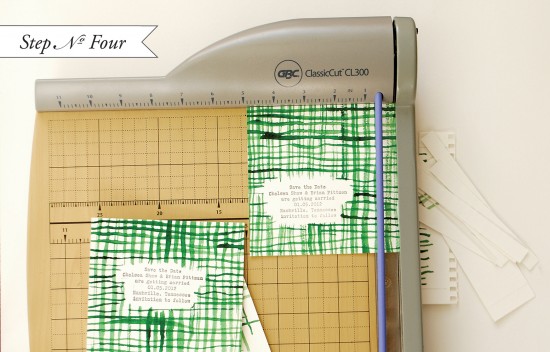

Step Four: Using your pencil lines as a guide, use a paper cutter or X-acto and self healing mat to trim each save the date into a 5×5″ square.
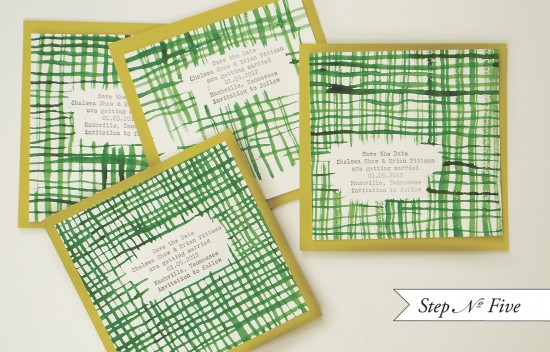

Step Five: Using double stick tape, mount each 5×5″ square on a 5.5×5.5″ square backer in a coordinating or complementing color. Â You’re done! Â These are quick and simple, yet make a huge statement!
Materials:
Custom Save the Date Stamp – “Old Typewriter” Save the Date
Pencil & Ruler
Watercolor paint, color(s) of your choice.
Watercolor Brush – Spending a little more on a brush will pay off if you are producing a large quantity of save the dates.  Make sure that the brush you choose won’t lose its bristles.
Paper cutter or x-acto, self healing mat & ruler – Find at your local office supply or hobby store.
5.5×5.5″ square backers – We used moss green
Photo CredÂits: Antiquaria
I love the colors and the way the watercolor looks. I want to try this for other cards. Like thank you notes! Thank you for the great idea!