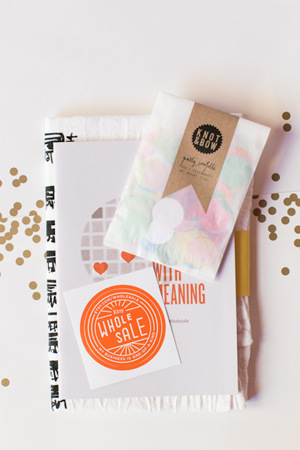
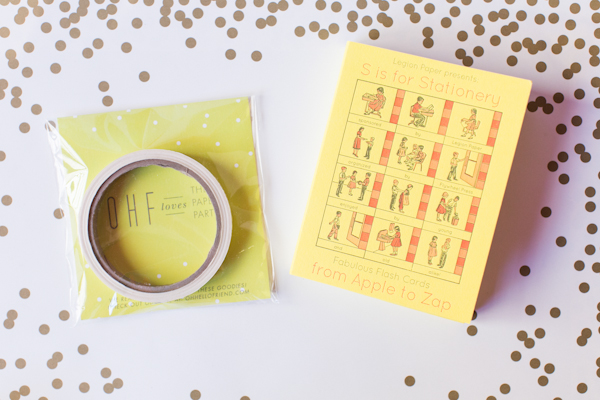
Happy Weekend!

Happy Friday everyone! This summer is flying by crazy fast – this week in particular felt like it went by in two seconds. I’m hoping time will slow down just a teensy wee bit in August? I need a bit more time before September (and baby #2) roll around – aaah! But in the meantime

Bird-and-Bloke-Globe-Photo

Globe photo print by Bird and Bloke

…a few links for your weekend:

This week on Oh So Beautiful Paper:

Check back soon for this week’s cocktail! I hope you all have a wonderful weekend, and I’ll see you back here next week! xoxo

DIY Wedding Reception Table Numbers

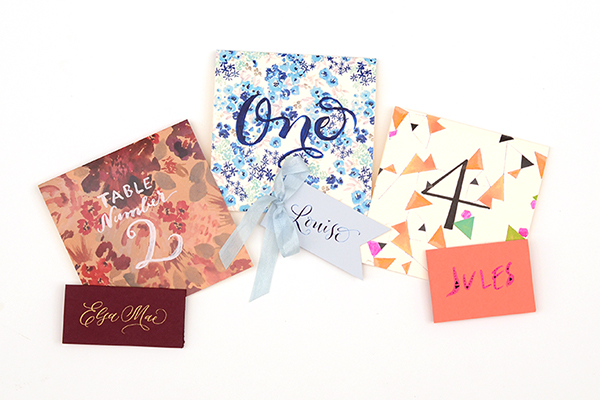
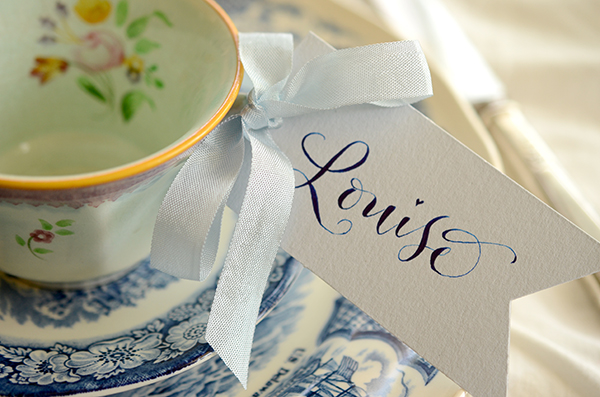
Summer brings wedding galore, and for us…that means party decor! We’ve been helping clients create gorgeous day of stationery and in the process have come up with some fun and festive table numbers that you can do yourself! We know that by the time couples usually think about reception stationery, they’re usually over their budget and are short on time. Luckily, these table numbers are not costly or time consuming. You could easily knock them out in an afternoon. There are endless options once you have the basics of creating them…so the only limit to the project is your imagination! We’ll show you three different styles to kick start your creativity. To complete your tablescape, we’ll also show you place cards to complement to each design. – Bailey and Emma of Antiquaria

DIY Tutorial: Wedding Reception Table Numbers by Antiquaria for Oh So Beautiful Paper

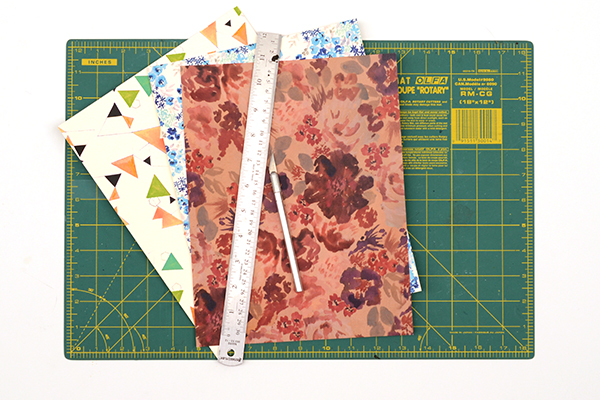
Up until adding the actual numbers to the cards, the process is exactly the same. We will be making 5.5″ square tented cards (showing the pattern on both sides) and the size works perfectly with a standard 8.5″ x 11″ piece of card stock.

DIY Tutorial: Wedding Reception Table Numbers by Antiquaria for Oh So Beautiful Paper

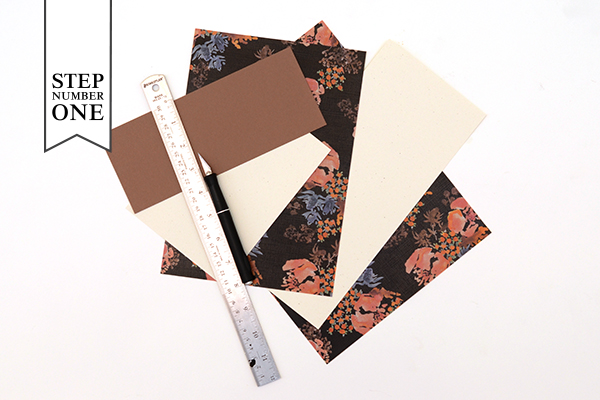
Step One: Select your paper and cut the cards to size. Cut a rectangle measuring 5.5″ x 11″. If you’re using a standard sheet of paper like we did, that is only one cut (since the length is already 11″).

DIY Tutorial: Wedding Reception Table Numbers by Antiquaria for Oh So Beautiful Paper

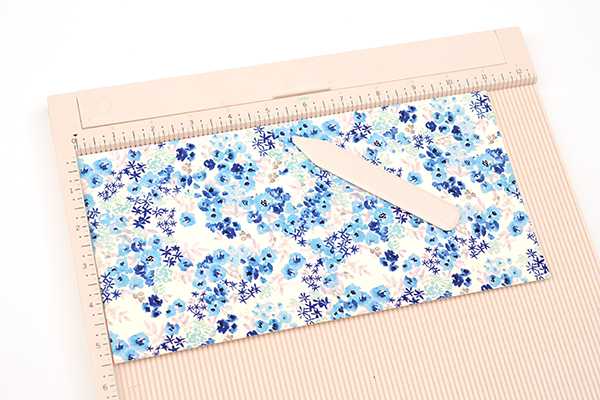
Step Two: To make the tented card and have a clean fold, you’ll want to score the paper at the 5.5″ mark on a score board. Repeat steps one and two until you have enough cards to accommodate all of your tables (usually between 8-25 for a standard wedding).

Option One: Painted Script Floral

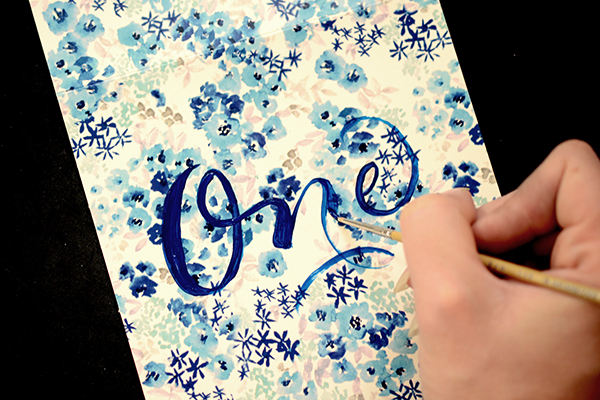
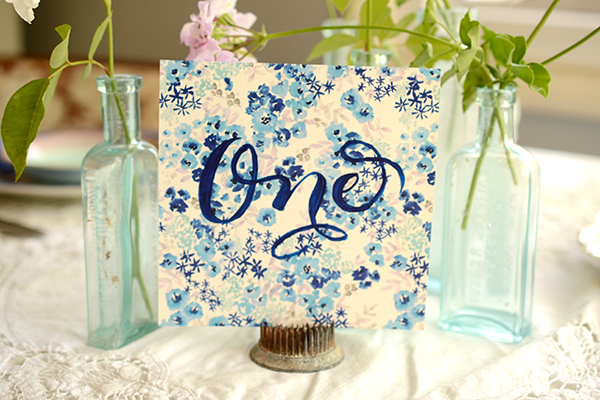
For the first version that we put together, we used our “Paloma” Blue Floral Card Stock and painted the table numbers (spelled out) in navy blue acrylic paint. The effect is playful and traditional at the same time.

DIY Tutorial: Wedding Reception Table Numbers by Antiquaria for Oh So Beautiful Paper

With a small pointed paint brush, write out the table number in cursive across the middle of the card. Go back over the letters, adding weight to the lines (as shown above). If you need help finding out where the weights should go or what shape to paint the letters, refer to a favorite script font or perhaps your invitation suite! That way, everything will coordinate.

DIY Tutorial: Wedding Reception Table Numbers by Antiquaria for Oh So Beautiful Paper

DIY Tutorial: Wedding Reception Table Numbers by Antiquaria for Oh So Beautiful Paper

Option Two: Modern Neon Geometric

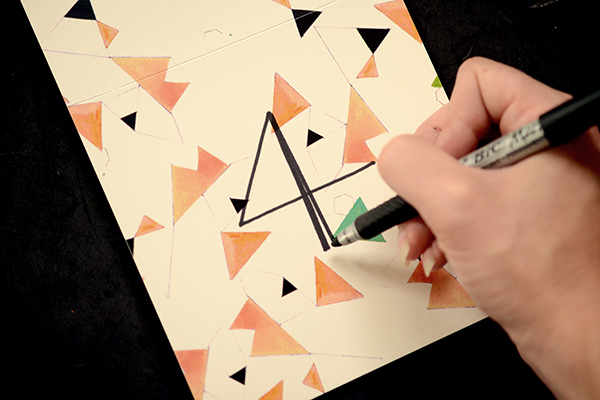
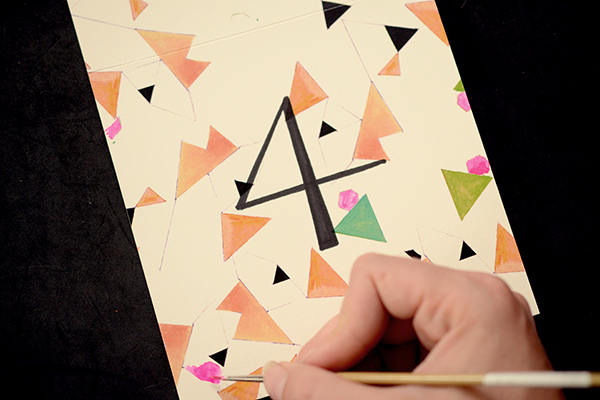
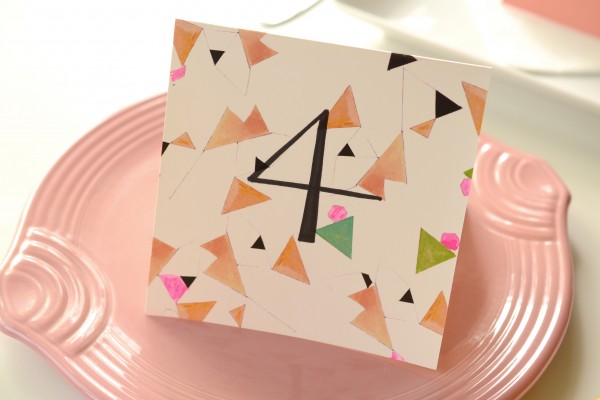
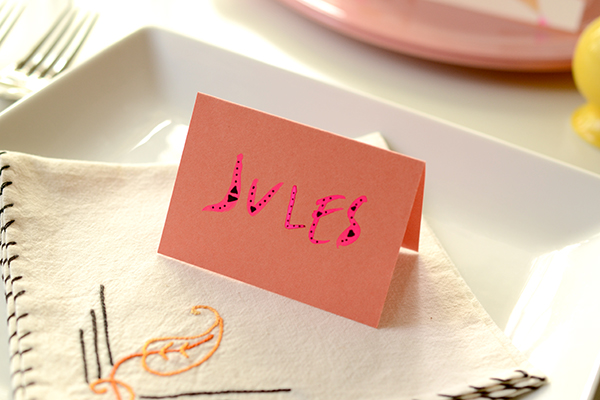
In this interpretation, we’ve put a modern spin on the technique. We used our “Geo” patterned card stock and wrote the number in a simplistic style to create the look. Pops of neon pink painted on help add some punch to the cards.

DIY Tutorial: Wedding Reception Table Numbers by Antiquaria for Oh So Beautiful Paper

First you’ll write the table number in the center using a permanent black marker. Fill in and bulk up the number as needed (shown above).

DIY Tutorial: Wedding Reception Table Numbers by Antiquaria for Oh So Beautiful Paper

Next you’ll add the final touch of neon using hot pink gouache. We painted into different shapes already printed on the paper making sure they all balanced with one another.

DIY Tutorial: Wedding Reception Table Numbers by Antiquaria for Oh So Beautiful Paper

DIY Tutorial: Wedding Reception Table Numbers by Antiquaria for Oh So Beautiful Paper

Option Three: Autumn Garden Floral

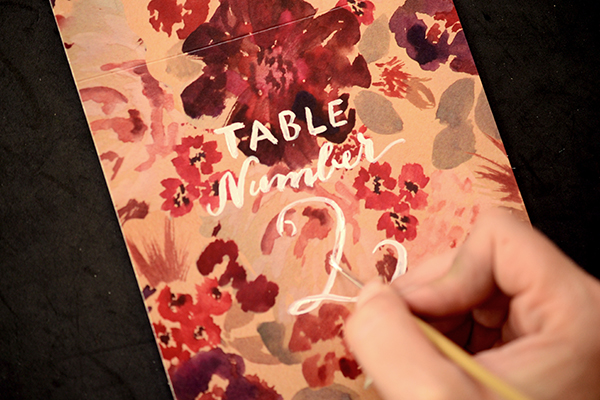
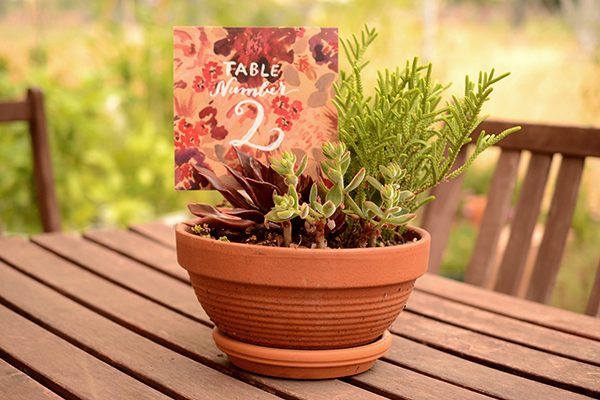
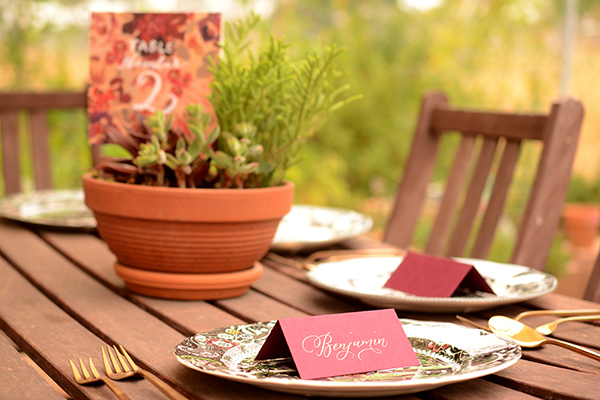
For our final interpretation, we used our “Diana” floral card stock to create the perfect garden inspired table decor. The gorgeous rich shades of the pattern mean that this style would just as easily work for fall and winter weddings.

DIY Tutorial: Wedding Reception Table Numbers by Antiquaria for Oh So Beautiful Paper

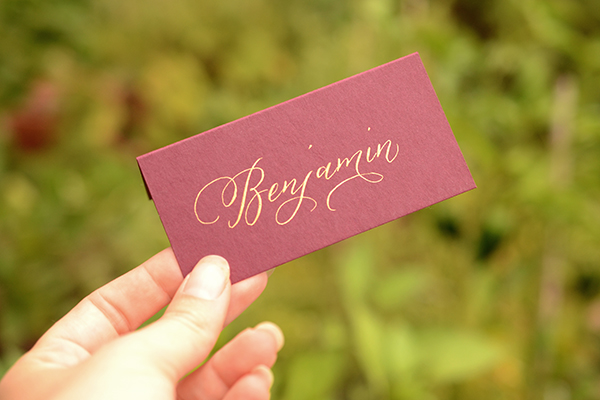
With a small pointed paint brush, paint the word “TABLE” about 1 inch from the fold with white acrylic paint. Below that, in cursive, paint the word “Number,” trying to center it as much as possible. Finally, you’ll add the numeral centered below. Go back over the number, adding weight to the lines (as shown above). It would be extremely helpful to have these cards planned out on a separate sheet of paper before painting on the lettering. That way, you can know exactly how to center the text, and how large you should make it.

DIY Tutorial: Wedding Reception Table Numbers by Antiquaria for Oh So Beautiful Paper

TableNumberDIY-Diana-Placecard-2

TableNumberDIY-Diana-Final-2

Materials

Patterned Paper

Self Healing Mat

Craft Knife

Metal Ruler

Scoreboard

Acrylic paints

Permanent Marker

Anti­quaria is a mem­ber of the Designer Rolodex – you can see more of their beau­ti­ful work right here!

Photo Credits: Antiquaria for Oh So Beautiful Paper

DIY Autumn Floral Wedding Invitations

Summer may just have arrived, but in the world of wedding invitations, we’re already looking forward toward the autumn and winter seasons. We love this fresh take on an autumn color palette – mixing a dark watercolor pattern with lovely shades of peach, coral, and blush – for a beautiful suite of autumn floral wedding invitations and save the dates. It has romance written all over it! – Bailey and Emma of Antiquaria
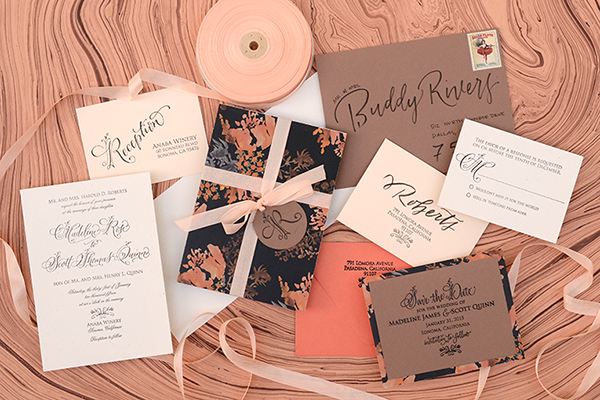
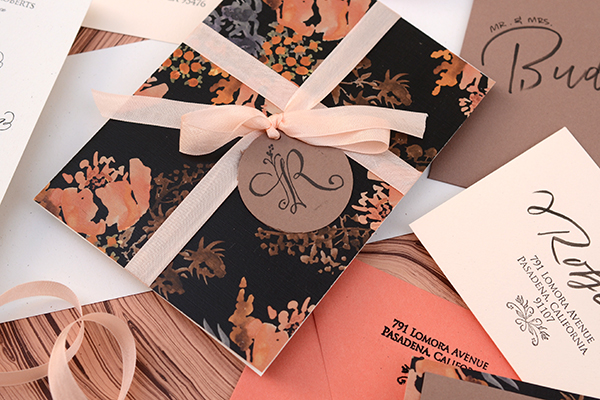
DIY Tutorial: Autumn Floral Wedding Invitations by Antiquaria for Oh So Beautiful Paper

Autumn Floral-DIY-Final2

DIY Tutorial: Autumn Floral Wedding Invitations by Antiquaria for Oh So Beautiful Paper

Step One: For this design, we’re making a save the date and wedding invitation suite together. None of the paper came cut to size, so we had to cut the paper and cards ourselves. You can manually cut them with a self healing mat, kraft knife, and metal ruler or you can take everything to be cut at a local printer (the best idea for precision).

You’ll need these final paper sizes:

Save the Date – Java, 3.75″ x 5″

Save the Date Backer – “Zoe” Floral Patterned Cover, 4.25″ x 5.5″

Invitation – Milkweed, 5″ x 7″

Invitation Folder – “Zoe” Floral Patterned Text Weight, 10″ x 7″

Reply Card – Milkweed, 3.5″  x 4.875″

Reception Card – Old Lace, 3.5″ x 4.875″
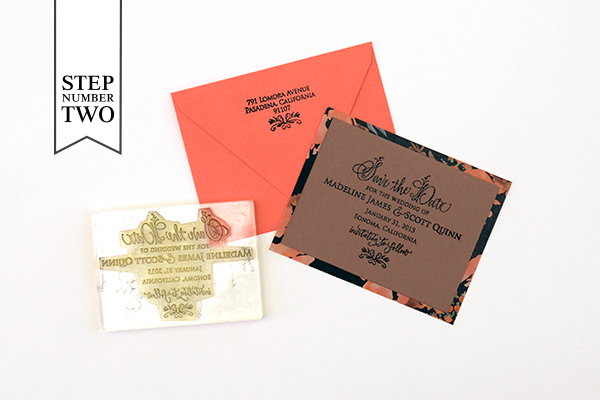
DIY Tutorial: Autumn Floral Wedding Invitations by Antiquaria for Oh So Beautiful Paper

Step Two: Create your save the date. We embossed our Floral Calligraphy Save the Date design onto a Java card with black embossing powder for a great opaque look (see steps below). We also embossed our return address stamp on the back flap of our envelope. You will mount the Java card onto the patterned backer, using double sided tape or stick glue, making certain that the margins are equal on all sides.
DIY Tutorial: Autumn Floral Wedding Invitations by Antiquaria for Oh So Beautiful Paper

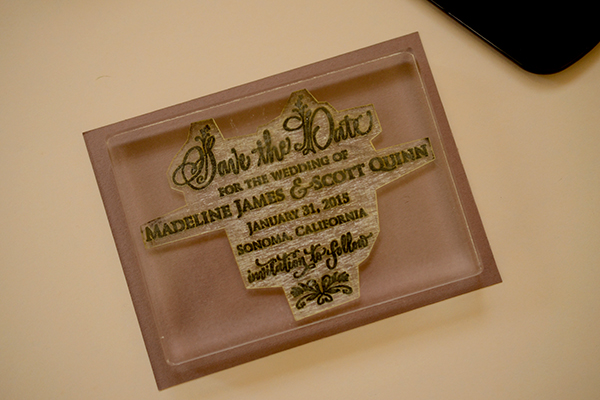
Stamp the save the date onto your card using black ink.
DIY Tutorial: Autumn Floral Wedding Invitations by Antiquaria for Oh So Beautiful Paper

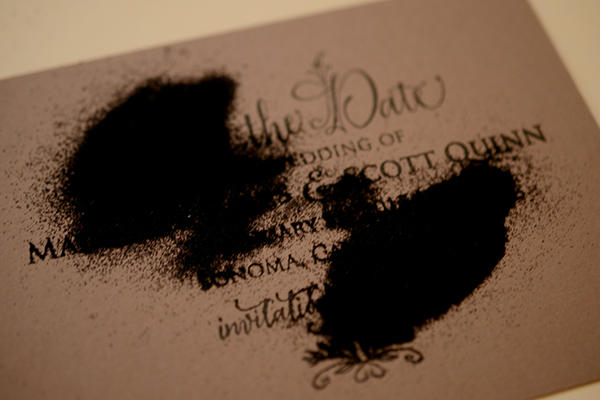
Immediately cover the printed image with black embossing powder (best to do this step over scrap paper). Shift it around to cover the entire image and tap off  the excess.

DIY Tutorial: Autumn Floral Wedding Invitations by Antiquaria for Oh So Beautiful Paper

Heat set the design with an embossing heat tool.  For more information about this process, please watch our video tutorial found here.
DIY Tutorial: Autumn Floral Wedding Invitations by Antiquaria for Oh So Beautiful Paper

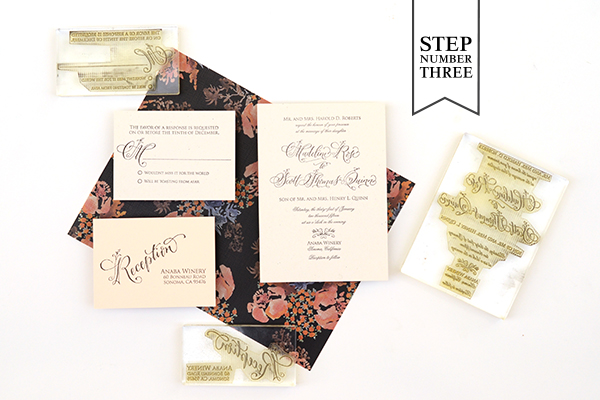
Step Three: Stamp all of your invitation suite cards. We used designs from our Floral Calligraphy Collection for this suite, including the Floral Calligraphy Invitation Stamp, Floral Calligraphy Reply Card Stamp and Floral Calligraphy Reception Stamp. We used black ink with the designs to tie everything together with the floral watercolor paper!
DIY Tutorial: Autumn Floral Wedding Invitations by Antiquaria for Oh So Beautiful Paper

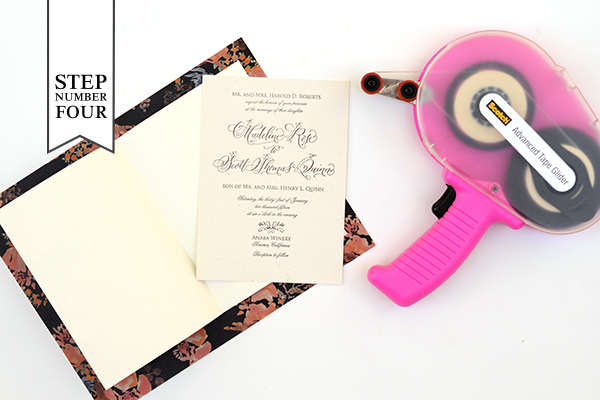
Step Four: We love coming up with new ways to incorporate pattern and color into our designs. This patterned invitation “folder” is one fun way! Fold your 10″ x 7″ patterned text weight paper in half. Apply double sided tape or stick glue to the back of your invitation card. Stick it into the right hand side of the “folder” and press to adhere. The invitation card and right hand side of the folder should be the same size, 5″ x 7.”

DIY Tutorial: Autumn Floral Wedding Invitations by Antiquaria for Oh So Beautiful Paper

Step Five: Next, we’ll make our reply envelopes. Our return address stamp design didn’t include a name – but that’s okay! We’ll simply add one! With a black brush pen, we wrote the last name across the envelope, a little higher than center. Then we stamped our return address design in black right below it. Mission accomplished!
DIY Tutorial: Autumn Floral Wedding Invitations by Antiquaria for Oh So Beautiful Paper

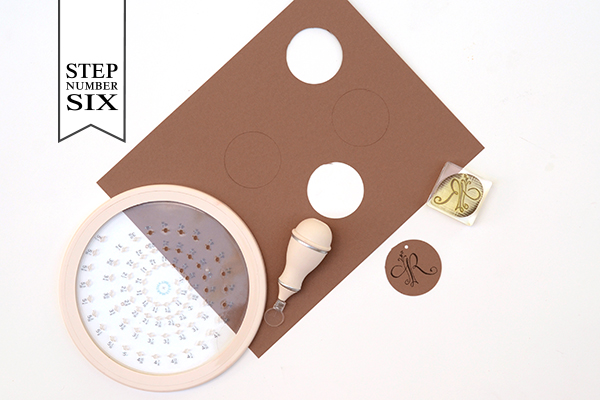
Step Six: A monogram tag is a really great way to tie the suite together. And you can also use it at your reception and on personal stationery after the wedding! We cut out 2″ circle tags using a circle making tool (or using a circle punch). Then, we stamped our Floral Calligraphy Monogram Initial Stamp in black in the center. Finally, we punched a small hole in the top center so that we have something to thread our ribbon through!
DIY Tutorial: Autumn Floral Wedding Invitations by Antiquaria for Oh So Beautiful Paper

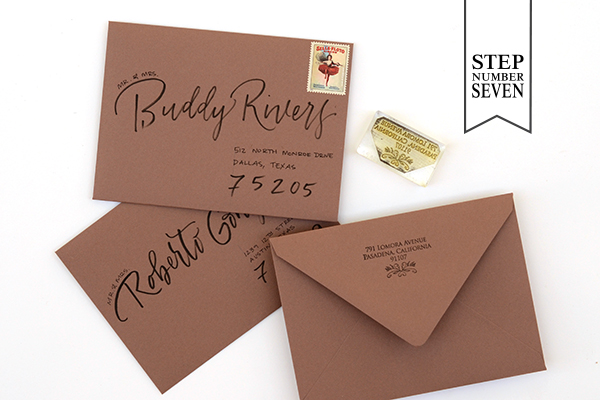
Step Seven: A big consideration for any invitation suite is how your are going to address them. We decided that a modern brush style in black would be fun with this design. After stamping our return address on the back flap, we addressed them using this calligraphy addressing tutorial.
DIY Tutorial: Autumn Floral Wedding Invitations by Antiquaria for Oh So Beautiful Paper
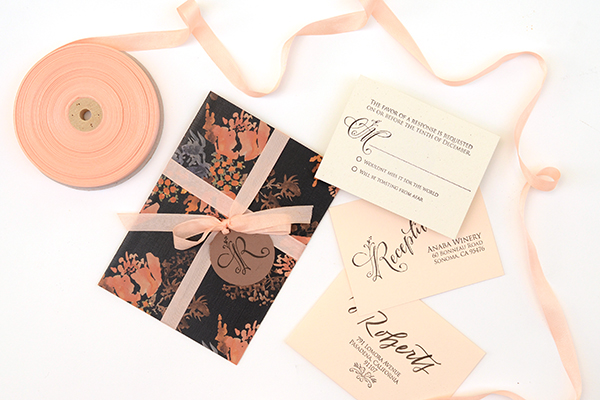
The Final Touches: To finish off the suite, we tucked all of the cards inside our “folder” and then tied it all up with some gorgeous blush colored tailors ribbon. Guests will feel like they’re opening a gift when they receive it in the post and get a small glimpse of the fun to come!

Materials

Stamps

Floral Calligraphy Save the Date Stamp

Floral Calligraphy Return Address Stamp, No.2

Floral Calligraphy Invitation Stamp

Floral Calligraphy Reply Card Stamp

Floral Calligraphy Reception Stamp

Floral Calligraphy Initial Monogram Stamp

Paper

“Zoe” Floral Patterned Paper-in Cover weight and Text weight

Java Cover Stock

Milkweed Cover Stock

Old Lace Cover Stock

Papaya A2 Envelopes

Java A7 Envelopes

Old Lace 4bar Envelopes

Other Items

Self Healing Mat, Kraft Knife and Metal Ruler

Double sided tape or stick glue

Circle Cutter or Circle Punch

Stamp Pad in Black

Embossing Powder and Heat Tool

Brush Pen

Hole Punch

Tailors Ribbon in Grecian Pink

Anti­quaria is a mem­ber of the Designer Rolodex – you can see more of their beau­ti­ful work right here or visit the real wedding invitations gallery for more wedding invitation ideas!

Photo Credits: Antiquaria for Oh So Beautiful Paper
How to Create Unique Personal Stationery with Rubber Stamps

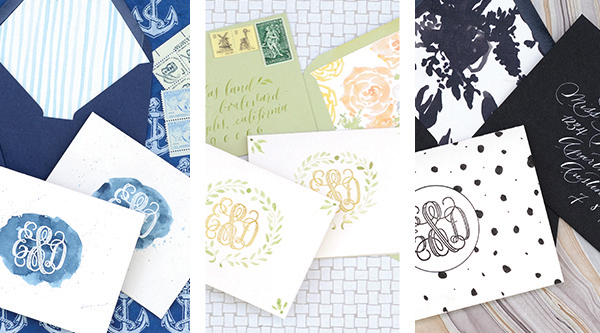
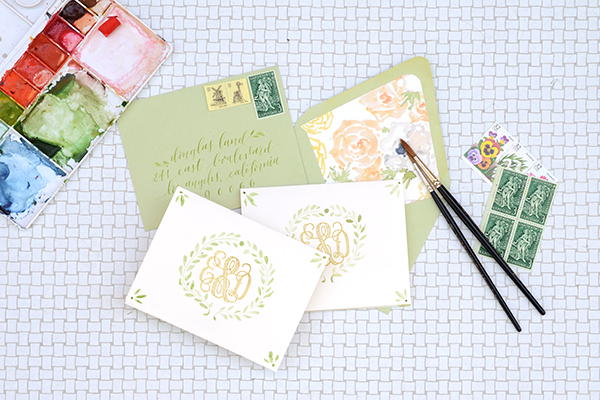
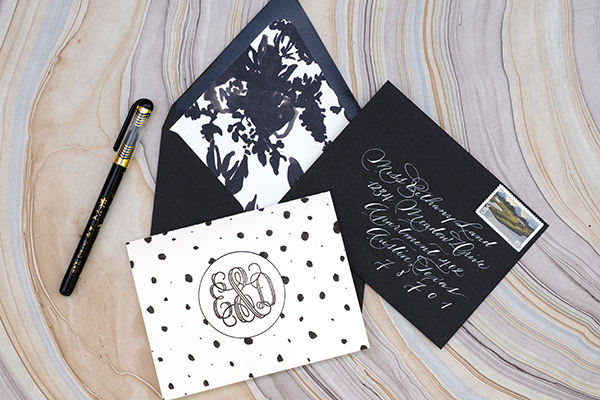
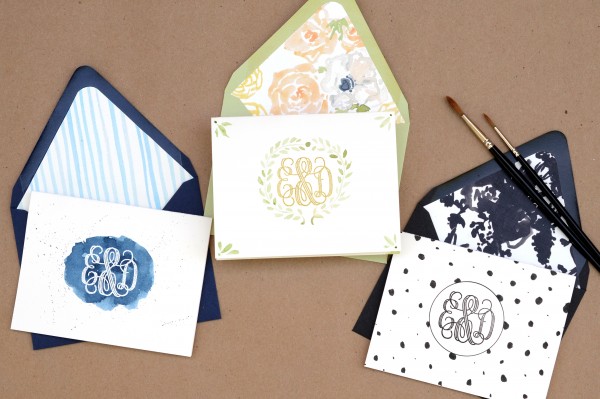
Wedding season is officially here and events of all kinds are in full swing. And with that… of course comes thank you notes! We’ve been designing lots of personal stationery as thank you notes for our clients recently so we put together some DIY versions to show how fun it can be to craft your own personal stationery. We used the same monogram rubber stamp for all three designs and the results couldn’t be more different! – Bailey and Emma of Antiquaria

DIY Tutorial: Rubber Stamp Personal Stationery by Antiquaria via Oh So Beautiful Paper

It’s always good to have some monogrammed stationery on hand for when a last minute occasion arrises. Make a bunch at one time and store them in a pretty box with pens and postage. Monogrammed stationery also makes for a really great handmade gift!

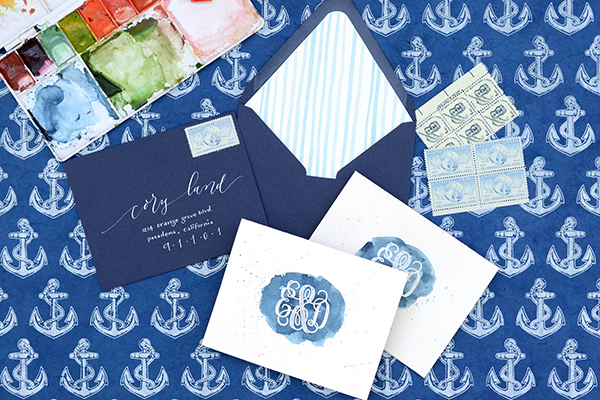
DIY Tutorial: How to Create Unique Personal Stationery with Rubber Stamps by Antiquaria for Oh So Beautiful Paper
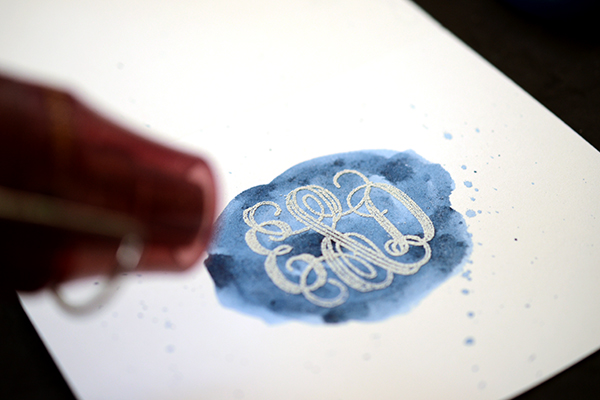
 Option One: Blue and white is such a classic color combination. We put a painterly spin on it with this gorgeous watercolor card. Adding white embossing on top of the paint really elevates the design and makes the monogram pop off of the card, literally!

DIY Tutorial: How to Create Unique Personal Stationery with Rubber Stamps by Antiquaria for Oh So Beautiful Paper
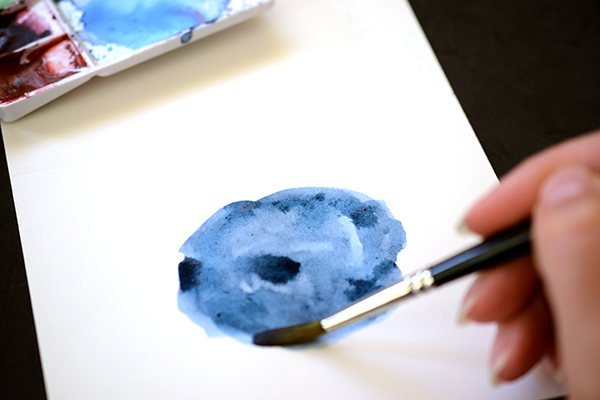
Step One: On the front of the card, in the center, paint a loose oval with indigo colored watercolor paint. Add multiple layers so that parts of the circle are darker than others. After the circle is complete, splash a little extra paint around the circle for a splattered effect. To do this we simply flicked the tip of the brush with our fingertip over the card. Set aside to dry completely.

DIY Tutorial: How to Create Unique Personal Stationery with Rubber Stamps by Antiquaria for Oh So Beautiful Paper
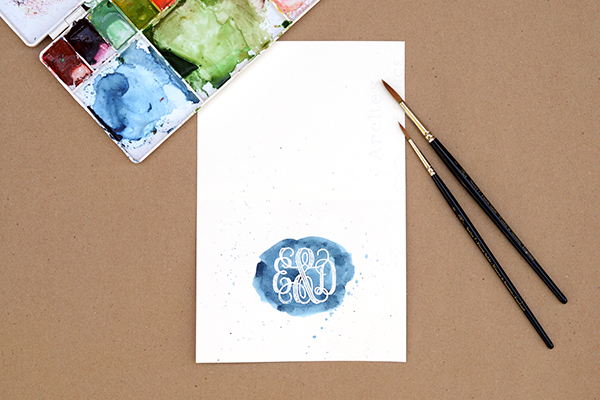
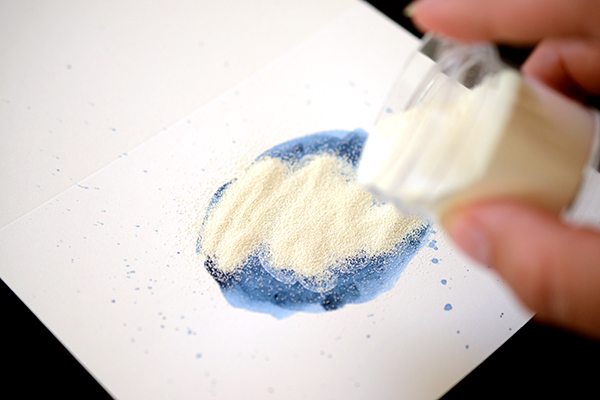
Step Two: Stamp your monogram in the center of the watercolor oval using a white ink pad. Quickly sprinkle embossing powder over the stamped image. Shift it around until the monogram is completely covered with powder. Tip the excess off onto a scrap piece of paper.

DIY Tutorial: How to Create Unique Personal Stationery with Rubber Stamps by Antiquaria for Oh So Beautiful Paper
Step Three: Using a embossing heat tool, melt the powder. You can watch our video tutorial of the process here.

DIY Tutorial: How to Create Unique Personal Stationery with Rubber Stamps by Antiquaria for Oh So Beautiful Paper
DIY Tutorial: How to Create Unique Personal Stationery with Rubber Stamps by Antiquaria for Oh So Beautiful Paper
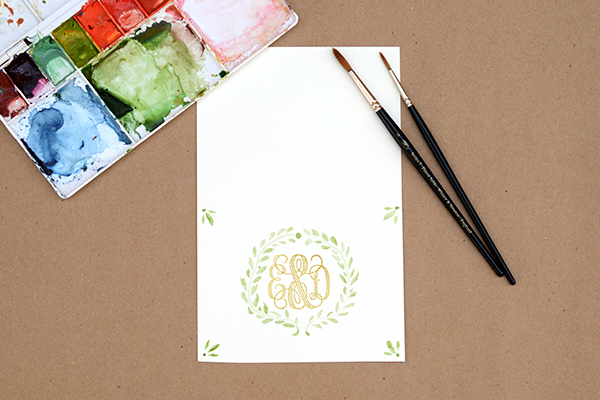
Option Two: Wreaths have been a popular design element in stationery for a while now. We just can’t get enough of them – especially when they’re hand painted in shades of green!

DIY Tutorial: How to Create Unique Personal Stationery with Rubber Stamps by Antiquaria for Oh So Beautiful Paper
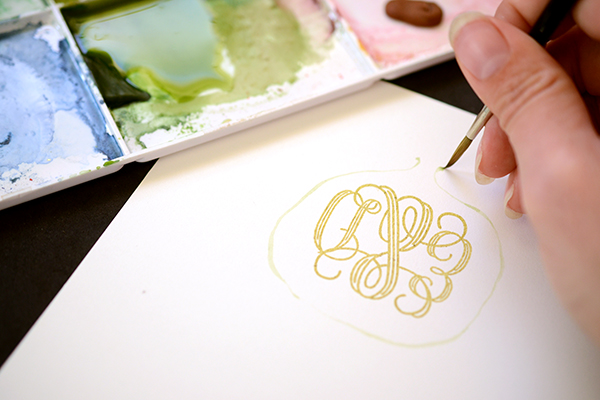
Step One: After stamping your monogram in the center of the front of your card, paint a little vine circle around it, leaving the bottom open (as shown above). Don’t try to make the oval perfect, a meandering vine will be more natural once the leaves are painted around it!

DIY Tutorial: How to Create Unique Personal Stationery with Rubber Stamps by Antiquaria for Oh So Beautiful Paper
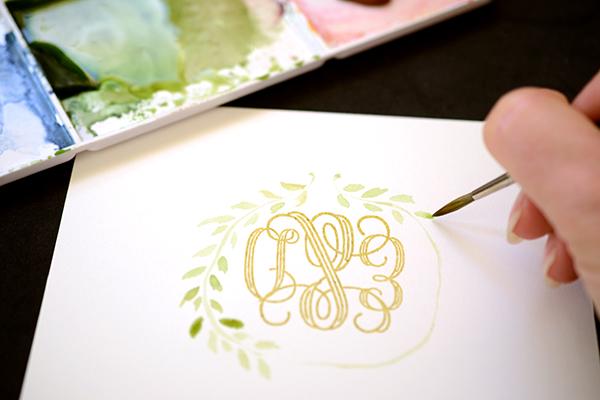
Step Two: Add your leaves to the oval. The technique is simple: just load your brush with watercolor paint, lay it down flat, and then pick it up, dragging up to the point as you lift it off. This will give you the shape of the leaf with very little effort! Practice first before starting on the final cards until you get it down. Varying the size and color of the leaves will help give a more natural look to the card. Paint the leaves starting at the bottom and finishing at the top. Where they meet, leave a little space and paint a small dot in the top center to finish it off.

DIY Tutorial: How to Create Unique Personal Stationery with Rubber Stamps by Antiquaria for Oh So Beautiful Paper
Step Three: We also added little leaf adornments to each corner, using the same technique to finish off the card design.

DIY Tutorial: How to Create Unique Personal Stationery with Rubber Stamps by Antiquaria for Oh So Beautiful Paper
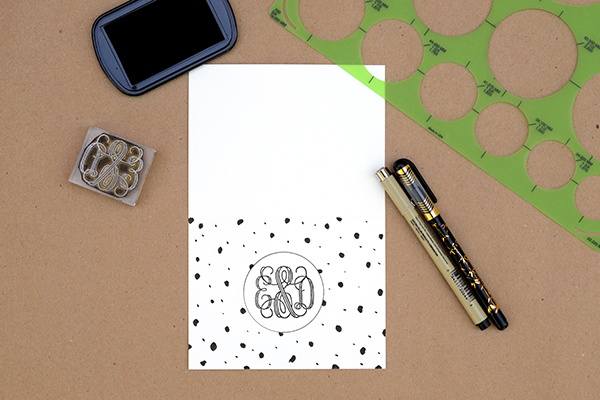
Option Three: This stunning, black and white design is both modern and whimsical at the same time. Plus, you don’t even have to pull out the paint for this one!

DIY Tutorial: How to Create Unique Personal Stationery with Rubber Stamps by Antiquaria for Oh So Beautiful Paper
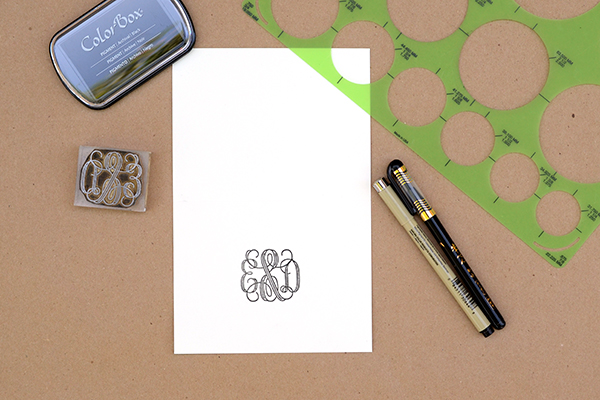
Step One: Stamp your monogram in the front center of the card in black ink. Set it aside to dry.

DIY Tutorial: How to Create Unique Personal Stationery with Rubber Stamps by Antiquaria for Oh So Beautiful Paper
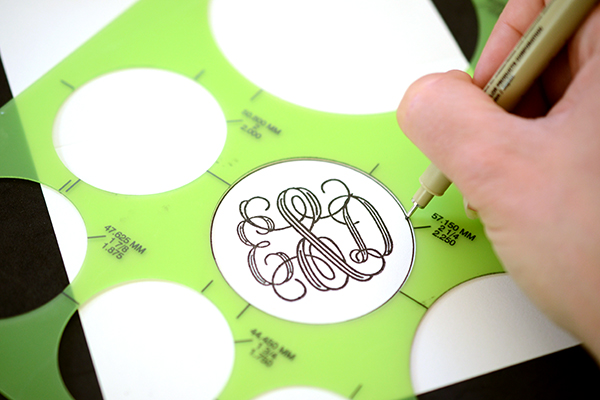
Step Two: Find a circle on your template that is â…›” to ¼” larger than the design, and trace it using a black felt tipped pen.

DIY Tutorial: How to Create Unique Personal Stationery with Rubber Stamps by Antiquaria for Oh So Beautiful Paper

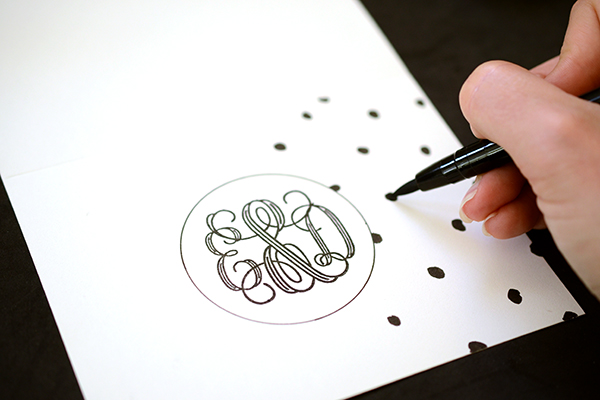
Step Three: With a brush pen, add little black polka dots around the circle – but make sure not to put any inside. We didn’t make the size or pattern of the dots even for this design, so it has a lovely organic irregularity… plus it’s easier to do!

DIY Tutorial: How to Create Unique Personal Stationery with Rubber Stamps by Antiquaria for Oh So Beautiful PaperP-Stationery-final2

Step Four: Add little bitty dots around your polka dots to fill in the white spaces of your design by touching only the very tip of the pen to the paper.

DIY Tutorial: How to Create Unique Personal Stationery with Rubber Stamps by Antiquaria for Oh So Beautiful Paper

Materials

Antique Monogram Stamp

A2 Folded Card, preferably made of Watercolor Paper (90lb hot press). We cut an art sheet down into rectangles (5.5″ x 8.5″) and scored them down the middle to make our own cards.

Envelope liner templates

Double Sided Tape or Stick Glue (to adhere liners into envelopes)

Option One:

Watercolor Paint

Paint Brushes

Frost White Stamp Pad

White Embossing Powder

Envelope Liner Watercolor Stripe Ocean Text Patterned Paper

A2 Envelope in night

Option Two:

Watercolor Paint

Paint Brushes

Stamp Pad in Olive

Envelope Liner Natalia Floral Text Patterned Paper

A2 Envelope in Sage

Option Three:

Circle Stencil Template

Black Brush Pen

Black Felt Tip Pen

Stamp Pad in Black

Envelope Liner Brushed Floral No.1  Text Patterned paper

A2 Envelope in Black

Photography by Antiquaria for Oh So Beautiful Paper
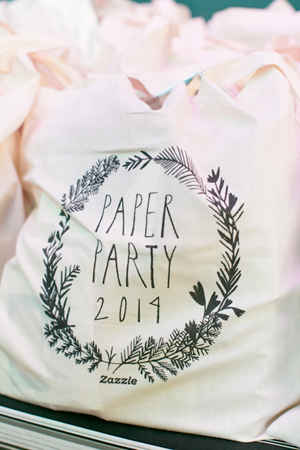
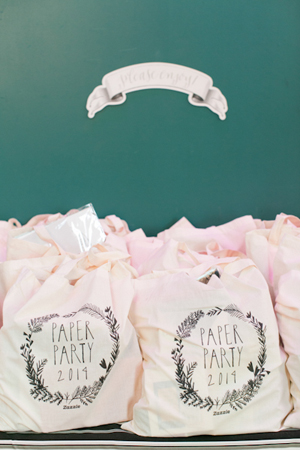
New Giveaway! Paper Party 2014 Tote Bags!

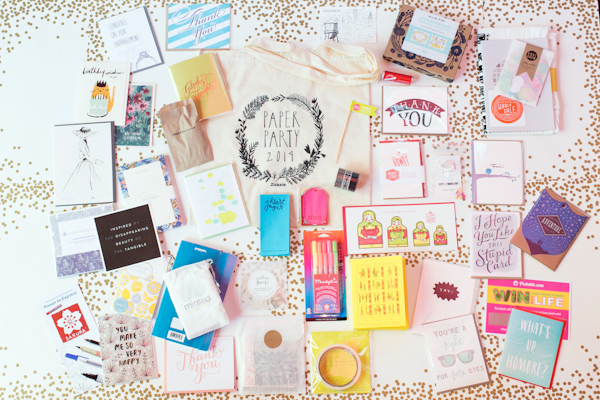
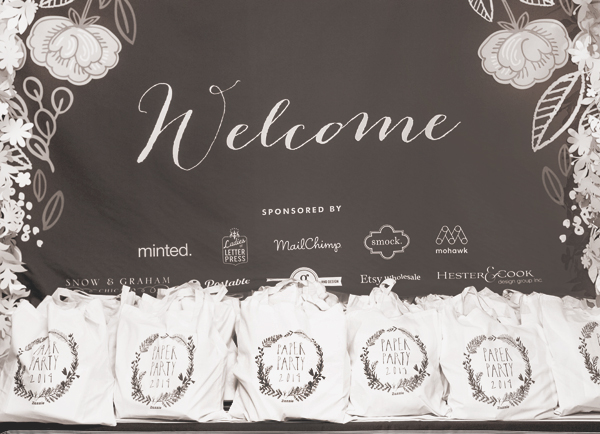
The gift tote bags are always a popular item at my annual Paper Party. I was absolutely thrilled to partner with Zazzle this year – they printed our custom design from Mr. Boddington’s Studio on their eco-friendly 100% cotton tote bags. Oh, and the gift bags were full of lots of great things, too!
OSBP-Paper-Party-2014-Charlie-Juliet-Photography-1

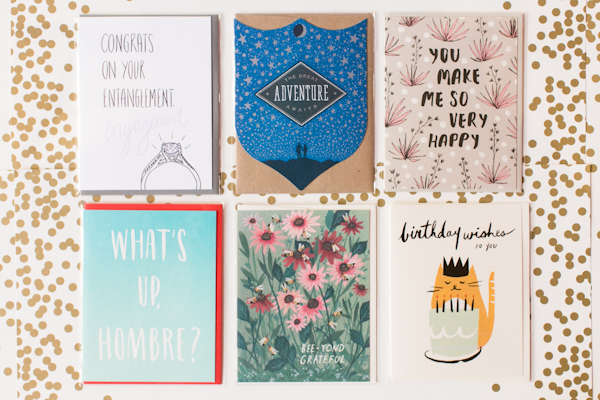
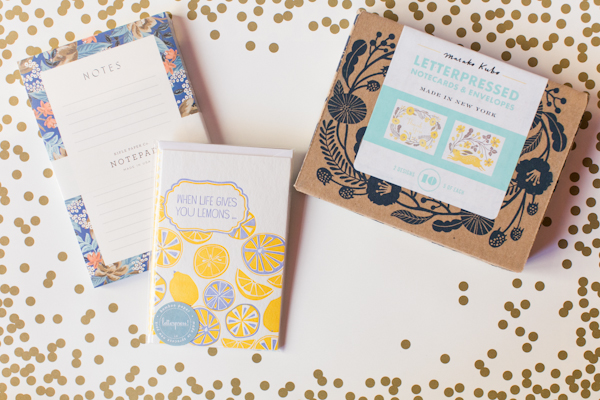
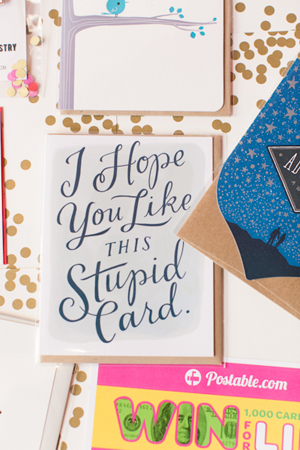
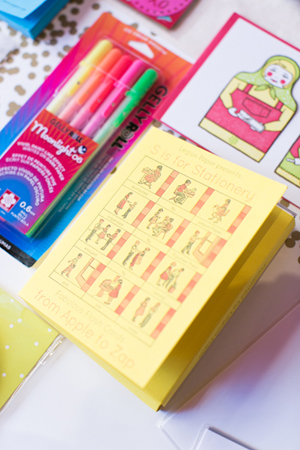
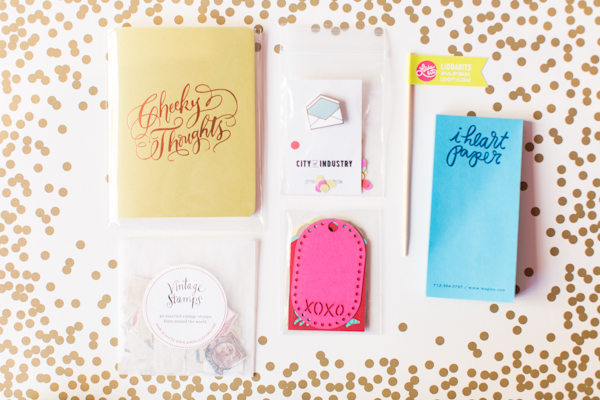
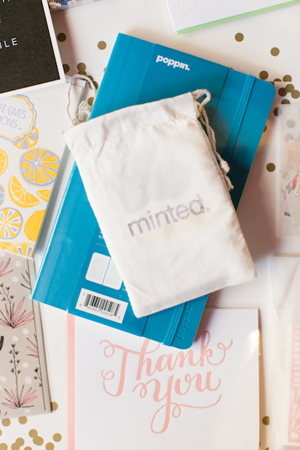
This year’s gift bags were stuffed with the most amazing items from some of my favorite stationers: Ladyfingers Letterpress, Moglea, Rifle Paper Co., Wild Ink Press, Emily McDowell, Parrott Design Studio, Hammerpress, Iron Curtain Press, Chronicle Books, Sycamore Street Press, Red Cap Cards, Idlewild Co., Maginating, Oh, Hello Friend, Tattly, Enormous Champion, Antiquaria Design Studio, Albertine Press, Belle & Union, Fig. 2 Design Studio, Mailchimp, Tradeshow BootcampSakura of America, Artifact Uprising, Mohawk, Legion Paper, Minted, Ladies of Letterpress, Postable, Poppin, Liddabits, Alexis Mattox Design, City of Industry, Three Potato Four, Angela Liguori, and a selection of goodies from Etsy Wholesale sellers!
OSBP-Paper-Party-2014-Charlie-Juliet-Photography-214

OSBP-Paper-Party-2014-Charlie-Juliet-Photography-37OSBP-Paper-Party-2014-Charlie-Juliet-Photography-36

The 125 party gift bags may have disappeared in under 15 minutes, but you’re in luck – because today I’m giving away a tote bag full of stationery awesomeness to to five lucky readers!

OSBP-Paper-Party-2014-Charlie-Juliet-Photography-9

To enter, just leave a comment below – any comment! You’ll have until 11:59 p.m. on Monday, June 2, 2014 to enter the giveaway. Five winners will be selected randomly and will each receive one tote bag. Bonne chance!

OSBP-Paper-Party-2014-Charlie-Juliet-Photography-8

OSBP-Paper-Party-2014-Charlie-Juliet-Photography-6OSBP-Paper-Party-2014-Charlie-Juliet-Photography-5

OSBP-Paper-Party-2014-Charlie-Juliet-Photography-7

OSBP-Paper-Party-2014-Charlie-Juliet-Photography-2OSBP-Paper-Party-2014-Charlie-Juliet-Photography-10

OSBP-Paper-Party-2014-Charlie-Juliet-Photography-11

Photo Credits: Charlie Juliet Photography

*Sorry, limited to U.S. readers only. Limit one entry per person. Please do not leave your email or web address in the body of the comment, only in the allotted boxes. $150 approximate total retail value. Winners will be contacted via email after comments close.