DIY Tutorial: Gold Embossed Save the Dates

We’re huge fans of gold in pretty much all arenas: housewares, fashion, jewelry, and stationery just to name a few! That’s why this week’s gold on gold embossed save the date tutorial is so awesome. Plus, with this simple and affordable technique, you can create a custom invitation with a high end look on a budget. – Bailey and Emma of Antiquaria

DIY Tutorial: Gold Rubber Stamp Save the Dates by Antiquaria via Oh So Beautiful Paper

DIY Tutorial: Gold Rubber Stamp Save the Dates by Antiquaria via Oh So Beautiful Paper

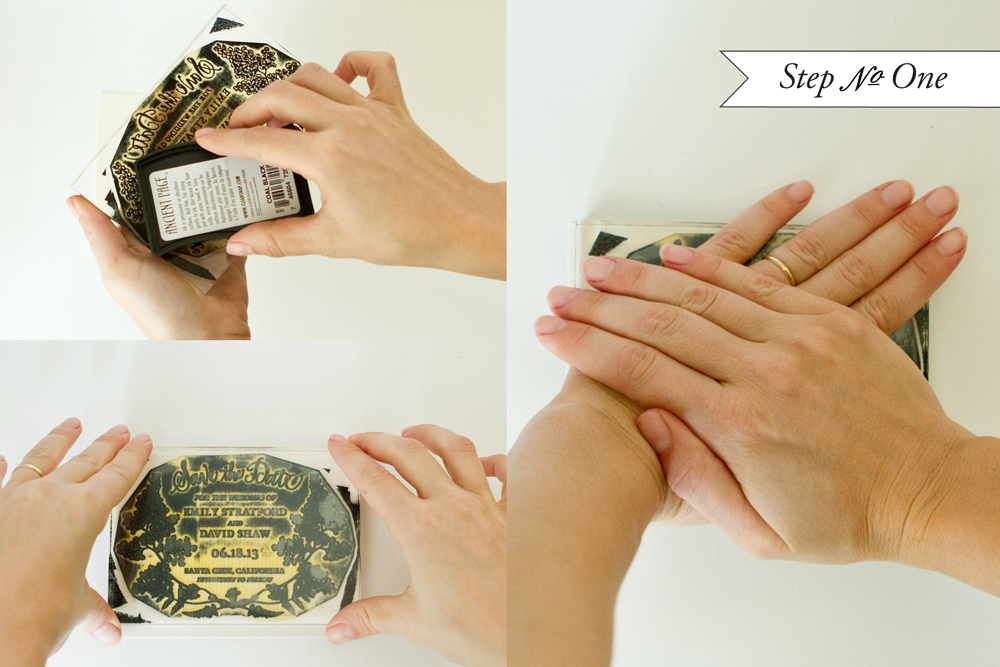
Step One: Unlike most of our stamping tutorials, this week’s embossing technique  is done one piece at a time. Start by inking your stamp (we used our Vintage Calligraphy Save the Date) with a gold metallic stamp pad. For specifics on how to ink your oversized stamp check out step one of this tutorial. Next, you’ll center the stamp over your A6 (4 1/2″ x 6 1/4″) card. Press down firmly to make the print. Lift the stamp off of the card and move quickly to step two.

DIY Tutorial: Gold Rubber Stamp Save the Dates by Antiquaria via Oh So Beautiful Paper

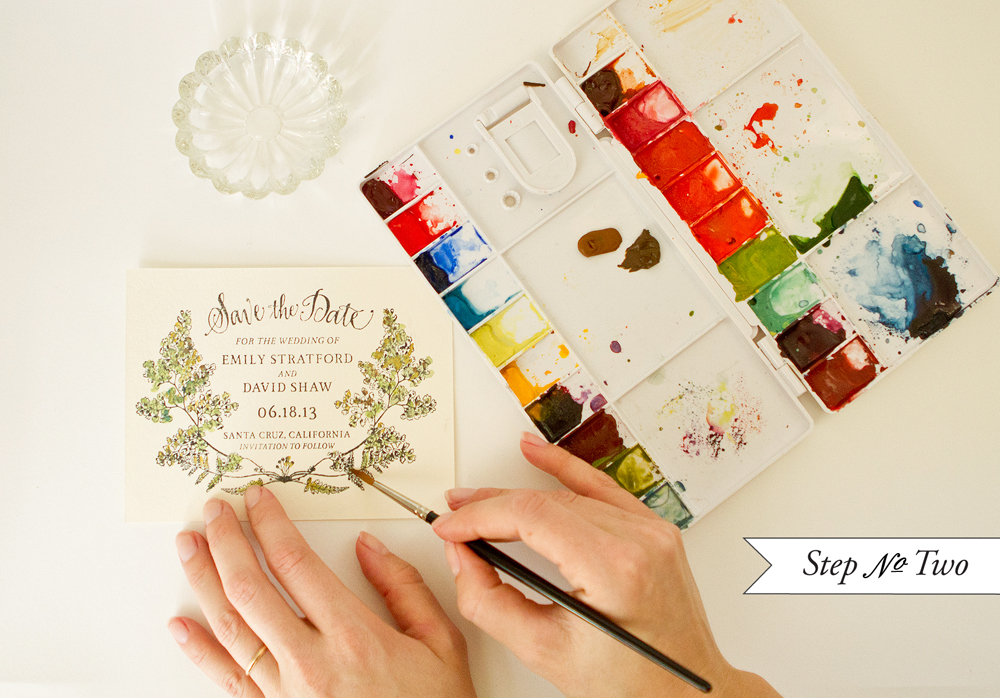
Step Two: While the ink is still wet (using pigment ink such as Colorbox is going to be your best bet for this project), sprinkle embossing powder over the print. Shift powder around the card until it is solidly covering all of the text and graphics. Gently tap the excess off onto a piece of loose leaf computer paper for reuse. If there are still specs of powder on the card, remove them very carefully with a small paint brush. Any powder left will solidify if exposed to the heat.

DIY Tutorial: Gold Rubber Stamp Save the Dates by Antiquaria via Oh So Beautiful Paper

Step Three: Using an embossing heat tool, set the powder by heating it (not too close or you’ll burn the paper) until the powder has solidified. You will want to do a small area at a time to ensure proper solidification. When you’re done, double check you handiwork to make sure all of the areas have been set.

DIY Tutorial: Gold Rubber Stamp Save the Dates by Antiquaria via Oh So Beautiful Paper

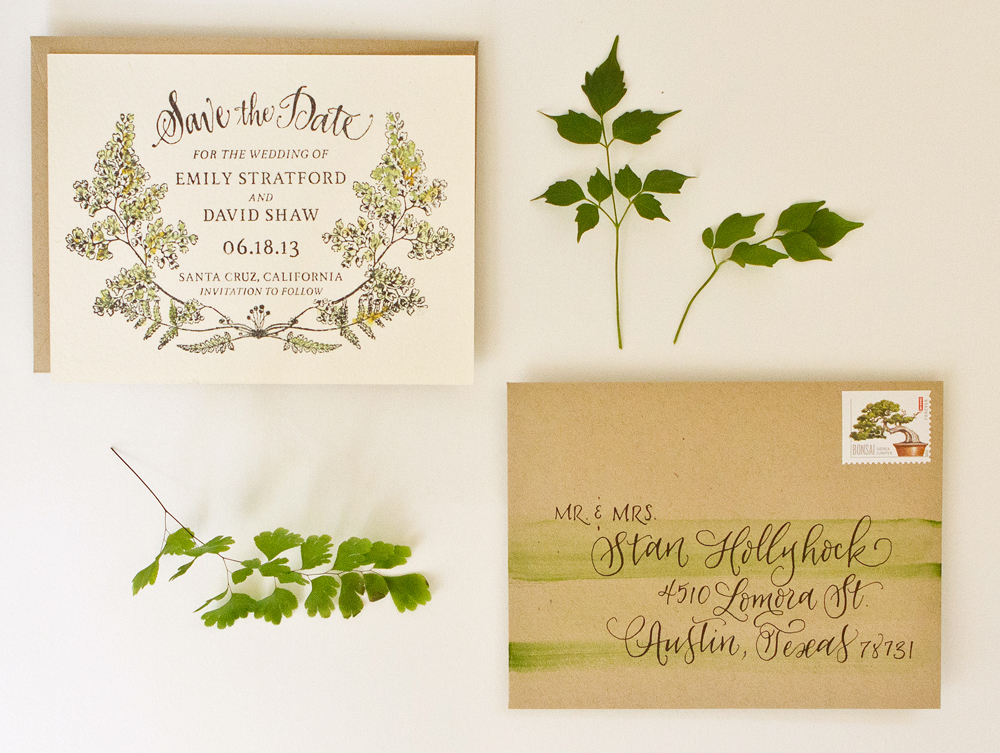
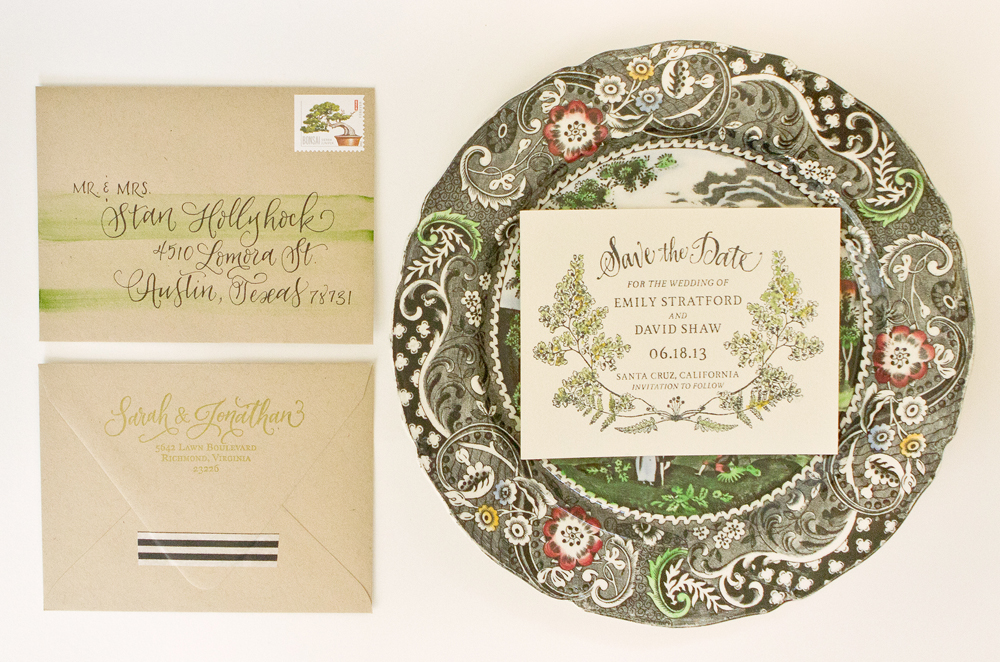
Step Four: You’ll want to repeat steps 1 – 3 for your return address (we used our Bow Return Address stamp). How amazing is the gold embossing on the gold envelope?! Swoon. We’re in love.

Finish them off with more gold – a fabulous piece of gold glitter washi tape on the back flap of the envelope!

Materials

Stamps:

“Vintage Calligraphy” Save the Date

Bow Return Address

Paper and Tools:

A6 Cards in Luxe White

A6 Envelopes in Stardream Antique Gold

Stamp Pad in Gold

Embossing Powder in Superfine Gold

Heat Tool

Washi Tape Gold Glitter

Anti­quaria is a mem­ber of the Designer Rolodex – you can see more of their beau­ti­ful work right here or visit the real wedding invitations gallery for more wedding invitation ideas!

Photo Credits: Antiquaria

{happy weekend!}

What. A. Week. While we weathered the storm pretty well here in DC, my thoughts have been with those in New York and New Jersey affected by Hurricane Sandy.  The images and stories of the destruction are completely overwhelming and I know the road to recovery, much less the restoration of power, will be a long one.  When I haven’t been completely glued to the news, somewhere between last weekend and today, my little Sophie suddenly stopped looking like a newborn and started looking like a real baby.  She’s getting bigger each and every day, even though she’s still smaller at 7 weeks than some newborns, she’s paying closer attention to objects, and she’s smiling at us!  The smiles just make my heart melt.  This weekend we’re planning to visit our favorite flea market and relax at home, but in the meantime…

…a few links for your weekend!

This week on Oh So Beautiful Paper:

That’s it for me this week!  I hope you all have a wonderful weekend, and I’ll see you back here on Monday – when I’ll start sharing some of my favorite holiday cards! xoxo

{happy weekend!}

Happy Friday everyone!  We enjoyed our first cool and crisp week here in DC – fall has definitely arrived and I couldn’t be happier!  We took Sophie to pick out a couple of pumpkins from our favorite pick-your-own farm in the area, although of course she slept through everything.  We’re getting more comfortable taking longer excursions outside and I’m looking forward to taking Sophie for walks around our neighborhood – particularly now that the leaves are starting to change.  But in the meantime…

…a few links for your weekend:

This week on Oh So Beautiful Paper:

That’s it for me this week!  I hope you all have a wonderful weekend, and I’ll see you back here on Monday! xoxo

Photo Source: mmarcotte51

Sarah + Ryan’s Bright Hand-Lettered Wedding Invitations

This bright and colorful wedding invitation suite from Alison of Love Citron features two of my favorite things – watercolor and whimsical hand lettering.  Alison began by creating the lettering for the invitation suite, then added watercolor washes on both the invitation elements and accompanying ceremony programs. Alison selected bright pink and orange envelopes and patterned liners to complete the design.  So pretty!

Hand Lettered Watercolor Wedding Invitations by Love Citron via Oh So Beautiful Paper (7)

From Alison: Everything in this wedding suite is handmade. I hand lettered all of the text and edge painted the programs. We used bright accents, like hot pink envelopes lined with patterned paper and bright orange vellum response envelopes.

Hand Lettered Watercolor Wedding Invitations by Love Citron via Oh So Beautiful Paper (6)

Hand Lettered Watercolor Wedding Invitations by Love Citron via Oh So Beautiful Paper (4)

Hand Lettered Watercolor Wedding Invitations by Love Citron via Oh So Beautiful Paper (5)

I also wanted to include watercolor elements, so I painted the lettering on the RSVP. I also did watercolor washes on the ceremony programs and each individual element of the invitation suite.

Hand Lettered Watercolor Wedding Invitations by Love Citron via Oh So Beautiful Paper (3)

Hand-Lettered Watercolor Wedding Invitations by Love Citron via Oh So Beautiful Paper (1)

Hand-Lettered Watercolor Wedding Invitations by Love Citron via Oh So Beautiful Paper (2)

Thanks so much Alison!

Check out the Designer Rolodex for more tal­ented wed­ding invi­ta­tion design­ers and the real invi­ta­tions gallery for more wedding invitation ideas!

Photo Credits: Love Citron

DIY Tutorial: Botanical + Watercolor Save the Dates

Here at Antiquaria we love ferns. So much so that one of the first china collections that we curated for our vintage shop was dedicated to them! For today’s DIY tutorial, we combined our love for this specific botanical variety and one of our other major obsessions, watercolor, to create a simple and natural save the date.  – Bailey and Emma of Antiquaria

DIY Tutorial: Botanical Watercolor Save the Date by Antiquaria via Oh So Beautiful Paper

DIY Tutorial: Botanical Watercolor Save the Date by Antiquaria via Oh So Beautiful Paper

DIY Tutorial: Botanical Watercolor Save the Date by Antiquaria via Oh So Beautiful Paper

Step One: We get asked the question all the time – “Where do you find a stamp pad large enough for your stamps?” The answer is that any raised bed stamp pad will suffice! Simply flip the stamp (we used our Fern Forest Save the Date Stamp) over in your hand and ink the stamp, dabbing and swiping the pad across it until there is an even layer of ink. Once it is well inked, flip it over and align it over your paper (for this Save the Date you will use an A2 card). Once you’re sure it’s straight, place the stamp down with each hand on either side of the stamp.

DIY Tutorial: Botanical Watercolor Save the Date by Antiquaria via Oh So Beautiful Paper

Without moving the stamp, place your hands on the top of the stamp and press down firmly, making sure that you have pressure on all parts of the stamp. Lift the stamp off the paper, set aside and let the print dry. For this design, you will want to use a permanent, waterproof ink.

DIY Tutorial: Botanical Watercolor Save the Date by Antiquaria via Oh So Beautiful Paper

Step Two: Once the print is dry, you will want to fill in the botanical part of the design with color! Using multiple shades of greens and ochres, paint in the leaves with a small fine tip watercolor brush. Try not use too much water in this step to avoid painting too far outside the lines.

DIY Tutorial: Botanical Watercolor Save the Date by Antiquaria via Oh So Beautiful Paper

Step Three: Give the lowly envelope a little watercolor flourish as well! Simply sweep a wide, flat watercolor brush loaded with paint across the middle section of your envelope a couple of times and you’re done! Let the paint dry throughly before addressing the envelope.

DIY Tutorial: Botanical Watercolor Save the Date by Antiquaria via Oh So Beautiful Paper

Step Four: Lastly, stamp your return address (we used our Calligraphy Ampersand Return Address Stamp) on the back flap of your envelope in moss-colored ink and let it dry. Use black and white striped washi tape as a decorative seal & send them on their way!

Materials

Fern Forest Save the Date Stamp

Calligraphy Accent Return Address Stamp

Stamp Pad Waterproof black and moss green

Watercolors

Water and Jar

Paint Brushes – fine pointed and 1 in. flat

Washi Tape

Anti­quaria is a mem­ber of the Designer Rolodex – you can see more of their beau­ti­ful work right here or visit the real wedding invitations gallery for more wedding invitation ideas!

Photography by Jamie Simon of Intertwyned