Summer Giveaway with Moontree Letterpress

It’s Mon­day, which means that it’s time for another install­ment of our sum­mer con­test series with Moon­tree Let­ter­press!  In case you missed it the first time, here’s a bit of back­ground on the con­test and how to enter.  This week’s theme is “Pulling a Rabbit Out of a Hat” – and the win­ner with the best six word story will receive 50 per­son­al­ized let­ter­press notecards!  Feel free to leave multiple entries, and don’t be afraid to get creative!

Letterpress-Notecard-Giveaway-Moontree-Letterpress

You’ll have until 11:59 p.m. EST on Tues­day to leave your entry in the com­ments below, then Rebecca will announce the win­ner on her blog on Wednes­day!  And just in case you need some inspi­ra­tion, you can check out these six word auto­bi­ogra­phies.  Bonne chance!

Photo Credit: Moon­tree Letterpress

Folk Art Cards and Artwork from Urubbu

We often see pretty birds in our Capitol Hill neighborhood; my husband can recognize almost all of them, but the only one I can name by sight is the cardinal.  Yesterday I spotted a pretty little house finch walking home from the grocery store and it reminded me of the beautiful folk-inspired prints and cards from Urubbu.  I first discovered Urubbu at last year’s National Stationery Show and have been a fan ever since.  I love all of the flora and fauna-inspired designs!


Urubbu-Wolf-Card Urubbu-Moose-Card

Urubbu-Thank-You-Bird-Card Urubbu-Owl-Thinking-of-You-Card

Urubbu-Floral-Card Urubbu-Pear-Tree-Card

Urubbu-Cardinal-Card Urubbu-Love-Bird-Card

Urubbu-Deer-Card Urubbu-Christmas-Tree-Card

You can check out more from Urubbu right here!

p.s. Don’t for­get to check back later this morn­ing for the new install­ment in our Mon­day sum­mer con­test series with Moon­tree Let­ter­press.  This week we’re giv­ing away a set of per­son­al­ized let­ter­press notecards!

{happy weekend!}

Happy Friday everyone!  Do you have something fun planned for the weekend?  Tomorrow I’m helping a wedding planner friend with a wedding in Virginia and I’m a wee bit nervous.  Hopefully it will be a fun day, but it’ll definitely be interesting!  Can you believe this is the last weekend of June?  This summer is just flying by!  But in the meantime…

Strawberry Rosemary Sangria via A Cozy Kitchen

…a few links for your weekend!

This week on Oh So Beautiful Paper:

That’s it for me this week!  I hope you all have a wonderful weekend, and I’ll see you back here on Monday!  xoxo

p.s. I still have a bunch of items available in my tag sale.  Check it out!

Rosemary + Lavender

It’s been a bright and colorful week, so I thought I would help end the week on a more subdued note.  These rosemary and lavender invitations from Satsuma Press combine two of my favorite herbs (and scents!) in one gorgeous wedding invitation suite.  Ah, rosemary and lavender – a soothing combination even through the computer screen…

Rosemary-Lavender-Letterpress-Wedding-Invitations

Rosemary-Lavender-Letterpress-Wedding-Invitations


Rosemary-Lavender-Letterpress-Wedding-Invitations

You can check out lots more pretty wedding invitations from Satsuma Press right here!

DIY Geek Chic Graph Paper Save the Dates

It’s the ladies of Antiquaria, back with another fabulous and creative DIY project for you all!  This project is for wedding save the dates, but you can easily apply this tutorial to any party invitations or announcements!

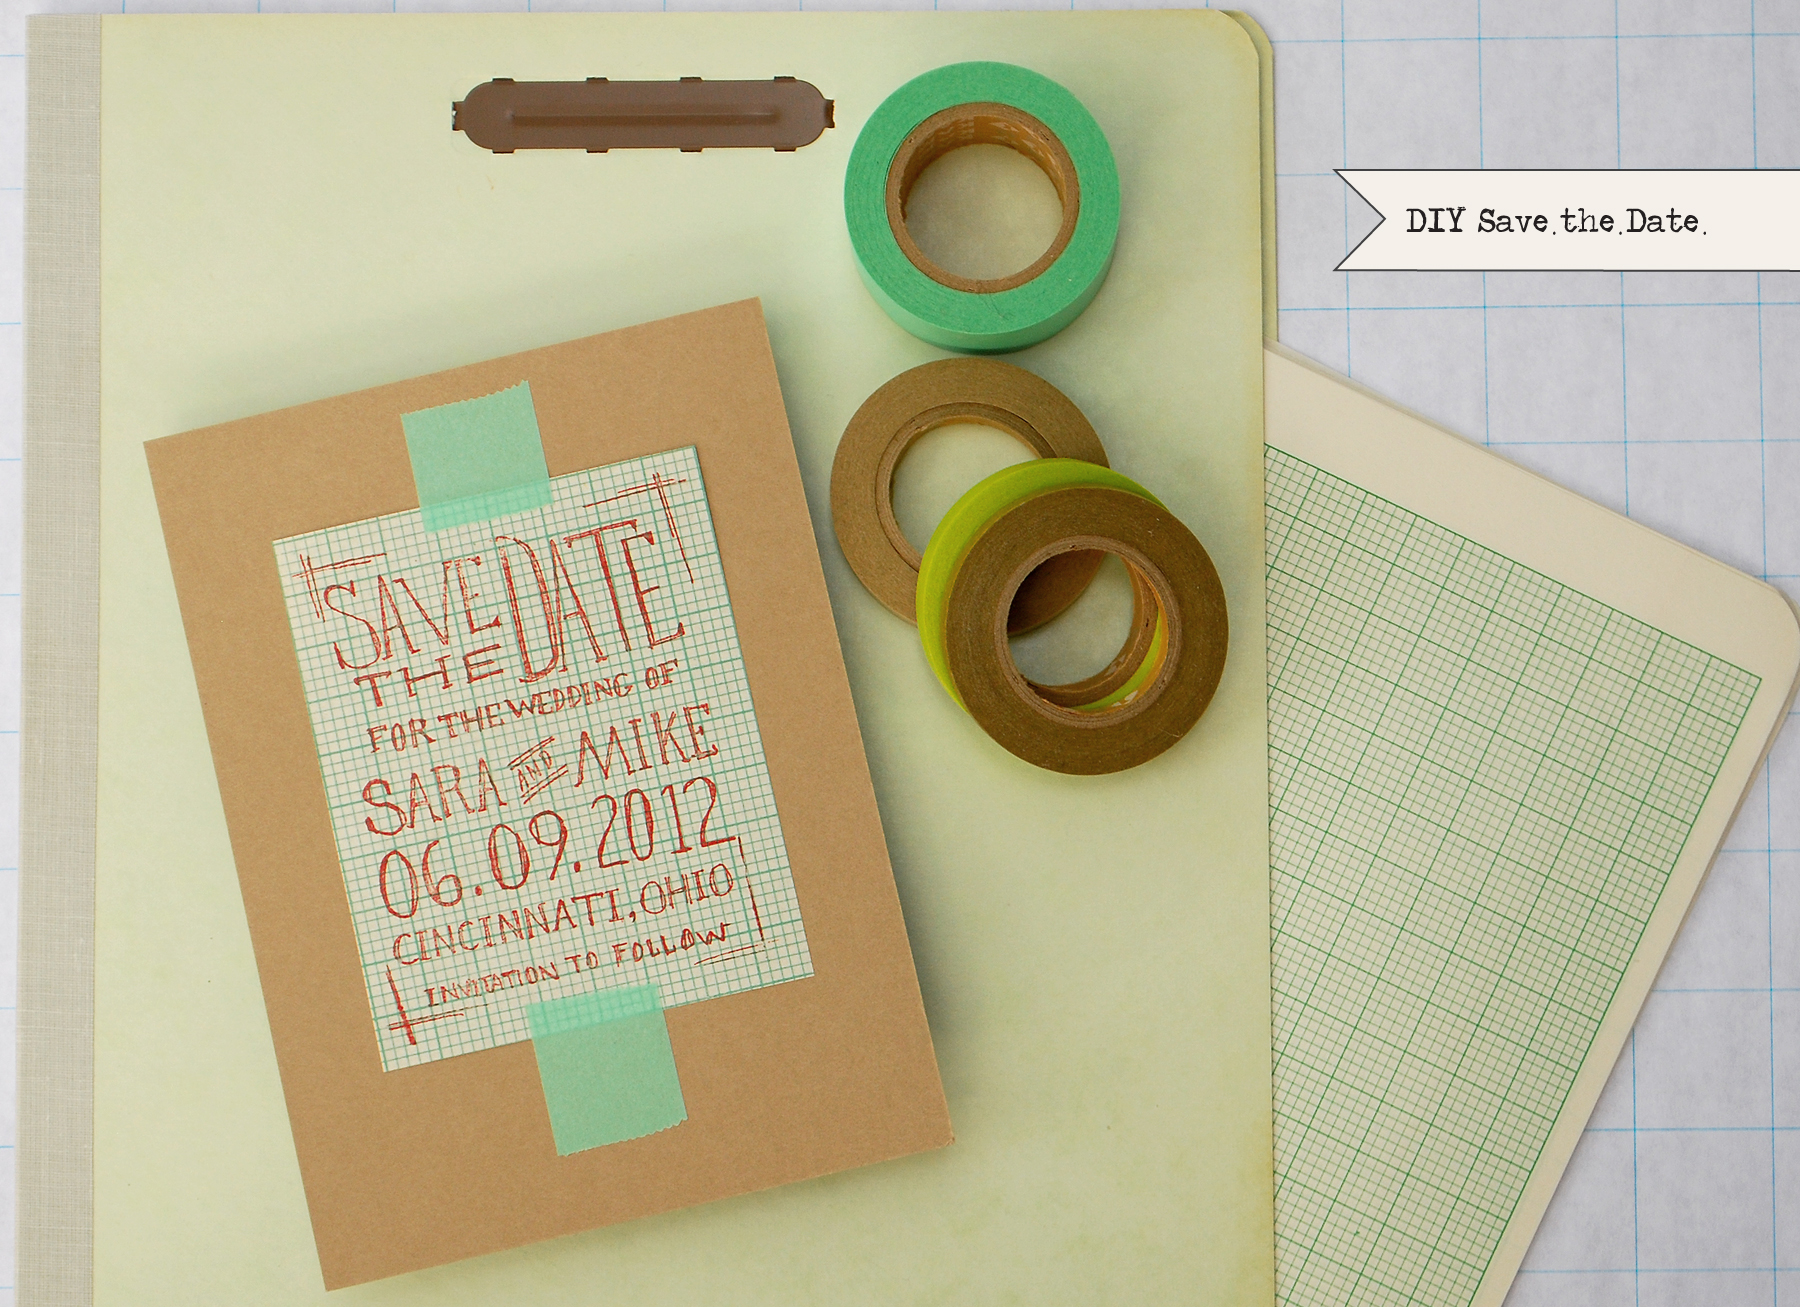
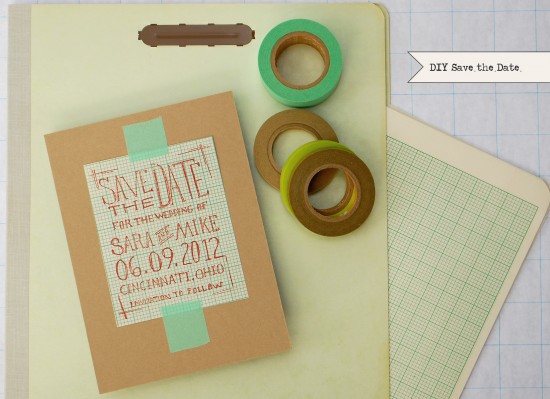
Inspired by some awesome vintage graph paper we found while rummaging through an estate sale, we crafted up this super easy (only 3 steps!) and affordable DIY save the date perfect for a casual and cheeky affair!!  This project requires just a few materials and most that are extremely easy to find – you might even have them hanging around your office at this very moment.
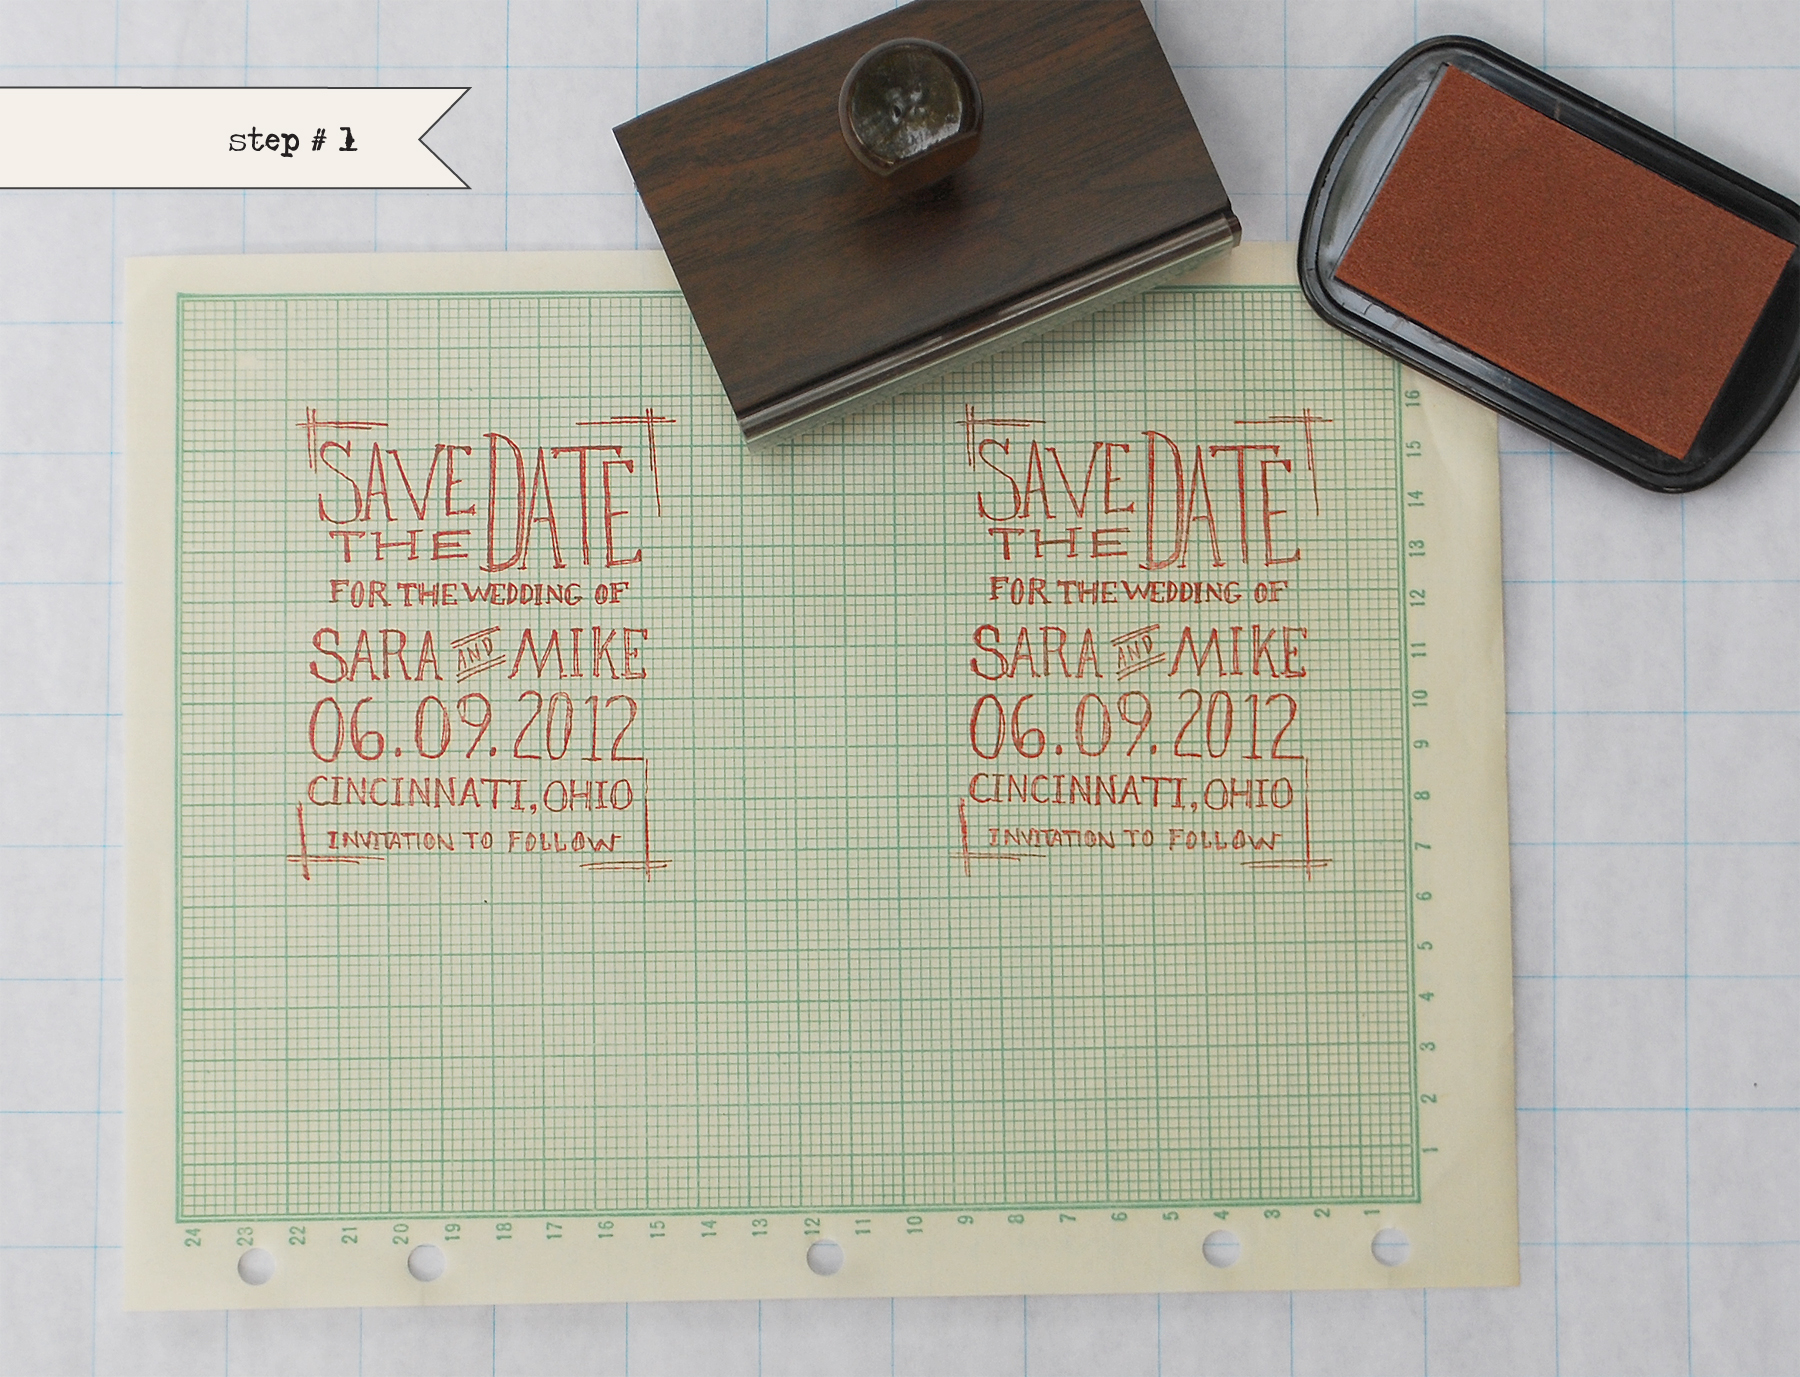
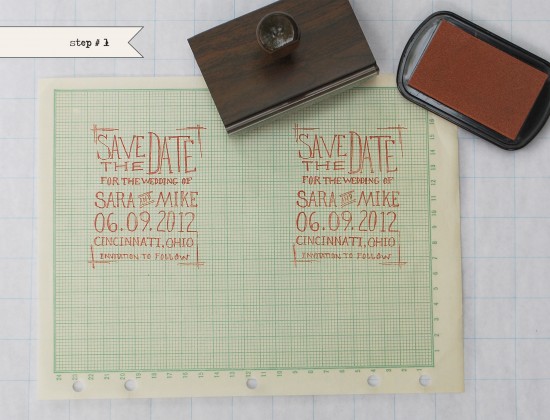
DIY Geek Chic Rubber Stamp Wedding Save the Date Tutorial

Step One: Choose the paper you wish to stamp on (a list of options follows below) and lay it on a flat surface.  Ink the stamp; we used the “Sketchbook” save the date stamp for this design.
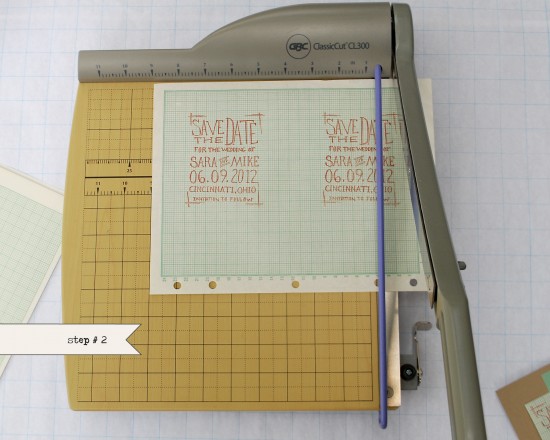
Hand Stamped Save the Dates: Step 1

Step Two:  Once you have all of your images stamped, use a paper cutter or a cutting mat, x-acto knife and ruler to cut them to the correct size.  Our suggestion is to give 1/8″ to 1/4″ of border on each side of your image.
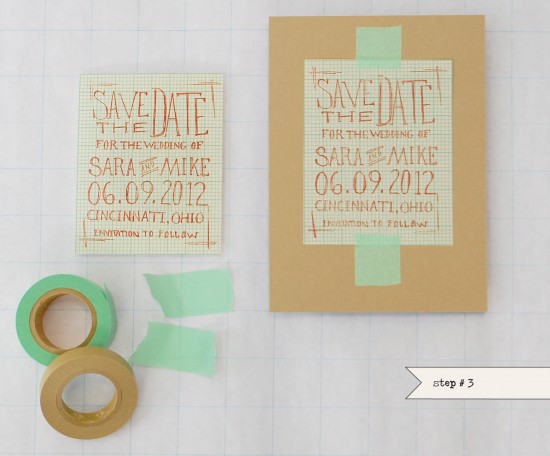
Hand Stamped Save the Dates: Step 2

Step Three: Tear pieces of decorative washi tape to secure the stamped image in place on the backer (size A6).  If you want the stamped image to be more securely affixed to the backing, use spray adhesive to adhere them together.

Hand Stamped Save the Dates: Step 3

Materials List:

Custom rubber stamp: “Sketchbook” Save the Date

Washi tape

Spray adhesive

Decorative Paper: (this can be found at your local office supply store, thrift stores, estate or garage sales or in your own office!)  Or, if you want, go here to print your own customizable graph paper for free!!

Paper cutter or self healing matt, X-acto and ruler

Color Box Stamp Pad: We chose a rust/brown color for this tutorial

Backing Paper: We used pre-cut Kraft card stock, size A6

Photo Credits: Antiquaria