How to Create Calligraphy and Floral Frames

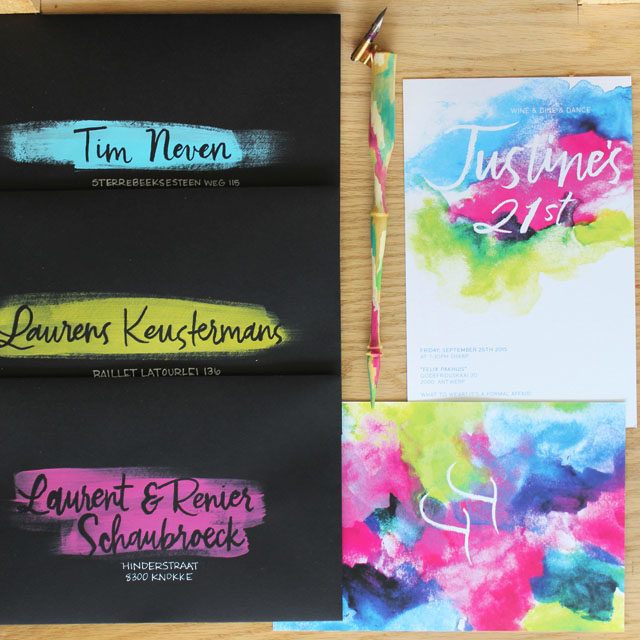
We design lots of calligraphy frames in the studio for wedding invitations, art prints, stamps… we just can’t get enough! We thought it would be fun today to show you a little bit about the process of making a frame with a pointed calligraphy pen and a brush pen. You can really explore this topic in so many variations, which is what makes it so much fun! We hope that this little lesson helps springboard you into making designs that are your own! –Bailey and Emma of Antiquaria

How to Create Calligraphy and Floral Frames for Wedding Invitations and Art Prints / Antiquaria for Oh So Beautiful Paper

Materials

Hot press watercolor paper

Calligraphy pen, pointed nib, and Sumi ink

Brush Pen

Monogram Rubber Stamp – we used our Handwritten Calligraphy Names Monogram

Stamp Pad

Pencil

How to Create Calligraphy and Floral Frames for Wedding Invitations and Art Prints / Antiquaria for Oh So Beautiful Paper

There are endless techniques you can use to make illustrated borders, and today we’re only going to dip into a few of the basics. We recommend taking a few minutes (or hours) to peruse IAMPETH, which has amazing resources and inspirations for pointed pen work, since that is the tool that we’re going to primarily use today. Most of these decorations start with a compound curve (the main stem that will border your image) and are decorated off of that curve. Here’s a little bit about each decoration:

How to Create Calligraphy and Floral Frames for Wedding Invitations and Art Prints / Antiquaria for Oh So Beautiful Paper

For this plume-like decoration, you want the thick stroke (using pressure) to be on the inside, next to the main stem, as shown above. Make the little loops smaller as you go up the stem.

How to Create Calligraphy and Floral Frames for Wedding Invitations and Art Prints / Antiquaria for Oh So Beautiful Paper

This decoration resembles a feather. With a pencil, draw a shape on the side of your main stem, as a guide. Then fill in the shape with light compound curves, moving up the stem.

How to Create Calligraphy and Floral Frames for Wedding Invitations and Art Prints / Antiquaria for Oh So Beautiful Paper

This simple little leaf decoration just has arches up the side of the stem. In the middle of each, we drew in little dots.

How to Create Calligraphy and Floral Frames for Wedding Invitations and Art Prints / Antiquaria for Oh So Beautiful Paper

The abstract floral border is done off of a pencil line, with no main stem. Start with a pencil line. Then, using a brush pen, or a small paint brush and ink, make little petal shapes up the pencil line.

How to Create Calligraphy and Floral Frames for Wedding Invitations and Art Prints / Antiquaria for Oh So Beautiful Paper

Next, add in your leaves.

How to Create Calligraphy and Floral Frames for Wedding Invitations and Art Prints / Antiquaria for Oh So Beautiful Paper

Lastly, add in some details with your calligraphy pen. Outline around the shapes to define them and add the centers of the abstract flowers.

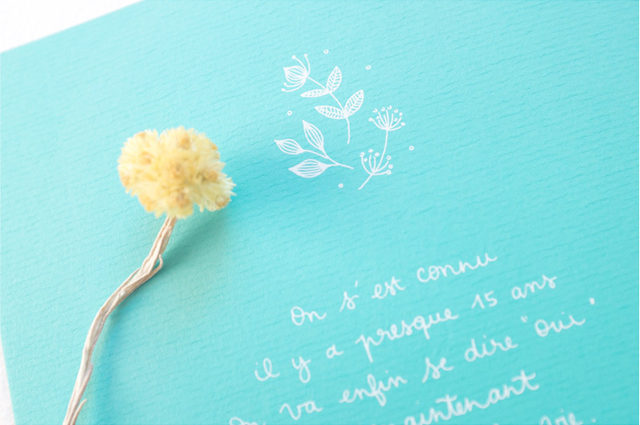
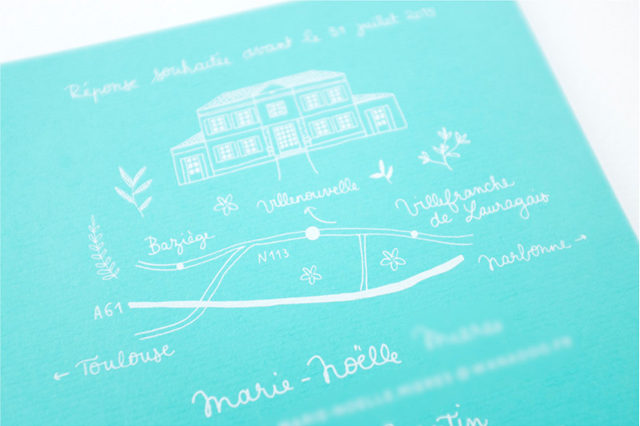
Decorated Monogram. In the series of pictures below, we use the above techniques (specifically the abstract floral border) to embellish one of our Monogram Stamps (our Handwritten Calligraphy Names Monogram). You could do the same thing around an invitation, single initial monogram or to address an envelope!

How to Create Calligraphy and Floral Frames for Wedding Invitations and Art Prints / Antiquaria for Oh So Beautiful Paper

How to Create Calligraphy and Floral Frames for Wedding Invitations and Art Prints / Antiquaria for Oh So Beautiful Paper

How to Create Calligraphy and Floral Frames for Wedding Invitations and Art Prints / Antiquaria for Oh So Beautiful Paper

How to Create Calligraphy and Floral Frames for Wedding Invitations and Art Prints / Antiquaria for Oh So Beautiful Paper

How to Create Calligraphy and Floral Frames for Wedding Invitations and Art Prints / Antiquaria for Oh So Beautiful Paper

How to Create Calligraphy and Floral Frames for Wedding Invitations and Art Prints / Antiquaria for Oh So Beautiful Paper

Calligraphy Wall Art. After lettering a phrase, we decorated the border using the same pointed pen that it was written with (mainly the plume technique). Alternatively, you could use a fine tip Micron pen to draw any of the lettering or borders that we’ve shown here. You could also use color or gold to embellish your work!

How to Create Calligraphy and Floral Frames for Wedding Invitations and Art Prints / Antiquaria for Oh So Beautiful Paper

How to Create Calligraphy and Floral Frames for Wedding Invitations and Art Prints / Antiquaria for Oh So Beautiful Paper

How to Create Calligraphy and Floral Frames for Wedding Invitations and Art Prints / Antiquaria for Oh So Beautiful Paper

How to Create Calligraphy and Floral Frames for Wedding Invitations and Art Prints / Antiquaria for Oh So Beautiful Paper

How to Create Calligraphy and Floral Frames for Wedding Invitations and Art Prints / Antiquaria for Oh So Beautiful Paper

How to Create Calligraphy and Floral Frames for Wedding Invitations and Art Prints / Antiquaria for Oh So Beautiful Paper

How to Create Calligraphy and Floral Frames for Wedding Invitations and Art Prints / Antiquaria for Oh So Beautiful Paper

How to Create Calligraphy and Floral Frames for Wedding Invitations and Art Prints / Antiquaria for Oh So Beautiful Paper

We hope you have tons of fun playing around with the techniques! Be sure to show us your interpretation on Instagram by tagging us @antiquariadesign! We can’t wait to see what you come up with.

Vivid Watercolor 21st Birthday Party Invitations

These bright and colorful watercolor invitations from Ashley Bush Lettering and Design are so fun for a 21st birthday party! And those envelopes? OMG. Ashley used masking fluid and a bright swash of paint to create the most amazing resist technique in the address. Love love love!

Colorful Watercolor Birthday Party Invitations by Ashley Bush Lettering and Design / Oh So Beautiful Paper

From Ashley: This collection was for a 21st birthday celebration! The concept was bright watercolor fun with a big emphasis on the envelopes! I started with the invitation design: I hand painted the multi-colored splash and finalized the design in Photoshop. I also created some custom brush-lettering for the front and back of her invitations.

Colorful Watercolor Birthday Party Invitations by Ashley Bush Lettering and Design / Oh So Beautiful Paper

We carried the colorful painted look right onto the envelopes, but instead of making every envelope the same color scheme I decided to mix and match, utilizing all of the fun colors from the invitation!

Colorful Watercolor Birthday Party Invitations by Ashley Bush Lettering and Design / Oh So Beautiful Paper

Colorful Watercolor Birthday Party Invitations by Ashley Bush Lettering and Design / Oh So Beautiful Paper

The black envelopes gave just the right pop for the bright colors. Using a small, fine-tip brush I lettered the names on the envelopes in masking fluid, brushed the paint on, and finished the address with a white Gelly Roll pen! You can see a video of this process here and if you want to try lettering with masking fluid you can follow my step-by-step tutorial.

Colorful Watercolor Birthday Party Invitations by Ashley Bush Lettering and Design / Oh So Beautiful Paper

Thanks Ashley!

Photo Credits: Ashley Bush Lettering and Design

Printable Tropical Envelope Liners

Are you ready for something SUPER fun?!? Sakura of America recently released a set of amazing new brush pens called the Pigma Professional Brush, and we wanted to do something really awesome to show you what these babies can do! Nothing makes me smile more than a colorful envelope and patterned envelope liner – and today we have printable tropical envelope liners in TWO gorgeous patterns for you to enjoy!

Printable Tropical Envelope Liners / Illustrated by Swiss Cottage Designs with Sakura Pigma Professional Brush Pens / Oh So Beautiful Paper

Courtney from Swiss Cottage Designs illustrated the tropical patterns using all three Pigma Professional Brush pen weights – fine, medium, and bold. Courtney and I are still feeling the tropical vibe from the Paper Party so we decided to keep on running with a tropical theme. One pattern features illustrations of watermelons, pineapples, and palm fronds, and the other has flamingos, toucans, coral, and fish! Both patterns make me wish I was somewhere on a beach with a tropical drink in hand!

Printable Tropical Envelope Liners / Illustrated by Swiss Cottage Designs with Sakura Pigma Professional Brush Pens / Oh So Beautiful Paper

You can print the envelope liner patterns on text weight letter size paper. You can leave the patterns black and white – or add a dose of color using colored pencils or your favorite Gelly Roll pen! The Glaze pens almost look like watercolor and are great for coloring in those fine details! You can even use the patterns as coloring sheets just for fun!

Printable Tropical Envelope Liners / Illustrated by Swiss Cottage Designs with Sakura Pigma Professional Brush Pens / Oh So Beautiful Paper

Here are the instructions for making the envelope liners:

Step 1. Lightly trace an outline of the envelope on the back of the liner page. If you’re using Paper Source envelopes, you can use one of these handy envelope liner template kits. Cut out the liner, being careful to cut on the inside of the lines. Trim an additional 1/16″ off each side and 3/4″ off the bottom of the liner.

Step 2. Place the liner in the envelope. Use a glue stick or double sided tape on the back of the liner (along the top triangle and just above the crease) to adhere the liner to the envelope.

Printable Tropical Envelope Liners / Illustrated by Swiss Cottage Designs with Sakura Pigma Professional Brush Pens / Oh So Beautiful Paper

Printable Tropical Envelope Liners / Illustrated by Swiss Cottage Designs with Sakura Pigma Professional Brush Pens / Oh So Beautiful Paper

The Pigma Professional Brush pens use archival waterproof ink, which also makes them my new favorite pen for addressing envelopes. The brush nibs respond to changes in pressure or direction while maintaining smooth and consistent ink flow, so they’re super easy to use! The flexible brush nibs offer both thin and thick brush strokes and they won’t smear, feather, or bleed through on most paper. Courtney addressed a few envelopes using the different pen weights – I love the subtle gradient in the bold brush!

Printable Tropical Envelope Liners / Illustrated by Swiss Cottage Designs with Sakura Pigma Professional Brush Pens / Oh So Beautiful Paper

Printable Tropical Envelope Liners / Illustrated by Swiss Cottage Designs with Sakura Pigma Professional Brush Pens / Oh So Beautiful Paper

Printable Tropical Envelope Liners / Illustrated by Swiss Cottage Designs with Sakura Pigma Professional Brush Pens / Oh So Beautiful Paper

And yes, I may have foiled an envelope liner or two (in light pink metallic foil) using my Minc foil applicator. The Minc works with toner ink, so just print the liner patterns on a laser printer, or use a copying machine to make as many copies of the liner as you’ll need, and foil away!

Printable Tropical Envelope Liners / Illustrated by Swiss Cottage Designs with Sakura Pigma Professional Brush Pens / Oh So Beautiful Paper

Download the envelope liner patterns from Swiss Cottage Designs right here! And you can pick up a set of the Pigma Professional Brush pens right here!

All artwork © 2015 Swiss Cottage Designs created exclusively for Oh So Beautiful Paper. All artwork is made available for personal use only. By downloading the patterns you agree to the terms of use.

Swiss Cottage Designs is a mem­ber of the Designer Rolodex â€“ you can see more of Courtney’s beau­ti­ful work right here!

Photos by Nole Garey for Oh So Beautiful Paper

This post is sponsored by Sakura of America. All content and opinions are my own. Thank you for supporting the sponsors that make Oh So Beautiful Paper possible!

Business Card Inspiration #18

It has been a little while since I rounded up some pretty business cards! Here are a few recent favorites!

Business Card Inspiration / Oh So Beautiful Paper

1. Illustrator Meera Lee Patel‘s colorful painterly business cards (via Instagram)

2. Beautiful watercolor and letterpress business cards with gold edge painting by Holly Hollon for Joanne Lue Events (via Instagram)

3. GORGEOUS green and gold foil business cards by Christine Wisnieski for floral studio Molly Taylor & Co. (via Instagram)

4. Gold foil and offset printed business cards for Candlefish / Design by Fuzzco and gold foil by Mama’s Sauce (via Instagram)

5. Hand lettered letterpress printed business cards / Printed by Czar Press for Odd Daughter Paper Co. (via Instagram)

p.s. If you’d like to submit your own business cards for a future post just tag your photos with #osbpbusinesscardlove on Instagram!

Marie-Noelle + Nicolas’s Boho Chic Illustrated Wedding Invitations

Illustrator Nathalie Ouederni of Studio Kalumi created these lovely boho chic wedding invitations for her best friend’s wedding – and I’m so thrilled she’s here today to share them with you! Nathalie combined wildflower illustrations inspired by the French village where the bride and groom grew up with hand written text throughout the invitations. And I LOVE the screen printed white ink over turquoise paper!

Boho Chic Illustrated Wedding Invitations by Nathalie Ouederni / Oh So Beautiful Paper

From Nathalie: When my best friend announced me she was getting married, it was a bit of a shock. We have known each other for more than ten years now and she has been with her fiancé for almost fifteen years, but this news seemed very unreal! I was very excited to design her wedding invitation suite, but also a bit terrified!

Boho Chic Illustrated Wedding Invitations by Nathalie Ouederni / Oh So Beautiful Paper

She gave me complete freedom regarding the colors, theme and technique. The only guidelines the couple gave me were that they wanted something modern, chic, handmade, romantic, and a little bohemian without being too girly. Marie-Noëlle also told me she wanted something in the line of the floral and vegetal patterns I usually make, so these were my starting points.

Boho Chic Illustrated Wedding Invitations by Nathalie Ouederni / Oh So Beautiful Paper

I started doodling some flowers with watercolors and made a proposal going this way, but I felt like it was a bit too much old fashioned and ‘heavy’. I wanted something fresh and more original. The floral pattern is inspired by the wildflowers that you can find where the couple comes from (a cute village close to Toulouse, France).

Boho Chic Illustrated Wedding Invitations by Nathalie Ouederni / Oh So Beautiful Paper

Some time before, I had found a turquoise card stock in a paper shop and instantly fell in love with the color. I knew  white screen printing would look amazing with the turquoise paper for these invitations. This printing process also fitted the couple’s desire to have something ‘handmade’.

Boho Chic Illustrated Wedding Invitations by Nathalie Ouederni / Oh So Beautiful Paper

The text on these invitations is also handwritten, which adds to the handmade and bohemian feel. I had a lot of fun creating the seamless pattern for the envelope liner and the stickers to close the envelopes, the different monogram logos, the wedding map, and more. The printing studio did an amazing job with all the details of these invitations, and were so easy to work with!

Boho Chic Illustrated Wedding Invitations by Nathalie Ouederni / Oh So Beautiful Paper

Boho Chic Illustrated Wedding Invitations by Nathalie Ouederni / Oh So Beautiful Paper

Thanks Nathalie!

Check out the Designer Rolodex for more tal­ented wed­ding invi­ta­tion design­ers and the real invi­ta­tions gallery for more wedding invitation ideas!

Photo Credits: Nathalie Ouederni / Studio Kalumi