Megan + Micah’s Metallic Art Deco Letterpress Wedding Invitations

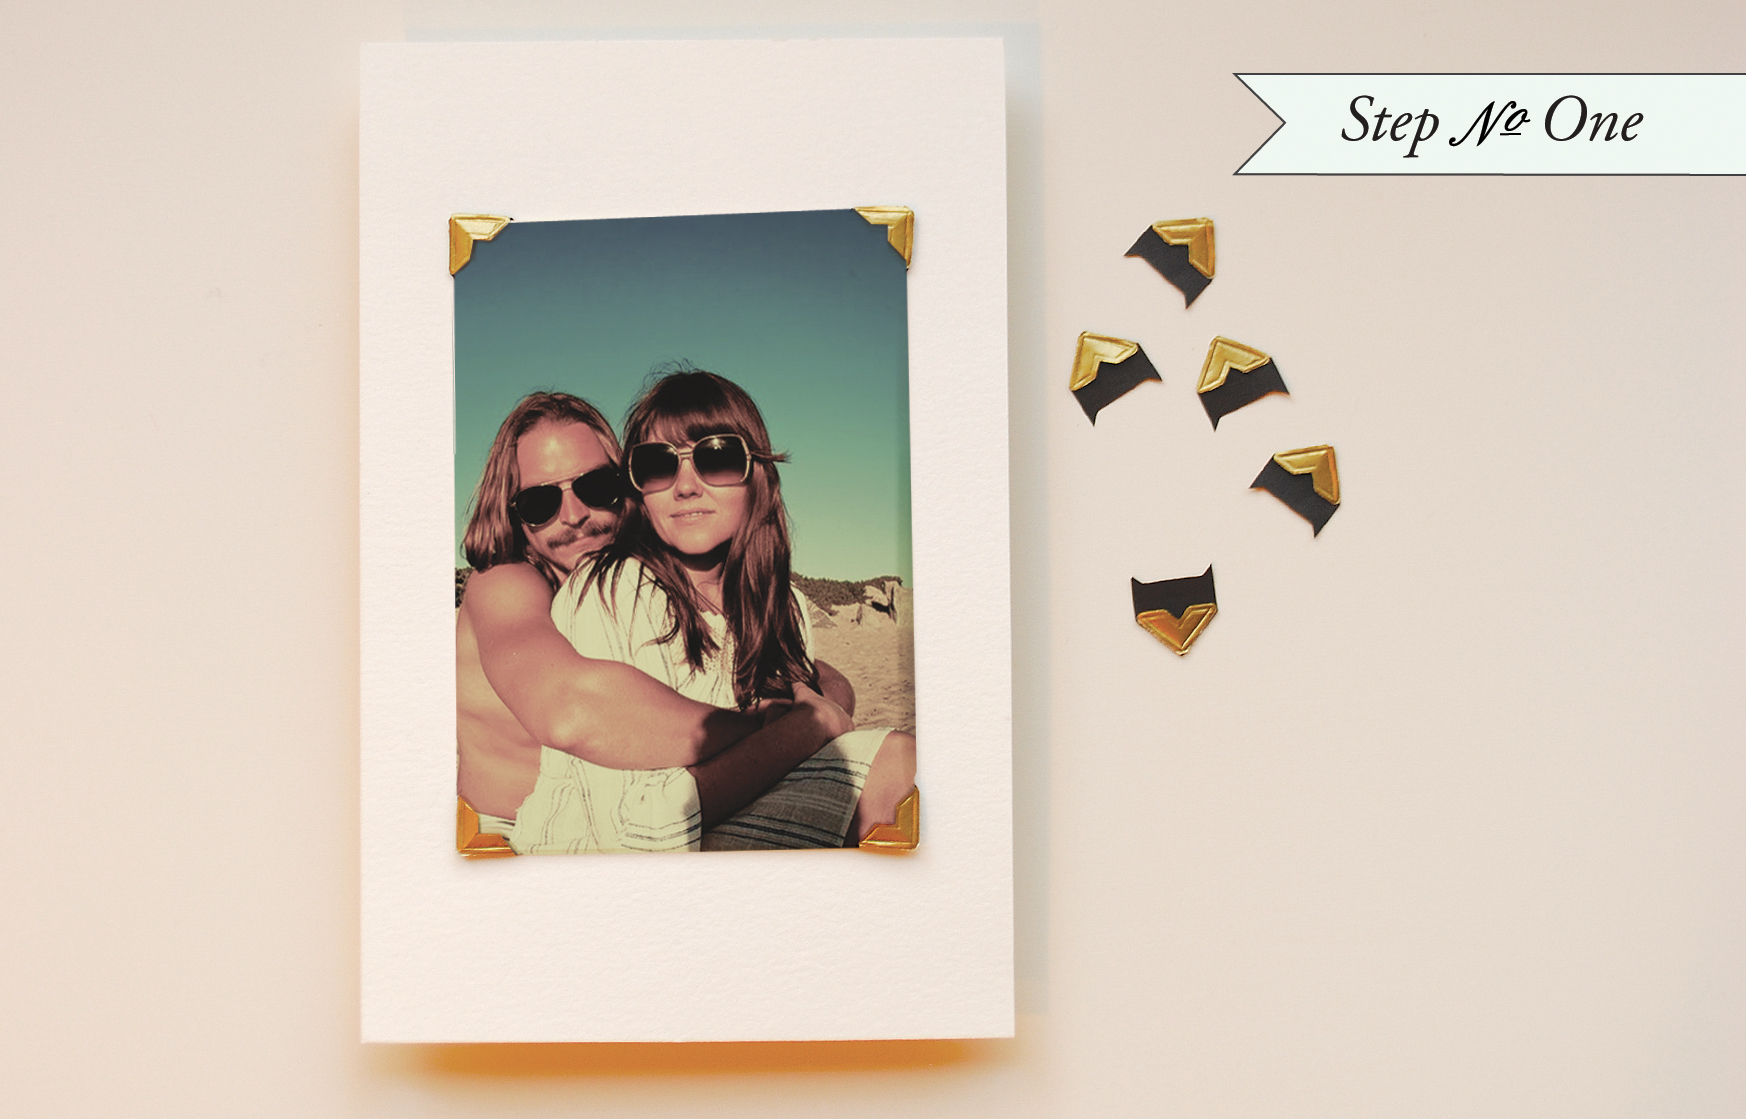
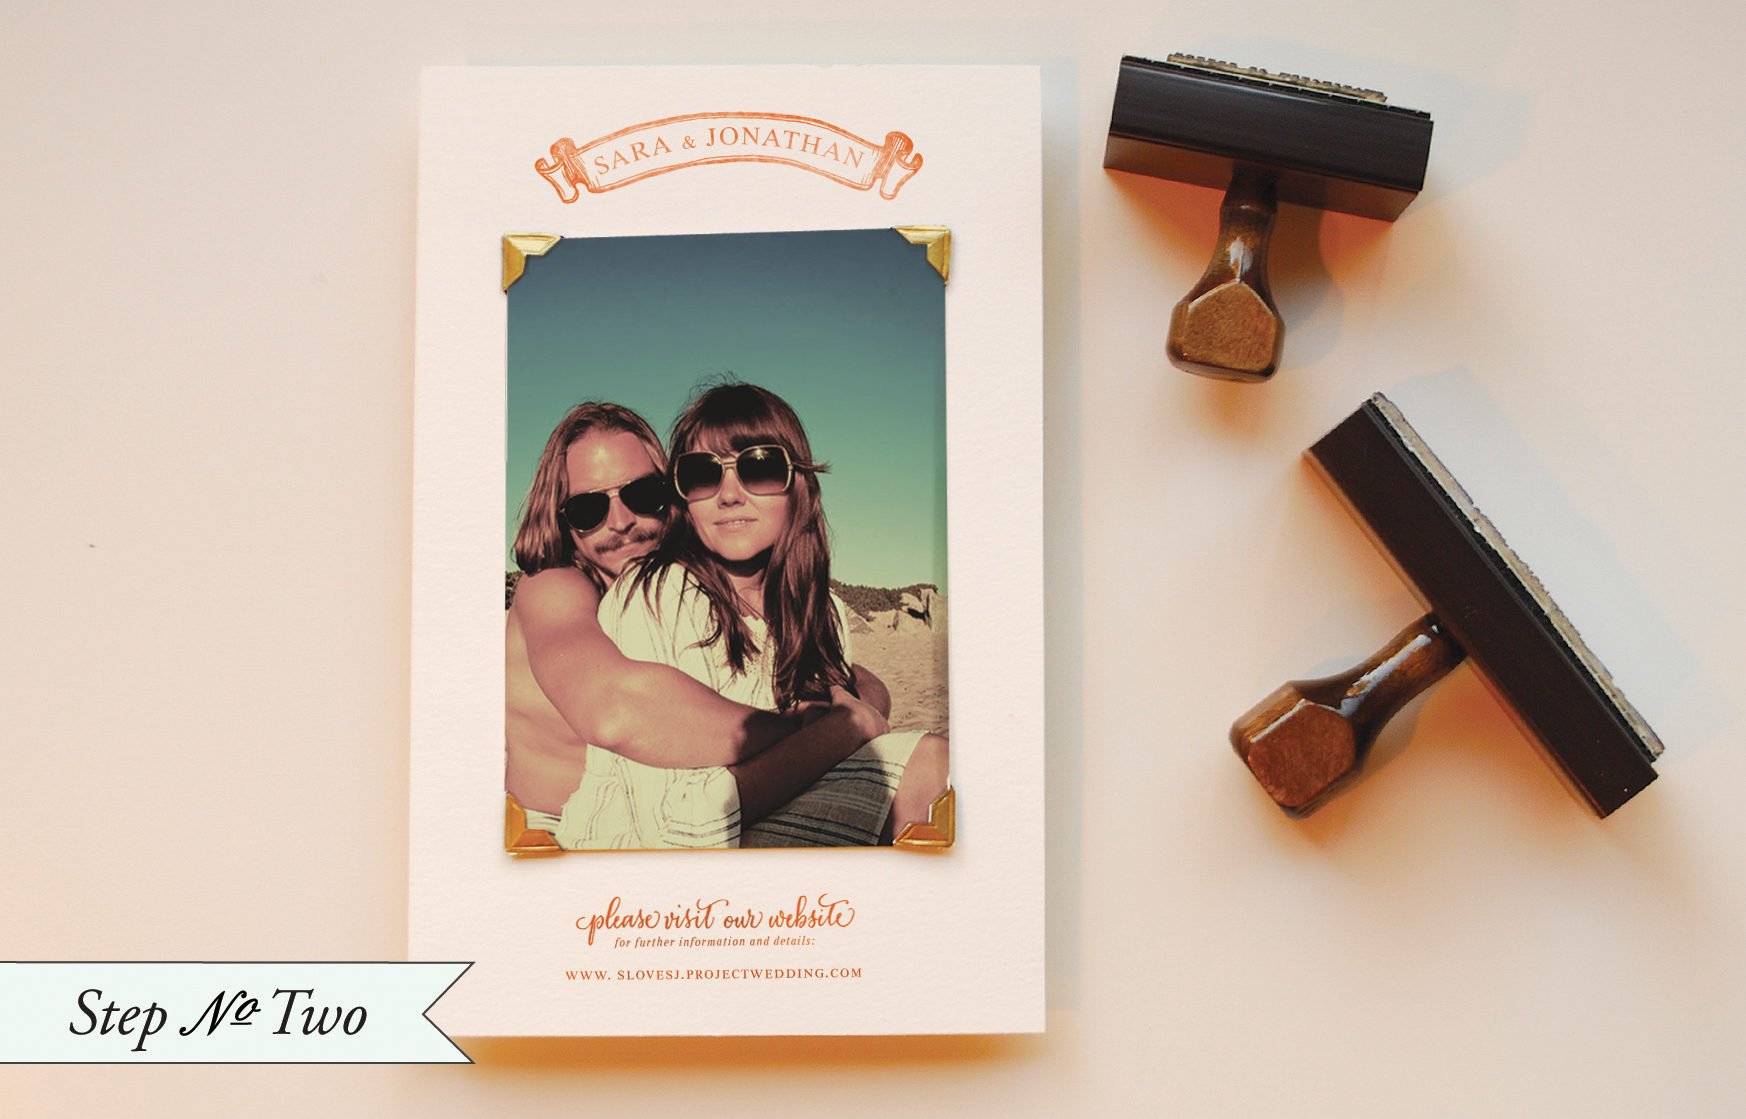
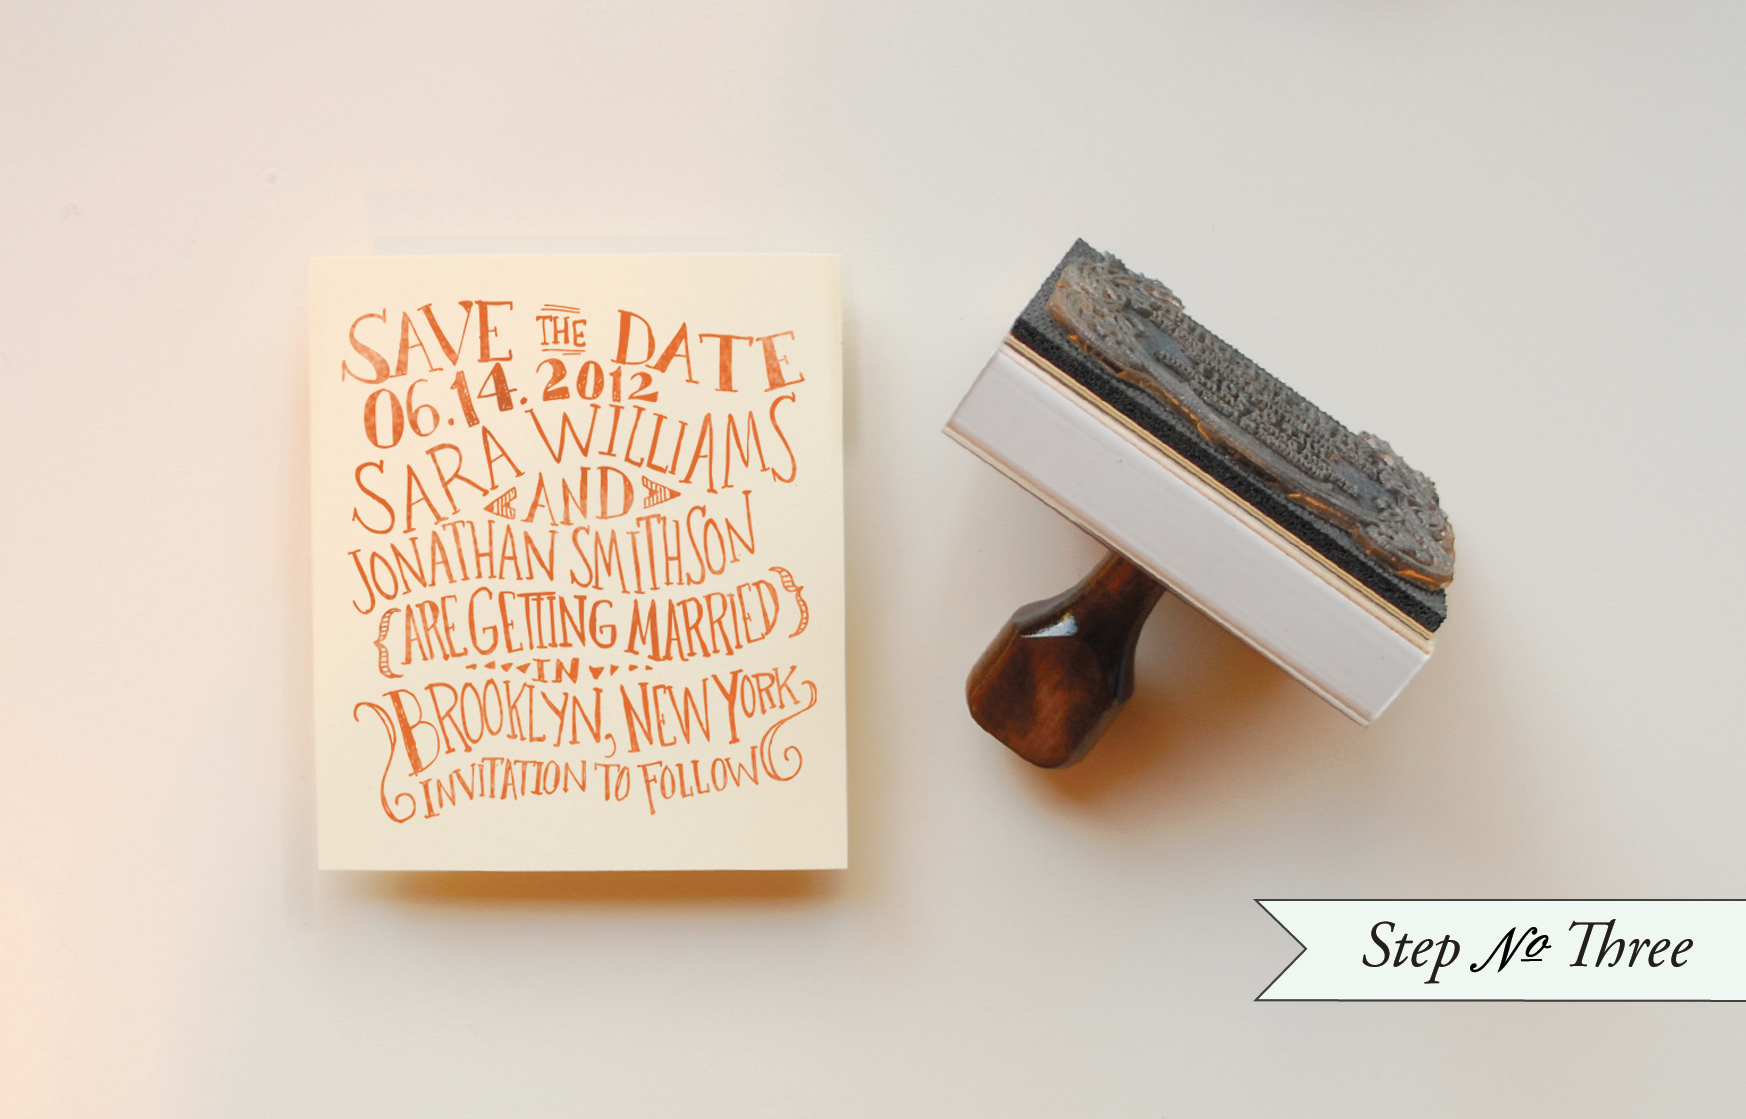
Brynne from Harken Press sent over these fun vintage-inspired save the dates and invitations that she created for a recent wedding, along with some of the fun day-of wedding stationery details.  Brynne started off with an Art Deco-inspired save the date, followed by a classic wedding invitation – all letterpress printed in a beautiful soft metallic gold ink by Quality Letterpress.

From Brynne: The bride and groom were initially inspired by vintage circus posters and the Art Deco movement for their wedding suite.  The one color design reflects the mood the couple wanted for the wedding; romantic, unique, vintage inspired, and a little nontraditional.


Each piece uses a gold (slightly metallic) ink and Crane Lettra cotton paper that compliments their neutral color palette of gold, white, and brown.  Letterpress printing was the perfect way to add that old world charm and elegance that suited this event.  Tim at Quality Letterpress did an amazing job with the printing.

Megan and Micah also had a few extra finishing touches for the big day.  Guests were asked to fill out a card with funny memories, their thoughts on why they thought Megan and Micah were perfect for each other, and marriage advice.  The cards were hung on a line with clothespins, making it interactive and decorative at the reception.  All the guest cards were later compiled into a book to remember the festivities.

So fun!  Thanks Brynne!

Design: Brynne Fischer at Harken Press
Letterpress Printing: Quality Letterpress

Check out the Designer Rolodex for more tal­ented wed­ding invi­ta­tion design­ers and the real invi­ta­tions gallery for more wedding invitation ideas!

Photo Credits: Invitation photos by Harken Press; wedding photos by Sara Kelley Photography

{happy weekend!}

Happy almost weekend everyone!  Do you all have fun plans for the weekend?  My husband and I are looking forward to hanging out with some friends, attending one of our favorite antique fairs here in DC, and hopefully going to see a movie.  It’s been months since we last went out to the movies, which is really unusual for us!  But in the meantime…

…a few links for your weekend!

This week on Oh So Beautiful Paper:

We have another fun cocktail coming up for you this afternoon, so check back a bit later for the recipe!  I hope you all have a wonderful weekend, and I’ll see you back here on Monday! xoxo

Photo Credit: Scissor Variations

Diane’s Circus-Inspired Bar Crawl Party Invitations

Lindsay from McMillian + Furlow sent over these super fun bar crawl invitations that she designed to help celebrate a friend’s return to the United States from a teaching stint overseas.  Lindsay wanted the invitations to feel jubilant and playful, so she drew inspiration from vintage circus posters, incorporating a very American red and blue color palette along with fun wood type-inspired fonts.  So cool!

From Lindsay: I decided to go with a circus themed bar crawl, and found a ton of inspiration in vintage Barnum and Bailey posters, raffle tickets and the beloved classic popcorn bag.  Along with the red and blue, I love how the design feels very American, which is appropriate for this particular celebration.

I’m always trying to find any excuse to use some of my favorite wood type fonts, and this project was no exception.  The combination of bold color, playful typography and circus-inspired illustration all contribute to the success of this festive design.  The invitations were printed digitally on a thick glossy paper and mailed in bright yellow envelopes.  With all this hype it’s bound to be a exceptionally good time!

Thanks Lindsay!

Photo Credits: McMillian and Furlow

Lauren + Joe’s Red and White Carnival Wedding Invitations

Lauren and Joe’s wedding invitations are so bright and cheerful, they make me happy just looking at them!  You might remember Lauren as the designer of Emily and Matt’s awesome German beer wedding invitations, and today she’s back to share the invitations from her own wedding!  Lauren incorporated big bold pops of red along with fun stripes and patterns into her booklet style wedding invitations, complementing the vintage carnival wedding theme.  So fun!

From Lauren: Our wedding had a vintage carnival theme, so we wanted the invitations not only to reflect that but also to really create some excitement about our big day.  We came up with the idea to do booklets that had the feel of old carnival or circus programs, complete with an “Admit One” ticket as the RSVP.


The booklet format was great because it allowed us to include a lot of information (since we were requiring guests to ride buses to the venue, etc.) and to carry out the sensationalist tone we were going for.  The booklets were offset printed on Ecru White Cotton Lettra paper.  Interior pages and other elements were printed digitally on Mohawk Loop Antique Vellum in Milkweed.

To make them even more fun and interactive, guests received the invitations in a fun, moss-filled box.  The boxes took many hours and required quite the assembly line, but we’d say it was well worth it in the end!

Thanks again Lauren!

Check out the Designer Rolodex for more tal­ented wed­ding invi­ta­tion design­ers and the real invi­ta­tions gallery for more wedding invitation ideas!

Photo Credits: The Creative Parasol

DIY Rubber Stamp Photo Card Save the Dates

It’s the ladies of Anti­quaria, back with another fab­u­lous and cre­ative DIY project for you!  This week they’re here with some awe­some DIY photo card save the dates!

Need a fabulous and unique way to incorporate your engagement shoot into your save the date?  We’ve got the solution for you: hand stamped photo save the date cards!  We are constantly inspired by all the wonderful engagement shoots that folks are putting together these days, and wanted to find a way to incorporate that imagery with rubber stamps.  We think the results are truly adorable and your family and friends will love receiving a sweet photo of the two of you.

DIY Photo Card Save the Date

DIY Photo Card Save the Date

Step One: Cut paper to a size A9 card (5.5″ x 8.5″).  Use photo corners (our most recent obsession) to secure your (3″ x 5″) photo to the card.  You just stick them on each corner to activate and the adhesive, center over the paper and press down to secure.

DIY Photo Card Save the Date

Step Two: This step will take two stamps, a monogram (we used our ribbons & banners monogram) and a website stamp (we used our calligraphy accent website stamp).  Ink each stamp thoroughly, position and stamp down on a hard, even surface.  Let dry.

DIY Photo Card Save the Date

Step Three: Cut paper to (4″ x 4.5″).  Ink a save the date stamp (we used our “Circus” save the date stamp) and make print on a hard surface.  Make sure when stamping, you apply moderate and even pressure over the entire stamp.  Let dry before assembly.

DIY Photo Card Save the Date

Finish up the suite with twine, wrapping the bundle a few times before making a knot.

Rubber Stamps:

“Banners” monogram

“Calligraphy Accent” website card

“Circus” save the date

Supplies:

A9 Card (5.5″ x 8.5″)

A9 Envelope

Photo – Printed locally or online.  Look for specials and deals on 3″ x 5″ prints

Save the Date (cut to 4″ x 4.5″)

Stamp Pad (we used orange)

Orange twine

Photo corners

Photo Credits: Anti­quaria, Save the Date photograph by Kelly Lynn James

p.s.  I’ve got two holiday card round ups coming a bit later this morning, so check back soon!