Friday Happy Hour: Classic Egg Nog

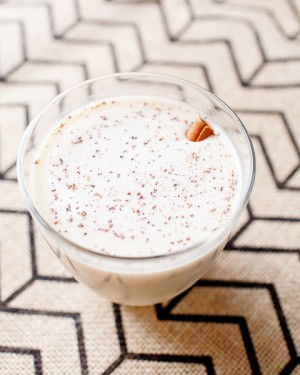
When I was a kid, my mom used to make me egg nog. Well, “egg nog.” Into a blender would go milk, an egg, sugar, cinnamon, and some vanilla extract. Eight year old me loved the weird, unsanitary egg milkshake that resulted. Years later, I tried egg nog in a carton from a dairy chain that shall remain unnamed, a think syrupy glop that, I can say with confidence, was not fit for human consumption. So I can understand if people hear “egg nog” and think “no thanks!” Other than Punch, there’s probably no other drink that’s been so terribly abused over the years and bears so little resemblance to its original form. But bear with me! Egg nog has a long and illustrious pedigree and deserves your reconsideration. Done well, egg nog is a rich and tasty milk punch that definitely deserves a second chance. – Andrew

OSBP-Signature-Cocktail-Recipe-Classic-Egg-Nog-9

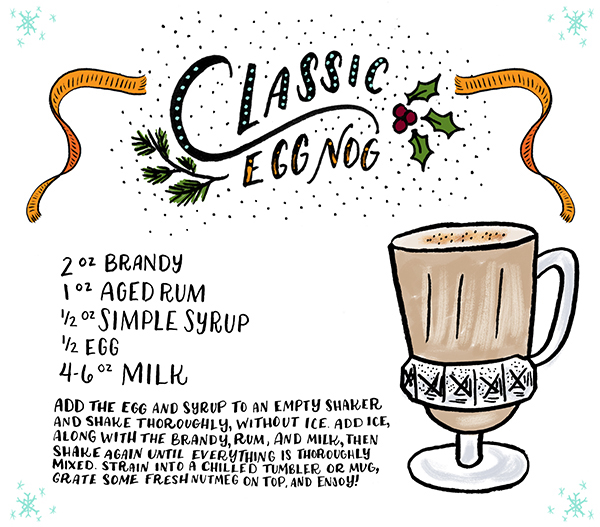
OSBP-Signature-Cocktail-Recipe-Classic-Egg-Nog-Shauna-Lynn-Illustration

Illustration by Shauna Lynn for Oh So Beautiful Paper

Egg Nog (serves 2)

4 oz Brandy
2 oz Aged Rum
1-2 oz Simple Syrup
1 Egg
Vanilla Extract (optional)
6-12 oz Milk

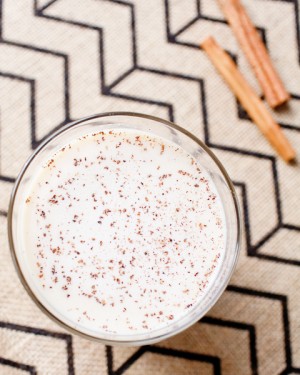
Add the egg and syrup to an empty shaker and shake thoroughly, without ice. Add the brandy, rum, milk, and ice, then shake again until everything is thoroughly mixed. Strain into a chilled tumbler or mug, grate some fresh nutmeg on top, and enjoy!

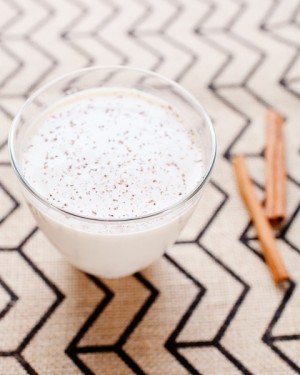
OSBP-Signature-Cocktail-Recipe-Classic-Egg-Nog-6OSBP-Signature-Cocktail-Recipe-Classic-Egg-Nog-47

This is adapted only slightly from the 1862 recipe by Jerry Thomas, one of history’s greatest bar tenders. (Milk Punch, of which this is a variant, goes back even farther to the 1600s.) And it’s not at all what you’d expect: it’s rich, with a smooth oaky depth thanks to the brandy and rum and just a bit of sweetness from the sugar and milk. The egg and milk give the drink a sturdy body and rich froth on top, but it’s something you can sip – not an egg milkshake.

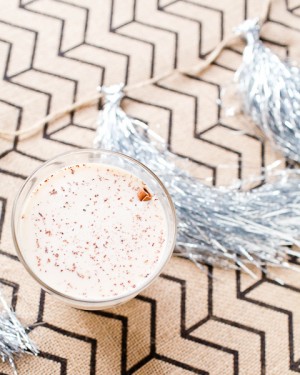
OSBP-Signature-Cocktail-Recipe-Classic-Egg-Nog-38

Here are some additional thoughts, in no particular order of importance: used aged rum only, as clear rum absolutely will not do here. Consider bumping up the simple syrup to an ounce per serving, as the original egg nog was much less sweet than most drinks we’re familiar with now. Eggs in 1862 were also much smaller than eggs are todays, so you probably only need half an egg per serving – or use one egg  make two drinks at once. If you have some handy, a dash of Allspice Dram can jazz up your egg nog. And my mom was on to something: though it’s not historically authentic, a dash of vanilla extract is a pretty solid addition. So. It’s Christmastime. Go make some egg nog.

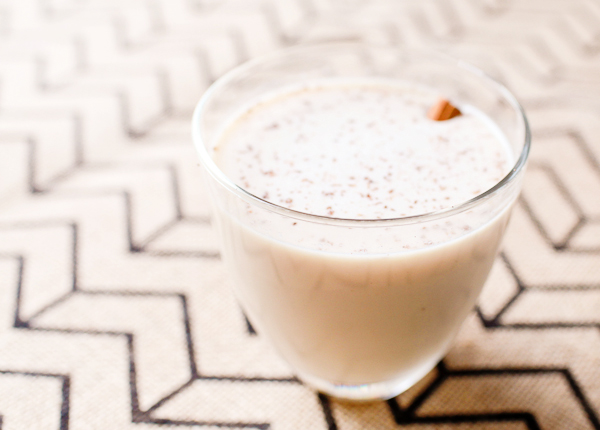
OSBP-Signature-Cocktail-Recipe-Classic-Egg-Nog-33OSBP-Signature-Cocktail-Recipe-Classic-Egg-Nog-27

Happy Holidays!

Photo Credits: Nole Garey for Oh So Beautiful Paper

Happy Weekend!

Happy Friday everyone! Less than a week before Christmas! I’ll be back on Monday and Tuesday with a couple of quick (but very fun) posts before heading off for our annual holiday hiatus. But in the meantime…

OSBP-St-Germain-New-Years-Eve-Cocktail-Party-Ideas-Recipes

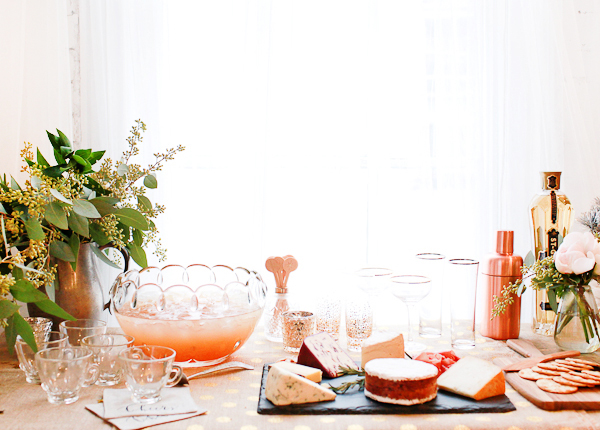
Our New Year’s Eve Cocktail Dinner Party with St-Germain

…a few links for your weekend!

This week on Oh So Beautiful Paper:

Check back soon for this week’s cocktail! I hope you all have a wonderful weekend, and I’ll see you back here early next week! xoxo

The Juggle Struggle

Joy wrote this post about juggling last week – a topic that has been on my mind a lot lately. Sophie turned 15 months old last Friday. The milestones seem to be coming faster and faster (talking! getting ready to walk!), but I don’t have that many photos of Sophie from the last few months to record all the changes. There are a couple of reasons. First, this kid is on the move! She rarely sits still for more than 5 seconds, and if she sees me pointing a camera in her direction she’ll immediately crawl over and try to grab it from me. But the main reason is that Sophie started daycare in mid-September, just after her first birthday.

OSBP-Family-Photos-Charlie-Juliet-Photography-17

OSBP-Family-Photos-Charlie-Juliet-Photography-55OSBP-Family-Photos-Charlie-Juliet-Photography-14

After being Sophie’s sole daytime caregiver for the entire first year of her life, I was really looking forward to having my days back. Before daycare, I spent my entire day with Sophie, trying to squeeze emails or mini photo sessions into naps or quiet time, but often not truly starting to work until after 7 or 8 p.m. I had to completely forget about trying to get any house-related projects done during the week, leaving lots of not-yet-unpacked boxes from our move in March. It was a rough schedule, and our stress levels were at an all-time high. So when a space opened up at my husband’s work (after being on the wait list for eight months!), we welcomed the chance with open arms.

OSBP-Family-Photos-Charlie-Juliet-Photography-41OSBP-Family-Photos-Charlie-Juliet-Photography-42

OSBP-Family-Photos-Charlie-Juliet-Photography-32

But with full time childcare came daycare illnesses. Sophie has been sick continuously for the last three months. We’ve had more colds than I can count, two fevers, three ear infections, and endless congestion. Which means several trips back and forth to the pediatrician, and lots of days home until Sophie was well enough to go back to daycare, just to get sick again. It has been an exhausting, endless loop, detracting from the increased productivity that daycare was supposed to allow in the first place.

But mostly? Mostly I just miss my days with Sophie. Even with the exhaustion and late nights, I miss my sweet girl. She’s getting so big so fast, and I know that this second year will fly by even faster than the first. But I know that I can’t do both. I can’t spend my days with Sophie and develop all the new content and features that I want for OSBP. Photo shoots, DIY projects, even just reviewing and responding to submissions takes a lot of time, and that doesn’t even include the mundane tasks of organizing my office and filing paperwork. There are days that I only get to spend a couple of hours with Sophie between picking her up from daycare and when she goes to sleep. I miss Sophie most of all on those days. I love my job, I want to grow my business, and I need to help provide for my family, but I also want to be present while my daughter is small.

OSBP-Family-Photos-Charlie-Juliet-Photography-59

OSBP-Family-Photos-Charlie-Juliet-Photography-69OSBP-Family-Photos-Charlie-Juliet-Photography-99

So, like Joy, this leads to a lot of guilt and stress, in many of the same ways. But I also find myself questioning my priorities, and the way I allocate my time. I tell myself everything would be easier “if only” – if only we could afford a nanny instead of daycare, if only I could afford a staff to help shoulder the workload, etc. – but that’s just wishful thinking. I don’t have any real answers or solutions.

OSBP-Family-Photos-Charlie-Juliet-Photography-75OSBP-Family-Photos-Charlie-Juliet-Photography-95

OSBP-Family-Photos-Charlie-Juliet-Photography-8

Sorry for the semi-downer of a post, but this has been on my mind so much lately that I needed to write it down. It’s a daily struggle, and I do hope that it will eventually get easier. But in the meantime, my sweet girl is home from daycare with yet another fever and ear infection. And while it means I won’t get anything else done today, I’m looking forward to taking care of her.

Since I don’t have many recent photos of Sophie, these photos were all taken by the talented CJ of Charlie Juliet Photography during our last trip to NYC in August, when Sophie was around 11 months old. 

DIY Tutorial: Handmade Patterned Notebooks

A handmade gift (or wedding favor) is always such a special way to show someone how much you care. With the holiday season in full swing, we’ve been brainstorming what handmade gifts to make this year for family and friends (an Antiquaria tradition!). This year, one gift that will be under the tree of all of our loved ones are a set of these patterned journals. They’re small enough to be carried around in a handbag which is ideal so that they’ll always be there to capture a great idea or quick thought. – Bailey and Emma of Antiquaria
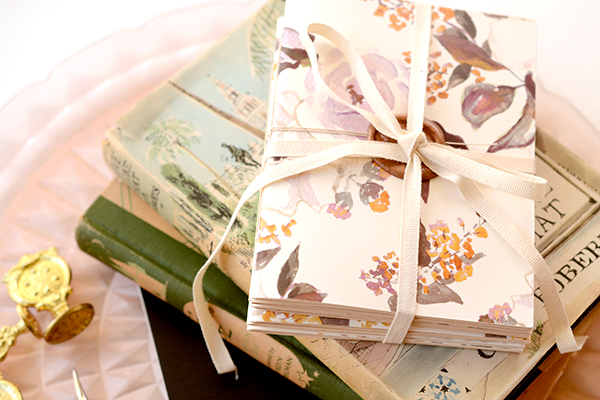
DIY Tutorial: Pattern Notebook Gifts or Wedding Favors by Antiquaria for Oh So Beautiful Paper

We will be bundling them into sets of three but any quantity would be lovely! Six would be so luxurious for a friend who loves to write or sketch! While the process of making these journals has quite a few steps, they are fast and easy…we promise. You can easily knock out making them for all of your loved ones in a day if you work in an assembly line process!
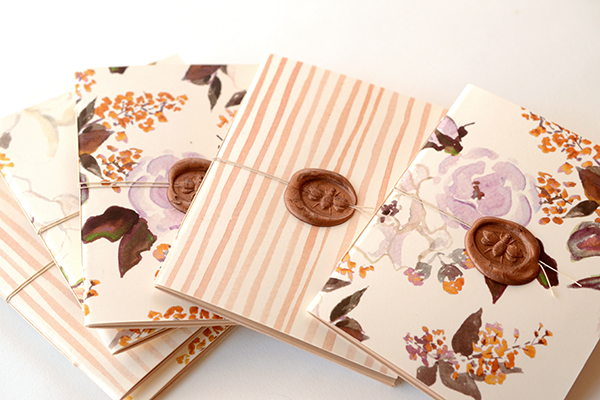
DIY Tutorial: Pattern Notebook Gifts or Wedding Favors by Antiquaria for Oh So Beautiful Paper

Step 1: First, you will need to cut your cover sheets (we used our “Annabelle Violet” Floral Patterned Paper) and your text interior sheets (we used 4 sheets) to size. For ease, we just cut the 8.5″x11″ into 2 pieces (final measurement 8.5″x5.5″) using a metal ruler, craft knife and self healing mat. This way, there is not any paper waste! This also makes a wonderfully small pocket notebook size.
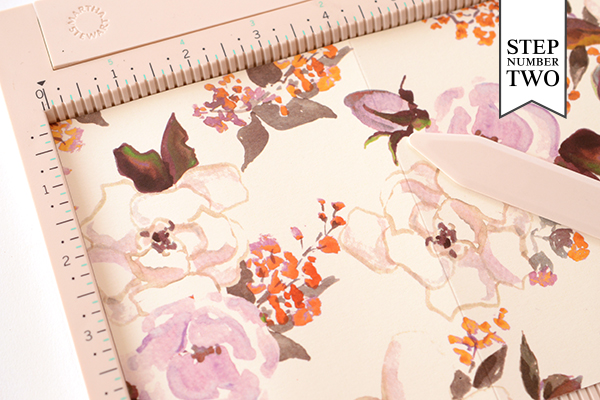
DIY Tutorial: Pattern Notebook Gifts or Wedding Favors by Antiquaria for Oh So Beautiful Paper

Step 2: Next, you’ll fold both the cover and interior pages in half. In order to make a clean fold on our cover paper we scored it down the center (at the 4.25″ mark). The interior sheets (8 in total) we just folded in half and used a bone folder to make the fold crisp.
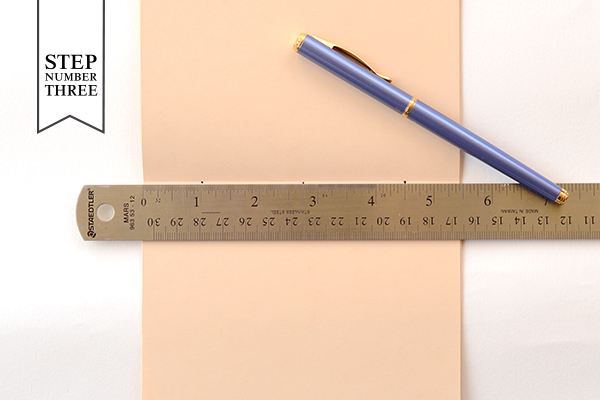
DIY Tutorial: Pattern Notebook Gifts or Wedding Favors by Antiquaria for Oh So Beautiful Paper

Step 3: We will be stitching these notebooks together, so we’ve got make holes to thread our needle through. Position your ruler over the center fold in the text paper stack. Make marks at 1 inch, 2.75 inches and 4.5inches. We’ve used a dark pen here so that you can see the dots…but feel free to use a pencil or whatever you have on hand.
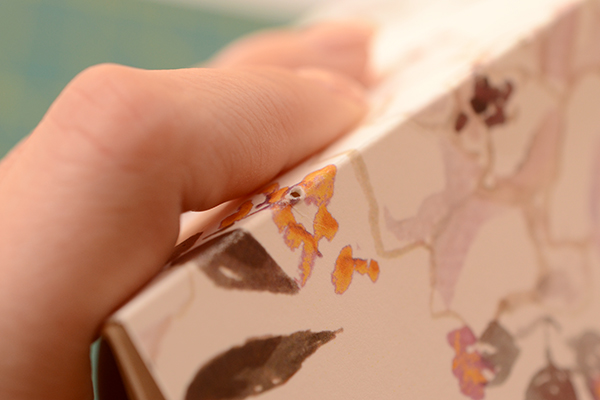
DIY Tutorial: Pattern Notebook Gifts or Wedding Favors by Antiquaria for Oh So Beautiful Paper

Step 4: After you’ve marked your holes, you will need to punch through them with an awl. Stack your cover and interior pages together before making clean puncher marks though ALL of the sheets. This doesn’t take much force. If it helps, you can use binder clips to hold the pages and cover together and keep it straight.
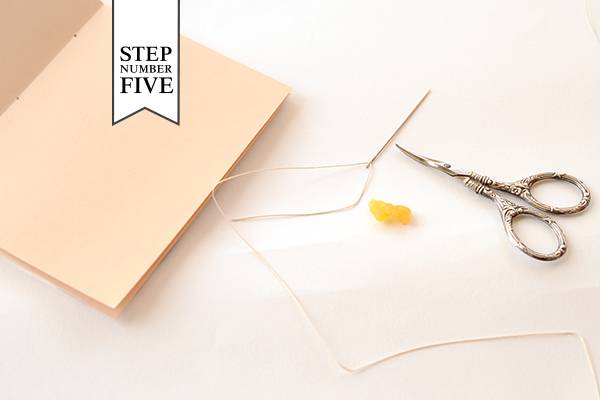
DIY Tutorial: Pattern Notebook Gifts or Wedding Favors by Antiquaria for Oh So Beautiful Paper

Step 5: Now you’re ready to sew! This step contains many sub-steps that go quickly once you get the hang of it. Thread your needle with bookbinding thread. We used approx. 18 inches for each book because it’s better to cut off extra than to come up short! If you’re having a hard time threading your needle, you can run a little beeswax on the tip to make it stiff and easier to thread through.
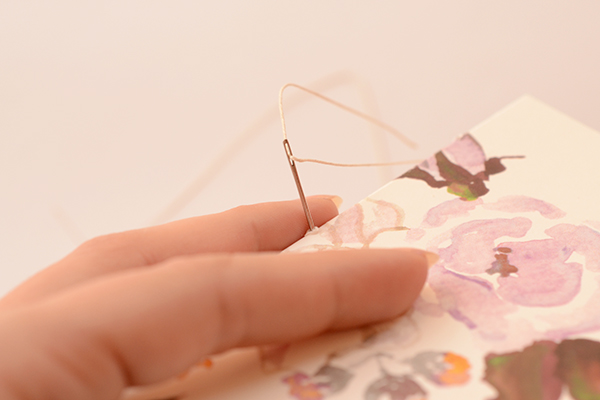
DIY Tutorial: Pattern Notebook Gifts or Wedding Favors by Antiquaria for Oh So Beautiful Paper

Step 5a: Thread your needle through the center hole on the outside of your journal as shown above. Pull through, leaving a tail that is approximately 6 inches long.
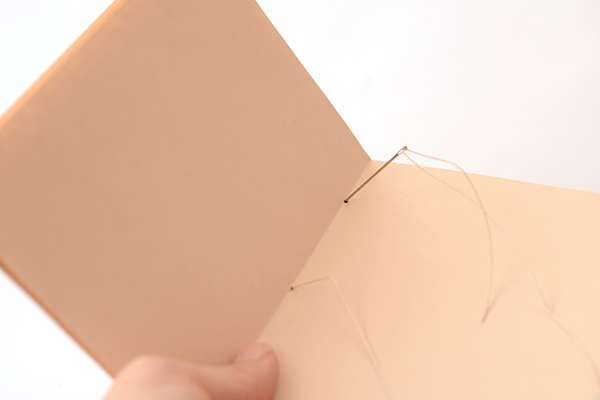
DIY Tutorial: Pattern Notebook Gifts or Wedding Favors by Antiquaria for Oh So Beautiful Paper

Step 5b: Now sew through the top hole in the inside of the journal as shown above. Make sure you still have your 6″ tail on the outside and you don’t pull it through!
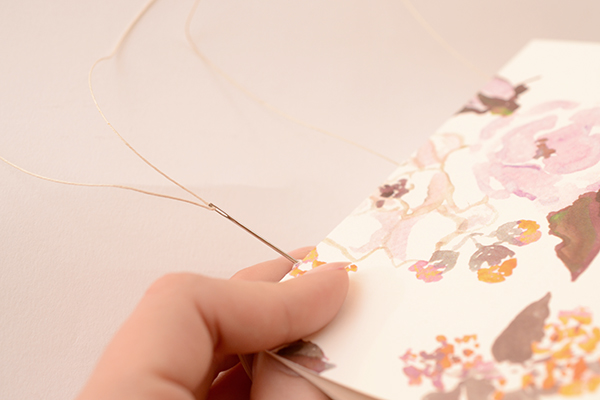
DIY Tutorial: Pattern Notebook Gifts or Wedding Favors by Antiquaria for Oh So Beautiful Paper

Step 5c: Next, you’ll bring your needle down and sew through the bottom hole on the outside of your journal.
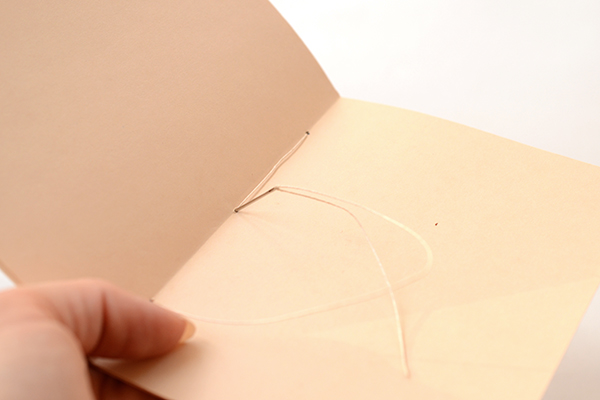
DIY Tutorial: Pattern Notebook Gifts or Wedding Favors by Antiquaria for Oh So Beautiful Paper

Step 5d: Now, you’ll sew through the center hole once more, ending up on the outside cover.
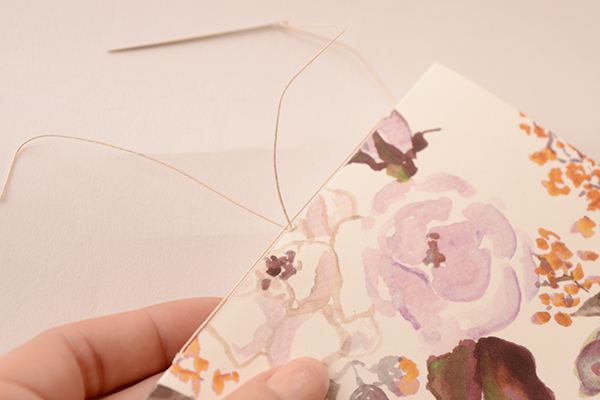
DIY Tutorial: Pattern Notebook Gifts or Wedding Favors by Antiquaria for Oh So Beautiful Paper

Step 5e: Once you’ve pulled your thread through the center a second time, you can take your needle off of the thread. Make sure that there is one thread end on either side of the spine thread (the one that’s down the center).
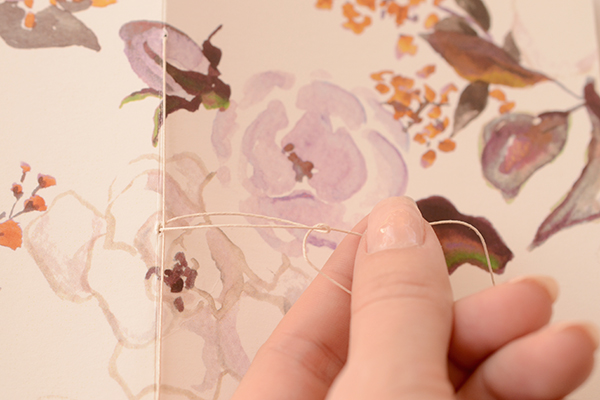
DIY Tutorial: Pattern Notebook Gifts or Wedding Favors by Antiquaria for Oh So Beautiful Paper

Step 5f: Pull your thread taught (not too hard or you’ll rip the paper) making sure that there is no slack on the outside or inside of the journal. Loop one thread under the other into a knot to tie off the binding.
DIY Tutorial: Pattern Notebook Gifts or Wedding Favors by Antiquaria for Oh So Beautiful Paper

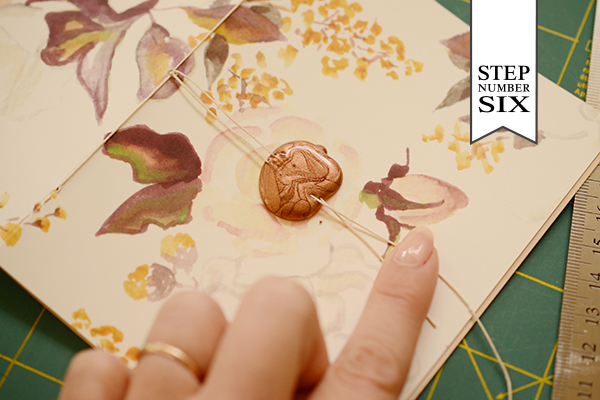
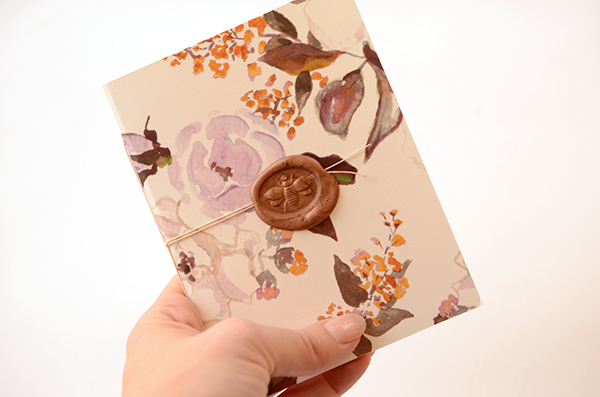
Step 6: Now we decorate! Instead of having loose string on the binding or tying it into a bow, we decided to secure it with sealing wax! Pull your two binding threads across the center front of the journal. Drip hot wax (we use a wax formulated for a glue gun-for ease) in the center over the threads (see above). Using your wax seal of choice, press it into the hot wax until it cools and releases (see below). Trim off and make the thread ends even, if desired.

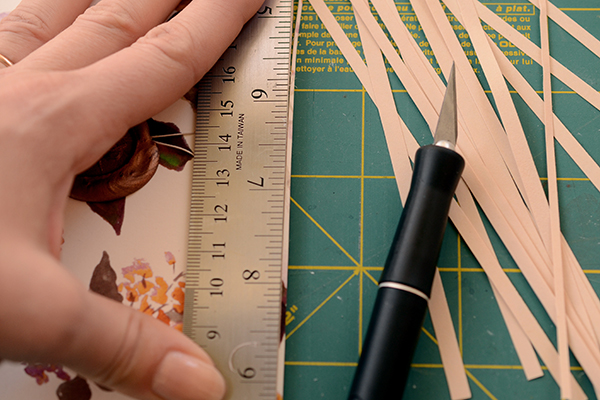
Step 7: We’re not going to lie… this may be the trickiest step out of the whole process! Once the journal is finished and  folded, you’ll need to make the edges of the book even so that they’re crisp and clean, like the journals that you buy in a store. The trick to this is using a REALLY sharp, new blade on your craft knife. If you’re making a lot of these journals, you may need to change your blade more than once!

Line up your ruler with the edge of your front cover. Make sure that all of your pages and the back cover are flat and pressed down (we kinda lean on the whole journal and ruler at the same time so that it doesn’t shift). Now, start trimming off the excess. It will take a few passes but will eventually be a clean, straight edge!
DIY Tutorial: Pattern Notebook Gifts or Wedding Favors by Antiquaria for Oh So Beautiful Paper

Et voila! Now your journal is finished and ready to give! We guarantee that your loved ones will cherish these little pretties for years to come. They may even ask for them year after year.
DIY Tutorial: Pattern Notebook Gifts or Wedding Favors by Antiquaria for Oh So Beautiful Paper

Materials

“Annabelle”  Patterned Paper, in Cover

“Annabelle Violet”  Patterned Paper, in Cover

“Watercolor Stripe” Coral Patterned Paper, in Cover

Text Paper for interior pages

Metal Ruler, Self Healing Mat and Craft Knife

Bone Folder

Scoreboard

Awl

Bookbinding Thread

Needle

Wax Seal

Sealing Wax and Glue Gun

Scissors

Beeswax (optional)

Photos: Antiquaria for Oh So Beautiful Paper
Pretty Paper in the Office: Notebooks

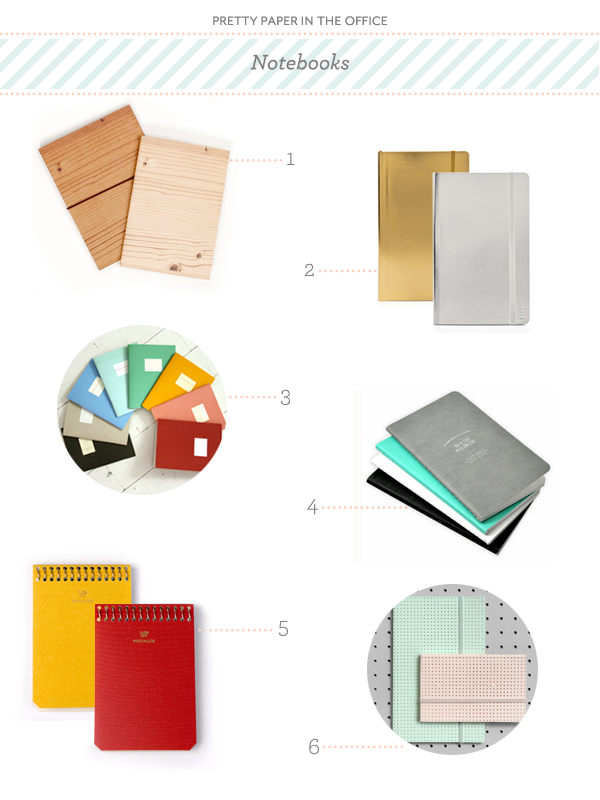
A great gift no matter the time of year has to be the versatile notebook. Personally, I’ve turned notebooks into sketchbooks, planners, and journals when the mood strikes. They’re perfect for those of us who like to go with the flow, and don’t require a different item for each aspect of our workday. The best part is the variety of styles that are available; you’re bound to find one that suits the way you work! – Julie

Pretty Paper in the Office - Notebook Round Up
No. 1 Woodgrain eco notebook by Poketo; No. 2 Metallic soft cover notebook by Poppin; No. 3 Color Pop mini notebooks by Poketo; No. 4 Ogami stone notebook from Jenni Bick (The paper is made of stone!); No. 5 Postalco notebooks from Canoe; No. 6 Perforated notebooks from Present&Correct

 {images via their respective sources}