This week we’re fighting off winter blues with a fun and colorful tropical inspired invitation suite! The best part of this design? The awesome fabric inner envelope. As soon as we stumbled on this adorable tutorial on over on Martha Stewart, we were hooked and knew that we need to incorporate the technique into a DIY invitation suite! – Bailey and Emma of Antiquaria


Step One: Over a piece of wax paper, thinly coat a piece of fabric measuring 13.5″ x 14″ with fabric decoupage on front and back. Once both sides are covered, hang the fabric from a pant hanger until dry (see below).


Step Two: Once the fabric is dry, trace an A7 envelope template on the “wrong” side of the fabric with a marker. Using a pair of very sharp fabric scissors, carefully cut out the envelope along the line.

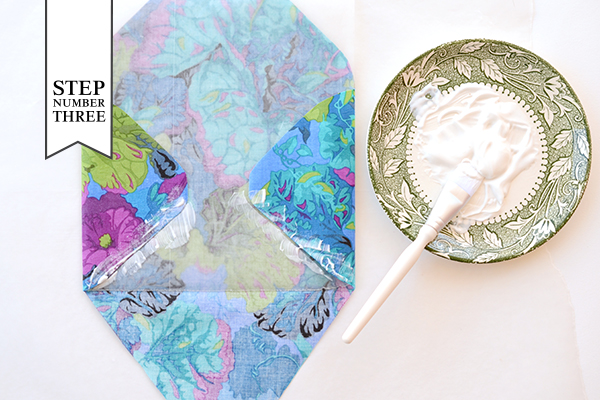
Step Three: Now you’ll assemble the envelope. Place a sheet of wax paper approximately 7″ wide in the middle and fold the side flaps over it. Apply decoupage to the lower portion of the side flaps as shown above. Fold up the bottom flap to adhere it to the sides. Paint a thin coat of decoupage along the seams to seal the envelope closed (shown below).


Step Four: Next, you’ll emboss the invitation piece. Place your fig A7 card on a stable and firm surface. Ink your invitation stamp (we used our Vintage Calligraphy Invitation stamp) and center it over the card. When ready, press the stamp down with moderate pressure to make the print. Lift the stamp off and quickly move on to adding your embossing powder.
Once you’ve made your print, immediately cover it with embossing powder by sprinkling it across the card. Shift the powder around until you have covered the entire image. Now, you will pour the excess powder off of the card onto a scrap piece of paper so that you can reuse it for future prints. Heat set the print, using an embossing heat tool. You will be able to see the powder melt into an opaque and solid color when it’s done. For more information about how to emboss using stamps, please watch this instructional video.
Note:Â One key thing about embossing is that it is wise to try to closely match your ink color with your powder color. By doing this, you will get much more crisp and opaque results. For example, we used a white pad with white embossing powder on this invitation.

Step Five: Next, you’ll stamp your reply postcard on a 4″ x 6″ cream card. We used our Calligraphy Accent Reply Postcard stamp with eggplant ink.
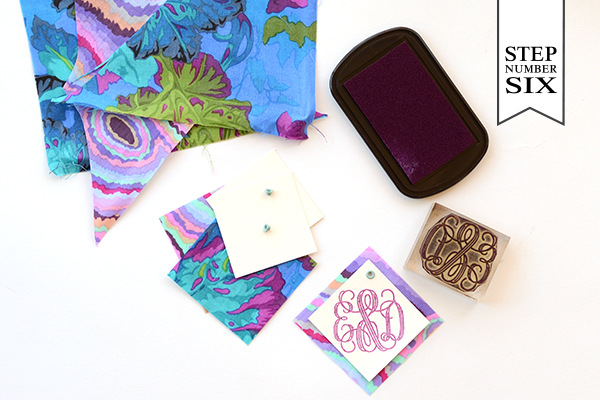
Step Six: There’s no reason to waste the scraps from cutting out the envelopes! We cut them into little 2.5″ squares to use with our monogram tags! The paper tag (in front) is a 2″ square. Once you have both squares cut, layer them on top of one another and punch a hole in the top center of the diamond. Insert a 1/8″ grommet into the hole so that the two pieces hold together.
Stamp your monogram stamp (we used our Antique Monogram stamp) on the tag with the same eggplant stamp pad as we used on the reply postcard.

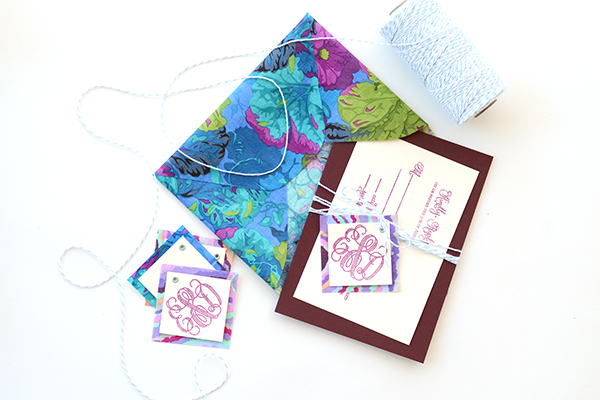
Step Seven: Now all that’s left it to put it all together! We stamped the return address and addressed the outer envelope with turquoise ink for a tonal look. We also wrapped all of the pieces together with teal bakers twine to tie it all together!

Materials
Vintage Calligraphy Invitation Stamp
Calligraphy Accent Reply Postcard Stamp
Antique Monogram Stamp
Fabric cut into 13.5″ x 14″ pieces
Rotary cutter, scissors, and self healing mat
Wax Paper
Decoupage, Paint Brushes, and Pant Hanger
Envelope Templates
A7 Cards in fig
A7.5 Envelopes in Pool
Cream Cardstock-cut into 4″ x 6″ and 2″ x 2″ pieces
Stamp pads in white, eggplant and turquoise
Embossing Powder, Embossing Heat Tool
1/8″ grommets
Crop-o-dile Tool for hole punching and grommet installation
Bakers Twine in Teal
Photography: Antiquaria for Oh So Beautiful Paper