9TH LETTER PRESS: Trade Show Lessons Learned from a Rookie Exhibitor

Hello, all. Today’s guest post consists of all the “ah ha!” moments Sheli and I had while exhibiting at the 2013 National Stationery Show. If you’re planning on exhibiting or are just curious in general, this post is for you. –Isabel of 9th Letter Press
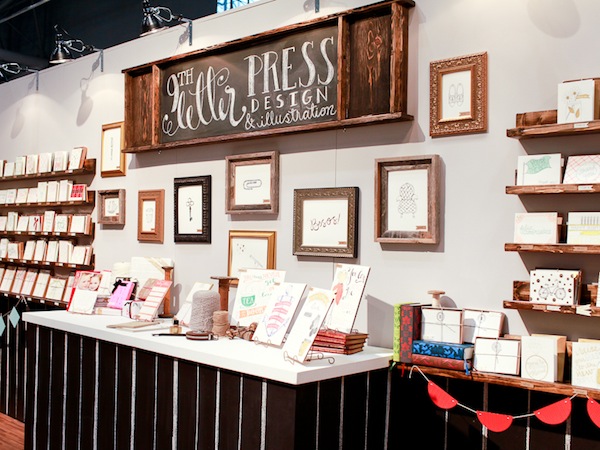
9th Letter Press at the 2013 National Stationery Show by Oh So Beautiful Paper

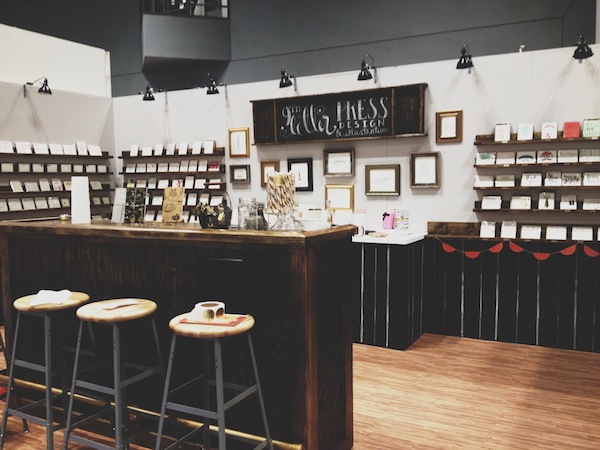
The 9th Letter Press booth at the 2013 National Stationery Show

I tend to think in “lists” (which is the extent of my organization talents) so I thought I’d provide one for you all with the most important lessons worth sharing:

  1. Absolutely research, prep, and plan for the show. The best resources available come from Trade Show Bootcamp, Show Time and Pushing the Envelope. Grab a highlighter and take lots of notes. I can’t tell you how useful these resources were!
  2. Excited to fill out order forms at the show? Get equally excited about printing inventory before you leave. You’ll be so happy doing the legwork beforehand and not afterward. Make your best educated guesses of what your bestsellers might be and have those printed, packaged and ready to go for when you come back. If you letterpress print your products, I would suggest having twice as much of everything printed before hand, because you may be surprised what gets ordered. We were shocked by how much more we needed to print once we got home! We will certainly be printing more inventory ahead of time in the future!
  3. Make sure you have a good selection for the most popular card-giving occasions. Ex: birthday, thank you, sympathy, etc.
  4. Make sure to bring extras! By the end of the show your cards will not be in the pristine shape that you brought them in. It will give you peace of mind knowing you can switch out a card that has suffered from being dropped, stolen or gotten dirty in some way throughout the show.
  5. Ship and pack a set: we ended up shipping a set of our products directly to our hotel and also packing two carry ons full of our products. If something happened to either set, we figured we’d be covered. (We were).
  6. Don’t forget to decorate your booth! Adding little touches of your brand throughout your display will go a long way.
  7. No matter how cute they are, leave your wedges and heels at home. Your feet will thank you.
  8. Make sure to have something to send to your retailers before and after the show. The first should arrive somewhere between two to three weeks before the show. We opted to do a more elaborate mailer to a smaller group of retailers so that we could focus on stores that we knew were a good fit for us. I also liked the idea of the mailer being personal with lots of detail and an accurate representation of our brand. Doing a mass run can limit just how creative you can be.
  9. You might consider getting an app like Handshake that will consolidate orders, information and reports to help with turnaround time after the show.

Here are a few pictures of our booth building out in New York, which was an adventure in of itself:

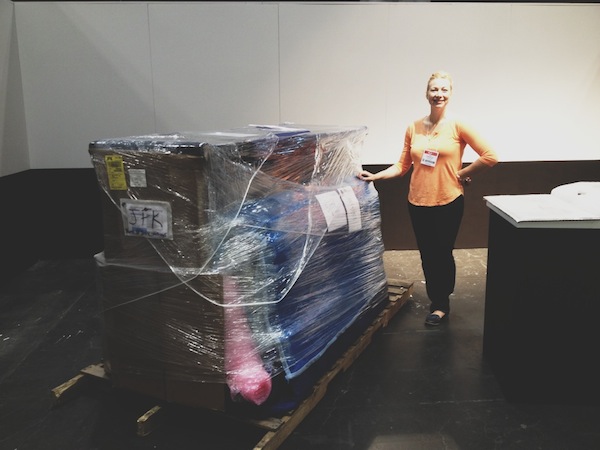
Sheli posing with 9th letter press wrapped pallet

Meet Sheli, the left brain of 9th Letter Press. She’s the person who puts into motion my big ideas. Without her, I’m not sure how anything would have come together, let alone have gotten to New York. We packed up our booth on an 8 foot pallet, which we packed with lots of care in the studio parking lot. When the freight company came to pick up our wrapped up pallet, we said goodbye, and crossed our fingers it would arrive safely in New York — it did!

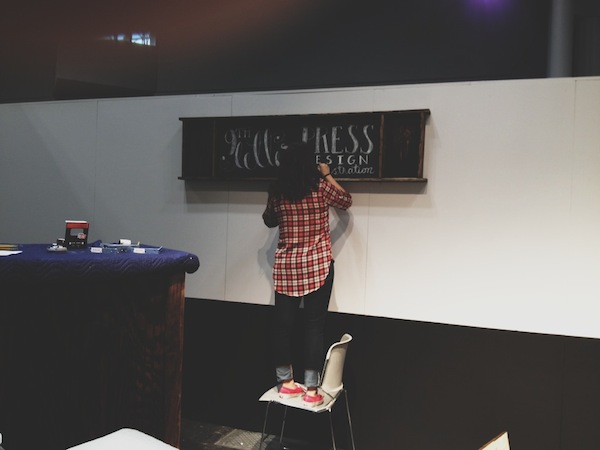
Isabel putting together 9th Letter Press sign

That’s me working on our signage! I wanted the booth to match the look of our studio in Winter Park, Florida, which has a very old New York meets the industrial revolution feel. In order to keep with that aesthetic, we built a super tall bar complete with purse hooks and a brass rail, added dark walnut shelves, and found foam “wood” floors.

9th letter press booth at NSS

And here’s the end result! Sheli and I were thrilled with how everything turned out. We did spend a few late nights at the convention center to get it done, but it was well worth it. I really hope all or at least part of that was helpful!

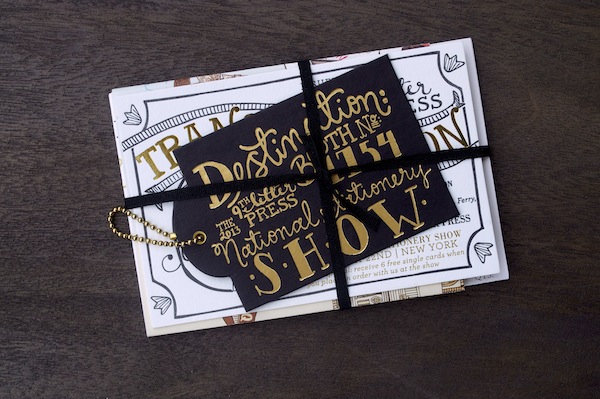
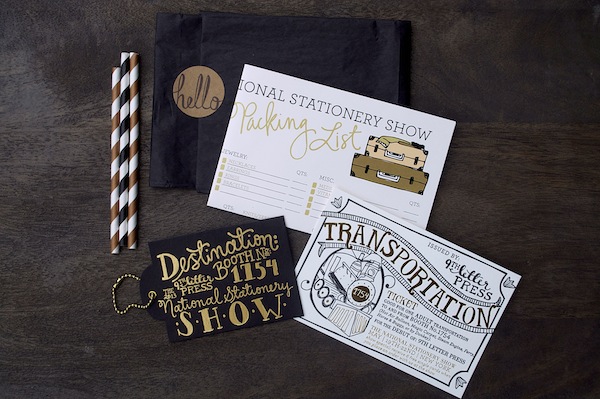
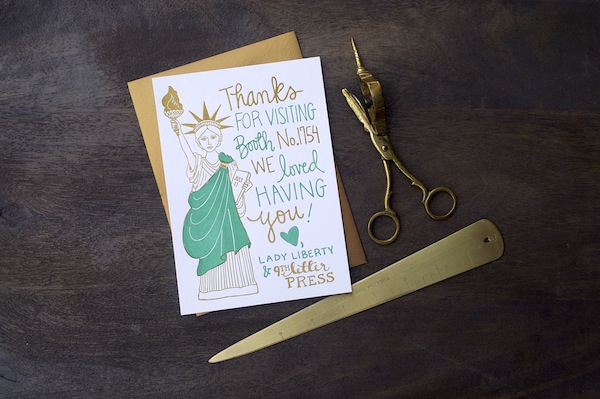
Our mailers were travel themed so we included an old fashioned train ticket, a packing list, gold foil pressed luggage tags, and a gold pen to write down their information on the tag. After the show, we followed up with sending sweet little cards with an illustrated lady liberty on them.

NSS booth mailer letterpress

letter press mailer

letter press mailer from NSS

Photo Credits: 9th Letter Press Team
Hand-Lettering with Ladyfingers Letterpress

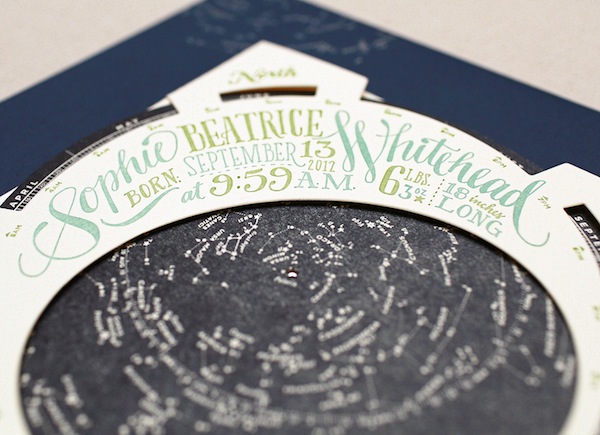
Greetings! It is an honor and a pleasure to be guest blogging on our most favoritest blog in the world for the next few days! We were thrilled when we were asked to create Sophie’s birth announcements, and are psyched to share with you more unique and curious work from the minds and hands of Ladyfingers Letterpress! â€“Arley-Rose and Morgan of Ladyfingers Letterpress

Ladyfingers Letterpress via Oh So Beautiful Paper

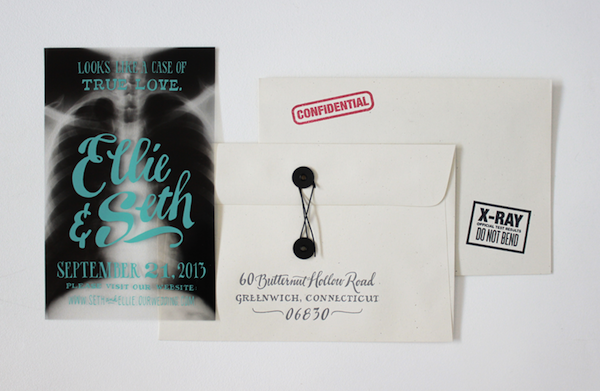
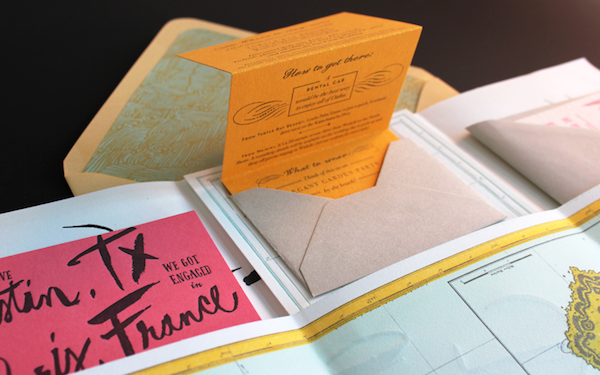
If you are familiar with our work, you know that we are all about blurring the lines between stationery and “whoaa!?”. We’re a bit crazy about coming up with new and exciting ways in which your guests receive your big announcement. When the right clients come along who are as excited about doing something different as we are, get ready for the unexpected. Piñatas stuffed with an invitation? Sure! Little cutouts of the couple who can dance and move on top of a record player? Why not! Full letterpress rainbow roll knocked-out flats? It can be done! There is no task to large nor too complex for our inquisitive brains. Challenges keep us going. Conformity kills our spirit. And ice cream is always on our minds.

Ladyfingers Letterpress via Oh So Beautiful Paper

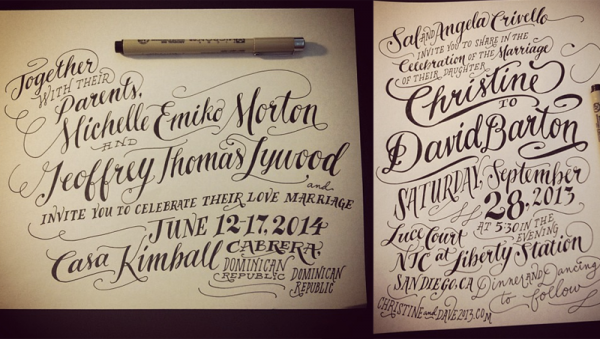
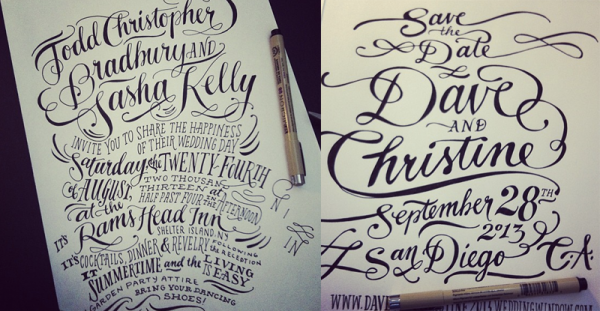
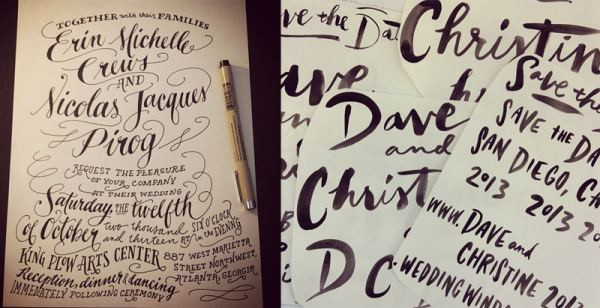
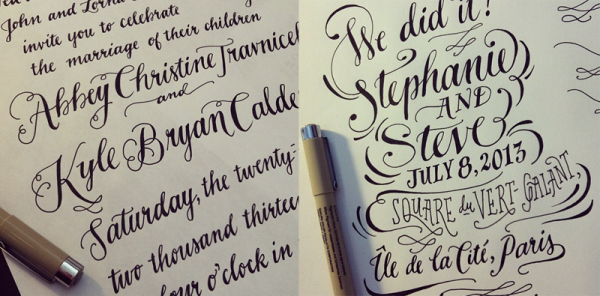
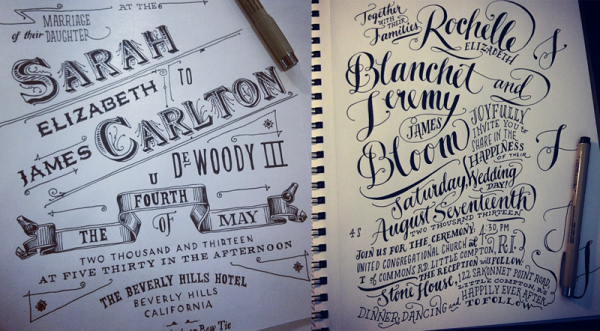
Another thing you may recognize about our work is the abundance of hand-lettering. Our obsession began back in the early 2000s when Arley-Rose was using it to rebel against the rigidity of the type world that was prevalent during her time studying at Parsons. Now, its easier and faster for her to draw letters than use design programs to create a layout, and her trademark handiwork has become one of the most identifying features about our work.

Ladyfingers Letterpress via Oh So Beautiful Paper

In our first post as guest bloggers, we’d like to introduce ourselves in this short clip where we give you a short and informal tour of our studio, and take you along as we hand-letter a real life invitation! (Pardon the absence of Morgan, the other mastermind behind Ladyfingers. She was out running errands when we recorded this!)

Interested in getting started with hand-lettering? Here are some tips to create your own illustrative voice using the most valuable design software ever: your hands, your brain, and a pen & paper:

• Materials: I like using Micron .08 or .05 pens and standard sketchbook paper. I don’t usually do a pencil sketch first, since I find that I lose the initial gesture of the design if I am tracing over existing line work. (If you feel more comfortable creating a layout in pencil and tracing in ink, be sure to draw lightly or your ink lines may become compromised when you’re erasing your pencil lines. Feel free to also use a lightbox to trace!)

Hand Lettering Ladyfingers Letterpress

• How does your message sound? Before you start, consider the tone or the voice of your piece. Is it formal? Fun and exciting? Remember that when people read text, they put it in a voice. (Or maybe that’s just me?) Do you want your lettering to sound like its being spoken by Vincent Price or a little kid on a trampoline? Or maybe just you, being really excited, and happy to share your joyful message with your most favorite people in the world? Don’t be ashamed to show how psyched you are! Your excitement will translate into a beautiful piece.

Ladyfingers Letterpress Hand Lettering

• Put some music on! I find that music and lettering have a lot in common. Not only do they both share a rhythm that can inspire people to keep reading/listening, but in the same way that you don’t have to listen to a song very long to know if its a somber song or a happy song, a nice piece of hand lettering should hit you with an expression as soon as you see it. You don’t wait till the last note to understand the essence of a song, so why should you have to wait til the last word to understand the message of a design?

Ladyfingers Letterpress Hand Lettering

• Practice, practice, practice! There is no app for this. There is no photoshop filter that will make your lettering look better. If you want to truly get better at hand-lettering, do it every day and don’t be afraid to make mistakes. Your hand and arm muscles will get used to drawing letters and it will become easier. Start with mastering one lettering style, whether its Roman, Script or Sans Serif. Need inspiration? Check out the different type styles on MyFonts.com. Once you have your favorite lettering style down pat, introduce a contrasting style. For example, I love combining script with a serif face.

Ladyfingers Letterpress Hand Lettering

• Draw other things, too! We wouldn’t be where we are today if it weren’t for a lifetime of drawing. To be a good letterer, you need to be comfortable with your pen enough to be free with it. Gotta know the rules before you can break ’em! Controlled chaos, that’s really what lettering is!

Ladyfingers Letterpress Hand Lettering

Once my drawings are finished, I scan them into the computer at high resolution. Sometimes I’ll clean up little errors in Photoshop and then drop them into Illustrator. I have a specific profile set up under Live Trace  so that my drawings come out crisp and un-live-tracey. Once they’ve been vectorized, I can move letters around and play with the design a little. Sometimes if I am drawing and I don’t like a letter or word that I just drew, I’ll draw another off to the side and move it in when I’m in Illustrator. The key is to have fun! Cuz if it ain’t fun, why do it?

Photo Credits: Ladyfingers Letterpress

Friday Happy Hour: Le Marais

It’s summer, and summer means drinks with lots of ice to beat the heat and probably some tonic water to help quench your thirst.* A lot of drinks along this model combine gin with tonic, because, well, gin and tonic, duh! They go together pretty well. But it doesn’t always have to be gin! So here’s a drink we whipped up, a play on the Sidecar, that combines brandy with St-Germain and tonic for a new favorite summer drink: Le Marais.– Andrew

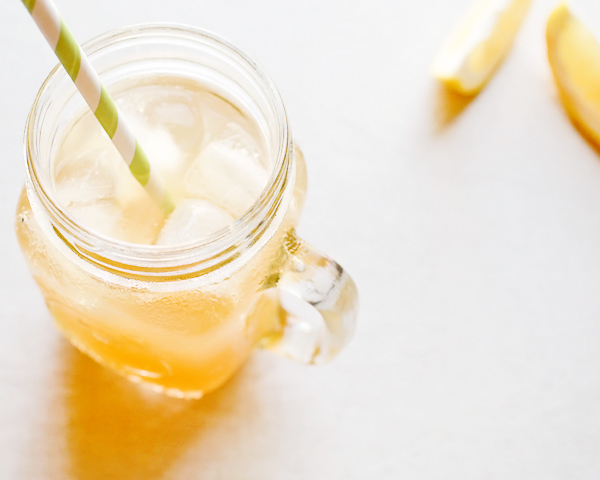
Signature Cocktail Recipe: Le Marais with St-Germain by Oh So Beautiful Paper (5)

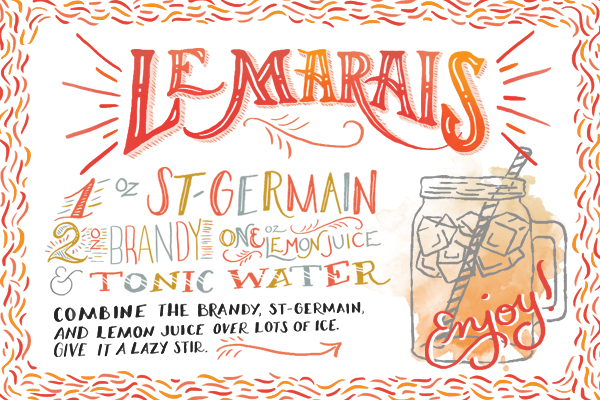
Signature Cocktail Recipe Card: Le Marais, Illustration by Shauna Lynn Illustration for Oh So Beautiful Paper

Illustration by Shauna Lynn for Oh So Beautiful Paper

Le Marais

2 oz Brandy
1 oz 
St-Germain
1 oz Lemon Juice
Tonic Water

Combine the brandy (or cognac if you want to get extra Frenchy), St-Germain, and lemon juice over lots of ice. Give it a lazy stir. Top with tonic water and enjoy languidly.

Signature Cocktail Recipe: Le Marais with St-Germain by Oh So Beautiful Paper (9) Signature Cocktail Recipe: Le Marais with St-Germain by Oh So Beautiful Paper (21)

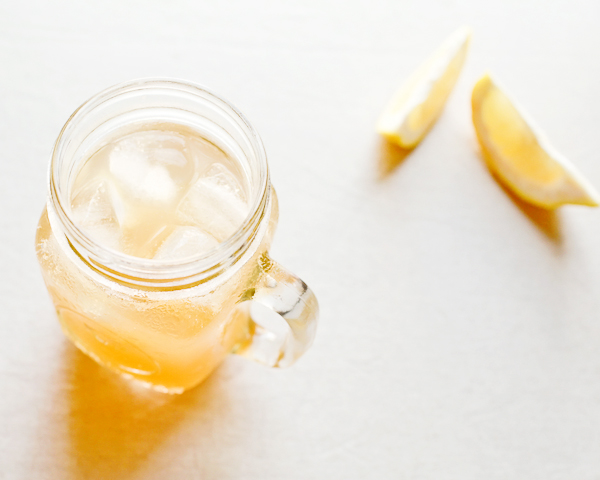
Like the Sidecar, Le Marais has hints of oaky vanilla from the brandy, tartness from the lemon and some (floral) sweetness from the St-Germain. But all of these flavors really come together when you add lots of ice and lots of tonic water: a rich, crisp, utterly refreshing drink. This is the sort of cocktail for which coasters were invented – try one on a hot, humid day and see how long your glass stays dry.

Signature Cocktail Recipe: Le Marais with St-Germain by Oh So Beautiful Paper (4)

Nole had the genius idea to name this drink Le Marais after the Parisian neighborhood of the same name. It pays tribute to the French origins of both the brandy (or cognac) and the St-Germain. But Le Marais – “The Marsh” – also conjures up the city of its origins, our swampy sweaty Washington, DC, and the sort of humid climate where you can best enjoy one of these.

Signature Cocktail Recipe: Le Marais with St-Germain by Oh So Beautiful Paper (25) Signature Cocktail Recipe: Le Marais with St-Germain by Oh So Beautiful Paper (27)

*And cure your malaria while you’re at it. Tonic water gets its bitterness from quinine, derived from the bark of the South American cinchona tree. Some enterprising Brits in India got the idea to make their malaria medicine a bit more palatable by drenching it in gin and citrus juice. A whole bunch of very good drinks owe their existence to that innovation.

Photo Credits: Nole Garey for Oh So Beautiful Paper

This post is brought to you in collaboration with St-Germain. All content, photos, recipes, and words are our own. Thank you for supporting the sponsors that help make Oh So Beautiful Paper possible!

{happy weekend!}

Happy Friday everyone! And surprise – I’m on vacation! We took our first cross country flight with Sophie yesterday for some much needed rest in Big Bear with my side of the family. We’re hanging out here for a few days, then spending a couple more days in LA before heading back to DC. Next week I have a couple of fantastic guest bloggers holding down the fort – and I’m so excited about what they have planned for you! You won’t want to miss it! But in the meantime…

…a few links for your weekend!

This week on Oh So Beautiful Paper:

I hope you all have a wonderful weekend – don’t forget to check back for this week’s cocktail recipe and then again next week for some amazing guest posts! I’ll see you back here in a couple of weeks! xoxo