Gregg + Ilana’s Outdoors-Inspired Save the Dates

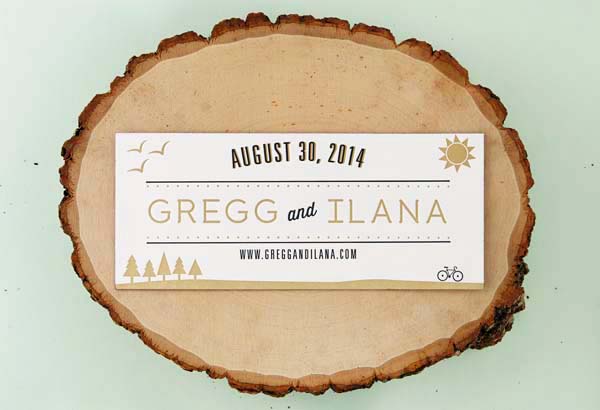
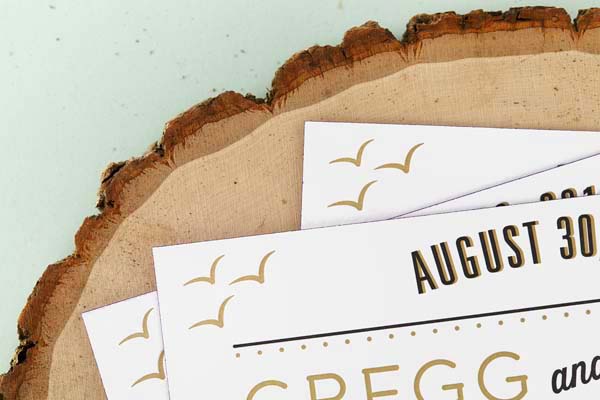
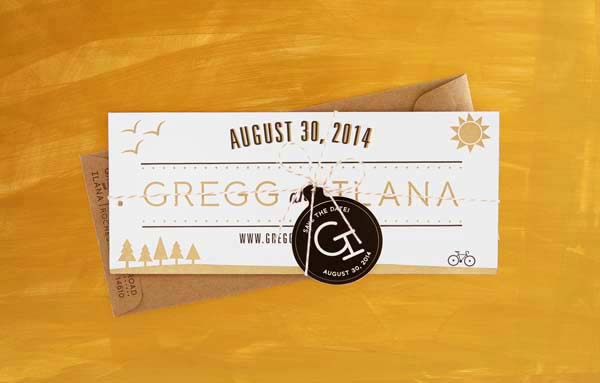
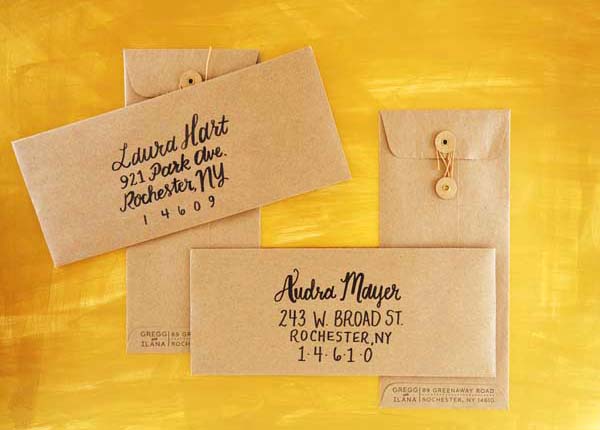
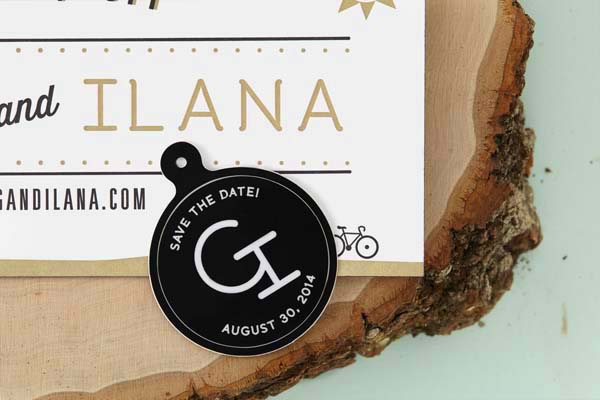
When it comes time to design their own wedding invitations and personal stationery, designers can often be their own toughest clients – but I always love to see the results! For her own wedding save the dates, Ilana from Sugar and Type wanted to capture her fiancé’s love of cycling and their shared love of the outdoors. Ilana incorporated lots of outdoors-inspired imagery with a horizontal layout, hand addressed kraft paper envelopes, and purple edge painting!

Outdoors-Inspired-Letterperss-Save-the-Dates-Sugar-and-Type5

From Ilana: My fiancé was a professional BMX Racer, and now rides Cyclocross all over the United States. Cycling is a huge part of our lives, and I really wanted to incorporate our love for the outdoors, hiking, biking, and soaking up the sun. After showing Gregg tons of options, he loved this approach! It was so rewarding to find something we felt represented our relationship.

Outdoors-Inspired-Letterperss-Save-the-Dates-Sugar-and-Type6

Outdoors-Inspired-Letterperss-Save-the-Dates-Sugar-and-Type7

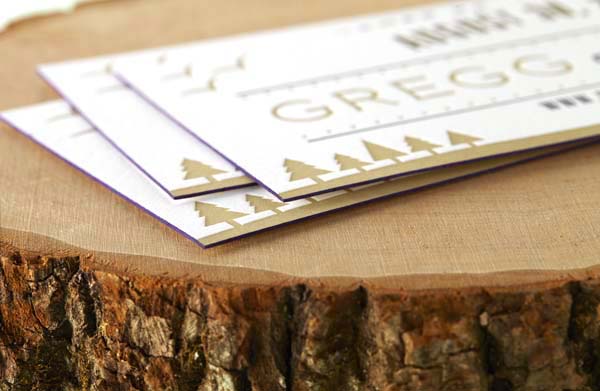
I was happy to call our dear friend Amy of Greengirl Press and be able to help her pull our prints off her Vandercook Press. We used 220 lb paper, giving us the opportunity to do a pop of color with purple edge painting.

Outdoors-Inspired-Letterperss-Save-the-Dates-Sugar-and-Type8

Outdoors-Inspired-Letterperss-Save-the-Dates-Sugar-and-Type2

Outdoors-Inspired-Letterperss-Save-the-Dates-Sugar-and-Type4

Thanks Ilana!

Design and Envelope Addressing: Sugar and Type

Letterpress Printing and Edge Painting: Greengirl Press

Check out the Designer Rolodex for more tal­ented wed­ding invi­ta­tion design­ers and the save the date gallery for more beau­ti­ful cus­tom save the dates!

Photo Credits: Audra Zaba Photo

DIY Autumn Floral Wedding Invitations

Summer may just have arrived, but in the world of wedding invitations, we’re already looking forward toward the autumn and winter seasons. We love this fresh take on an autumn color palette – mixing a dark watercolor pattern with lovely shades of peach, coral, and blush – for a beautiful suite of autumn floral wedding invitations and save the dates. It has romance written all over it! – Bailey and Emma of Antiquaria
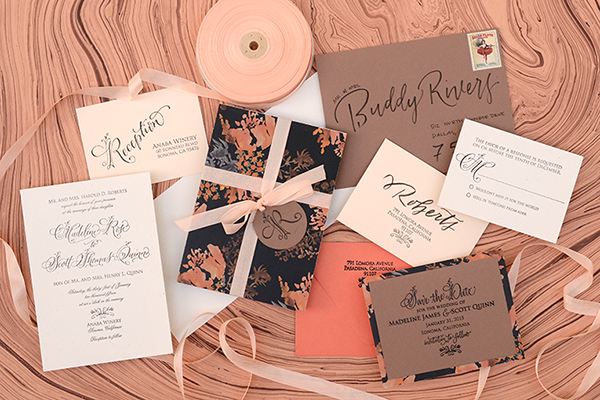
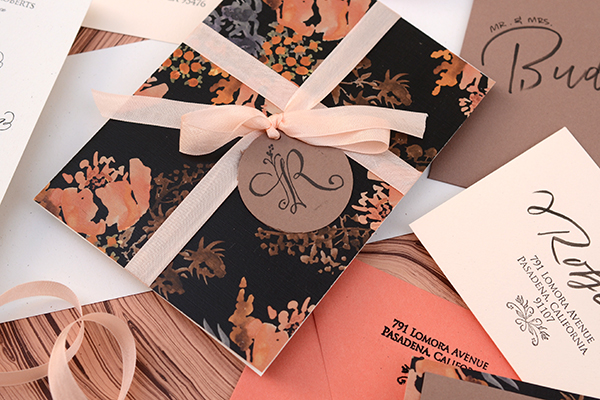
DIY Tutorial: Autumn Floral Wedding Invitations by Antiquaria for Oh So Beautiful Paper

Autumn Floral-DIY-Final2

DIY Tutorial: Autumn Floral Wedding Invitations by Antiquaria for Oh So Beautiful Paper

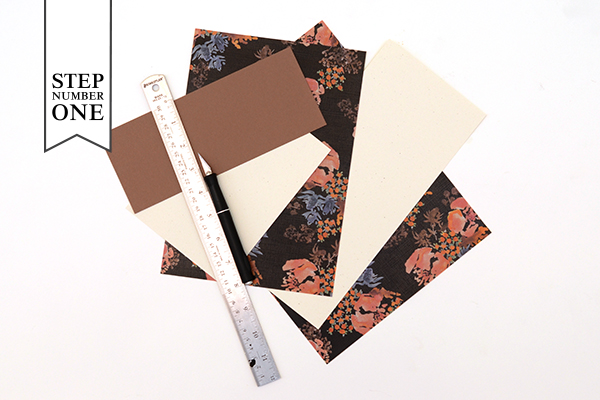
Step One: For this design, we’re making a save the date and wedding invitation suite together. None of the paper came cut to size, so we had to cut the paper and cards ourselves. You can manually cut them with a self healing mat, kraft knife, and metal ruler or you can take everything to be cut at a local printer (the best idea for precision).

You’ll need these final paper sizes:

Save the Date – Java, 3.75″ x 5″

Save the Date Backer – “Zoe” Floral Patterned Cover, 4.25″ x 5.5″

Invitation – Milkweed, 5″ x 7″

Invitation Folder – “Zoe” Floral Patterned Text Weight, 10″ x 7″

Reply Card – Milkweed, 3.5″  x 4.875″

Reception Card – Old Lace, 3.5″ x 4.875″
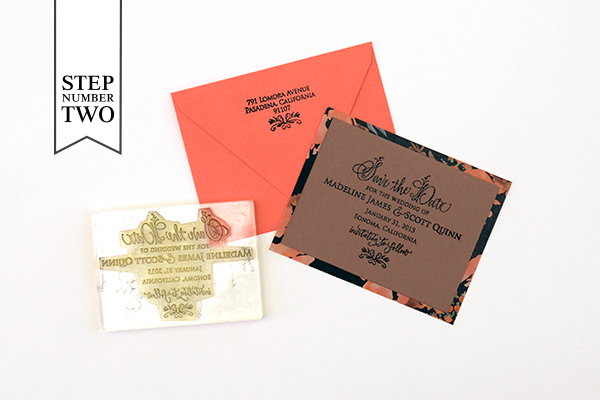
DIY Tutorial: Autumn Floral Wedding Invitations by Antiquaria for Oh So Beautiful Paper

Step Two: Create your save the date. We embossed our Floral Calligraphy Save the Date design onto a Java card with black embossing powder for a great opaque look (see steps below). We also embossed our return address stamp on the back flap of our envelope. You will mount the Java card onto the patterned backer, using double sided tape or stick glue, making certain that the margins are equal on all sides.
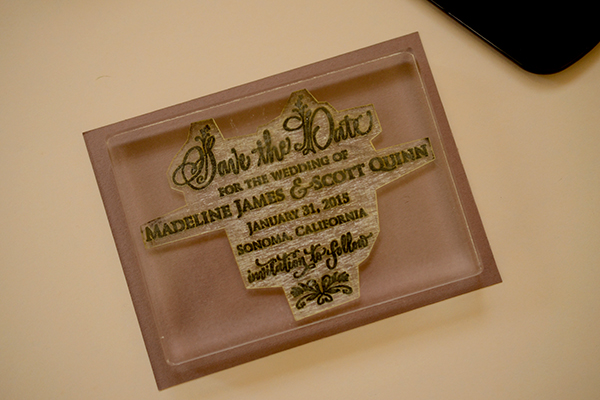
DIY Tutorial: Autumn Floral Wedding Invitations by Antiquaria for Oh So Beautiful Paper

Stamp the save the date onto your card using black ink.
DIY Tutorial: Autumn Floral Wedding Invitations by Antiquaria for Oh So Beautiful Paper

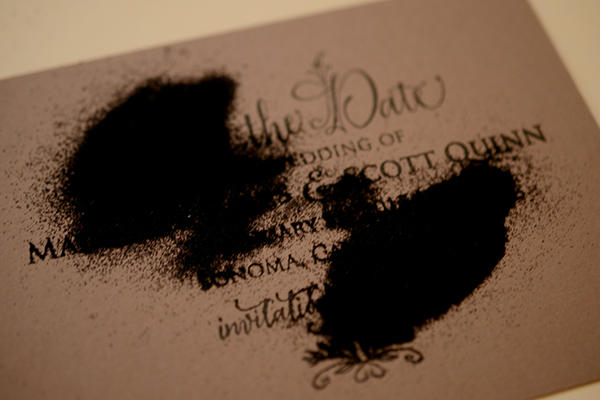
Immediately cover the printed image with black embossing powder (best to do this step over scrap paper). Shift it around to cover the entire image and tap off  the excess.

DIY Tutorial: Autumn Floral Wedding Invitations by Antiquaria for Oh So Beautiful Paper

Heat set the design with an embossing heat tool.  For more information about this process, please watch our video tutorial found here.
DIY Tutorial: Autumn Floral Wedding Invitations by Antiquaria for Oh So Beautiful Paper

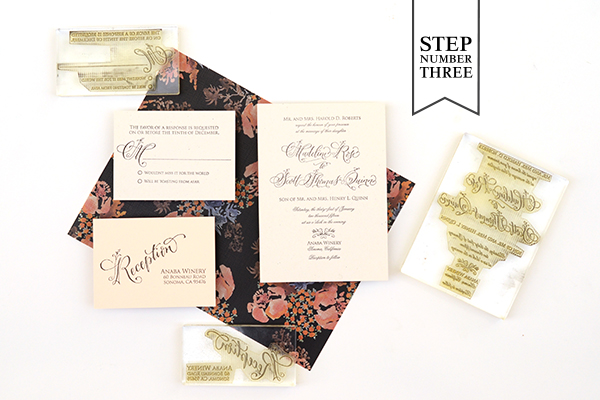
Step Three: Stamp all of your invitation suite cards. We used designs from our Floral Calligraphy Collection for this suite, including the Floral Calligraphy Invitation Stamp, Floral Calligraphy Reply Card Stamp and Floral Calligraphy Reception Stamp. We used black ink with the designs to tie everything together with the floral watercolor paper!
DIY Tutorial: Autumn Floral Wedding Invitations by Antiquaria for Oh So Beautiful Paper

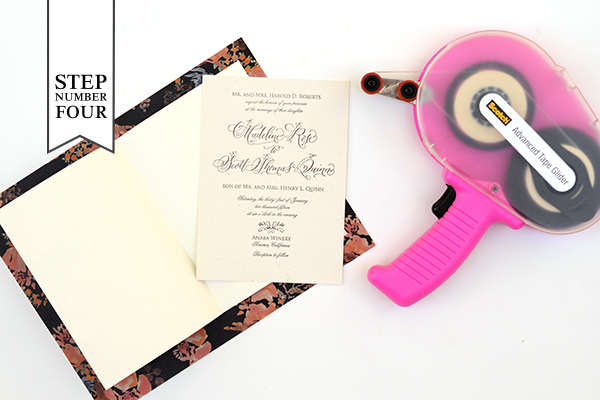
Step Four: We love coming up with new ways to incorporate pattern and color into our designs. This patterned invitation “folder” is one fun way! Fold your 10″ x 7″ patterned text weight paper in half. Apply double sided tape or stick glue to the back of your invitation card. Stick it into the right hand side of the “folder” and press to adhere. The invitation card and right hand side of the folder should be the same size, 5″ x 7.”

DIY Tutorial: Autumn Floral Wedding Invitations by Antiquaria for Oh So Beautiful Paper

Step Five: Next, we’ll make our reply envelopes. Our return address stamp design didn’t include a name – but that’s okay! We’ll simply add one! With a black brush pen, we wrote the last name across the envelope, a little higher than center. Then we stamped our return address design in black right below it. Mission accomplished!
DIY Tutorial: Autumn Floral Wedding Invitations by Antiquaria for Oh So Beautiful Paper

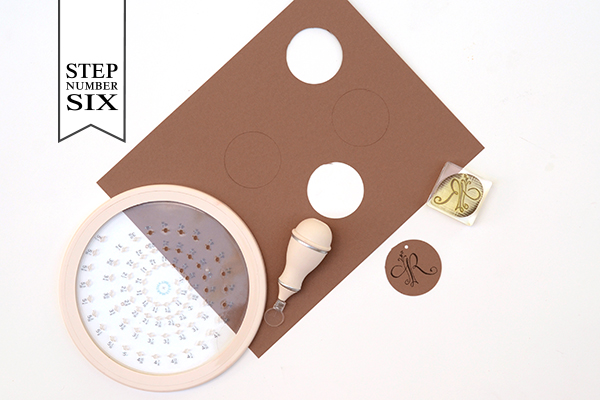
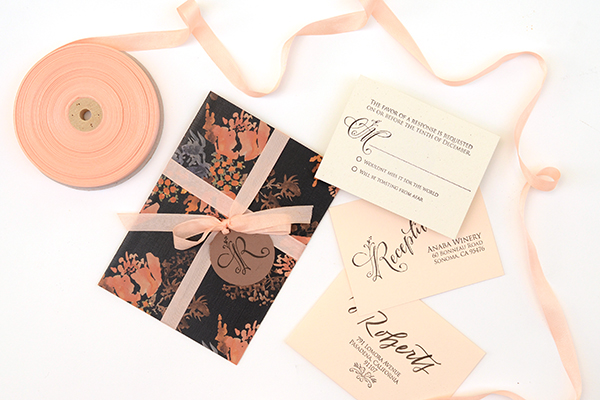
Step Six: A monogram tag is a really great way to tie the suite together. And you can also use it at your reception and on personal stationery after the wedding! We cut out 2″ circle tags using a circle making tool (or using a circle punch). Then, we stamped our Floral Calligraphy Monogram Initial Stamp in black in the center. Finally, we punched a small hole in the top center so that we have something to thread our ribbon through!
DIY Tutorial: Autumn Floral Wedding Invitations by Antiquaria for Oh So Beautiful Paper

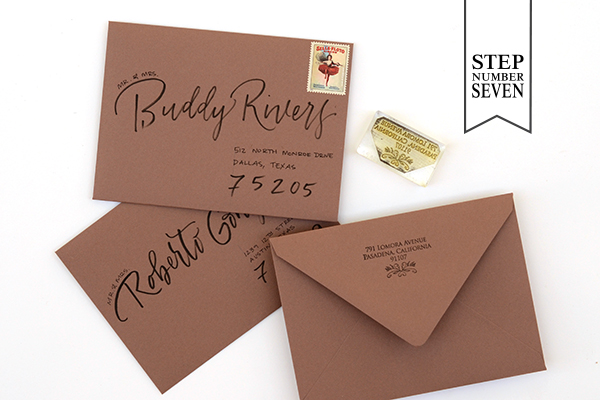
Step Seven: A big consideration for any invitation suite is how your are going to address them. We decided that a modern brush style in black would be fun with this design. After stamping our return address on the back flap, we addressed them using this calligraphy addressing tutorial.
DIY Tutorial: Autumn Floral Wedding Invitations by Antiquaria for Oh So Beautiful Paper
The Final Touches: To finish off the suite, we tucked all of the cards inside our “folder” and then tied it all up with some gorgeous blush colored tailors ribbon. Guests will feel like they’re opening a gift when they receive it in the post and get a small glimpse of the fun to come!

Materials

Stamps

Floral Calligraphy Save the Date Stamp

Floral Calligraphy Return Address Stamp, No.2

Floral Calligraphy Invitation Stamp

Floral Calligraphy Reply Card Stamp

Floral Calligraphy Reception Stamp

Floral Calligraphy Initial Monogram Stamp

Paper

“Zoe” Floral Patterned Paper-in Cover weight and Text weight

Java Cover Stock

Milkweed Cover Stock

Old Lace Cover Stock

Papaya A2 Envelopes

Java A7 Envelopes

Old Lace 4bar Envelopes

Other Items

Self Healing Mat, Kraft Knife and Metal Ruler

Double sided tape or stick glue

Circle Cutter or Circle Punch

Stamp Pad in Black

Embossing Powder and Heat Tool

Brush Pen

Hole Punch

Tailors Ribbon in Grecian Pink

Anti­quaria is a mem­ber of the Designer Rolodex – you can see more of their beau­ti­ful work right here or visit the real wedding invitations gallery for more wedding invitation ideas!

Photo Credits: Antiquaria for Oh So Beautiful Paper
Paper Party 2014 Invitations!

You’ve already seen the photos from the 2014 Paper Party during the National Stationery Show, but today I wanted to share a few photos of my most favorite detail from the entire party: the invitations! The party invitations have become a dream project each year, with an amazing team contributing to everything from design to printing to envelope addressing. This year I was lucky enough to work with Mr. Boddington’s Studio, Smock, Mohawk, and Meant to Be Calligraphy. I’m so excited to share the resulting invitations with you!

Paper Party 2014 Invitations by Mr. Boddington's Studio, Smock, Mohawk, and Meant to Be Calligraphy for Oh So Beautiful Paper

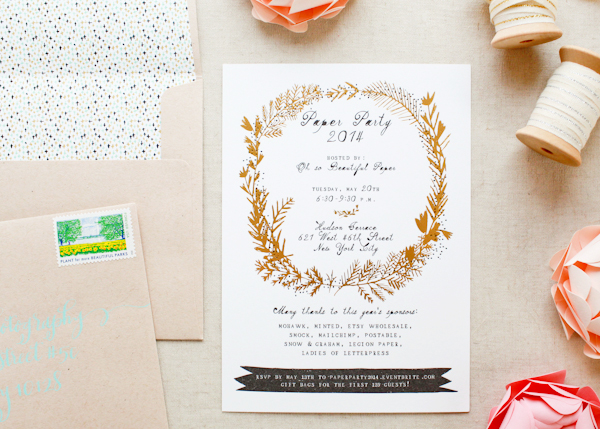
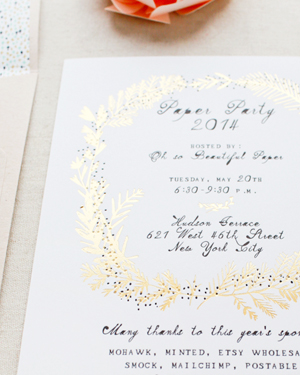
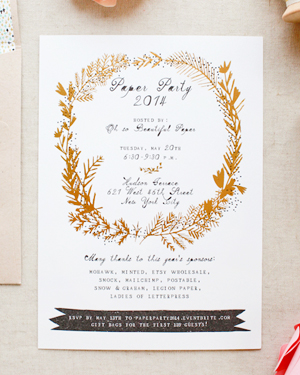
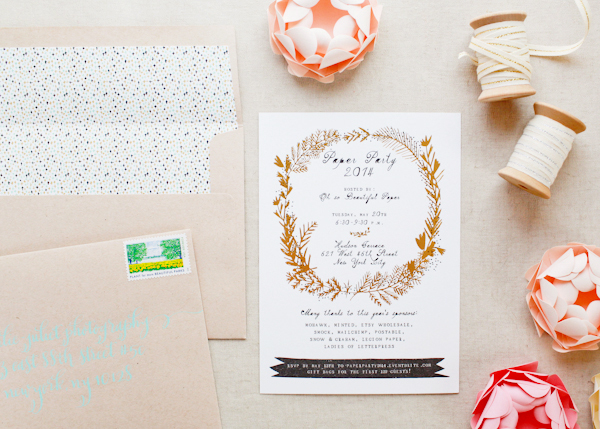
I was absolutely thrilled to work with Mr. Boddington’s Studio on this year’s design – they designed everything from email save the dates to the tote gift bag design! I wanted the invitations to reflect the quirky sophistication that has become Mr. Boddington’s Studio signature style while also complementing our floral party inspiration. We decided to keep the main invitation in classic black and white with a botanical wreath printed in shiny metallic gold foil – all letterpress printed by Smock.

Paper Party 2014 Invitations by Mr. Boddington's Studio, Smock, Mohawk, and Meant to Be Calligraphy for Oh So Beautiful PaperPaper Party 2014 Invitations by Mr. Boddington's Studio, Smock, Mohawk, and Meant to Be Calligraphy for Oh So Beautiful Paper

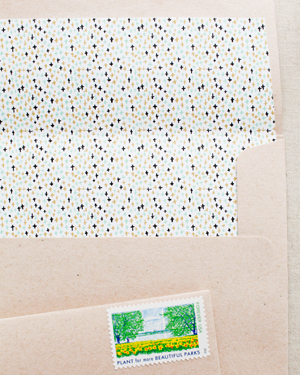
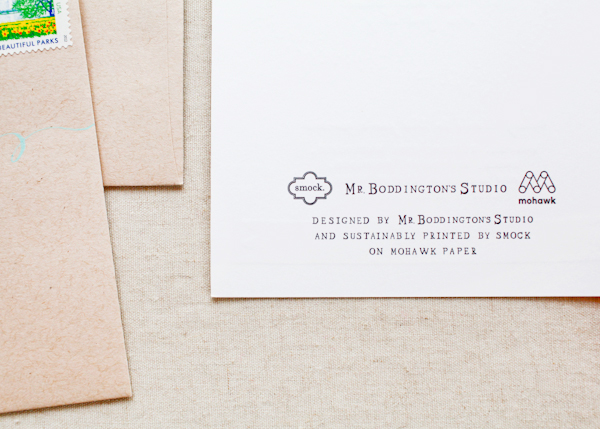
We printed the invitations on Mohawk’s Superfine Ultrawhite Eggshell 130 lb paper. The envelopes are Mohawk’s Loop Antique Vellum Kraft paper envelopes in A7 size. Mr. Boddington’s Studio also designed a fun patterned envelope liner to add a little surprise of color, which was digitally printed by Smock.

Paper Party 2014 Invitations by Mr. Boddington's Studio, Smock, Mohawk, and Meant to Be Calligraphy for Oh So Beautiful PaperPaper Party 2014 Invitations by Mr. Boddington's Studio, Smock, Mohawk, and Meant to Be Calligraphy for Oh So Beautiful Paper

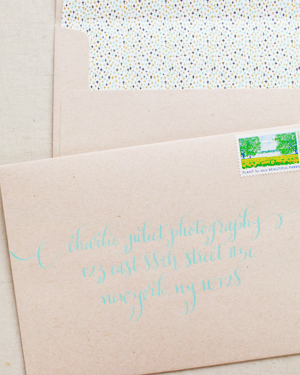
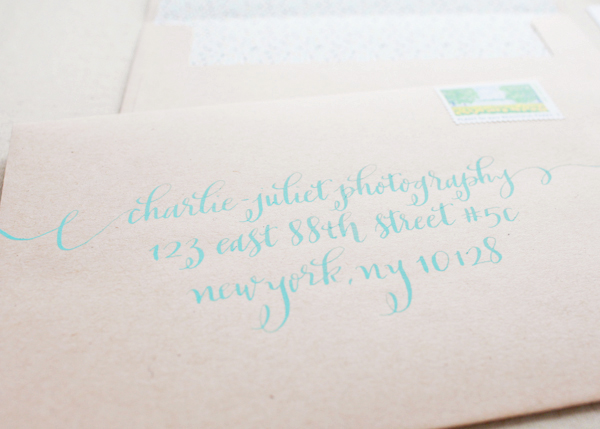
The amazingly talented Michele from Meant to Be Calligraphy addressed the envelopes in her Jackson style. We picked a light aqua ink to complement the blue in the envelope liners – I love the way it looks against the kraft paper!

Paper Party 2014 Invitations by Mr. Boddington's Studio, Smock, Mohawk, and Meant to Be Calligraphy for Oh So Beautiful Paper

Paper Party 2014 Invitations by Mr. Boddington's Studio, Smock, Mohawk, and Meant to Be Calligraphy for Oh So Beautiful Paper

Paper Party 2014 Invitations by Mr. Boddington's Studio, Smock, Mohawk, and Meant to Be Calligraphy for Oh So Beautiful Paper

I hope you love the invitations as much as I do!

Design: Mr. Boddington’s Studio

Printing: Smock

Paper: Mohawk Superfine Ultrawhite Eggshell 130 lb

Envelopes: Mohawk Loop Antique Vellum Kraft 80 text in A7 size

Envelope Calligraphy: Meant to Be Calligraphy

Photo Credits: Nole Garey for Oh So Beautiful Paper

Happy Weekend!

It has been such a whirlwind week, with three and a half days at the National Stationery Show, one big Paper Party (more on that next week!), and very very little sleep. And despite the sore feet and general exhaustion that always follows the show, my heart feels like it’s about to burst with happiness after meeting and spending time with so many amazing people at the show. I really do love our stationery community! I’ll be back to share lots more from the show next week, but in the meantime…

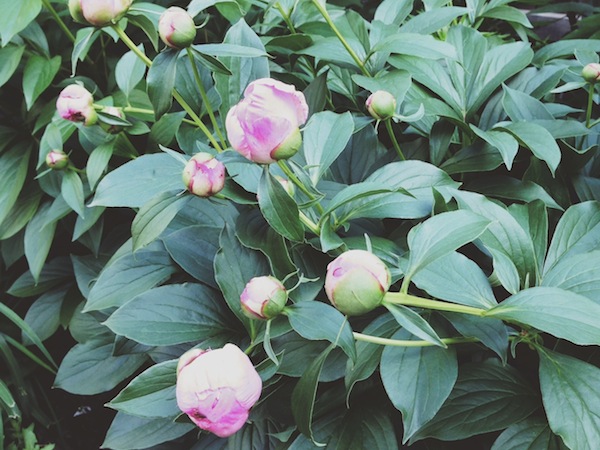
OSBP-Peonies

A few of the (many!) peonies waiting for me when I came home from New York

…a few links for your weekend!

This week on Oh So Beautiful Paper:

Check back soon for this week’s cocktail! I hope you all have a wonderful weekend, and I’ll see you back here next week! xoxo

Envelope Addressing Styles

We’re often (very often) asked about addressing options for wedding invitations. Many of our clients are DIY couples and it’s simply not in their budget to hire a professional or to pay for digital addressing. Believe us: even if you or a loved one are planning address them yourself, they can still be creative and cohesive with your invitation! It’s simply a matter of the right tools, methods, and a some practice! – Bailey and Emma of Antiquaria

DIY Envelope Addressing Styles by Antiquaria via Oh So Beautiful Paper
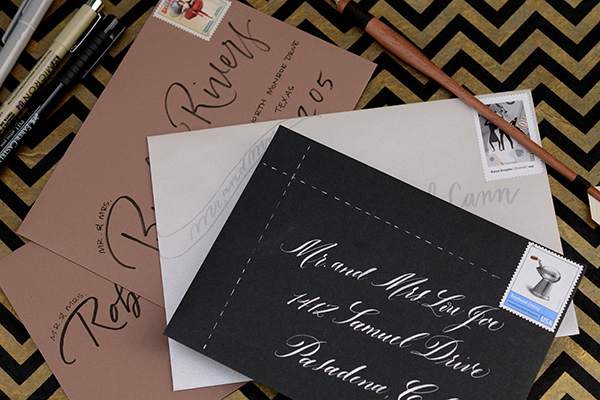
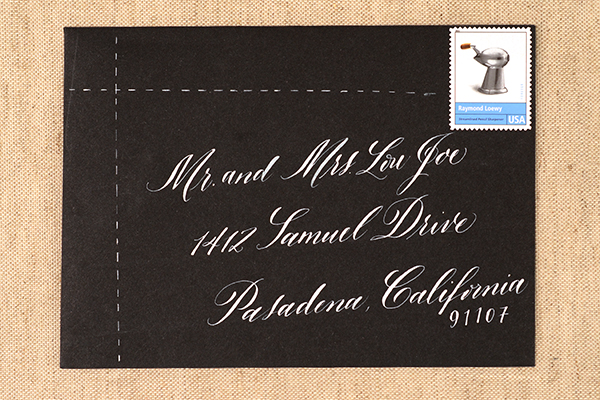
Option One: DIY Pointed Pen Calligraphy. For someone that has a little experience already with a dip pen and ink or for someone with plenty of time to practice before the invitations need mailing, calligraphy addressing can actually be a great DIY option. One hundred years ago, everyone who wanted to write had to use a dip pen and ink. We’re certainly used to modern pens these days, but it’s inspiring to think that it can be done with practice! It takes years and years of practice to truly master the art – so don’t hold yourself to expectations of perfection for the project. Try playing with your unique hand writing and see what is most natural for you with the tools.

DIY Envelope Addressing Styles by Antiquaria via Oh So Beautiful Paper
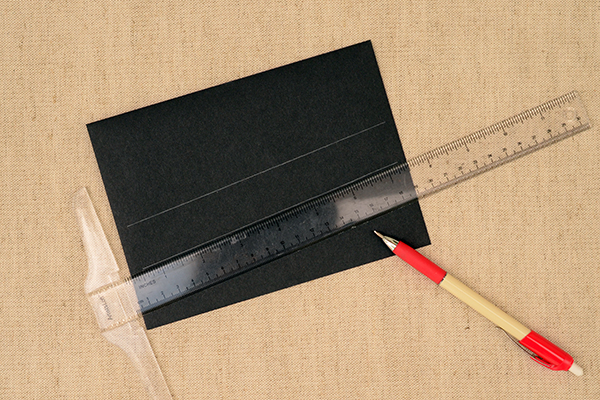
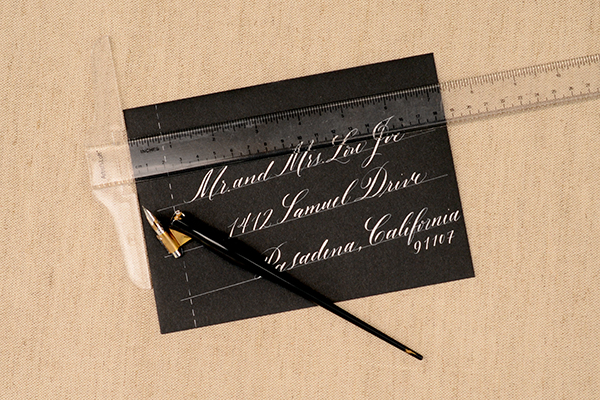
It’s really helpful to give yourself guidelines when writing with pen and ink (your focus will be more on the writing than keeping the lines straight). For a playful look, we drew them at a slant, leaving a ruler’s width between them. Three lines will suffice for most U.S. addresses but occasionally you’ll need four. Just count up how many 3 and 4 liners you need on your list and tackle all of the “ruling up” first.

DIY Envelope Addressing Styles by Antiquaria via Oh So Beautiful Paper
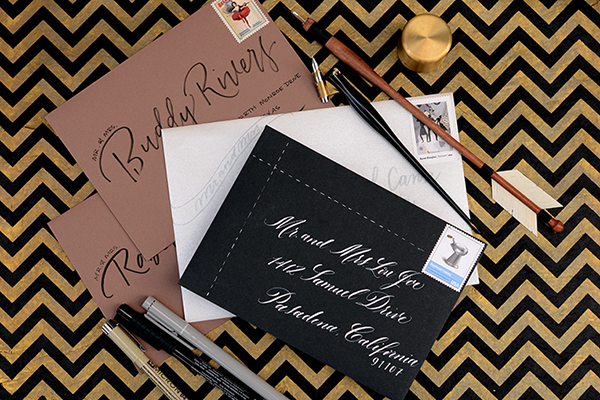
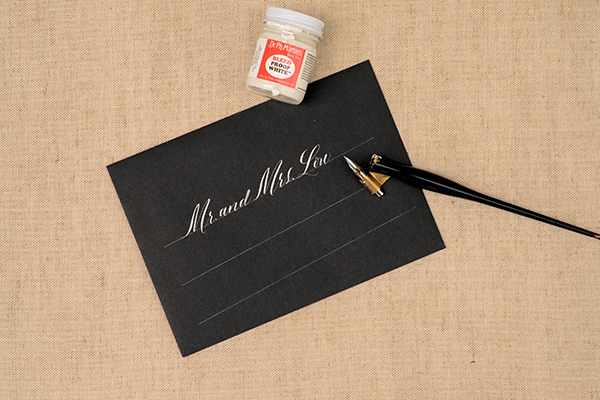
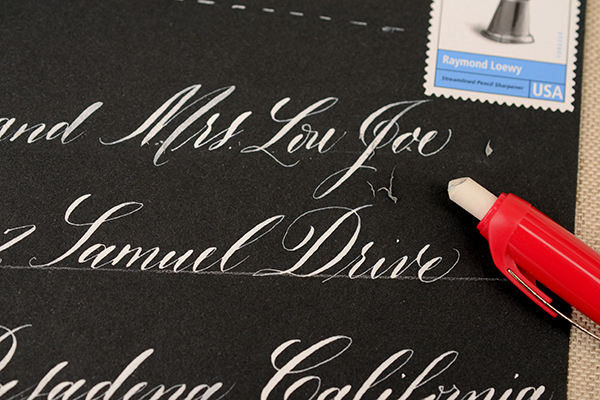
Address each envelope on your guest list. Set aside to dry. This can take minutes to a day depending on the ink and weather, so don’t be too anxious. The last thing you want is to smear you hard work! We used our favorite white ink on these gorgeous black envelopes. It’s the loveliest and most opaque that we’ve found but it must be diluted quite a bit to use with a pointed pen and nib. Add (distilled) water with an eyedropper to the bottle. Stir the ink with the water until it reaches the consistency of heavy cream.

DIY Envelope Addressing Styles by Antiquaria via Oh So Beautiful Paper
Once they’re all addressed, we added a fun little dashed line to further decorate and modernize the envelope. Use a T-square ruler and dash along the straight line with the white ink loaded into the dip pen. Let them all dry once more.

DIY Envelope Addressing Styles by Antiquaria via Oh So Beautiful Paper
Erase the lines gently once everything is good and dry.

You can find more information about DIY calligraphy on our blog. You can also search for local calligraphy classes to get you started. The key to calligraphy is practice, practice, and more practice!

DIY Envelope Addressing Styles by Antiquaria via Oh So Beautiful Paper
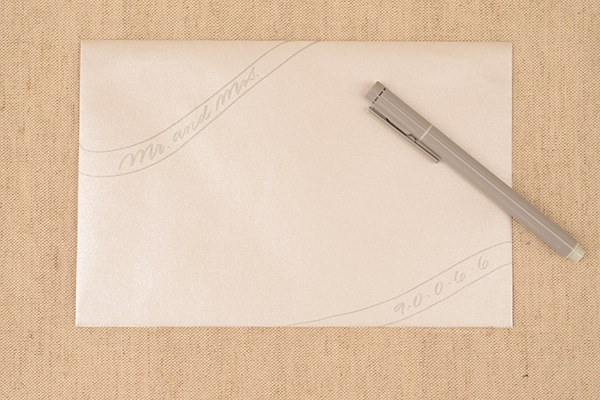
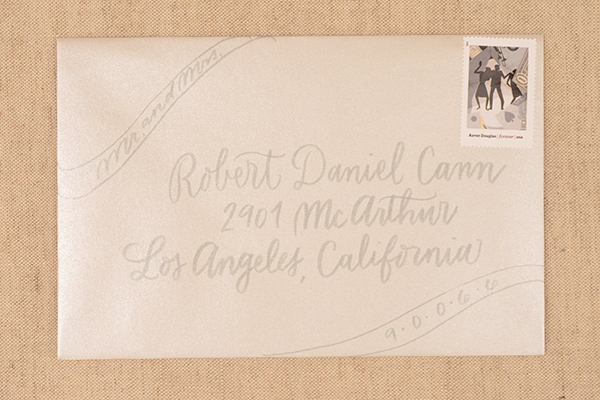
Option Two: Brush Pen Lettering. Brush pens can be a great option for addressing without the mess of an actual brush and ink. A lot of them are actually felt tipped (like the ones in this tutorial) which makes controlling them much easier. This silver and gray design is lovely, soft and tonal. Play with the brush lettering a bit and find a style that’s comfortable for you. You can print or use cursive with them, so the options are endless!

DIY Envelope Addressing Styles by Antiquaria via Oh So Beautiful Paper
Draw “ribbons” in the upper left and lower right corners. Then write the title(s) (i.e. Mr., Miss, Ms., or Mr. and Mrs.) in the upper left banner. Move to the lower right and write the zip code, spacing out each number with a small dot.

DIY Envelope Addressing Styles by Antiquaria via Oh So Beautiful Paper
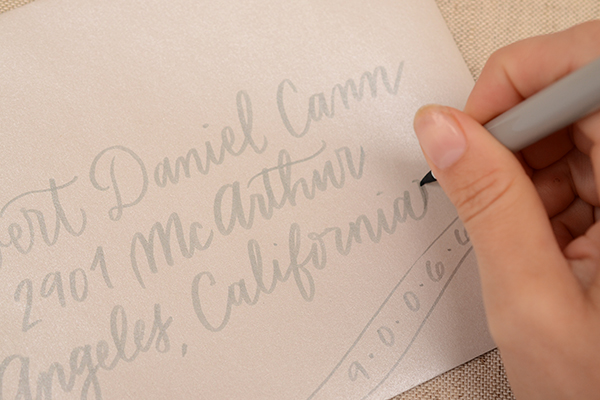
In the middle of the envelope, you’ll write the guest(s) name and address. We used a simple handwriting cursive. Because the brush pen gives the lines weight variation, it looks fancier than a ball point pen, which we love. One key to writing with a brush pen is to write on its point, as shown in the photo above. This will help keep the writing thin and legible. Center the address as much as you can, but the banners in the corners will help keep the design looking balanced even if it’s not perfect.

DIY Envelope Addressing Styles by Antiquaria via Oh So Beautiful Paper
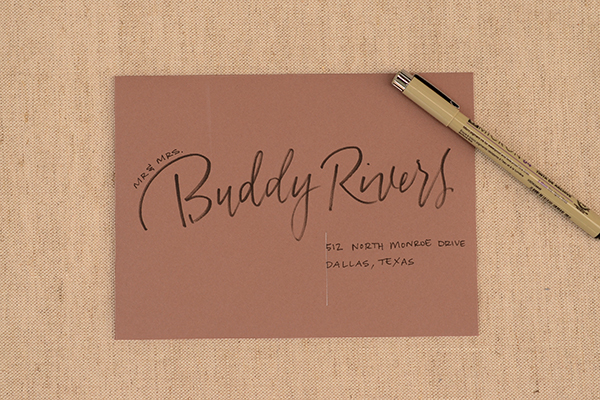
Option Three: Mixed Pen Lettering. This design uses two different kinds of pens to achieve a very custom look. We again used a brush pen, this time in black, as well as a thin felt tipped pen for variation in line quality and so that we could make some text much smaller.

DIY Envelope Addressing Styles by Antiquaria via Oh So Beautiful Paper
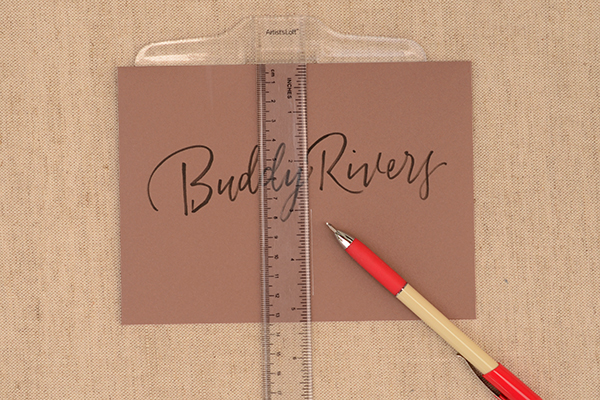
Write your guests name fairly large across the envelope. Vary the size of lettering depending on the length of their name (you’ll get the hang of this with practice).

DIY Envelope Addressing Styles by Antiquaria via Oh So Beautiful Paper
Then, draw straight line down, using a T-square ruler a little right of center. You will use this line to left justify the address.

DIY Envelope Addressing Styles by Antiquaria via Oh So Beautiful Paper
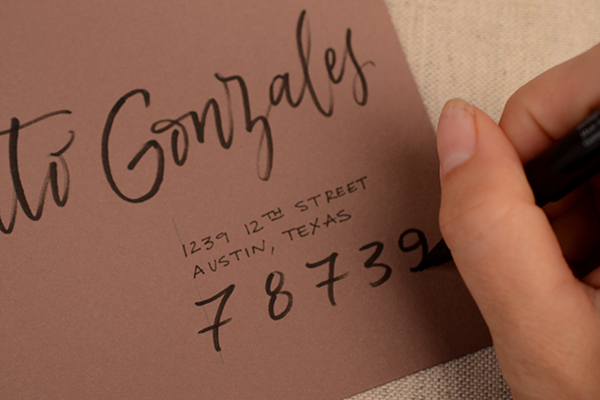
With the vertical lines as your guide, print the street, city and state portion of the address using the felt tipped marker. Add the appropriate title(s) to the left hand side of the guests name.

DIY Envelope Addressing Styles by Antiquaria via Oh So Beautiful Paper
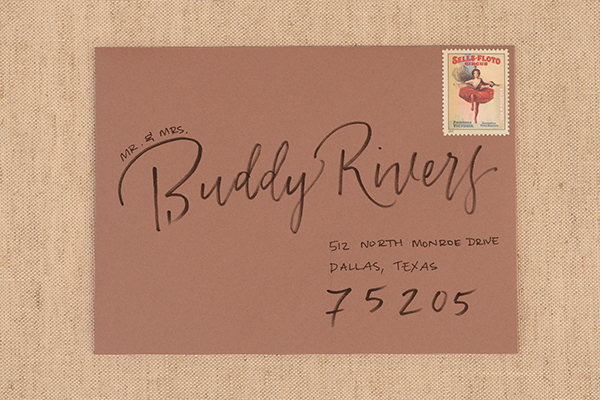
With the brush pen, add the guest’s zip code in large numbers below the address. Erase your vertical line and the envelope is done!

DIY Envelope Addressing Styles by Antiquaria via Oh So Beautiful Paper
DIY Envelope Addressing Styles by Antiquaria via Oh So Beautiful Paper
Addressing options really are limitless. Play around with ideas until you find something that works for you and coordinates well with your invitation suite. It can help to experiment with addressing your own save the dates (usually they’re less formal) to determine if you want to tackle the process of addressing your wedding invitations.

Materials & Resources

Calligraphy Starter Kit
White Calligraphy Ink

Calligraphy Resources: Setting up your Tools,  Lower Case Alphabet by Bailey Rivera, Calligraphy Supplies
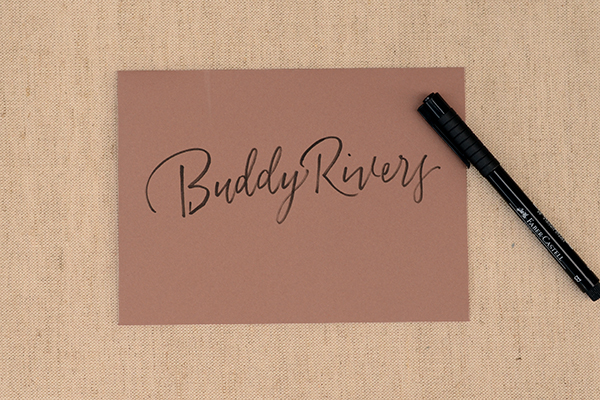
Brush and Felt Tipped Pens

For envelopes, we discuss many different envelope resources and options in a previous post, found here.

T-square Ruler

White Mechanical Pencil or Graphite Pencil

Photo Credits: Antiquaria for Oh So Beautiful Paper