Jaclyn + Jason’s Illustrated Nautical Wedding Invitations

We’re moving from rustic to nautical with our next set of wedding invitations.  Jaclyn and Jason worked with Diane of Faye + Co. for their Atlantic City wedding invitations – you might also remember Diane’s awesome sailor tattoo wedding invitations from a couple of years ago.  Jaclyn and Jason chose a completely nautical theme for their invitations, with beautiful illustrations and hand lettering by Diane.

From Diane: Jaclyn and Jason are a fun couple and wanted the seaside reflected in their wedding invitations.  First we set the tone with a save the date postcard, using hand-drawn artwork of a nautical lantern.

On the invitations, we went all out!  From a tattoo-inspired anchor, to the dock-style posts, a rope border around the entire piece, to bits of inspiration from Atlantic City featured on the envelope liner.

This style invitation was a first for me, since the invitation folded vertically instead of a standard gatefold or trifold invitation.  At the bottom of the invitation was a perforated rsvp postcard that could be separated from the rest of the invitation with ease.

Not too long after sending off the invitations, I was contacted to design the bridal shower invitations as well – I was ecstatic!  From the save the date and invitation, all the way through to the bridal shower, this couple has a stylish set of stationery for their wedding.

Thanks Diane!

Check out the Designer Rolodex for more tal­ented wed­ding invi­ta­tion design­ers and the real invi­ta­tions gallery for more wedding invitation ideas!

Photo Credits: Faye + Co.

Georgie + Dave’s Nature-Inspired Wedding Invitations

Happy Monday everyone!  I love starting the week with a gorgeous set of wedding invitations, and today is no exception.  These invitations come to us from Amy of Saint Gertrude Design and Letterpress in Melbourne, Australia.  Amy combined a laser-cut tree overlay with two-color letterpress printed wedding invitations to achieve a modern, yet rustic, aesthetic for these wonderful invitations.

From Amy: Georgie and Dave’s wedding invitation suite was quite an epic project, merging two-colour letterpress print with an intricate laser cut folder.  This couple may be Melbourne cityfolk, but their attitudes and values were just so beautifully down-to-earth that I felt a simple but rustic vibe was needed for their invitations.

They were married under a canopy of trees at The Boulevard in Kew and rather than just paying lip service to this, an intricately illustrated tree was laser-cut to create a silhouette over the letterpress printed invitations underneath.  A heart cut into its trunk aligned perfectly with the couple’s heart monogram below and this motif ran throughout all of their stationery.  The whole suite was tied up in cotton string with a gift tag.


Beautiful!  Thanks Amy!

Check out the Designer Rolodex for more tal­ented wed­ding invi­ta­tion design­ers and the real invi­ta­tions gallery for more wedding invitation ideas!

Photo Credits: Structured Pieces

{happy weekend!}

Happy Friday everyone!  Despite some truly gorgeous spring weather over the last couple of days, I’m actually feeling like I might be coming down with a cold – so I’m going to head out a bit early to rest and recuperate.  I hope you all have fun plans for the weekend!  But in the meantime…

Constellation-Place-Cards-Neither-Snow-Calligraphy

Photo Credit: Tec Petaja, Calligraphy by Neither Snow, Paper Goods by Mr. Boddington’s Studio

…a few links for your weekend!

This week on Oh So Beautiful Paper:

As usual, we have a fun cocktail coming up for you this afternoon, so check back a bit later for the recipe!  I hope you all have a wonderful weekend, and I’ll see you back here on Monday!  xoxo

DIY Rubber Stamp Floral Wedding Invitations

It’s the ladies of Anti­quaria, back with another cre­ative DIY project for you!  Today they’re sharing a fun tutorial on how to make gorgeous rubber stamp wedding invitations with a floral motif!

We love the versatility and custom look that rubber stamps can give your invitation suite.  This week, we wanted to show how the same stamp designs can lead to two very different wedding invitation suites: one designed for a festive tropical bash, and the other for more traditional, sophisticated affair!  It’s as simple as changing the stamp pad and envelope colors!  Let us show you…

DIY Tutorial: Floral Rubber Stamp Wedding Invitations

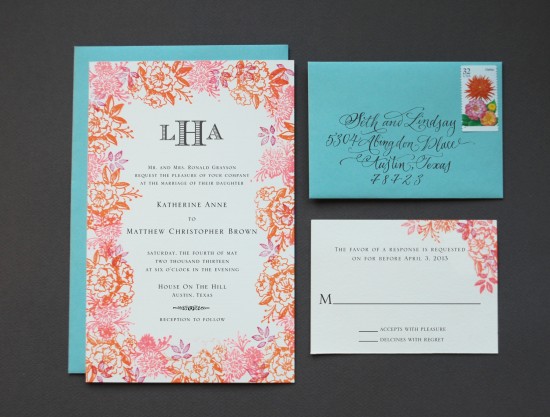
Option 1: For the tropical fete… shades of coral, mango, and berry make the floral border.  Lovely pool colored envelopes complement the suite.

DIY Tutorial: Floral Rubber Stamp Wedding Invitations

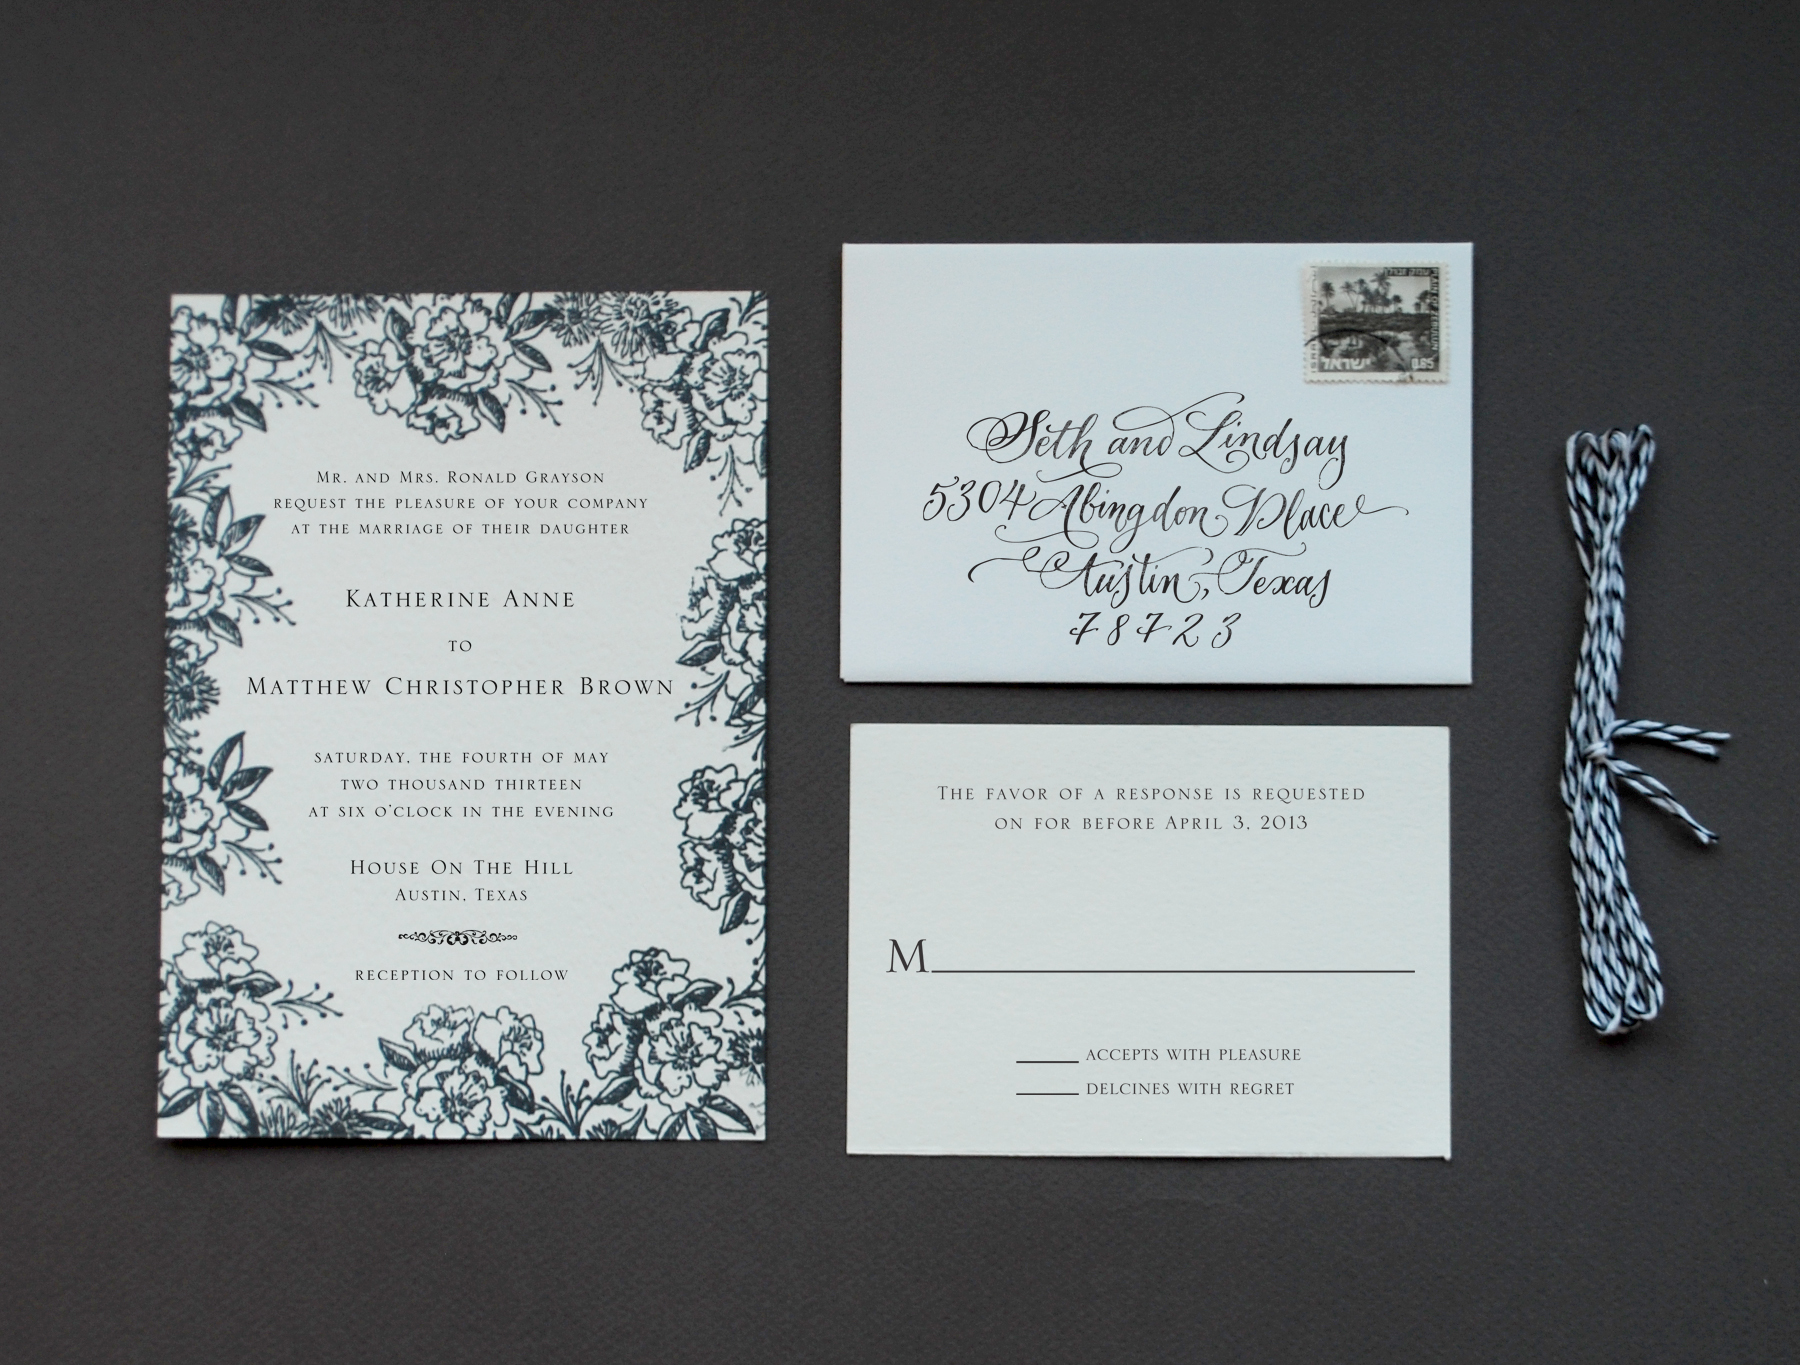
Option 2: Traditional black and white convey elegance and sophistication.

DIY Tutorial: Floral Rubber Stamp Wedding Invitations

Step 1:  You’ll want to stamp your invitation wording first… it makes things much more simple.  Ink your stamp (we used our classic invitation stamp) thoroughly, and center it over your paper.  Press firmly but moderately, using the handle as your primary pressure point to avoid an uneven print.  Let dry.

DIY Tutorial: Floral Rubber Stamp Wedding Invitations

Step 2: Put a sheet of regular text weight paper underneath your already printed invitation. Using your border stamps, (we used our camellia pattern stamp, daisy pattern stamp and small leaves pattern stamp) begin stamping the motifs around the border, making sure not to cover any text.  Go in a clockwise pattern and stamp the images sparsely first… you can always come back in and add more in each circular pass.  It also helps to stamp off of the page, giving the invitation a full bleed effect.  It  would be wise to start with your largest motif and move to the smaller ones to fill in the border.  If you are using multiple colors, be certain to make the overall border balanced in color and design.

DIY Tutorial: Floral Rubber Stamp Wedding Invitations

Step 3: Print your reply card (we used our classic reply card stamp) in the same manner as you did the invitation text.  If you like, you can also add your floral motifs to this card, like in the tropical suite, or keep it simple, as shown above.

DIY Tutorial: Floral Rubber Stamp Wedding Invitations

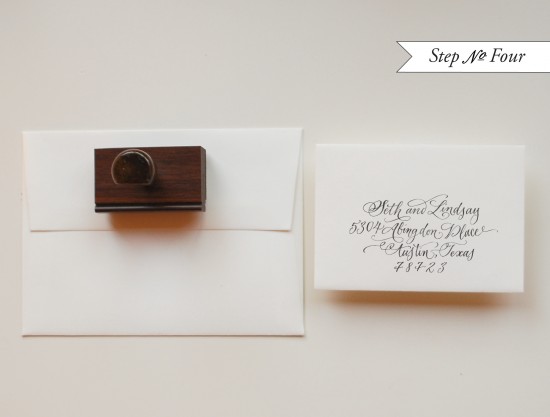
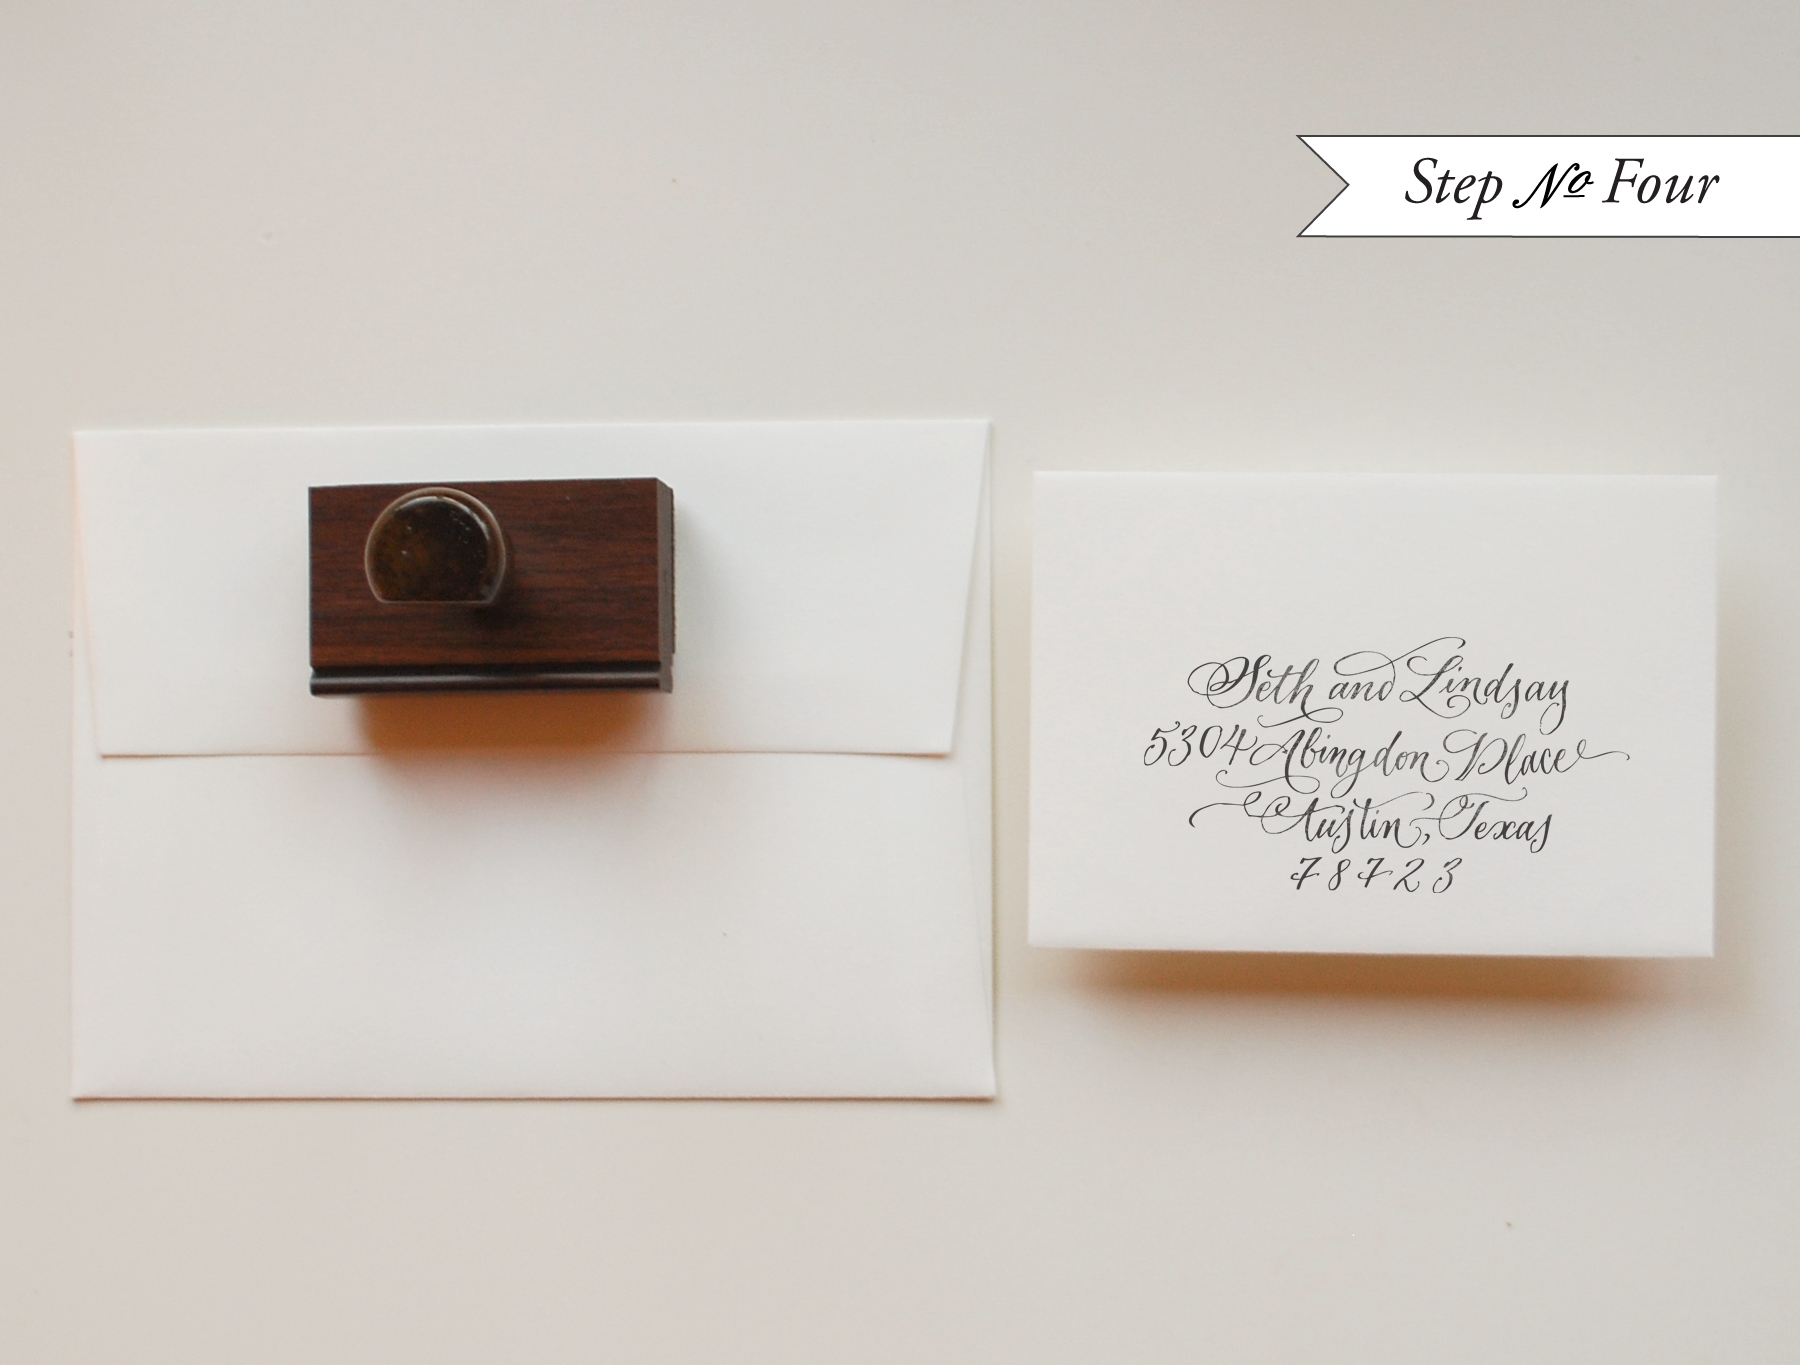
Step 4: Stamp your return and reply addresses (we used our calligraphy return address stamp) on your envelopes.  You can re-use the stamp long  after your wedding is over… maybe on all those thank you notes!!!

DIY Tutorial: Floral Rubber Stamp Wedding Invitations

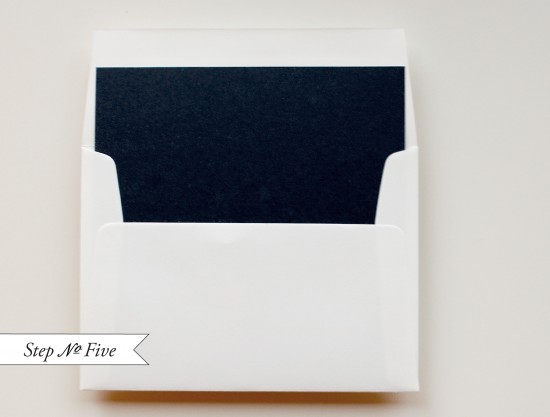
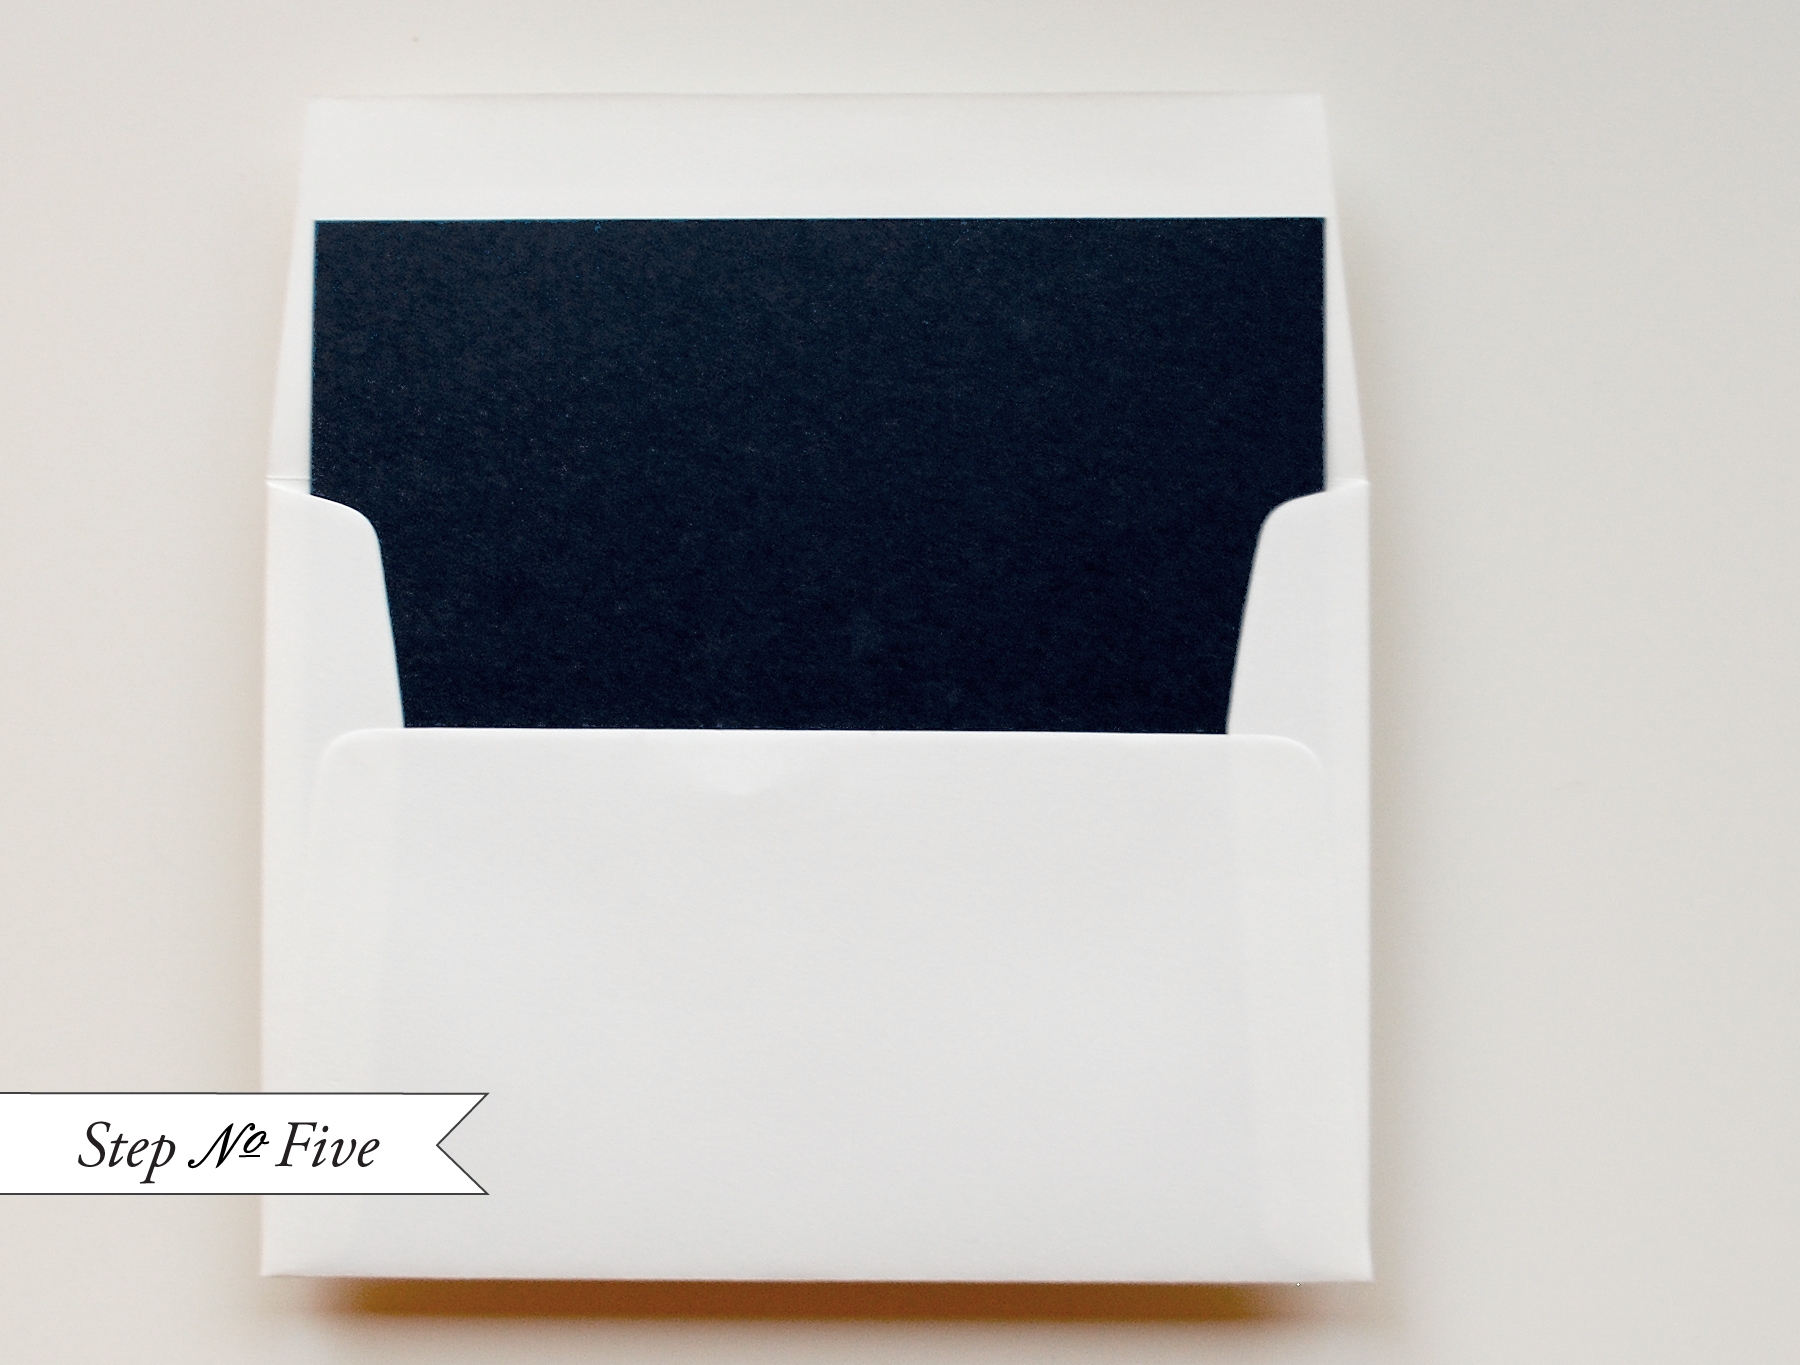
Step 5: We’ve chosen to add a black text weight paper liner to the outer envelope.  This is a great way to bring in some additional color to the suite and to create a nice balance.  It’s simple to do as well… you can find envelope liner template kits or pre-cut liners at Paper Source and local craft stores.  If you’re using square envelopes, you can also have your local print shop cut paper down to your envelope specifications.  Then just put a line  of double stick tape or stick glue across the top, slide them into position and press to secure.  Fold at the crease with a bone folder to get a nice, crisp edge.

DIY Tutorial: Floral Rubber Stamp Wedding Invitations

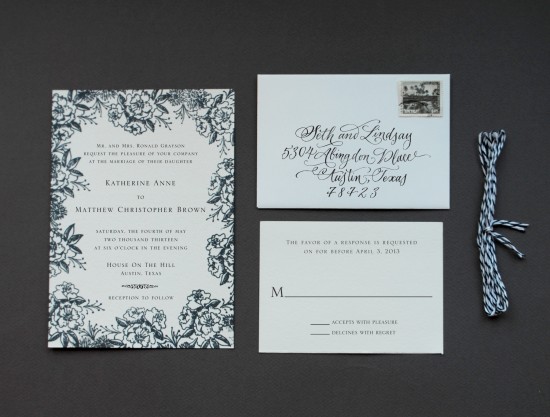
Now all that’s left is to tie the suite together, address them and hand them off to your post office to deliver to your lovely guests!!

Materials:

For the classic invitation suite

Classic Invitation Stamp

Classic Reply Card Stamp

Calligraphy Return Address Stamp

Camellia Pattern Stamp

Daisy Pattern Stamp

Small Leaves Pattern Stamp

Stamp Pad – in Black

Cover Weight Paper, cut to A7 (5″x7″) and 4bar (3″x5″)

A7 Envelope

4bar Envelope

Liner paper in black, cut to size

Double Stick tape

Twine – in black and white

For the tropical invitation suite

Classic Invitation Stamp

Classic Reply Card Stamp

Calligraphy Return Address Stamp

Classic Monogram Stamp

Camellia Pattern Stamp

Daisy Pattern Stamp

Small Leaves Pattern Stamp

Stamp Pad – in Coral, Mango Tango, Magenta and Antique Pewter

Cover Weight Paper, cut to A9 (5.5″x8.5″) and 4bar (3″x5″)

A9 Envelope – in Pool

4bar Envelope – in Pool

{happy weekend!}

This week felt like it was all about change – the change of seasons from winter to spring, the change of letting some things go, and the change of looking forward to lots of amazing things to come over the next few months.  It was also the first week that I didn’t feel completely overwhelmed by my never ending to do list, so maybe the two things go hand in hand.  This weekend I’m looking forward to heading out to the DC Big Flea and catching up with friends.  But in the meantime…

Photo Credit: flourfight

…a few links for your weekend!

This week on Oh So Beautiful Paper:

As usual, we have a fun cocktail coming up for you this afternoon, so check back a bit later for the recipe!  I hope you all have a wonderful weekend, and I’ll see you back here on Monday!  xoxo