Behind the Stationery: Dahlia Press

Our next installment of Behind the Stationery bring us to Seattle, Washington to chat with Stephanie Clarke of Dahlia Press. Stephanie shares about how she transitioned from moonlighting as an entrepreneur to investing full-time in Dahlia Press, how sketching on an iPad has expedited her overall process, and how her custom client workflow differs from designing a wholesale line. Here’s Stephanie! —Megan Soh

Behind the Stationery: Stephanie Clarke of Dahlia Press

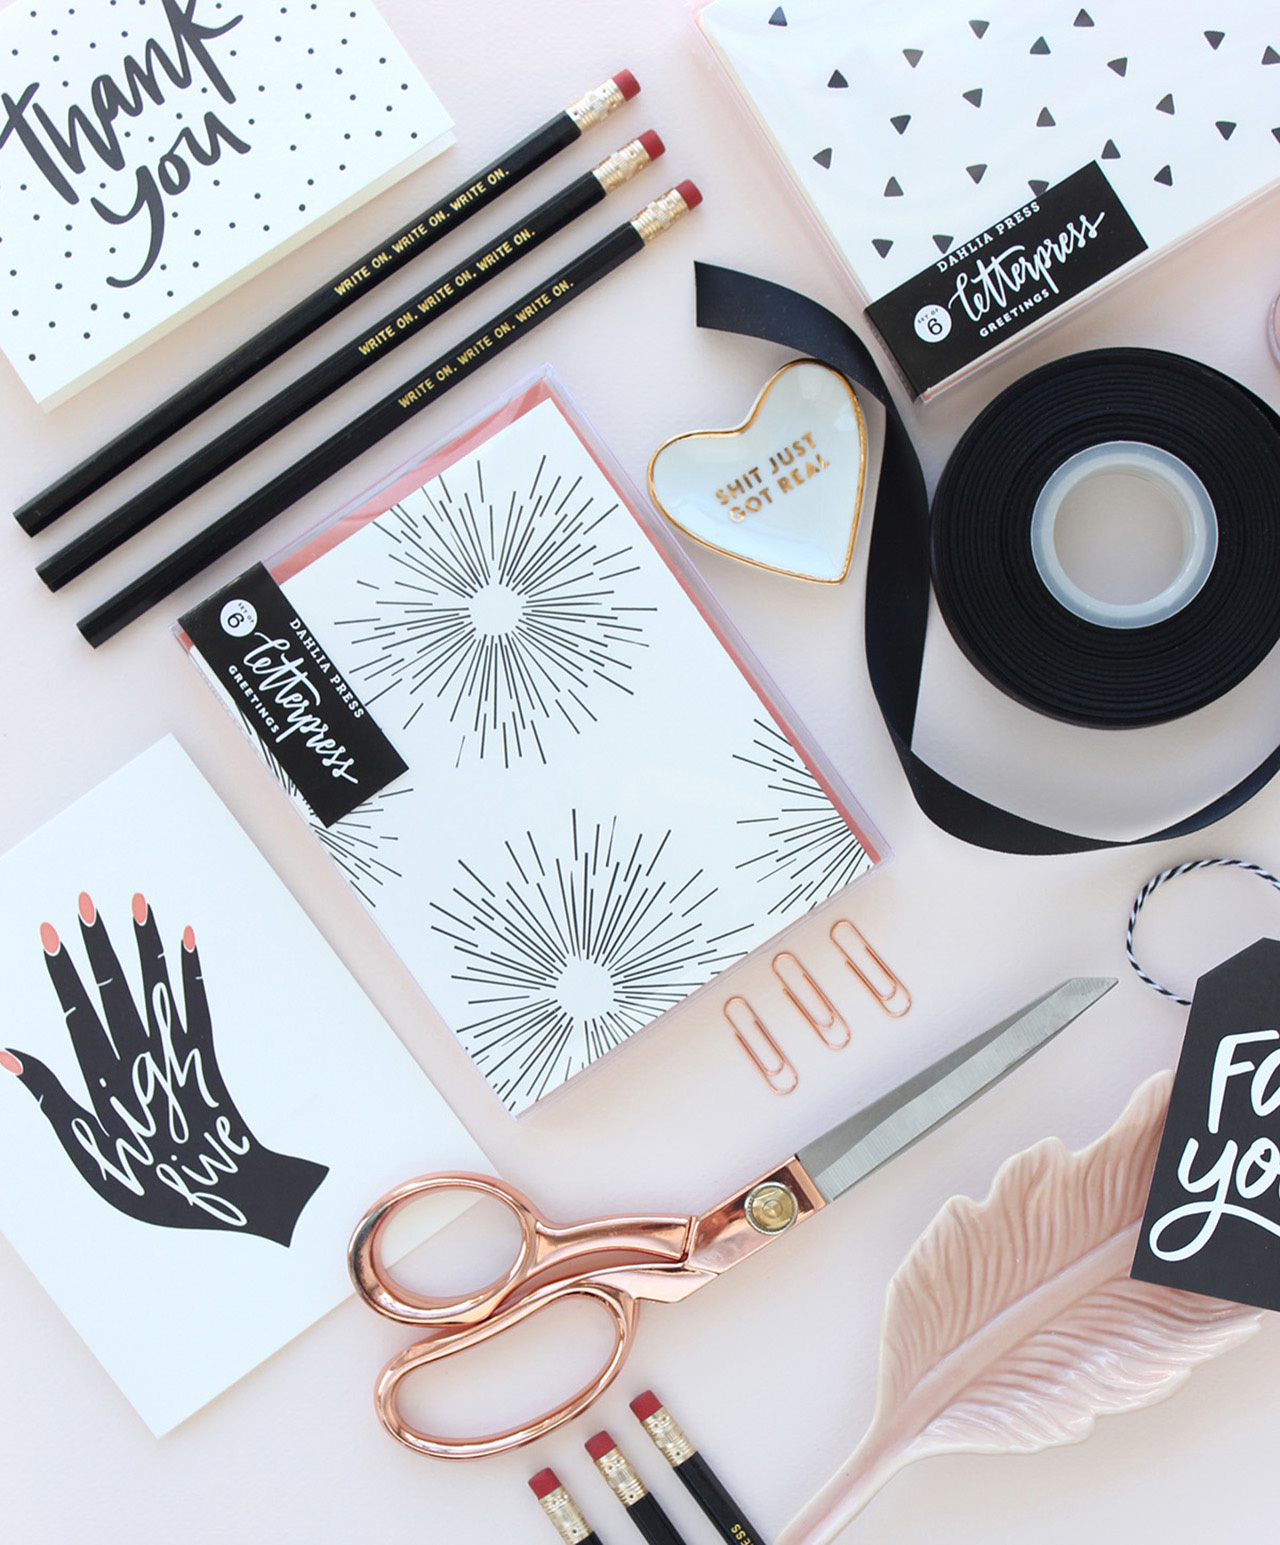
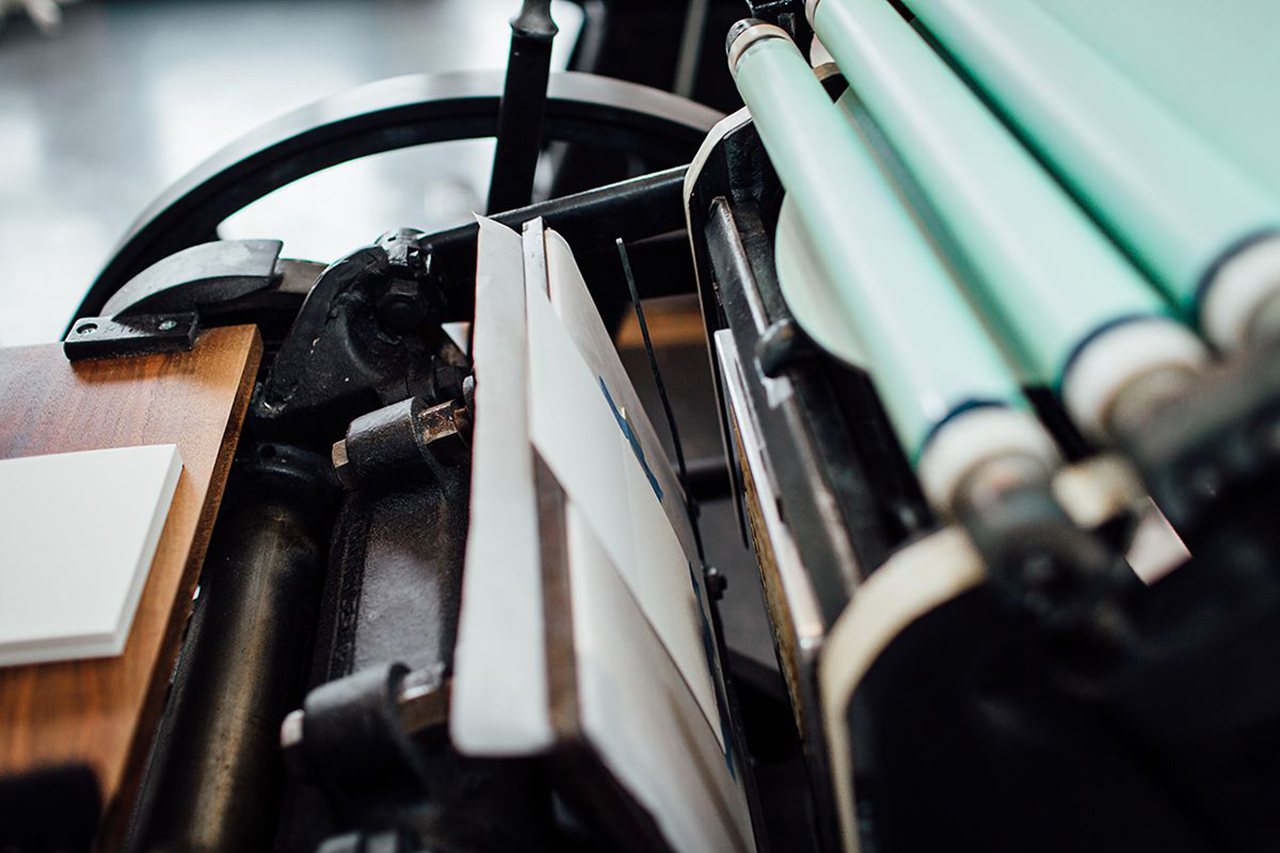
From Stephanie: I first fell in love with letterpress in a typography class. My instructor was a printer and would make all of the students letterpress flashcards of the typefaces we should all know by heart. Fast forward a couple years and by day I was a Graphic Designer for a retail branding firm designing everything from logos and interior environments to websites and packaging, and by night I was printing on a 1912 Golding Pearl platen press in my basement.
Behind the Stationery: Stephanie Clarke of Dahlia Press

Behind the Stationery: Stephanie Clarke of Dahlia Press

For 6 years, Dahlia Press was a side hustle. Named after the flowers in my front yard, I spent my evenings printing wedding invitations and custom stationery. To say that I started with a formal business plan and a vision for what Dahlia Press would eventually become wouldn’t be entirely correct. I knew that the entrepreneur in me wanted my own business, but I also knew that it was best for me to grow slowly and carefully, trying not to grow too fast to where I couldn’t sustain my full-time job (which I loved), and not too slow that the business wasn’t gaining momentum.
Behind the Stationery: Stephanie Clarke of Dahlia Press

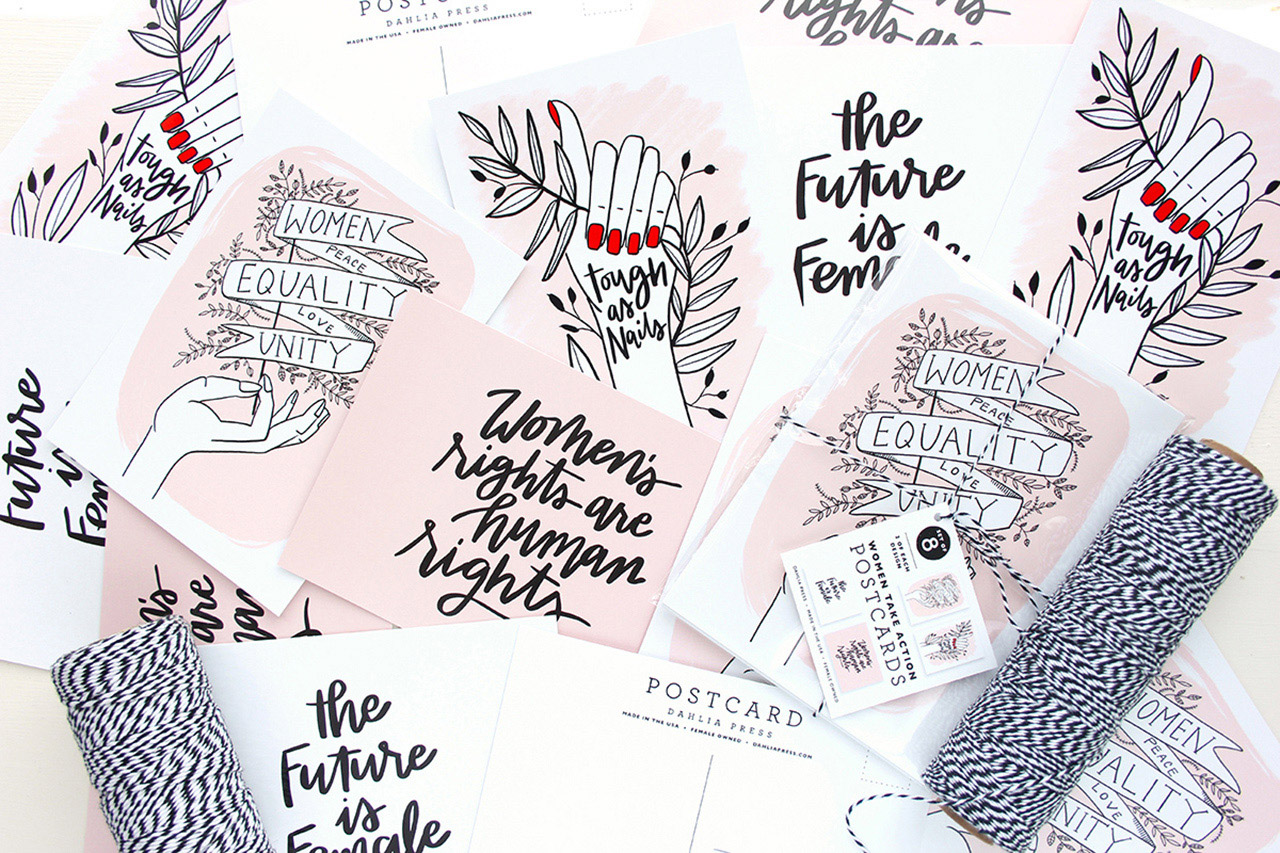
Eventually with hard work and late nights, Dahlia Press grew to a size where I could no longer sustain both jobs. Knowing Dahlia Press needed my full attention, I left my day job to focus on it entirely. It was at this time that we expanded our offerings to include a line of letterpress greeting cards for the retail and wholesale market.
Behind the Stationery: Stephanie Clarke of Dahlia Press

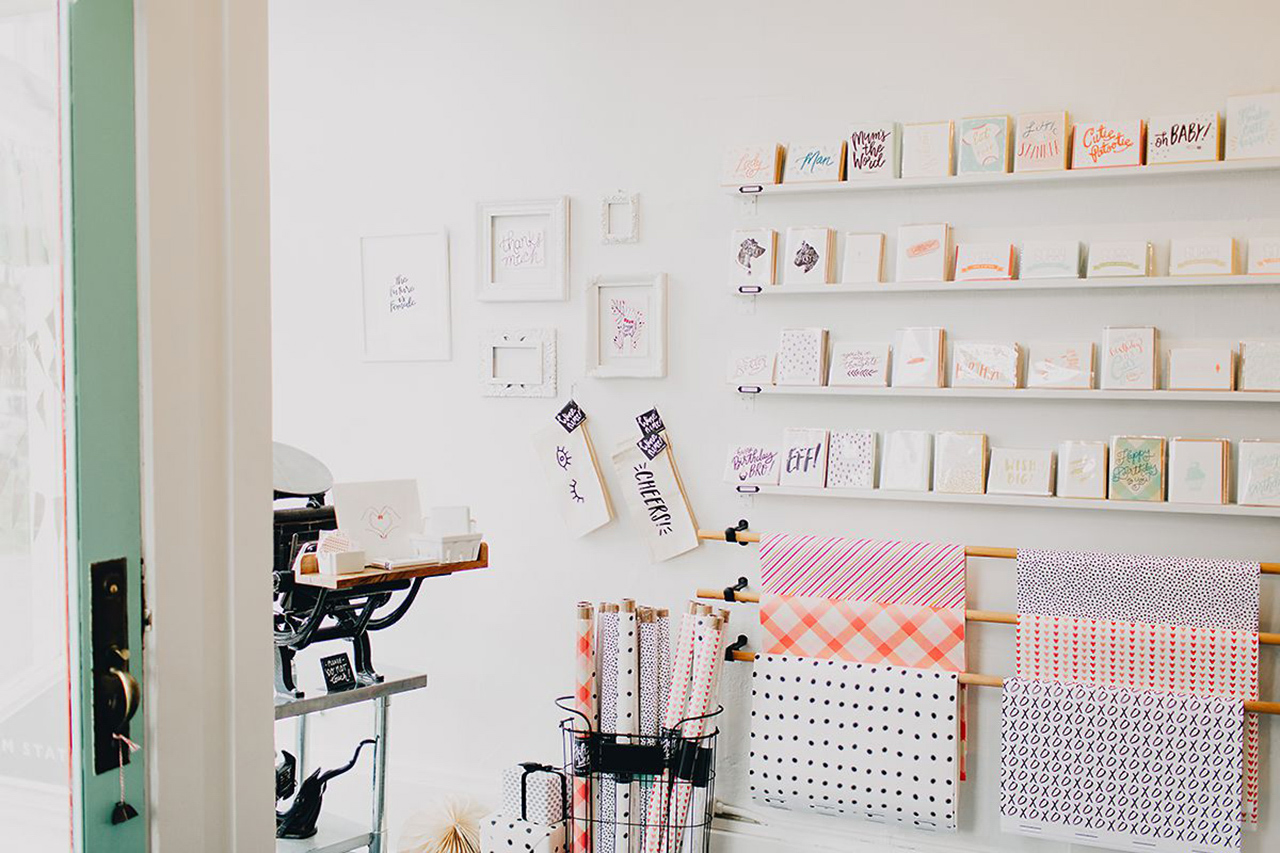
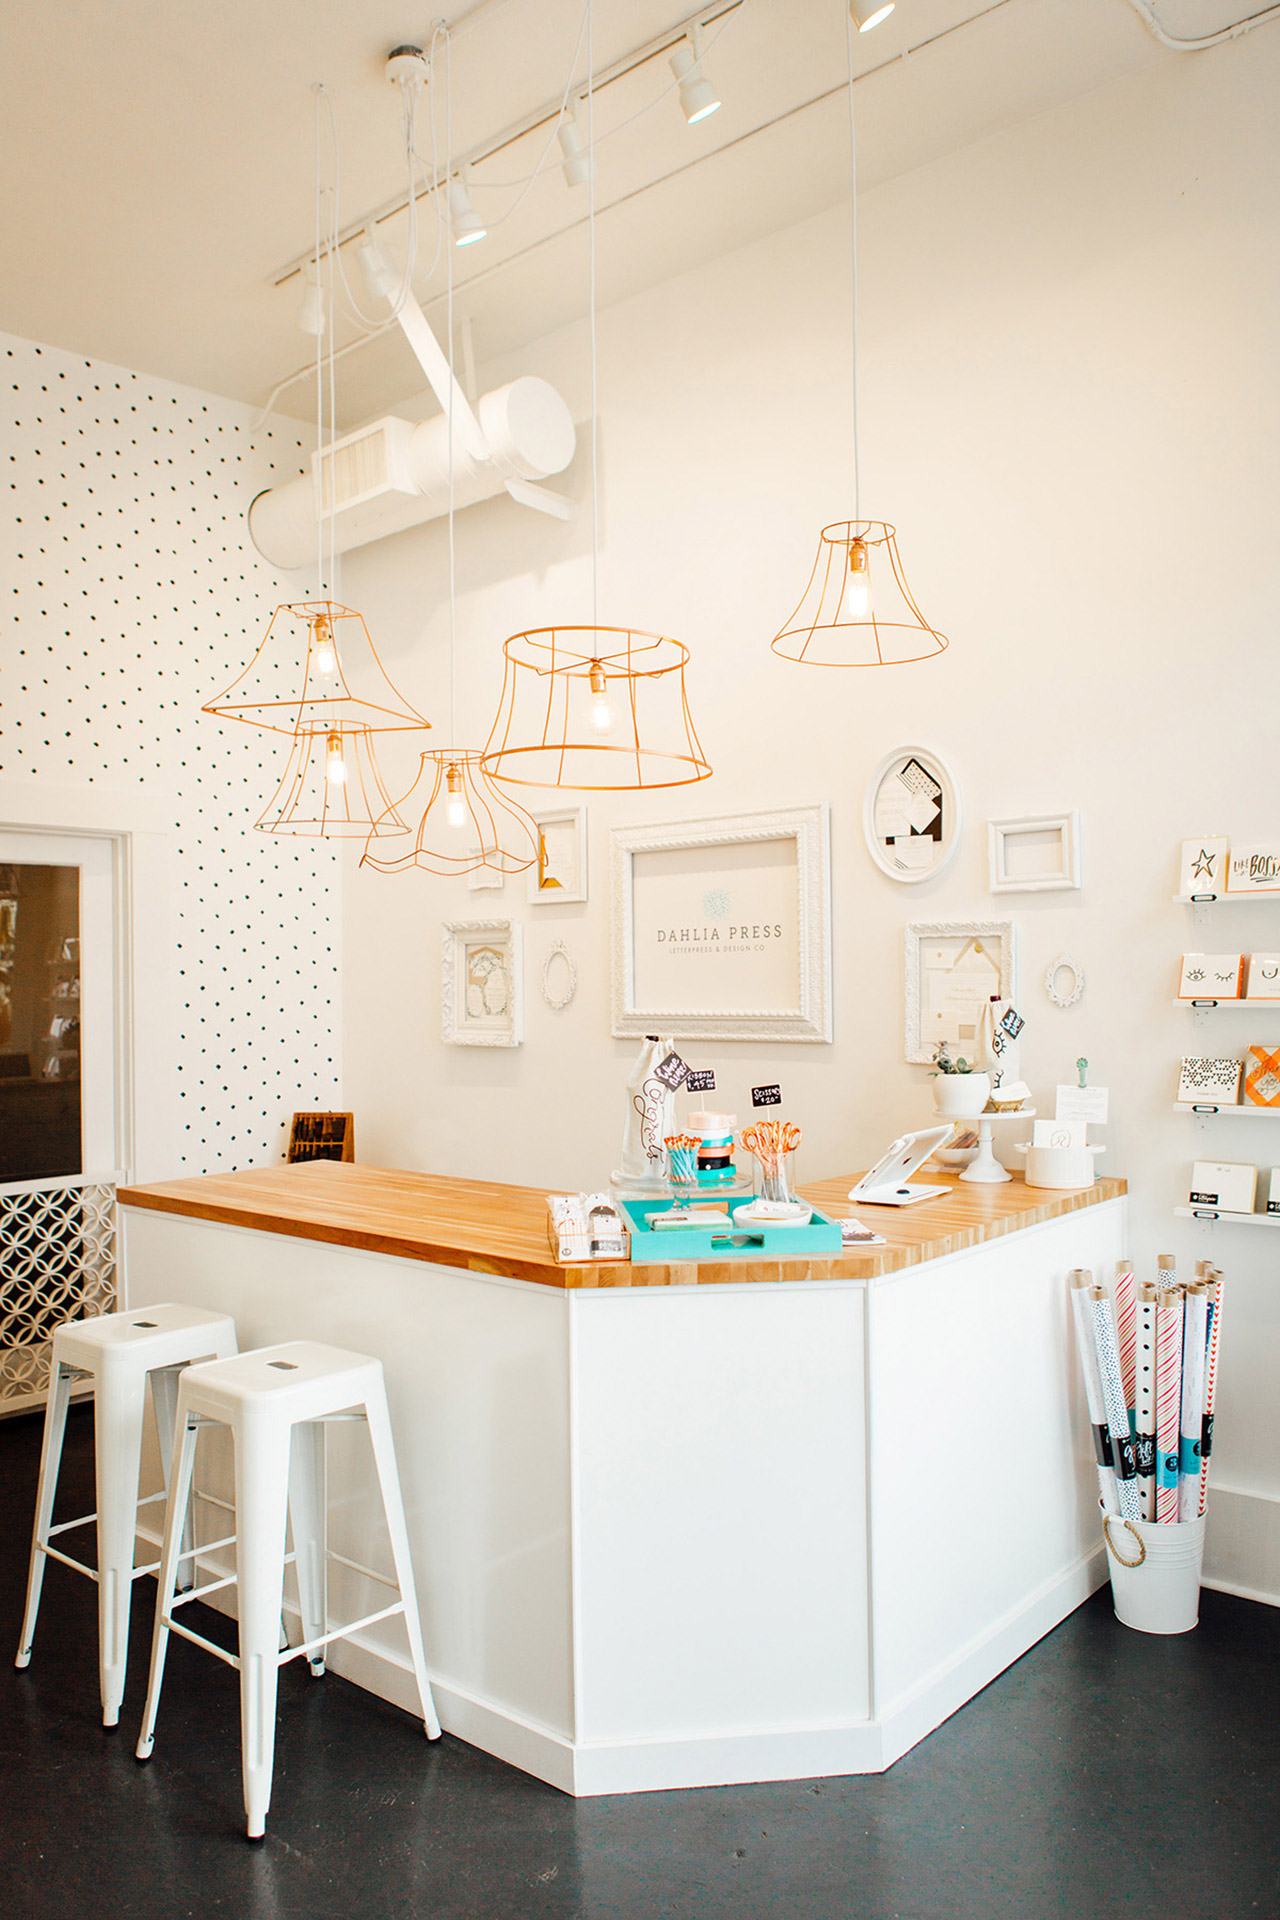
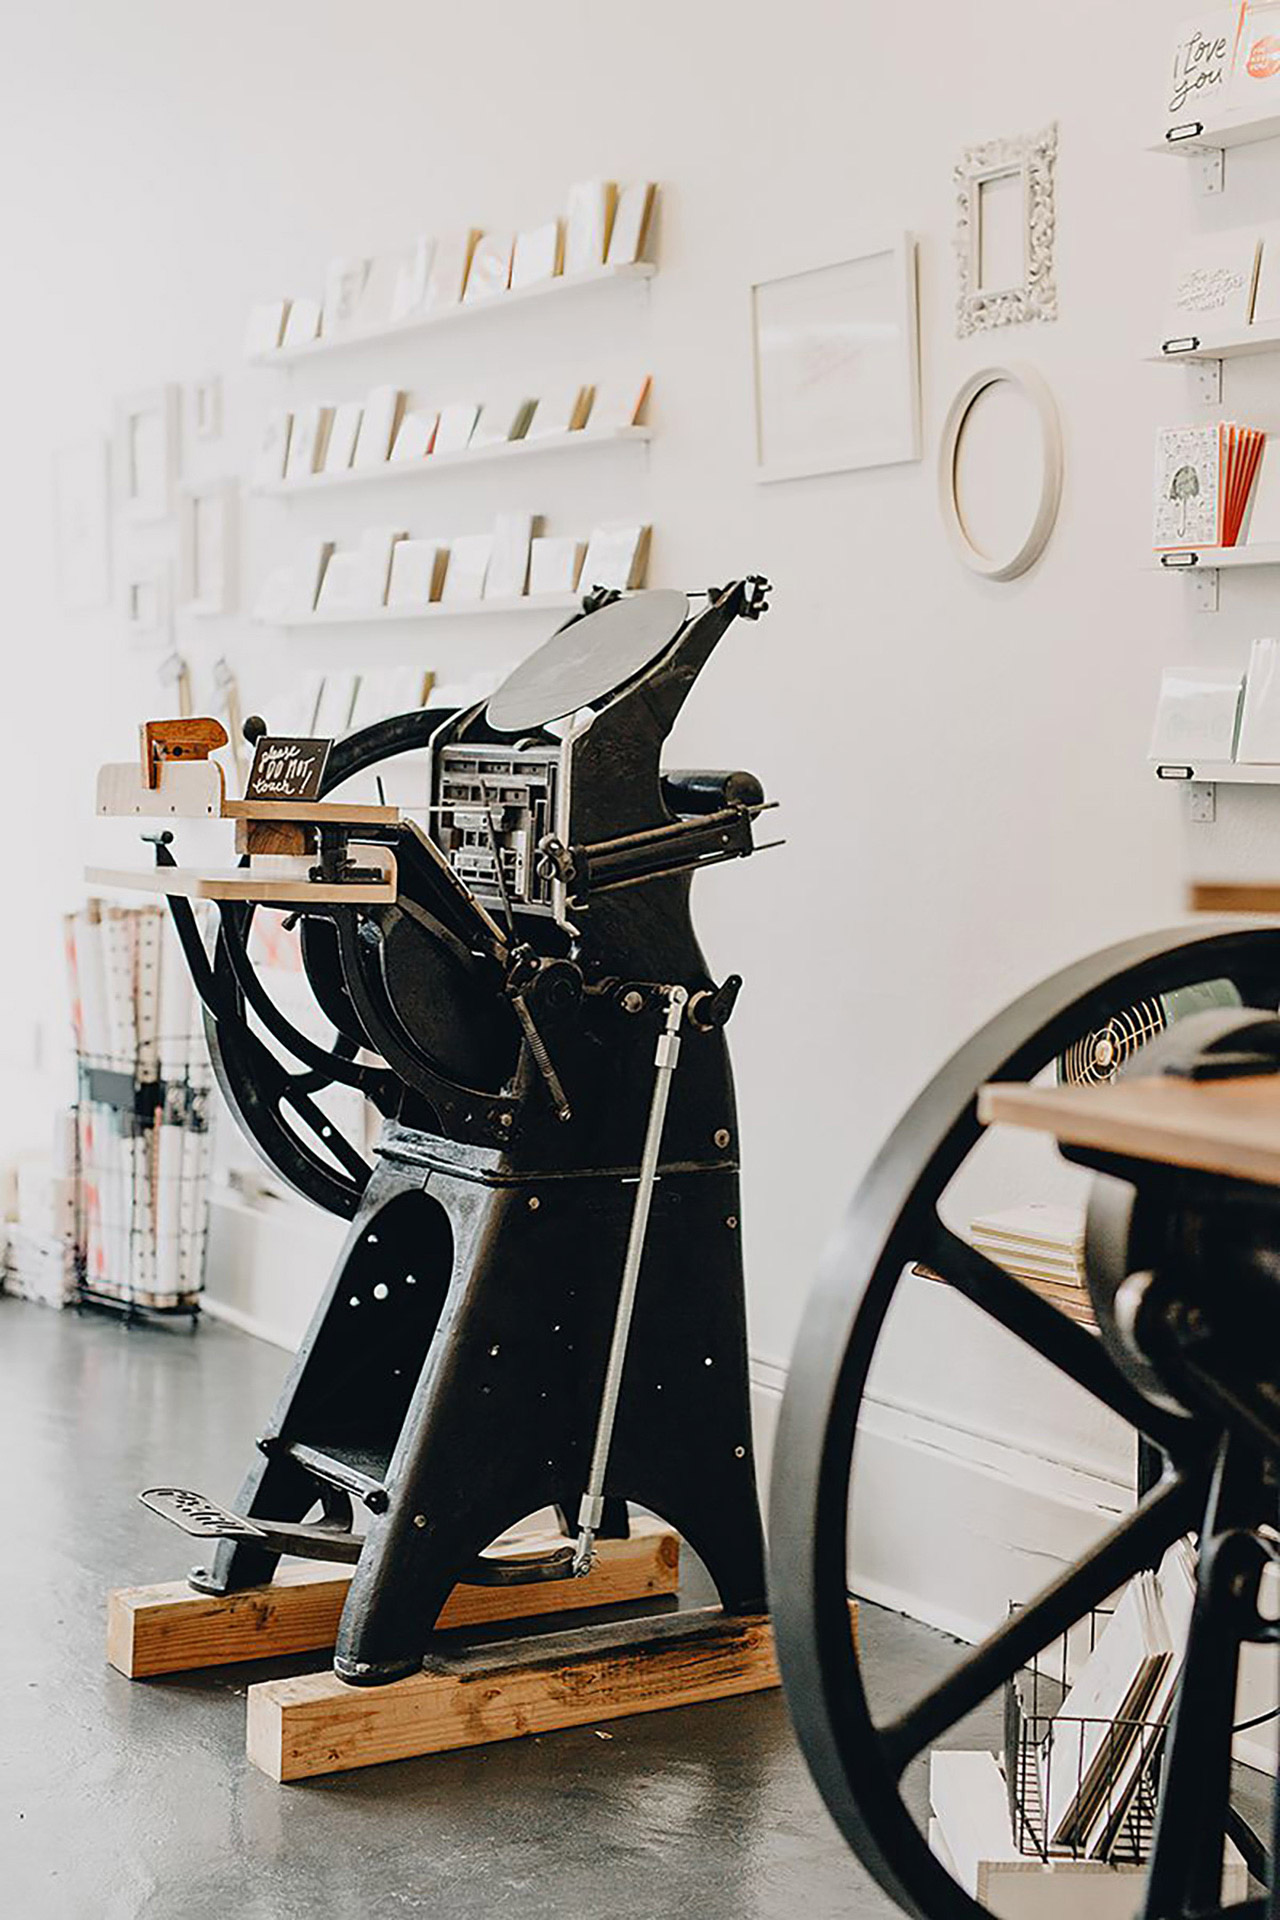
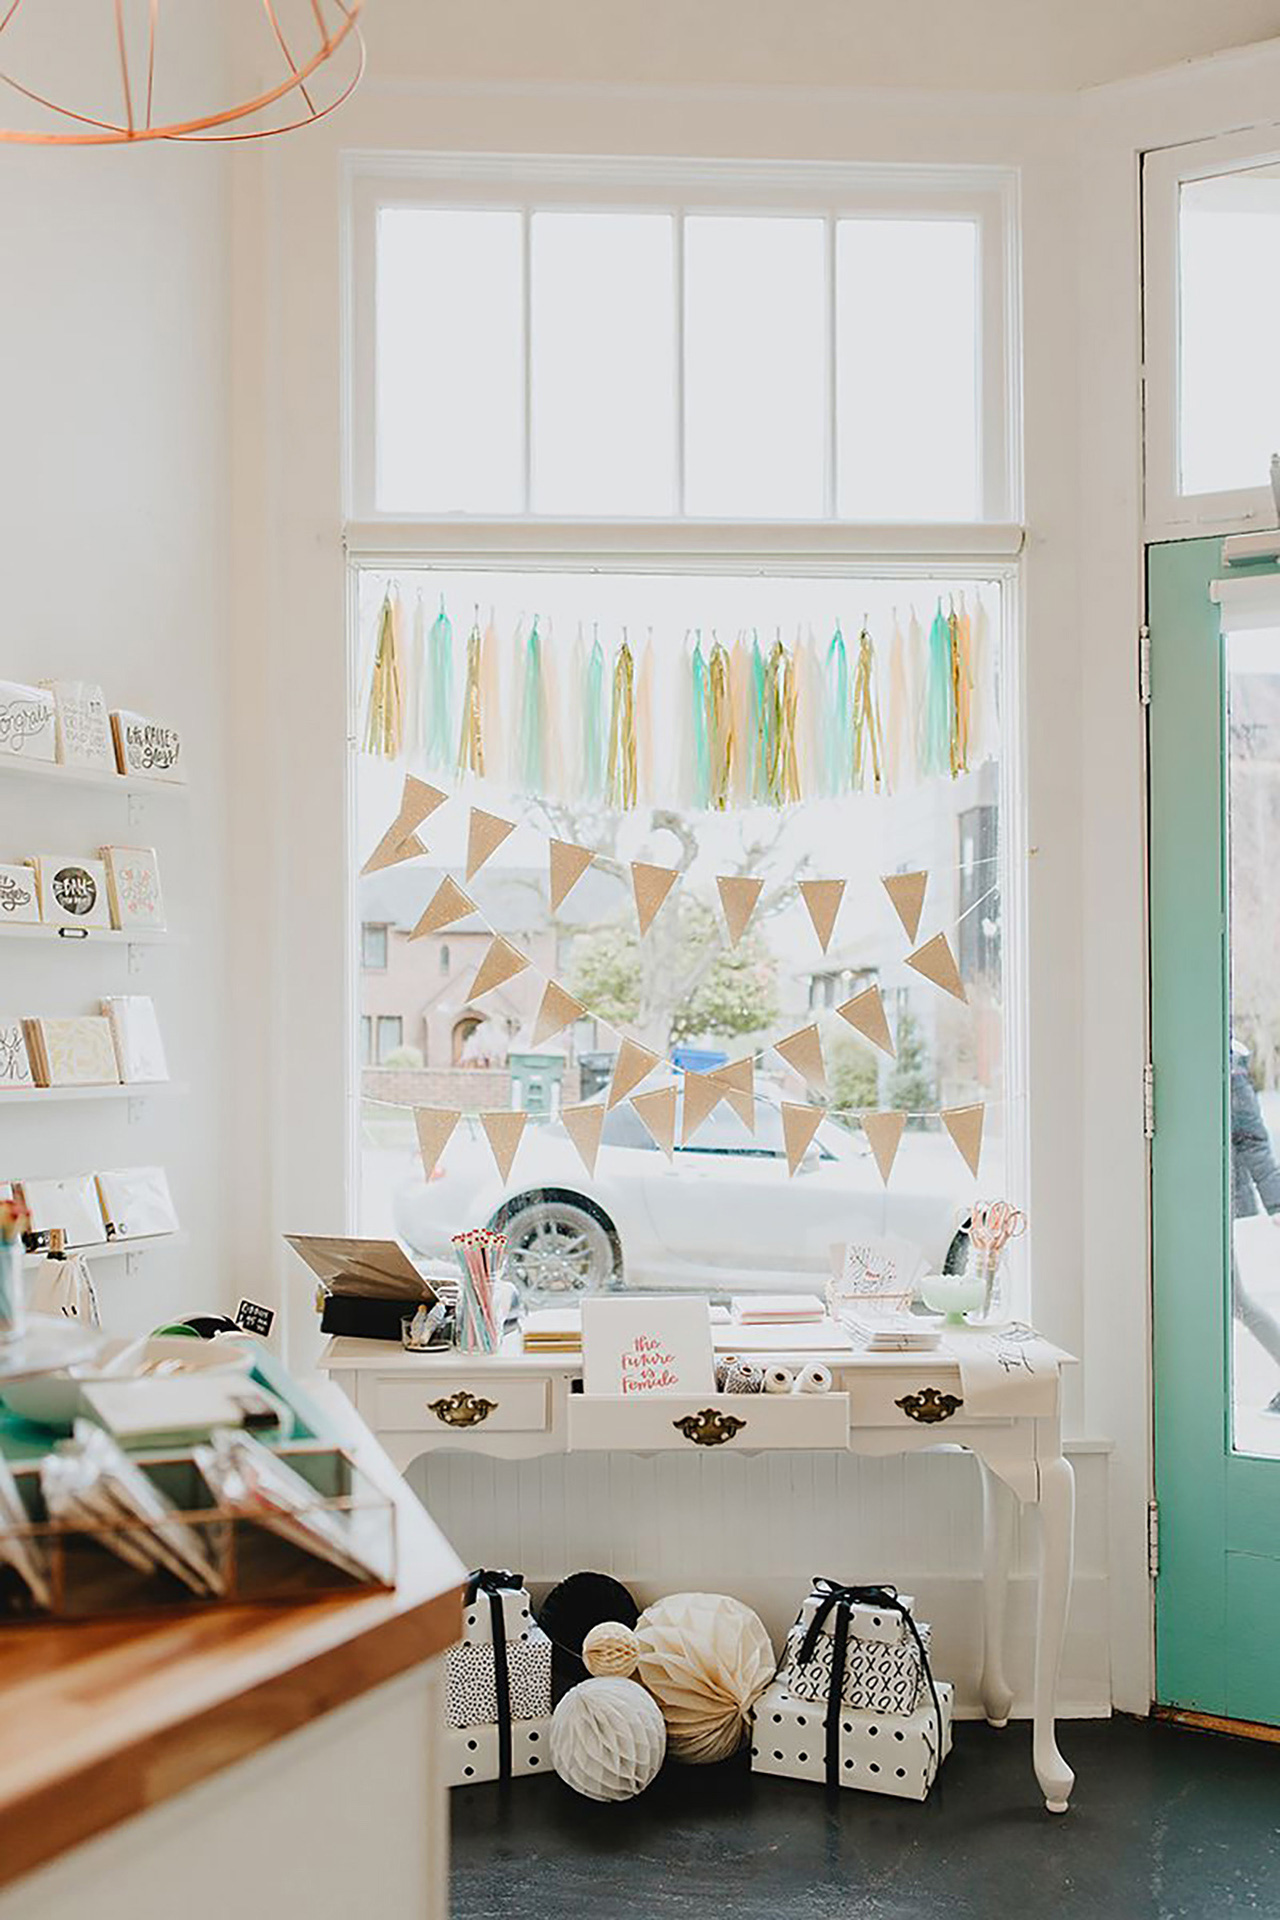
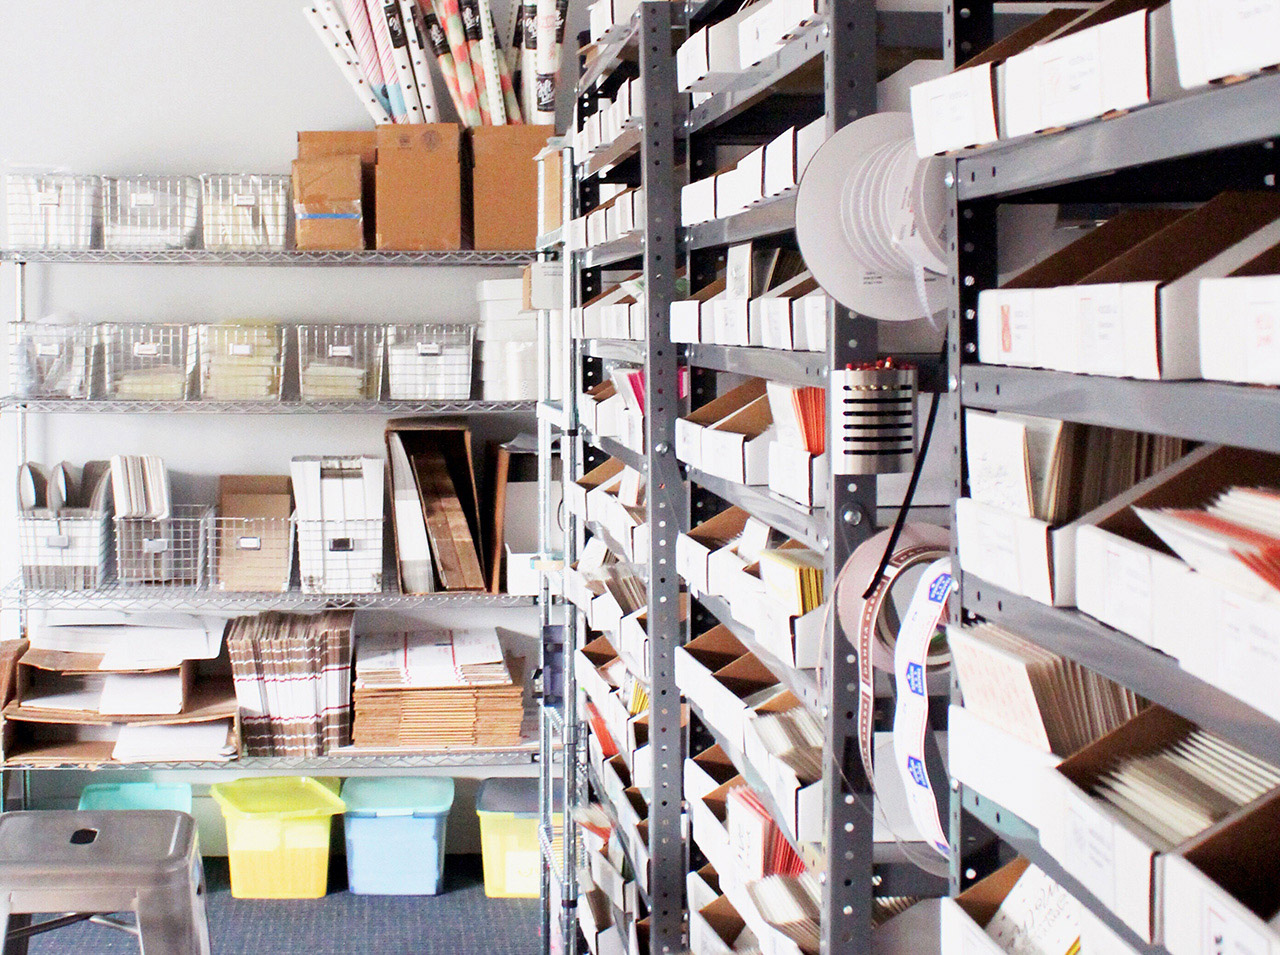
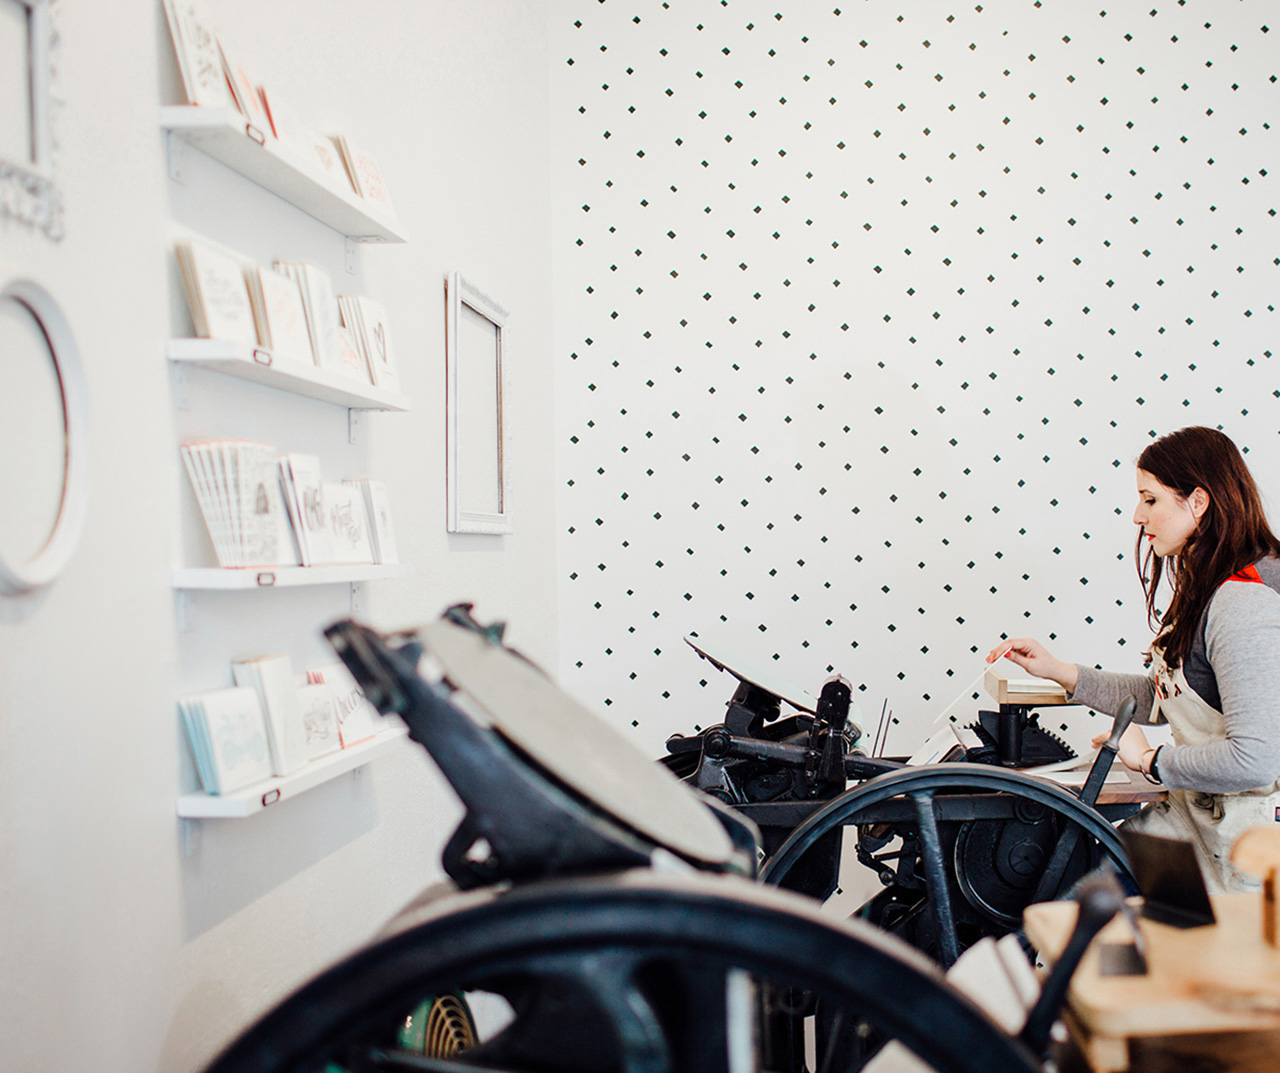
Shortly after we started our wholesale line and prepared to debut at the National Stationery Show, we outgrew the basement area. We were lucky enough to find an amazing brick and mortar space in Seattle’s Portage Bay neighborhood, where we have worked for the past 3 years. Our bright, sun-filled studio houses our three letterpress printing presses, a small retail area with a meeting counter for consultations with custom clients, work desks and a stock/shipping room in the back.
Behind the Stationery: Stephanie Clarke of Dahlia Press

Behind the Stationery: Stephanie Clarke of Dahlia Press

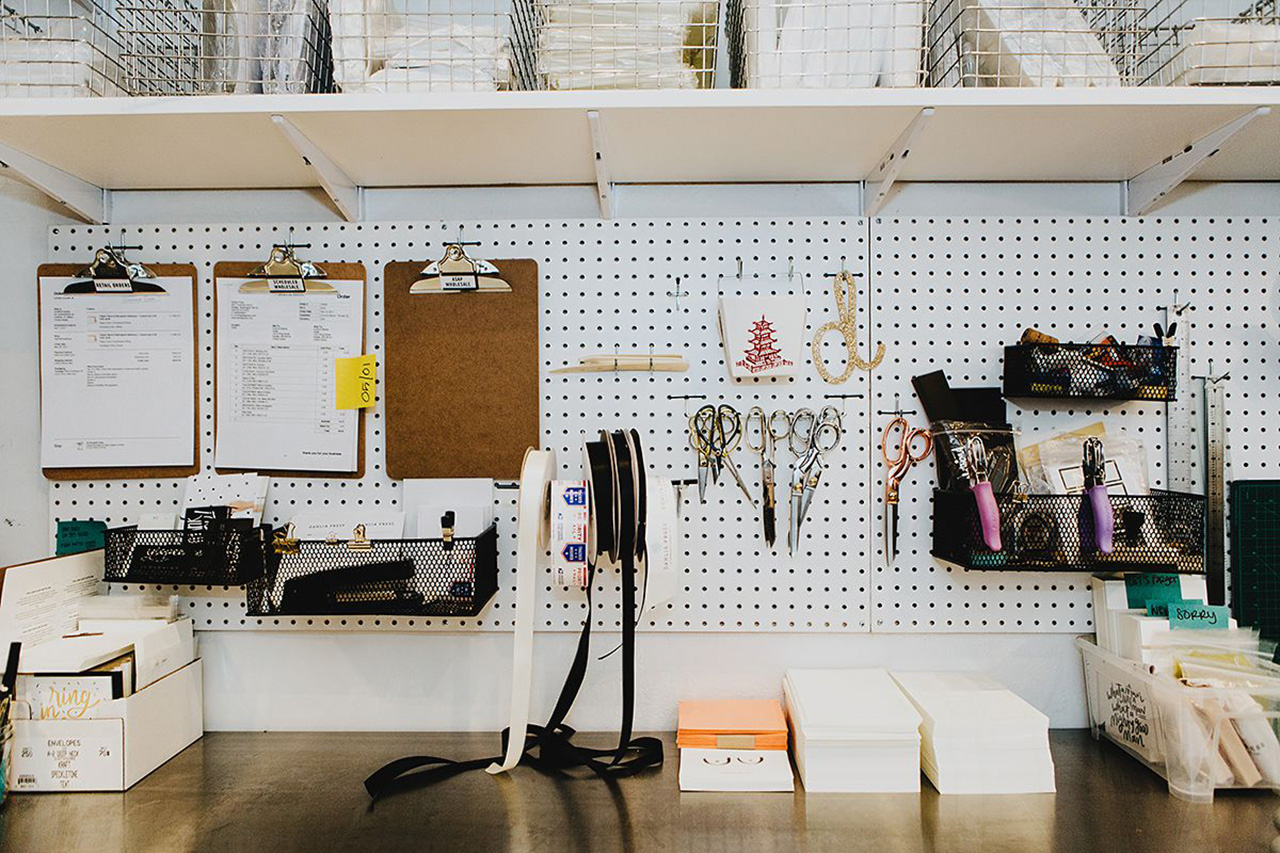
A typical work day starts with coffee and packing up the shop-dog Chloe to head to the studio. Once I arrive, normally around 9:30am, a second cup of coffee is poured and I check in with George (our press operator who also happens to be my older brother) to see what’s on our print list for the day. Emails are answered and I work with our team to fill orders in the back. I try to reserve the afternoon for tackling custom projects or writing quotes and sending invoices.

Behind the Stationery: Stephanie Clarke of Dahlia Press

Behind the Stationery: Stephanie Clarke of Dahlia Press

There’s always an ongoing list of items to do that normally consists of social media photos, mocking up new designs, editing art files, ordering supplies or packaging products. Around 6pm, I close up shop and pack up the dog to head home. Evenings are typically spent tackling whatever administrative tasks didn’t get done throughout the day, but occasionally I’ll use that time to sketch new concepts and ideas. It’s a labor of love, to say the least.
Behind the Stationery: Stephanie Clarke of Dahlia Press

Behind the Stationery: Stephanie Clarke of Dahlia Press

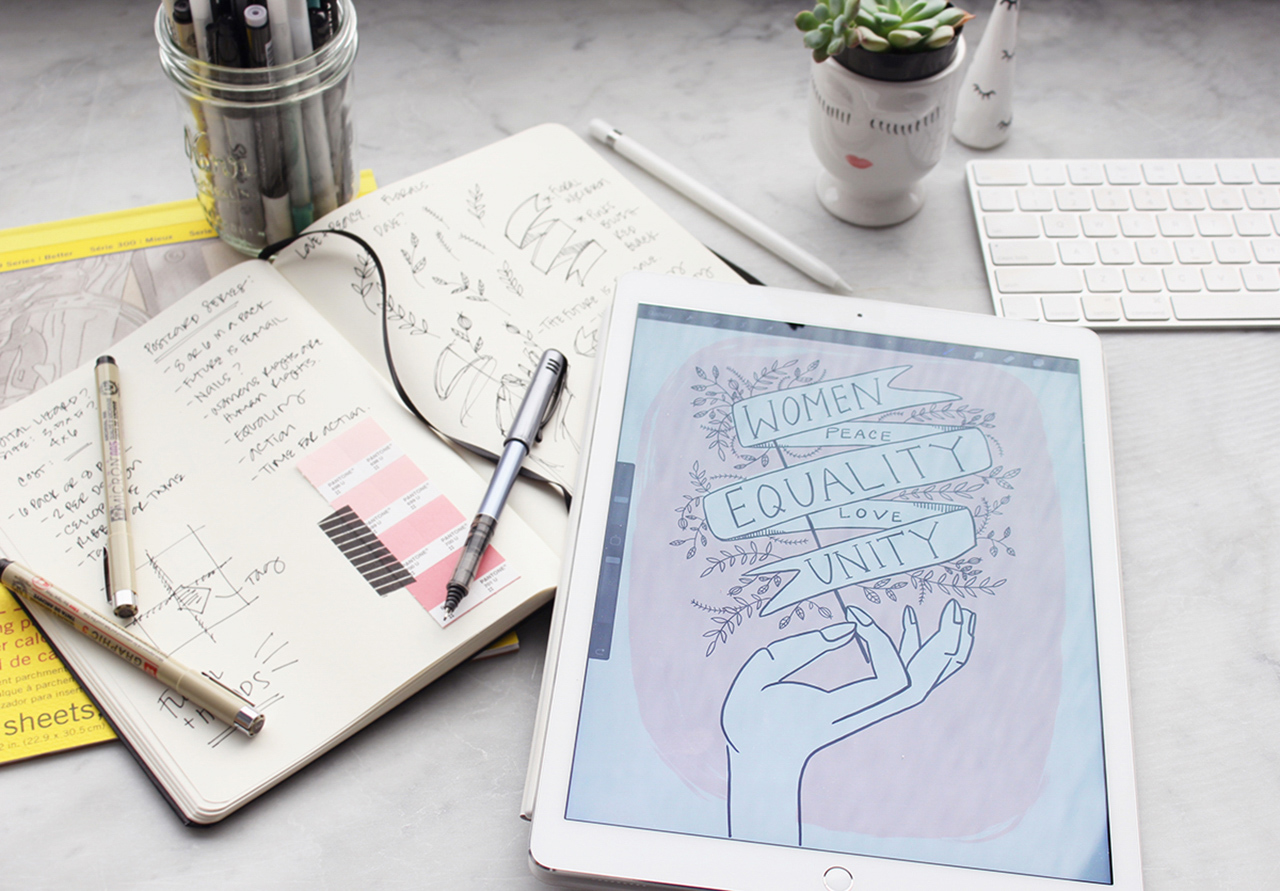
Depending on what I’m working on, the design and production process really varies. The process of designing our greeting card line always starts in a notebook. I’m an avid list maker, so I always have an ongoing list of phrases, ideas, sayings, and concepts jotted down. As much as I try to draw every day, there isn’t always time. If I have an initial idea, I’ll create a quick doodle or sketch in my notebook so I can come back to it later. For years, all of my lettering and illustrations were done on stacks and stacks of tracing paper using my favorite Micron or Tombow brush pens. Once the design was fine-tuned, I would scan it into Illustrator and prepare it for platemaking.
Behind the Stationery: Stephanie Clarke of Dahlia Press

Behind the Stationery: Stephanie Clarke of Dahlia Press

This past year my process changed slightly as I started experimenting with drawing software on my iPad Pro. Today I rarely use pens (although for finer details, it’s still preferred), and the majority of my drawings are done directly on the iPad. I then AirDrop the file to my computer and prep the file for the plate-making process. This change has shaved off hours of time, not to mention ink and paper! Once the plates arrive from the platemakers, we mix ink by hand and prep Ruby (our 1926 Chandler and Price press) for printing. My favorite moment is when that first print comes off the press. It’s so satisfying to see a design come to life and to feel that one of a kind impression.
Behind the Stationery: Stephanie Clarke of Dahlia Press

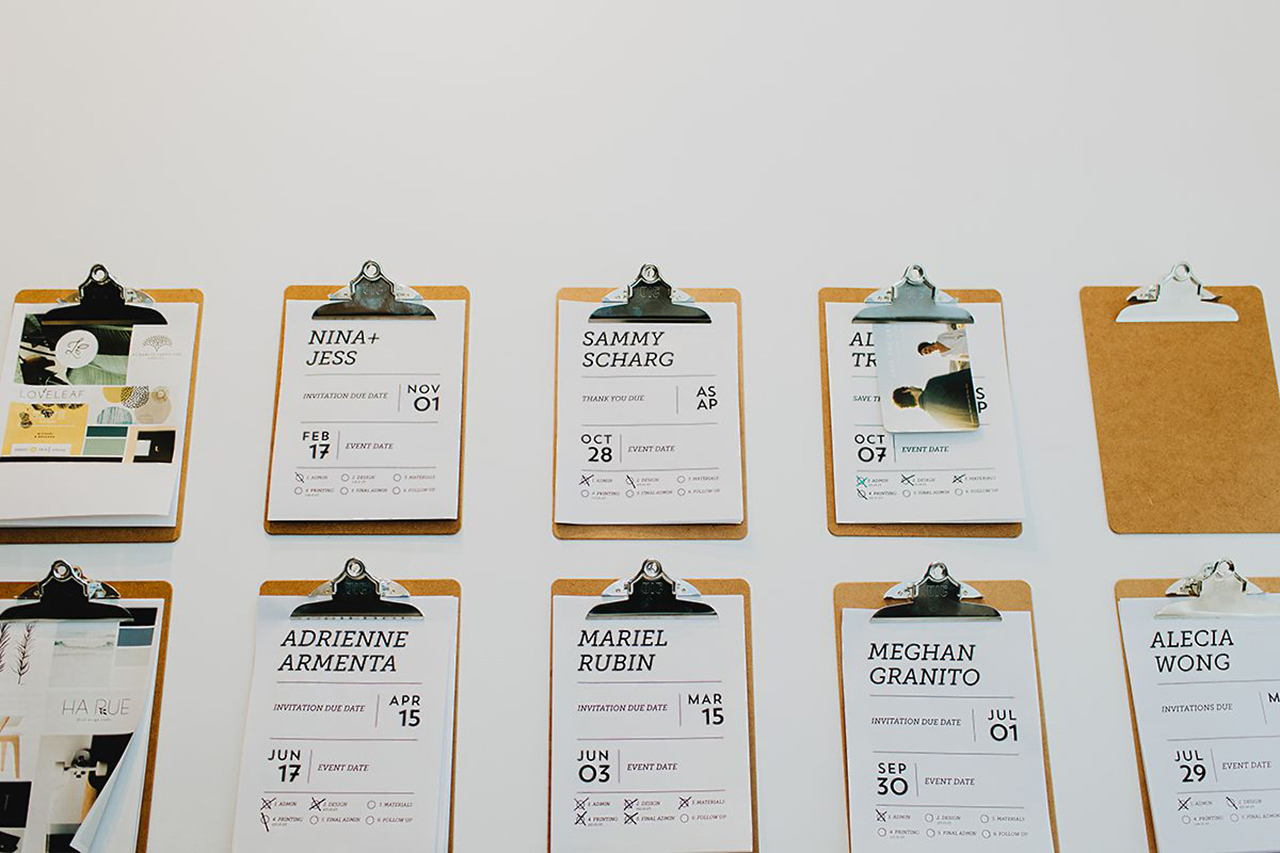
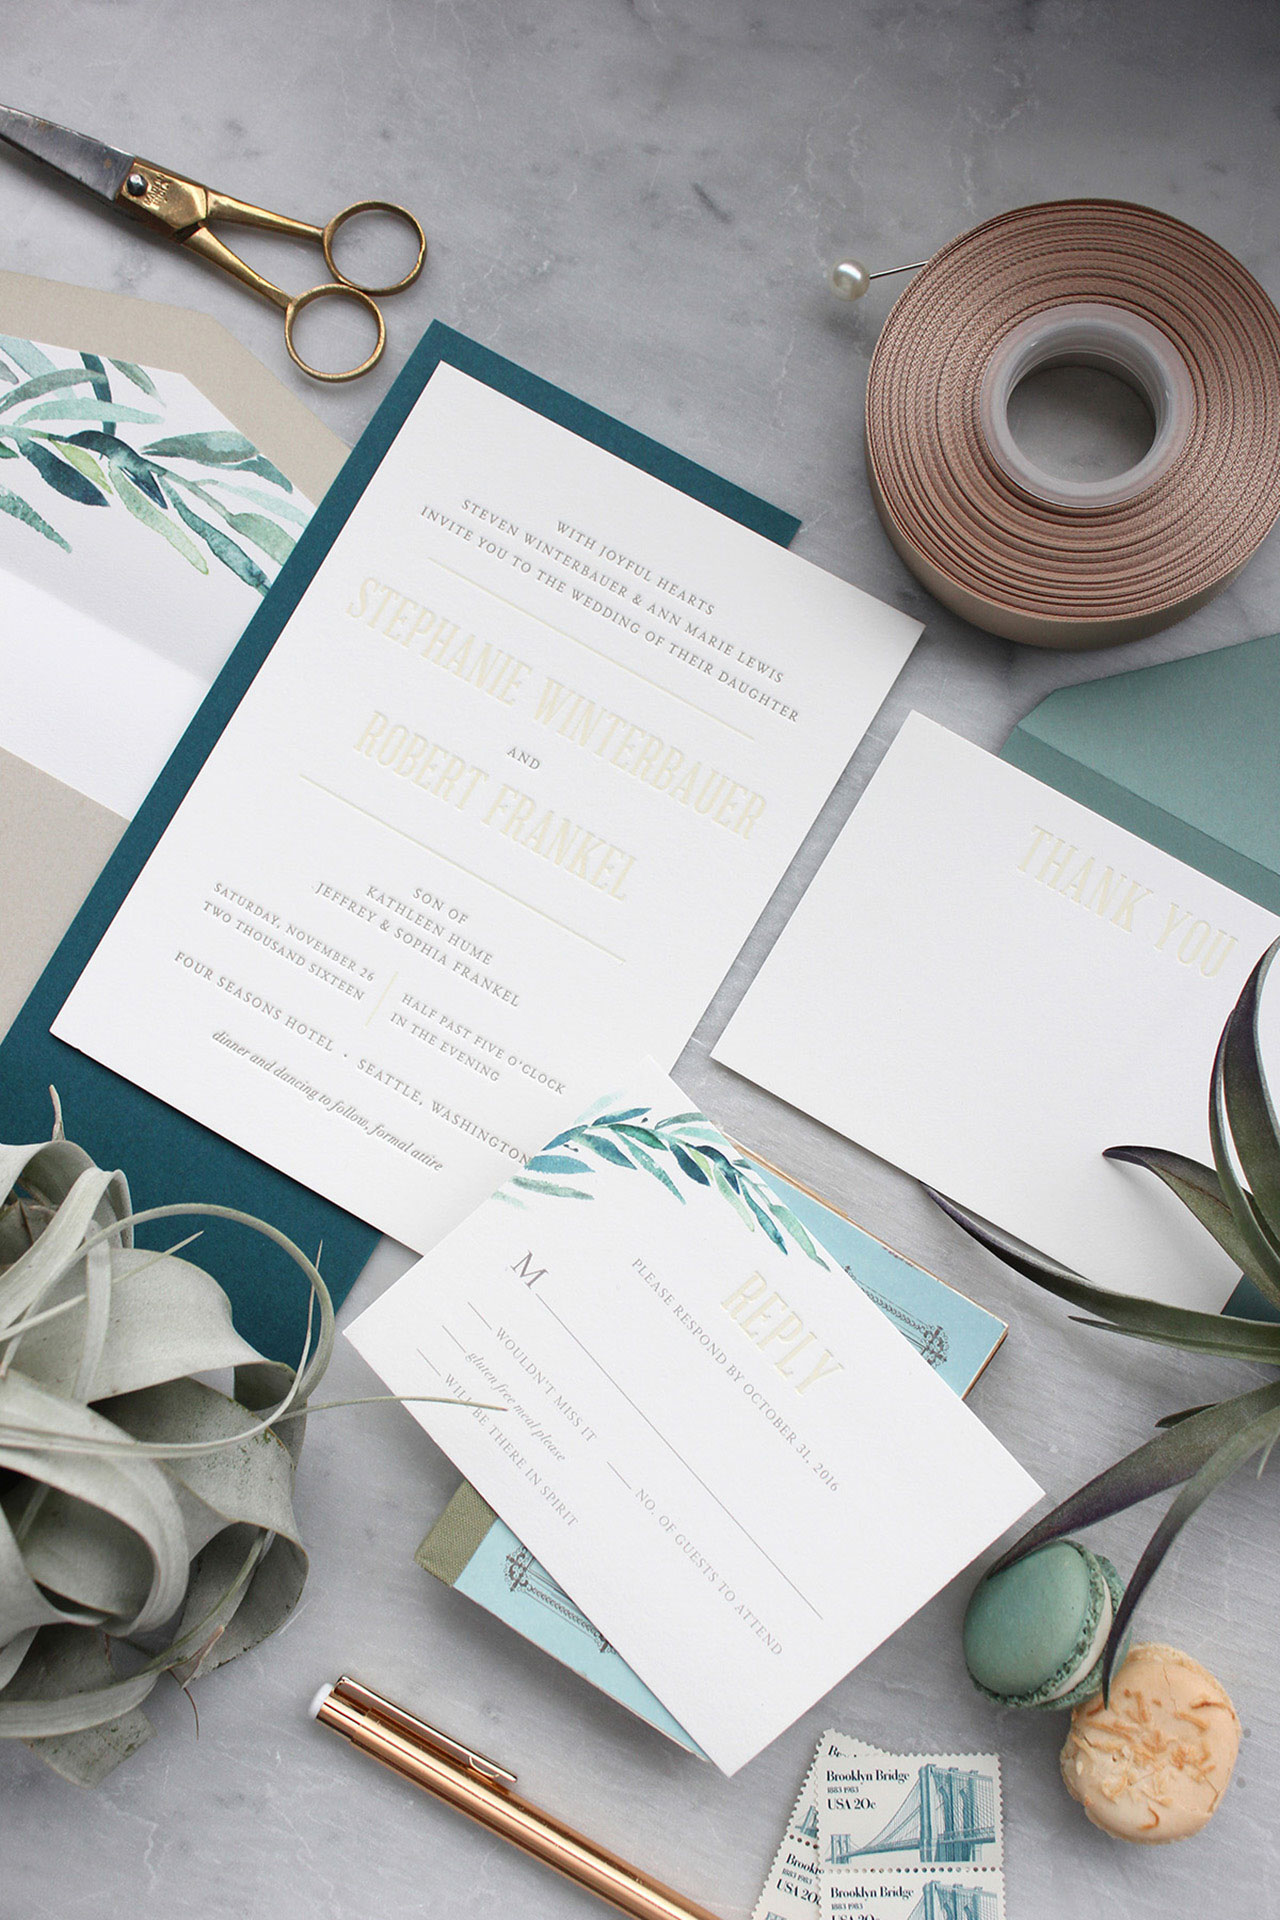
The process of working with our custom clients is a little more extensive. It always starts with a consultation (hopefully in person, but often over the phone too) where I get the all the details of their event and their overall vision. After the administrative details are worked out (quotes and contracts), we pull samples and swatches and start initial sketches of the design concept. Those sketches turn into a digitally mocked-up design, which we send to the client for review. We’ll go through a series of revisions and once the final design is approved, we finalize the art files and prep them for printing.
Behind the Stationery: Stephanie Clarke of Dahlia Press

As we print all of our greetings in house, we’ve relied on a list of trusted vendors to help us when it comes to printing our custom projects. They offer additional services such as foil stamping and die cutting, which allows us to expand our list of offerings and frees up our schedule to work on more projects.
Behind the Stationery: Stephanie Clarke of Dahlia Press

Studio images are by Krista Welch Creative. All other photos are by Dahlia Press.

Want to be featured in the Behind the Stationery column? Reach out to Megan at megan [at] ohsobeautifulpaper [dot] com for more details.

DIY Rainbow Watercolor Crepe Paper Backdrop

This post was sponsored, and paid for, by Rit Dye. All opinions are my own. Thank you for supporting the sponsors that make Oh So Beautiful Paper possible!

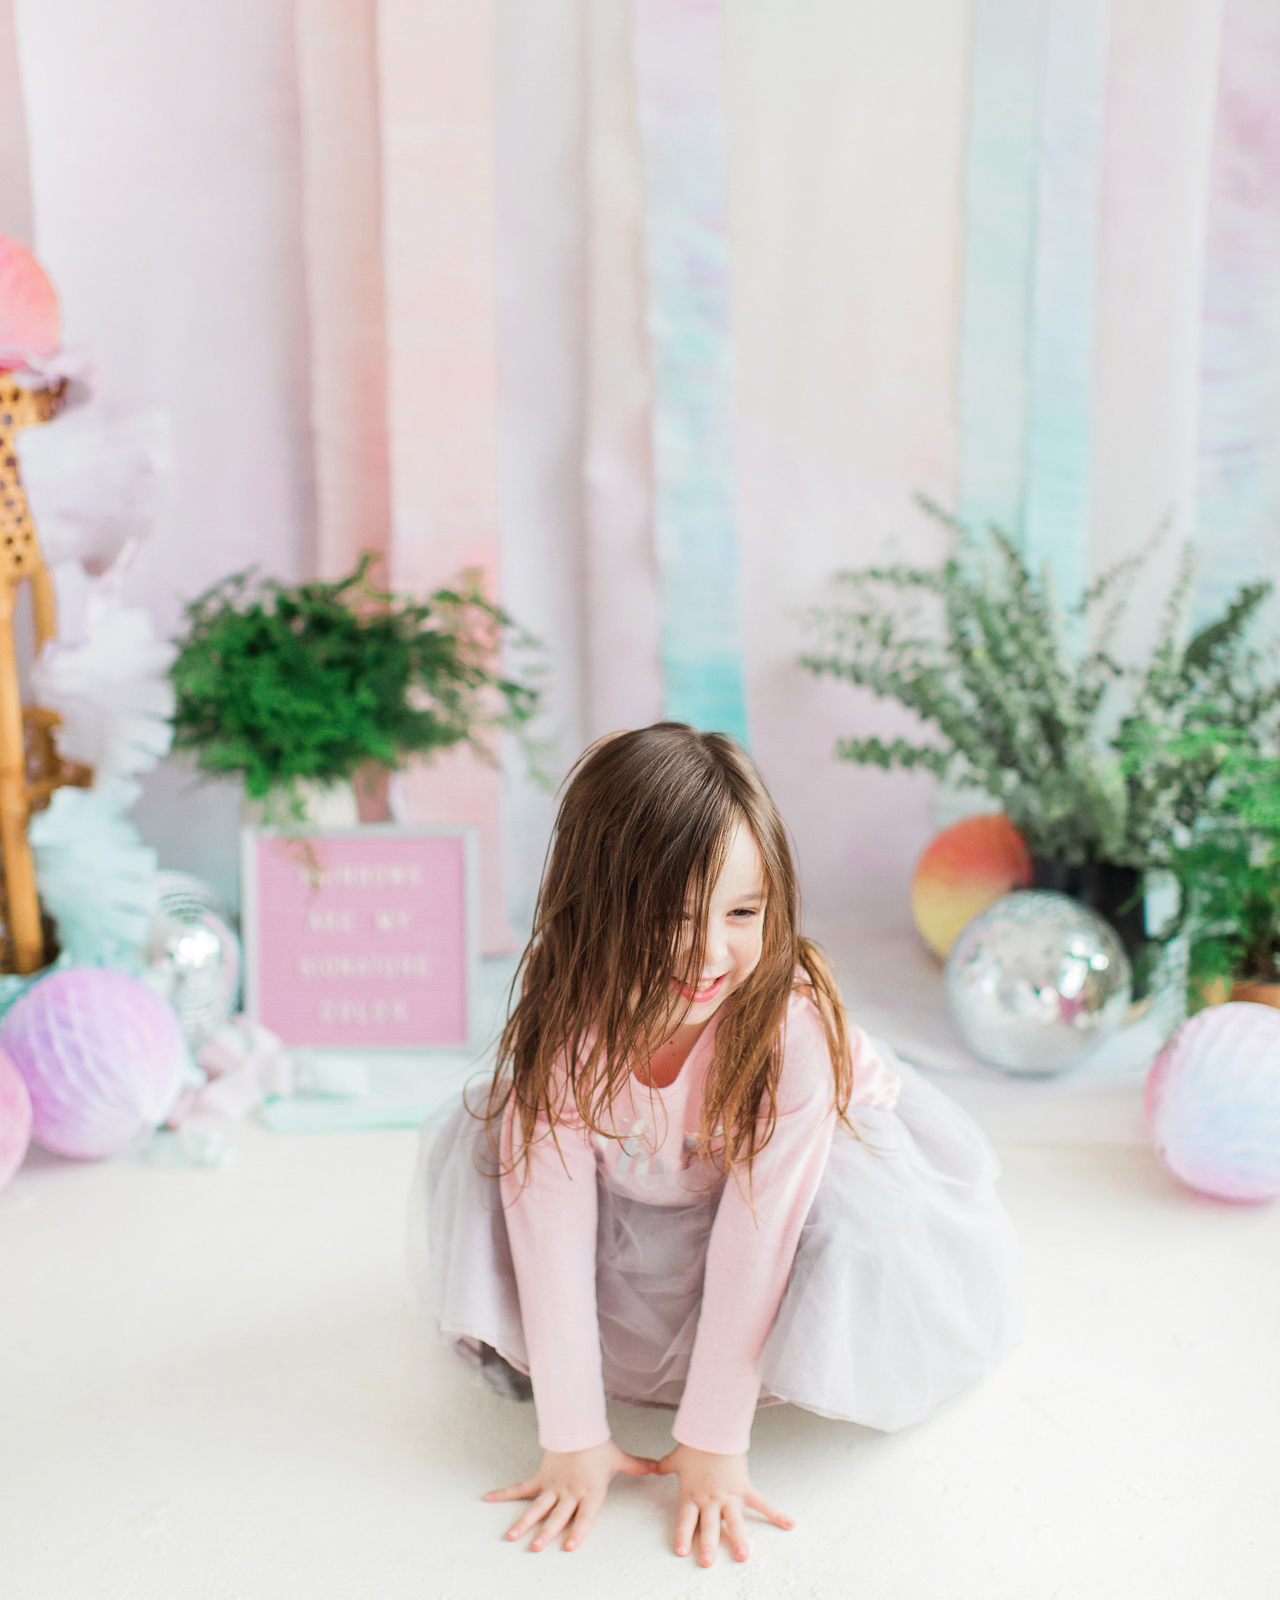
Spring is just around the corner – and I couldn’t be more excited! Every year I look forward to the explosion of spring flowers, from pale pink cherry blossoms and purple lilacs (my absolute favorite) to yellow daffodils and colorful tulips in nearly every shade of the rainbow. Oh, and fluffy peonies in every shade of pink? Yes, please! Today I’m paying homage to my favorite season with a DIY rainbow watercolor crepe paper backdrop that is perfect for spring weddings, birthday parties, and everything in between. This gorgeous pastel backdrop makes me so happy every time I look at it. Oh, and my secret ingredient for creating this gorgeous backdrop? Spray bottles filled with Rit All-Purpose Dye!

DIY Rainbow Watercolor Crepe Paper Backdrop with RIT Dye

DIY Rainbow Watercolor Crepe Paper Backdrop with RIT Dye

DIY Rainbow Watercolor Backdrop with Rit All-Purpose Dye

Rit Dye is one of my favorite tools for DIY projects! It’s really the perfect solution for adding pops of color throughout your wedding ceremony and reception, from ribbons for floral arrangements to napkins and table linens to dresses! Rit All-Purpose Dye is perfect for washable fabrics with natural fibers, like cotton, linen, wool, silk, and ramie – or even for materials like nylon, rayon, paper, and wood. I’ve used Rit All-Purpose Dye to dip dye envelopes, create dip-dyed muslin favor bags, and even to dye my own Shibori-style pink dinner napkins! And did you know that there’s also Rit DyeMore for synthetic fibers?? You can use Rit DyeMore for polyester, polyester cotton blends, nylon, acrylic, or acetate – or even faux fur! I’ll need to try that one next!

DIY Rainbow Watercolor Crepe Paper Backdrop with RIT Dye

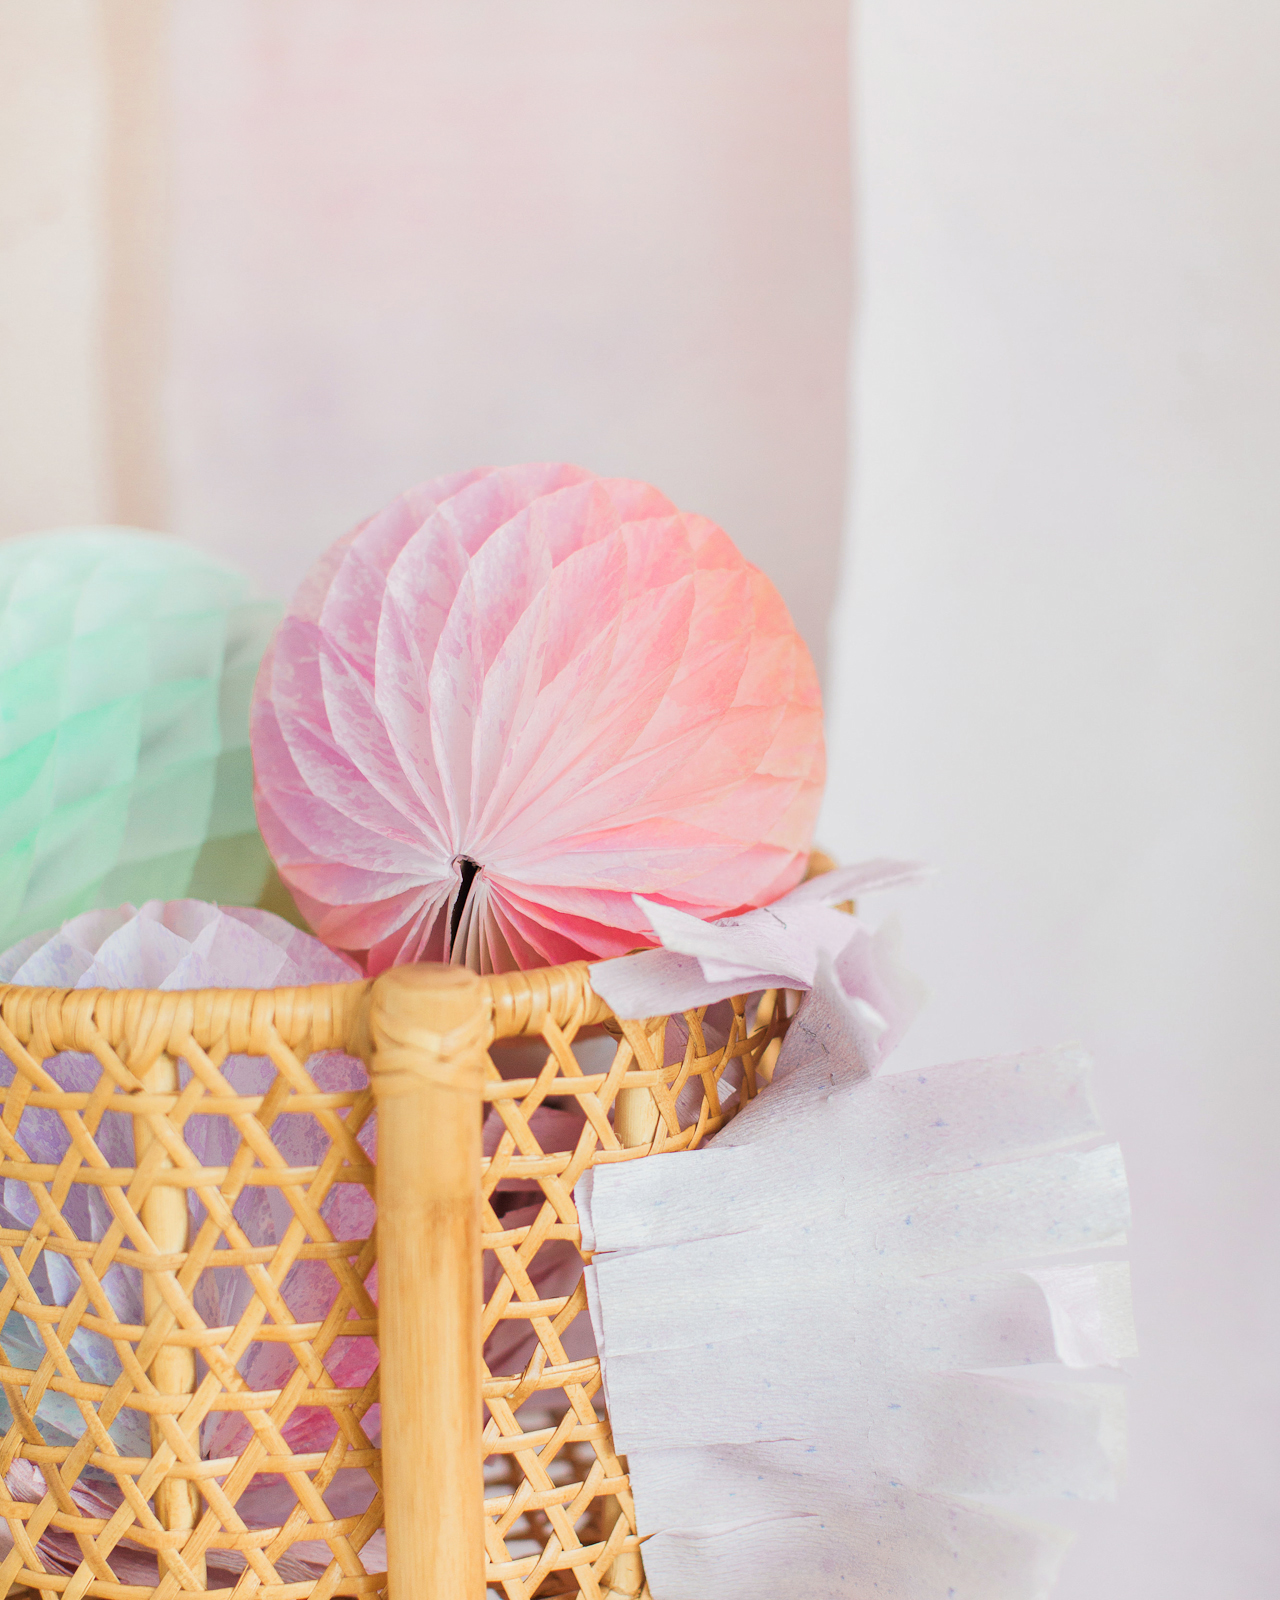
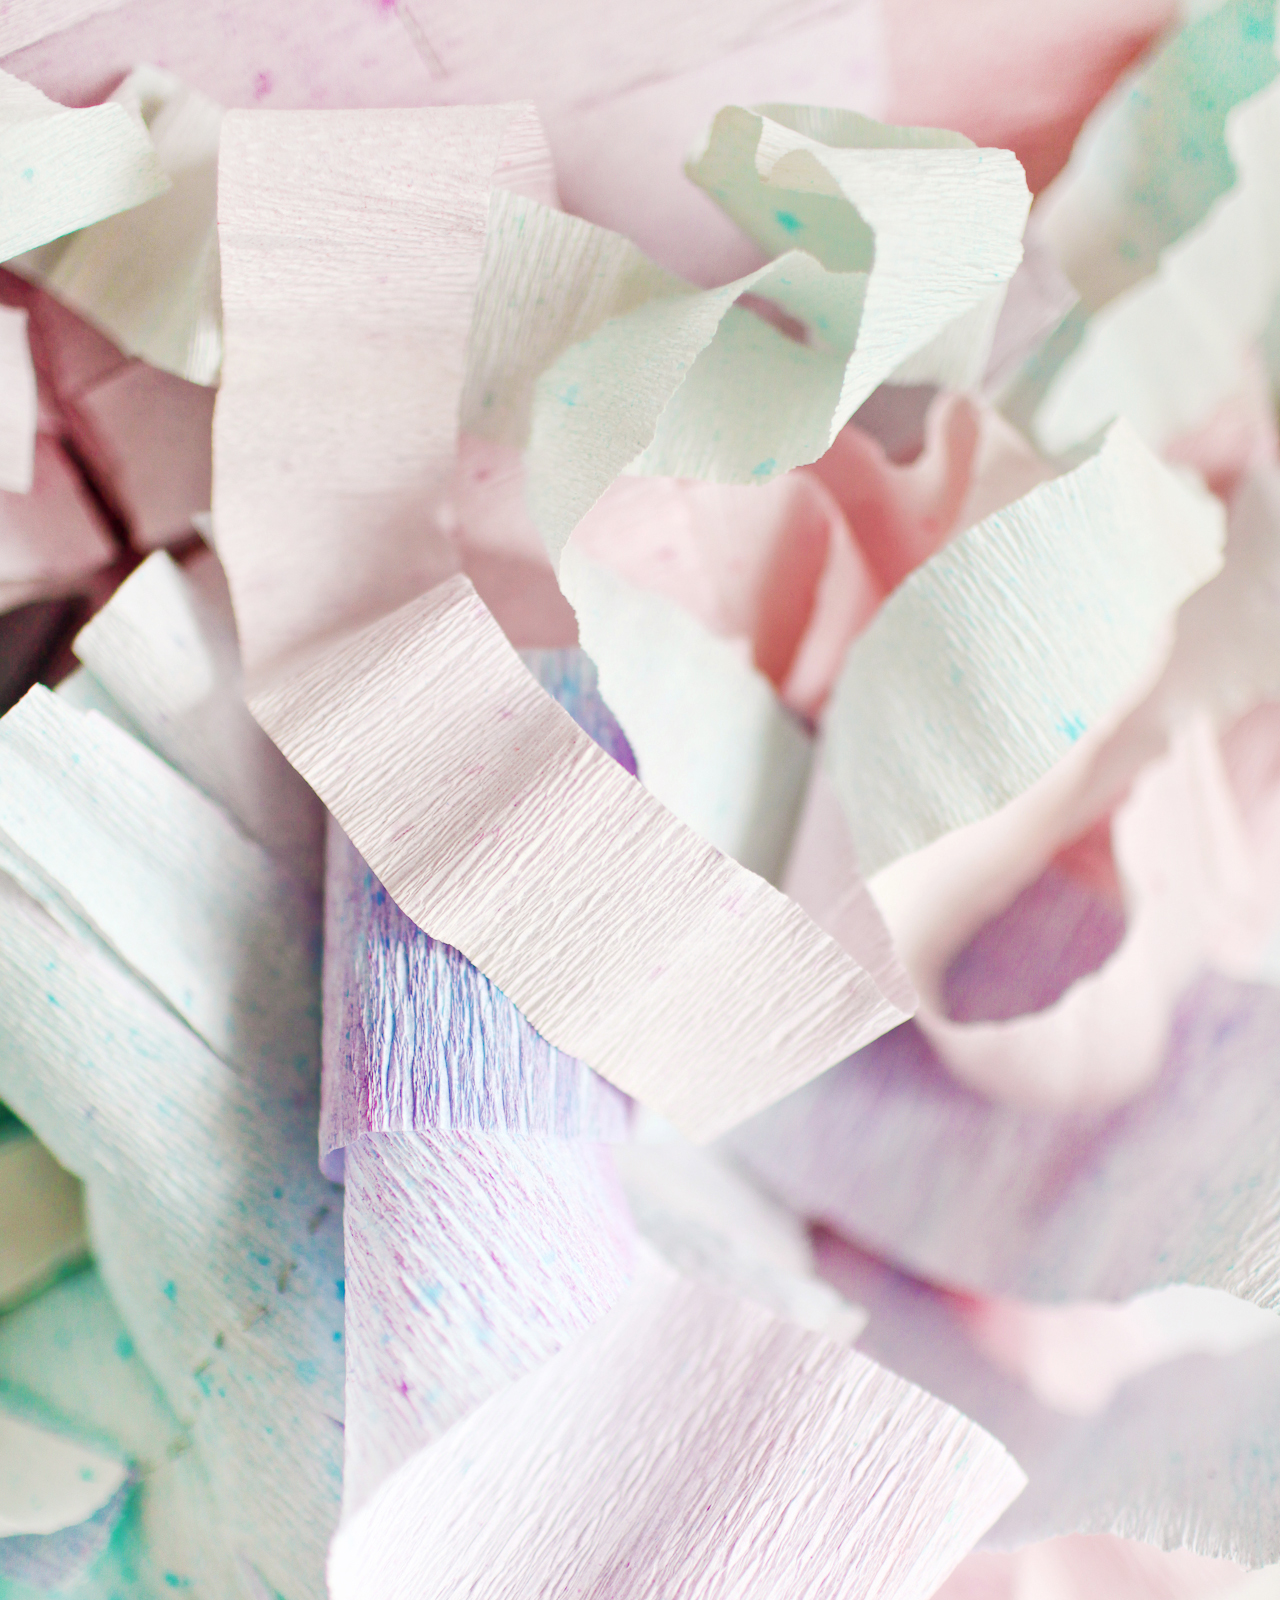
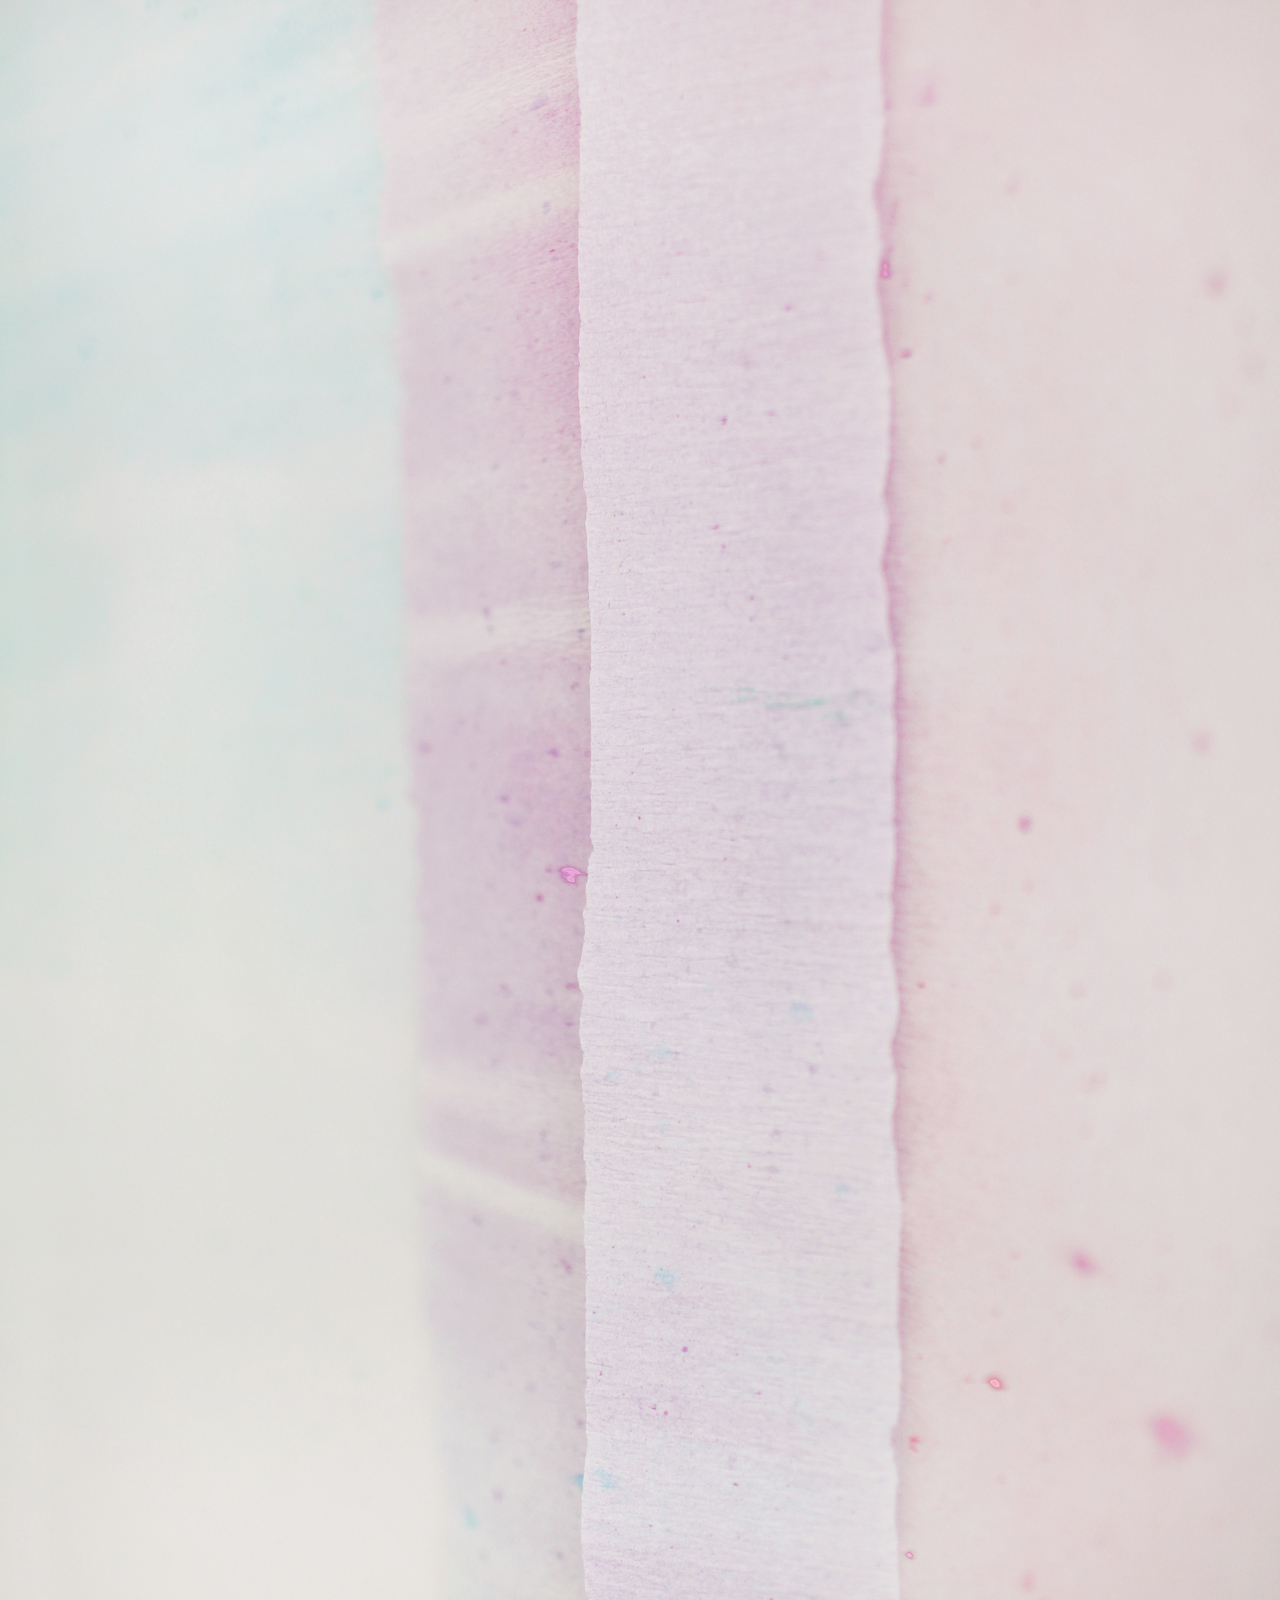
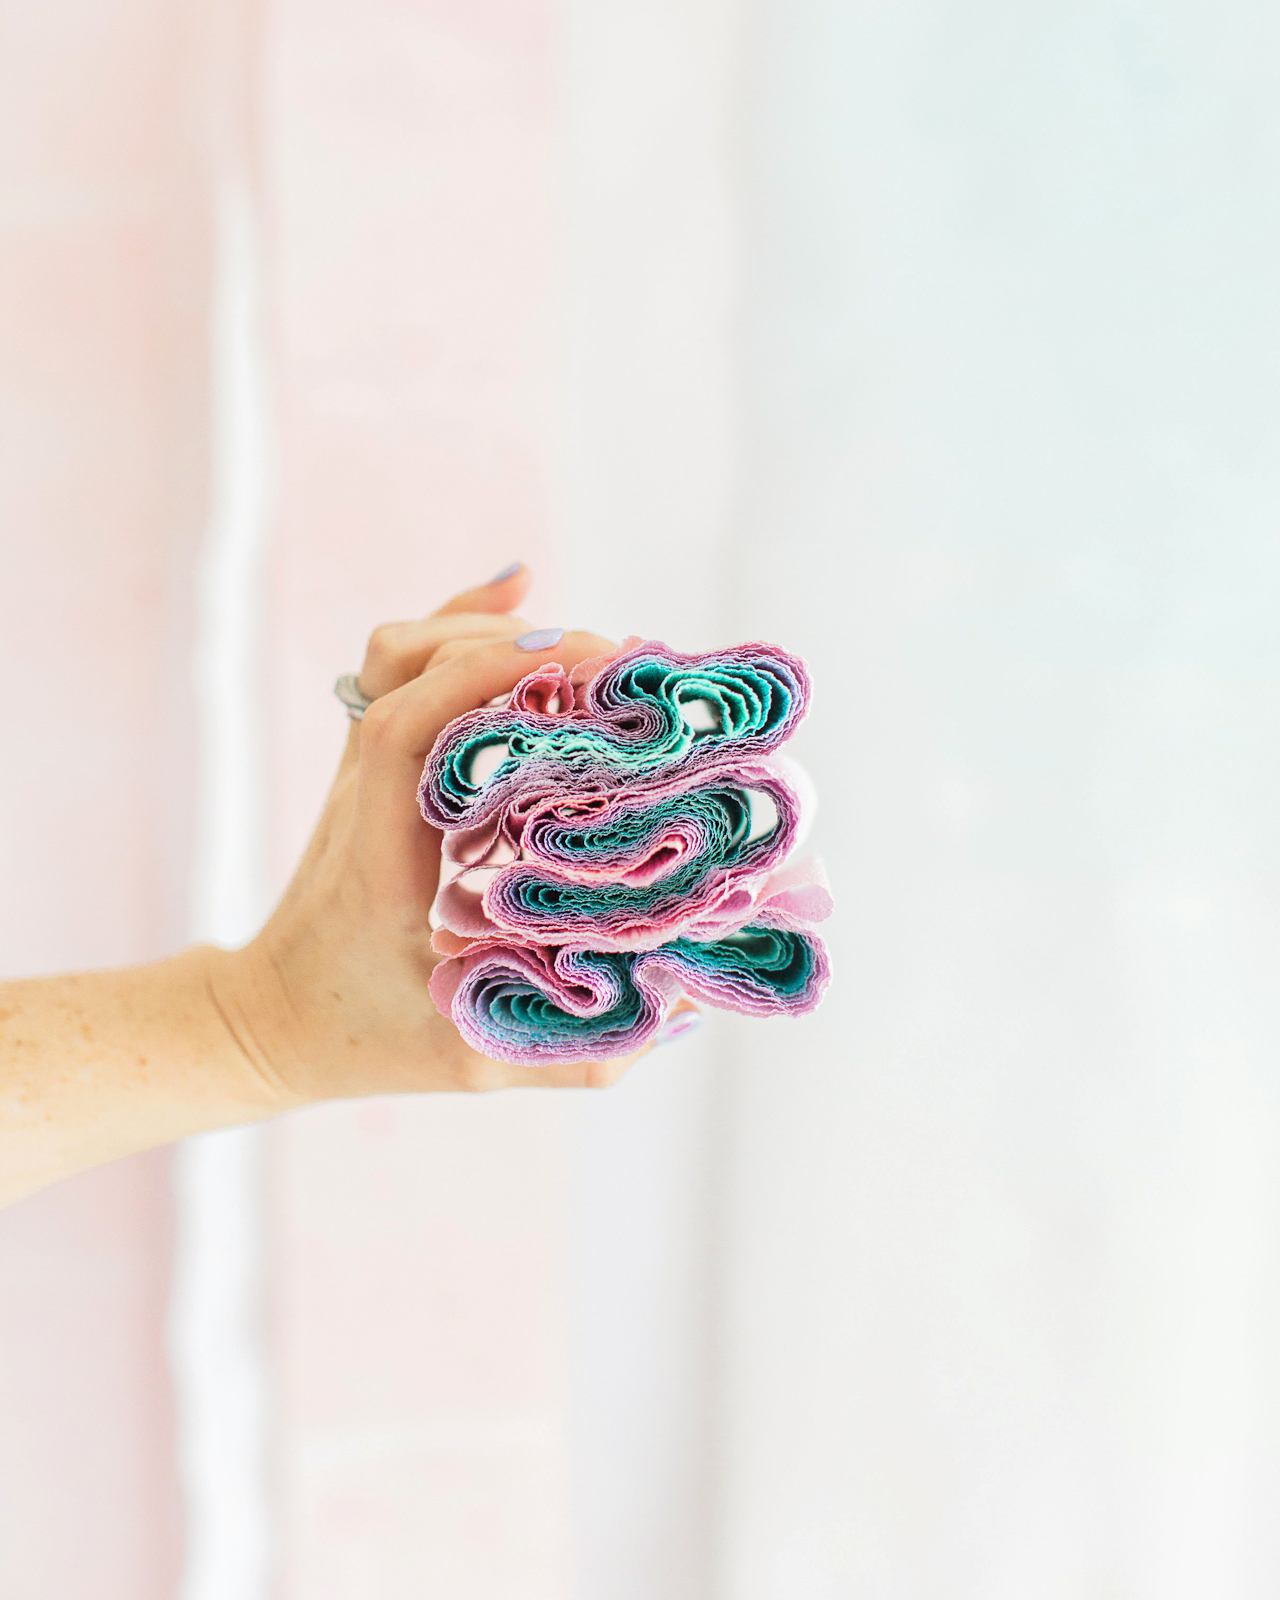
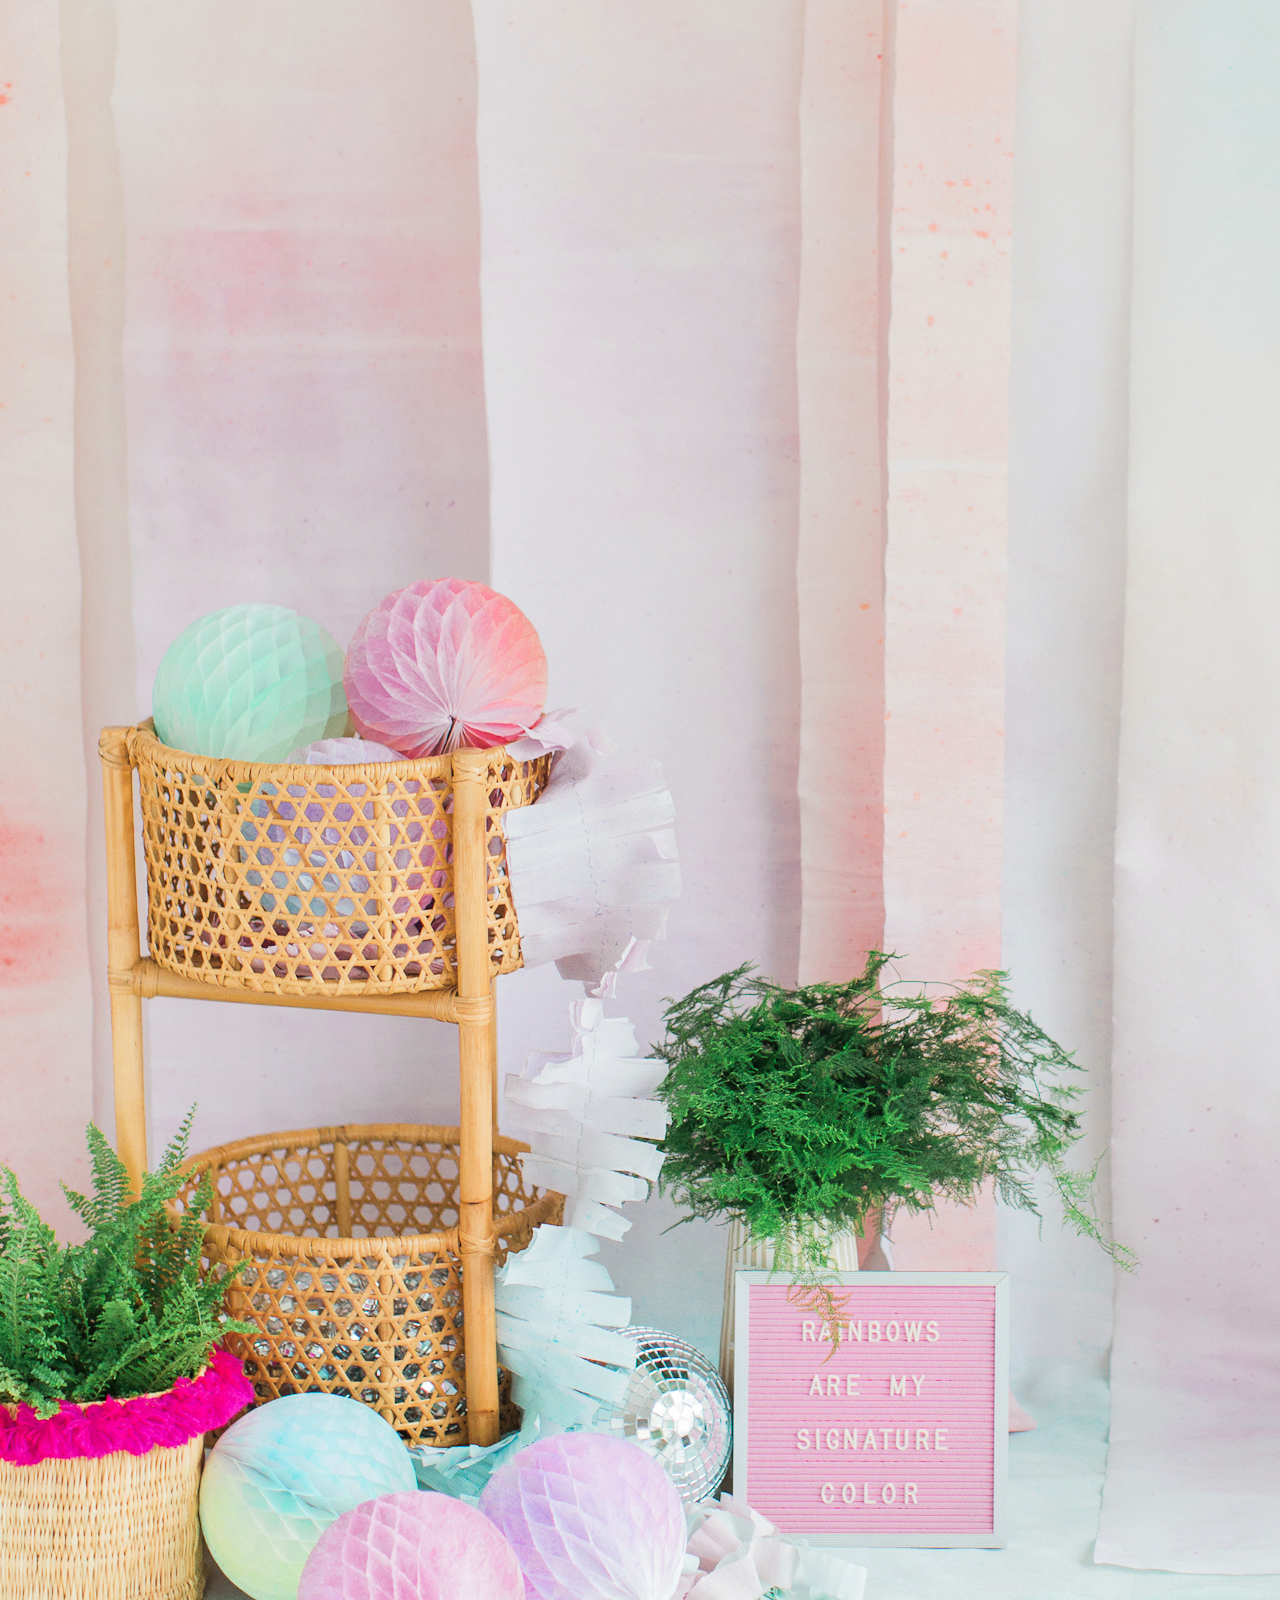
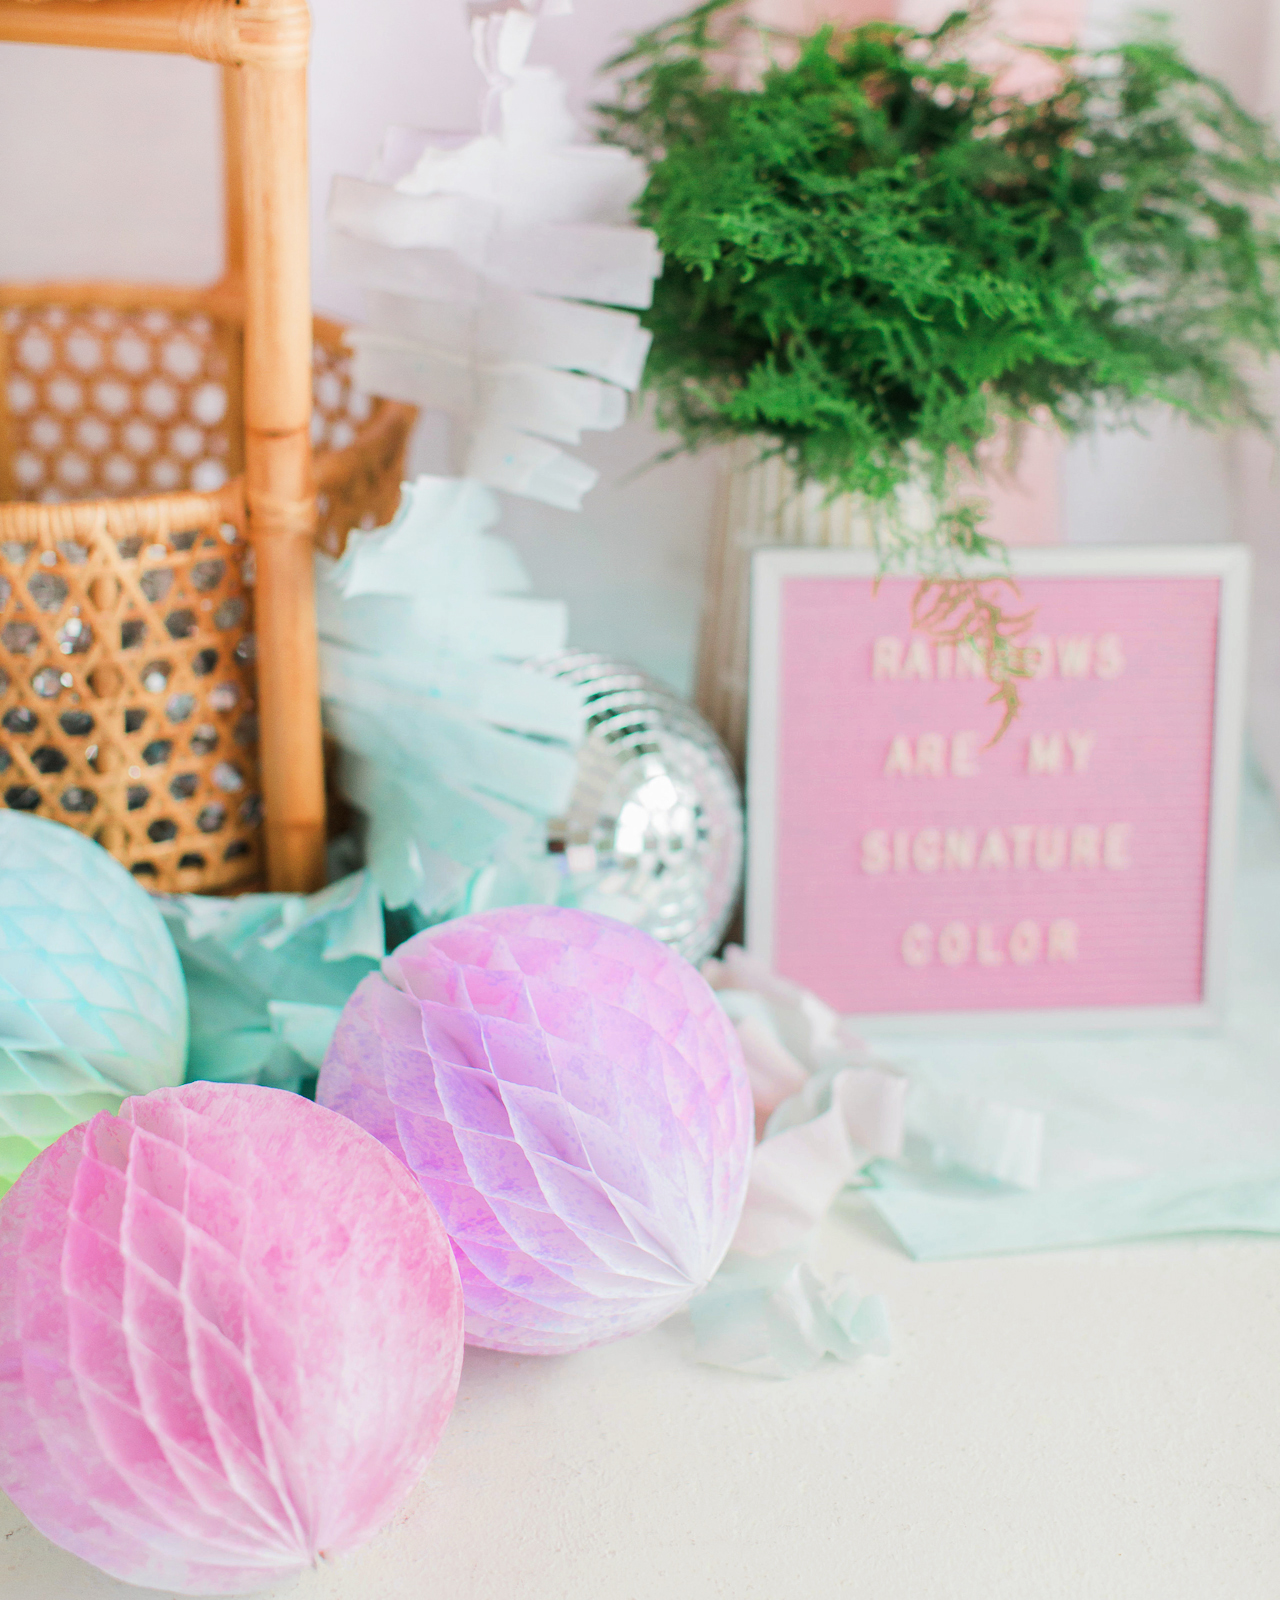
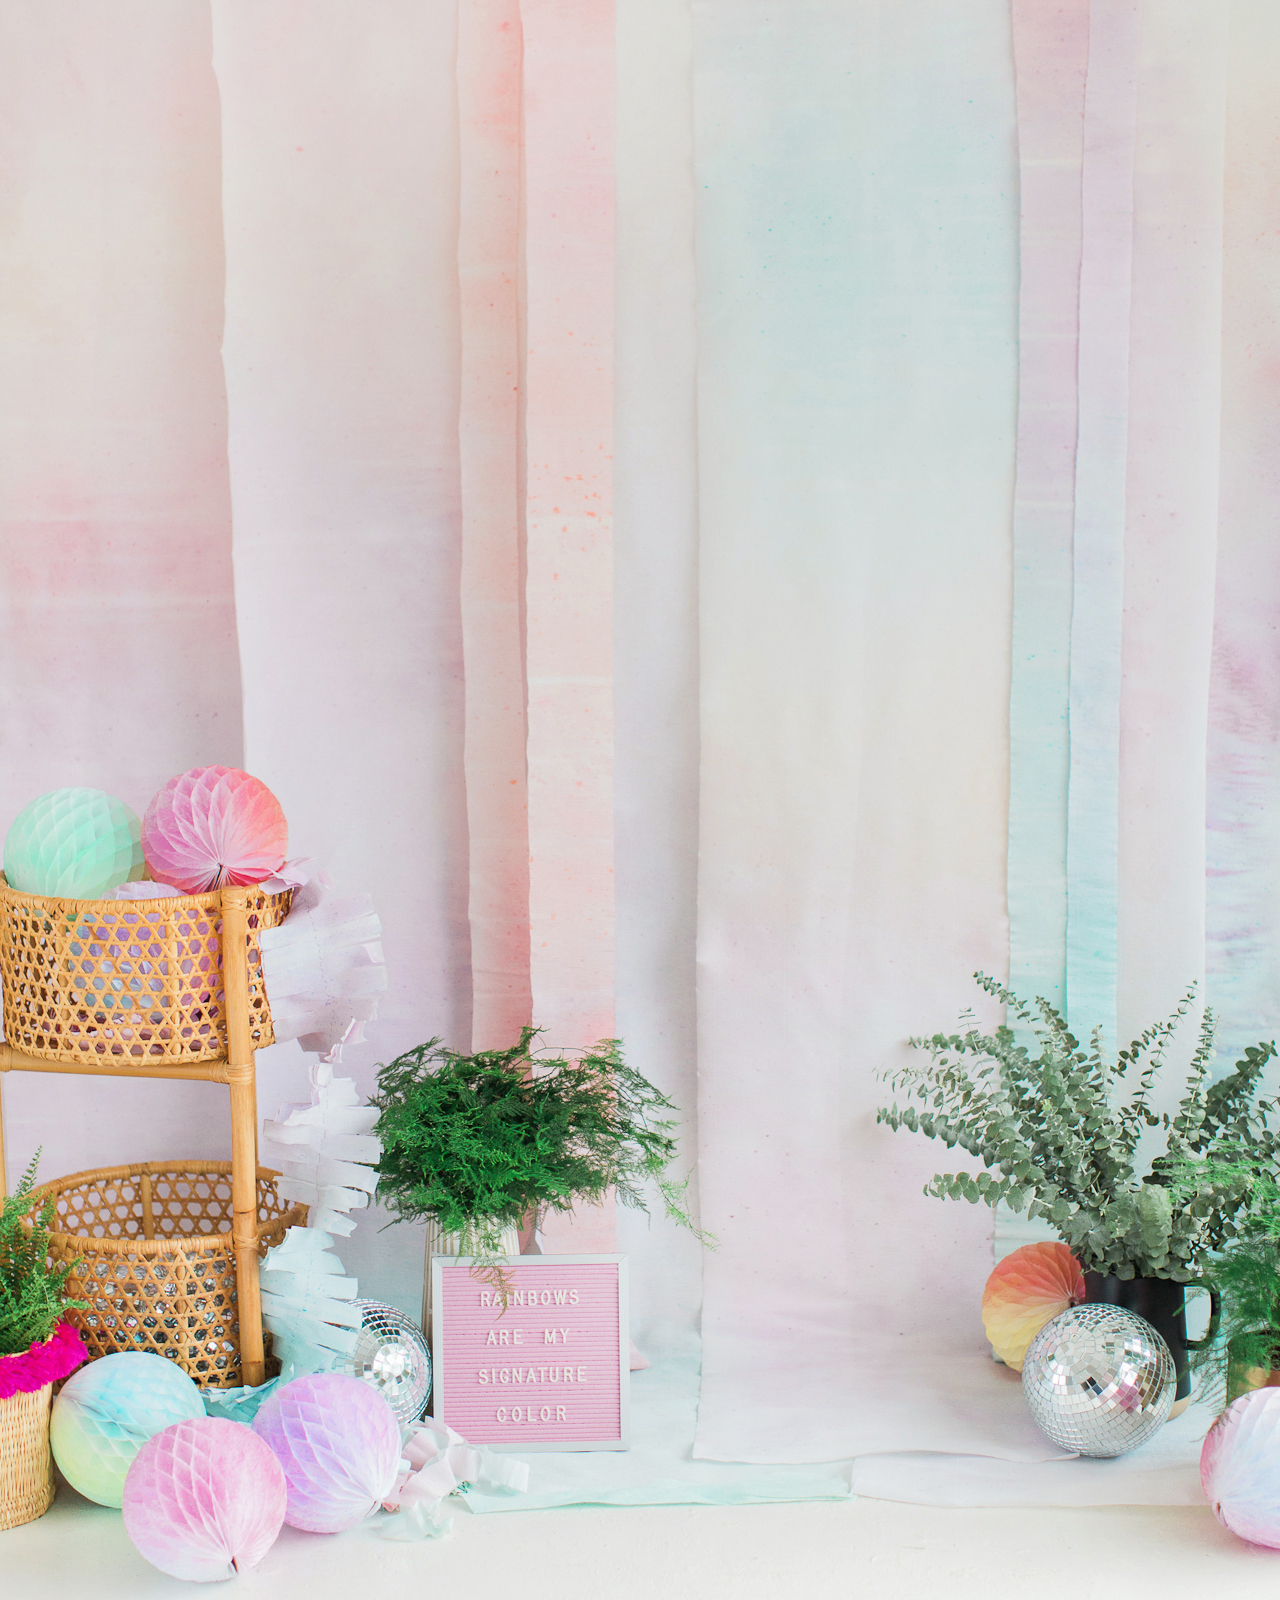
I was super excited to experiment with multiple Rit All-Purpose Dye colors to create this gorgeous watercolor-inspired backdrop. I mean, it’s a proven fact that rainbows make everything prettier. And a pastel rainbow? Even better! This pastel backdrop is made from a few rolls of white crepe paper spray dyed with fine mist spray bottles filled with Rit All-Purpose Dye. You can also use the same method to dye tissue paper decorations like honeycomb balls and tissue paper fans! Using spray bottles to create a super fine dye mist leaves the most gorgeous watercolor effect on crepe paper and tissue paper, and the result is completely unique wedding and party décor that you won’t find anywhere else!

DIY Rainbow Watercolor Crepe Paper Backdrop with RIT Dye

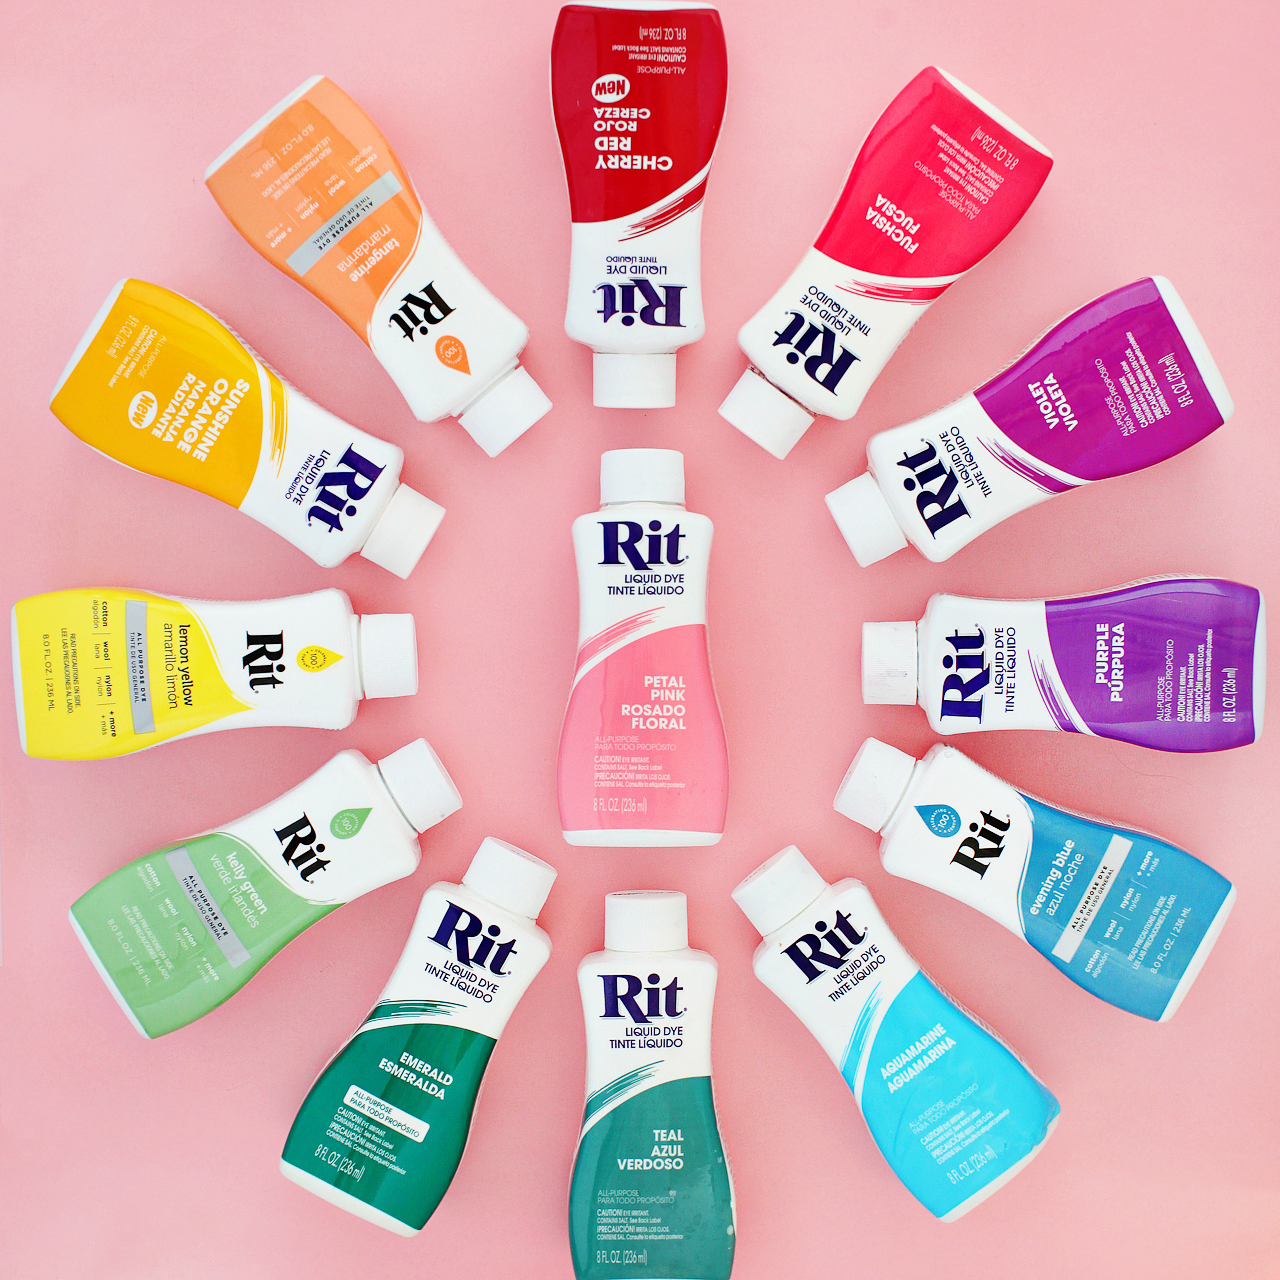
The best part about this DIY rainbow watercolor crepe paper backdrop is that you can completely customize the colors to suit your wedding color palette! Rit All-Purpose Dye is available in 50 shades, like Petal Pink, Coral, Violet, Aquamarine, and Kelly Green. Or you can create your own colors using the Rit Color Library, which includes color formulas to create over 500 additional colors – including Pantone on-trend colors by season! There’s seriously SO much color inspiration in the Rit Color Library! I love, love, love our pastel rainbow backdrop (you can find the specific color formulas I used a bit further below!), but I could also totally see a gorgeous ombré backdrop in several shades of a single color. How gorgeous would that be??

DIY Rainbow Watercolor Crepe Paper Backdrop with RIT Dye

Skill Level: Beginner

Approximate Crafting Time: 1 –2 Hours

Supplies

Rit All-Purpose Dye

2.5 oz Fine Mist Spray Bottles one bottle per dye color – I used a total of twelve spray bottles)

8-10 White Crepe Paper Rolls

Scissors

Protective rubber gloves

Rags or paper towels

Protective drop cloth

Measuring spoons

Gaffer’s Tape

Wood Dowels

Removable wall hooks

DIY Rainbow Watercolor Backdrop with Rit All-Purpose Dye

To make the DIY rainbow watercolor crepe paper backdrop:

Step 1. First, you’ll need to pick your colors! The Rit Color Library breaks all of the color formulas down by parent color: red, orange, yellow, green, blue, purple, pink, brown, and gray. I knew I wanted spring-inspired colors, so I went with shades of pink, peach, light purple, blue, teal, mint green, and sunny yellow. But I can’t wait to try this again with different color combinations. Burgundy and blush? Lavender and deep dusty blue? Sage green and rose? Yes, yes, and yes!
DIY Rainbow Watercolor Crepe Paper Backdrop with RIT Dye

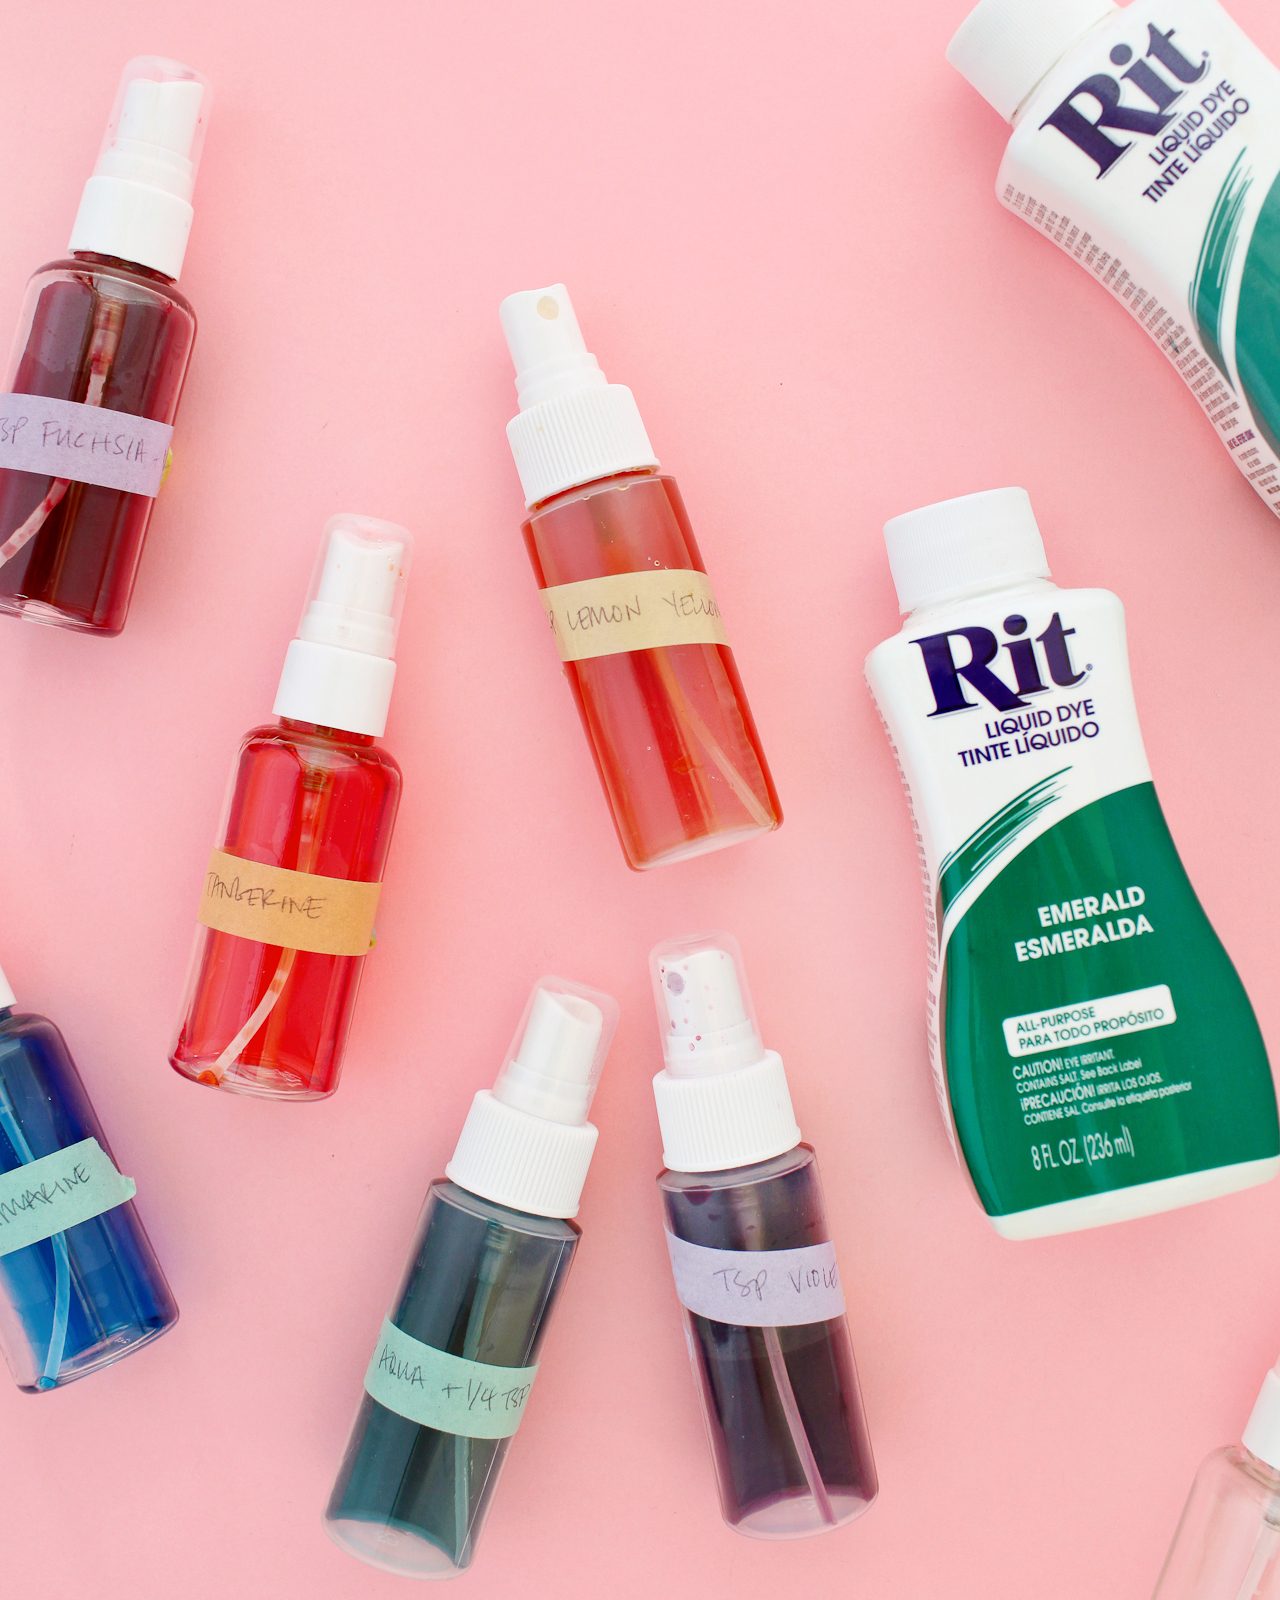
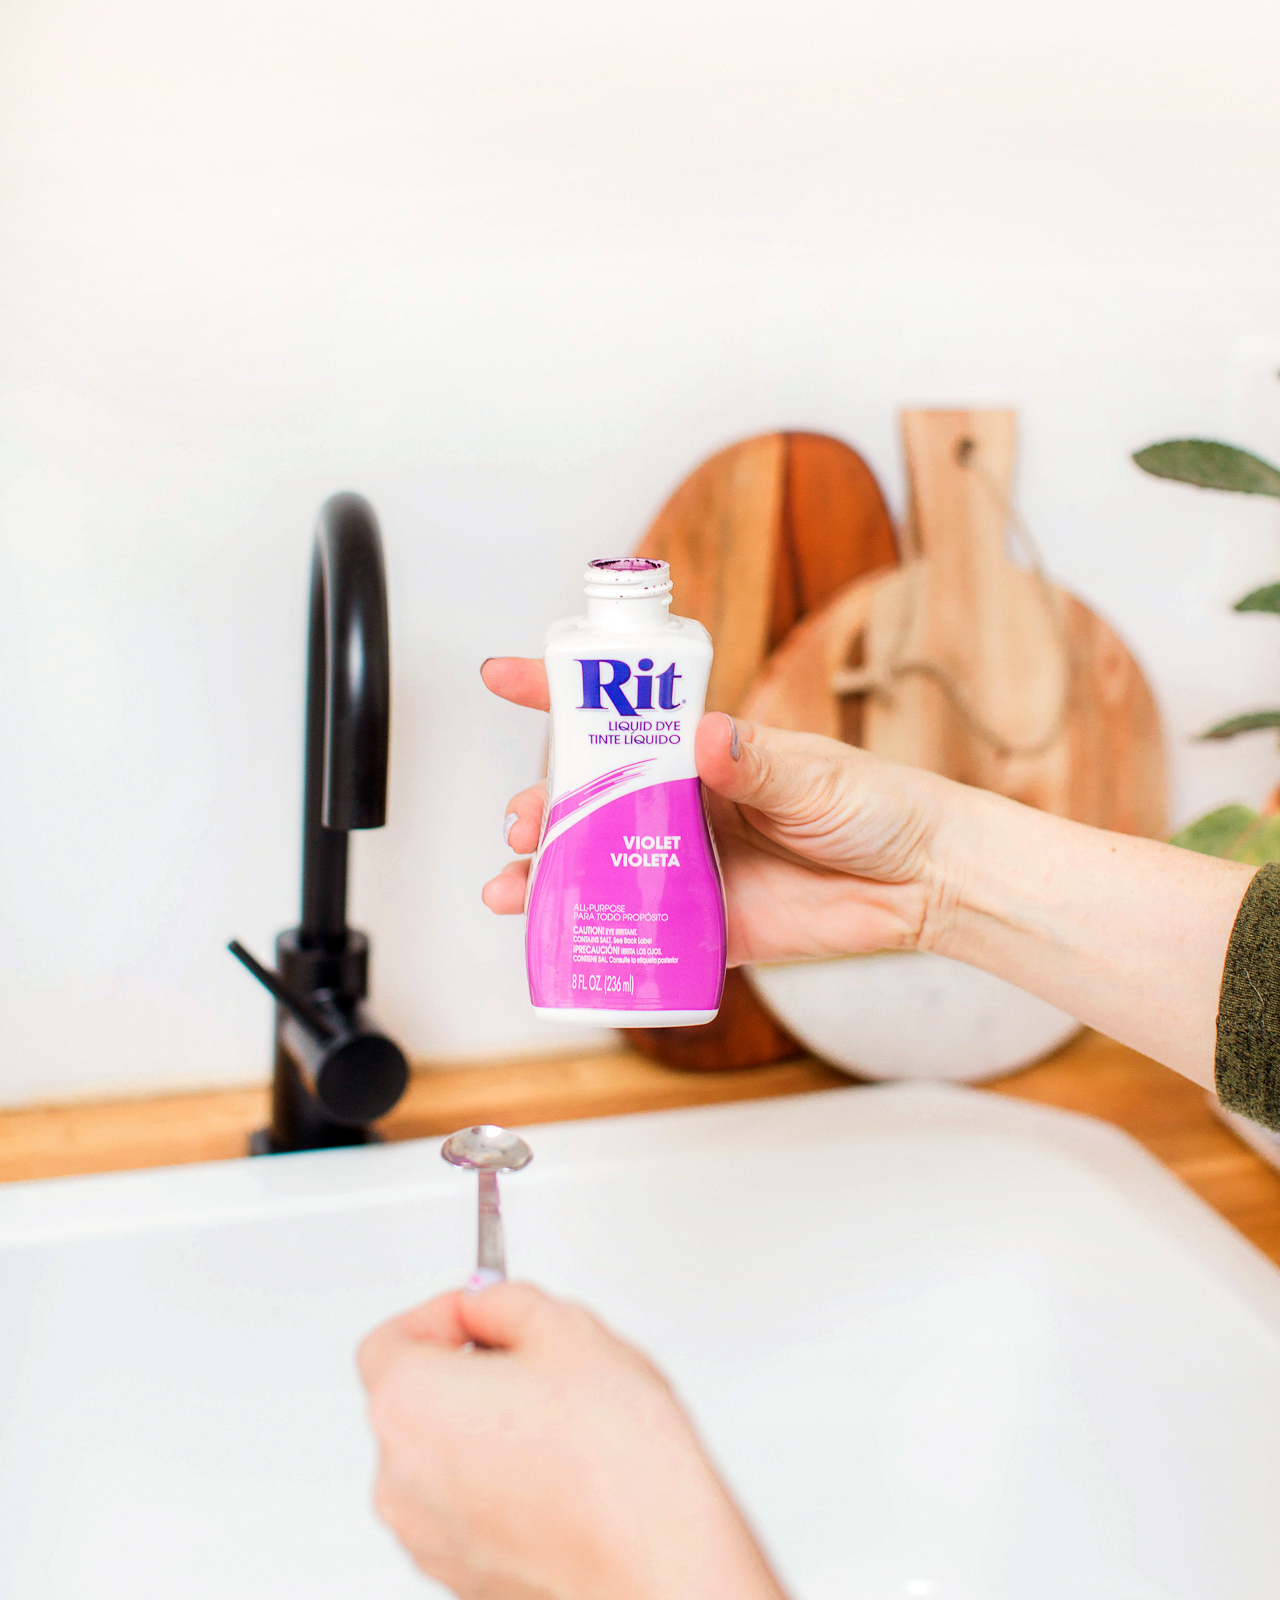
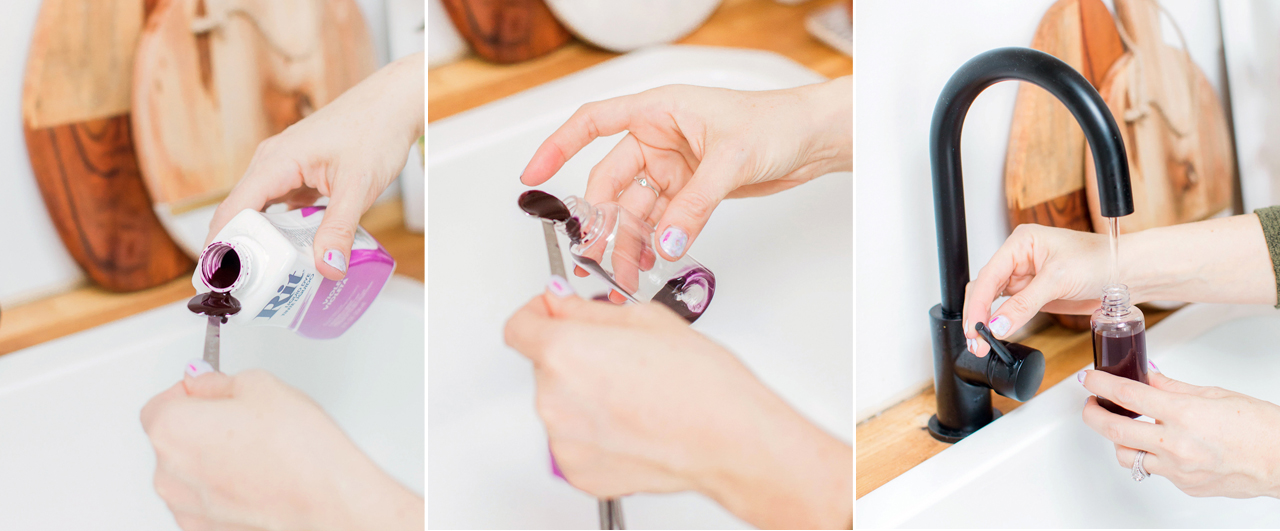
Step 2. Now that you’ve chosen your colors, mix your colors according to the recommended formula in the Rit Color Library, dividing the recommended dye amounts by 1/4. Don’t forget to wear your protective gloves! We’re using smaller amounts of dye than we’d need if we were planning to dye textiles, but because we’re turning the dye into a super fine mist, we still need the dye to be a bit more concentrated and intense. Dividing the color formula recipe by four seemed to do the trick for me! Shake dye bottles before pouring. Using a measuring spoon, measure the amount of Rit All-Purpose Dye and carefully pour the dye into the small spray bottles, then fill the spray bottle with hot water. Shake carefully to mix.
DIY Rainbow Watercolor Crepe Paper Backdrop with RIT Dye / Process

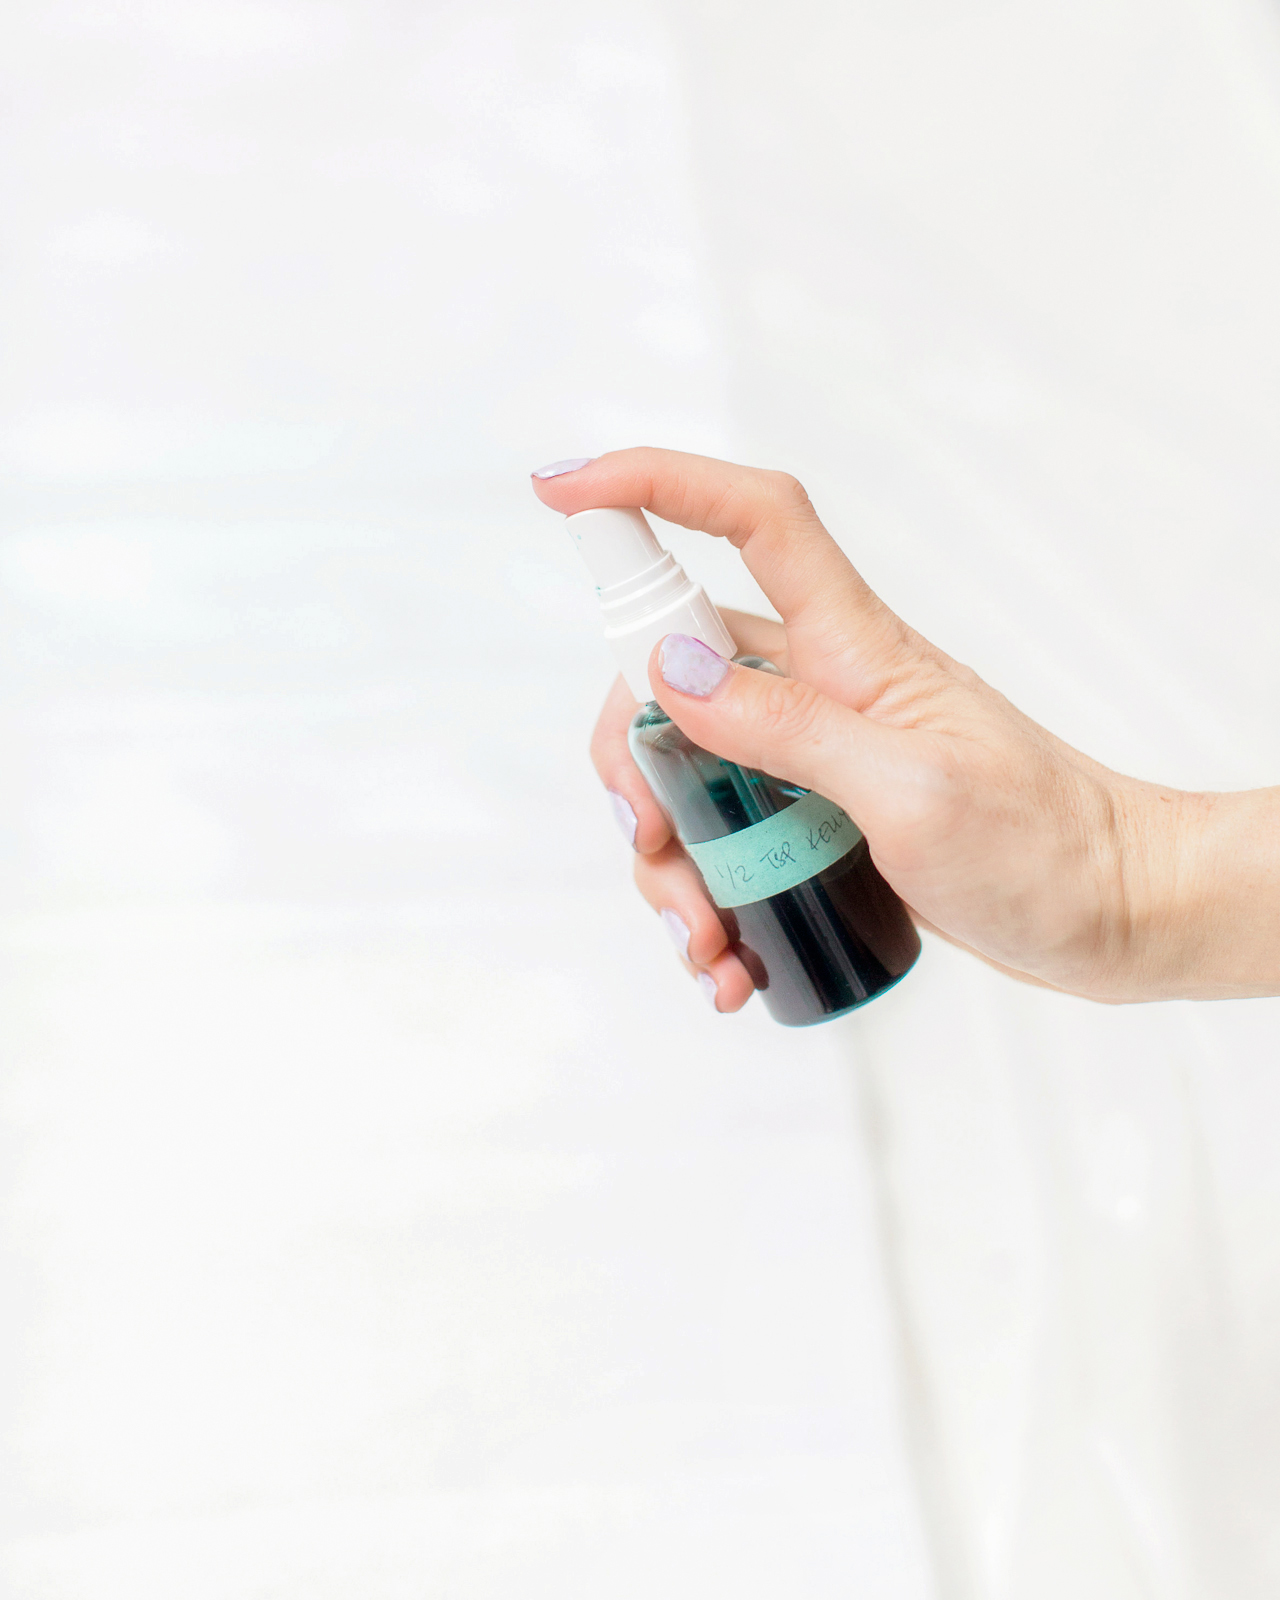
Pro tip: be sure to label your bottles as you go, otherwise you’re bound to lose track of what’s what (trust me on this). I used a bit of washi tape and wrote the color formula on a small piece of tape, then taped the written formula to each bottle.

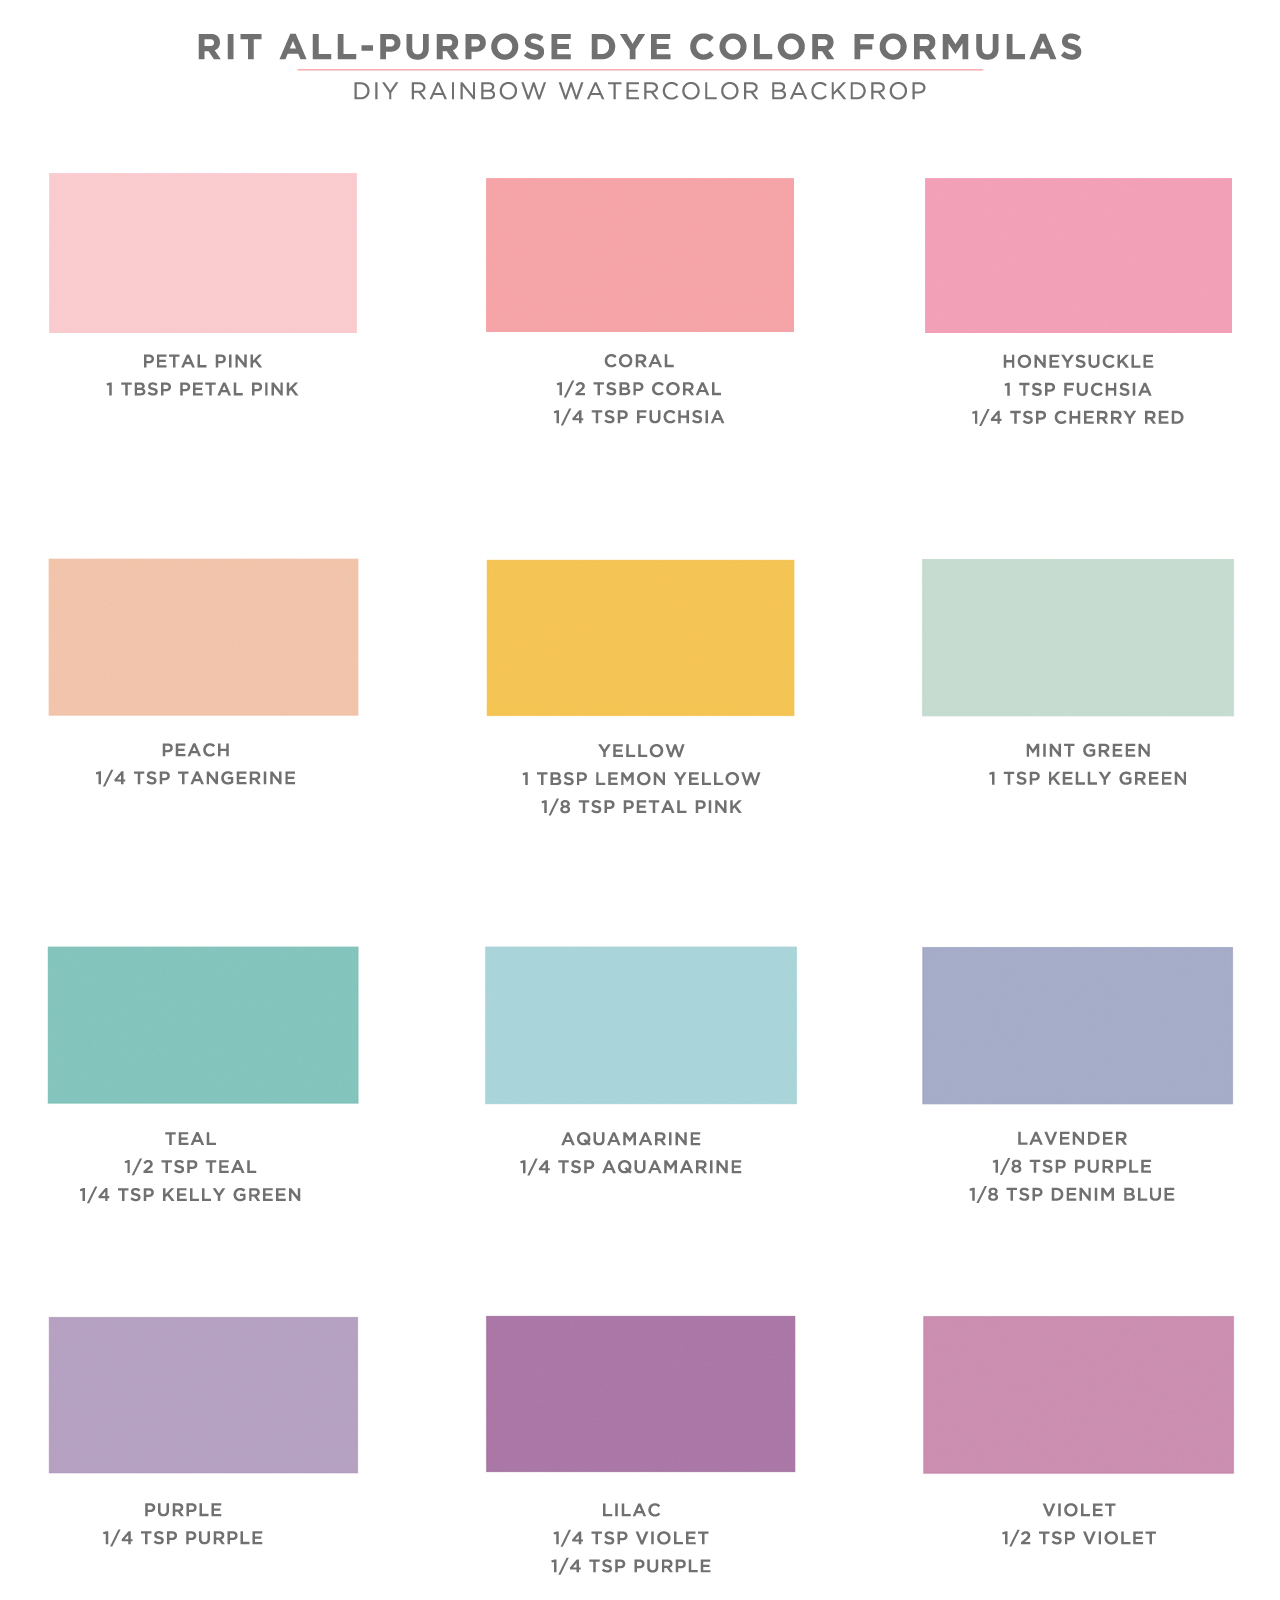
Here are the exact color formulas that I used to create the backdrop:

DIY Rainbow Watercolor Backdrop / Rit All-Purpose Dye Color Formulas

Step 3. Unravel each roll of white crepe paper until it’s one big long sheet, then place each sheet on top of a protective drop cloth on the floor of your workspace. Before you start spray dyeing, be sure to test your colors on a test sheet of crepe paper – or even just on a paper towel – and let it dry completely. The colors will become more intense as they dry! If a color is too dark, pour out a portion of the bottle and add more water to dilute the color. If you need a color to be darker, I found it easiest to pour out the entire 2.5 oz bottle and start over – usually doubling the original quantity of each color (i.e., going from 1/2 teaspoon of kelly green to 1 teaspoon of kelly green to get the perfect shade of mint green).

DIY Rainbow Watercolor Crepe Paper Backdrop with RIT Dye

Step 4. Using one spray bottle at a time, spray a very light coat of Rit All-Purpose Dye all over each sheet of white crepe paper, using each dye color in rainbow order. I switched things up a bit with the color order; sometimes I would start with pink or peach at the top and work my way down to lavender, other times I started with lavender and end with blue. Whatever order you choose, place analogous colors next to each other (oranges into pinks into purples) so the colors flow smoothly into each other and don’t end up looking muddy. For the best and most consistent results, make sure the crepe paper doesn’t get too wet and blot the nozzle with a paper towel or a rag after 5-8 pumps to maintain a fine spray mist.

DIY Rainbow Watercolor Crepe Paper Backdrop with RIT Dye

DIY Rainbow Watercolor Crepe Paper Backdrop with RIT Dye

Step 5. Once you’ve dyed all of your crepe paper, apply a couple pieces of gaffer’s tape to one end of each sheet and tape the paper to the floor. Then, pull on the other side of the paper to remove the stretch in the crepe paper and tape the other end to the floor. Allow the crepe paper to dry completely, around 30 minutes, then remove the gaffer’s tape. It’s gentle enough that it shouldn’t tear the paper as long as you’re very careful while removing it!

Step 6. To hang the backdrop, use a few pieces of gaffer’s tape to adhere the crepe paper to long wooden dowels and use non-damaging, removable wall hooks to hang the backdrop. For added depth and visual interest, layer the crepe paper sheets over each other – or even cut some of the sheets into a variety of widths and mix them all together!

DIY Rainbow Watercolor Crepe Paper Backdrop with RIT Dye

DIY Rainbow Watercolor Crepe Paper Backdrop with RIT Dye

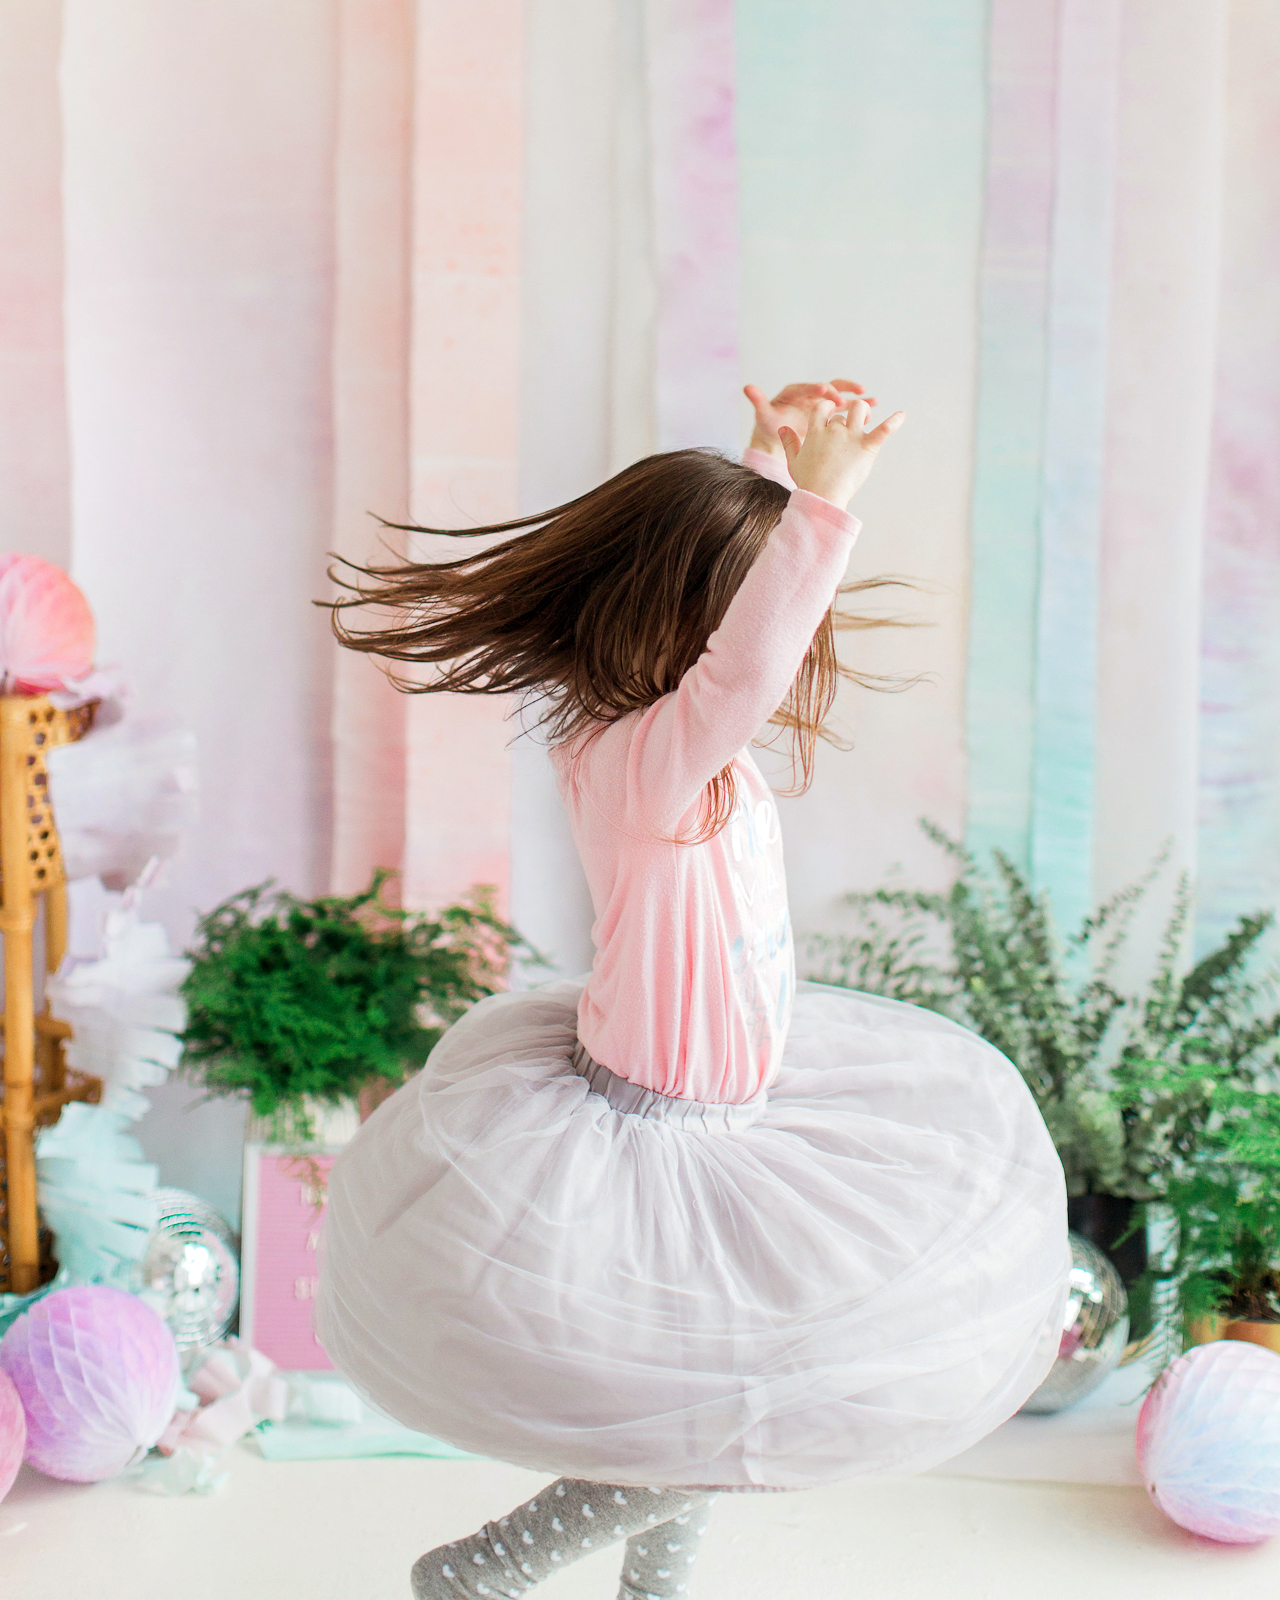
Ta da! It’s such a quick and easy way to add a dose of color to a wedding or party – and you can use the same technique to turn any white paper decorations into a rainbow, from round honeycombs to tissue paper fans and fringe crepe paper garlands! I absolutely LOVE this idea for a wedding ceremony backdrop – which you can reuse as a photo booth backdrop for the reception! Just be prepared for this backdrop to inspire a bit of twirling from your younger guests.

DIY Rainbow Watercolor Crepe Paper Backdrop with RIT Dye

DIY Rainbow Watercolor Crepe Paper Backdrop with RIT Dye

DIY Rainbow Watercolor Crepe Paper Backdrop with RIT Dye

DIY Rainbow Watercolor Crepe Paper Backdrop with RIT Dye

Pastels! Rainbows! Gah, I just love this DIY rainbow watercolor crepe paper backdrop SO much! But what do YOU think?? If you make this crepe paper backdrop for your wedding or party, be sure to share a photo on Instagram with the hashtag #madewithosbp so I can see it!

This is a sponsored conversation written by me on behalf of Rit Dye. The opinions and text are all mine. Check out the 50 shades of Rit All-Purpose Dye right here and browse over 500 color formulas in the Rit Dye Color Library here!


Photo Credits: Meghan Marie Photography and Nole Garey for Oh So Beautiful Paper

Friday Faves

Spring is the perfect time to take a look into our closet and freshen up your wardrobe! For many of us, we’re just starting to come out of winter coats, hats, and scarves and finally think about wearing skirts and dresses again! I’ve been working on my own spring closet edit, so I thought I’d share a few non-paper things that I’ve had my eye on this week! I mean, window shopping is fun, right? Especially when warmer weather is just around the corner! Come along for the ride!

Friday Faves / Spring Style Round Up

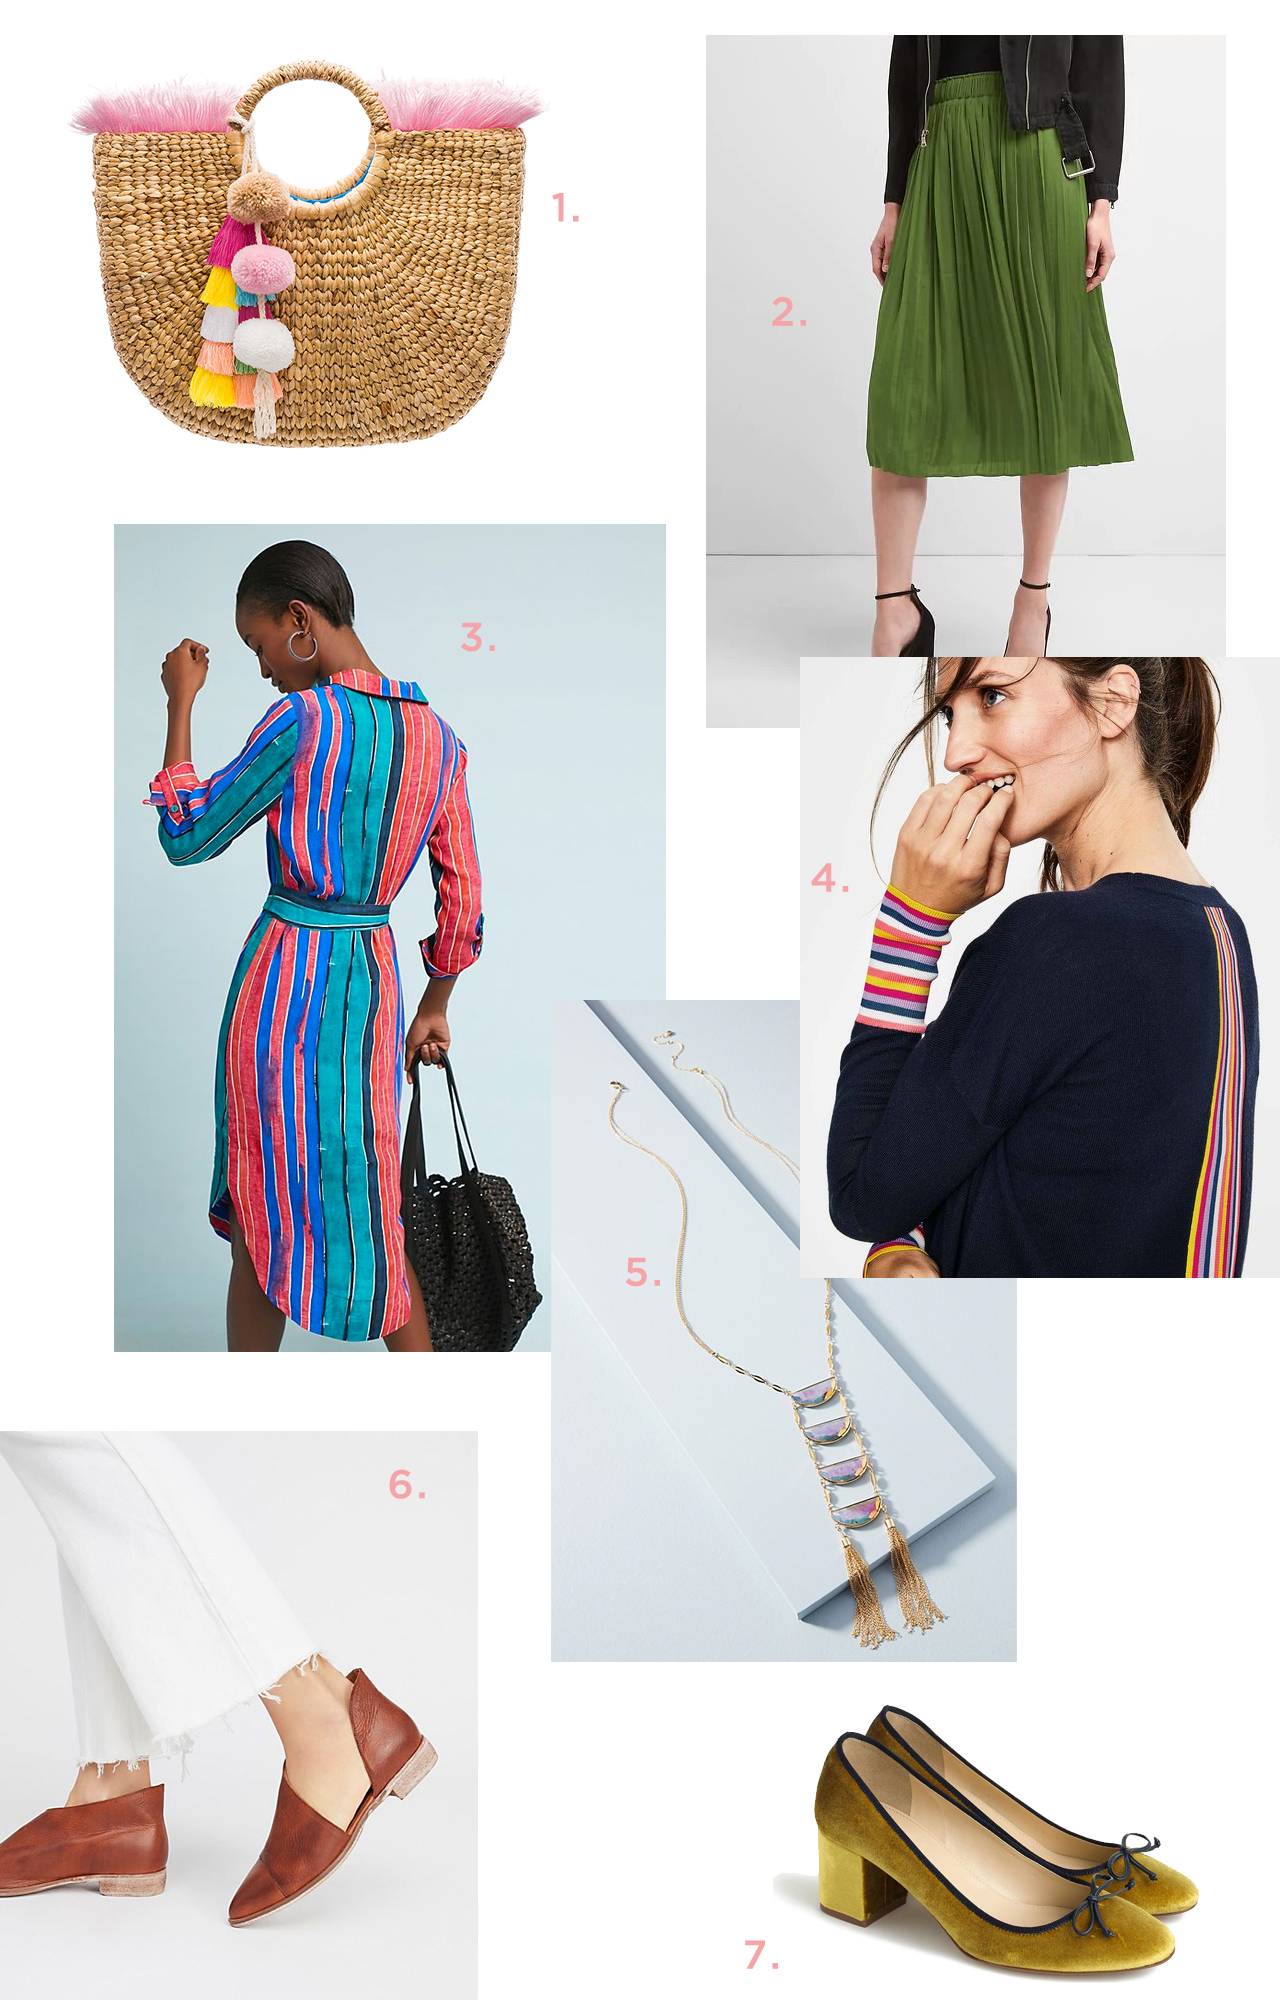
1. I mean, is this not THE most perfect bag for spring and summer? That texture! Those pom poms! The fringe! The bag also comes in a couple other color options, including an all-white pom pom and fringe version.

2. I usually live in jeans and a t-shirt, but I’m going to make more of an effort to wear skirts and dresses when the weather warms up again. I’m absolutely in love with this pleated chiffon skirt in this cedar green and pale pink color. Wouldn’t this skirt be so great with Joy’s DIY sequin tutorial??

3. LOVING the bright colors in this belted shirt dress! This one might also need to make its way into my closet for summer…

4. How fun are the rainbow stripes on this sweater from Boden?? 

5. I actually have this necklace and I LOVE IT. It has an iridescent sheen and sparkles like opal!

6. These sleek leather flats have been on my wish list FOREVER, and I keep hearing so many great things about them. And they come in so many great colors! I’m basically just looking for any excuse to grab a pair for myself at this point.

7. I love everything about these shoes, from the gorgeous color to the cute little bow on the front!

Is there anything you’ve been eyeing lately? Please share in the comments below – I need to shake my wardrobe up a bit this season!

Modern & Creative Save the Date Ideas

Any recently engaged couples out there?? Choosing a save the date is probably one of the first decisions you’ll make for your wedding! Save the dates can reveal a lot about your wedding, so it’s important to choose wisely. Will your wedding be casual or formal? Is it in the mountains or by the beach? Your save the dates should reflect the type of wedding you plan to have. And since there aren’t as many rules for save the dates as for the formal invitation, you have more freedom to play around with the design. So have fun and don’t be afraid to think outside the box! Here are a few modern and creative save the date ideas to get you started! – Annie

Wedding Stationery Inspiration: Modern & Creative Save the Date Ideas / Oh So Beautiful Paper

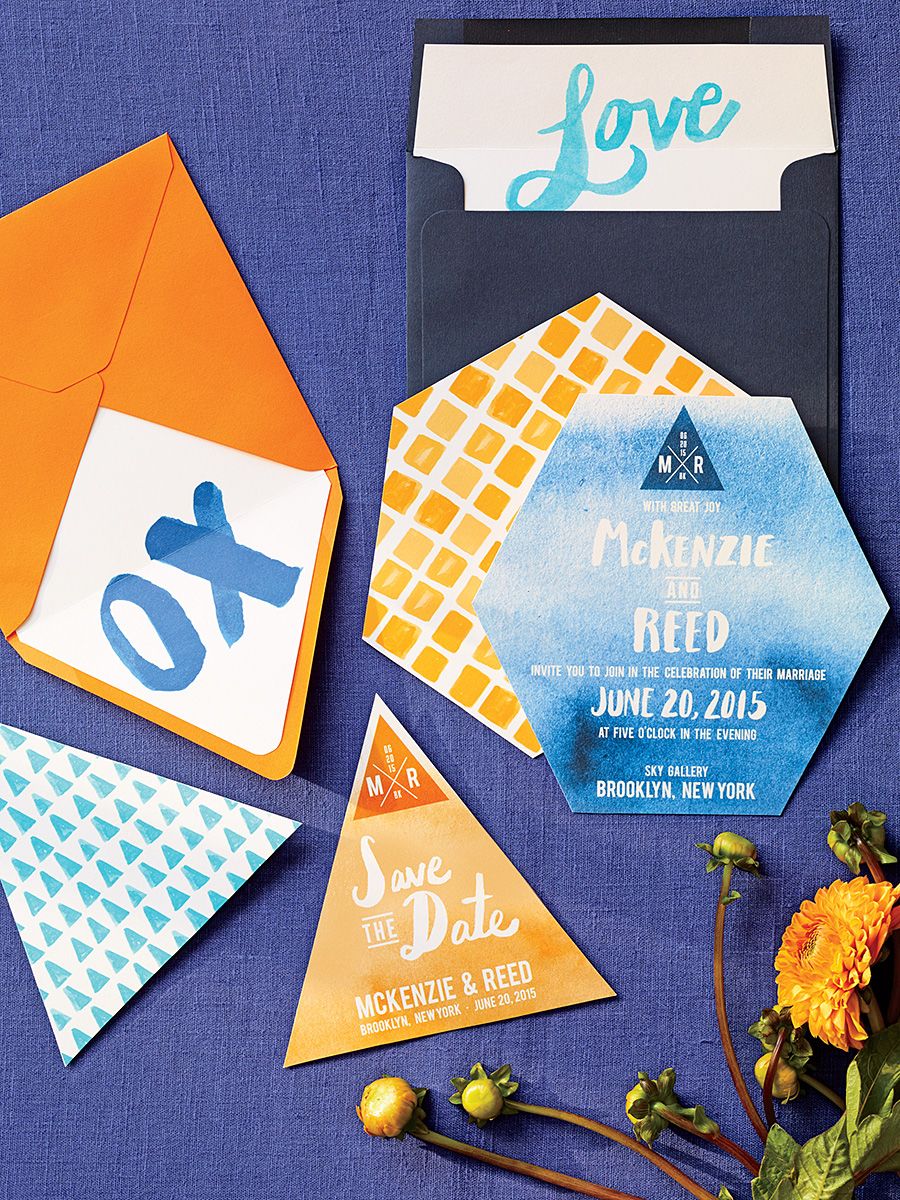
Love the bright splash of color in these modern watercolor save the dates! | Photography: Philip Ficks, Stationery: Swiss Cottage Designs via The Knot

Wedding Stationery Inspiration: Modern & Creative Save the Date Ideas / Oh So Beautiful Paper

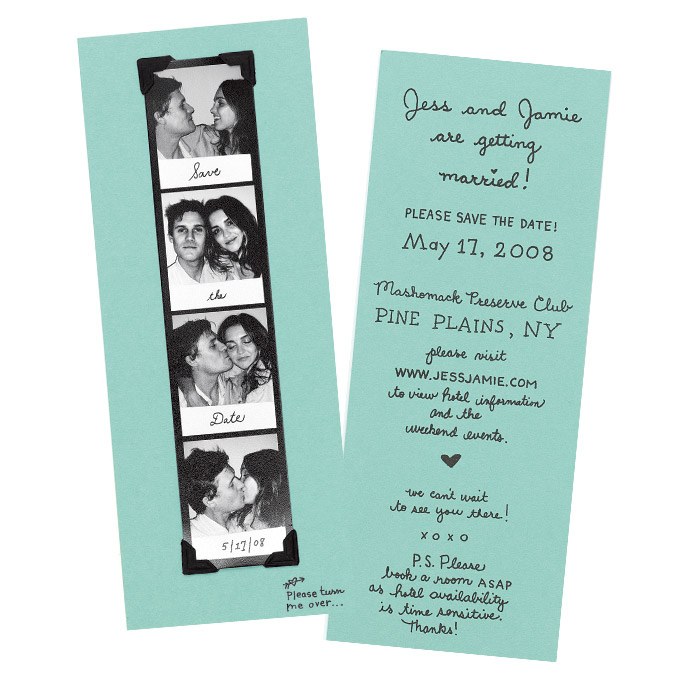
The photo booth strip and handwritten text add a personal touch. | Stationery: Bird and Banner via Brides

Wedding Stationery Inspiration: Modern & Creative Save the Date Ideas / Oh So Beautiful Paper

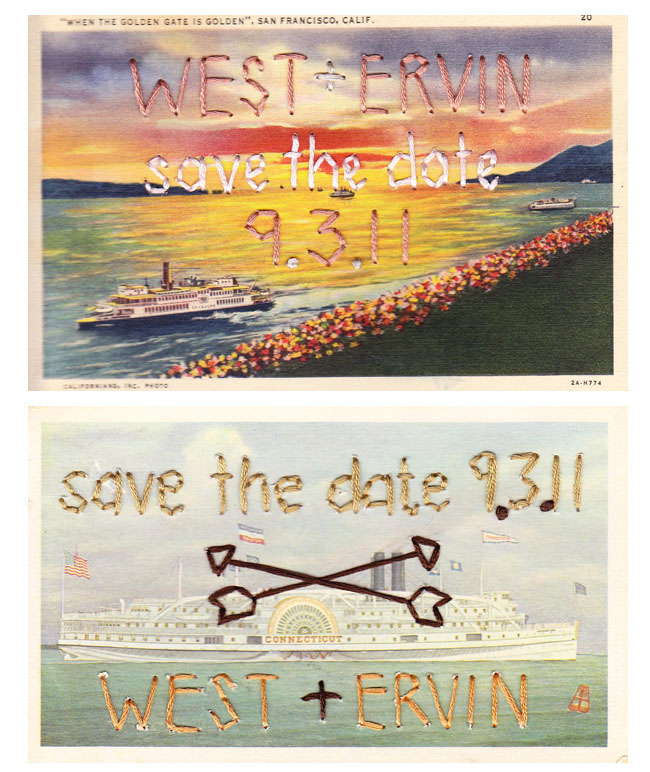
Obsessed with these embroidered vintage postcards! | Embroidery: Sarah West Ervin via Green Wedding Shoes

Wedding Stationery Inspiration: Modern & Creative Save the Date Ideas / Oh So Beautiful Paper

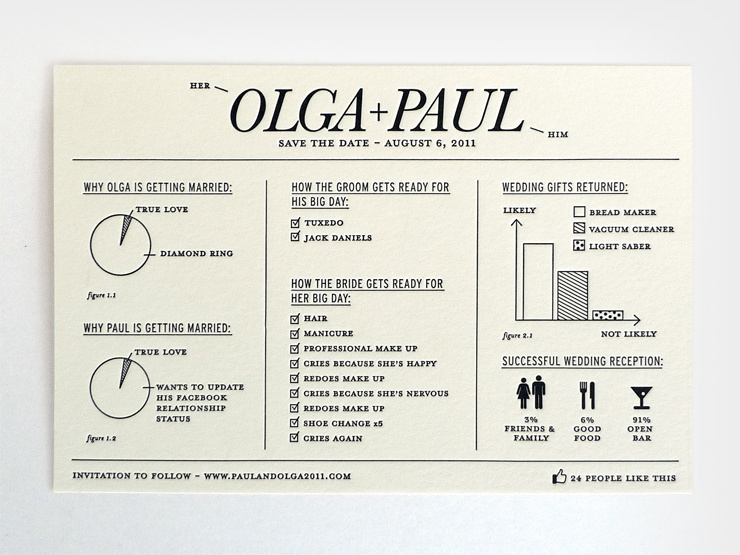
Feel free to play around with unique wording! This infographic save the date makes me wish I was invited. | Stationery: Natalie Grosner via Natalie Grosner

Wedding Stationery Inspiration: Modern & Creative Save the Date Ideas / Oh So Beautiful Paper

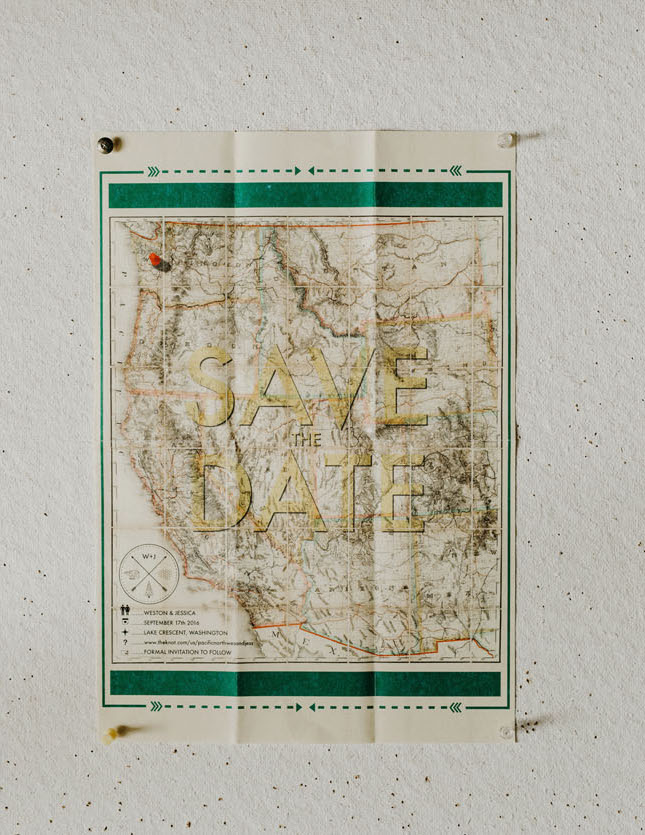
Feeling inspired by the geographic location of your wedding? Go with a map save the date! I’d hang this map save the date on my wall! | Photography: Phil Chester via Green Wedding Shoes

Wedding Stationery Inspiration: Modern & Creative Save the Date Ideas / Oh So Beautiful Paper

How fun is this pinwheel design?! | Photography: Christa-Taylor, Stationery: Tie That Binds via Style Me Pretty

Wedding Stationery Inspiration: Modern & Creative Save the Date Ideas / Oh So Beautiful Paper

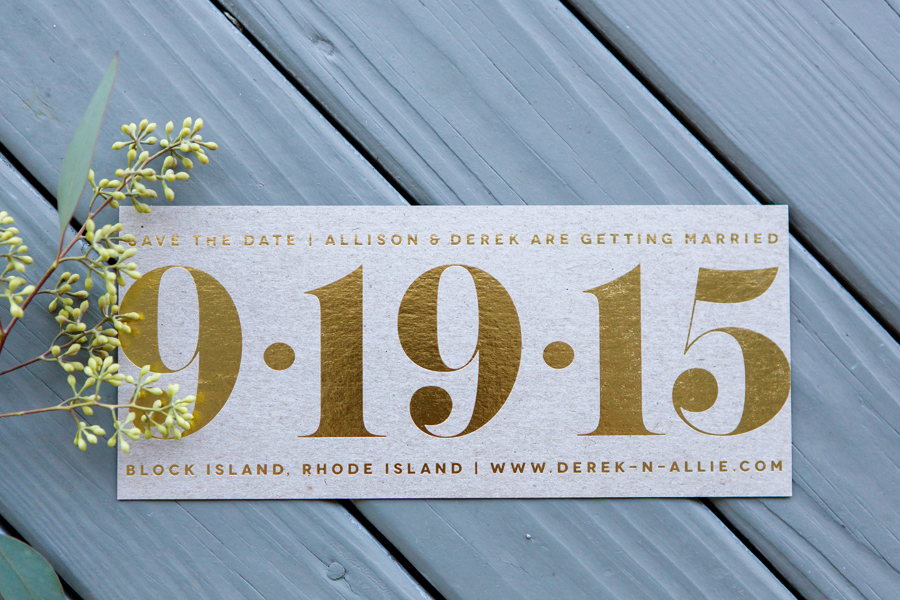
You can never go wrong with gold foil and bold type. | Photography: Ryon:Lockhart Photography, Stationery: Allison Rhodes Designs via Style Me Pretty

Wedding Stationery Inspiration: Modern & Creative Save the Date Ideas / Oh So Beautiful Paper

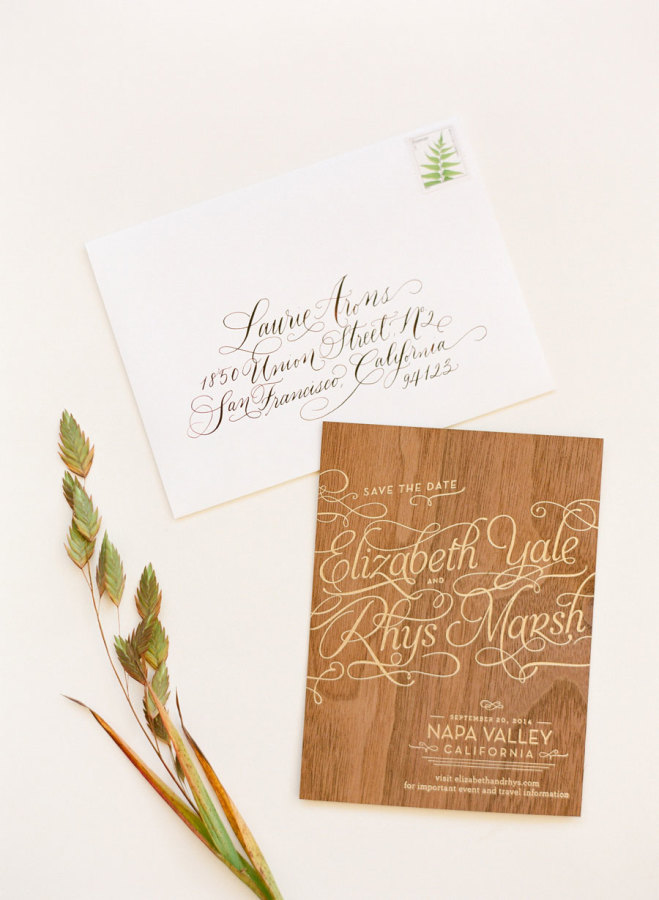
The combination of wood and gold calligraphy is stunning. | Photography: KT Merry Photography, Stationery: Anticipate Invitations, Calligraphy: Curlicue Designs Calligraphy via Style Me Pretty

Wedding Stationery Inspiration: Modern & Creative Save the Date Ideas / Oh So Beautiful Paper

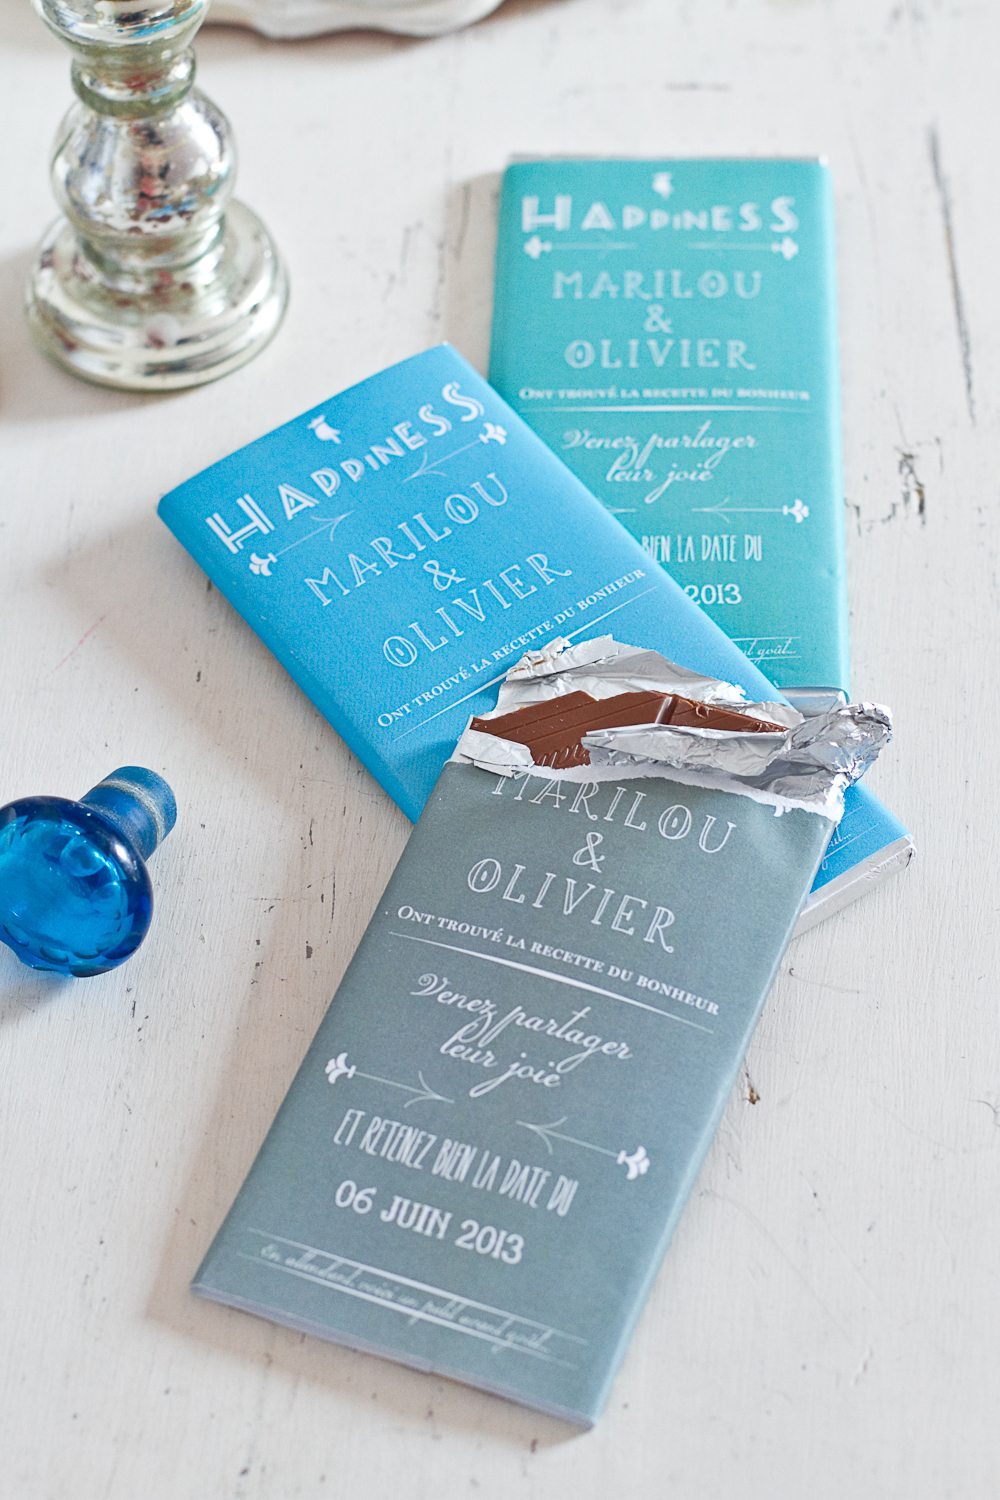
Has anyone ever said no to chocolate? | via Un Beau Jour

Wedding Stationery Inspiration: Modern & Creative Save the Date Ideas / Oh So Beautiful Paper

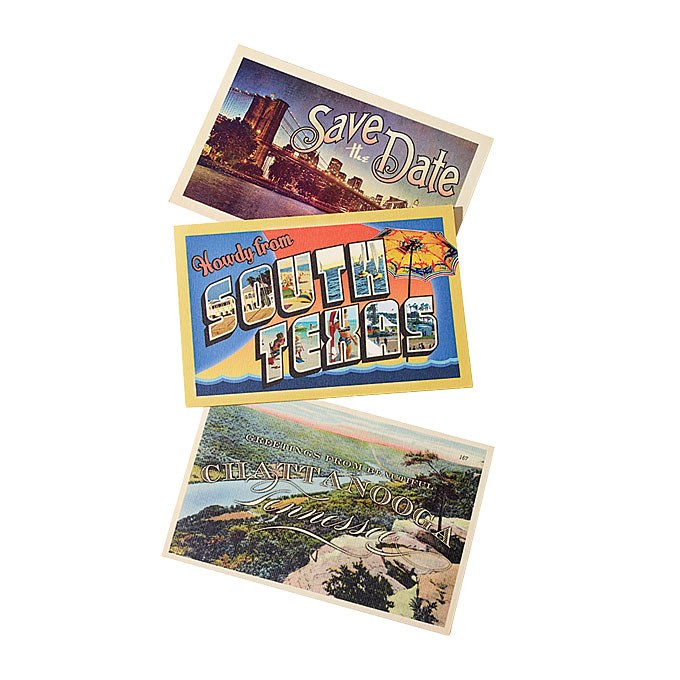
Give your guests a sneak peek at the wedding destination with postcards. You can even order a custom rubber stamp with your details to add all your information on the back. (And you’ll save money on stamps.) | Photography: Patricia Heal via Brides

Wedding Stationery Inspiration: Modern & Creative Save the Date Ideas / Oh So Beautiful Paper

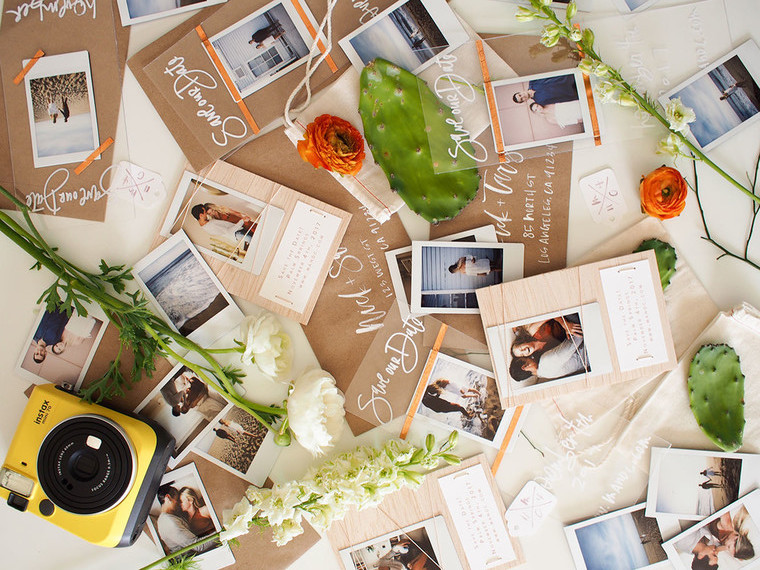
All you need is a Polaroid camera to make these cute DIY save the dates! | Calligraphy: A Fabulous Fete via 100 Layer Cake

Wedding Stationery Inspiration: Modern & Creative Save the Date Ideas / Oh So Beautiful Paper

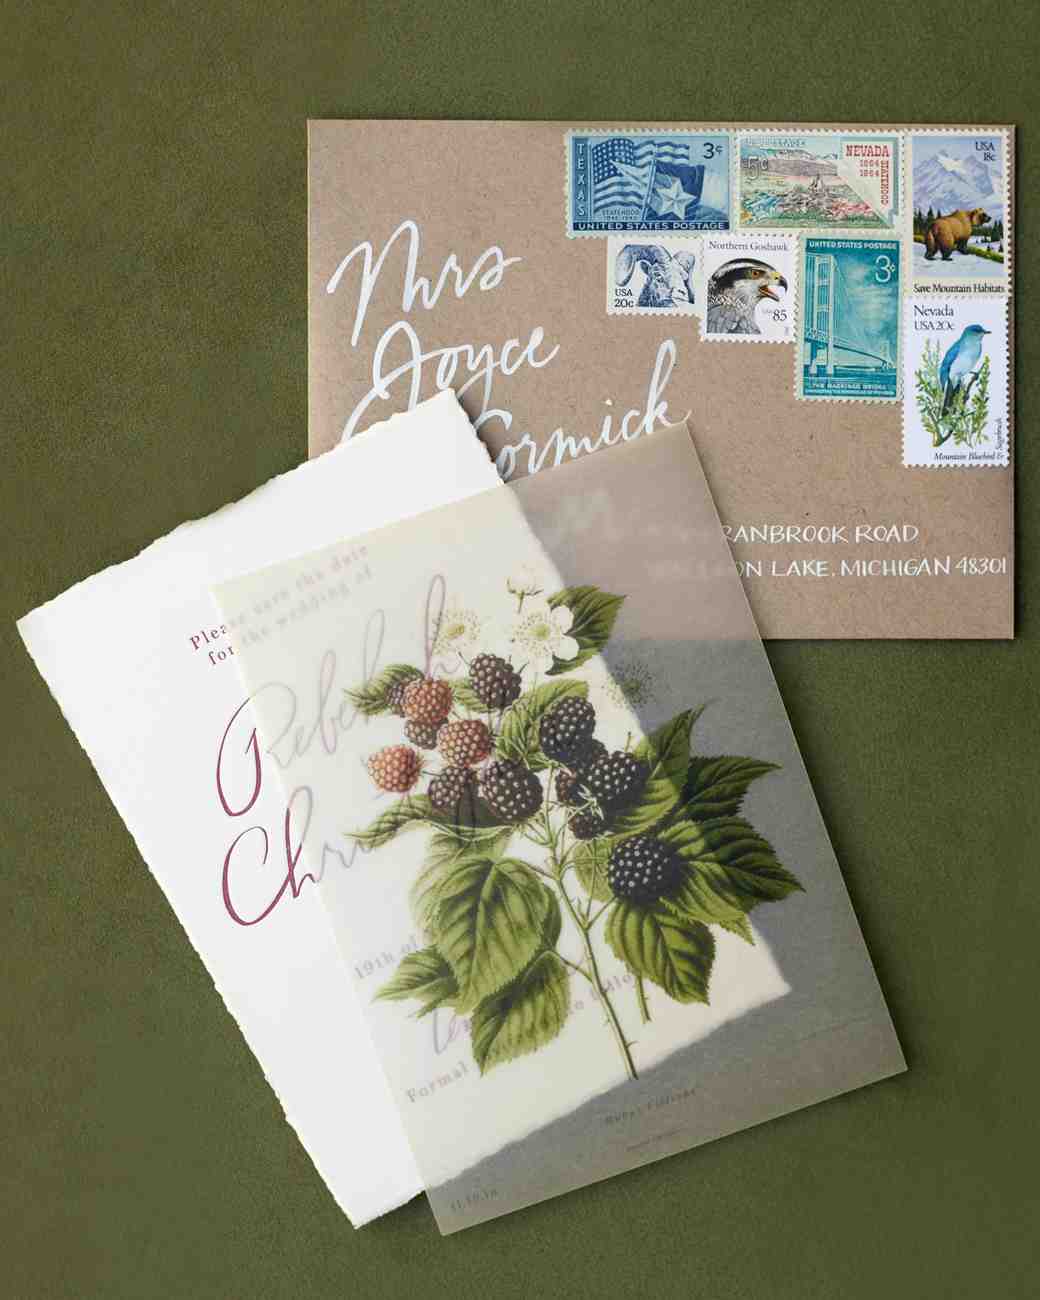
The sheet of vellum adds an elegant touch to an already gorgeous save the date. | Photography: Jose Villa, Stationery: Amber Moon Designs, Calligraphy: Anne Robin via Martha Stewart Weddings

You can find more wedding invitation and save the date inspiration in our real invitations gallery right here!

Black and White Calligraphy and Watercolor Wedding Invitations

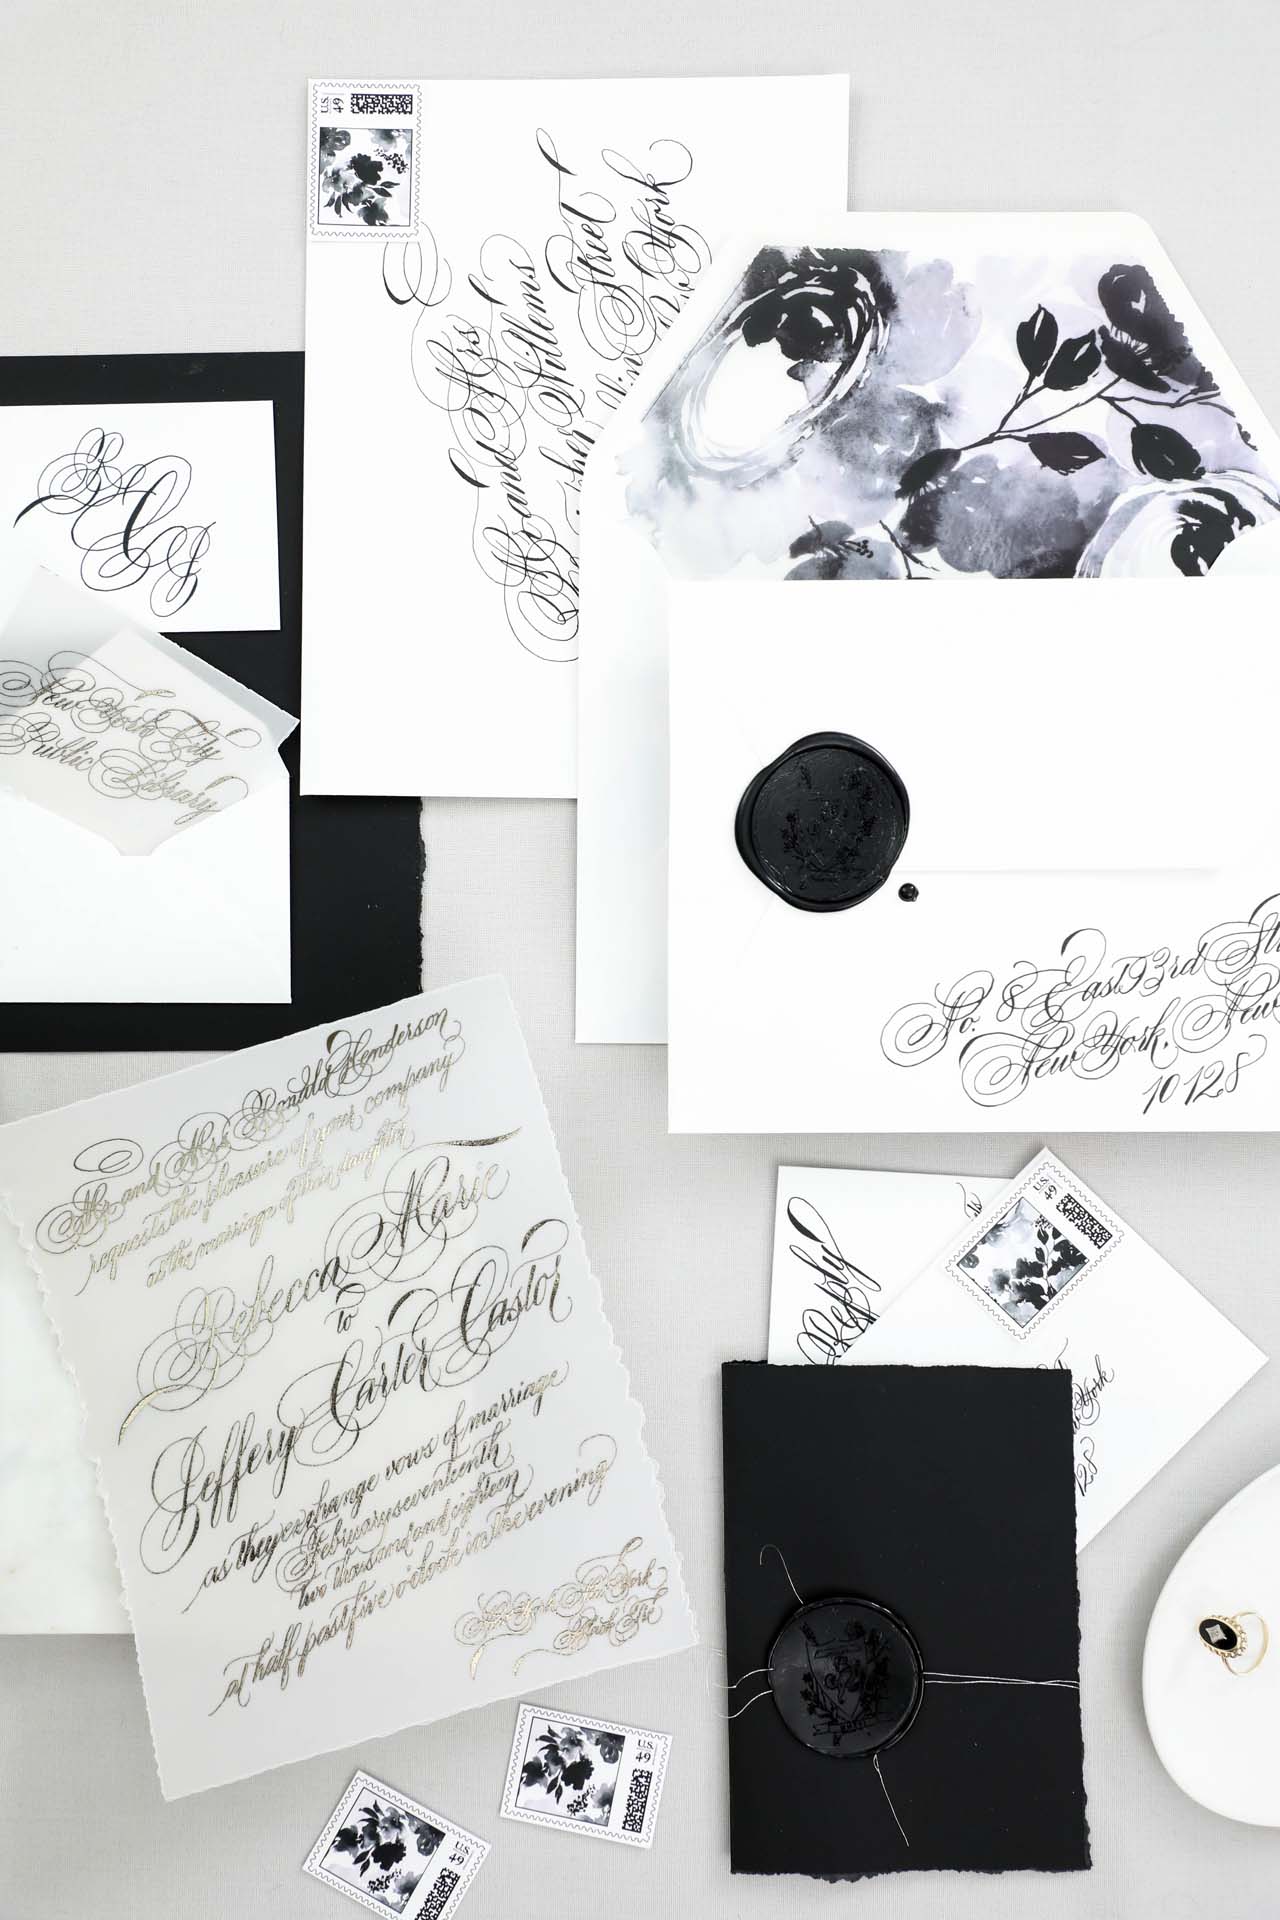
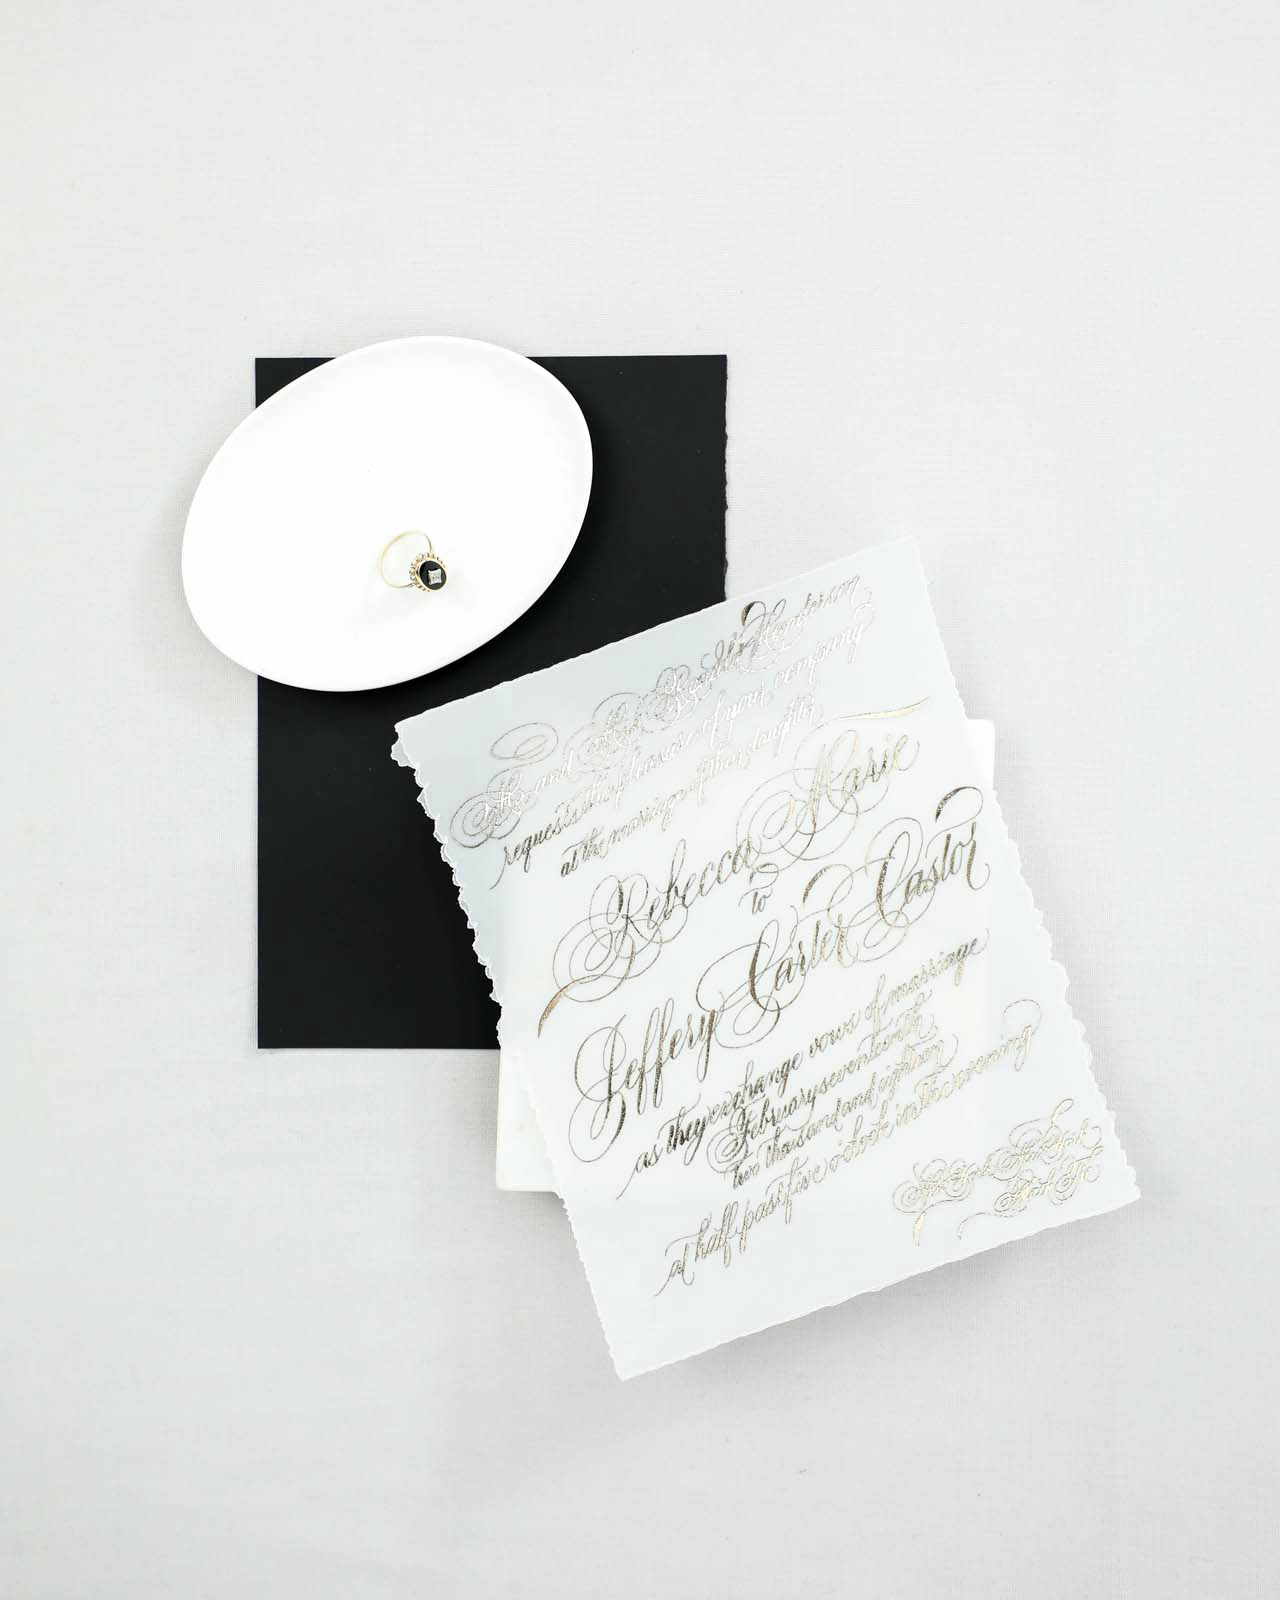
Black and white is a classic combination any time of year – but the high contrast feels especially dramatic in the winter, don’t you think? Victoria of Design House of Moira sent over these black and white calligraphy and watercolor wedding invitations, with flourished calligraphy text in stunning platinum foil on vellum, monochromatic watercolor floral details in the envelope liners, and a super dramatic 2 inch black wax seal. Just gorgeous for a black tie winter wedding!

Black and White Calligraphy and Watercolor Wedding Invitations by Design House of Moira

From Victoria: Winter weddings are often a palette cleanser after the spring and summer filled with pale blushes and French blues. I loved working with Rebecca on her winter wedding, which was held at the New York City Public Library. With hopes for snow on her wedding day, along with the neutral backdrop of the library, she chose a monochromatic palette of black and white with an accent of platinum foil for her wedding day. A true black tie wedding, her bridesmaids were in black gowns and the groomsmen in custom tuxedos.

Black and White Calligraphy and Watercolor Wedding Invitations by Design House of Moira

Black and White Calligraphy and Watercolor Wedding Invitations by Design House of Moira

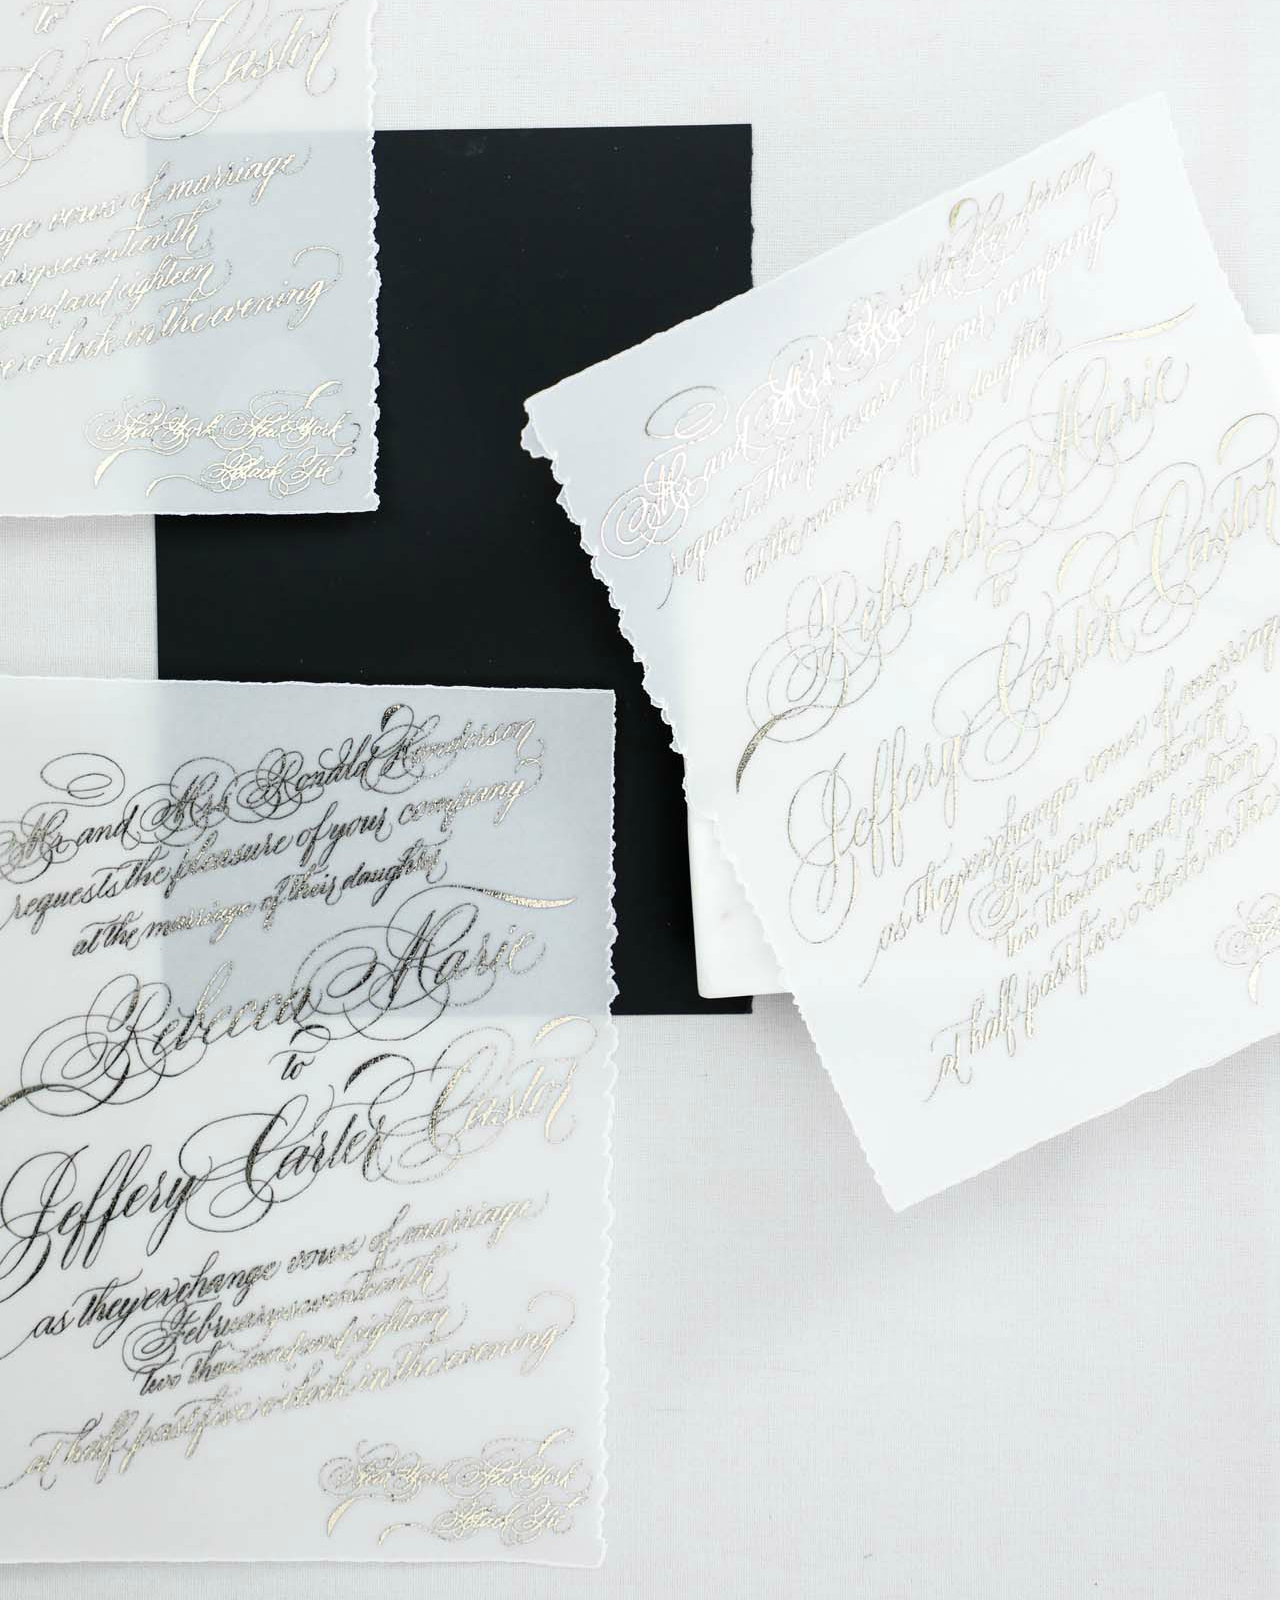
With each bride we work with, the paper selection is such an important step in our creative process. For Rebecca, we suggested using a heavy weight vellum for her main invitation to reflect the semi-transparency of the snow she loves so much and her engagement ring of onyx and diamonds. Her entire suite was hand calligraphed and printed in platinum and black foil with some serious flourishing and formality throughout. All the calligraphy was designed diagonally across each piece.

Black and White Calligraphy and Watercolor Wedding Invitations by Design House of Moira

Black and White Calligraphy and Watercolor Wedding Invitations by Design House of Moira

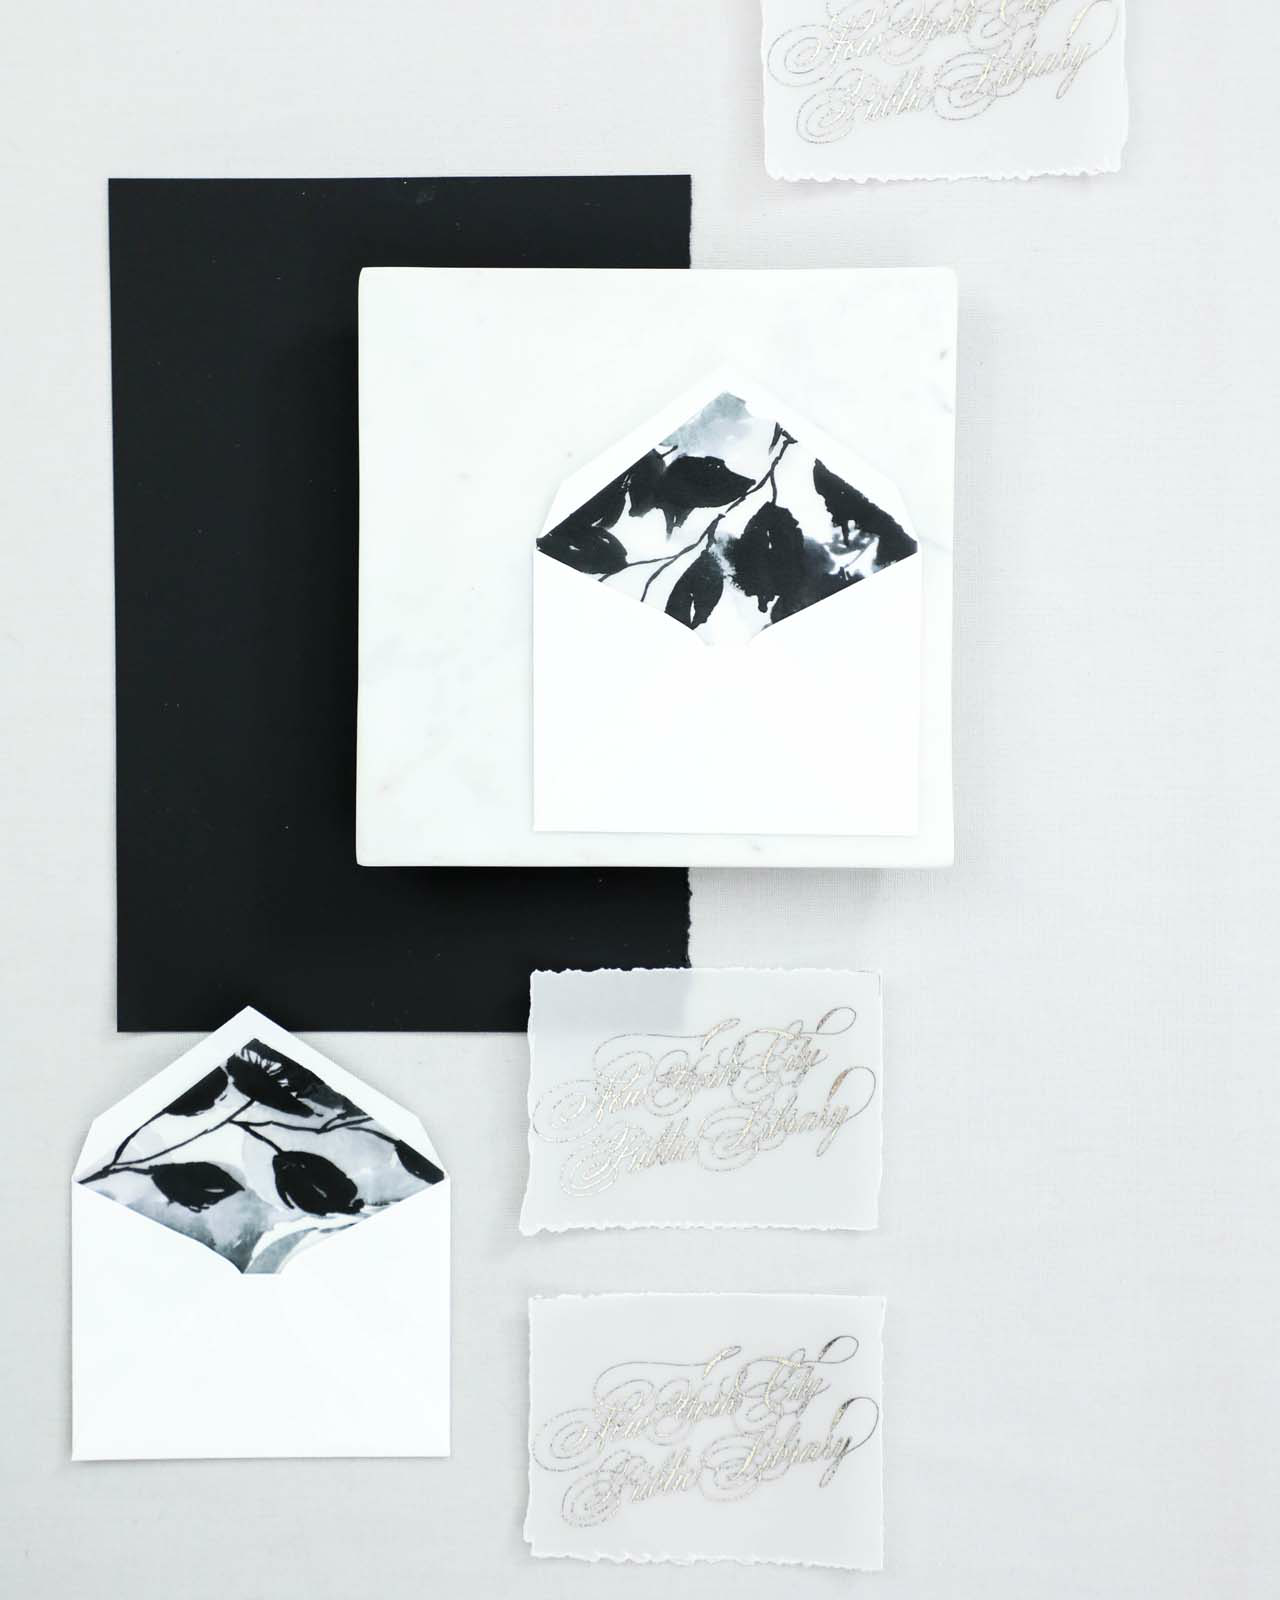
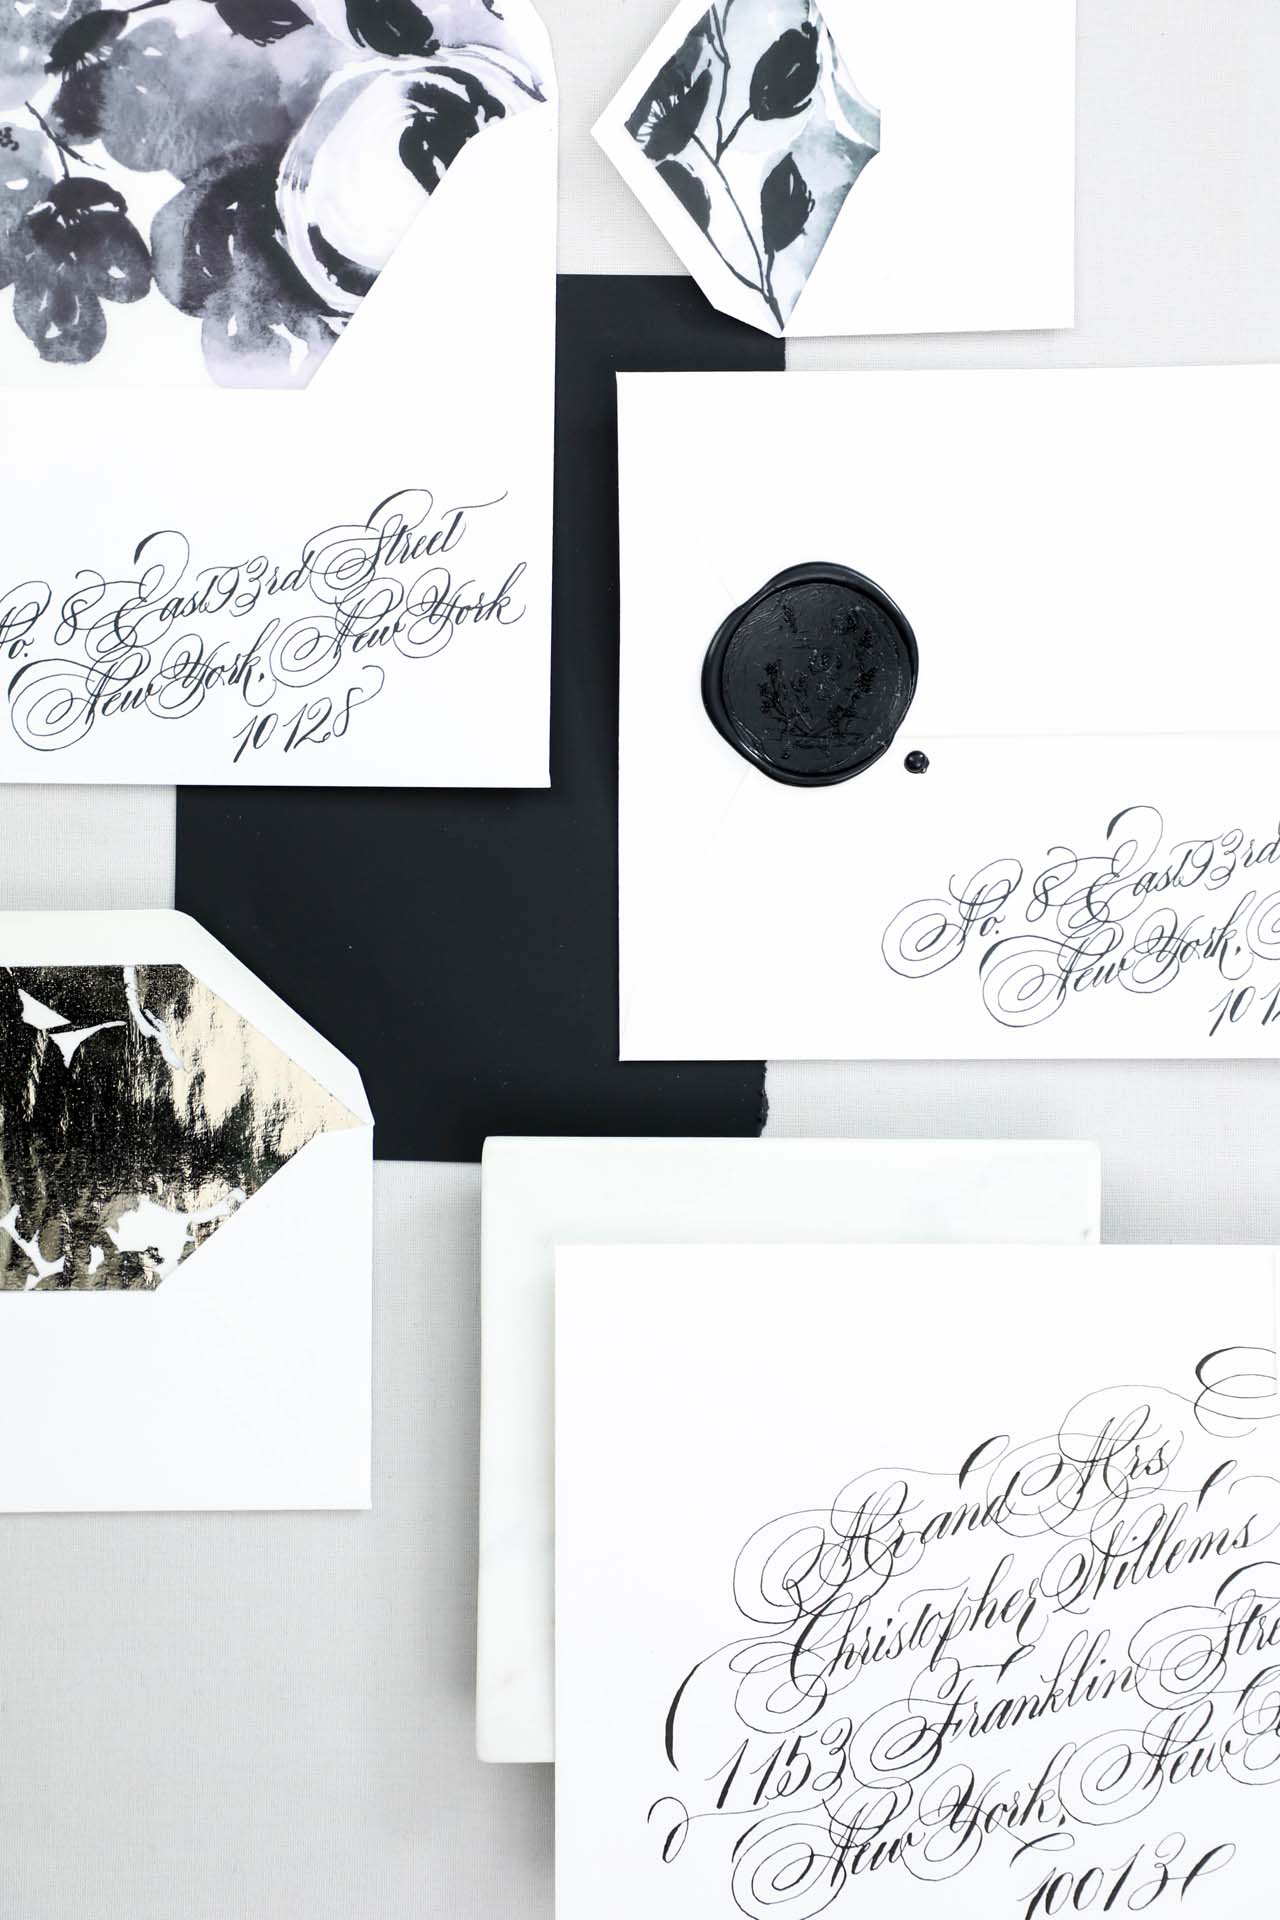
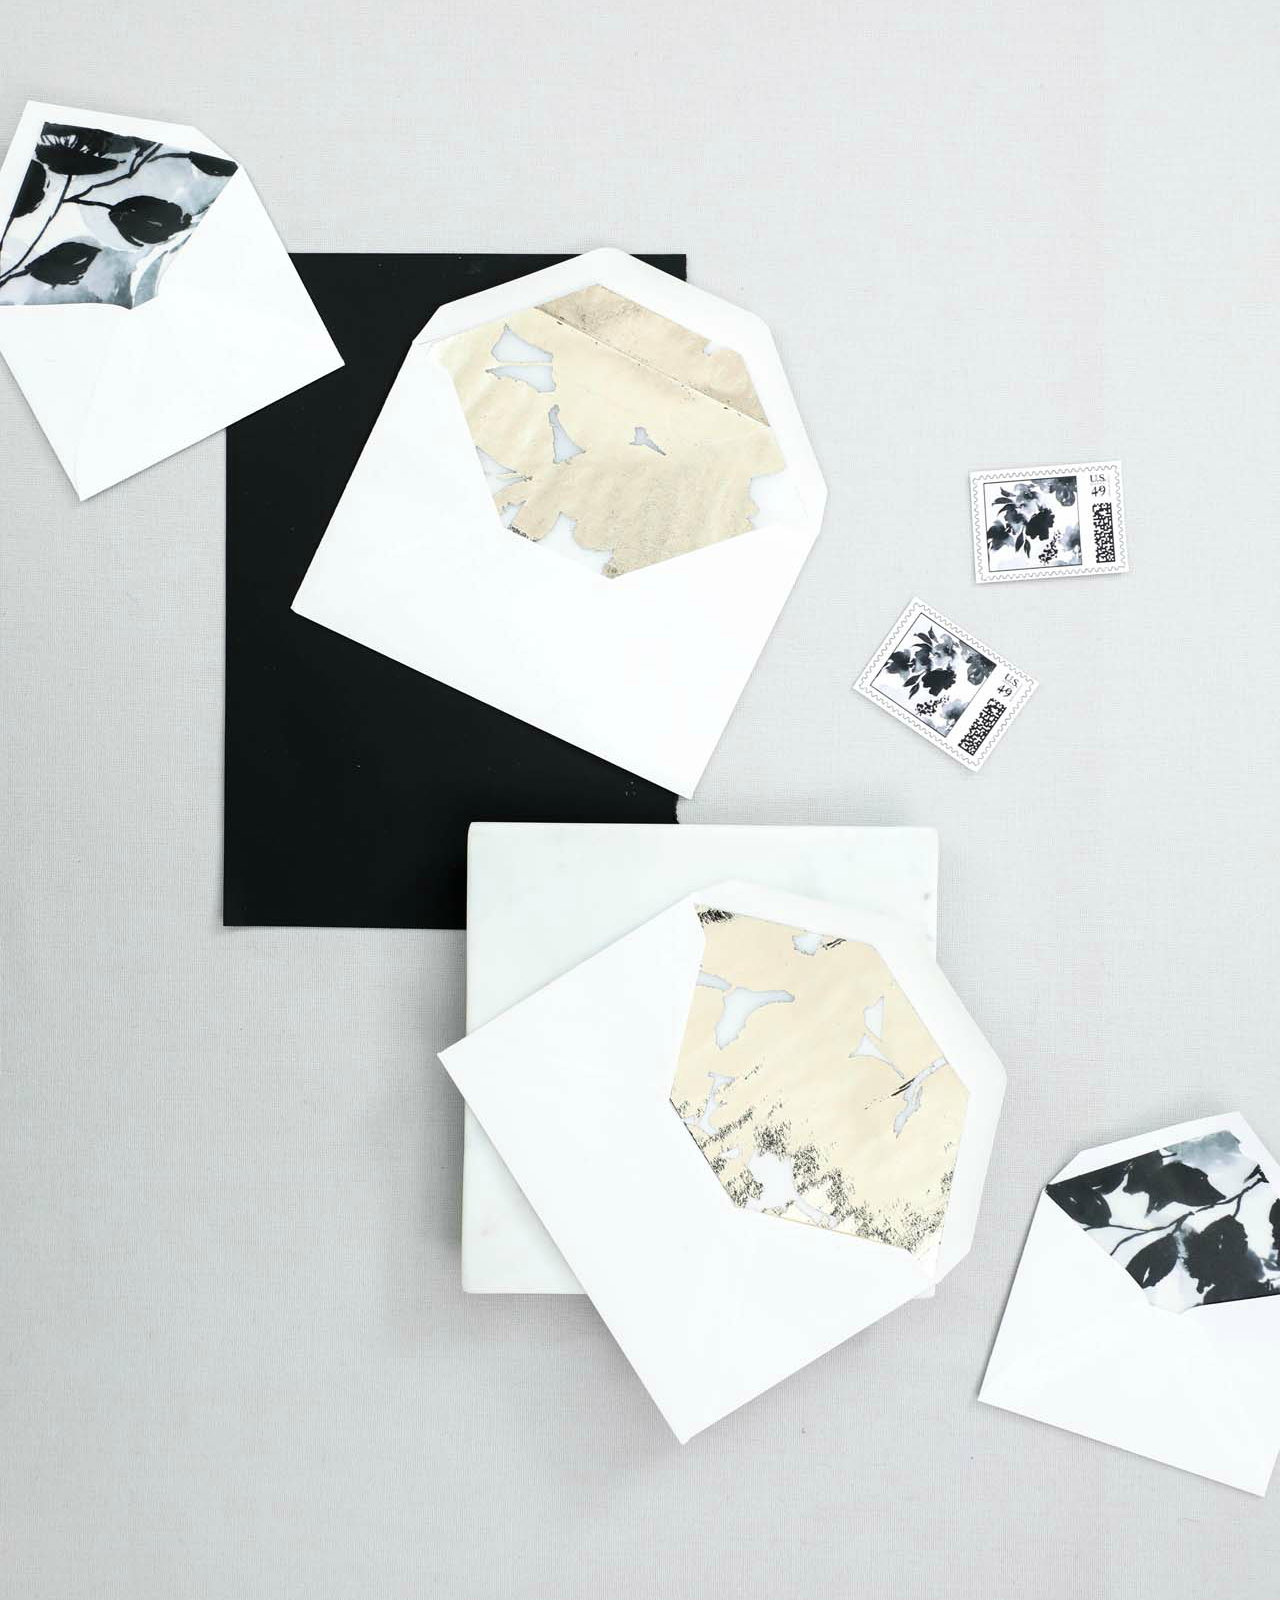
The bride really loved all the artwork we create here at Design House of Moira, but was concerned that she would have to forgo watercolor details for her suite due to her limited color range. We suggested a monochromatic watercolor piece created entirely in black for her and we lined her mailing envelopes with the pattern. Her reply envelopes were lined with a heavy foil pattern created from the positive and negative space of her floral artwork.

Black and White Calligraphy and Watercolor Wedding Invitations by Design House of Moira

Black and White Calligraphy and Watercolor Wedding Invitations by Design House of Moira

The final suite included her invitation printed on vellum, the reply card printed in black foil on cotton paper, and her small reception card, printed in platinum foil on vellum and tucked into a tiny envelope for an added detail. The smaller pieces of the suite were bound in a remarkably smooth paper in the blackest of blacks, tied with metallic thread, and sealed with a custom 2″ black wax seal.

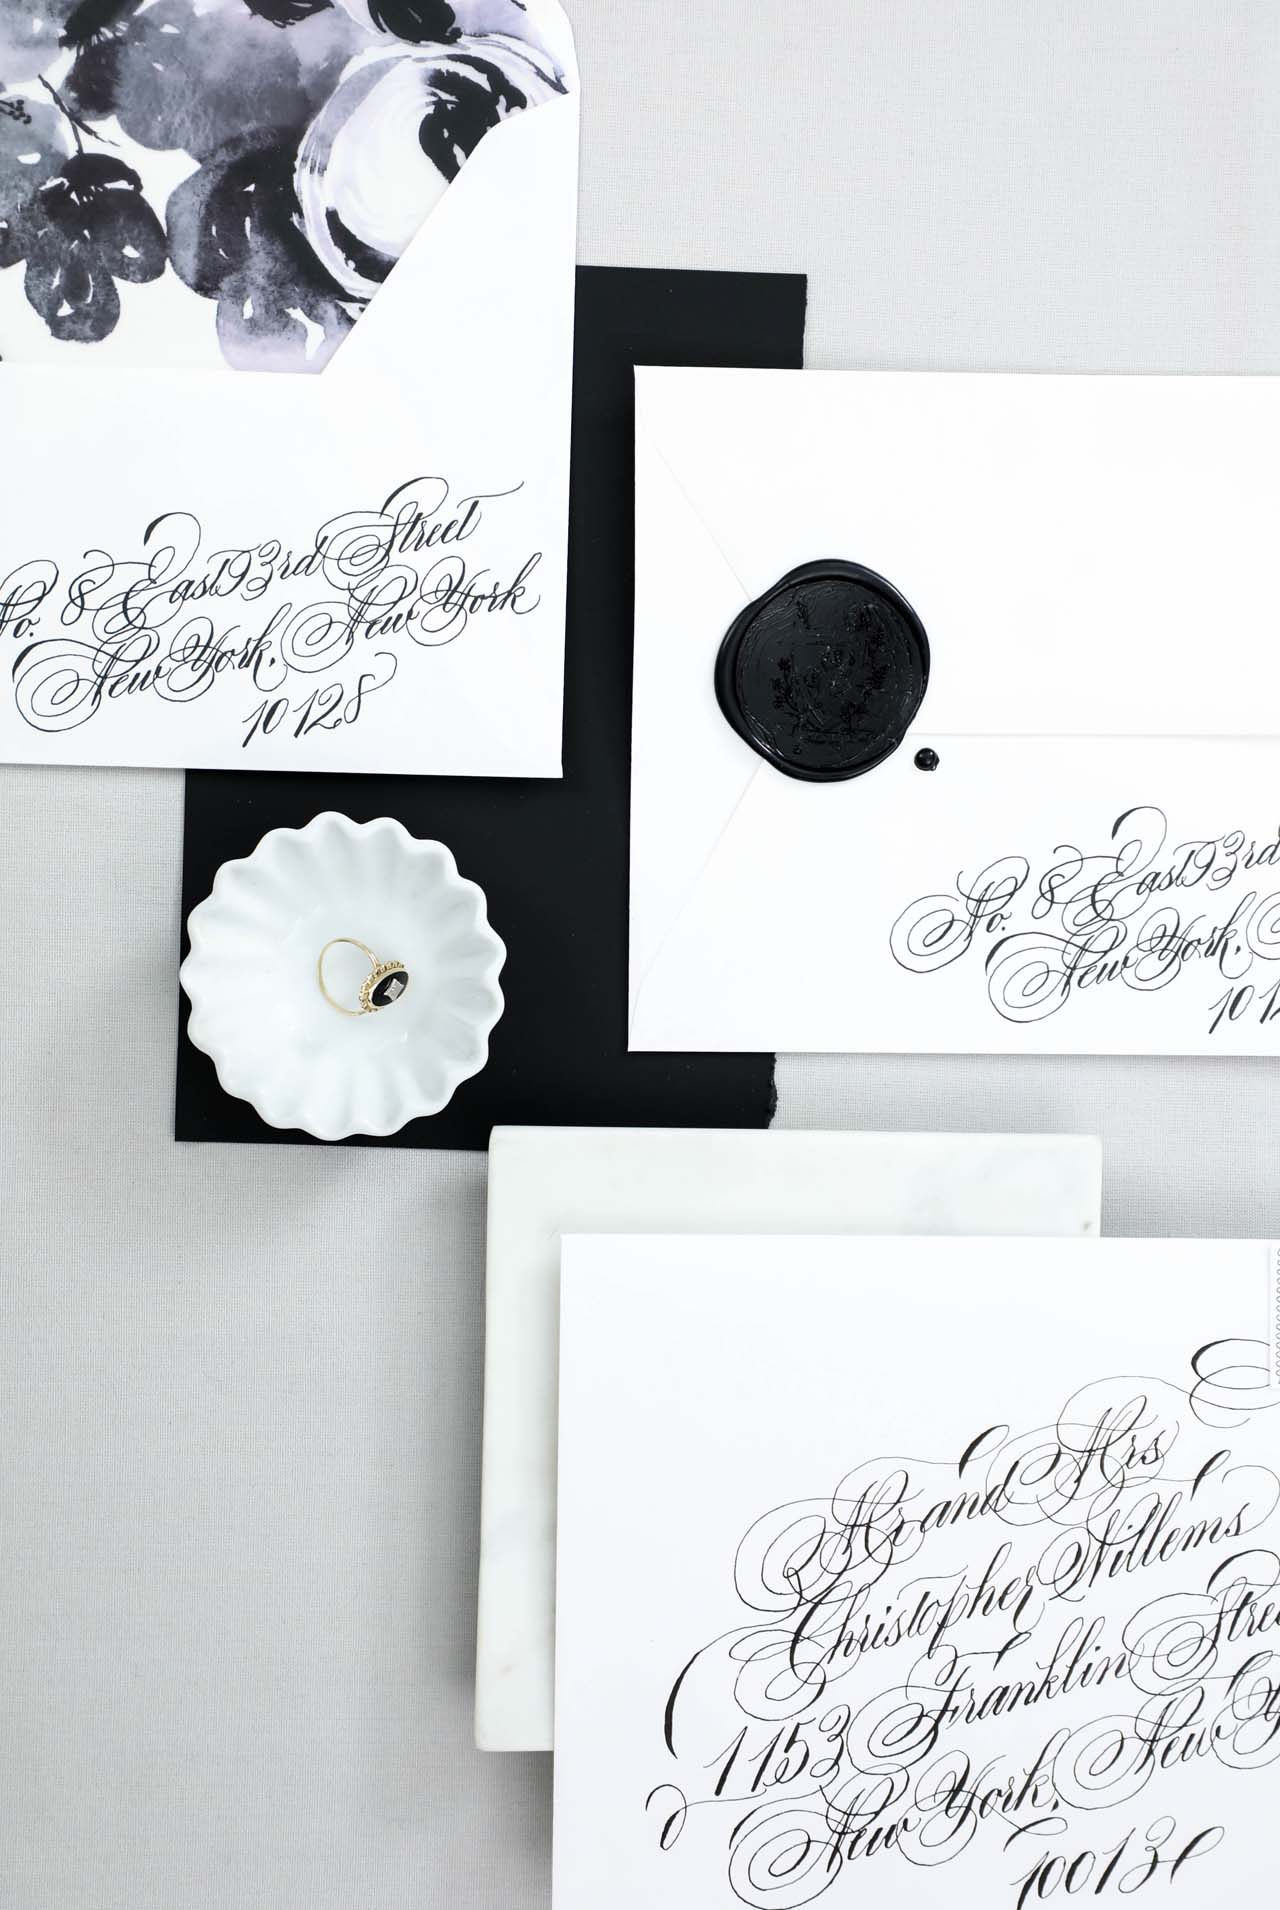
Her envelopes were all lined in her pattern, the back bore her return address in calligraphy and a wax seal sealed the envelope. Each envelope was hand addressed with matching calligraphy in black ink. The suite was finished off with two custom postage stamps designed with her artwork.

Black and White Calligraphy and Watercolor Wedding Invitations by Design House of Moira

Black and White Calligraphy and Watercolor Wedding Invitations by Design House of Moira

Thanks Victoria!

Design & Calligraphy: Design House of Moira
Foil Printing: Viking Printing 

Check out the Designer Rolodex for more tal­ented wed­ding invi­ta­tion design­ers and the real invi­ta­tions gallery for more wedding invitation ideas!

Photo Credits: Design House of Moira